

Vladislav
-
Posts
8,135 -
Joined
-
Last visited
-
Days Won
79
Content Type
Profiles
Forums
Gallery
Events
Blogs
BMT Wiki
Collections
Store
Everything posted by Vladislav
-
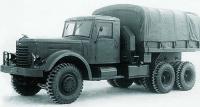
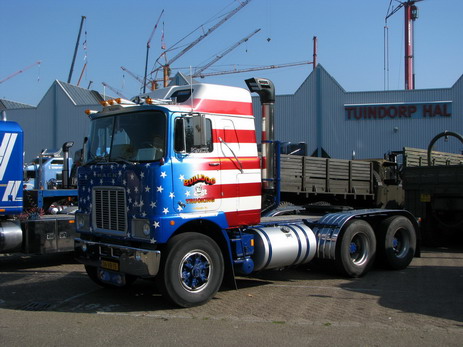
 Seems like a few hundred trucks all over Europe which are branded Mack. Not many still in use but plenty of collection items. I might be wrong since I haven't roamed all European countries but about a half of.
 -
This is a freshly restored (but original) Overdorp F-model which wore different colors during a bunch of years in the past. And its previous owner is a known to the comunity person, owns Liberty series RW now.
-
R Model Dash layout and Interior
Vladislav replied to nicste's topic in Exterior, Cab, Accessories and Detailing
Hmm... Never saw anything like that here in Russia -
What a shame
Vladislav replied to h67st's topic in Antique and Classic Mack Trucks General Discussion
Wonder did that thing run when parked ?... If the cab is in a reasonable condition the seller would have chances to add four and a half hundred to the content of his wallet. -
Front Spring Insulators
Vladislav replied to h67st's topic in Antique and Classic Mack Trucks General Discussion
Great to see the progress! And would be also cool to see the painted chassis soon -
1100 24 tires
Vladislav replied to 1wonton's topic in Antique and Classic Mack Trucks General Discussion
Checked out Ciat.com and found no truck tyres to fit 22 or 24 inch tube type rims. So seems like those are discontinued now. -
1100 24 tires
Vladislav replied to 1wonton's topic in Antique and Classic Mack Trucks General Discussion
P.S. As it was correctly pointed in the other thread some 12.00R24 tyres are currently offered as 325/95R24. -
1100 24 tires
Vladislav replied to 1wonton's topic in Antique and Classic Mack Trucks General Discussion
You can install 12.00R24 in place of your 11.00-24 as I did and the size increas would be sufficient but not crytical. Also you would get a bit higher road speed at the same RPMs. The tallest tubeless tyre you can fit using Budd wheels is 12R24.5. -
1100 24 tires
Vladislav replied to 1wonton's topic in Antique and Classic Mack Trucks General Discussion
Chinese tyres seem quite good, plenty of people use them overhere. I even tried a fortune and bought a pair for fronts on my car, 245/45R18 with 240km/h speed index. So far so good. But those tube ones for a truck are only known as 12.00R24 not 11.00 to me. -
Hope you guys will have a nice time at the show. Almost not able to attend being not allowed to leave one country and enter the other.
-
The bench looks great! And as long as you get the Mack into the shop you will find out a different feeling of owning it. Any action or work to it could be done at any time. Without bothering of having it or parts exposed to rain or snow of worrying of someone relocate a part or tool you rest interrupting a job.
-
A woman involved?
-
B75 711 turbo ran away
Vladislav replied to tippi98custom's topic in Antique and Classic Mack Trucks General Discussion
Agree. A long while back I had 1975 Mercedes car with diesel engine. One day I started it and noted more smoke off the exhaust pipe than I used to see and when I pressed the pump knob in (the same rack control setup as an old truck) it didn't stall. I removed the air filter hose and closed the hole by a palm of my hand (Later I figured it was not a good idea but the hole wasn't big so no damage to the hand). Got the engine stopped. Started once more and stopped the same way again. But there was really heavy and smelly grey smoke and I saw no oil level on the stick after half an hour I stopped that thing. Later I discowered the issue was a vacuum pump which supposed to sypply brakes. It should take air from vacuum buster line and put it into intake manifold. The pump had diaphragm. It collapsed so the pump started putting not only excessive air into the intake but also the engine oil. -
B75 711 turbo ran away
Vladislav replied to tippi98custom's topic in Antique and Classic Mack Trucks General Discussion
Last I went by this logic I had a fuel elbow broken which didn't allow me to place a wrench on one of the bolts. It didn't spin over its threads as I supposed to -
As said above.
-
Keith, Thank you for the GMC idea. Actually I don't have anything as a sample of such marker excepting interweb images of Cruiseliners equipped with them. My truck has small lights which looks like KW W900 fender lights. And from the web pics it looks like it was a typical setup for Cruiseliner Macks. I found a few offers on NOS ones on flea bay but would prefere to install larger torpedo style markers. Having no sample it turns out we should figure what they are (or were) and than try to find a source. So all ideas are welcome. Good thing or bad but now it's not a need of the day since I'm elbow deep in two other big Mack projects. Glad to learn you enjoyed the reading. P.S. If you have a chance to make a look on the GMC markers I'd like to see a big size photo of. Again, no rush.
-
Best B-day wishes and good luck on all the projects!
-
Those cooper lines are avalible new by foot (by meter in my country), just be sure to order the soft kind, not straight pipes which actually tough to bend. Also be sure checking the size since there's a trick with actual cooper pipe size and how it's marked in the sales lists. For fittings you can look Parker Fitting which would cover any need on whatever you break in the gas line. Vlad
-
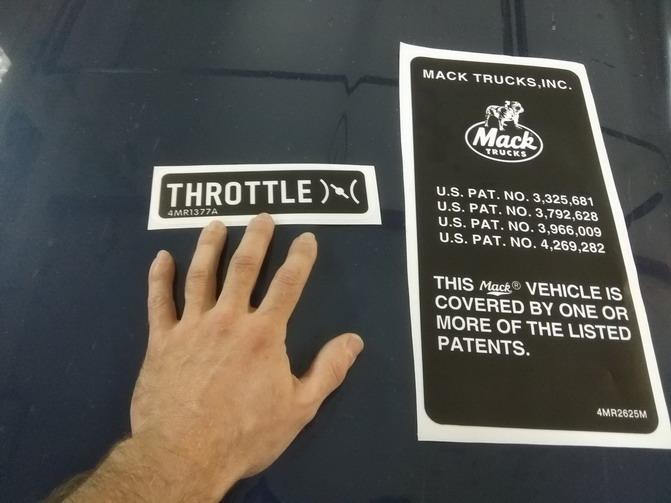
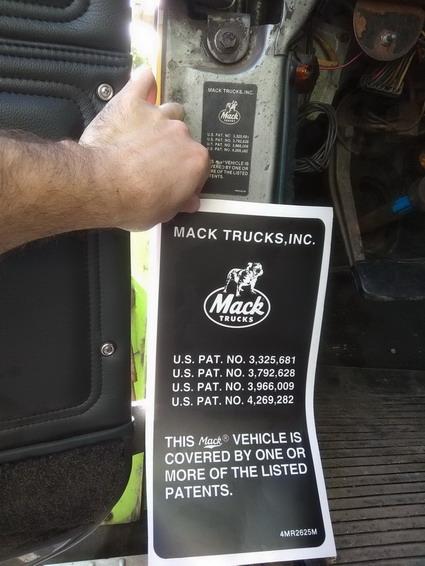
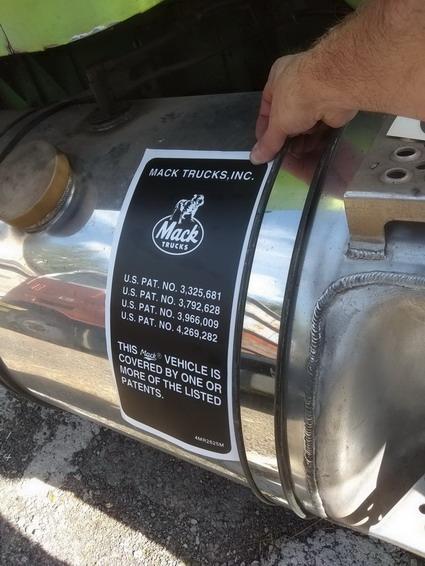
Ordered a couple of stickers to make up the R-model cab after paint. Supplied the guys with photos of the original ones plus basic measurements. After a few days they sent me pictures of the ready stuff and I said Ok and went to pick up. Once in their shop and I saw the prints in person I couldn't resist and almost laughed my butt off !
-
RD685
Vladislav replied to Ditchdiggerjcf's topic in Antique and Classic Mack Trucks General Discussion
Seems like all R-model axles fit the springs similar. But you can not use a beam off a DM because the U-bolt drillings located different. The same story with MH/RW2 axle beams. It looks like the casting is basically the same with wide spring fitting areas but then they're drilled specially to different chassis types. -
I would grab it. But need options to ship it to NJ 08901. Not for free but not for 5 times of the hood's cost. Vlad
-
Seems like someone has his so lovely trucks so only a thought of selling any sends shivers down his spine
-
Aussie Truckin' Pics..
Vladislav replied to Hayseed's topic in Antique and Classic Mack Trucks General Discussion
Excellent pics of those Fords! Many thanks for sharing. -
ENDTB 865
Vladislav replied to Sonrise's topic in Antique and Classic Mack Trucks General Discussion
Would be nice to see some pictures of your truck. B615 is not a very common animal. Vlad -
New here! B60T project
Vladislav replied to SkippyMack's topic in Antique and Classic Mack Trucks General Discussion
Welocme to the forum! Getting excited when doing restoration steps is a good practice. Patience and being organized helps too. Not many new parts for a B-model could be found nowadays and Watt's Mack is probably the best place to start the search. Still plenty of used stuff in people's yards, some things show up in the for sale section of the forum from time to time. Also it worth a try posting a thread with a question of a current need on here. Mack museum is closed to Covid and there's no info on the opening date so far. And taking to account they had a 2 month waiting time for a request when operated it now seems doubtful to get any info from them soon enough. Good luck with the project.


BMT Forum Logo
