

Vladislav
-
Posts
8,135 -
Joined
-
Last visited
-
Days Won
79
Content Type
Profiles
Forums
Gallery
Events
Blogs
BMT Wiki
Collections
Store
Everything posted by Vladislav
-
What a nice fall forest to walk in! Thanks for sharing.
-

B-73 Restoration
Vladislav replied to mattb73lt's topic in Antique and Classic Mack Trucks General Discussion
I like the way you move! -
Ok, count it out. Gråsten - a town in Denmark. Don't ask me how I could type that letter
-
Paul, too much of credit to me. I (virtually) wiped my eyeglasses and looked at those letters on the screen. Norway, Sweden, Danemark... My bet it's in Danish. But it's more bet than a fact. There's a Dutch guy who knows everything about every Mack in Europe. But he's a seldom visitor on here. I'll try tossing a question.
-
Try checking out this guy: https://www.ebay.com/itm/Mack-B-model-dump-truck-peterbilt-international-Kenworth-Studebaker-antique/264005462119 He's in your neck of the woods and seems parting out a Cruise.
-
They look excellent for ever used tanks!
-
If the tyres were never exposed to the sun and don't have cracks which could conduct water and sand to the cord I see no worry driving them. Just might worth to refresh steers for cheer up and comfort.
-
There are actually 3 relays. One below the dash. One somewhere under the hood or a cab depending the truck is conventional or cabover and the last (and the largest) is the starter solenoid which carries a double function being both a solenoid to put the gear into the flywheel and a relay to connect starter's power contacts. What I would do is jumpering each one of them. The 2nd one is what to start from since usually it's accessable (mounted on the firewall on R's and CH's) and operates reasonable currents so jumperng it with a screwdriver wouldn't make much fireworks. If the crank starts spinning you look for anything wrong in the cab. If not your way is to investigate the starter.
-
What front axle?
Vladislav replied to Bigdogtrucker's topic in Antique and Classic Mack Trucks General Discussion
Usually power steering equipped vehicles have larger caster angle since it's easier to "fight" the tendency to go straight and manual steering rigs have just light caster. On the other hand it could be the way FA-512 were bored with a light lean but had no caster wedges and once FA-53X were used with them the reason to add the angle to the bores disappeared. -
What front axle?
Vladislav replied to Bigdogtrucker's topic in Antique and Classic Mack Trucks General Discussion
Sounds interesting. Originally I met an issue with my original truck's beam having one king pine boring wore out. Looked for a fix, figured that Stemco tube could be used and even found a machine shop with a mill large enough to work the axle out. But having an extra axle but of heavier rating I resolved using it if it's suitable. That way I played a couple of hours with both of them putting both horizontly and on a side and checking by laser level. Also checked the angles the king pin holes bored to the side (or better to say off the side) and found both beams were similar. Also I remember I put a bar or so into the bores centering it some way to measure the angle by the long portion of length and pretty sure there was no evidence of leaning to rear or front. It also makes sence having caster plates (all my R's and 2 MH's have them and they look stock) there's no hard reason to do machining of an axle beam more complicated. Much easier to add a grade or two to the wedge and it's done. -
1990 R Model.
Vladislav replied to Miami Cossack's topic in Antique and Classic Mack Trucks General Discussion
As said above. And from the pics it looks like quite a solid truck. -
What front axle?
Vladislav replied to Bigdogtrucker's topic in Antique and Classic Mack Trucks General Discussion
Rob, I have removed FAW537 axle from my R-model and also had FAW538 off another R-model as a spare. I had to use that spare one for the truck so investigated both of them relating king pin hole angle, straightness and even the weight. And now I can state both of those were almost similar and absolutely symmetric face to back. King pin holes were bored straight from the top of the beam having zero angle to the drive direction. Castor angle establishes by the springs hanged to the chassis rails at a certain angle and also by wedged pads put between the axle beam and springs. So I bet no difference in steering or handling the road if you put the beam backwards. That's for a R-model. A few years back I had similar experience with my military Mack model NR. Also had two similar beams and chose one of to use. I well remember I found no difference face to back excepting that marking at the front of the left spring pad and even put my own mark for the drive direction of the truck just for any reason. -
The look could tell alot.
-
What front axle?
Vladislav replied to Bigdogtrucker's topic in Antique and Classic Mack Trucks General Discussion
Easily. My R-model axle beam had its stamping at the front. I type "had" because I removed it from the truck at a certain time. I investigated it through very well before sandblasting and paint and found no reason I couldn't put it backwards installing back on the truck. So you know where to look at. My understanding you will find the stamping or a ground off spot where it was. -
Cooling System, Paint
Vladislav replied to h67st's topic in Antique and Classic Mack Trucks General Discussion
What years and what engines did Mack paint in that color? I really like how it looks. -
Cooling System, Paint
Vladislav replied to h67st's topic in Antique and Classic Mack Trucks General Discussion
I add my vote to the request Never knew the original truck belonged to Smith. Interesting. -
Iranian R-model
Vladislav replied to Vladislav's topic in Antique and Classic Mack Trucks General Discussion
My bet is not too many people on here has an idea on the meaning of those 3 red letters on the title page of the video. In fact it's Persian script of the name our forum is all about -
Cooling System, Paint
Vladislav replied to h67st's topic in Antique and Classic Mack Trucks General Discussion
Great to see the progress! I like the engine look painted that color. Strange thing (nothing strange but an optic illusion) the engine looks greeny in the first pictures but much more to blue where it's already in the chassis. -
0FA10246-B14E-40D7-930A-1301927AE043.jpeg
Vladislav commented on Jaws612's gallery image in BMT Member's Gallery - Click here to view our member's albums!
 Nice pics of those old times. Many thanks for sharing.
 -
No. Regular (lighter) series R discontinued in 89 (or even in the late 88?). RD being a heavier mod of an R started from 78 or so and kept the classic round hood with round lights up to 1990 or 1991. Than it (RD not R) purchased new (slopped) hood and stayed in production until 2004. RB is another story.
-
Fuel pump
Vladislav replied to GW Hauling's topic in Antique and Classic Mack Trucks General Discussion
Seems like you haven't got all the air off the system. Even worn out plungers would build up pressure enough to get the fuel off the realeased nuts on the injector lines. I'd put an electric fuel pump in the line between the tank and the prime pump. Switch it on for half a minute to make good fuel flow in the lines and injection pump body than try cranking with it still on. Usually takes all air away in a matter of seconds and the engine fires up if the rack is in the correct position and the mecanical parts are solid. Vlad -
1965 Mack B815SX
Vladislav replied to AMGeneral's topic in Antique and Classic Mack Trucks General Discussion
Looks in a really great shape. Besides restored interior and non-rusted rear wall of the cab the frame represents very good condition. Still can't figure the type of the engine it has. Something like a non-intercooled EM6 of 225 or so HP? -
B's and LJ's in Missouri
Vladislav replied to B MACK's topic in Antique and Classic Mack Trucks General Discussion
Nice looking raw of old Macks. Although they're kept outside it seems like someone have fun owning them. Thanks for sharing. -
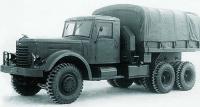
Looks like some experimental cab indeed. But doesn't show any countours of the series R-model cab. Interesting.
-
With Neway in 1981 those are the most probably 34000 or 38000 axles. Once I found a tag riveted to the lower side of the lower left airbag pad. But that was Neway tag with the suspension model not the axles.


BMT Forum Logo
