

Vladislav
-
Posts
8,043 -
Joined
-
Last visited
-
Days Won
79
Content Type
Profiles
Forums
Gallery
Events
Blogs
BMT Wiki
Collections
Store
Everything posted by Vladislav
-
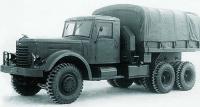
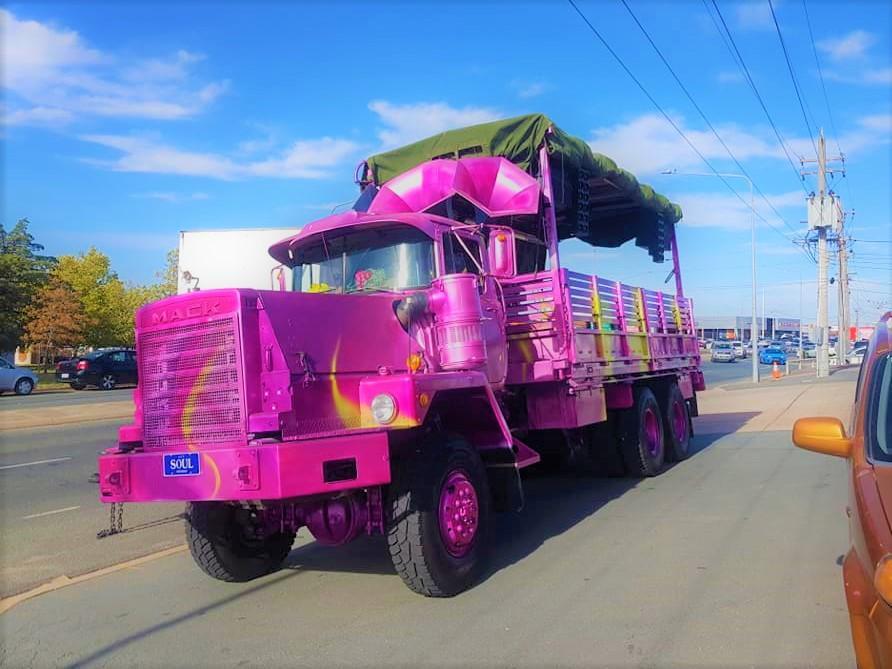
To personal taste the 1st pic look is better. Or Mack green instead.
-
Paul, isn't that your brother's new secret project to extensify the limo business?
-

Coca Cola LJ Mack colors
Vladislav replied to 1961H67's topic in Antique and Classic Mack Trucks General Discussion
I saw that truck in person in the summer of 2018. But don't know the owner. It was in PA indeed, parked in a yard near a local highway. The fenders were not absolutely perfect but quite good. The chassis looked cut in the middle with new longer rear section welded up. If it's up for parts definitely worth checking out. There was a huge and neat looking RD800 parked in that same yard. White cab with black fenders, hooked to a low boy trailer. I'm pretty sure I saw that truck's photo posted on the forum once a couple years back and too probably by the owner. That's a possible way to count out any contact info on the L-model. -
Finally some DM progress
Vladislav replied to mowerman's topic in Antique and Classic Mack Trucks General Discussion
You may also use construction foam if want to build a channel. Polyurethane foam doesn't stand out from air really much. Let some foam to get out from a can, wait for dry up, than cut into the shape you need with a paper knife. Speaking old wood I extracted from the hinge areas I filled the spots completely with new fiberglass. You get strength similar to a hockey stick handle. Some weight adds on but that's right above the hinges so no issue when opening. The amount of resin and fiber stock grows up that's true. But seems insufficient in relation to the worth of your labour. -
Finally some DM progress
Vladislav replied to mowerman's topic in Antique and Classic Mack Trucks General Discussion
Two hoods I put my nose into didn't have any inserts in the near the cowl area. Just empty channels, same as those which go along the center line and across to the sides. The hood looked glued up of two shells, inner and outer. Putting one into the other provides channels which are empty inside, even have ventillation holes penny large. Longer hoods seem being well balanced, same for the shorter ones though. The most of the weight is on the hinges at the front and after you pulled the dog up your way a little bit the center of gravity occures closer to the hinges. -
Welcome to the forum! Parts search may be real adventure sometimes with big respect from a customer if the turnout is good. Not big matter you supply needs of the shop guys or work at the desk. And even no matter you work at a particular brand dealership. Parts sales experience gives you universal skill to be able to sell parts for anything Just keep an open mind paying attention to nuances and especially to complicated cases. Experience grows up not when you grap a marked part from a shelf and give it into customrer's hands but when you also point in your mind what that part was for and the case it became needed. At least in general. Make your brain working while other folks just play their smartphones and you will find out yourself standing out pretty soon! Vlad
-
CL/RW/MH frame, CL hood, L model, V8 and other parts
Vladislav replied to Old Macks's topic in Parts for Sale
Is the 2nd truck a SW? Any side wiew photos? Thanks. -
Finally some DM progress
Vladislav replied to mowerman's topic in Antique and Classic Mack Trucks General Discussion
Original R-model hood (two ones I butchered up) had wooden inserts in the area hinge bolts fit and up high to form reinforcement channels. Put there exactly for the reason you mentioned - to build a shape of fiberglass being applied onto something. Guess if cedar is used there they would serve well not shorter than your sail vessel. In fact the restovers looked like fir or other relatively soft wood so years of water penetration followed to complete decay. Wood doesn't expant as much as metals by warm so must work well with epoxy fiber. I'm sure if you're looking for extreme strength metal inserts could be used either. But with some good portion of head scratching to avoid possible thermal destructions. -
B42 Emblems
Vladislav replied to Gregpet's topic in Antique and Classic Mack Trucks General Discussion
Watts Mack used to have them in stock if I'm not wrong. Checked out their online shop right now but didn't see exactly B-42. https://wattstruckcenter.com/shop/b-model-parts/b-model-emblems-and-trim You may PM Barry on here for more info on possibility to purchase them. Vlad -
Interesting sleeper definitely. My thoughts were of another kind though. Just spin in my mind a way to fit the sleeper right on the winch. Isn't that impossible? The winch would keep its place being hidden under the bunk with a big access door in the rear wall. And the matress floor can be (?) positioned high enough to clear up the drum. Would be a cool setup on my mind. But 1st issue I foresee is correspondence of the openings in the cab and the bunk. And the 2nd is alignement of the side countour of the cab and bunk may be lost.
-
82 v8 Superliner sleeper on marketplace
Vladislav replied to Hans Remmers's topic in Trucks for Sale
looks like Able Body to me (and that's my favorite style). Or at least very close to. -
Thank you for the lesson!
-
So do E9's drop a seat just after the engine shut off with no a few minutes idling before that?? Honestly dropped seat idea sends shivers up my spine relating to any vehicle. Regardless I've never experienced such "luck". BTW if it's fallen could it hang on the valve plate for some while before fracturing and meeting the piston and liner walls? The sequince idea looks realistic. So lay outs of the same kind with car engines.
-
Do you mean bad spray pattern? Sorry for the dumb question.
-
1960 Mack B61T Restoration
Vladislav replied to eightup's topic in Antique and Classic Mack Trucks General Discussion
I minded putting a complete suspension so meeting a trouble with points you attach brackets to the frame rails. Probably simple spicers might be used but that should be kept in mind. -
1960 Mack B61T Restoration
Vladislav replied to eightup's topic in Antique and Classic Mack Trucks General Discussion
One thing I can tell for sure CH frame rails stand wider from each other than a B. -
At the moment we talk about at least 2 slack ajuster worth
-
82 v8 Superliner sleeper on marketplace
Vladislav replied to Hans Remmers's topic in Trucks for Sale
Doesn't surprize. Quite solid truck overall with V8 and a sleeper well worth the 2nd figure. -
The picture must have been taken by a professional photographer. So the gunner was posing for it. This way the scene may be a bit more spectacular than it was in real. But on the other hand during a battle actual poses could be even more spectacular than on the photo. My hat's off to the job those guys did.
-
Mack B873sx restoration
Vladislav replied to hicrop10's topic in Antique and Classic Mack Trucks General Discussion
You don't need to remove all that surface rust if you're going to sandblast the whole cab before painting. Sure if you don't see a 10 years gap in time. Actually strange to see that much of it as long as you work in a shop not outside. Is the compartment dry enough? Or do you do wet sanding? And what is the reason at all you do that? To me it looks at least two ways may be chosen at this point. 1st you remove all the items off the cab, repair areas where actual rust through or dents take place, than sandblast the whole thing and bring its further faith into the hands of paint guy. 2nd is you sand off a certain area, for the best a portion of a cab with some borders, than mask the rest and apply primer, self etch or epoxy, depending on the religion you prefere to go along, and continue working on the next portion. This way no need in media blast is seen, or possibly locally only where deep rust was detected you can't sand off. Then paint guy will scotch-bright or sand your primer up and put his other layers over it. -
82 v8 Superliner sleeper on marketplace
Vladislav replied to Hans Remmers's topic in Trucks for Sale
With no torque rod in place and parked in that pool? May take longer to get rid of than I supposed initially. -
His forum name is Staxx I belive. And Mike in real life.
-
82 v8 Superliner sleeper on marketplace
Vladislav replied to Hans Remmers's topic in Trucks for Sale
And that drilling in the left knuckle for the steering lever must be empty on the 1st gen RW and WS. As on the pictures. Nice looking dog. I have no idea on what they're asking but suppose it will find a new home soon. Thanks for posting. -
Good thing it was not a standard single cab and Mack engine. Otherwise it would have me scratching my head on possible scratching some pennies.
-
1983 mh613 cabover
Vladislav replied to Joe Spaniak's topic in Antique and Classic Mack Trucks General Discussion
Yup, the most parts are still avalible to keep a MH in original shape. Or could be fund used. Welcome to the forum! A few pics of your pedigreed pal are strongly appreciated!


BMT Forum Logo
