

Joey Mack
-
Posts
11,837 -
Joined
-
Last visited
-
Days Won
259
Content Type
Profiles
Forums
Gallery
Events
Blogs
BMT Wiki
Collections
Store
Everything posted by Joey Mack
-

CRD92/93 vs CRD202/203 carriers
Joey Mack replied to BottleHauler84's topic in Driveline and Suspension
Awesome!!!! I wish I one, and the caging ring to set the bull gear. I could make some money rebuilding Mack rears. -
When I decide on Whiskey, I like Jim Beam.
-
Connecticut Construction Trucks
Joey Mack replied to BKrois's topic in Antique and Classic Mack Trucks General Discussion
Bob. That was one of my points. Designed to work. Not give me a Caddilac ride. Luv u bud.. -
Connecticut Construction Trucks
Joey Mack replied to BKrois's topic in Antique and Classic Mack Trucks General Discussion
When I was a new driver I came off the road after 1 year + and went local with a prominent construction company in Scarborough Maine. I learned how to drive!!! I drove 1975 -1979 R's and DM's. 9 spd, 12 spd. And twin stick 107's.. fast forward 25 years.... Those old Dogs were hard working trucks that could take a beating, and give me a beating at the same time.. Just my thoughts born from only a few years working Macks in the dirt... -
Happy Birthday 🎂 Hans Remmers
-
Back in the Mack Pack!
Joey Mack replied to BOBWhite's topic in Antique and Classic Mack Trucks General Discussion
Bob. I have tried a few times to post a picture from my book. But failed.. All E-6 2valves have an oil pressure spec of.... 25 PSI at 600 ROM idle speed, and 40-95 PSI At governed speed, with hot oil.. -
The drive shaft may need to be shortened or even lengthened. You can also put an E-7 flywheel on it and an Eaton Easy Pedal clutch in it at the same time..
-
Yes, and the ECM. I know someone with just such a set up.
-
How about an E-Tech ?
-
I wonder if ''Aircraft'' spray on paint remover will work too. It is at most auto parts stores.
-
I think X is a remaned unit.
-
I would expect $30K+.. I hope others comment on the cost.
-
FJH has a point.. Who's doing the inframe if you go that route?
-
even though the hole is outboard, the turbo pipe is in the way. that will need to move. also aside from it needing a good cleaning, pull the E.U.P. lifter out and inspect it and the guide pin for it, as well as looking at the cam lobe. new bolts torque to 60 lbft. M10 x 1.50 x 50mm long, grade 10.9
-
Left handed 1/8" drill bit is what I use. Many times when the bit gets a good bite, the bolt will unscrew. Use a center punch to make a dimple in the center of the bolt as a guide
-
Mack camelback spring end cap rebuild question
Joey Mack replied to Lmackattack's topic in Driveline and Suspension
38 -
Mack camelback spring end cap rebuild question
Joey Mack replied to Lmackattack's topic in Driveline and Suspension
put the twinkies in the boxes. all the heavy spec trucks I've worked on and roll offs had them. -
Finally some DM progress
Joey Mack replied to mowerman's topic in Antique and Classic Mack Trucks General Discussion
I'm done stealing your thread. Good luck Bud. 🍻🍻 -
Finally some DM progress
Joey Mack replied to mowerman's topic in Antique and Classic Mack Trucks General Discussion
Ok Bob, one more theft of your thread.. We made My Queen Happy .. We will figure out the floor covering later, I mean She will... 🍻
-
Mamdani is projected to win the Mayor's race in N.Y.C. What i dont understand is, as an antisemite, how can he win N.Y.C.? Is there something wrong within the Jewish community in N.Y. C.? I saw footage of a Pro Palestinian rally in the streets of N.Y.C. This will happen in other Big Cities, like in Minneapolis, for example. Why do progressives want to destroy the U.S.A.?
-
Auto power divider ??
-
MAYBERRY TRUCK SHOW
Joey Mack replied to 1961H67's topic in Antique and Classic Mack Trucks General Discussion
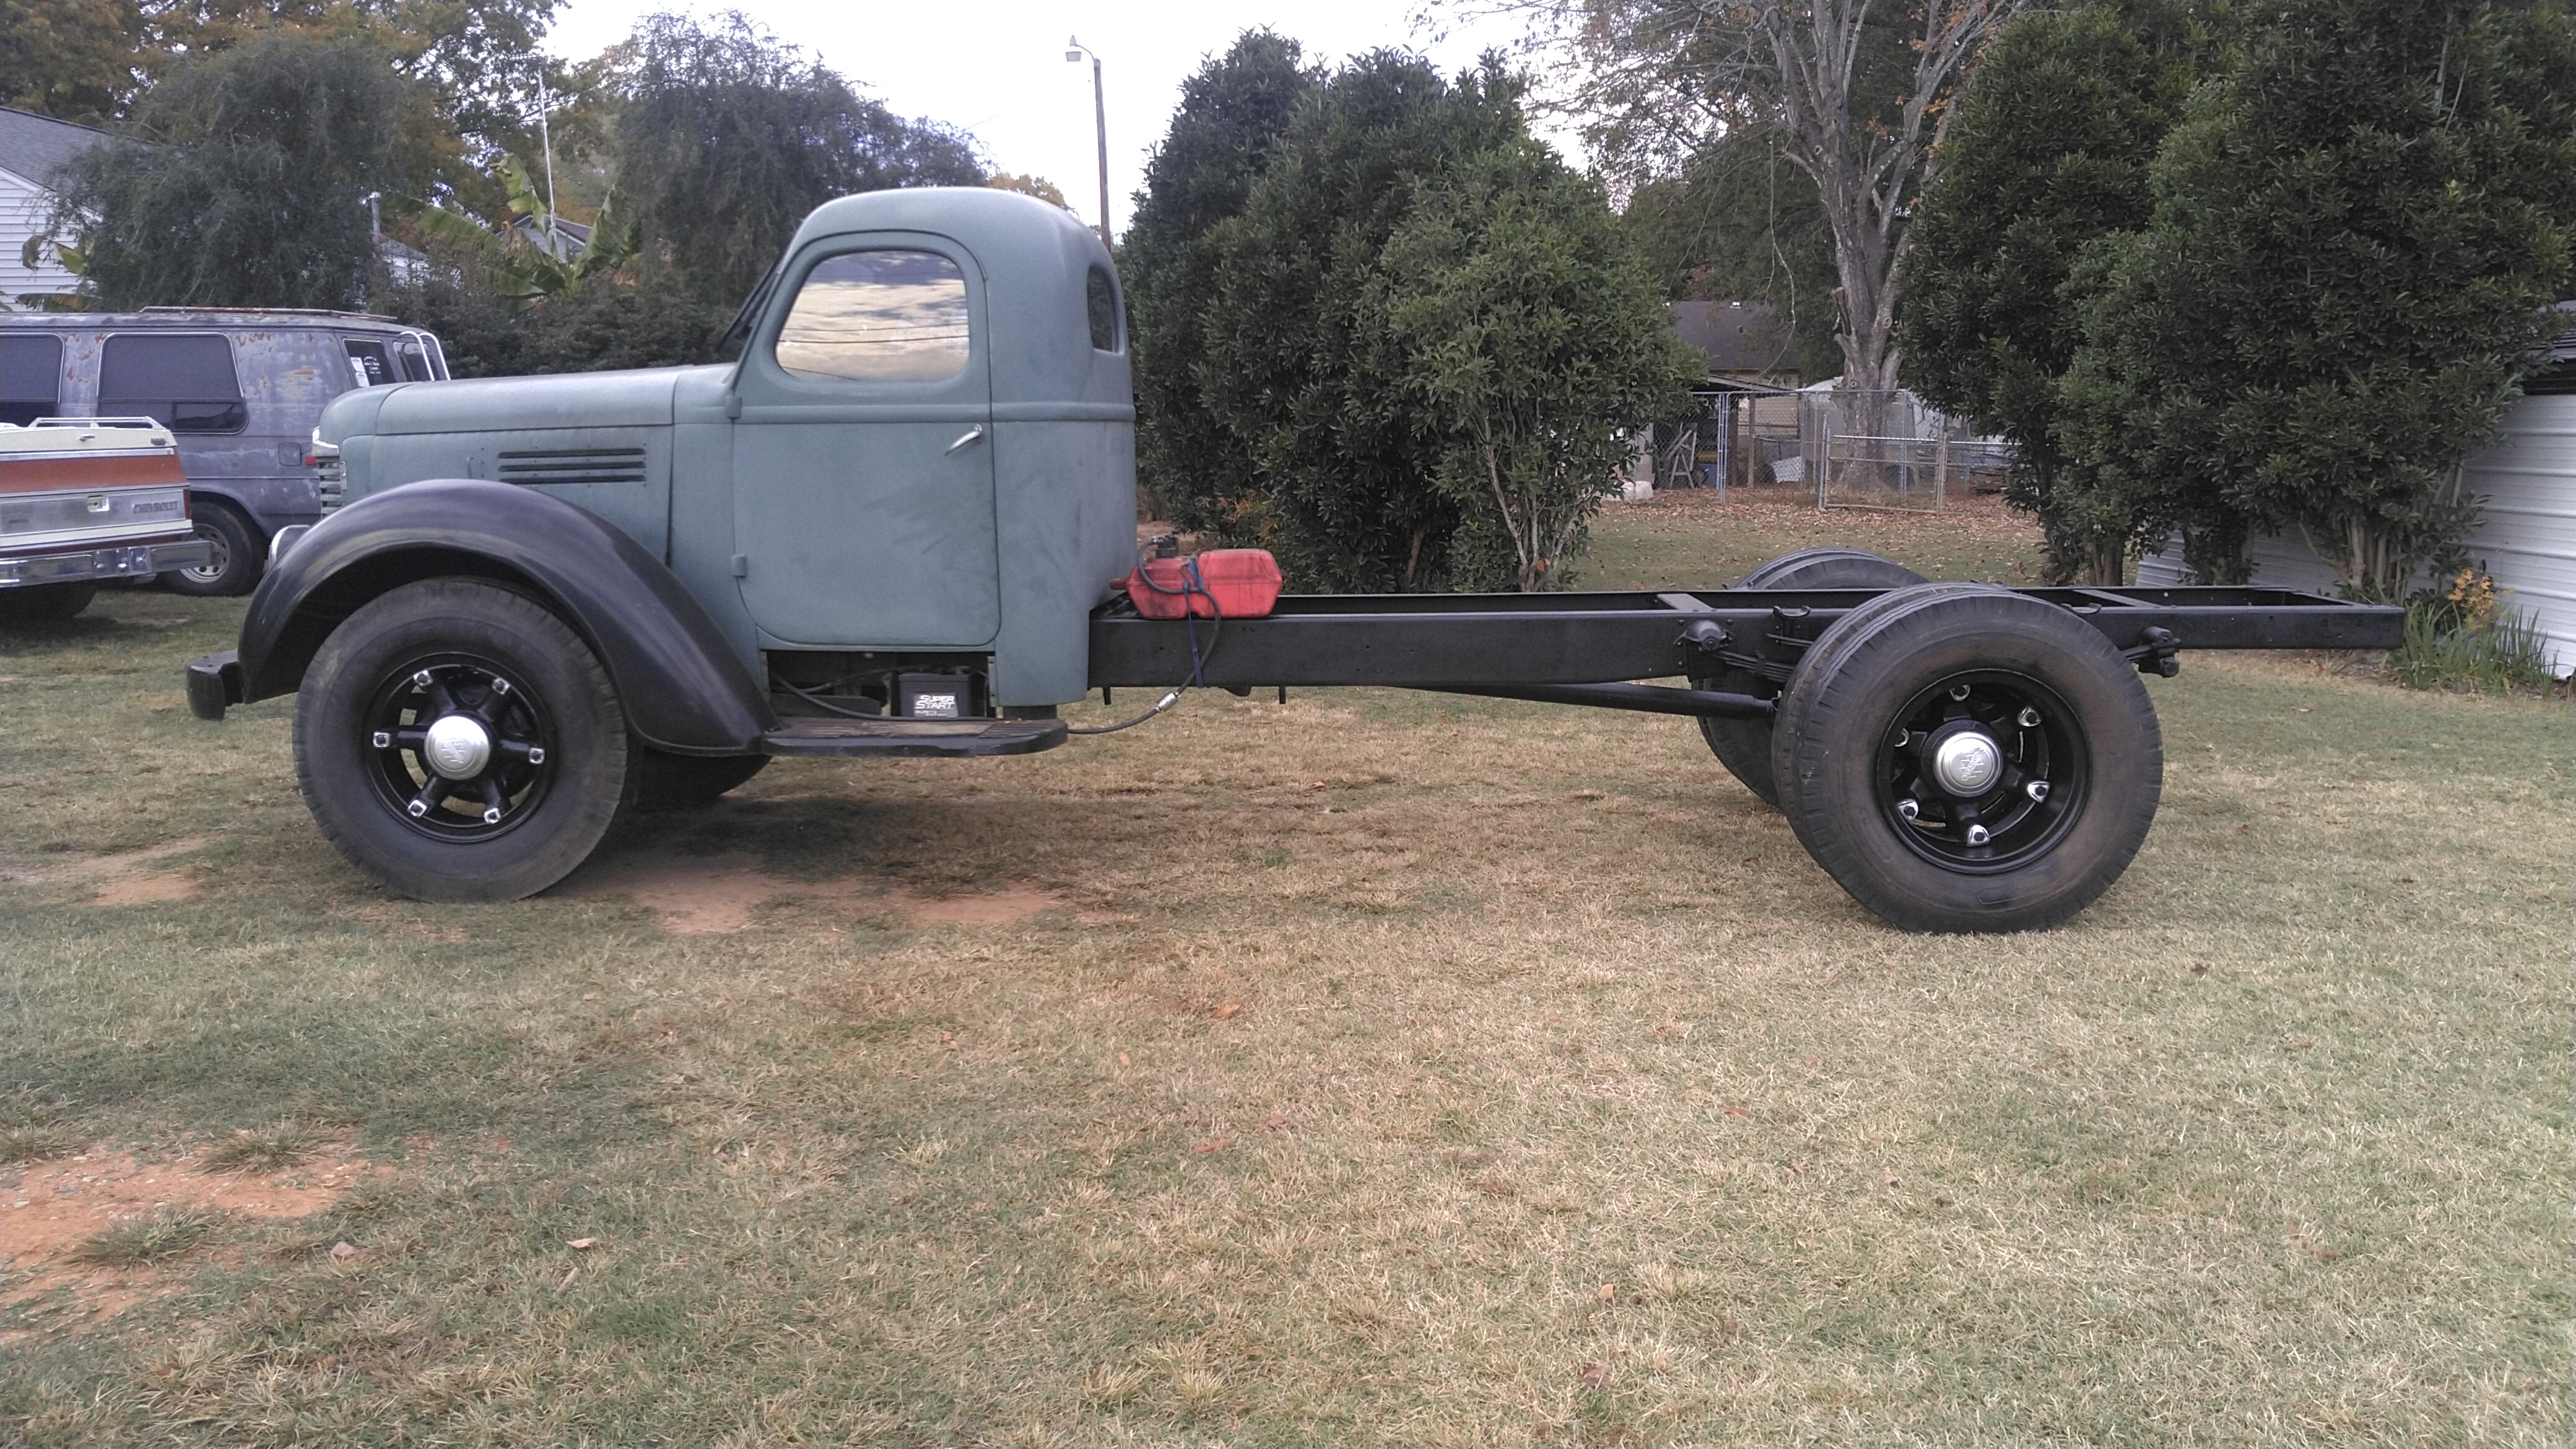
I had to miss this show again. Seems im busy when these shows come up. Just like the Colfax show.. Hell, I even missed Spencer N.C. shows, and its 5 miles away... When my '48 is on the road, things will be different.. just sayin' and now that I own a rare C-10, I have another show truck. -
Cruiseliner Transformation
Joey Mack replied to cruiseliner64's topic in Antique and Classic Mack Trucks General Discussion
Wonder if there are timing marks on the stem and arms ? You may want to mark them somehow. -
it is pressure tested at 80 PSI.. here is my home made kit that works. you will cut your own gaskets..
-
yes to removing the cooler. however, you already broke a gasket seal, so it would need to be put back together tightly and sealed. I can take a picture of my test tools.


BMT Forum Logo
