

Vladislav
-
Posts
8,138 -
Joined
-
Last visited
-
Days Won
79
Content Type
Profiles
Forums
Gallery
Events
Blogs
BMT Wiki
Collections
Store
Everything posted by Vladislav
-

77 R model enging block stamping numbers??
Vladislav replied to Lmackattack's topic in Engine and Transmission
Those numbers are always there. I have 3 or 4 E6V4 blocks with them and about the same count of E6V2 either. They're not an engine serial number definitely. Probably some internal factory markings. Might matter a group of parts you use working with a parts list for identification but I'm not familiar with that subject. One of my trucks has those put into the registry papers as the engine number. Looks logish if you don't know of how that number should be marked. And that's a kind of issue for me now since we're able to swap an engine legally if install a similar one. Which means similar model designation. In my case I couldn't use another similar E6 block in place of the old one since that different one is stamped differently in THAT spot. -
B model headlight upgrade
Vladislav replied to Bumblebee090458's topic in Electrical, Electronics and Lighting
I installed Xenon light in my 1985 Mercedes car as soon as I could put my hands on a set of. About 2001 year. Factory installed xenon used to have (must have?) dynamic level corrector for not blinding opposit traffic when the vehicle is bouncing on road bumps or gets out of horizont being loaded. I didn't have any correctors besides a manual one but saw no warnings from other folks when my lamps were set normal (or a bit lower than they should). LED lamps I put in two vehicles recently are no less brighter than factory xenon. Again it looks Ok and I also noted about 50-70% of upcoming traffic have it installed in the area I live. I suppose a half of them is modern cars with factory LED's and a half of home installed units. From where I'm sitting by the wheel I see no discomfort from them as long as they don't glow in the sky. -
RS700? Or RL? I like them both no matter alu or steel. Good luck on the project!
-
Sounds sensational !!! Thanks for sharing this top secret fact! That would be darn interesting to read the whole story. Maybe later, no matter. Say hi to Timoti Maikshilo. His scenaric photo's of NZ land were amazing. And have a smooth and safe travel home!
-
Wow! Excellent! I well remember that girl in red T-shirt hanging over a FWD firetruck at Macungie in 2018. But honestly it has me scratching my head on who was that guy wearing sun glasses?? Shame on me!
-
B model headlight upgrade
Vladislav replied to Bumblebee090458's topic in Electrical, Electronics and Lighting
LED lamps could be installed into the existing lenses. IDK if that's legal regarding your DOT requirements though. I put a pair in my motorcycle and also 4x4 Mercedes recently and very happy with the results. -
As said above and said before. Good luck on the progress! And I haven't noted if anybody mentioned that previousely, we all here like to see pictures!
-
Also you might enjoy seeing this. It was posted on here in the past.
-
For my application I ordered straight square U-channel 3" tall bent of polished SS in a fab shop. Than cut off the shelves in the corner areas for radius bends and wrapped those over a piece of steel tube. Could be done with no really big efforts if you have basic skills working with sheet metal. Some experiments with cardboard are worth executing before the real deal.
-
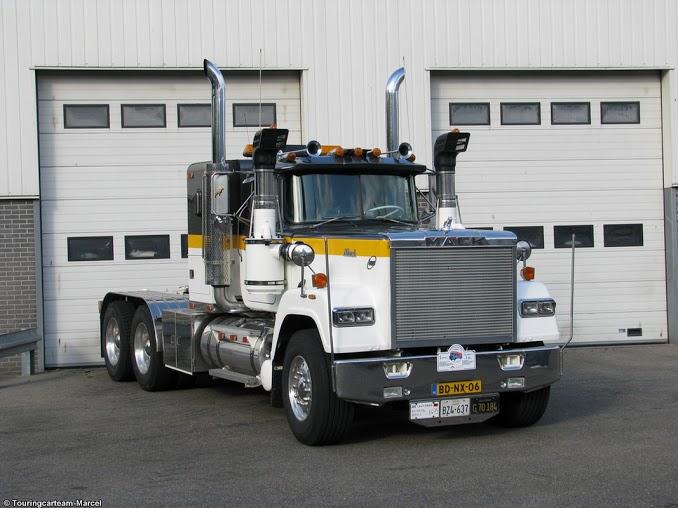
The truck looks cool! You will be a lucky guy purchasing it! I too wish that for you! I'd like to own one also some day. But so far it's only drool! The sleeper you have was made by Able Body. At least judging by the pics. As you can see it has two cut outs for the exhaust mufflers. The LH one was gone in unknown direction. Or possibly the sleeper has come from another truck which had two stacks and yours had one. Speaking the matter you asked I doubt you'll be able to find stainless skirds for that sleeper. They seem existing in the past but during my observations on different on-line truck accesory shops in the last 15 years I haven't seen any offers on those. Also a point is a R-model cab is not designed well to acomoddate straight skirds. It has rounded rocker panels which wouldn't suit flat boards. Or at least they would look wierd there. For my needs I fabricated stainless skirds for a sleeper but declined idea putting them on the cab. Sure that was a matter of my taste. Fabrication of stainless parts turned out into more complicated deal as it looked to me originally. The material is harder than common steel so you need high quality drill bits and notable amount of labour to attach marker lamps. The truck on the picture (not mine unfortunately) has a sleeper similar to yours. It's Able Body, I checked it out in person, there's a tag riveted to the back wall. As you can see there are stainless skirds attached to the bunk only and they look nice. I don't know where the owner accuired them from. Of what I know definitely they were put in place a long while back. Too possibly they're hand made.
-
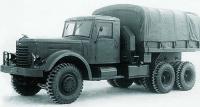
A couple more pics from the net representing the subject. It's an L-model not a B. But about the similar time frame. If you look well you can note the U-bolt passes a hole in the chassis skird at the inner side of the frame rail. I expect of your truck also having those holes in the corresponded areas.

-
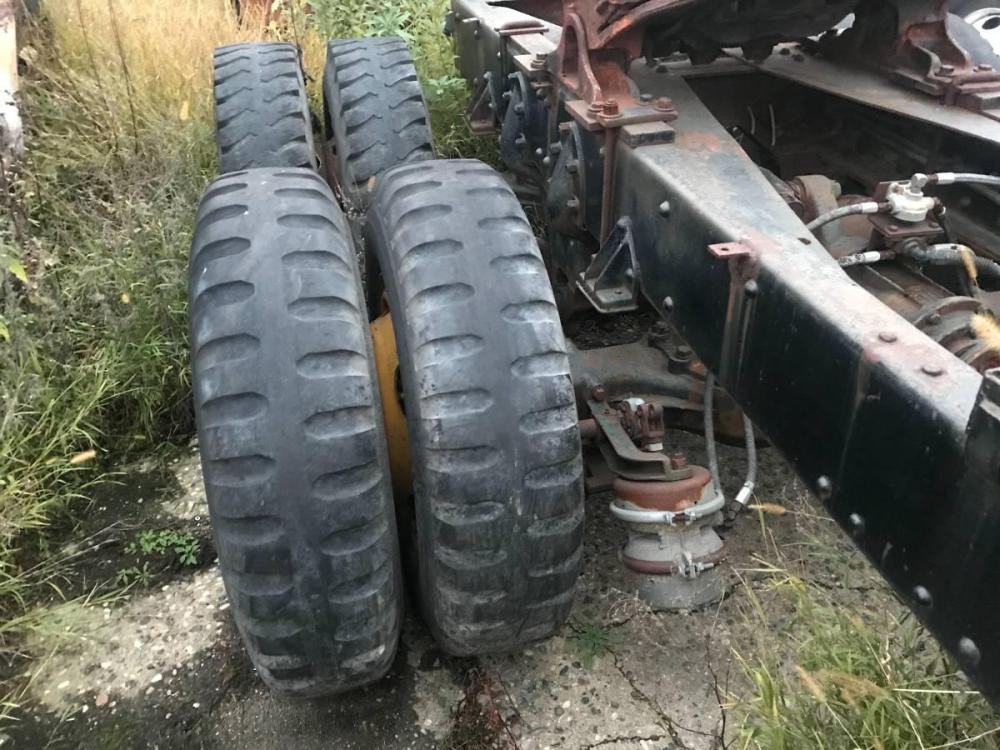
That's an interesting point of no signs of the 5th wheel ever installed. Iranians still have plenty B-models straight trucks with long wheel base and cargo body in operation. But those assembled in Iran have industrial style front grille with shutters in the most cases. I'm pretty sure you will make many discoveries about yout truck since it is not young and definitely keeps some history. If you make more pictures of it (chassis, engine compartment, front axle) people on here might share some useful info about it I belive.
-
Welcome to the group and greetings from Russia! Which part of Turkey are you in? I used to travel over your country a few times in the past. The Eastern areas recently the most. The truck looks very nice and definitly rare in your country nowadays. I was told there were many of them in the past but they seem gone. B-85 must be a firetruck from the factory but looking the picture the chassis more seems to me as a normal commercial truck or tractor. Too possibly someone put the cab with front end off a fire truck onto different chassis. The answer could be recieved reading the chassis number. Normally it is stamped into RH frame rail just behind the right front wheel. Starts with B-85... or B-61 or B-53 etc. Sorry no help about the dash switchews from my side besides what the guys already said. Cool looking truck, congratulations on the purchase! Vlad
-
Interesting configuration as it is. I don't remember seeing many (any-?) RB dump trucks. Thanks for sharing.
-
Right machine work presumes sharpness and accuracy with tolerances. Your bad experience with that speedy sleeve is the most prbably due to its imperfect fit. Which could be predicted by its very imperfect shape and even the design. A thin wall tube pressed over unevenly worn surface doesn't seem supplying perfect surface for a seal to seat against and work well. I honestly am surprized at all this technology is count as "good" and so widely used. And at the same time I heard from multiple guys that they use such a sleeve and got leak back again soon. As less excentricity of the spinning surface is as less deformation of the seal's rubber is required to keep tightness. It's more actual for higher revs applications though so doesn't seem the matter of your issue. Possibly there was leak just between the sleeve and the shaft if you didn't apply sealer or epoxy in between. Or the sleeve's shape was so imperfect so the seal couldn't do its job at all. Or got worn or cut by a certain sharp edge. Maybe it's worth for you to just spend a couple of hours in the evening to read on the web basic principles of fabrication of shafts. Engeneering is way not always a rocket since. Most basic points are easy enough to figure just by common logic.
-
Hmm...
-
Fixing the shaft condition could be the way to go. Lathe work is Ok if you dial the shaft's center well enough before cutting. Grinding in a machine is much better and preferrable option. Welding is no of good options since the shaft is (should be/ could be) made of high carbone steel. Which doesn't weld well and could easily crack through in the welded area later in service. So application of material (metal) on the area could be halvanic (chrome) or ultrasonic metal powder coating. I don't know which kind of technology could be found in your neck of the woods but strongly advise to get off of the idea to weld up. Also an option might be cutting/grinding the shaft over the worn area to lesser OD. Than locate a seal with lesser ID (and the same mounting size) using a chart or catalog. For example Timken offers a wide range of industrial seals and their catalog is on-line. Not almost correct way of fixing things but could be applied.
-
DM Cab Replacement
Vladislav replied to DaveM's topic in Antique and Classic Mack Trucks General Discussion
The mounts of both cabs are expected to be the same. There are some additional parts welded (or bolted?) to the cowl at the engine side to suit the steel nose shells and fenders. By other aspects cab must be similar. -
Cruiseliner Transformation
Vladislav replied to cruiseliner64's topic in Antique and Classic Mack Trucks General Discussion
Yup, looks nice and attractive. And nothing of the look it had when came into the shop. A question - what did you use to clean the lower side of the cab? I see bare aluminium the most (or light paint?) And my Cruiseliner is well covered with dry mud all over the under side of the cab. -
Happy Birthday Doubleclutchingweasel !
-
Merry Christmas BMT!
-
By very simple reason my "bet" the engine is E6-350 Econodyne. I have one in a 1988 R-model with similar injection pump. The "bet" is due to the 9-speed transmission used. Mine has the same. You don't need 9 speeds behind a Maxidine since its torque curve works well with just 5 speeds. I have another R-model also 1988 made which has T2070 7-speed transmission. Its ratios are similar to T2050 5-speed but have two "low holes". There's a similary rated T2060 6-speed and T2080 8-speed. All trio has first 5 gears spread much wider than "multispeeds" T2090, T2100, T2110, T2130 and T2118. Wider gear steps are aimed to serve with Maxidyne low torque curve engines. Ok, that my other R-model has its engine stamped as EM6-300L. Almost as Keith described regarding his DM. It's a bit easier to identify R or DM since E6-350 would be R/DM688 model and EM6-300 would be R/DM-690. That's what I have on the door tags. RW's are all 613 or 713 with Mack engines so no clue up.
-
Happy B-day D-Day!
-
Sounds strange. Those drums I had for 4" shoes had a track for 4" shoe exactly. There could be some exceptions sure but more looks like someone put incorrect drums in the past. The reason of using narrower shoes is to minimize the unsuspended mass of the axle. But lesser drum would split weight even notably. Same for possible savings of materials in the production.


BMT Forum Logo
