Wobblin-Goblin Posted January 20, 2015 Author Share Posted January 20, 2015 Today's progress:1. Stripped, prepped, primed, and painted the firewall.2. Stripped, prepped, and primed the oil pan of the air cleaner. It is now ready for paint (we will paint it with the hood and the cab).Tomorrow we will be putting the hood lacing on the firewall and removing the mirrors from the doors. We will also be straightening, prepping, and priming the tops of the hoods. 2 Quote Link to comment Share on other sites More sharing options...
Popular Post farmer52 Posted January 20, 2015 Popular Post Share Posted January 20, 2015 nice work but will you slow down. 4 Quote Ken PRR Country and Charter member of the "Mack Pack" Link to comment Share on other sites More sharing options...
NY-B61 Posted January 21, 2015 Share Posted January 21, 2015 nice work but will you slow down. Seriously. You're putting some of us to shame! 2 Quote Link to comment Share on other sites More sharing options...
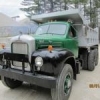
Popular Post Wobblin-Goblin Posted January 22, 2015 Author Popular Post Share Posted January 22, 2015 Today's progress:1. Pulled the radiator cover off (eight easy bolts) and installed the bulldog. Sanded the vertical steel on each side of the shutters and painted them the same green as everything else. Put radiator cover back on.2. Installed the hood lacing on the radiator cover and on firewall. That stuff is rugged material that doesn't want to bend easily. Be forewarned if you've never done it before.3. Spent a fair amount of time taking the dents, pucks, and bends out of the hood pieces. Tap here, tap there, hit here, hit there, whack here, whack there, set on floor and step here then step there...voila! It's not perfect, but it's not bad at all now for being true.4. Applied body filler on the areas where pitting was bad. Sanded. Primed one hood.5. Prepped, primed, and painted the chrome strip between the hood pieces. I painted it the same silver color as the radiator cover and wheels.6. Took side mirrors off. 7 Quote Link to comment Share on other sites More sharing options...
dblew Posted January 22, 2015 Share Posted January 22, 2015 Just so you know...my guilty pleasure is logging in each day to see where you're at!Seeing the BullDog perched up there brings a little tear to my eye. 1 Quote Link to comment Share on other sites More sharing options...
Wobblin-Goblin Posted January 22, 2015 Author Share Posted January 22, 2015 Today's progress:1. Finished sanding and priming the second hood piece. Now both are ready for paint, and we plan on painting them tomorrow.2. Removed the windshield glass and the rubber. 85% of the body work around the windshield is in fine condition. About 10% is a little wonky and 5% is in rough shape. That's pretty darn good, if you ask me. We might actually get to fix what needs to be fixed tomorrow and then put the new rubber in.BTW, I found more evidence of mud wasps when I pulled the defroster pieces from inside the windshield. They had built a mud nest in one of the ducts.Sorry, no pics today, but I should have some tomorrow. Quote Link to comment Share on other sites More sharing options...
Wobblin-Goblin Posted January 24, 2015 Author Share Posted January 24, 2015 Hoods are now painted. 1 Quote Link to comment Share on other sites More sharing options...
farmer52 Posted January 24, 2015 Share Posted January 24, 2015 Now that you have us hooked on your "refresh"....how about some pics? I am having withdrawals without pics. 1 Quote Ken PRR Country and Charter member of the "Mack Pack" Link to comment Share on other sites More sharing options...
thomastractorsvc Posted January 24, 2015 Share Posted January 24, 2015 Now that you have us hooked on your "refresh"....how about some pics? I am having withdrawals without pics.DITTO!!!!!!!!!!!!!!!!!!!!!!!!!!!!! Quote Robert"I reject your reality and substitute my own." Link to comment Share on other sites More sharing options...
Wobblin-Goblin Posted January 25, 2015 Author Share Posted January 25, 2015 Sorry about the lack of pictures, folks. I might have run into a snag with the paint. I matched it as best as I could with a color chart (the rattle can stuff I've been using vs. the stuff I sprayed on the hood), but it doesn't appear to be a good match once applied. I haven't seen the hoods since they were sprayed on Friday, so I'm holding out hope that they have darkened a little since then. The rattle can green I've used darkened some as it dried and hardened, so if this new paint does the same, it might be OK. If it doesn't darken, I'm not sure I want to continue using it due to it being lighter than I wanted. Quote Link to comment Share on other sites More sharing options...
Popular Post Wobblin-Goblin Posted January 31, 2015 Author Popular Post Share Posted January 31, 2015 Sorry about the delay, we got wacked pretty hard last week with snow, and it took a few days just to clear our way out to the garage (1,500' driveway).Today we installed the painted hood. I also vacuumed out the engine bay and interior because the last few times I worked on it, I generated a lot of dust, dirt, and paint chips. 10 Quote Link to comment Share on other sites More sharing options...
mrsmackpaul Posted January 31, 2015 Share Posted January 31, 2015 I have a real dumb question when it snows is the air muggy ? is it ok to leave metal bare for a few days or is there to much moisture in the air and does it get lite surface rusttop job Mr Wobblin Paul Quote Link to comment Share on other sites More sharing options...
Wobblin-Goblin Posted January 31, 2015 Author Share Posted January 31, 2015 It's actually quite dry during winter here. If you're not careful, you can get nosebleeds and cracked skin (I've had both already this year). Quote Link to comment Share on other sites More sharing options...
mrsmackpaul Posted February 1, 2015 Share Posted February 1, 2015 thanks for that you'll have to excuse me and my dumb questions as it dosnt snow here dosnt get below 20 degrees c in winter thats 68 f for you blokes Paul Quote Link to comment Share on other sites More sharing options...
Maddog13407 Posted February 1, 2015 Share Posted February 1, 2015 actually its a really good time to sandblast outside in the winter, if you can stand the cold. lot less moisture in the air. 1 Quote Link to comment Share on other sites More sharing options...
Brocky Posted February 1, 2015 Share Posted February 1, 2015 PaulPlease feel free to ask any questions about the US. Between here and Just Old Trucks we sure ask enough about OZ.. Quote Brocky Link to comment Share on other sites More sharing options...
Wobblin-Goblin Posted February 5, 2015 Author Share Posted February 5, 2015 Today's progress:1. Took the doors off.2. Took air cleaner off. Stripped it down to bare metal. Primed it.3. Stripped the right side of the cab (exterior) to get it ready for additional prep and priming.4. Made a tool to reach up under rear cab corner and pop out a big dent. 2 Quote Link to comment Share on other sites More sharing options...
farmer52 Posted February 5, 2015 Share Posted February 5, 2015 It's about time you did some work on the B. Seriously, nice work and keep us posted on the progress. At this rate you should be ready for York. Quote Ken PRR Country and Charter member of the "Mack Pack" Link to comment Share on other sites More sharing options...
Wobblin-Goblin Posted February 10, 2015 Author Share Posted February 10, 2015 Today's progress:1. Used the home-made tool to pop out the big dent on the cab corner behind the driver's seat. It actually looks pretty good now. You can see the tool in one of the pics. It worked well.2. Stripped more of the paint off the cab.3. Removed and disassembled the horn. One of the set screws holding a trumpet broke while still tight, so I used my drill press to drill it out and then unscrew the trumpet. Both trumpets had a bunch of junk (mud, insect debris, etc.). They are both clean now.4. Tested some of the circuit breakers to try and figure out some of the wiring. Also inspected under the dash to see what needed attention there. The windshield wiper linkage needs work and the hose that supplies hot air to the defroster is missing.Things are going slower now, obviously, because of the massive amounts of snow we've gotten here. I still look forward to working on the Mack every time, however. Quote Link to comment Share on other sites More sharing options...
Popular Post Wobblin-Goblin Posted February 13, 2015 Author Popular Post Share Posted February 13, 2015 Today's progress:1. Stripped about 95% of the cab. Took the exhaust stack off for better access.2. Cleaned the area afterward. Lots and lots of paint chips and dust. Did I mention there was lots of dust?Looking ahead:We'll be working on the doors soon, fixing the internals, replacing the old glass with new, and priming and painting them. We'll also be installing the new windshields after we fix the little bit of rot around the windshield opening. After that...we'll be painting the cab. 5 Quote Link to comment Share on other sites More sharing options...
Popular Post Wobblin-Goblin Posted February 14, 2015 Author Popular Post Share Posted February 14, 2015 Today's progress:1. Removed the cab lights. All but the center one worked, but they were all in sorry shape. I'm going to have to decide whether or not to go new or not.2. Finished stripping the cab of paint.3. Made a plate to go over the opening from the home-made snorkel on the air cleaner.Hopefully next week I'll have one new windshield and two new door windows made from a local glass cutter. With the cab stripped, we'll now repair some holes with a couple welded patches, some minor brazing, and then...PAINT.Thanks for following my project, BTW. 3 Quote Link to comment Share on other sites More sharing options...
thomastractorsvc Posted February 14, 2015 Share Posted February 14, 2015 the patch on the air cleaner looks great, on my truck it was easier to buy new lights. I bought these ones from ebay the fit good and were cast metal http://www.ebay.com/itm/5-Amber-Truck-Lights-CHROME-Cab-Marker-Lamps-Peterbilt-/281581918845?pt=Motors_Car_Truck_Parts_Accessories&hash=item418f971a7d&vxp=mtr 2 Quote Robert"I reject your reality and substitute my own." Link to comment Share on other sites More sharing options...
Wobblin-Goblin Posted February 14, 2015 Author Share Posted February 14, 2015 Thomas, just to be clear, are those selling for $45 per set of five, or $45 per light? It's a little ambiguous. Quote Link to comment Share on other sites More sharing options...
thomastractorsvc Posted February 14, 2015 Share Posted February 14, 2015 It says for 5, same place I got mine and there was 5 in a box for $45. They also have a slight curve that allowed them to match the roof. I started by installing with taper head machine screws and nylock nuts with star washer than my fat fingers could not get the fronts on the centers so installed some nut inserts and it worked out good and nut the rear. This what I copied from the site>>>> Pack of 5 Amber Cab Marker Lamps. Picture shows 2, but this listing is for 5.. Acrylic Lens. Die cast chrome housing. Mounting Hardware NOT Included. Lens is replaceable. 12V. Length: 7.91". Height: 2.42". Width: 2.53". Center to Center for Bolt Holes: 5.25". 1 Quote Robert"I reject your reality and substitute my own." Link to comment Share on other sites More sharing options...
j hancock Posted February 14, 2015 Share Posted February 14, 2015 I used the same type on a project and they are pretty nice. I think they got me for 50 bucks for the set of 5. Bought them from somewhere else. 1 Quote JimIt doesn't cost anything to pay attention. Link to comment Share on other sites More sharing options...


Recommended Posts
Join the conversation
You can post now and register later. If you have an account, sign in now to post with your account.