

Vladislav
-
Posts
8,043 -
Joined
-
Last visited
-
Days Won
79
Content Type
Profiles
Forums
Gallery
Events
Blogs
BMT Wiki
Collections
Store
Everything posted by Vladislav
-
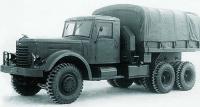
 They're original. That's original military Mack NM. The matter of the question at the time is it's an early steel cab series model or a later open cab one with a commercial L-model cab installed.
 -
Same here. Both for roads and the rivets
-
Yup, pretty sure. Also square fuel tanks and the air tanks removed from under the battery boxes and installed on brackets to the chassis. Plenty of minor similarities too.
-
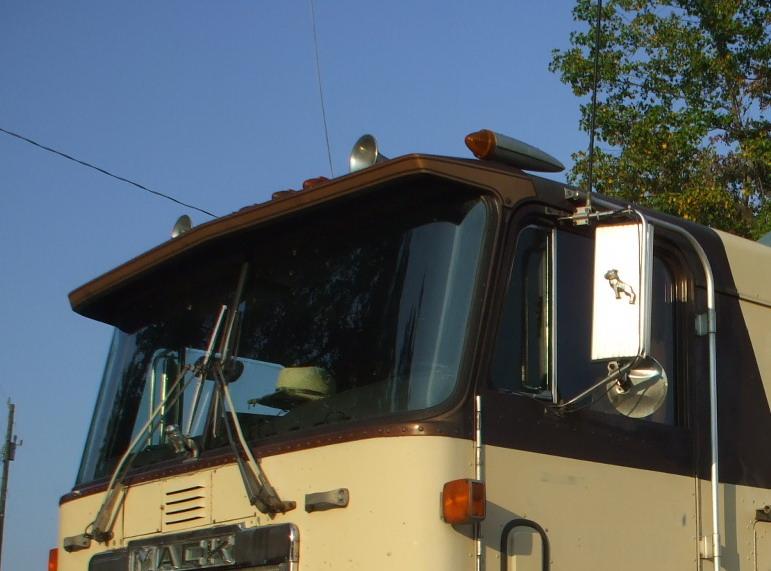
I already bought a set of KD-516 (or so) from Truck-Lite to install on the R and also another set without the short light for MH. But Cruiseliners had something different from the factory. If you look at the pics and also the brochure photo of green cab you posted above those lights have mounting area at the front only and the most of their body length is "flying in the air". I don't remember seeing such ones for sale or installed on other trucks. My new purchase has marker lights which look as Kenworth W900 fender turn light and I noted similar setup on other Cruiseliners. But those "flying torpedo's" are definitely a special and attractive thing.

-
Any ideas on what the torpedo marker lights on Cruiseliner are? Some special style with the tail part hanging in the air. Never saw anything like that on other Macks nor another branded trucks.
-
Great looking truck and I like the paint scheme.
-
Good point Jim. And right in time. I measured the rail and it's 3/8 x 10.4". The 2nd figure is not absolutely accurate so it seems as the option. The truck is WS785LS.
-
Front Spring Insulators
Vladislav replied to h67st's topic in Antique and Classic Mack Trucks General Discussion
In the asked task I'd put a bottle jack onto the top of the frame rail and make a lee of chain or tight stripe over the bottom of the spring and the jack top. Than lift the jack so it will pull the chain forsing the spring bottom to go up. My chain winches were 1 ton so applying 2 of them to both the springs didn't put more than 1 ton of force to each spring. And I remember well I didn't seat the insulators by the clamp bolts. The rubbers were completely in their places so I just put the clamps and drove the bolts in. -
From what I saw it's thicker. Going to grab a caliper and get precision figures.
-
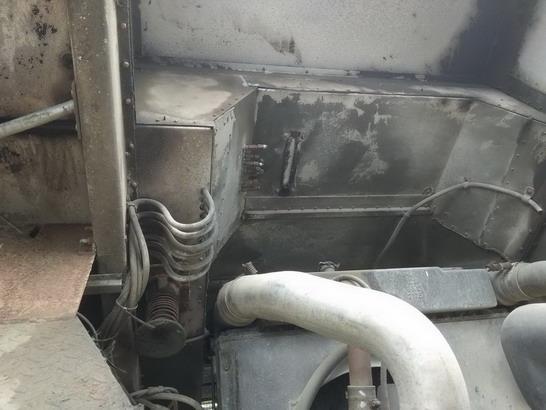
You're welcome Steve. The floor is quite good and doesn't show any corrosion by the first observation. i sure will clean the dust off it and look more detailingly but it's shape seems promising. Some outer panels have bents and I would swap them by aluminium sheet since the most of the panels are straight cuttings. There's also a mess of rivets so better to install new ones instead of aftermarket spots. Of difficulties there's a lower part of the windscreen opening which has multiple cracks but I found out it's fiberglass so could be repaired. And the windscreens themself is one of the 1st points in the fixing list. I'm afraid I will need to bring the truck or the cab to a glass shop for fabricating well fitted windscreens. And this means I should fix the opening first. Unfortunately all that is not a deal of the day since plenty of current affair already take place. Interesting you have Warszavwa. They're pretty rare here, I just can remember one or two owned by people. Pobeda's are pretty common, just seldom seen on a road.
-
Nope, the frame rails are solid and straight right from the under the cab factory split and almost to the rear end. I checked this out once more just an hour back. I hate frame mods so payed attention to the matter. The rails are no less than 5/16" thick and tall, probably 10.62", didn't measure so far. Thank you for posting the brochure scan.
-
Great point Mike, you catched it! It's written "snakes" indeed. I meant "snacks" to not be hungry. So far I didn't see any place in Russia where snakes are offered as food. Otherwise I wouldn't miss the chance to taste A 300 mile trip sounds like a drive. Anything really interesting or worth to be used as parts?
-
Hmm... I'm new to Cruiseliners and newer knew there was anything aside from a daycab and sleeper optins. If the side view gives you that feeling I suppose you're right. I didn't put an info request to the Museum on this truck and doubt will be able to do it soon in current situation. Of what I noted in person the matress in the cab looked too narrow and had its front (direction wise) line stepped to clear up the driver's seat.
-
Interesting. As long as my R's went to Russia from Quebec I don't see anything impossible for that IH to go the same track. I will ask local folks on more pictures of that truck and possibly someone is familiar with it.
-
I noted the cost of old Macks selling in Australia is much higher than in the US and also in Europe. Wonder why it is. Might be higher overall cost level for everything but I doubt on that by a matter of today's market globalization.
-
Paul, I also thought about that many times but than finally figured the matter. Say a B-model is a very common old truck in the States, at least over East coast area and you don't need to go a hundred km because you can find multiple offers in a radius of 50. And if I look for an old Russian truck such as GAZ-51 or ZIS-157 which are about the same common overhere as a B-model in Pennsilvania I would also go for an example no further than 100km. Macks are extremely rare pearls overhere so the scale of the hunt is different. And my hobby is that exotic as long as I'm here. Once I thought to myself of if I ever live in the States I would import and restore ZIL
-
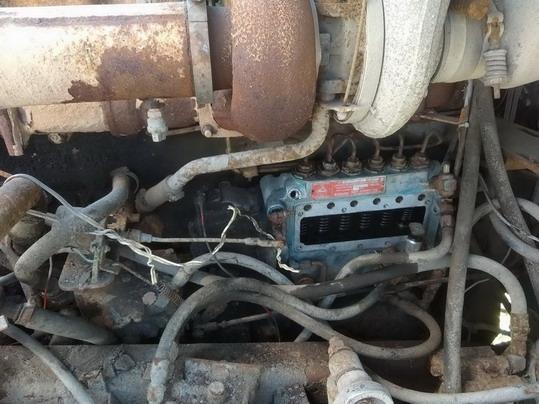
To my sorprize it's unclear to me so far. It's inline 6 END engine with turbo on the exhaust manifold. Originally I saw the turbo only and thought it was something like 237. The tag on the block is missed and the paperwork kept the # started with CM6-250 what I figured as misswritten EM6-250. But when looking the truck I found out it had a chassis mounted aftercooler in front of the radiator. And being a 1982 Macungie built unit the engine seems even as E6-350 2V. On the other hand the tranny is 5 speed so the engine should be Maxidine. Any EM6 with CMAAC? Telling more there's second transmission behind the main box connected by a drive shaft. Probably Browny and probably 3 speed but I didn't investigate the matter so far. There was an air shift control in the cab but it's no longer there, the air lines under the floor were cut.
-
Ok, to my understanding the engine SIZE is 672 ci
-
I once bought Mercedes G for parts and the story behing it was the guy had the front shaft front joint loose for a while. Ended up he had the axle pinion shaft broke down probably due to constant vibration and all the front drive shaft hitted the pavement at the speed of 100km/h. The guy got back to the place and picked up his broken parts on a side of the road only on the next day. Took him two bottles of Vodka to get relaxed in the evening.
-
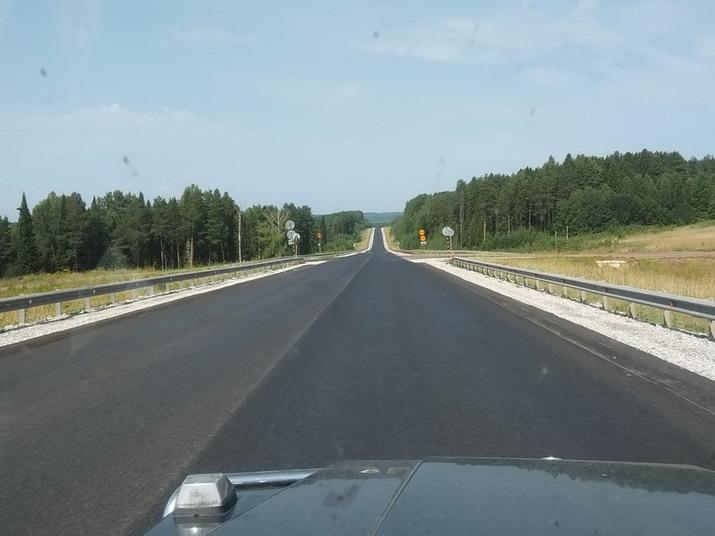
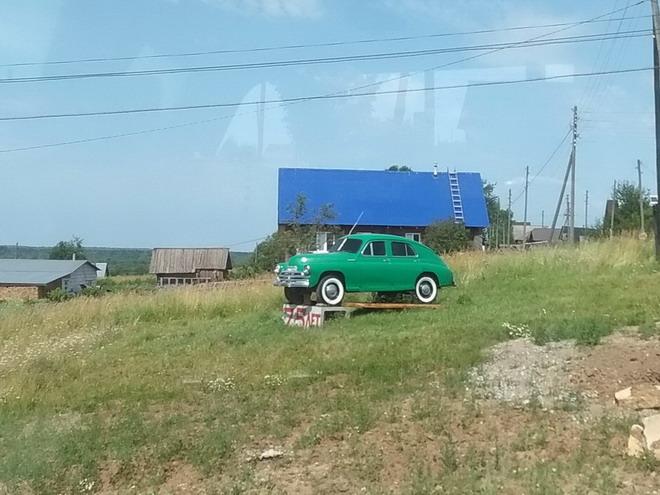
The end of that part of the story we started backing home on the next day and the loaded trailer went to his company yard with a plan to hit the road in a couple of days. I took another road which worth pointing out since I drove no less than 1500km of nealy empty 2 lane highway with about no passes and light overspeeding. Would do it really nasty if drive a faster car but not this time. Telling further the trailer arrived to my place yesterday and we offloaded the Mack successfully. But I will share that part of the story the other day. Too much to type (and read?) at once, especially by language you don't use to use in everyday practice The pics - really long sections of empty road we combined with road repairs in 3 or 4 places. Some typical Ruaain road scenaries. Also an old Russian car Pobeda (means a victory) someone put on a display near the road.

- 68 replies
-
- 10
-

-

-
That same day we catched the final destination, met the owner and I finally saw the aim of the trip myself. Can't say I was really excited but the truck more looked alive than dead. The next day we installed the rear crank seal housing since the owner removed it planning to change the seal but didn't, flywheel, clutch set and the tranny. I brang a chain winch along the other things but the point to attach it was the body's front board which was not a perfect location to hang the tranny up. As a follow we put plenty of labour getting it in place. Having experience of installing clutch on my R-model I resolved to fit the pressure plate and discs on the tranny shaft and put on the engine all togeter. But R-model had a single disc clutch and the Cruiseliner had double discs. We put the tranny on the flywheel housing closer to the end of the day but the next morning I had to release the attaching screws and move it back for half an inch since we couldn't fit the pressure plate to the flywheel. Seemed like the intermediate plate didn't seat onto the flywheel pins. We tinkered with the matter for an hour or so and the pressure plate got better location. But closer to the end of the 2nd working day I found out no declutching. Ok, that's for further repair, home, not in the field. The end of the day was spent to reattach battery terminals to suit common (European or a car style) batteries I had to install on the truck. I grabbed a few cable sections with clamps at home so just connected them to stock Mack cables with bolts and nuts and insulated with duct tape. Took me plenty of time and no luck actuating the starter since the owner lost the ignition key... I straight jumped the starter the next day but didn't have luck with firing up the engine. Took me half more day to buy a bottle of either fluid, attaching a can with fresh diesel and getting black smoke from the pipe with smooth engine idling in the end. But my joy haven't happen to turn into real satisfaction since air pressure gauge didn't lift its needle higher than 15 or so psi. It went a lil bit higher when I revved the engine up for some while but slowly dropped down when back at idle. So no brake release and no truck moving. And the final decition was loading it on a trailer with a crane. Which was found locally and made its work quite quick and smooth

- 68 replies
-
- 12
-
-
-
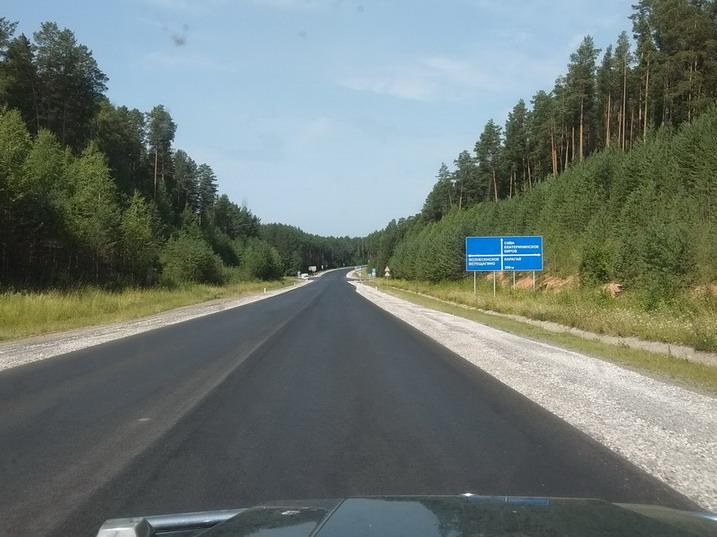
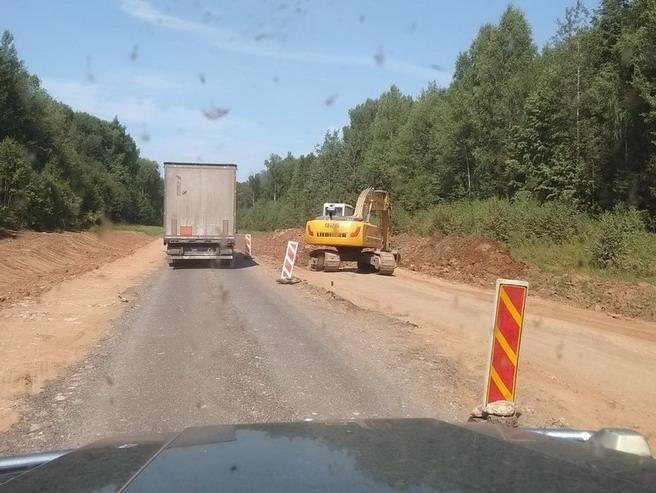
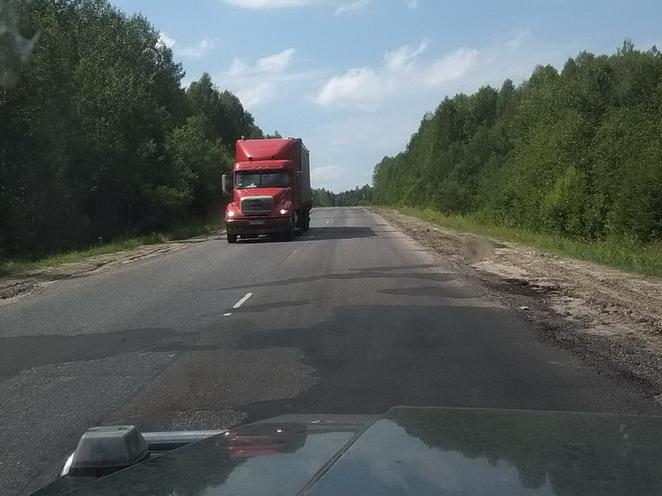
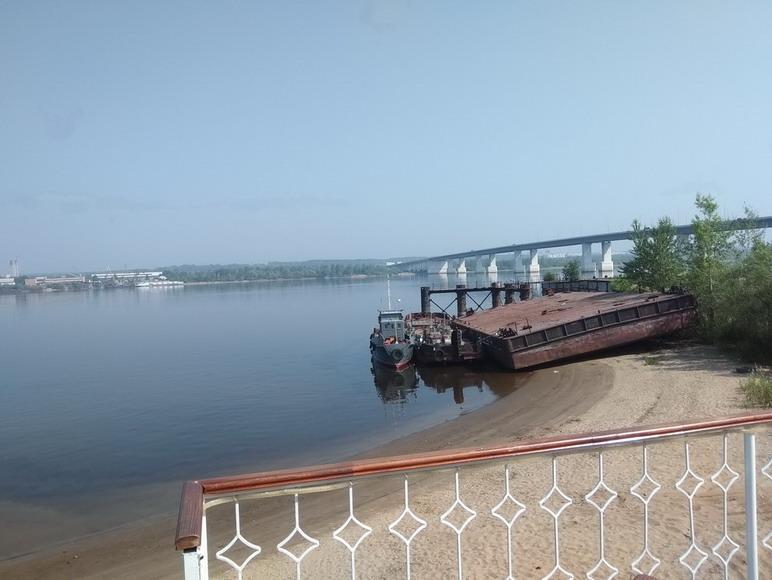
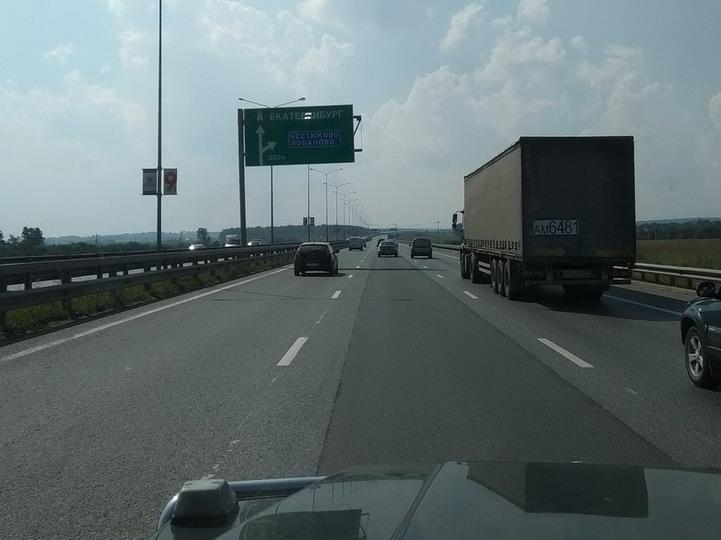
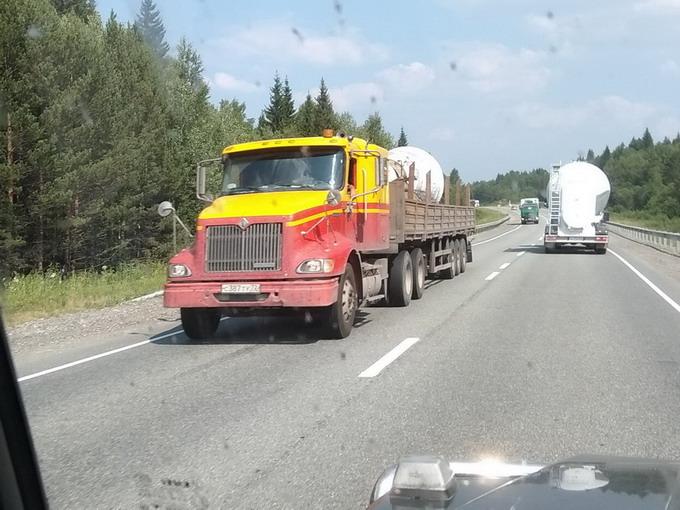
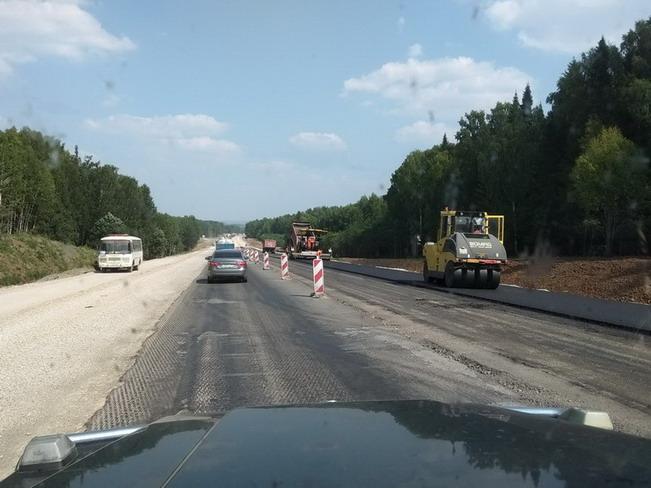
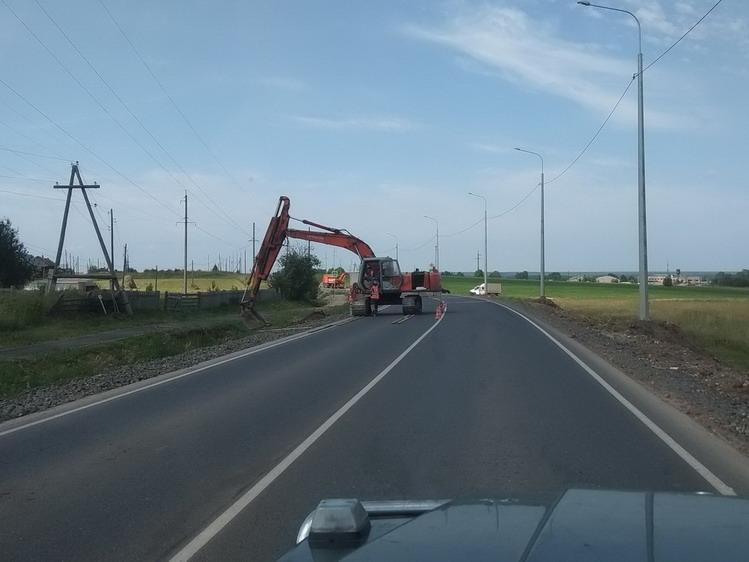
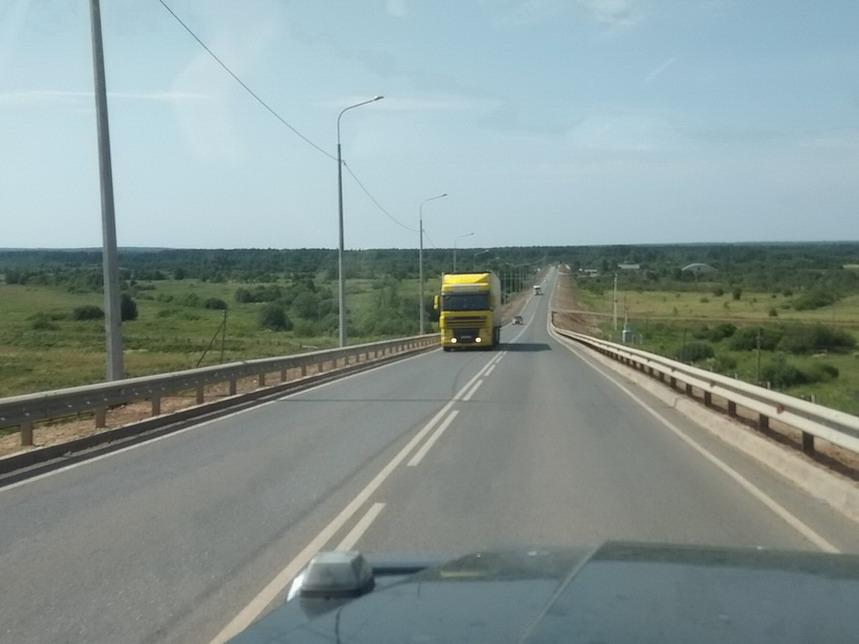
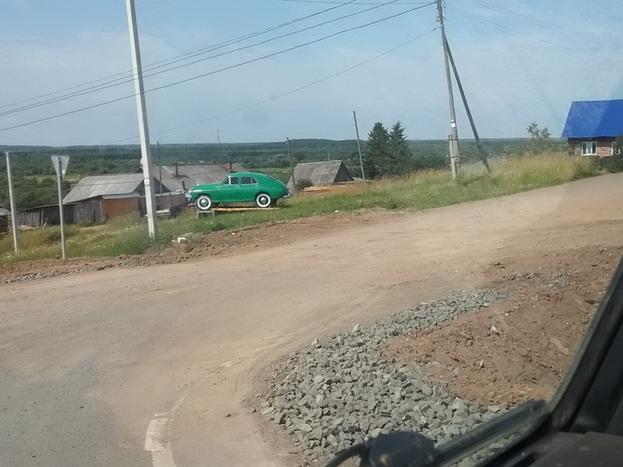
The place I found to stay overnight was a small hotel right near the river by the name of Kama. KamAZ truck plant was named to it but the actual plant's location was in a few hundred km lower down the river's draft. Worth to admitt the water was cold and the dinner was excellent and cheap. Further road represented a section of a 6 lane highway starting from the city of Perm' which in 30 km turned out into a common 2 lane road with avarage traffic. Met that yellow with red IH somewhere overthere. Than further catched a couple of sections of road repairs where one of the two lanes was closed and traffic got switched to one direction changing another in 10 or 15 minutes. You had to stay in a line of vehicles and wait. The pics - the Kama river and the hotel near it. It's location was a side of the city of Perm'. Also IH truck and road repair scenary..
- 68 replies
-
- 10
-
-
-
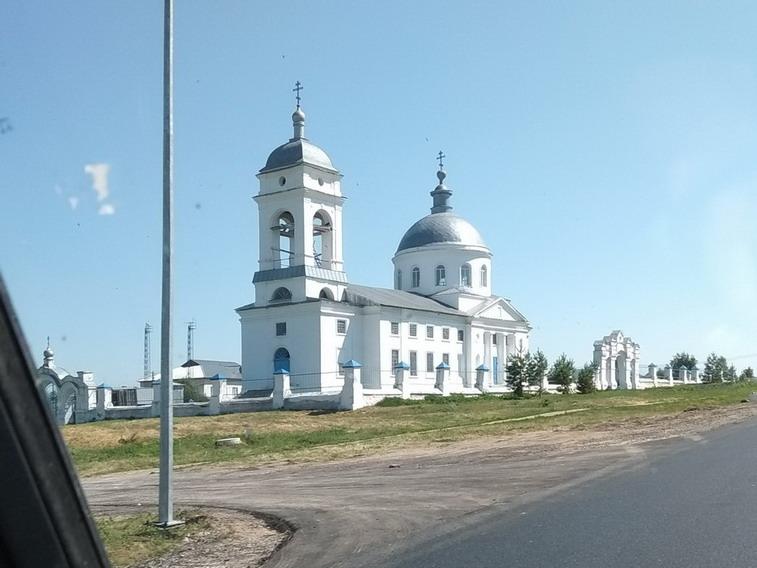
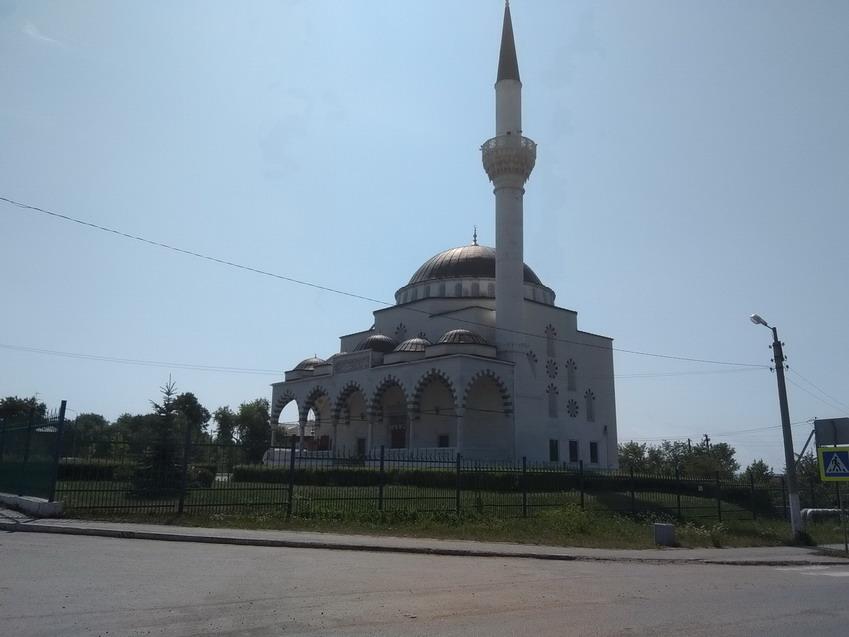
We also saw a few churches and mosques in that region since it's partly Muslim habitated.
-
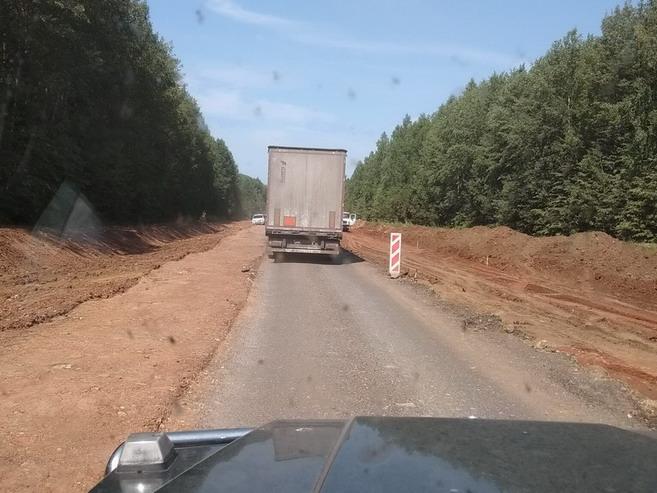
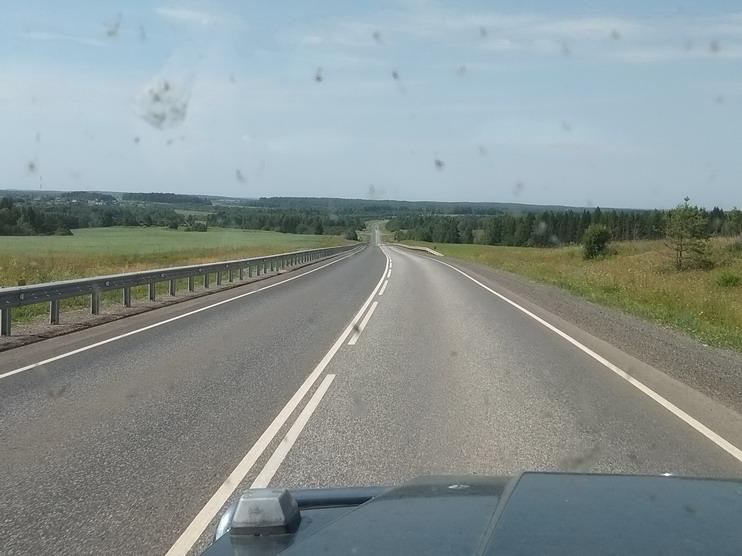
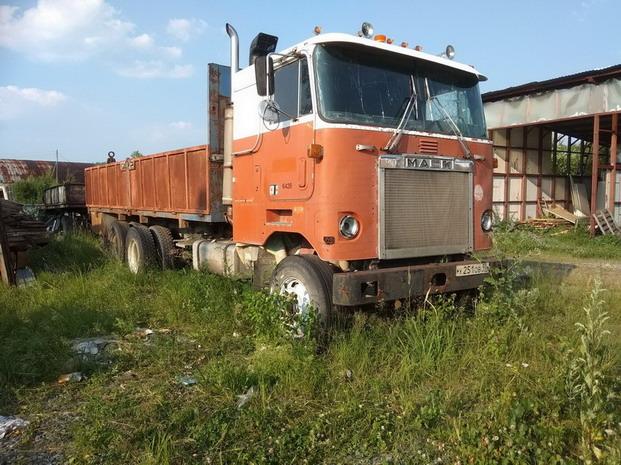
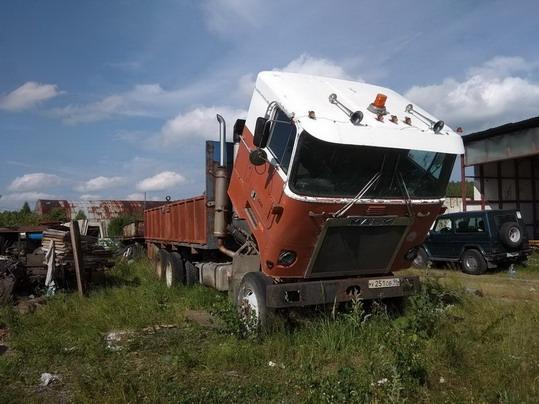
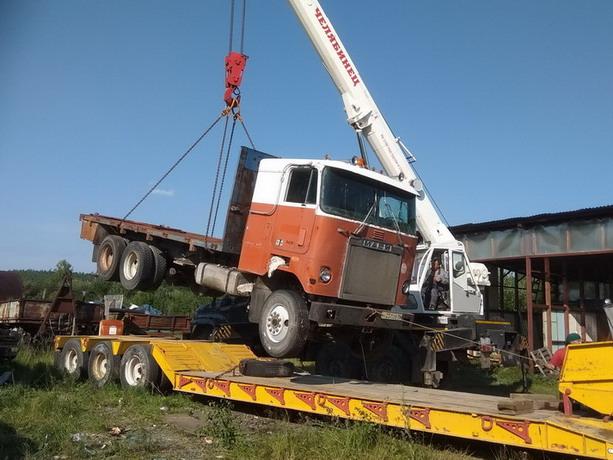
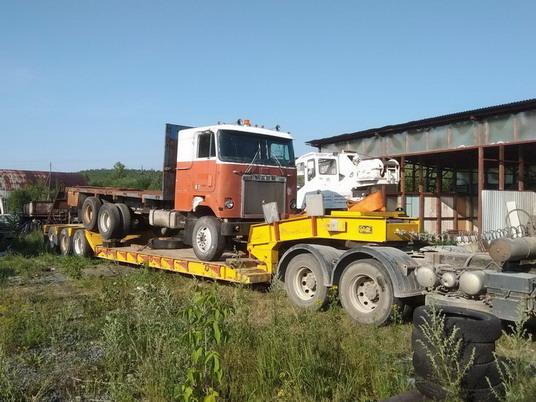
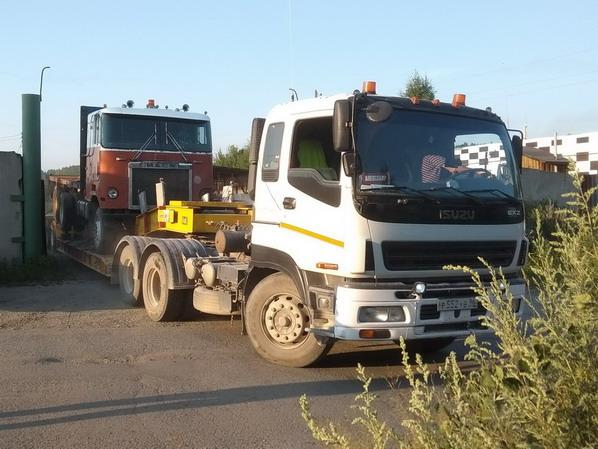
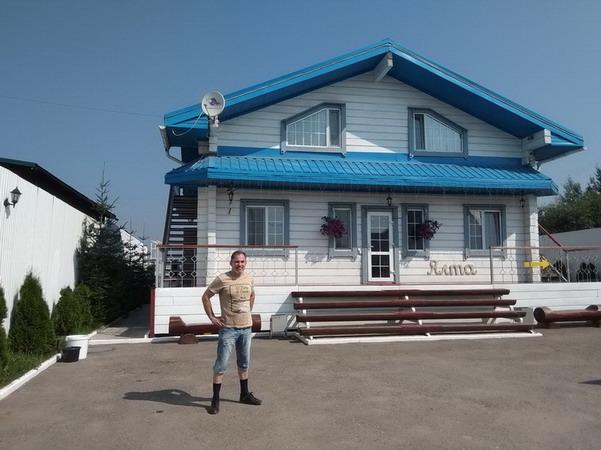
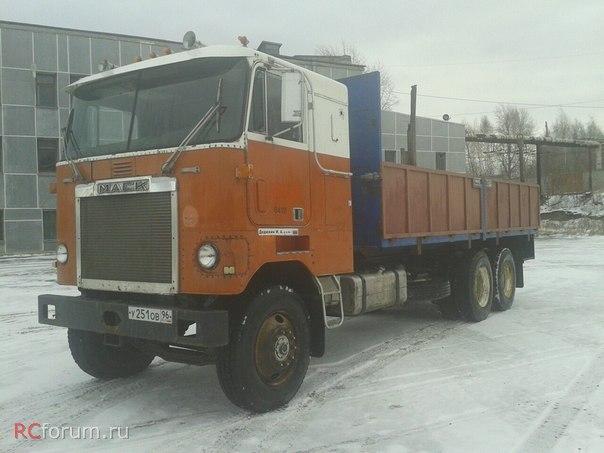
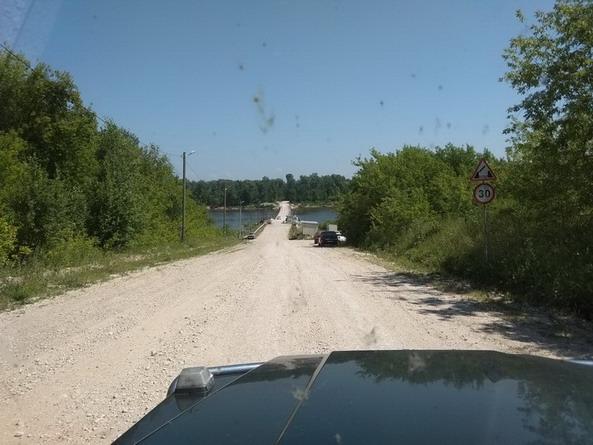
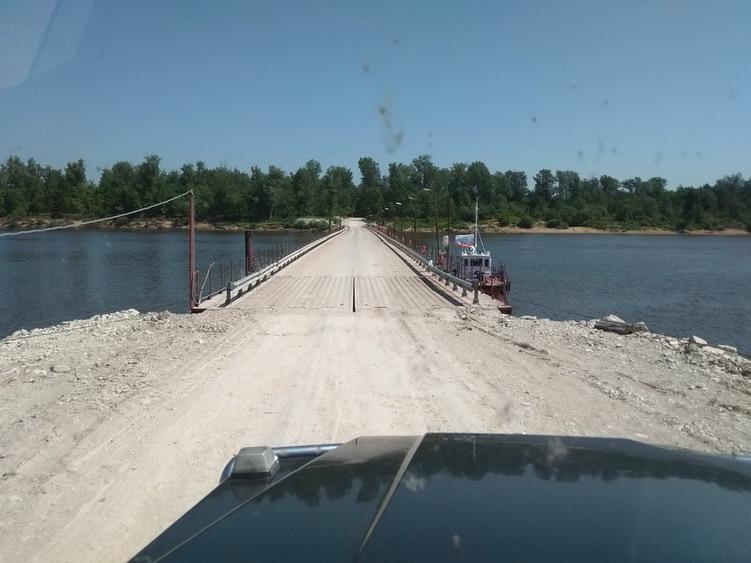
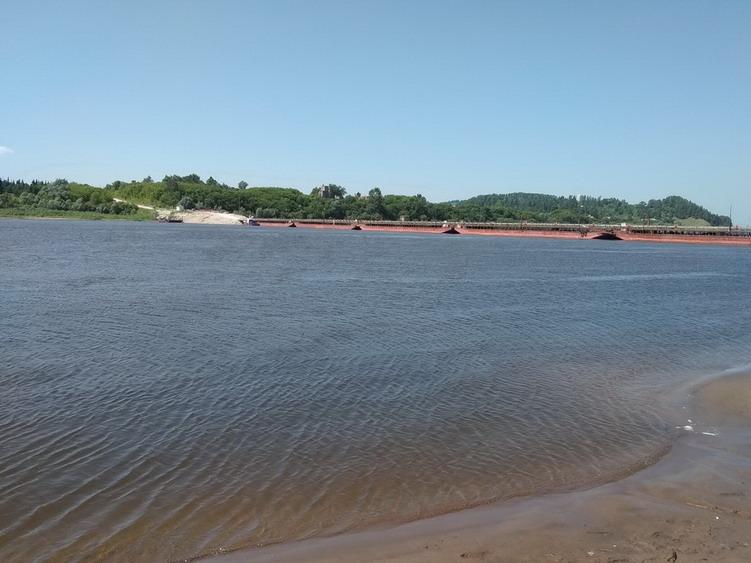
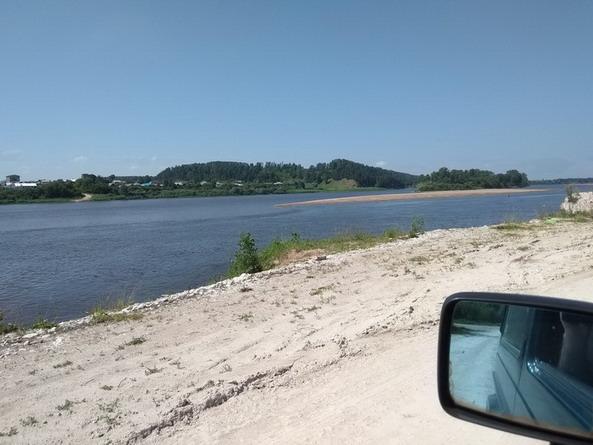
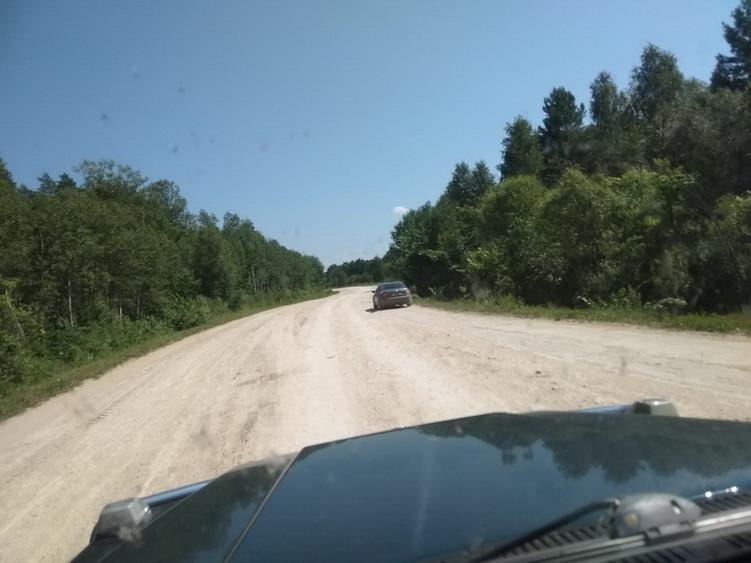
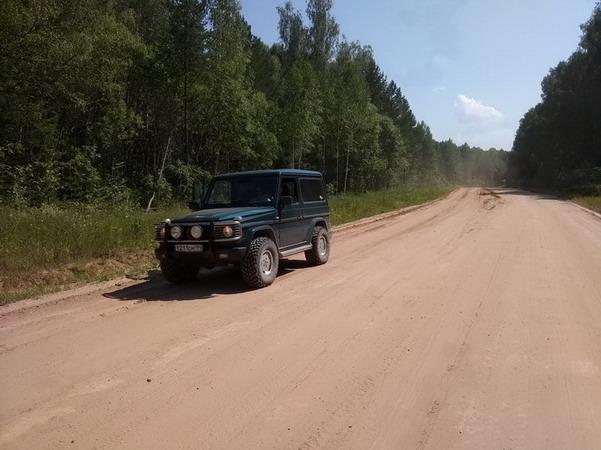
As i said many times in the past there're just a few Mack trucks in Russia and only a finger count of old ones so I keep the track on the most of them. A few years back a friend of mine sent me a picture from the net with orange Cruiseliner with Russian plates. Those indicated registration of the city of Ekaterinburg which is a kind of a capital of the Ural mountains region. A bit later another friend met the owner on some local truck forum and supplied me with contact info. I made a phone call, learned the specifications and the chassis # and was also told that the truck was selling. But the asking price didn't suit my interest. In a couple of years I had another talk and the owner said he had a clutch broken down but was off the line to fix at the time being busy with current affairs. We splitted the cost to a half if buying as is but the guy was also not ready to arrange the sell being busy. I supposed he had something wrong with family or so and didn't bother him for some while. Called in a half of a year and again in a year and again. Time goes fast as we all know and in this passed spring I was again sent a picture by a friend. The pic showed the truck with windscreens and headlights broken so I immediately made a call. Turned out scums slicked in to the yard and ruined the glasses, outer mirrors and instruments in the dash. The owner was really broken and splitted the cost twice more. So it was the time to get or loose and I started planning a roadtrip. I had old 14" clutch discs of the style needed so the initial plan was to assemble the clutch, install the tranny (which was T1078 5 speed) and try to get the truck running.If the stars line up really well I would load my car onto the Mack's bed and drive home in the Mack. But that didn't seem real enough so i also looked for possibilities to tow or move on a trailer. Cabovers are usually tall animals so common trailers wouldn't work. And lowboys are extremely costy. Anyway I put a request on a local transportation website and to my big surprize got multiple lowboy offers of a quite reasonable price range. Corona times aren't nice for all the commersion and it looked like the transportation serives didn't became an exception. Ended up with a person local to the place where the truck was parked and his particular trailer was low enough to not remove horns and lights off the roof. The time shedule was also comfortable. At a certain time I loaded my trusty Mercedes-G with a pair of good batteries, clutch discs, tools, rags and plenty of other useful items and catched the road with a company of my shop guy. The distance to cover was a bit less than 2000 km and I resolved to make it in 2.5-3 days making stops and even swimming in rivers to turn the deal into a kind of a holiday trip. Turned out we made the first 3 hundred km and the outside temp got up to 36 Celsias (95F-?). The G doesn't have AC from the factory so after covering 3 more hundred km I didn't miss a chance and drove 5 km aside of the highway to catch Volga river. We freshed ourselves up, got snakes in a local cafe and covered 3 more hundred that day. Stayed overnight near big city Kazan' and planned to continue the way. Google map showed the road on my telephone quite straight. But when I zoomed that blue line in one spot seemed strange to me. There was a big river crossing and the line had a small gap. I felt surprize and switched to the satellite view. Found out no bridge on the photo and a ferry crossing script. Such layout didn't suit a state of Russian main road to Siberia. Still can't understand why navigation recommended that way but didn't decline the idea completey. Googled "Viatka river crossing" and read multiple web discussions on bridge construction and finally learned that there was a ponton bridge there at the time, no ferry. Something was written also about bad road sections before and after the bridge but having big wheels and time I figured I'd make a try. Now it seems as a worth to do deal but I will definitely not drive that road again. Covered 2 hundred km of a half-empty local road and catched a gravel section nearly 5 km long before came to the bridge. Turned out it was a private and a toll bridge. Not a problem for a car but truck pass would be costy. The best thing I steered into the woods right after the bridge and we got to a sandy beach almost close to the water. Swam for half an hour and went back on the road. Its part after the bridge was discovered much worse than before it. Just a dirt road with deep ditches and total washboard. I passed 2 or 3 cars which drove 5km/h. Not anything unusual to me and my 33 MT tyres so I drove 40 with plenty of shaking and dust. Funny thing it took us no less than 25 km to get to black top paved way. The pics - the truck as I first saw it on the net image, the bridge and the road further.
- 68 replies
-
- 11
-
-

BMT Forum Logo
