

Vladislav
-
Posts
8,135 -
Joined
-
Last visited
-
Days Won
79
Content Type
Profiles
Forums
Gallery
Events
Blogs
BMT Wiki
Collections
Store
Everything posted by Vladislav
-

IMG-20230511-WA0020.jpg
Vladislav posted a gallery image in BMT Member's Gallery - Click here to view our member's albums!
From the album: Iranian Macks
-
IMG-20230511-WA0018.jpg
Vladislav posted a gallery image in BMT Member's Gallery - Click here to view our member's albums!

From the album: Iranian Macks
-
Went to Georgia, fuelled at Gulf station, saw a Mack truck
Vladislav replied to Vladislav's topic in Odds and Ends
That's because it's a standart US F-700 chassis. With fish belly at the center, same way as DM models have. The tail end section is the same as you have on your R-model. 9 inch high and 1/4 inch (6.35mm) thick. With the same width between the rails (over them). There was earlier years F-600 chassis though that duplicated R-model style. Or correctly to say it originates it. But those early F's seem scarce. -
Went to Georgia, fuelled at Gulf station, saw a Mack truck
Vladislav replied to Vladislav's topic in Odds and Ends
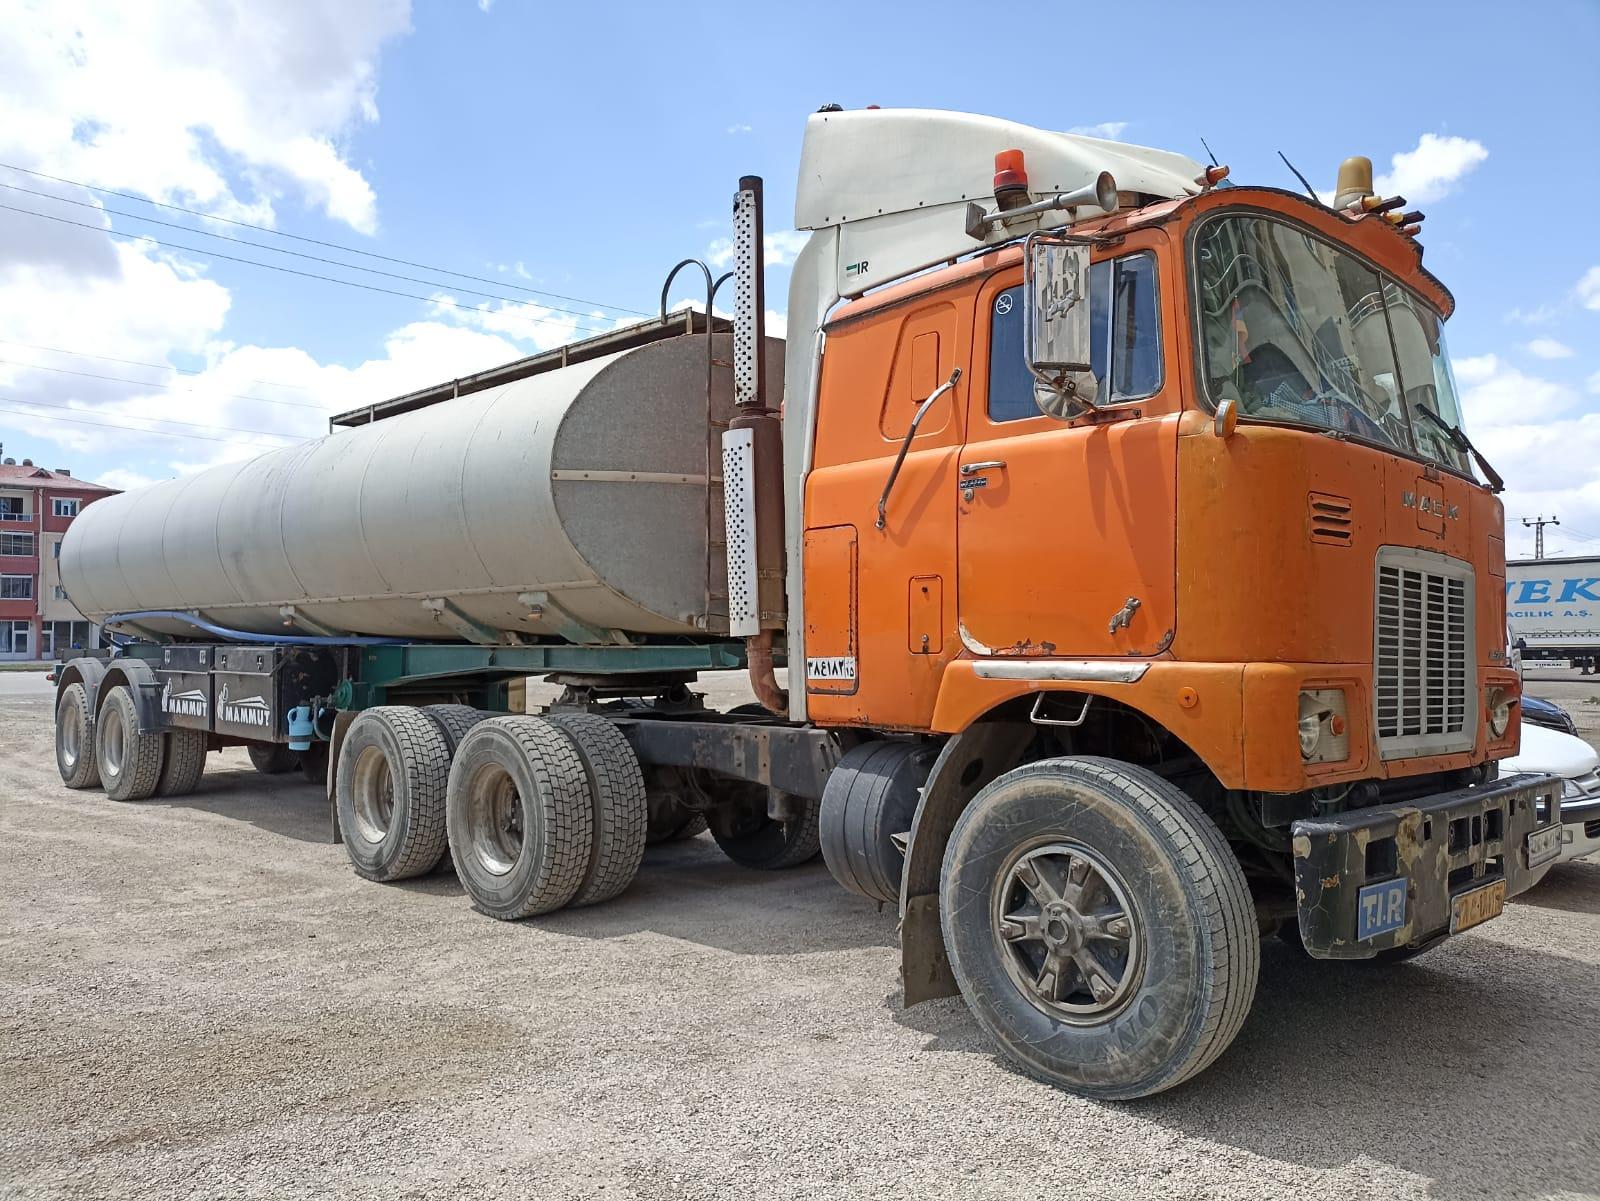
Ok, you must count me a lucky guy. I catched up with one more Bulldog the other day. Also in Turkey, not far from Iranian border. It was parked near a big building and there was a guy nearby fixing his car. I had short conversation with him in Farsi but even didn't figure out was that truck his or not. The guy has busy time laying under the car on the ground removing a fuel tank. So I didn't take much of his attention, just made a few pics and general investigation of the rig. Overall it looked like made in the US F-model of mid 70's with 6-cyl gold engine with that "coolpower thingy" telling the way MrsMackPaul would do. The tranny was T100 with two air cylinders on the top cover so I guessed 10 or 12 speed. Double frame with Camelback at the rear. It was interesting to note the crossmembers were riveted to the rails, no bolts. Wonder up to which year Mack offered riveted chassis? I thought they discontinued that much earlier. Also a huge local aftetmarked fuel tank could be seen. And a tank for air start at the right. But actually there was electric starter on the engine. Overall the truck looked quite good for the age. Ok, forgot to mention the main fact - it was registered in Iran.

-
You should check some basic things about the carb. Fuel level and (my guess) correctness of hole sizes of the duses. Both fuel and air. Also air leak in the intake manifold in its portion between the carb and the cyl. heads. But I think you meant that talking about vacuum check. Nice L btw, drool😀
-
Went to Georgia, fuelled at Gulf station, saw a Mack truck
Vladislav replied to Vladislav's topic in Odds and Ends
Ohell !!!... But I see no way getting a girl in a car since I ride a bike! -
Was this our guy?
Vladislav replied to doubleclutchinweasel's topic in Antique and Classic Mack Trucks General Discussion
No doubt. But he deleted some of the pics from the thread I belive. -
Went to Georgia, fuelled at Gulf station, saw a Mack truck
Vladislav replied to Vladislav's topic in Odds and Ends
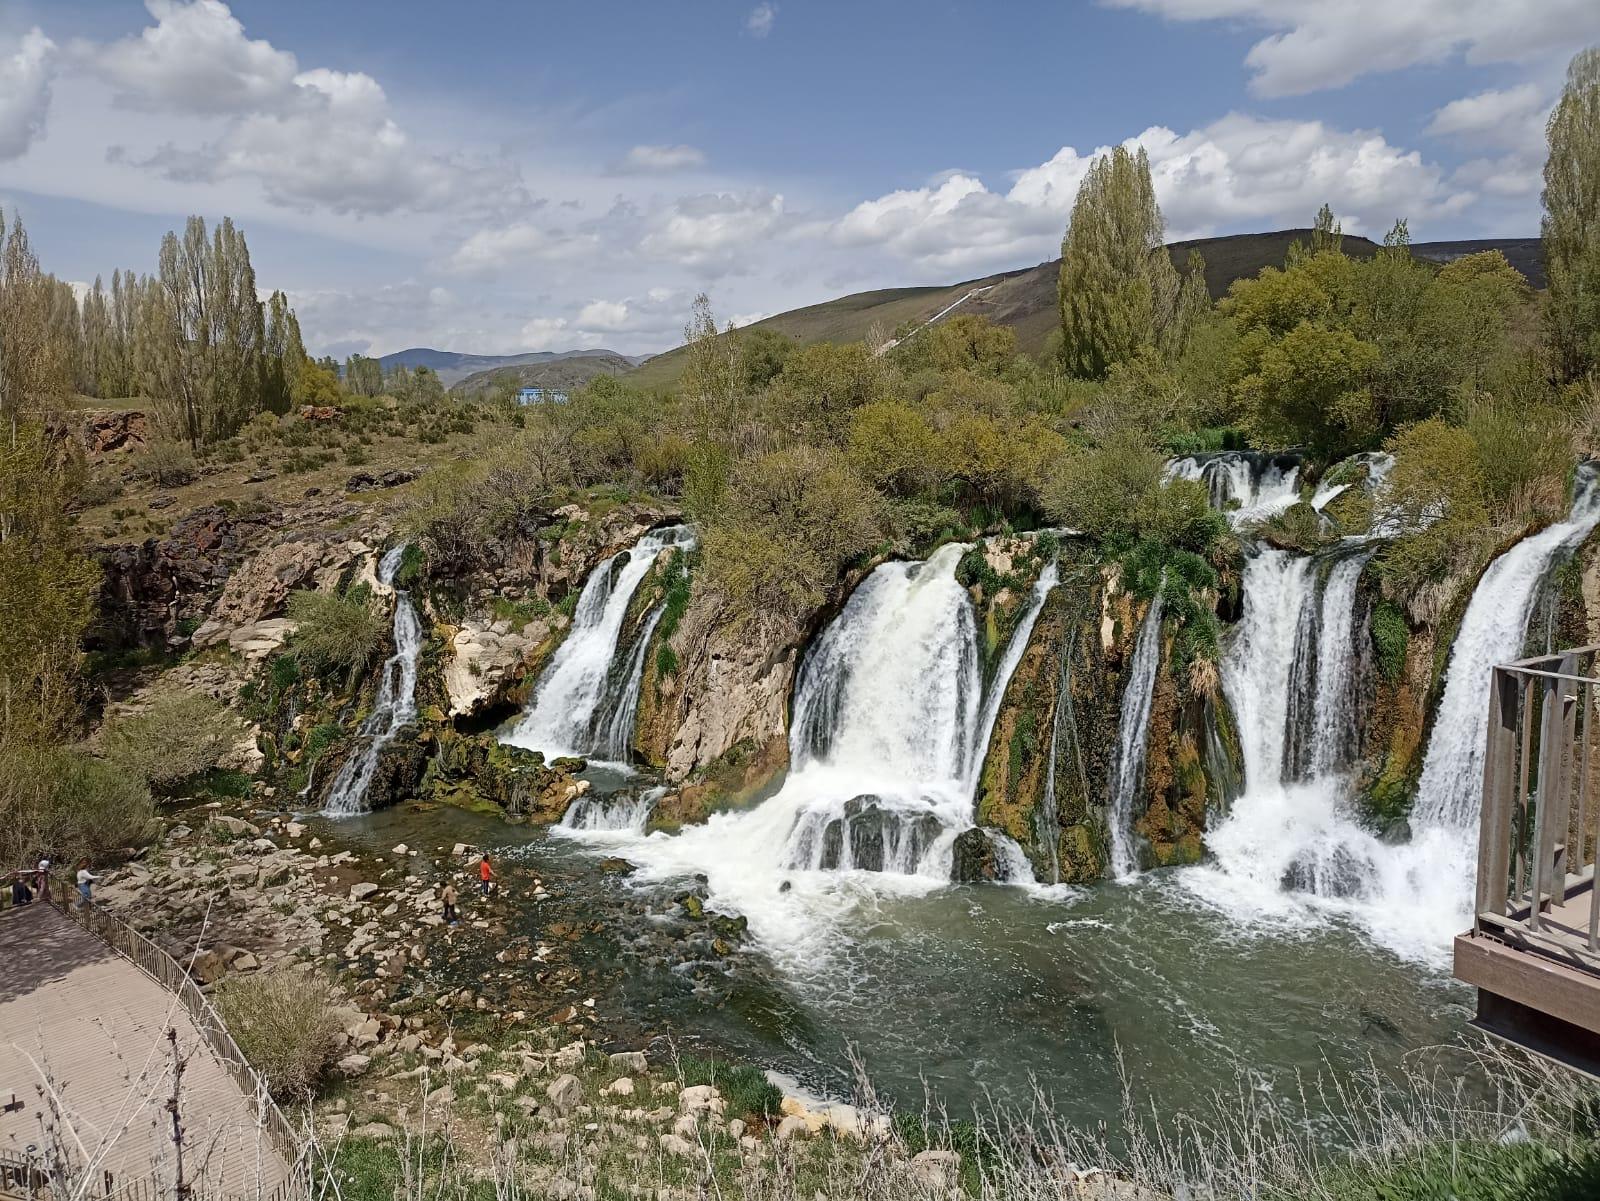
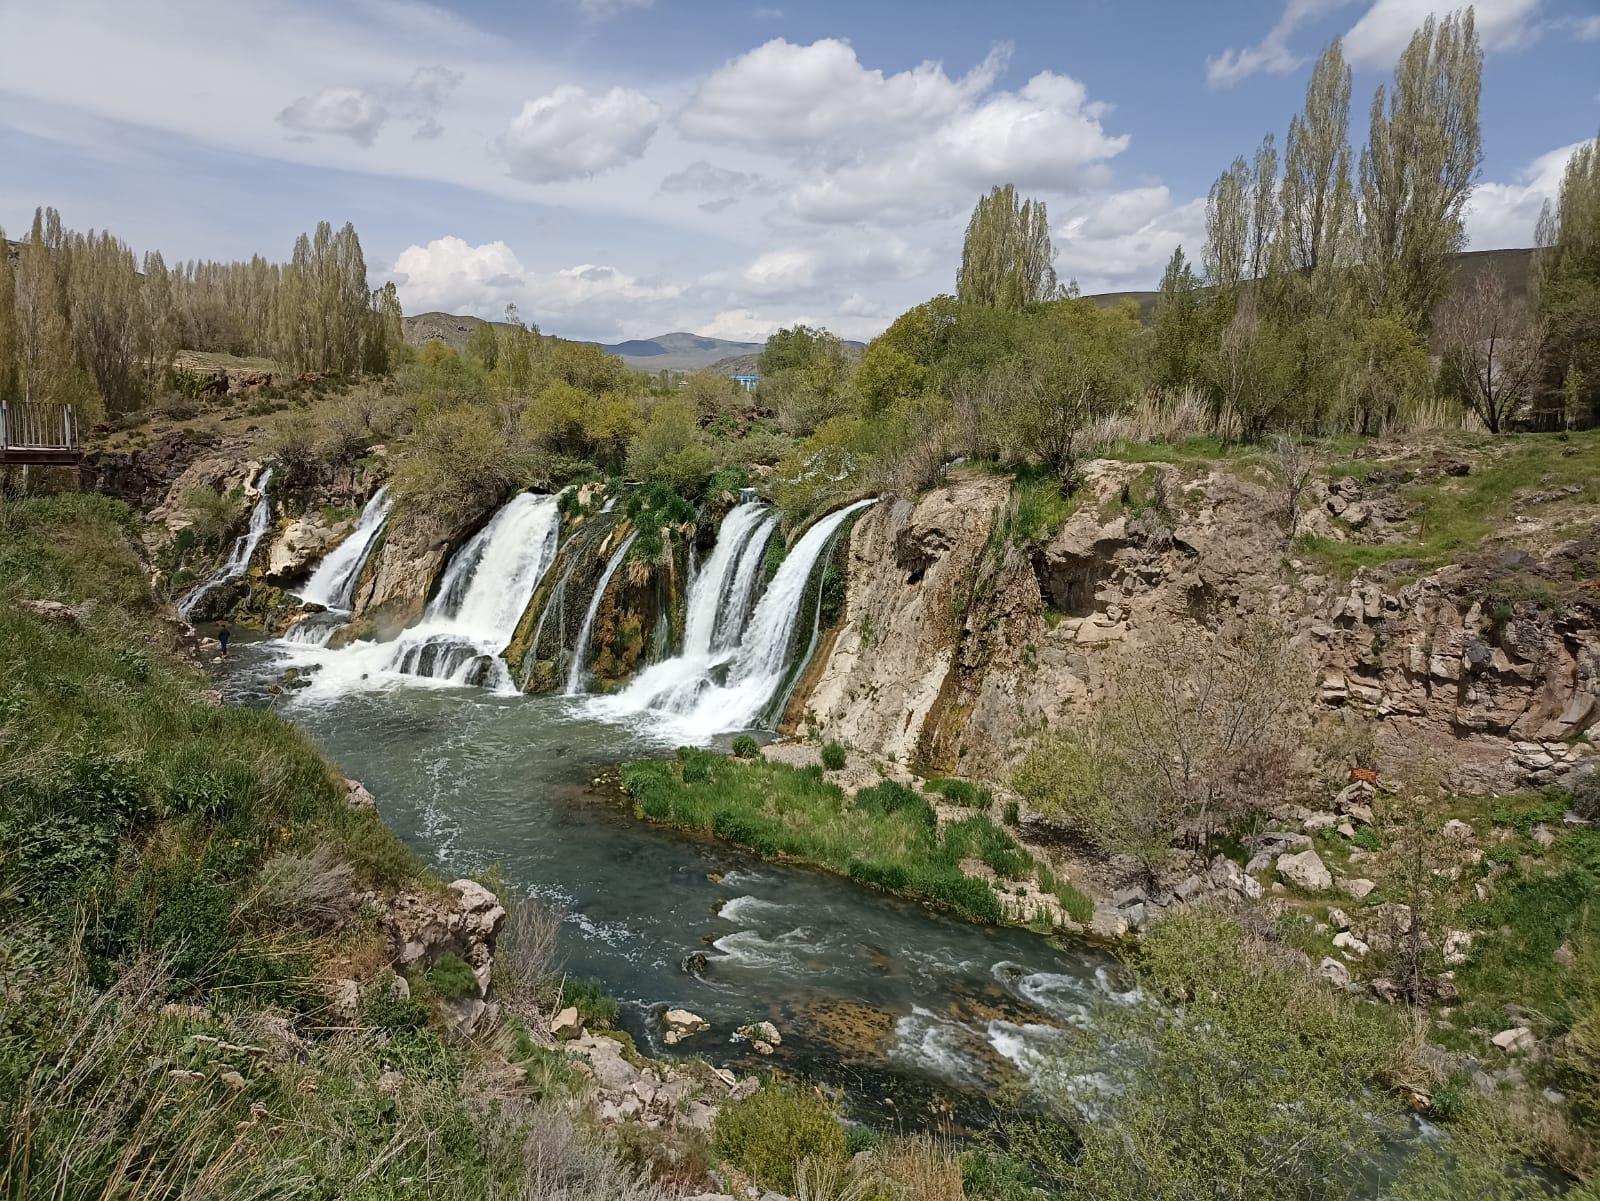
Ocassionally I also saw a beautiful waterfall not far away from the highway. Turned out it was a local recreation area with big park and restaurant (You seat by a table and see the fall in 50 metes). What impressed me was all that located "in the middle of nowhere". All in all I got a feeling Turkish people improved their level of life sufficiently during the last decade.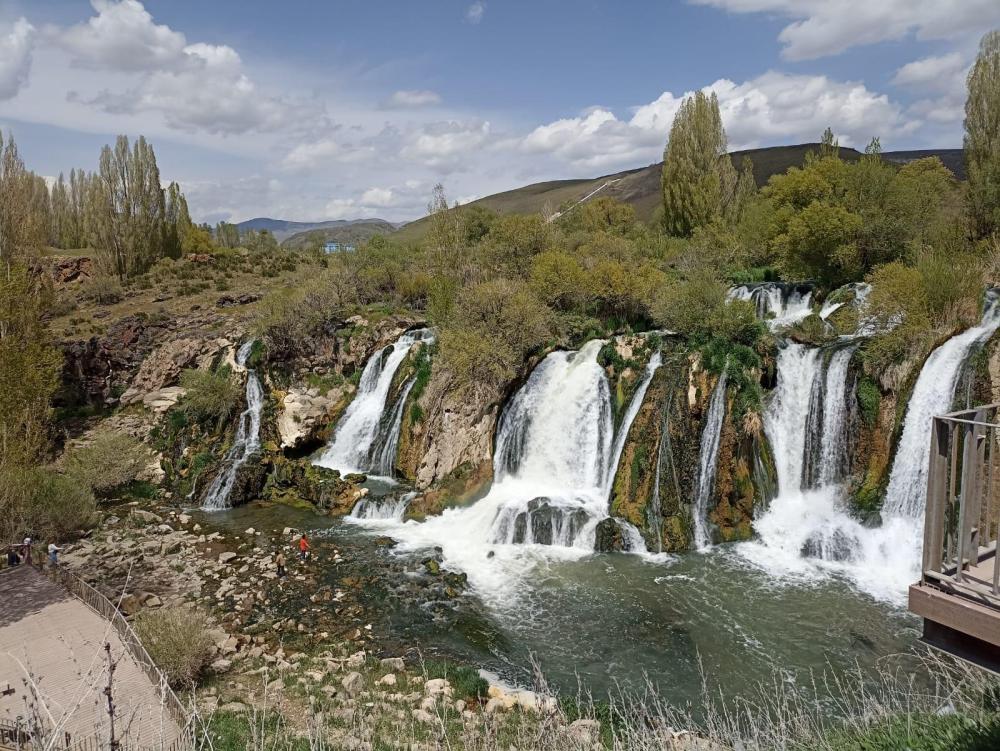

-
Went to Georgia, fuelled at Gulf station, saw a Mack truck
Vladislav replied to Vladislav's topic in Odds and Ends
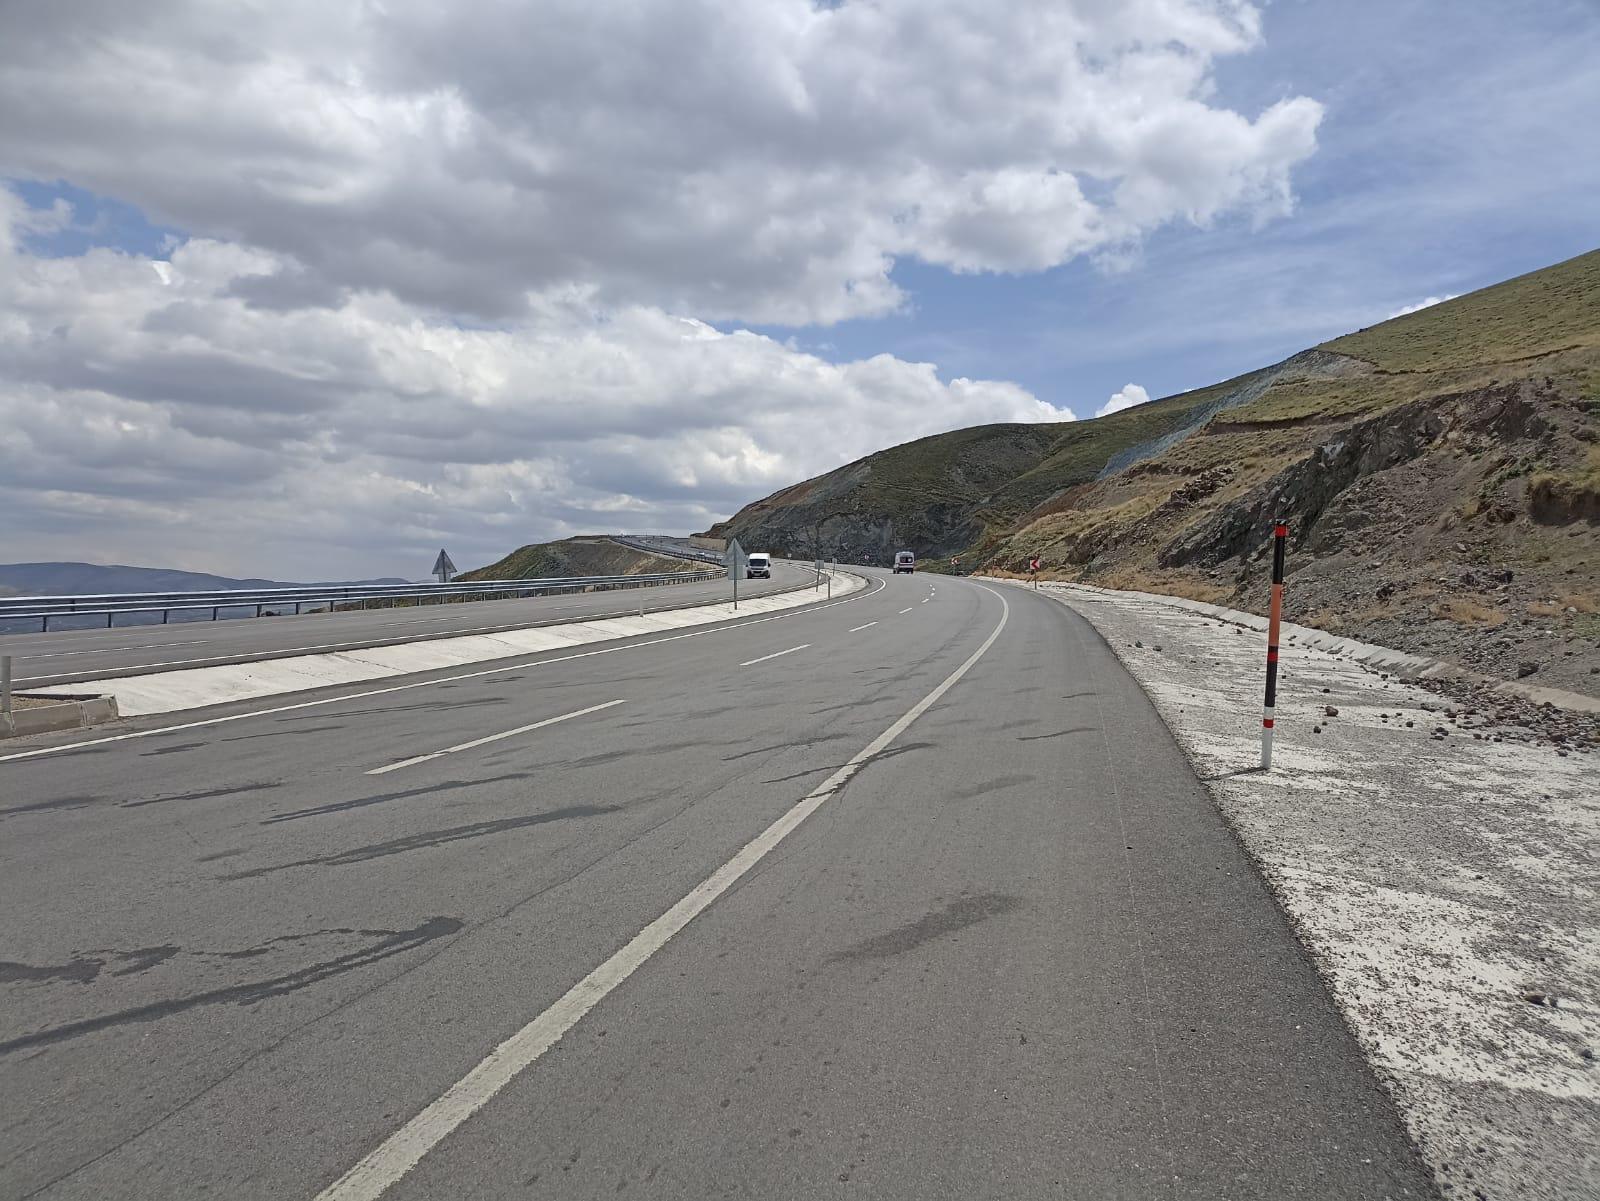
If you zoom the last pic you can see a steep portion of the road along the mountain side with two trucks going up and down. The hill might be seen not really steep but impresses of how long it is. The first two shots were made standing on that stretch and the 3rd one is the next portion on the way down (from where the 4th pic was taken). -
Went to Georgia, fuelled at Gulf station, saw a Mack truck
Vladislav replied to Vladislav's topic in Odds and Ends
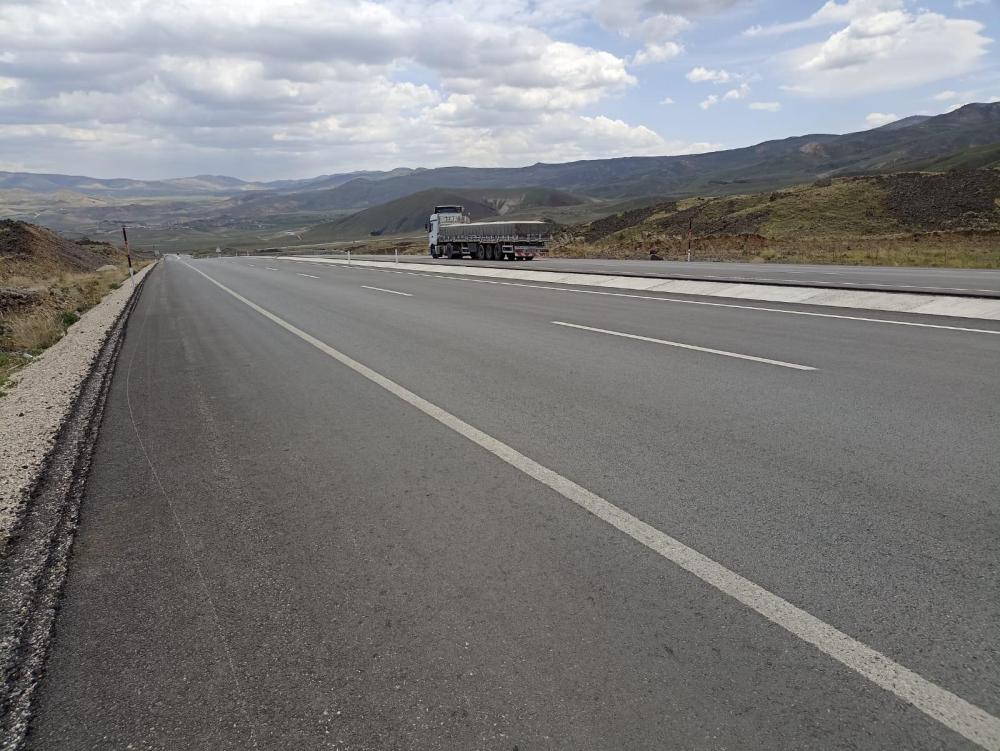
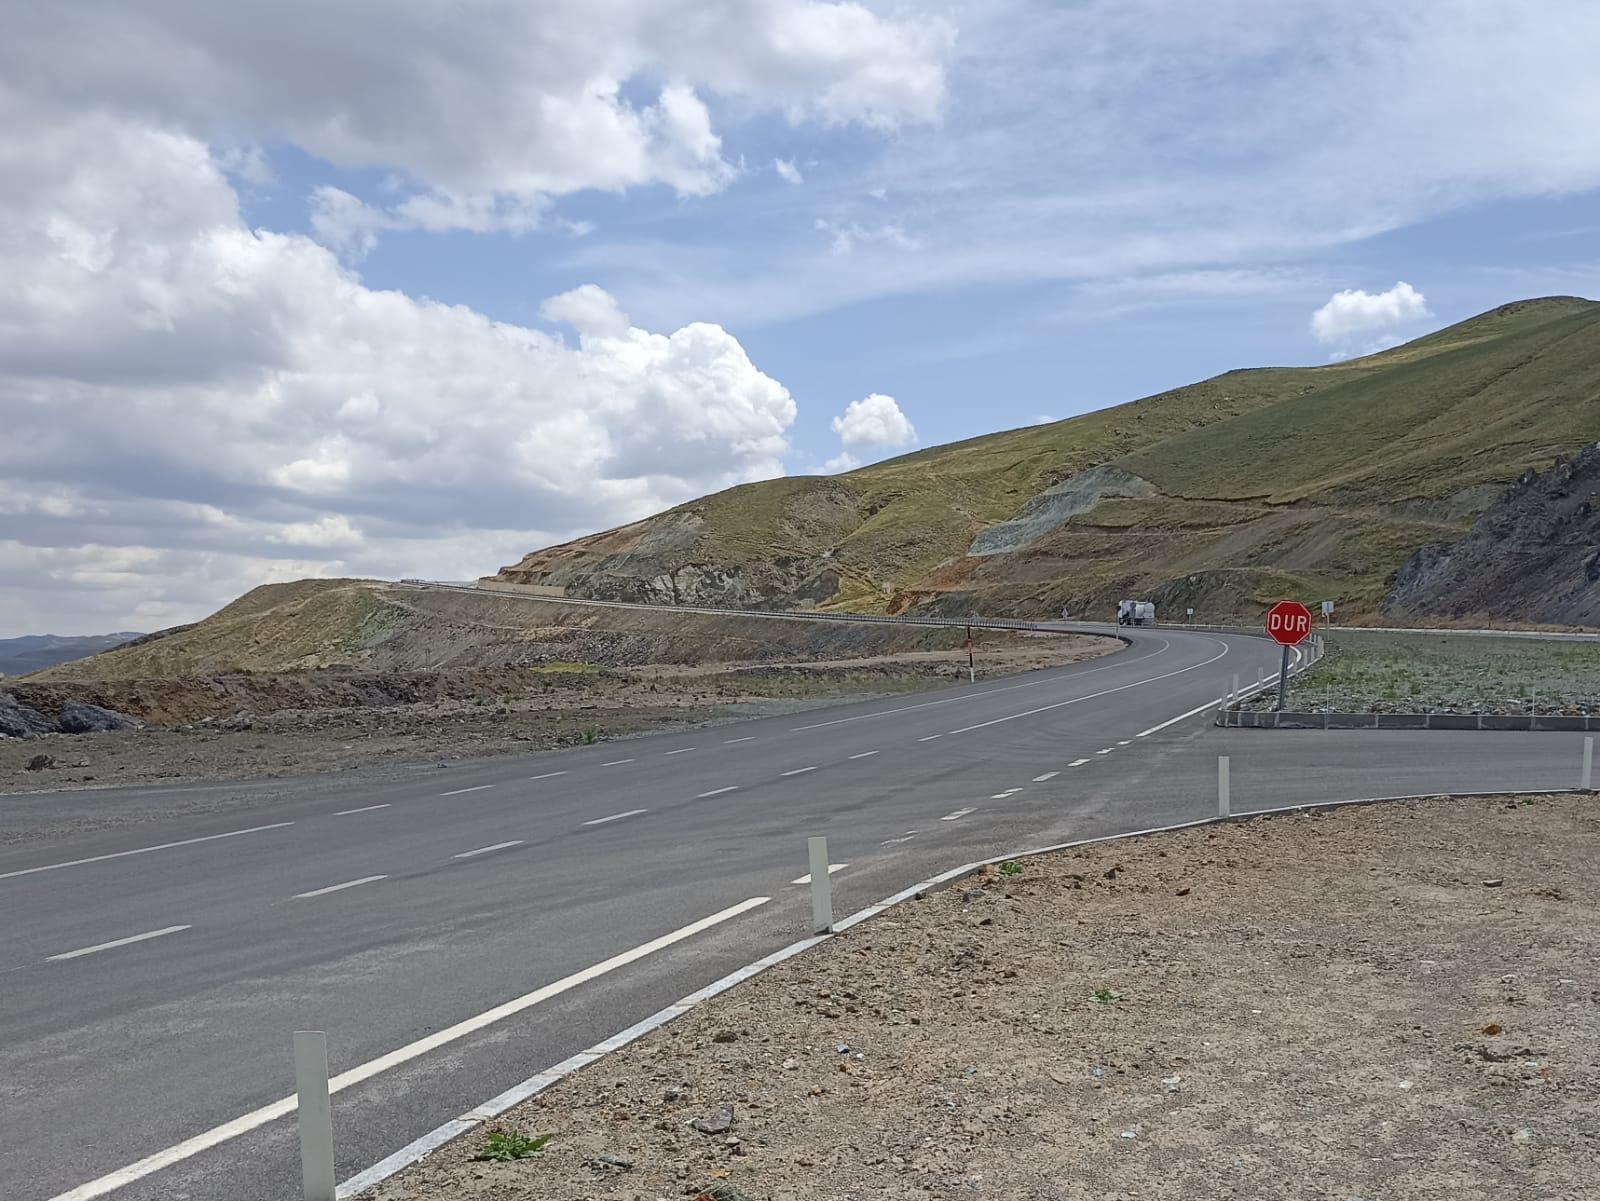
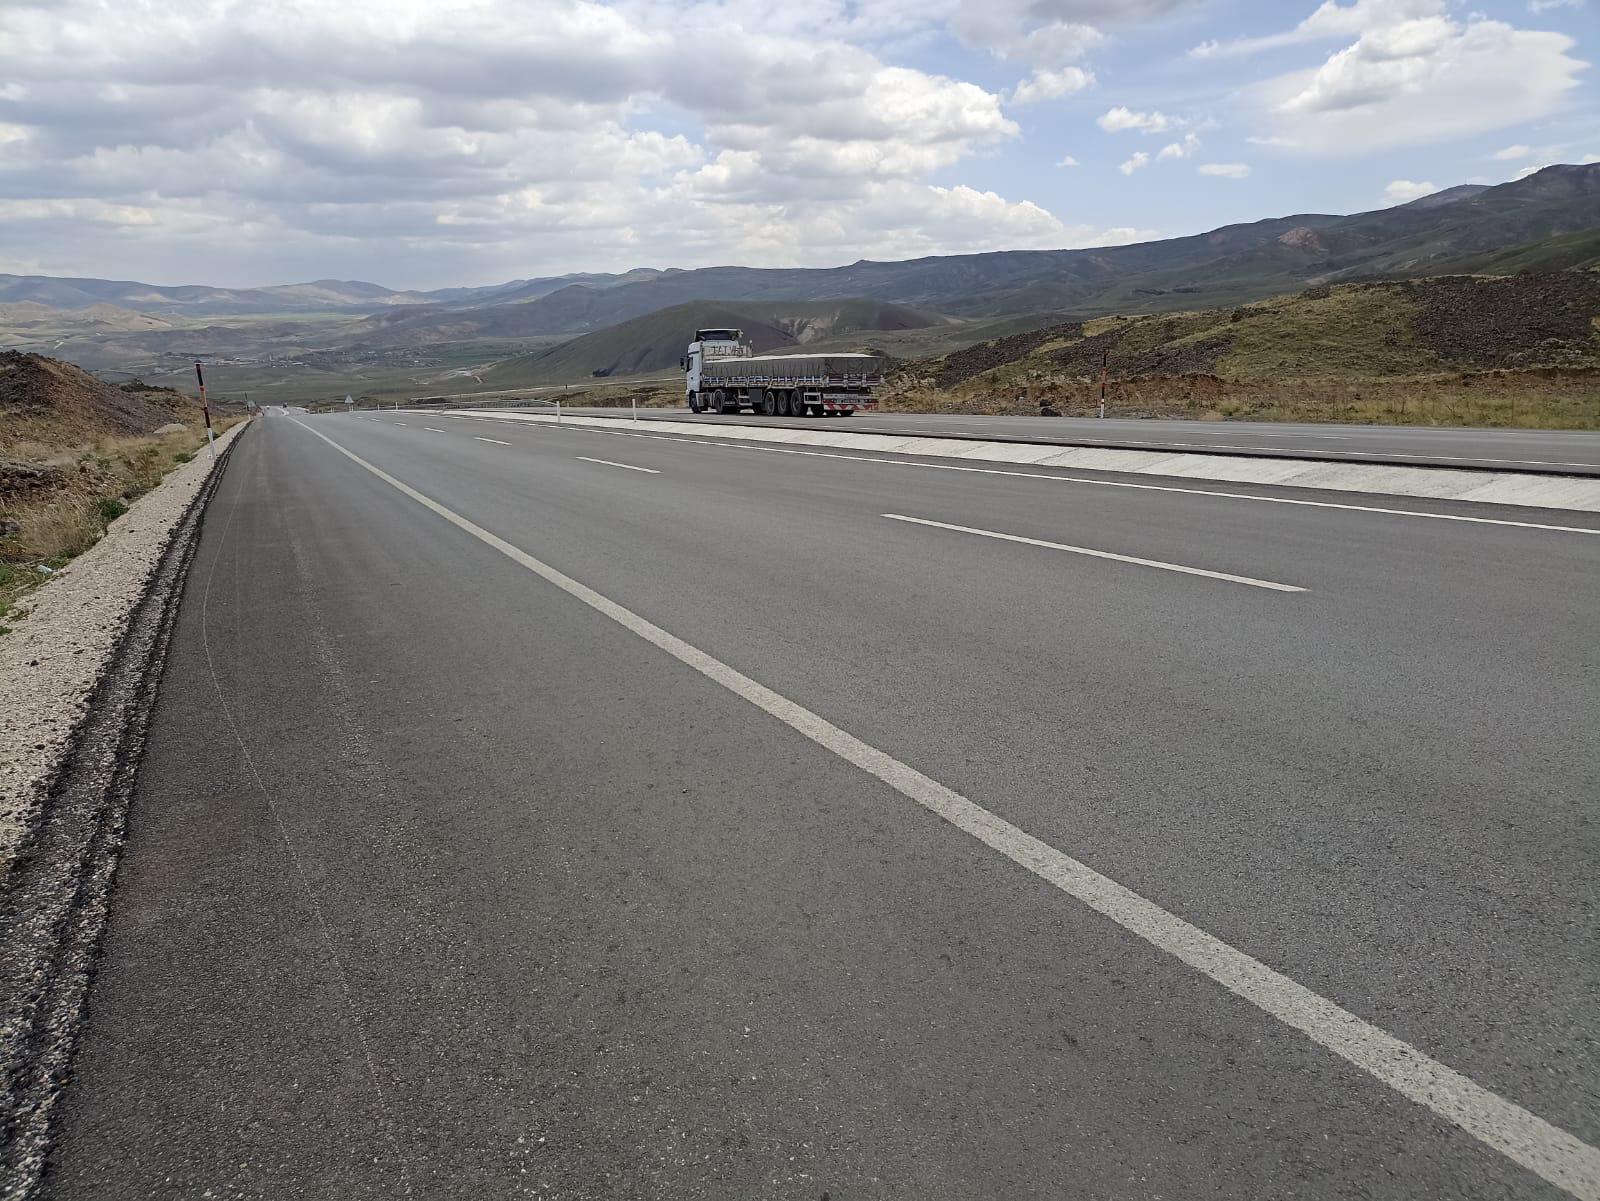
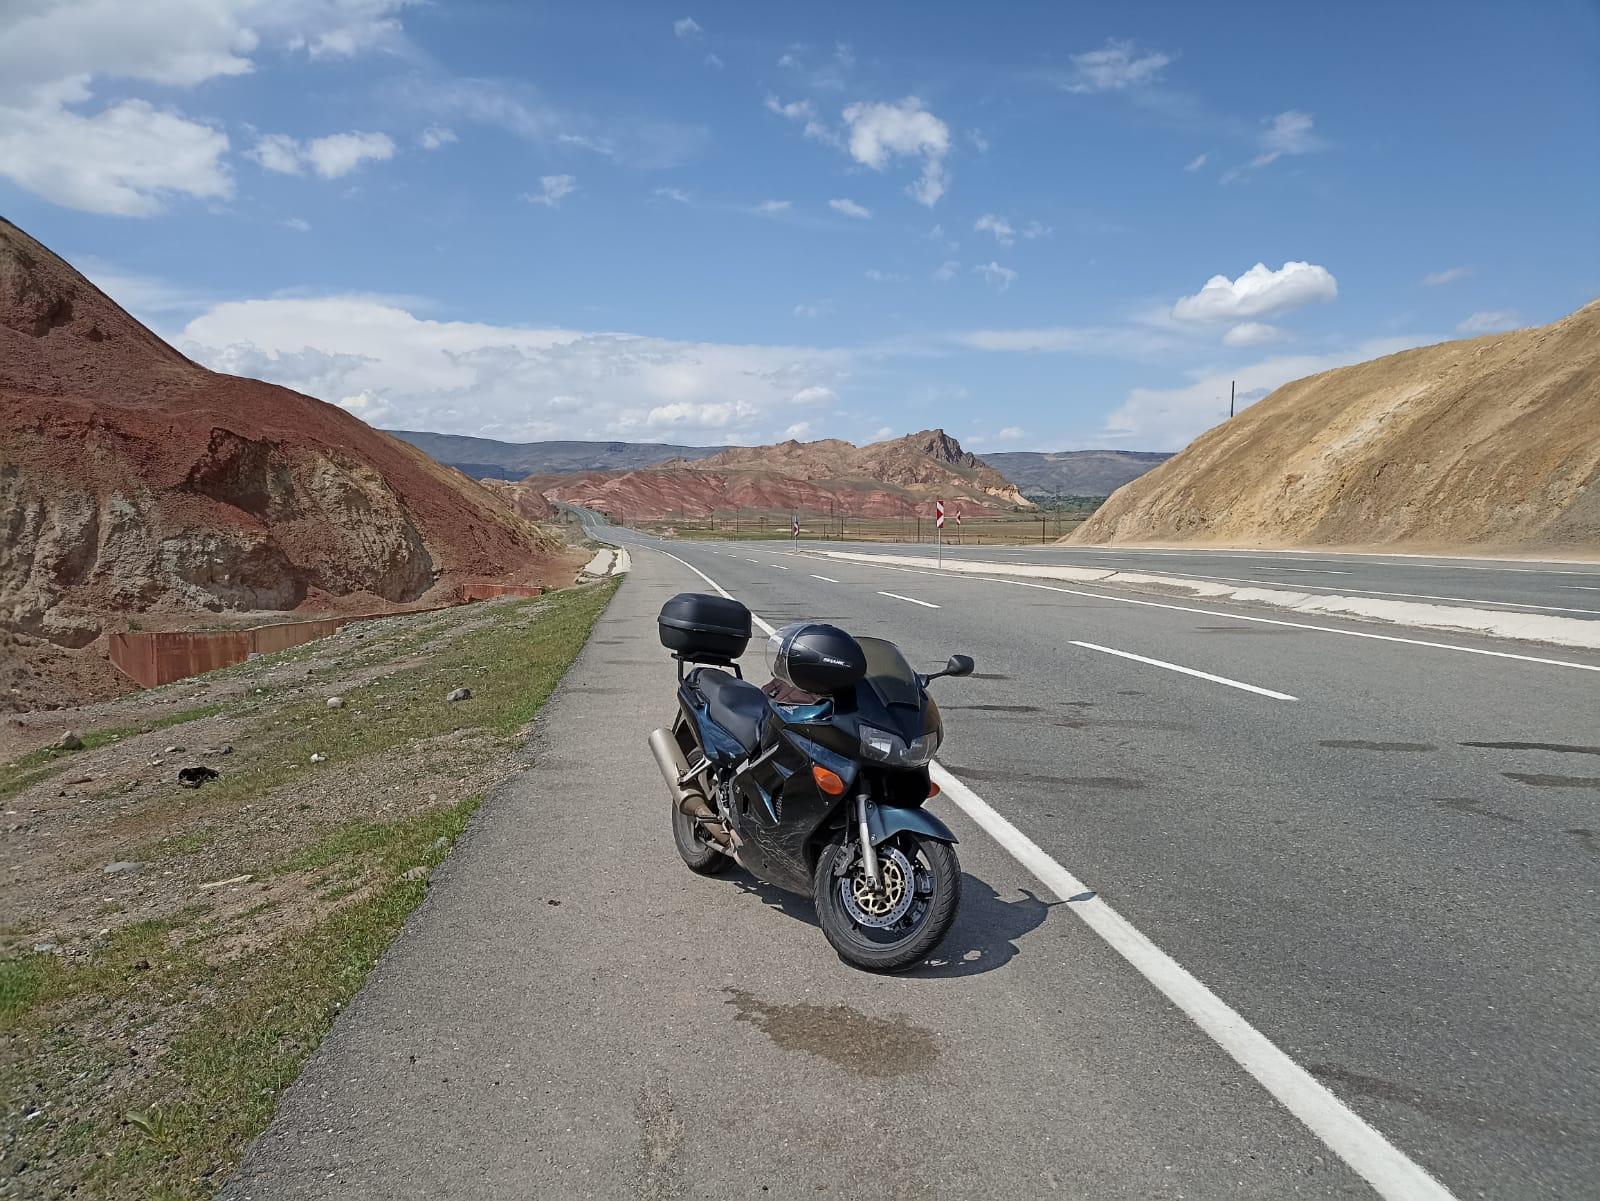
Tom, I tried my best a couple more times to film how steep and curvey East Turkish roads are. Telling my impression by words they're excellent. Yes, I saw many road signs marking incline frkm 6 to 8%. But that's in a mountain area all over which is much hilly than Appalaches. And 90% of highways between small towns (I don't mean willages) are of 4 lanes. Also I payed more attention and noted modern semi trucks go uphill 60-70km/h what seems way off any trouble. Worth to note though that many portions of the road marked with signs having (using?) chains. Pretty sure winter times are a lot of "fun" for local truckers since snow and hard wind are common thing in winter months.

-
Went to Georgia, fuelled at Gulf station, saw a Mack truck
Vladislav replied to Vladislav's topic in Odds and Ends
Also my grand dad was a photographer for living. He made his pics with German captured Leica (first 35 mm film camera I belive) and I used it either in my early days. -
Went to Georgia, fuelled at Gulf station, saw a Mack truck
Vladislav replied to Vladislav's topic in Odds and Ends
Glad to be of service, Mark. I'm not a photographer sure but in very beginning my dad gave me a book of "Practicle photograpy". Aside of general thigs it detailingly explained how b/w film and paper got in reaction with chemicals and how you can correct underexposed film by working with printing. I even made those things personally in bath room with red light. But only once😀 -
Went to Georgia, fuelled at Gulf station, saw a Mack truck
Vladislav replied to Vladislav's topic in Odds and Ends
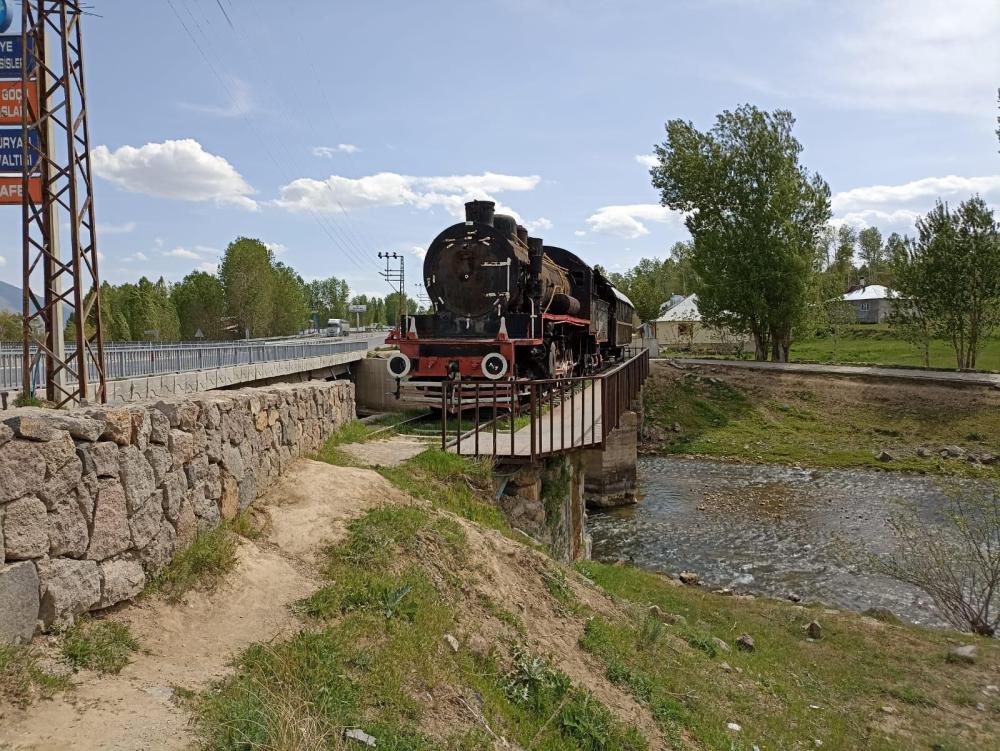
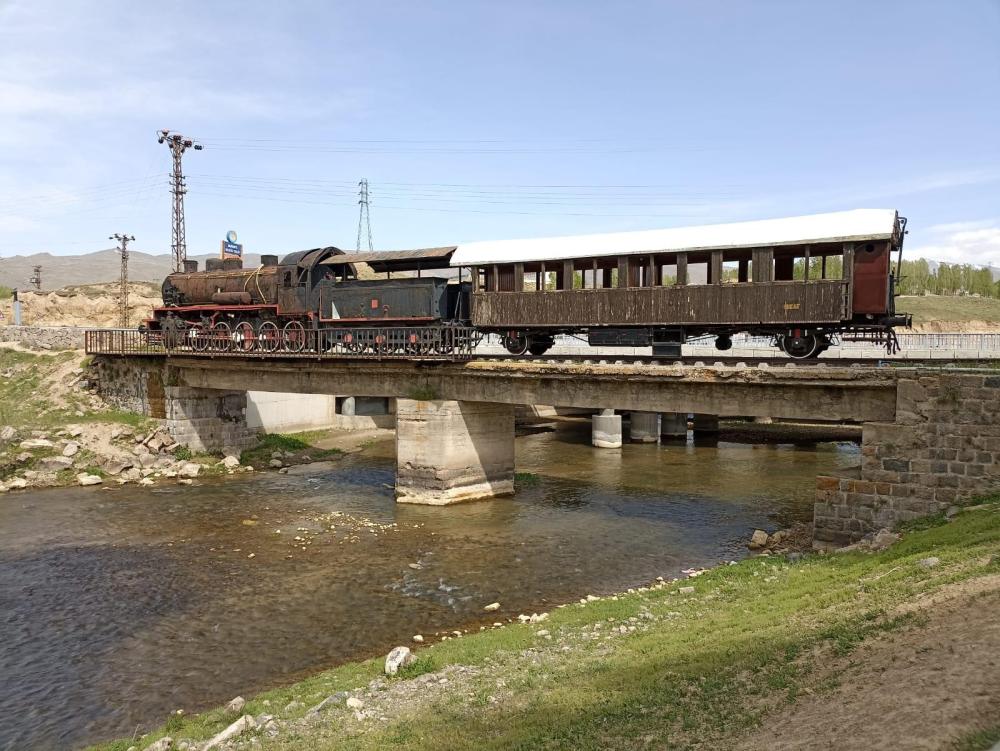
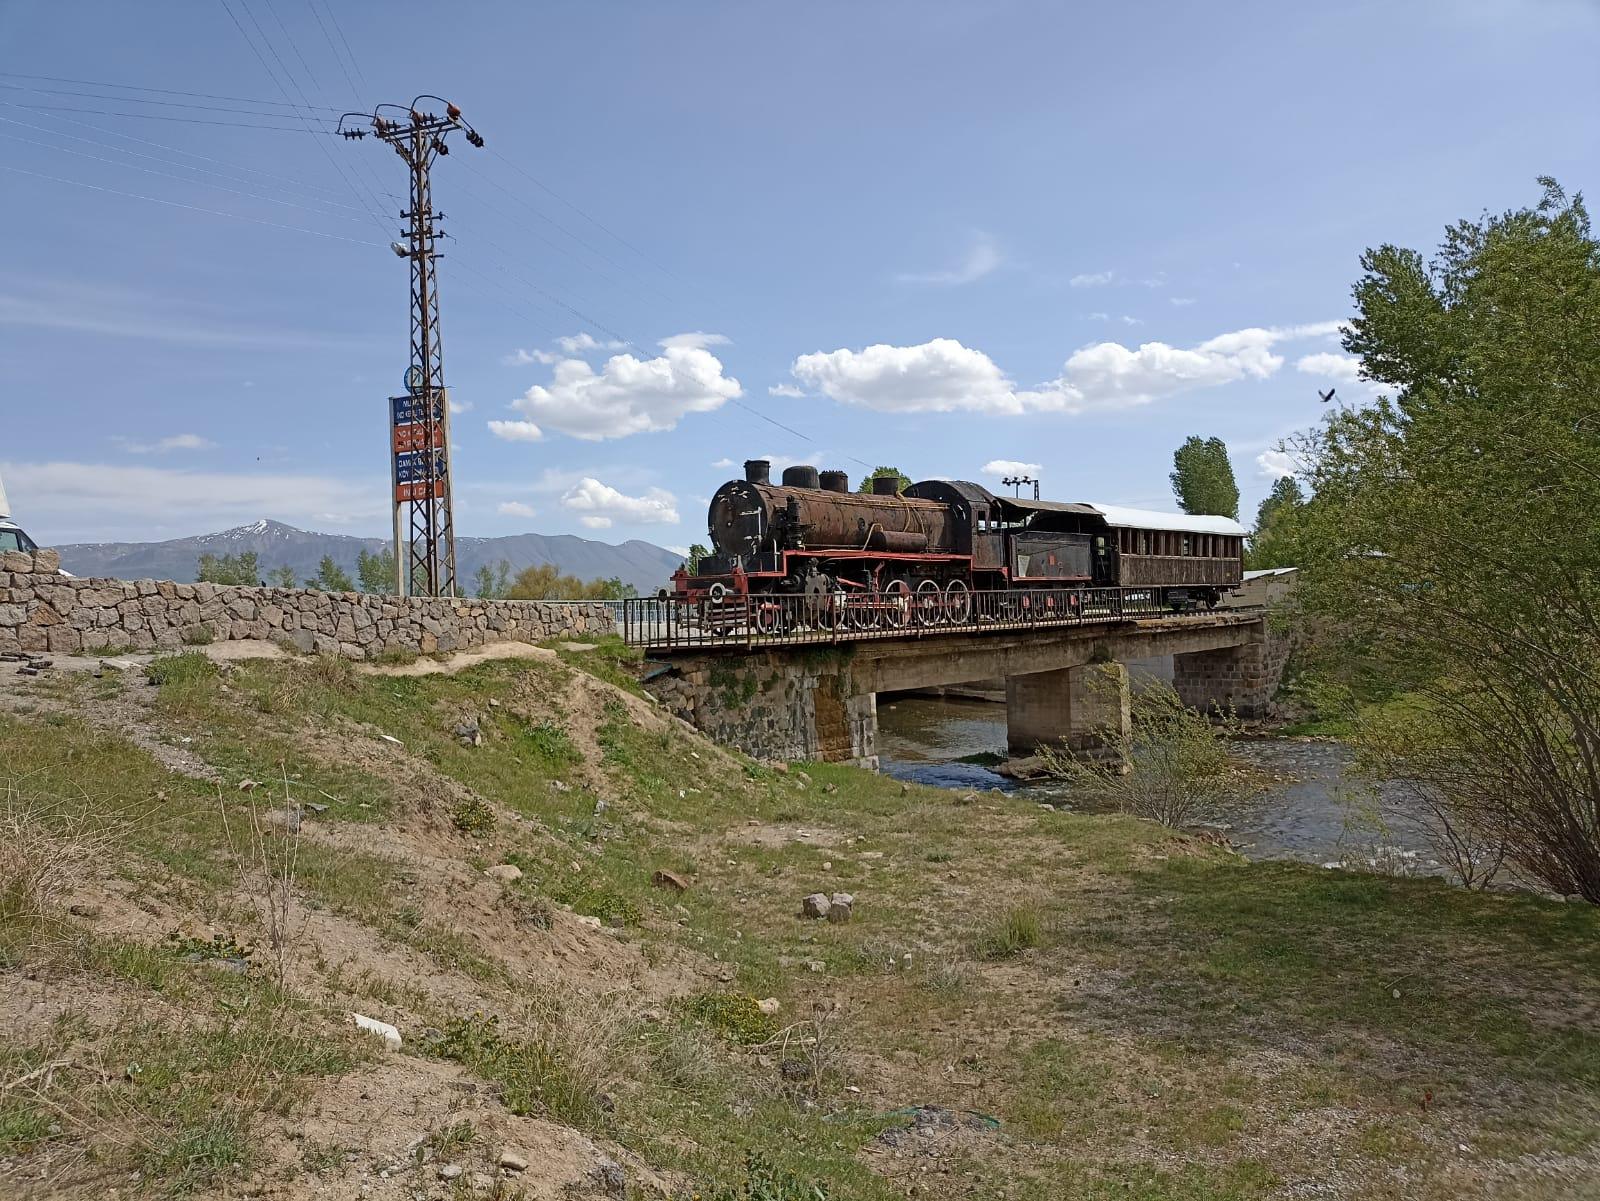
Met a steam loc on my way today. Turkish guys made a cool thing keeping an old portion of the bridge (there's a new one in 20 meters aside) and layed rails on it. My original guess was that was and old RR bridge but I didn't find traces of the track before and after the bridge. So seemed like it was a product of someone's creativity and it turned out fine on my mind. The loc itsef represented relatively poor condition but looked like it was restered to some grade in the past. The car showed traces of vandalizm but was solid overall. Would be interesting to count out was that Turkish produced loc or a imported one and where it was made if so.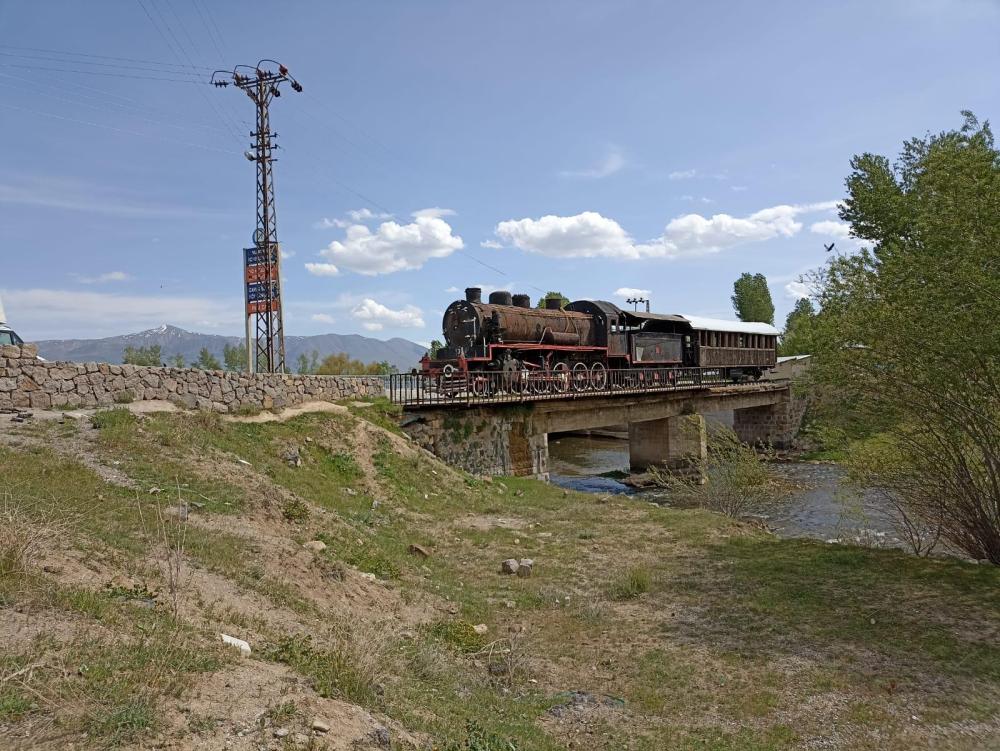
-
Went to Georgia, fuelled at Gulf station, saw a Mack truck
Vladislav replied to Vladislav's topic in Odds and Ends
Yes, she is. When I was looking for a bike VFR-750 was in my focus. Actually I enjoyed the look. But those 2 or 3 examples to choose from at the time were selling pricy. And all were 17 y.o. At a certain day I visited a bike dealer to look a CBR-600F. It was in a really poor shape but some dark green thing nearby took my attention. I asked "what's that" and heard back "VFR-800" I answered "oh, well, Ok" meaning it was way off my cost range. I looked over the bike though and asked to try seat on it. That was my "mistake". Next morning I woked up and found myself realizing " I don't want to look for a motorbike anymore"😀Called the guys, arranged the deal, payed twice of what I was planning to. Have ridden her for 16 years since and never had a thought I made a wrong choice that day😀 -
Went to Georgia, fuelled at Gulf station, saw a Mack truck
Vladislav replied to Vladislav's topic in Odds and Ends
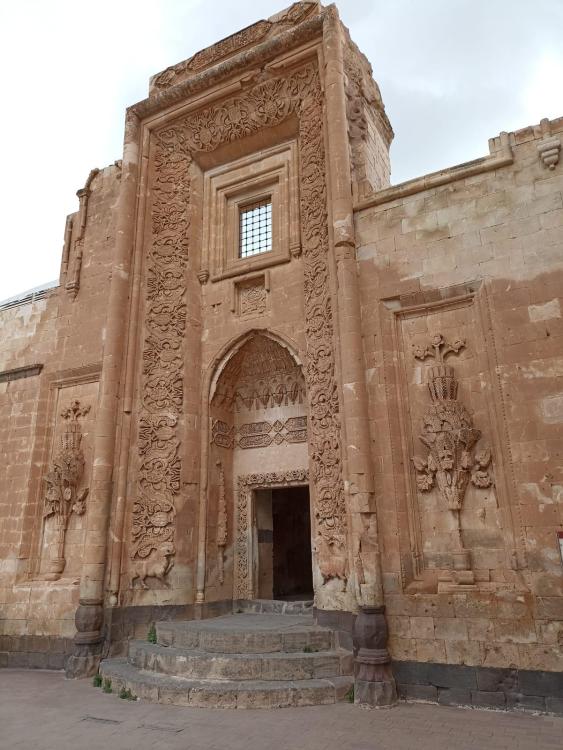
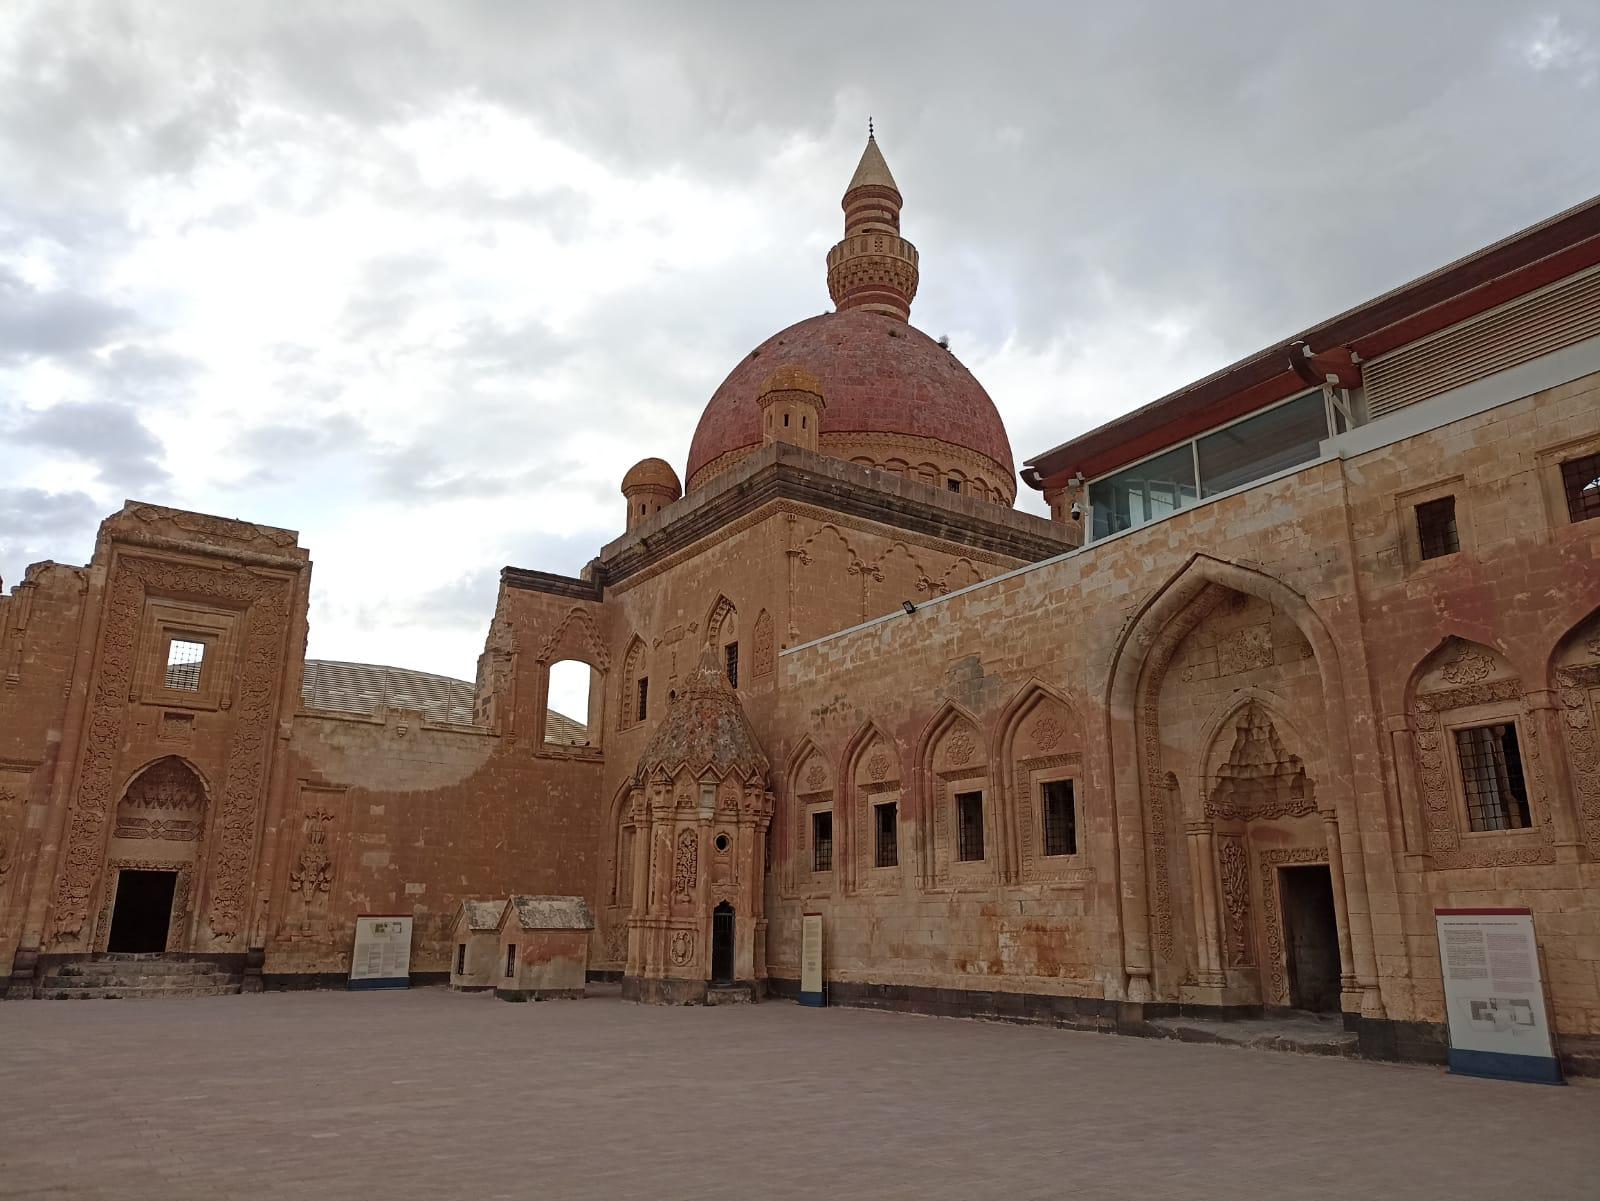
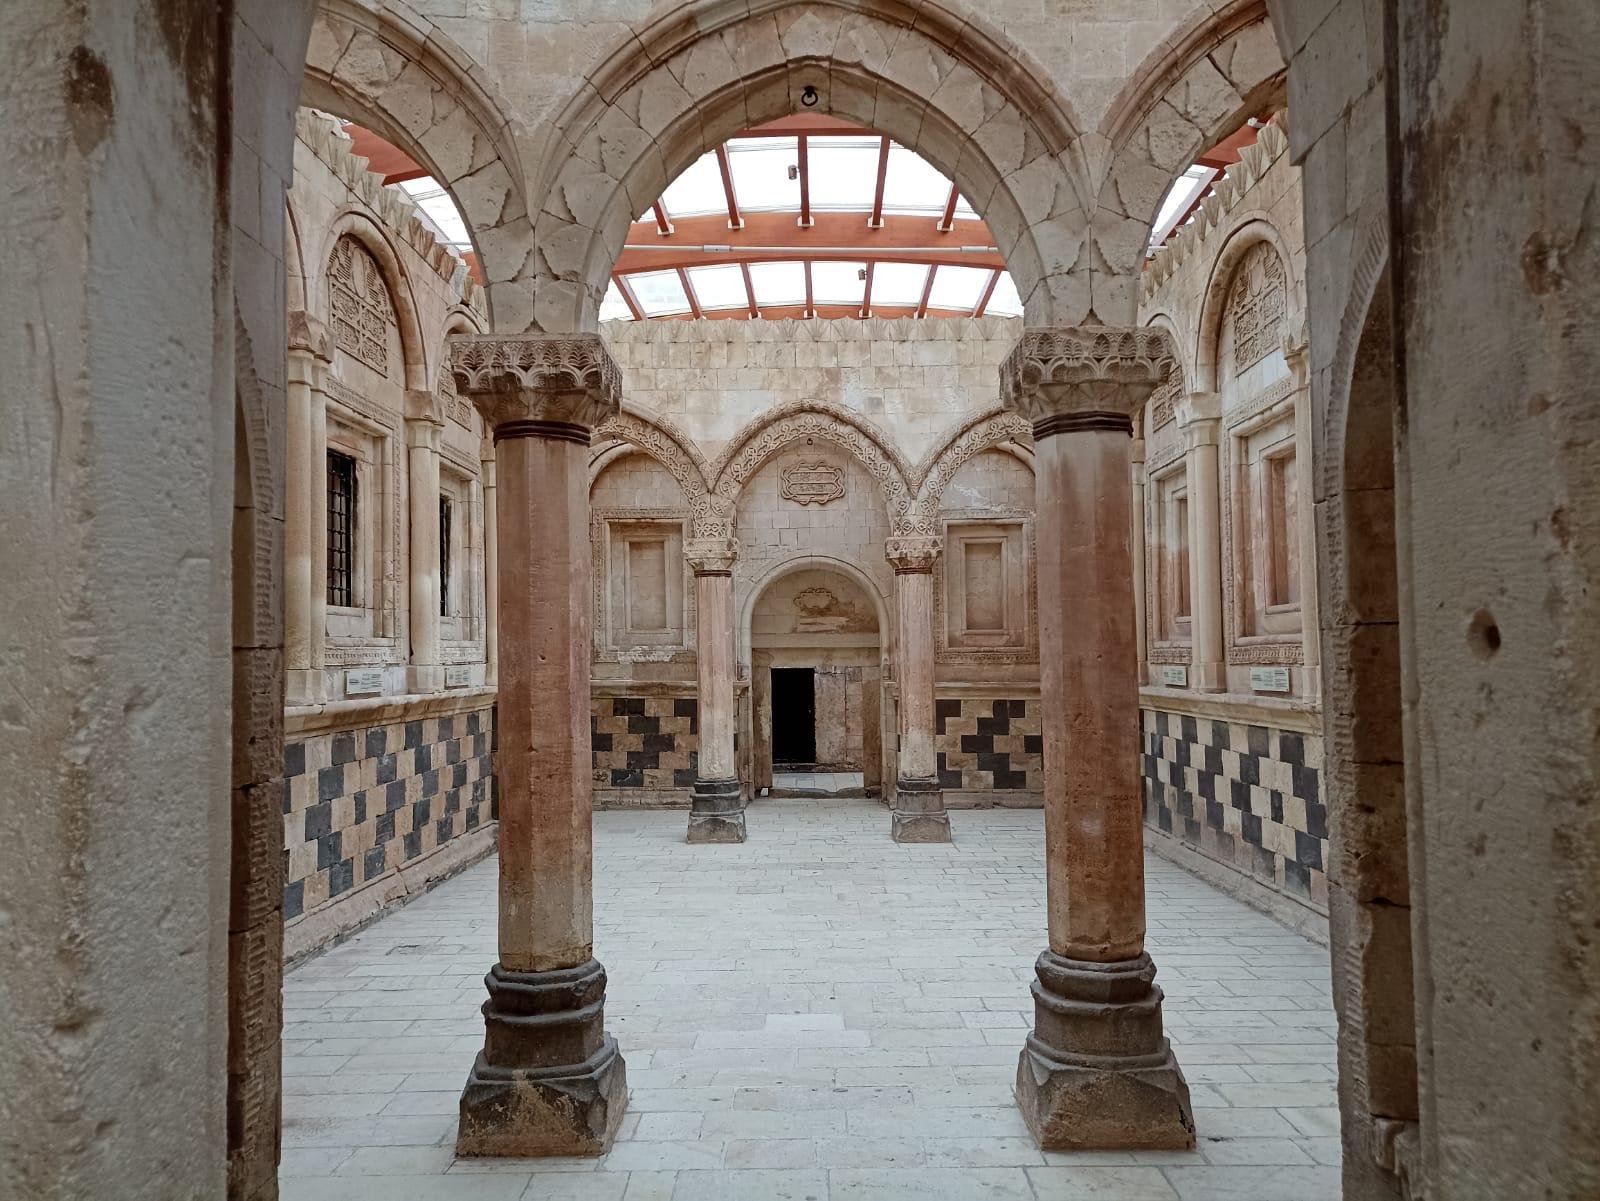
The castle of Ishak-Pasha in Dogubayazid, Turkey. I haven't learned how long ago it was built and who was that guy but he definitely had a taste in scenaries and too probably women. I honestly can imagine the only thing he missed in his life as collecting antique trucks😀 The last pic is a wiew from one of the windows.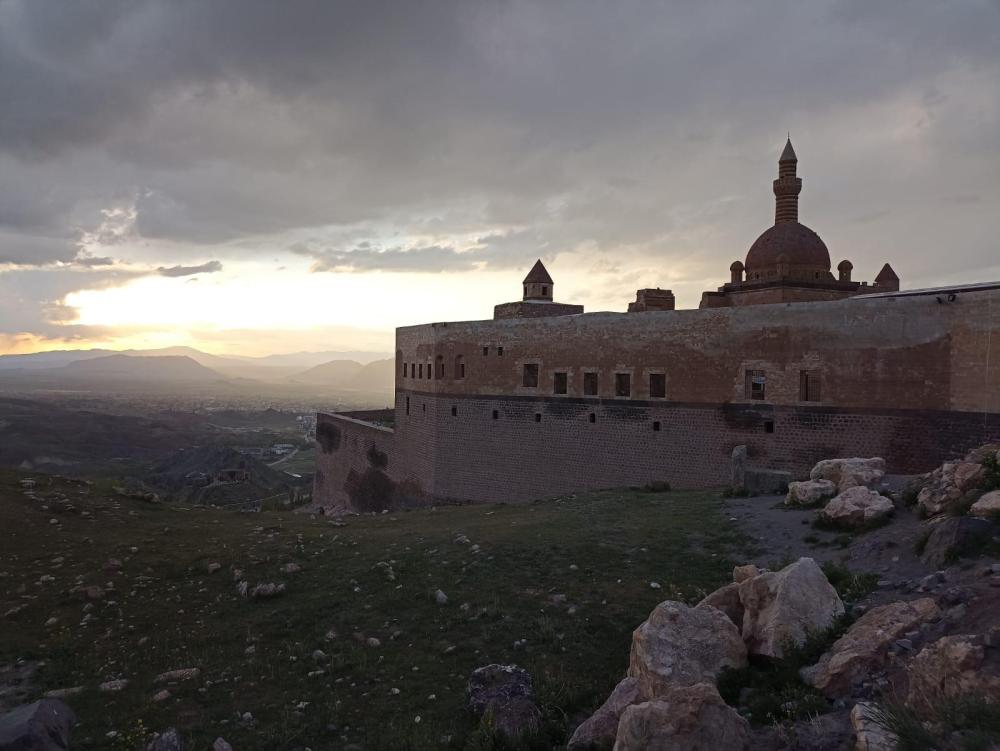

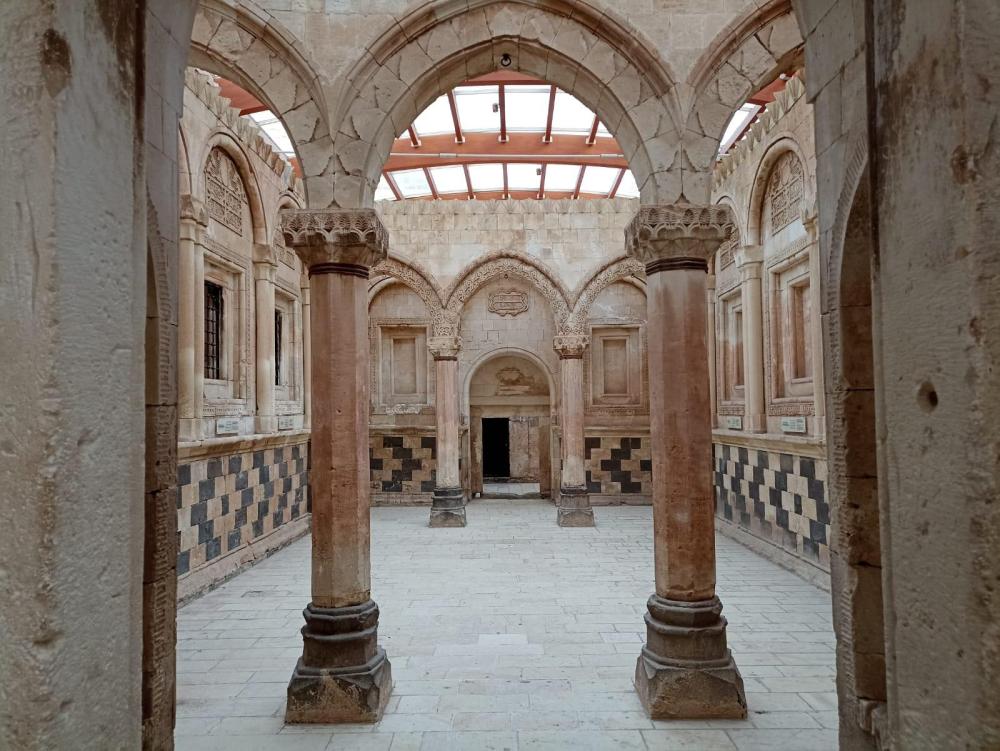
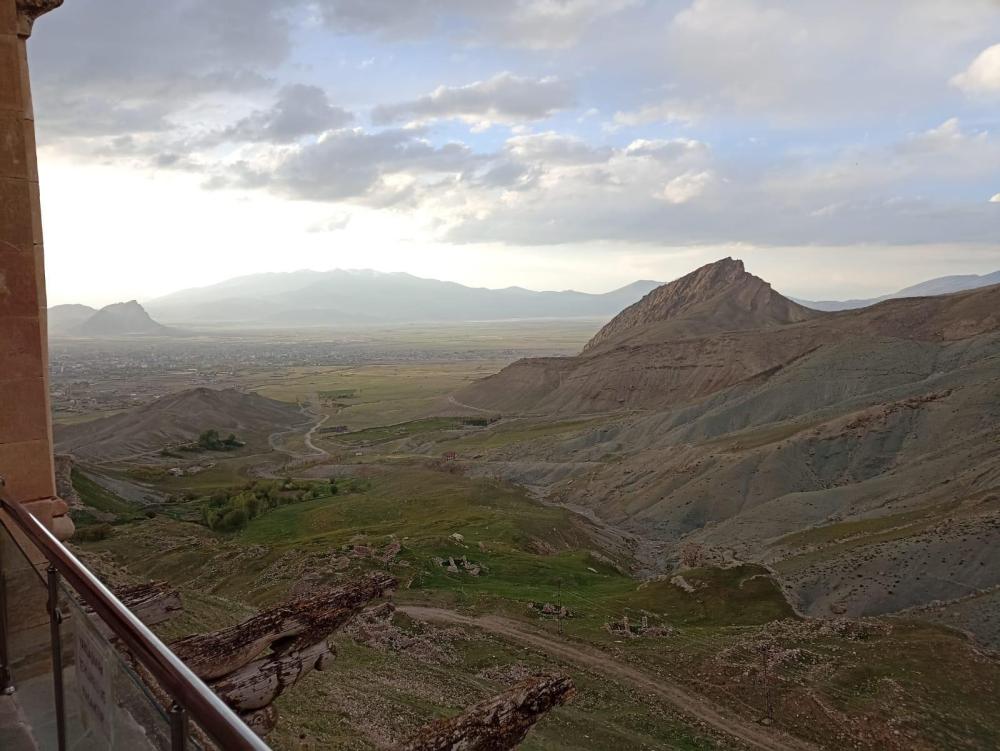
-
Went to Georgia, fuelled at Gulf station, saw a Mack truck
Vladislav replied to Vladislav's topic in Odds and Ends
Paul, to me it seems like a good approach to relate description with a map. If you haven't lost interest in that look where Moscow first. Than Rostov-na-Donu, than Vladikaukaz (still in Russia). Than stretch from Vladikaukaz to Tbilisi (the capital of Georgia) is that portion of the road with the mountain pass and snow aside of the road. Than further I passed Georgian city of Borjomi (that's a place Georgians produce well known mineral water branded by the same name as the city). And from there I went to Turkish Ardohan crossing GE/TR border on my way. Than further east to Dogubayazid and today I came to the city of Van near the salt lake of Van. -
1970-71 R685t steel nose
Vladislav replied to Hans Remmers's topic in Antique and Classic Mack Trucks General Discussion
Nice "little" truck indeed. And it's definitely a R not RM or RD. Would be cool if someone will keep it and restore. -
Went to Georgia, fuelled at Gulf station, saw a Mack truck
Vladislav replied to Vladislav's topic in Odds and Ends
Brocky, you are welcome! It's always fun when you share your fun😀 The long time waiting is for trucks. Mostly due to cargo. Plenty if paperwork must be arranged. Also X-ray inspection. Sure that's a matter of amount of stuff involved. But it's government business so drivers and cargo owners have to pay by the time spent. Cars are much easier deal if not too many in the line. Usually it takes from one to a few hours to pass a border with a car. Motorbike is even more easier deal since you overpass the line of cars (and sure the trucks) and has less lugguge to be inspected. I crossed Geragian border in 1,5 hours and about the same time from Georgia to Turkey. There were no cars at the latter pass at all but I needed Turkish insurance which I didn't buy at home. There was an office at the border cross (they usually are there) but it took them nearly 40 minutes to get the deal done. -
Went to Georgia, fuelled at Gulf station, saw a Mack truck
Vladislav replied to Vladislav's topic in Odds and Ends
The snow was seen at the mountain pass, about its highest point of 2500m above the sea level. Overall it's quite warm in the region, nearly +20C. And the road was clean and dry including the pass. -
Went to Georgia, fuelled at Gulf station, saw a Mack truck
Vladislav replied to Vladislav's topic in Odds and Ends
Thanks for the comment, Bob. That snow happened to be more of a scenary thing than an issue. The air was nearly 15 Celsias which with help of sun made the ride quite comfortable. -
Went to Georgia, fuelled at Gulf station, saw a Mack truck
Vladislav replied to Vladislav's topic in Odds and Ends
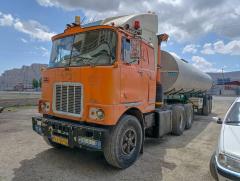
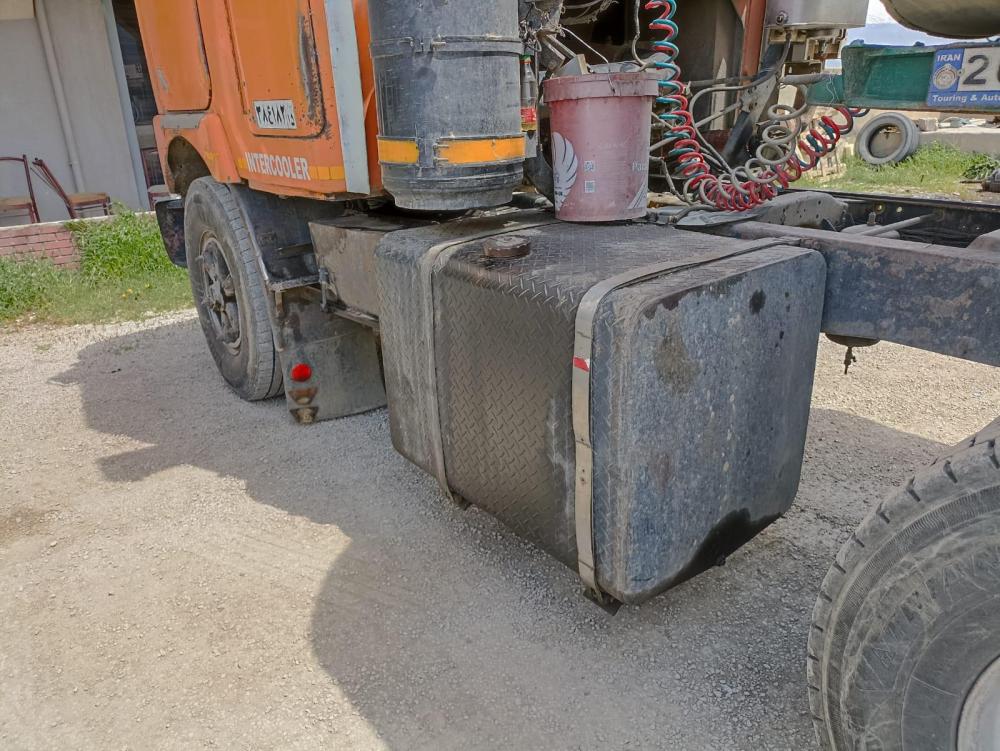
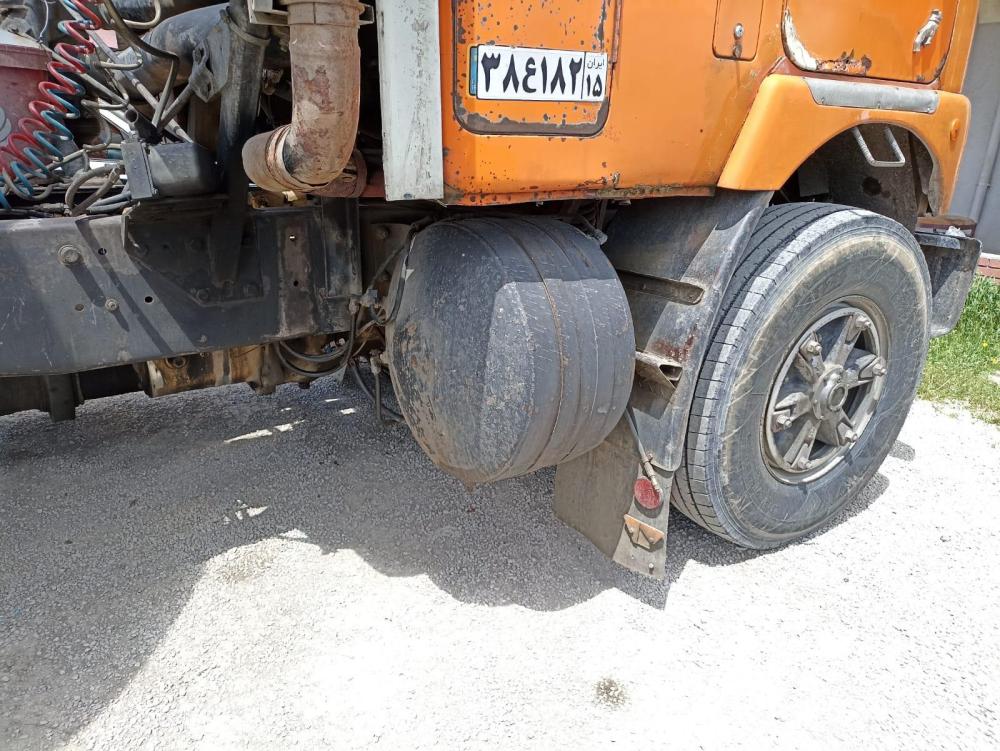
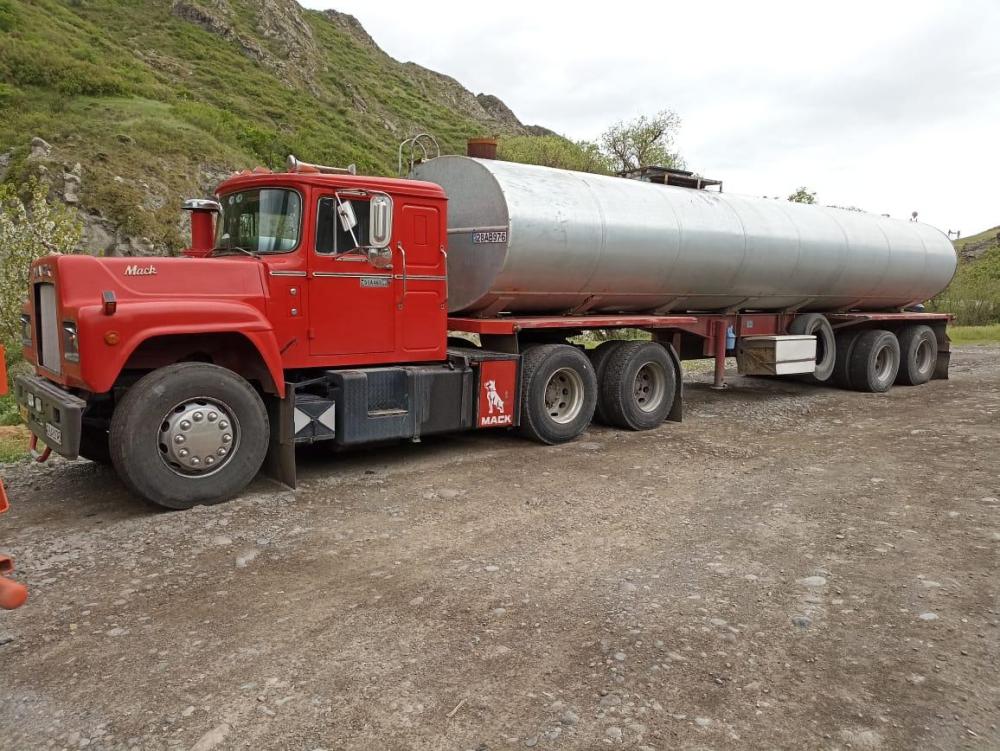
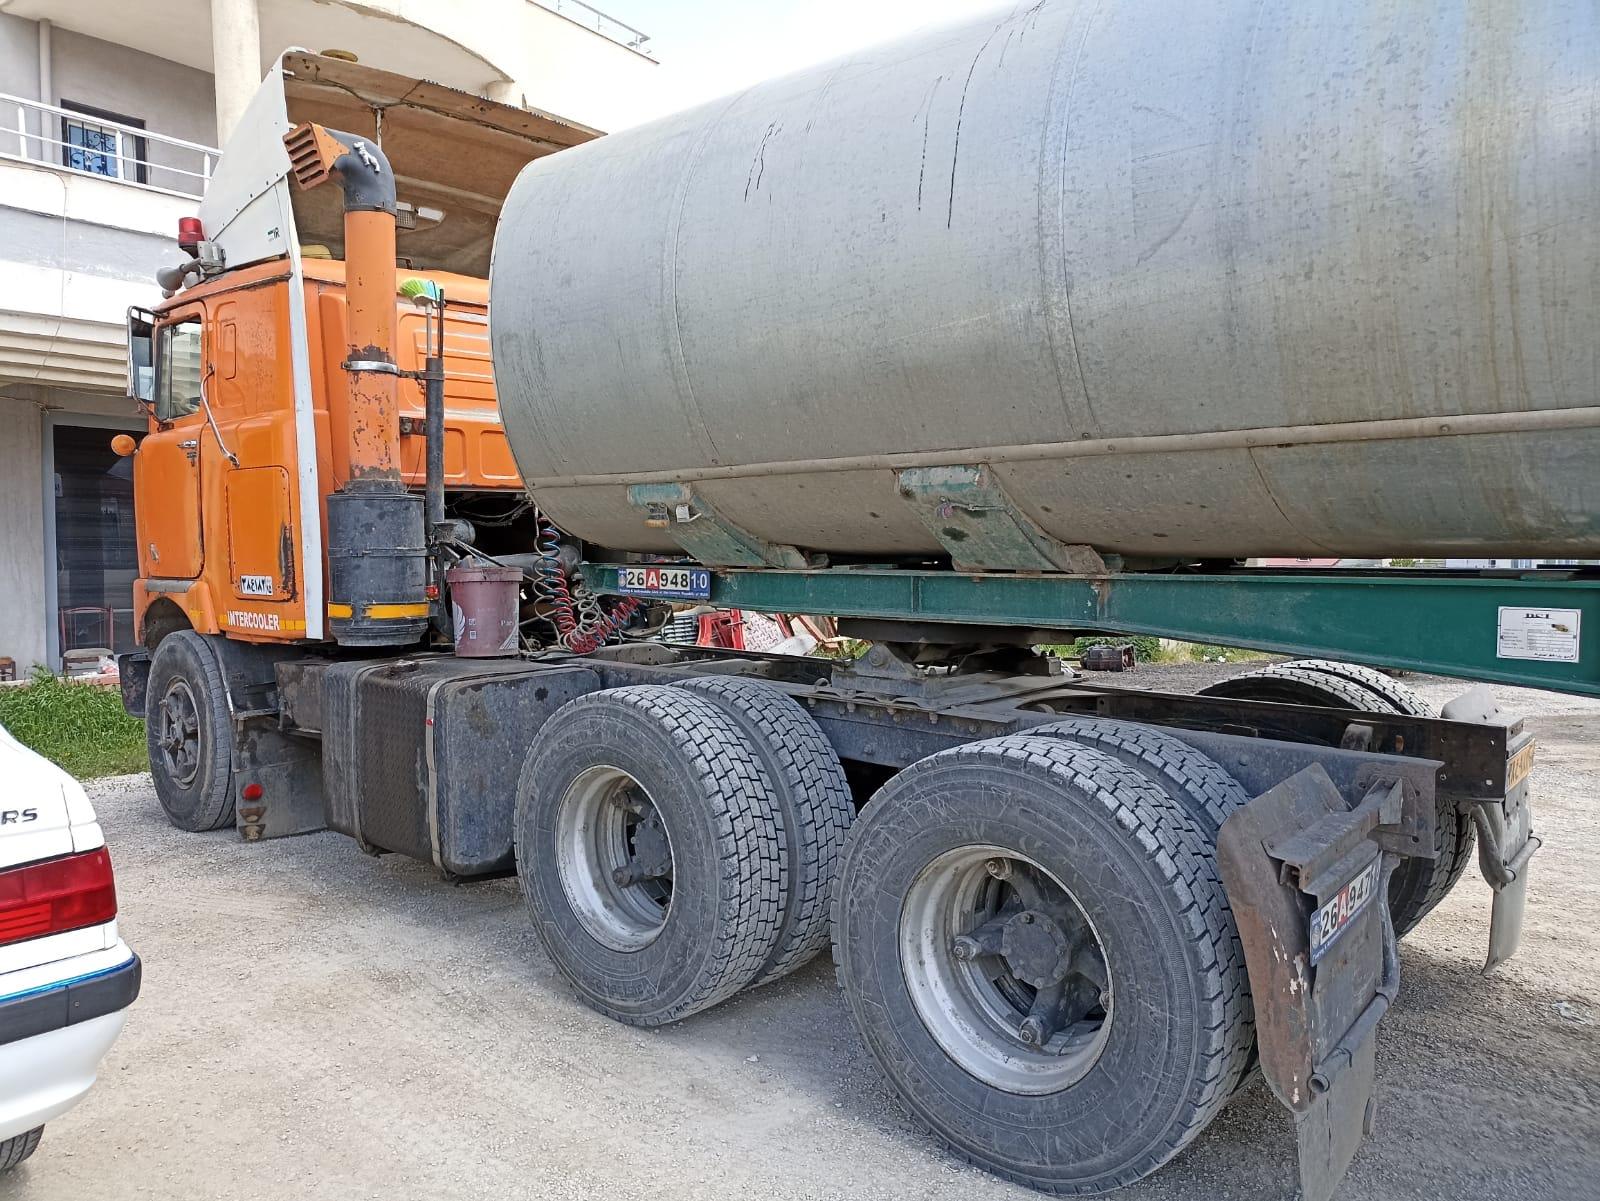
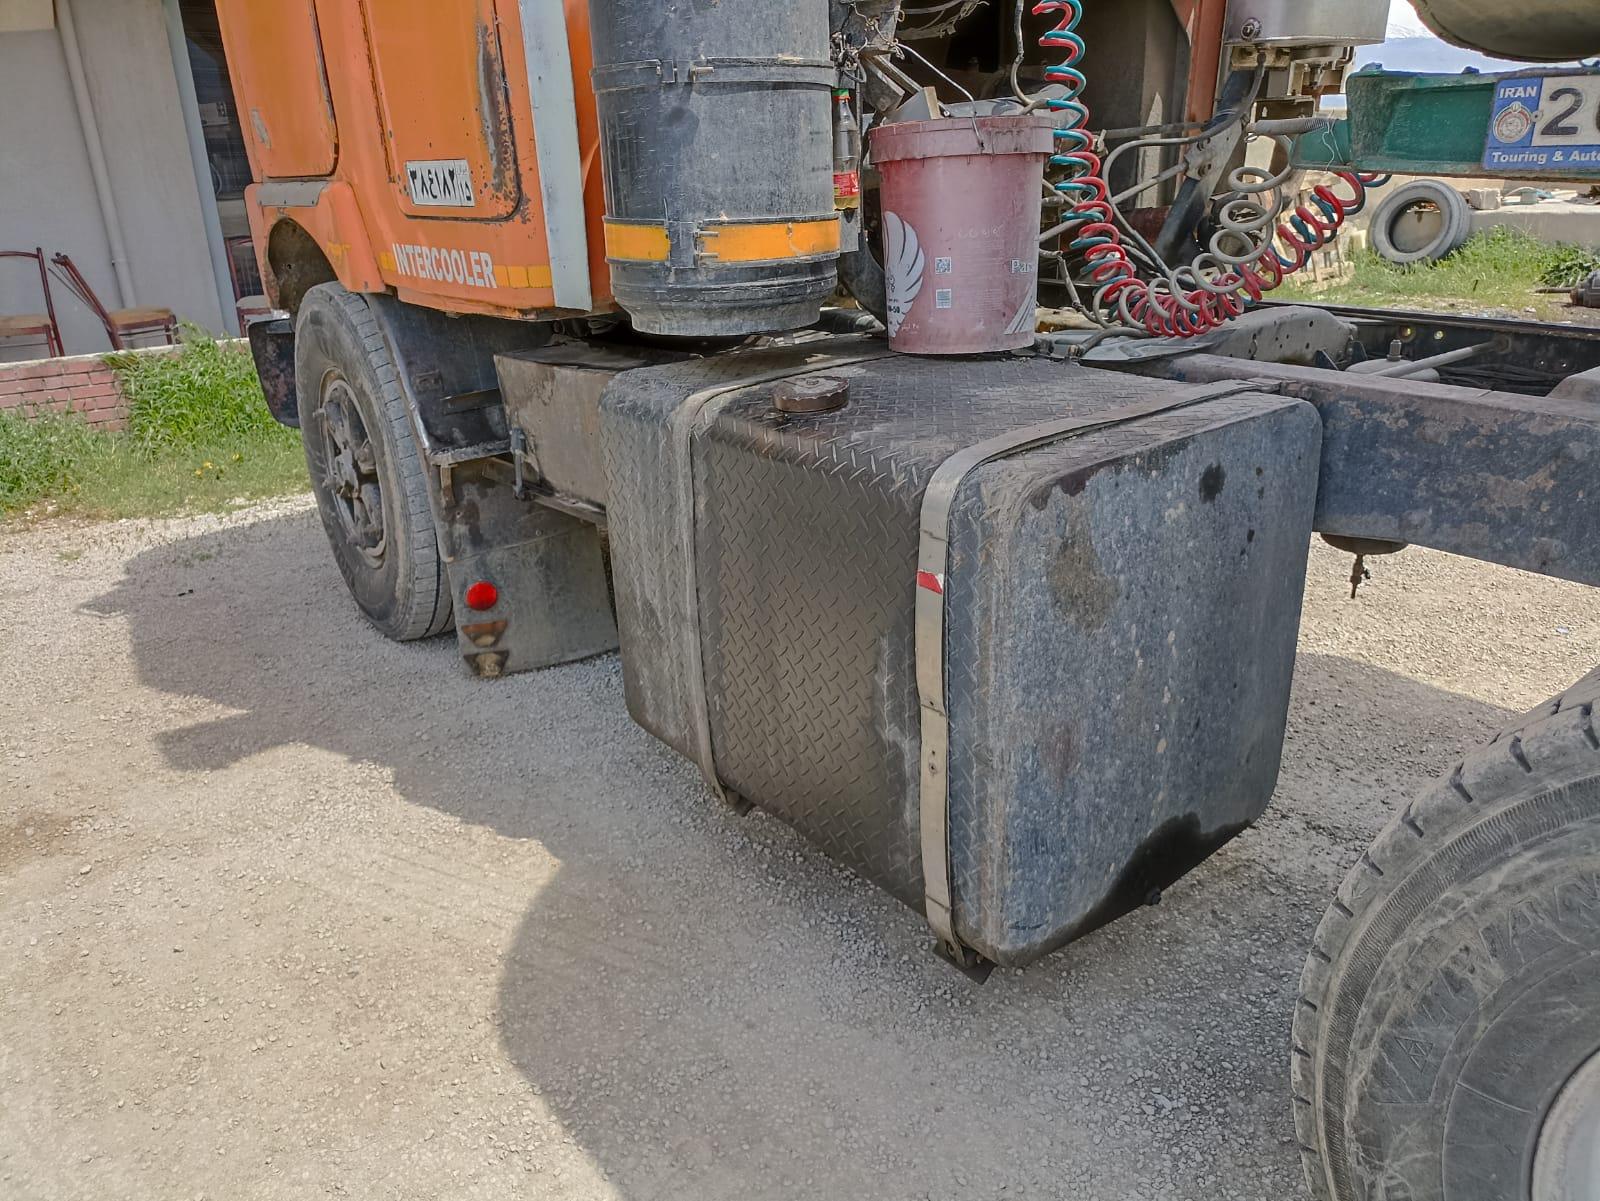
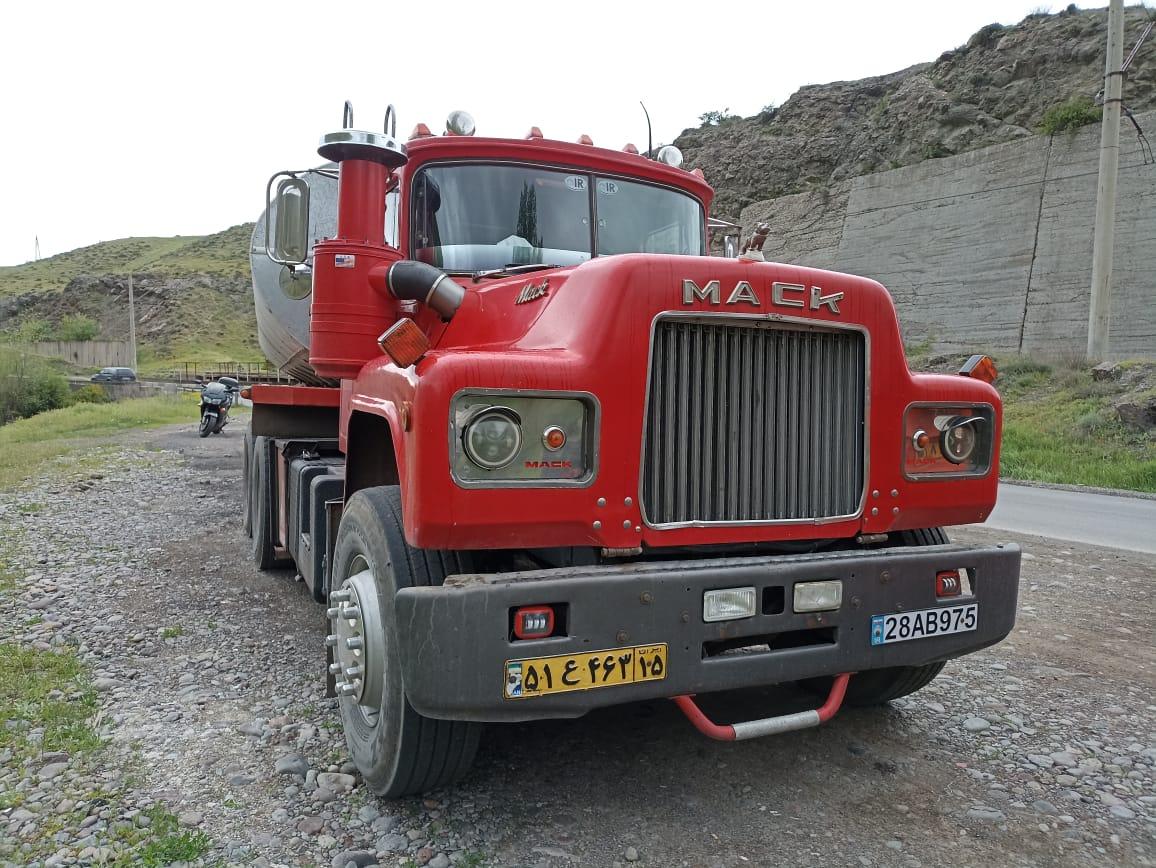
That's Iranian built cab. You can see difference in the shape of windscreens, doors and even the cowl. They seem ordering chassis and mechanical components from Mack and made cabs and hoods locally. R-model was either produced in short and sleeper versions. -
Went to Georgia, fuelled at Gulf station, saw a Mack truck
Vladislav replied to Vladislav's topic in Odds and Ends
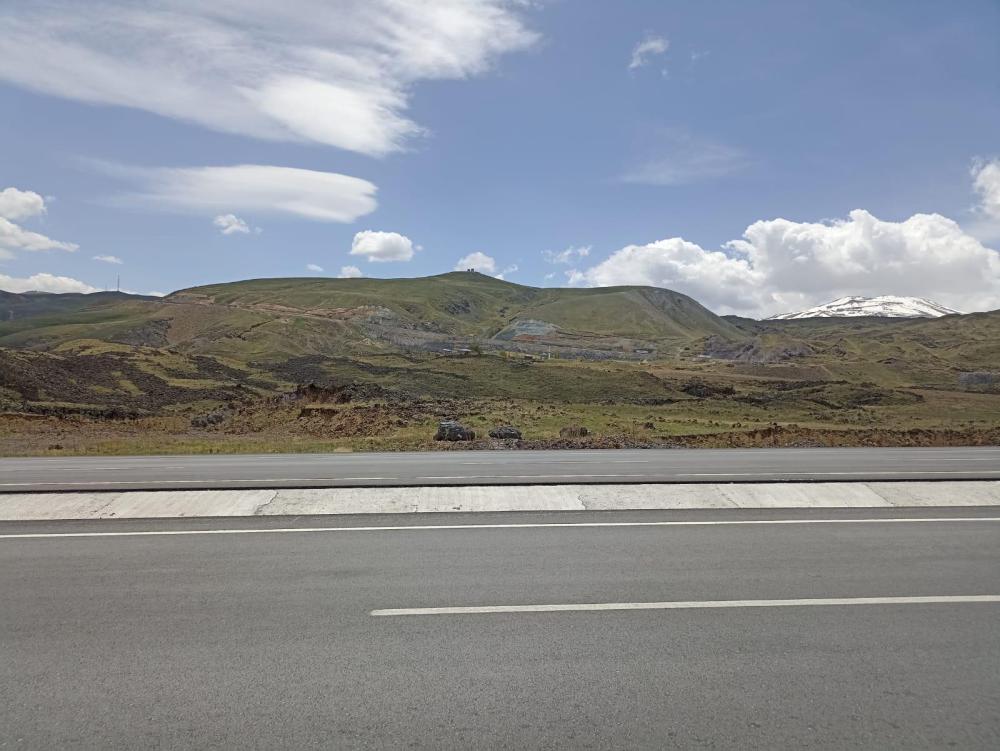
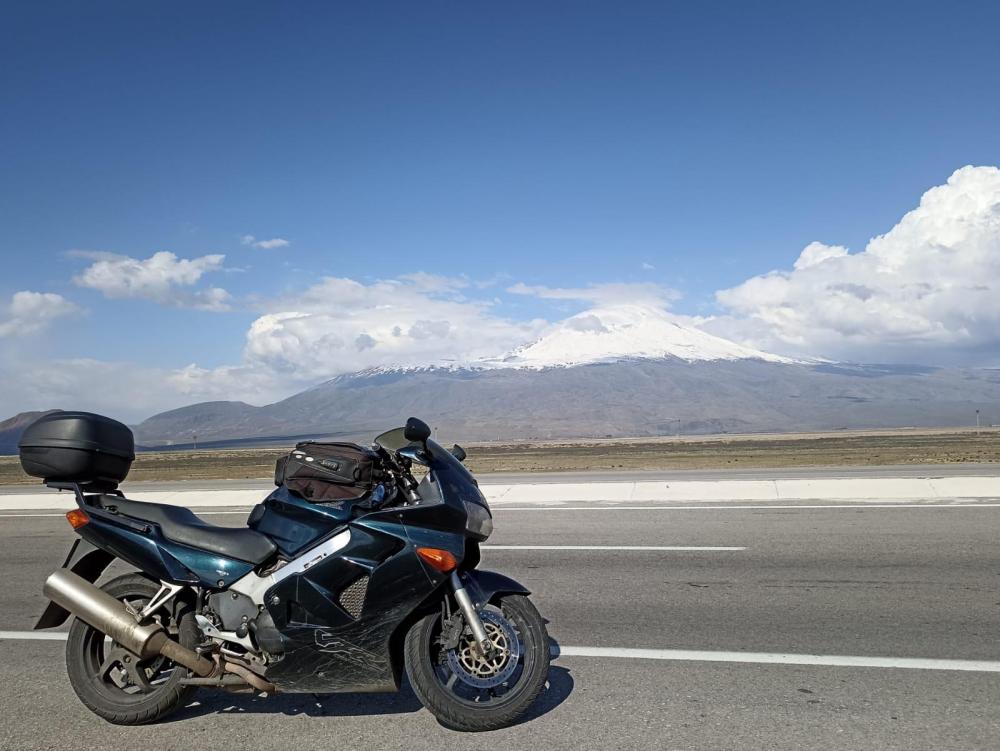
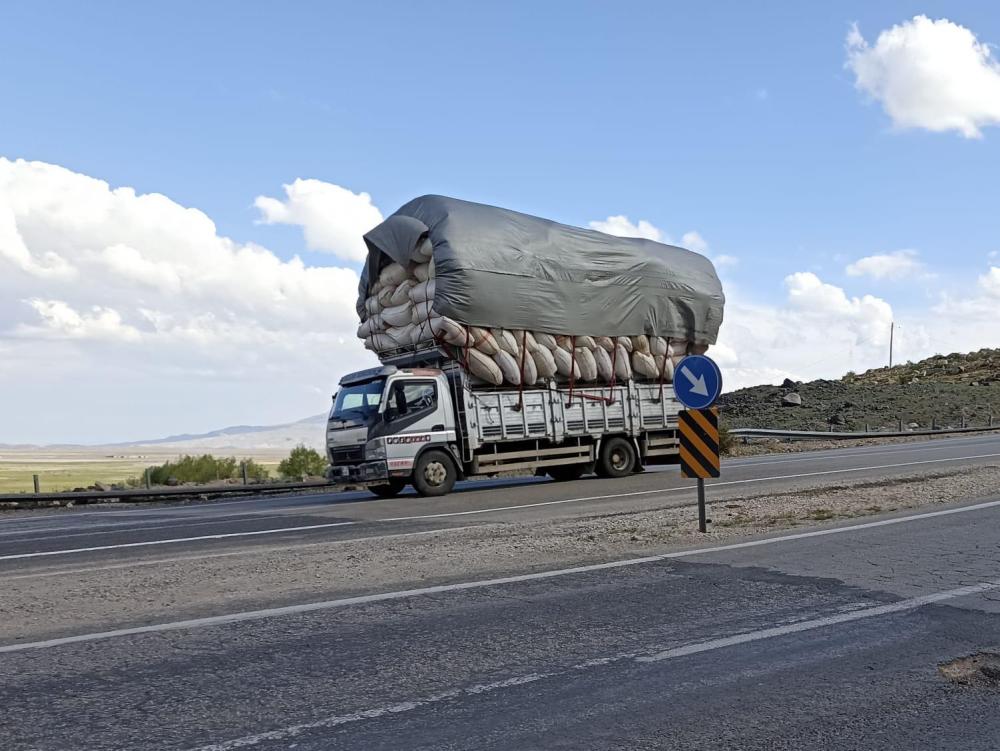
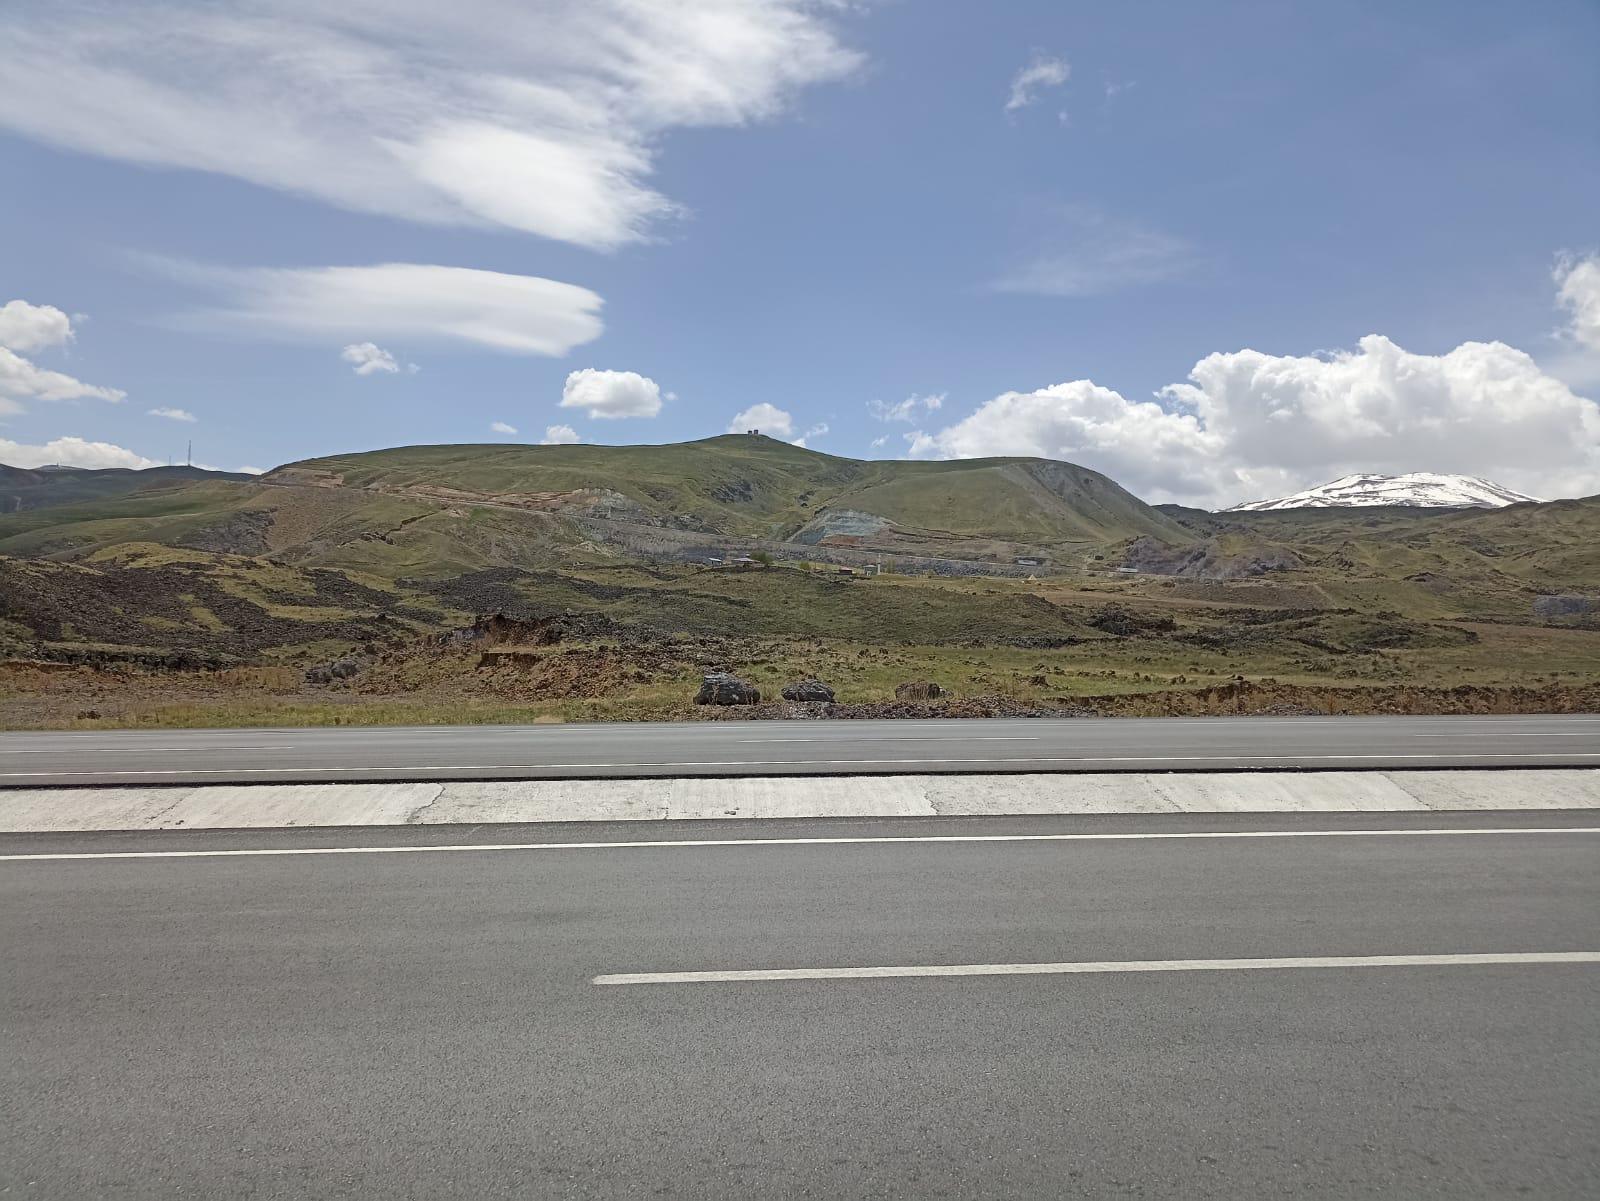
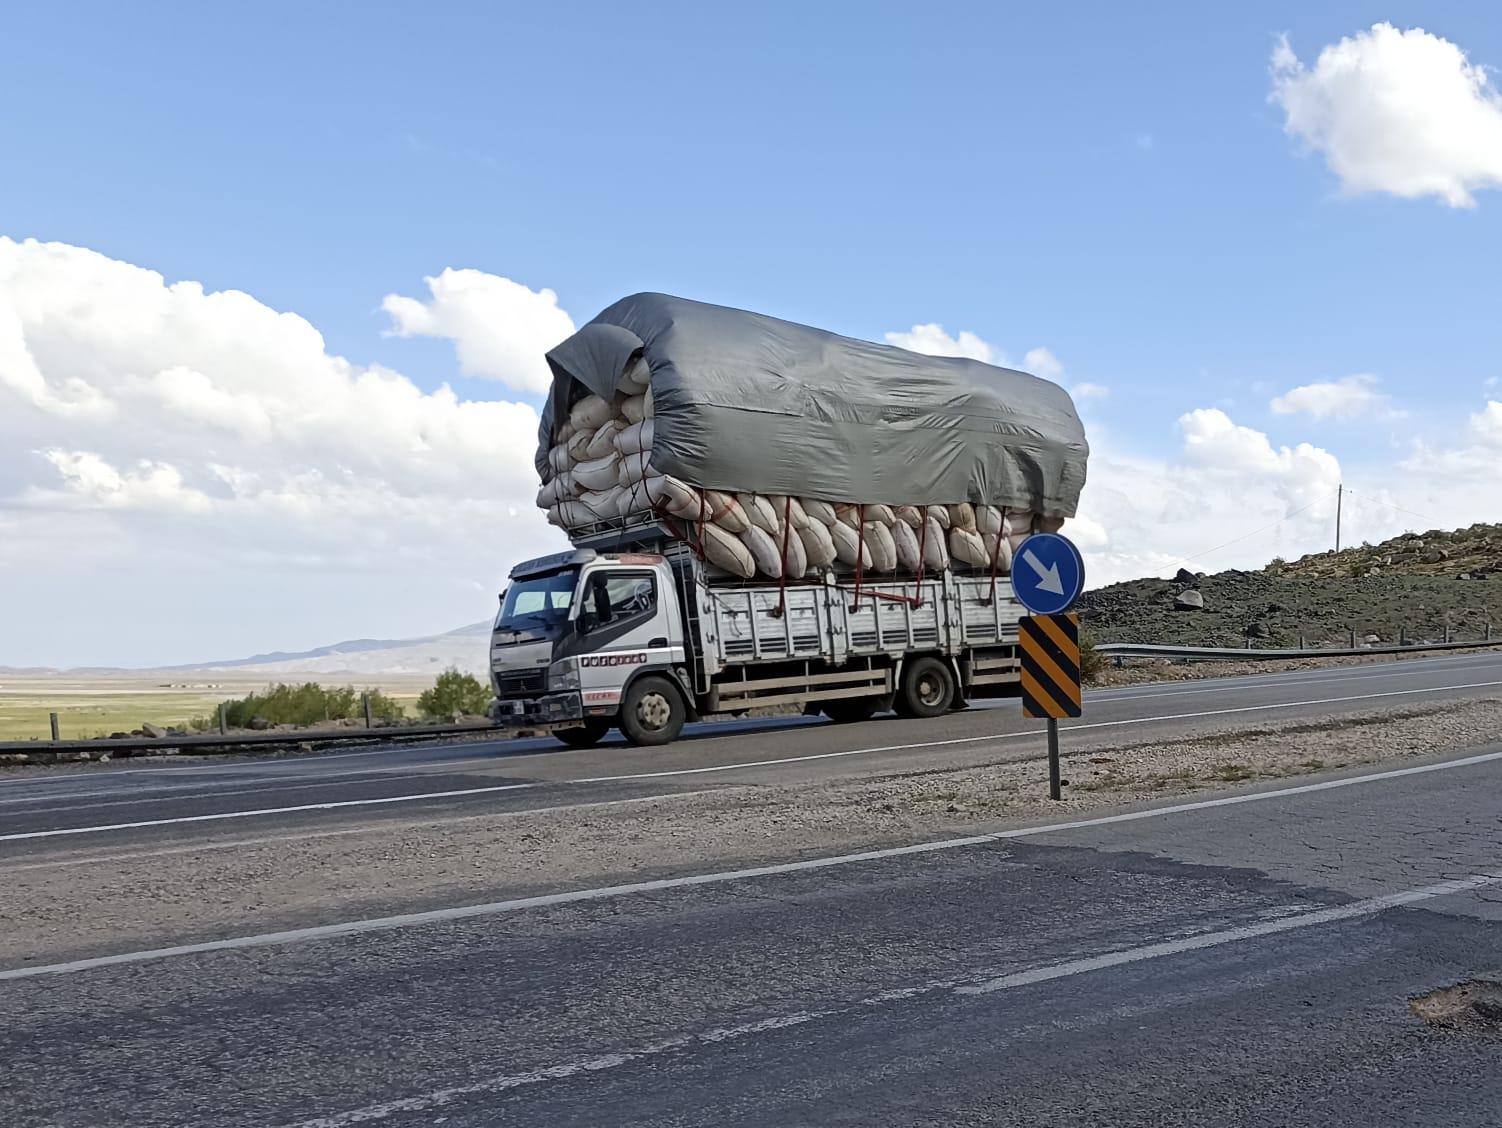
Eastern Turkey. Kurdish land. Big mountain you can see at the background on the 3rd pic is Ararat. 5137 meter high. Armenian national symbol but geographically located in Turkey. BTW no more Mack trucks on my way so far.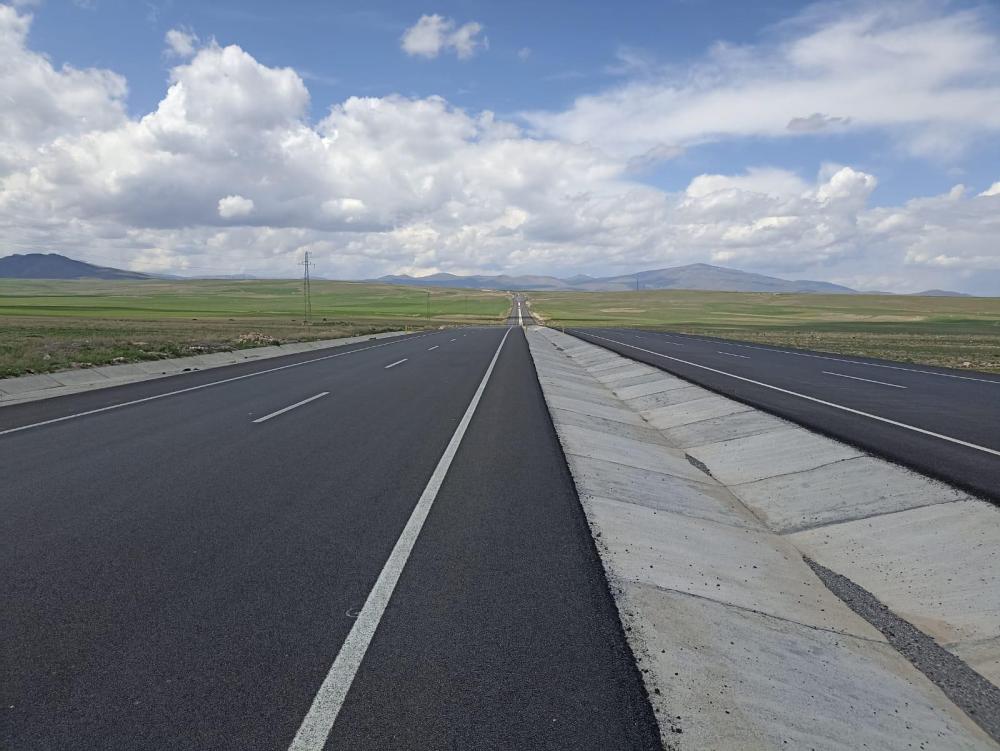


-
Went to Georgia, fuelled at Gulf station, saw a Mack truck
Vladislav replied to Vladislav's topic in Odds and Ends
Thanks for the comment. The bike is quite powerful and fast. But it's cool to drive roads where nobody can check your speed. Currently I'm in the right area😀 -
Went to Georgia, fuelled at Gulf station, saw a Mack truck
Vladislav replied to Vladislav's topic in Odds and Ends
The guy looked younger. And the truck either did 😀 -
Went to Georgia, fuelled at Gulf station, saw a Mack truck
Vladislav replied to Vladislav's topic in Odds and Ends
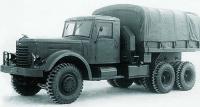
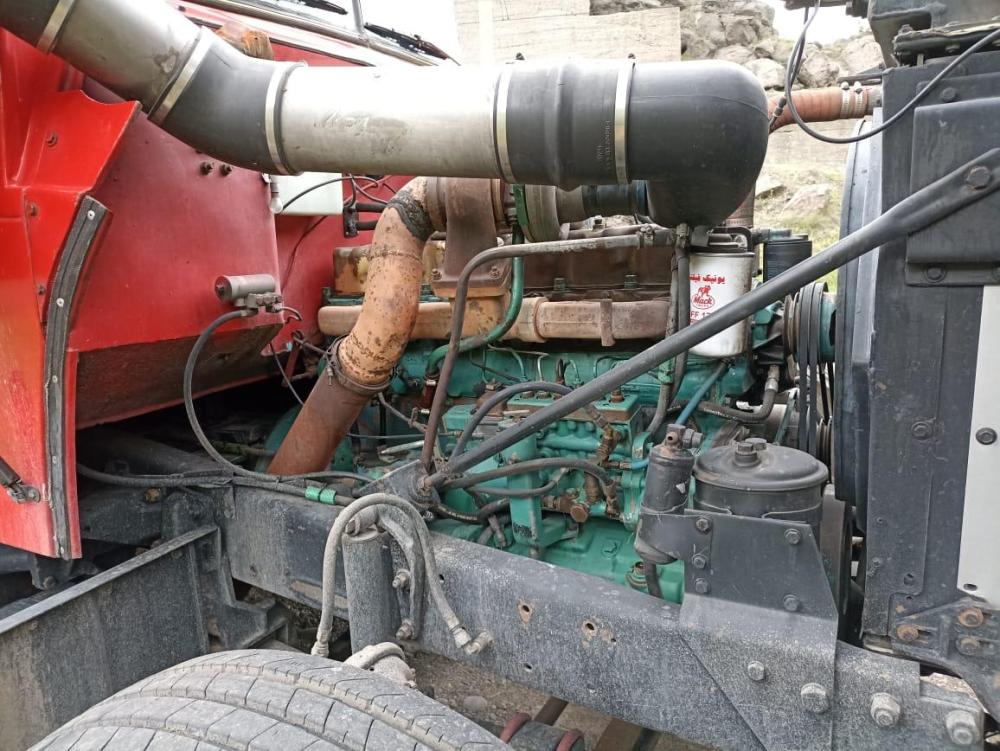
But the Mack 😀was met on my way. Otherwise all this blah-blah-blah would'n worth being posted at all. The truck was Iranian. I saw it parked on a side of a road. Also in Georgia but close to Turkish border (don't ask me what I was doing there 😀) I sure stopped by (there were two trucks with similar trailers but the 1st one was Volvo or MAN), knocked to the cab door and said Salam, adding a few Persian words I happened to learn in the distant past (of having nothing to do definitely). The guys got exited seeing my interest and represented the threasure. I was told it was Iran Kaveh assembled R600 of 1970 with 250hp. It had two sticks originally but was swapped with Eaton due to wear. The truck looked well cared and restored in the past. Fresh paint on the cab and chassis, the engine seemed owerhauled. I honestly have no idea how it's possible to cruise mountain passes of 2500m high having 250 hp and a tank trailer hooked. Just seems I'm way far from knowing everything in this world. So here you go
- 46 replies
-
- 12
-

-


BMT Forum Logo
