


mattb73lt
-
Posts
1,421 -
Joined
-
Last visited
-
Days Won
146
Content Type
Profiles
Forums
Gallery
Events
Blogs
BMT Wiki
Collections
Store
Everything posted by mattb73lt
-

Parting out U685T
mattb73lt replied to JoeH's topic in Antique and Classic Mack Trucks General Discussion
Ok, thanks. -
Parting out U685T
mattb73lt replied to JoeH's topic in Antique and Classic Mack Trucks General Discussion
Ok, no problem. Looks like that is a 4.25(?) ratio. Let me know if Yarnell doesn’t take it as could come down and get it anytime. -
Parting out U685T
mattb73lt replied to JoeH's topic in Antique and Classic Mack Trucks General Discussion
What’s it have for a rear end? Specifically the carrier and ratio. I’m looking for a CRD 117 in about a 4.50 ratio. But, I’d take the whole axle if it’s easier. -
B-73 Restoration
mattb73lt replied to mattb73lt's topic in Antique and Classic Mack Trucks General Discussion
Thank you all for the comments, they actually help keep me motivated. Two Winter seasons to get it done. I’m not going to say years because there was a lot of pauses during that time. The end result was a nearly brand new cab which should serve me a long time. A few photos to show some perspective on how it went. Now, back to work or play.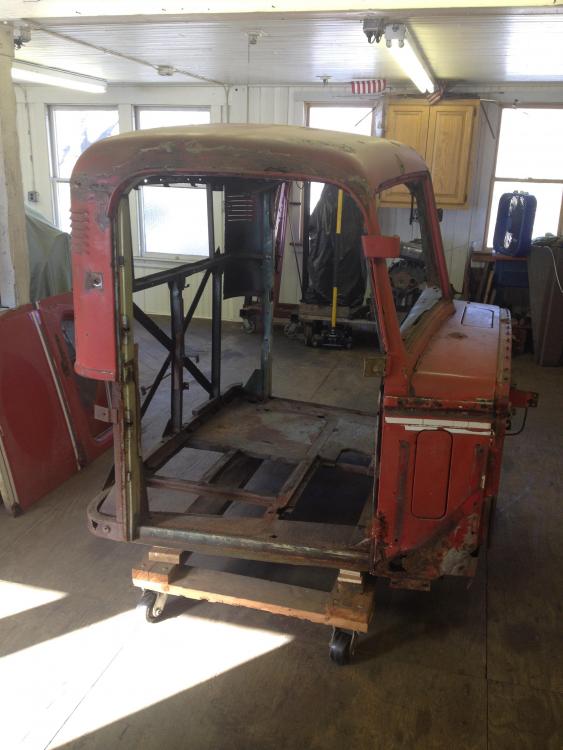


-
B-73 Restoration
mattb73lt replied to mattb73lt's topic in Antique and Classic Mack Trucks General Discussion
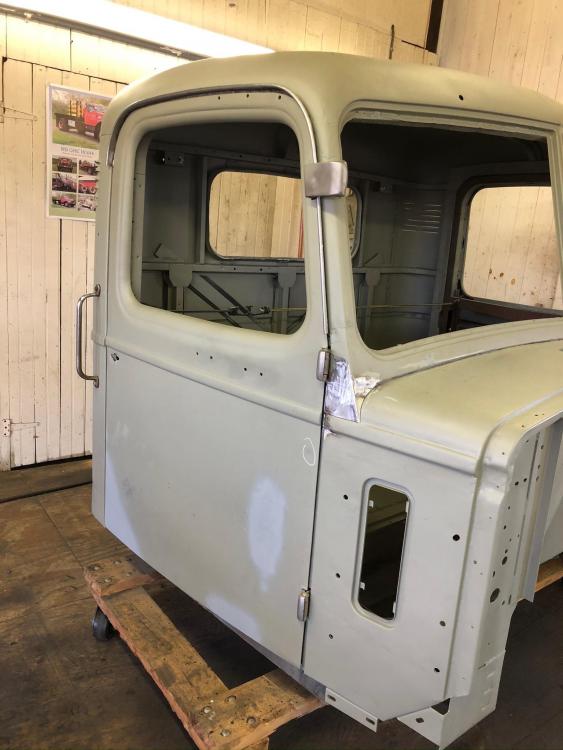
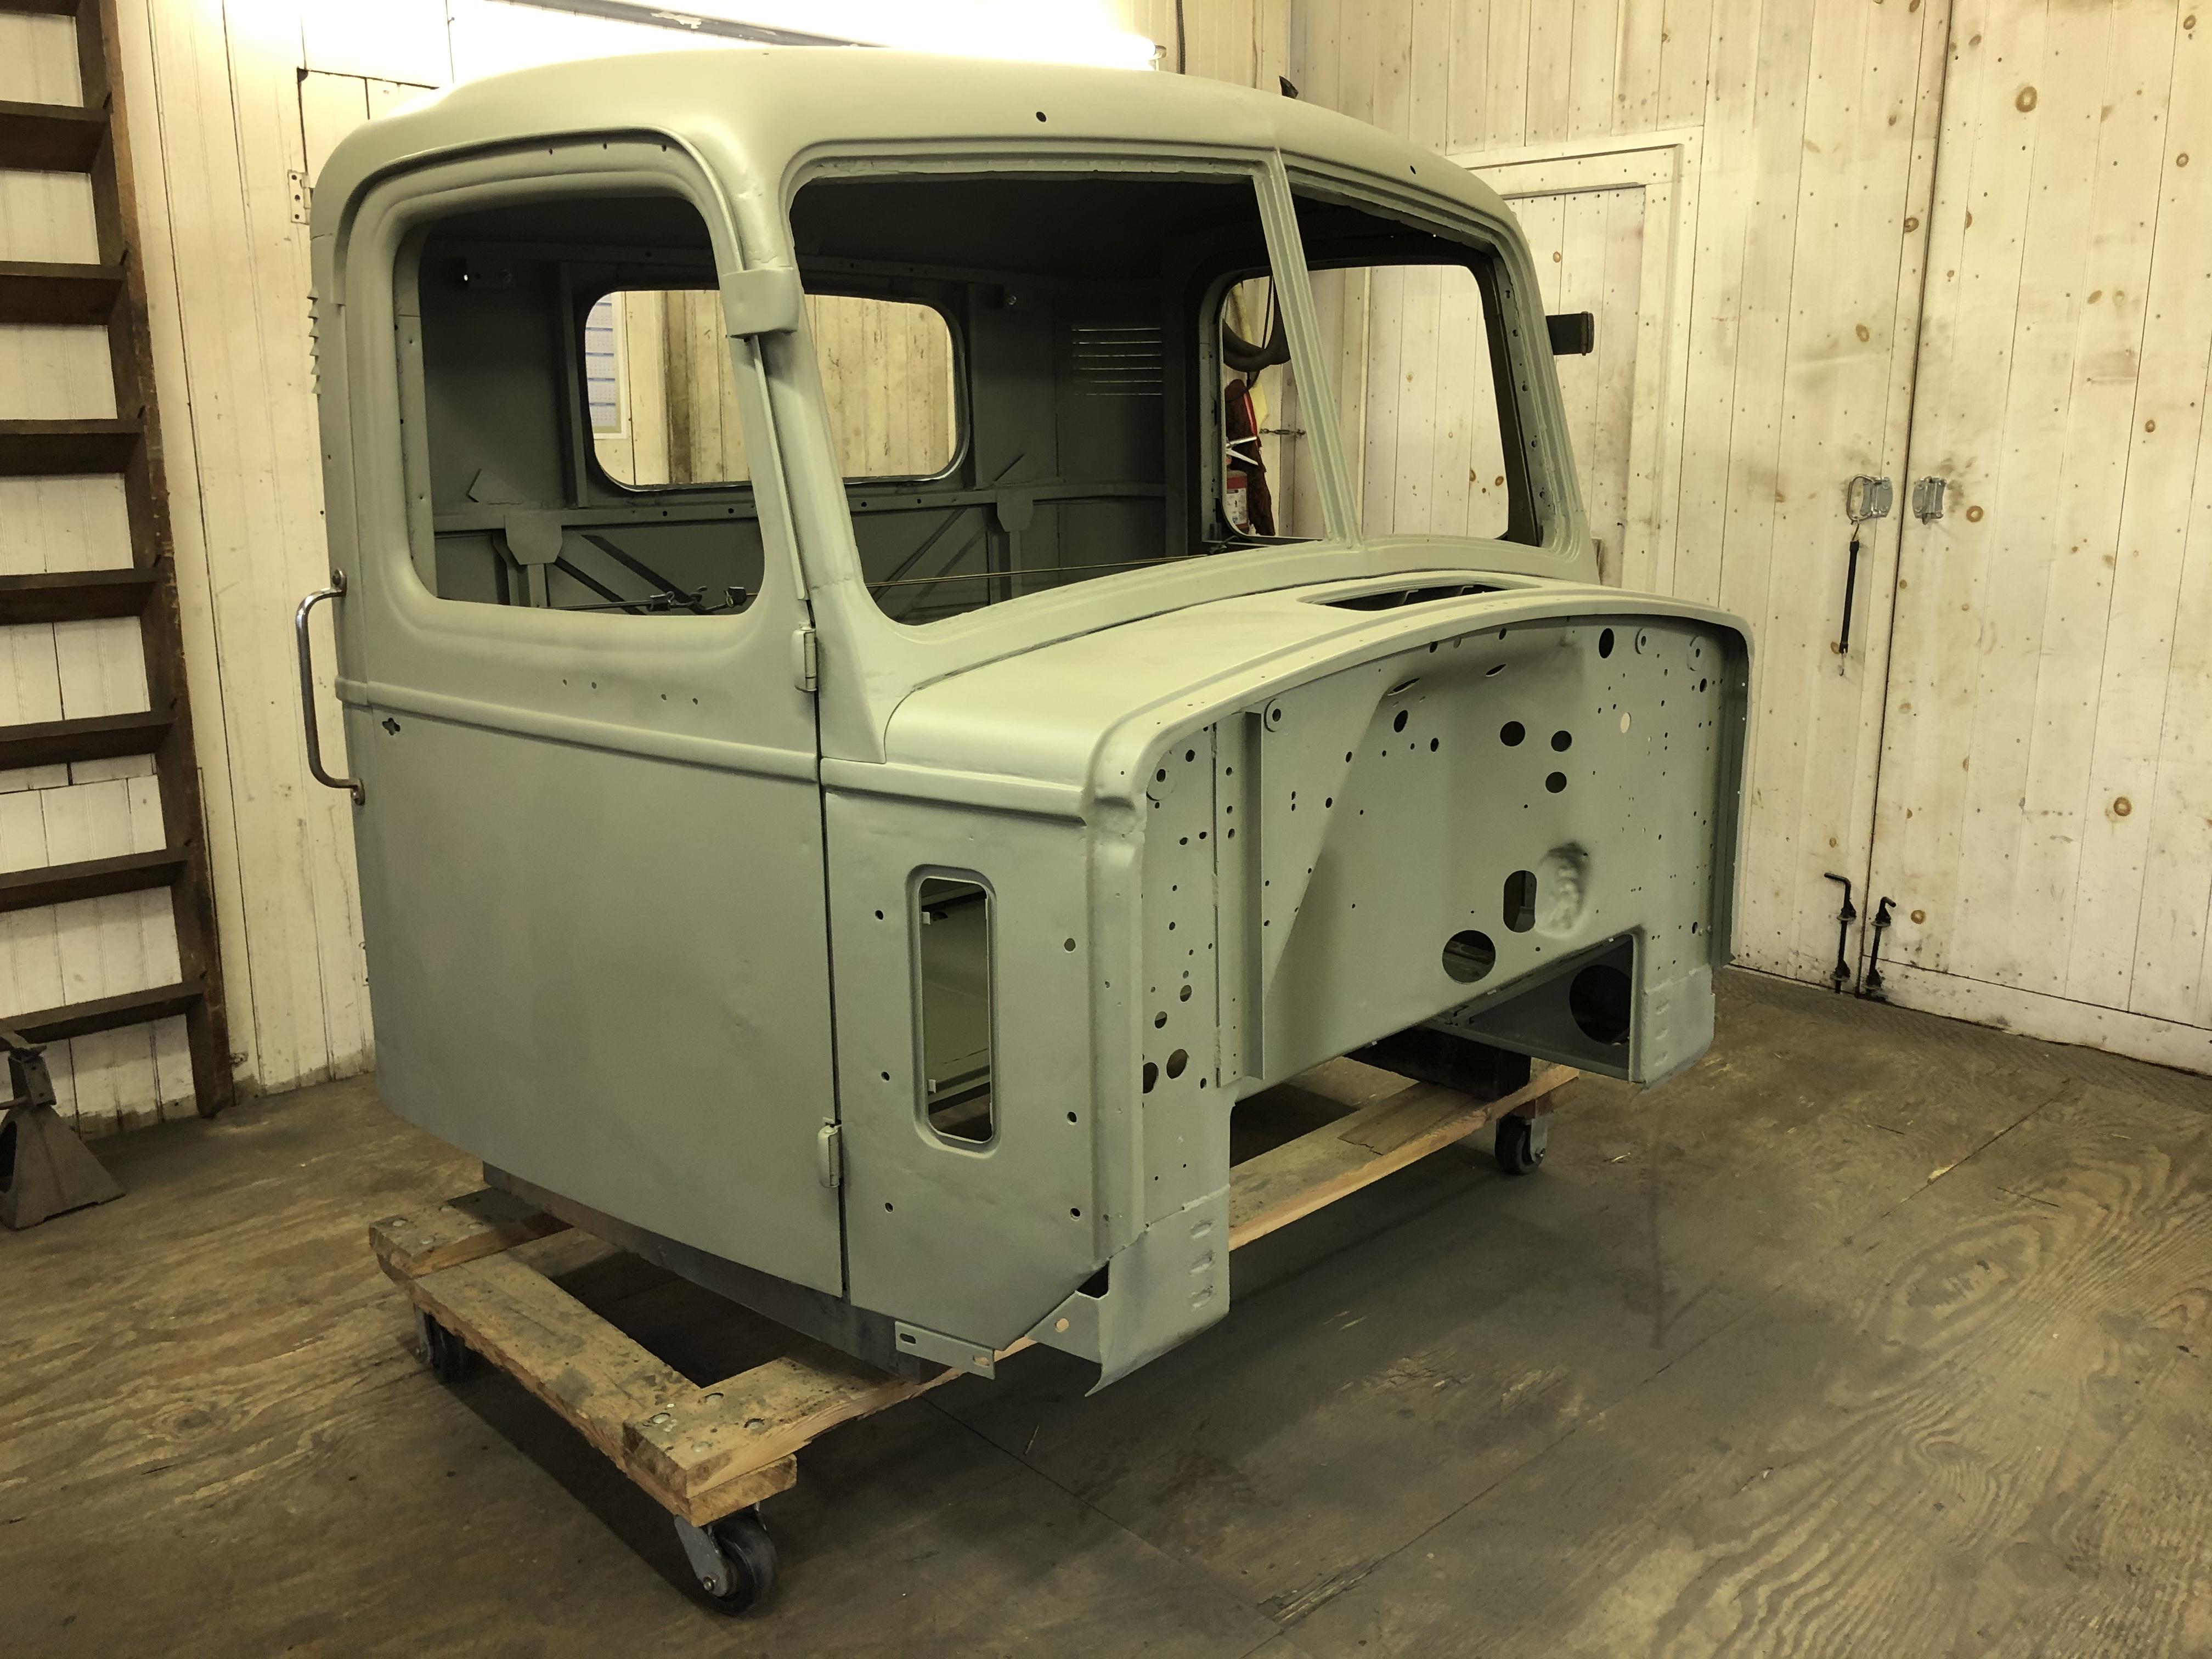
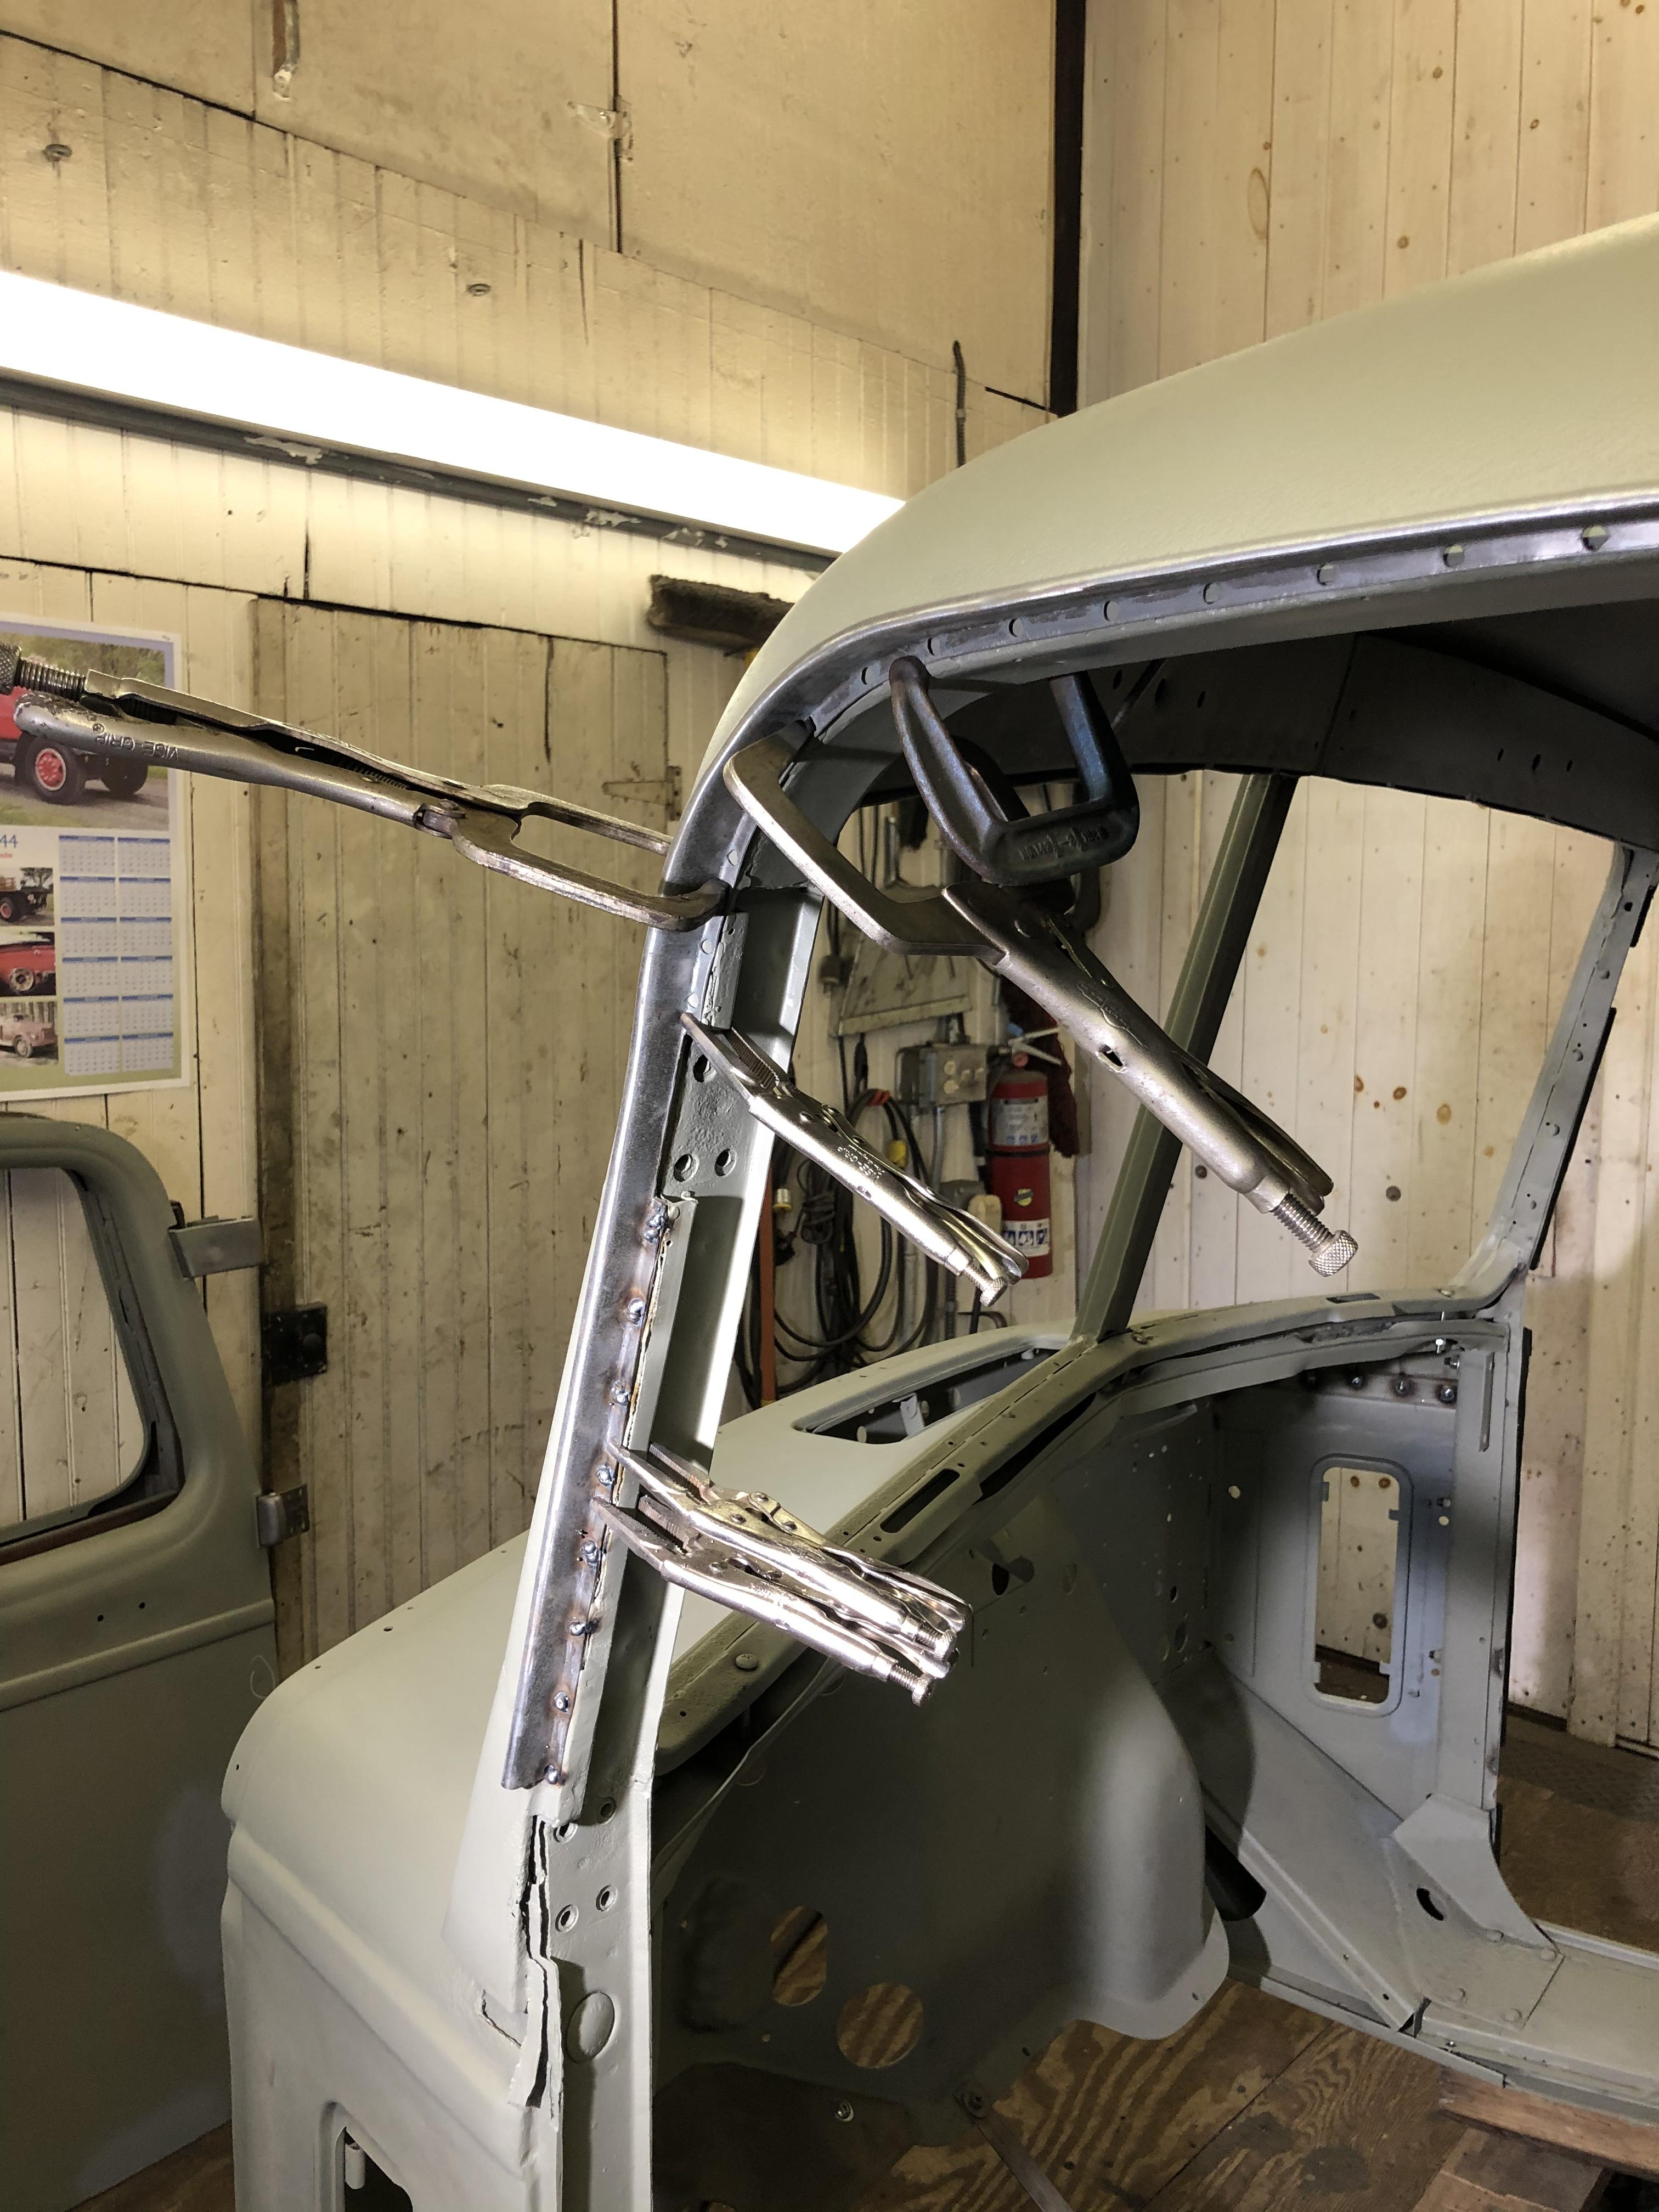
DONE, DONE, DONE!!!! Final patches on the lower windshield pillars installed and cleaned up the gutters. Test fit the doors and all is well with no rubbing. Obviously, I need to tweak a lot of little stuff. Looking at my last couple of posts, it doesn’t look like a lot of progress. But, there was, as it was all the hard stuff that shows. I am amazed I brought this cab back and now my big headache is behind me!!
-
1958 Mack B-73 Tractor
mattb73lt replied to j hancock's topic in Antique and Classic Mack Trucks General Discussion
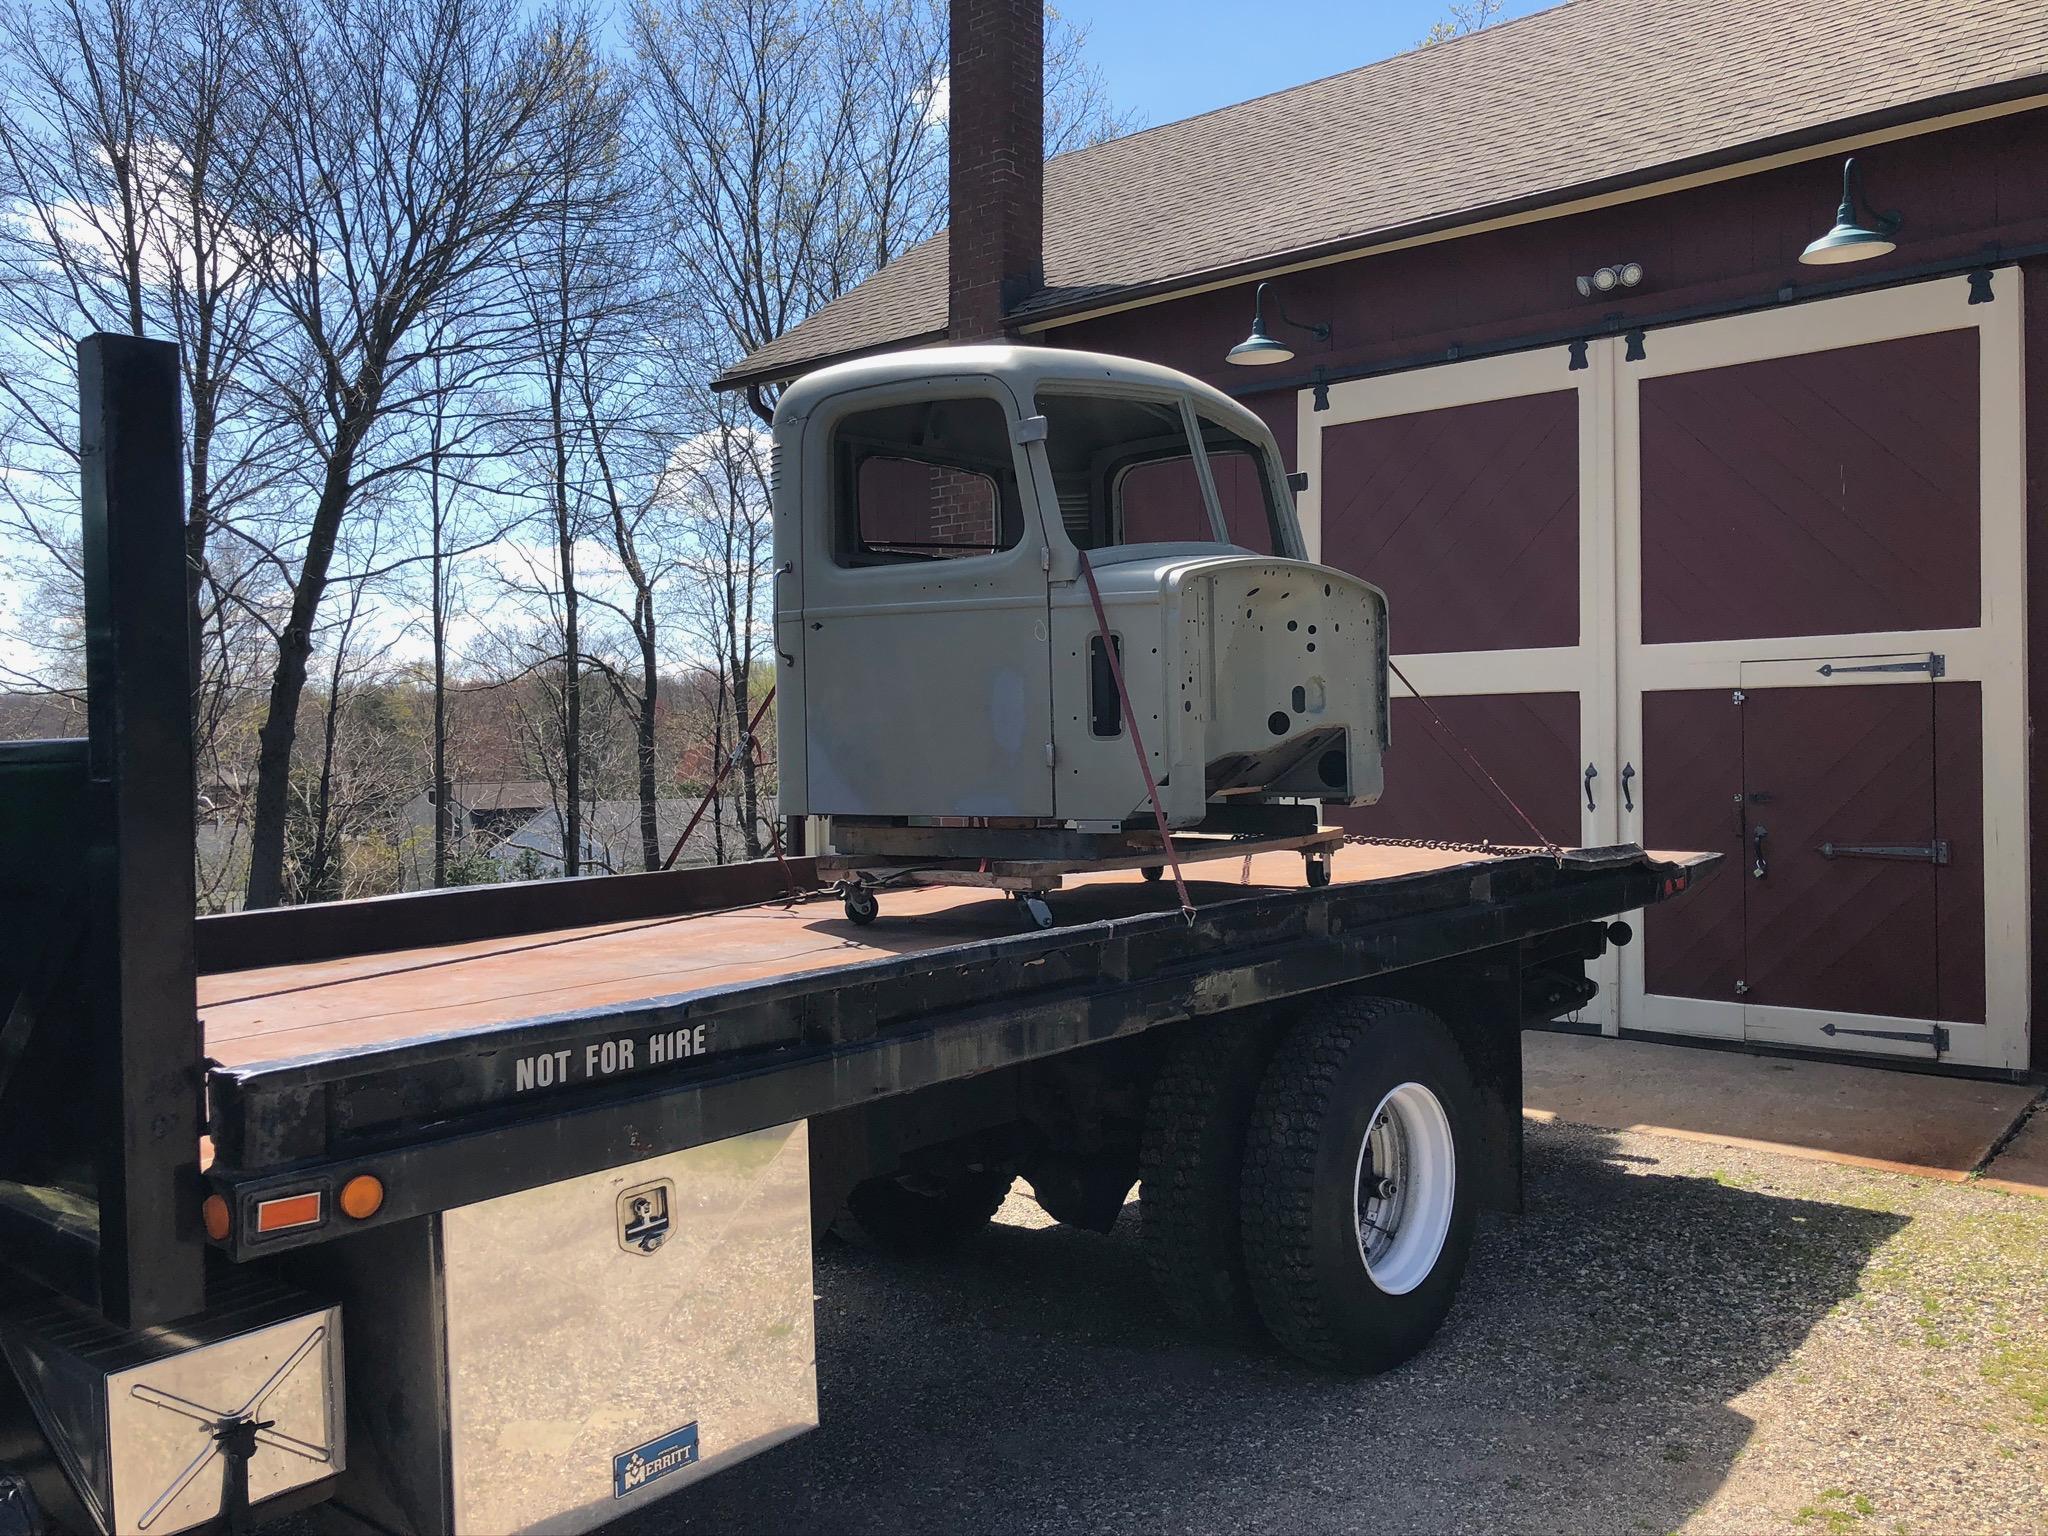
It’s coming into sight!! I need a couple days to finish my metal work, I’m thinking by the end of this week. Then body work/paint by the end of May. This crazy shutdown has certainly given me a lot more time on it. -
1958 Mack B-73 Tractor
mattb73lt replied to j hancock's topic in Antique and Classic Mack Trucks General Discussion
I drove that truck!! I was visiting the gentleman who owned it at the time back in 2001, just East of Dallas, when I was down that way doing some training. Went to look at it and take some pictures of it as I had picked up my B-73 a few years before. It's changed hand a couple of times since. Very nice truck. -
B-73 Restoration
mattb73lt replied to mattb73lt's topic in Antique and Classic Mack Trucks General Discussion
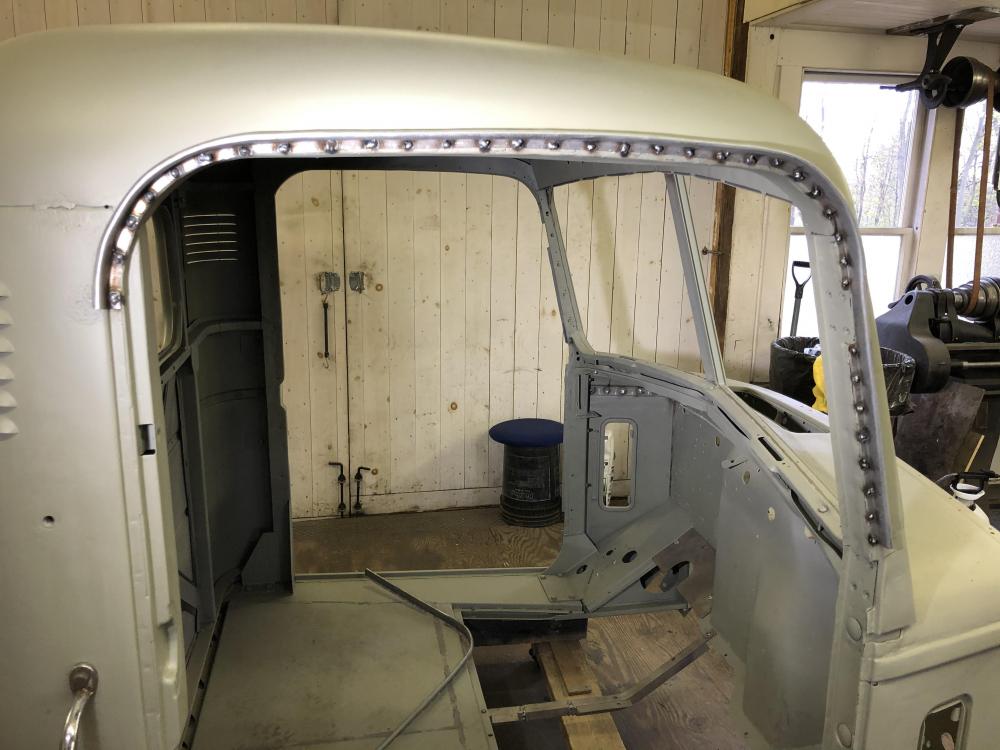
36 separate welds per side and now I have rain gutters!!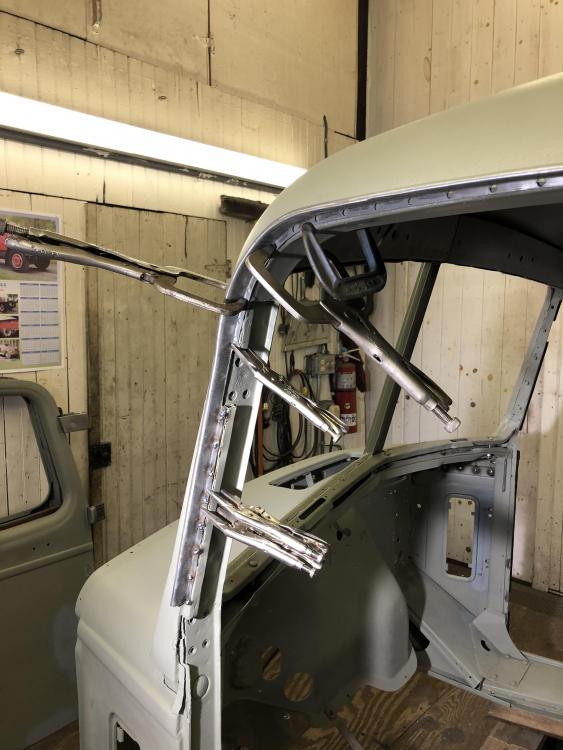
-
B81-87 floor plan
mattb73lt replied to hicrop10's topic in Antique and Classic Mack Trucks General Discussion
I found this on a Facebook page, don't know if it would help? Looks like someone was repairing their's.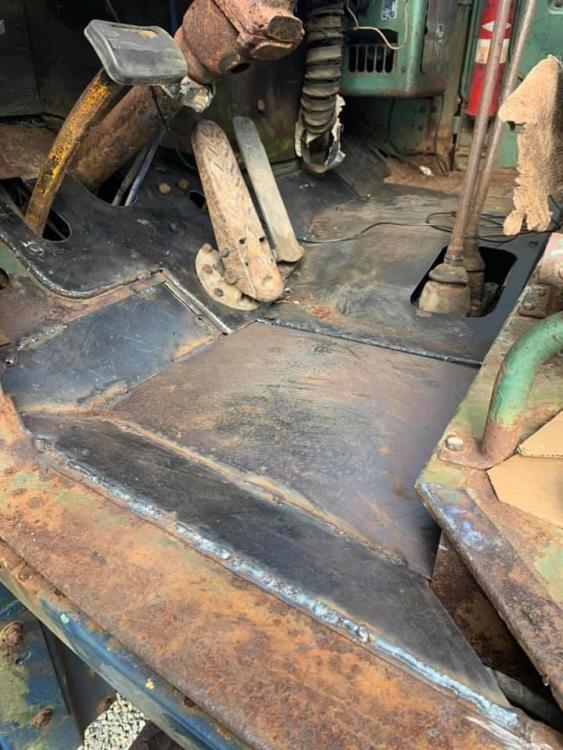
-
Connecticut Construction Trucks
mattb73lt replied to BKrois's topic in Antique and Classic Mack Trucks General Discussion
Matt Pfahl has the B81, still. He also had the R model, but I believe he sold it recently. -
B-73 Restoration
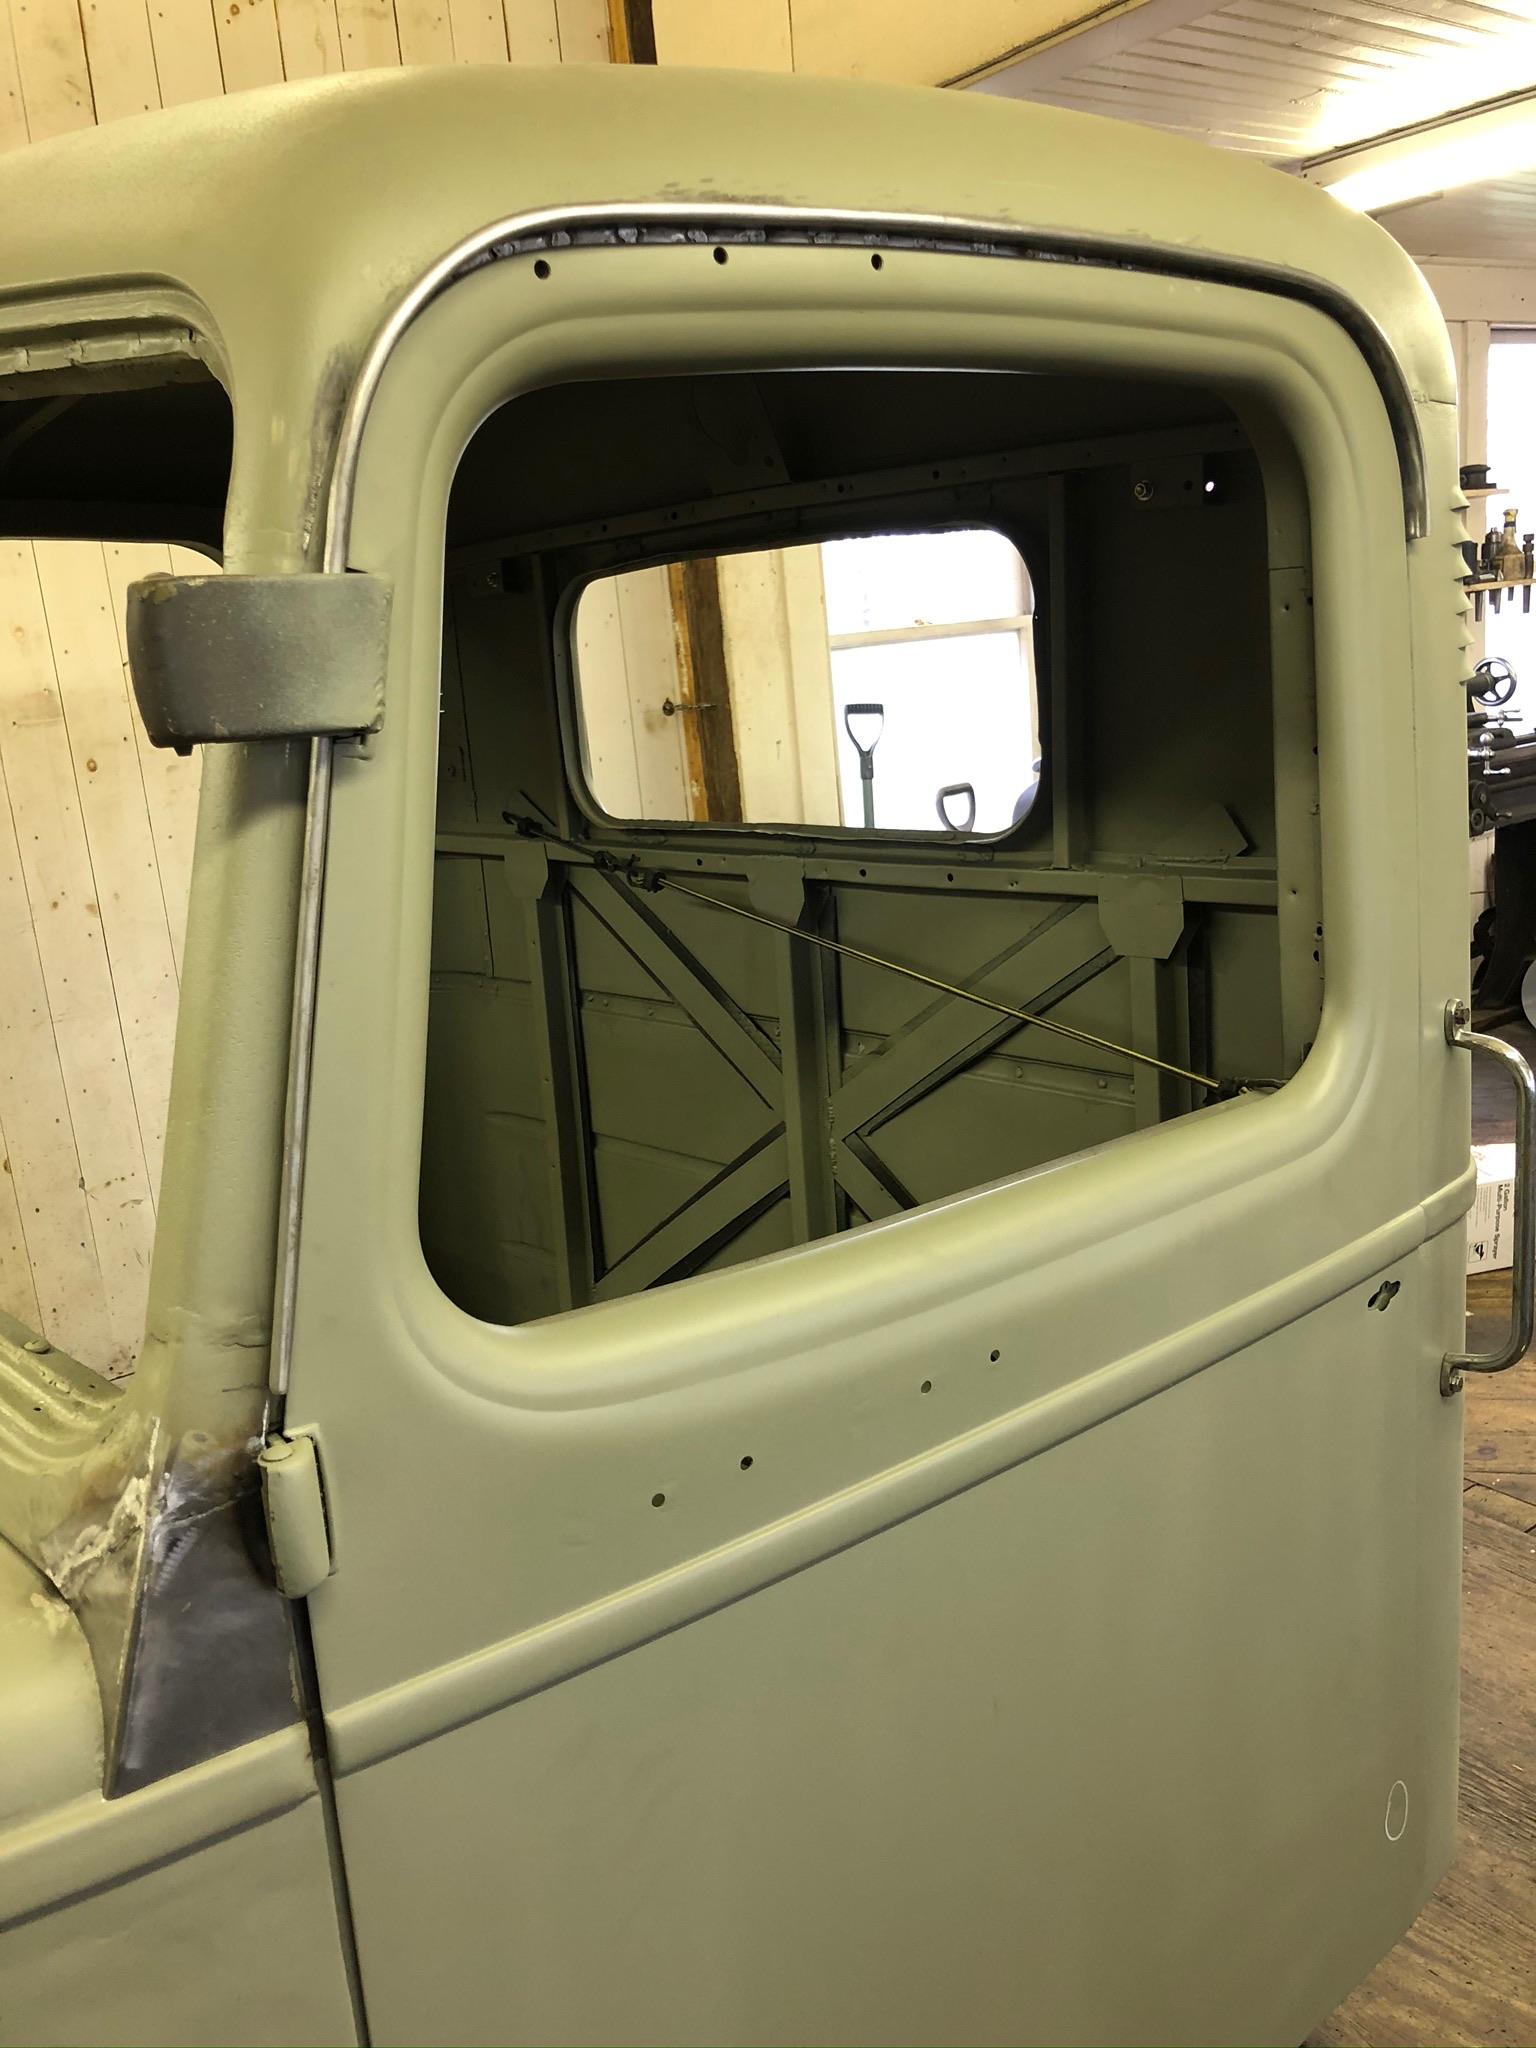
mattb73lt replied to mattb73lt's topic in Antique and Classic Mack Trucks General Discussion
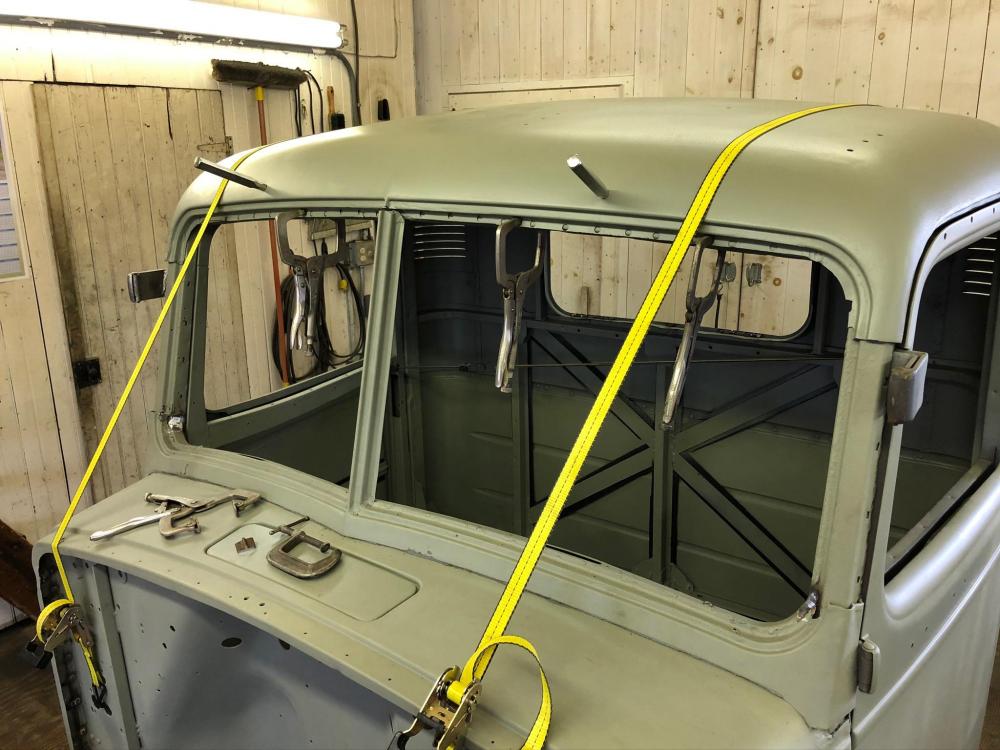
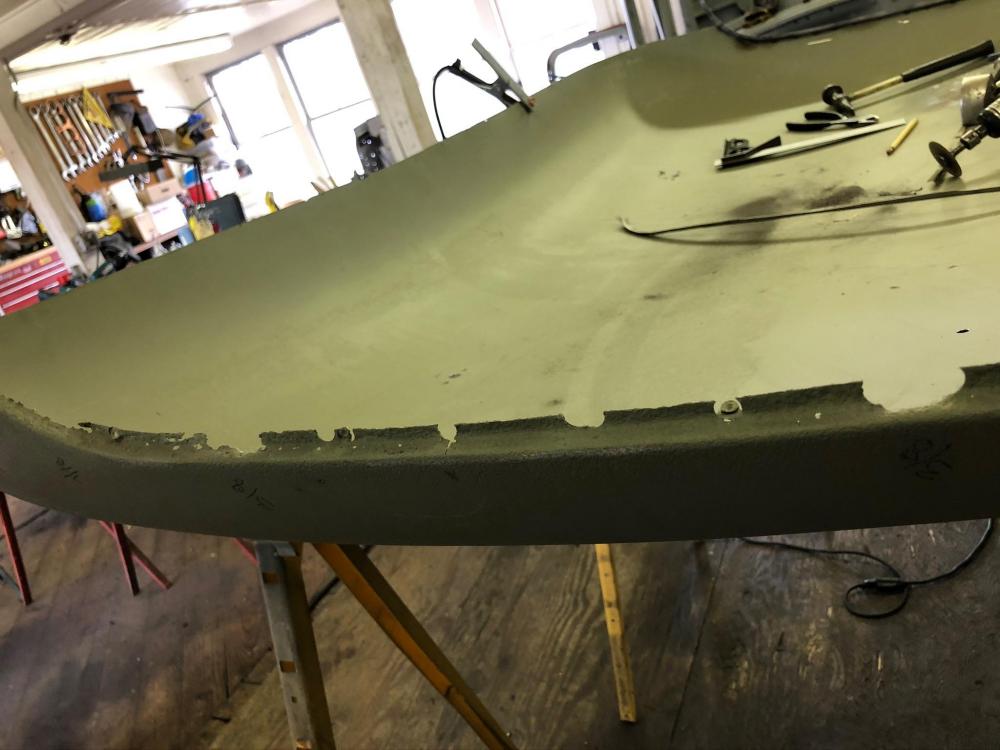
The windshield area was a pain to repair, like the roof edges.
-
B-73 Restoration
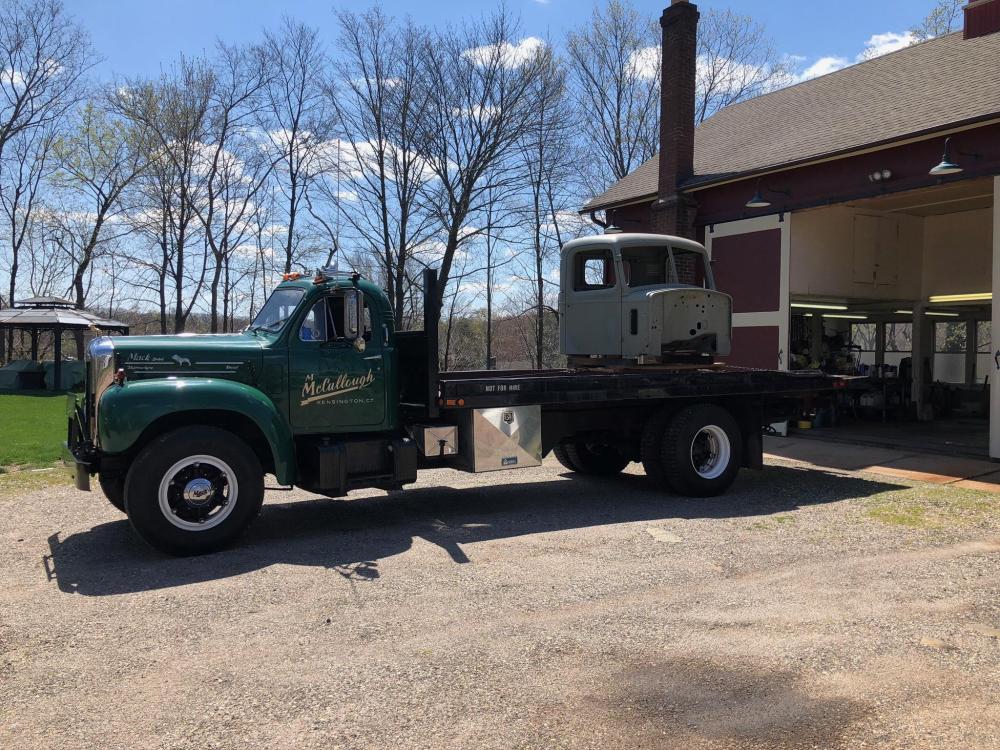
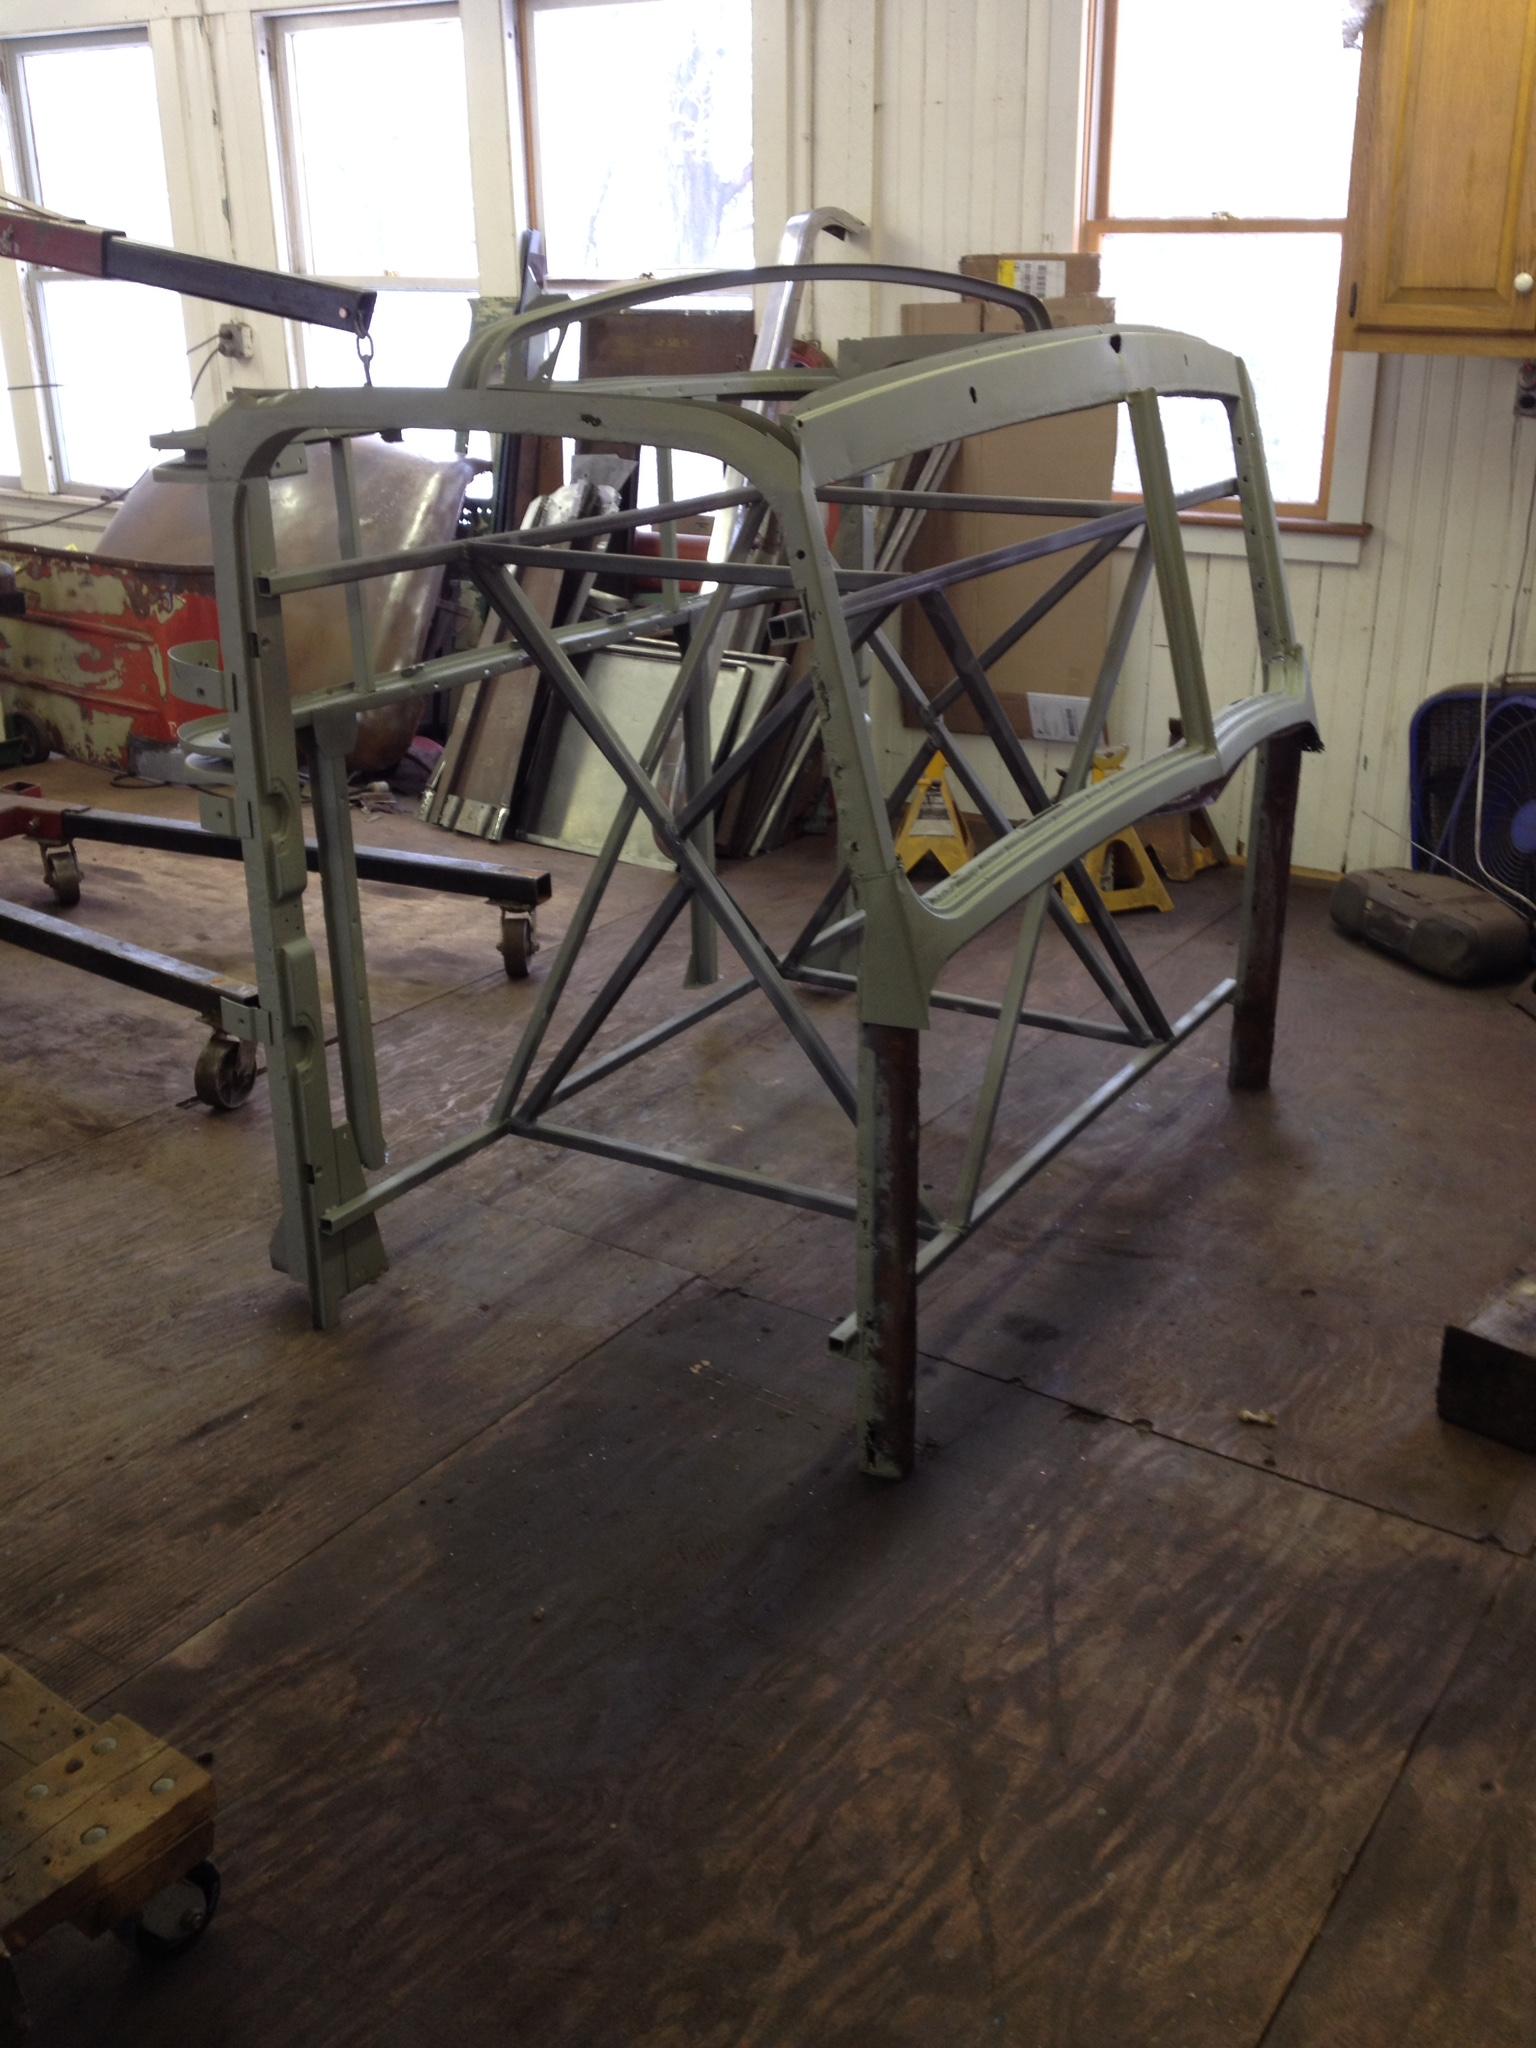
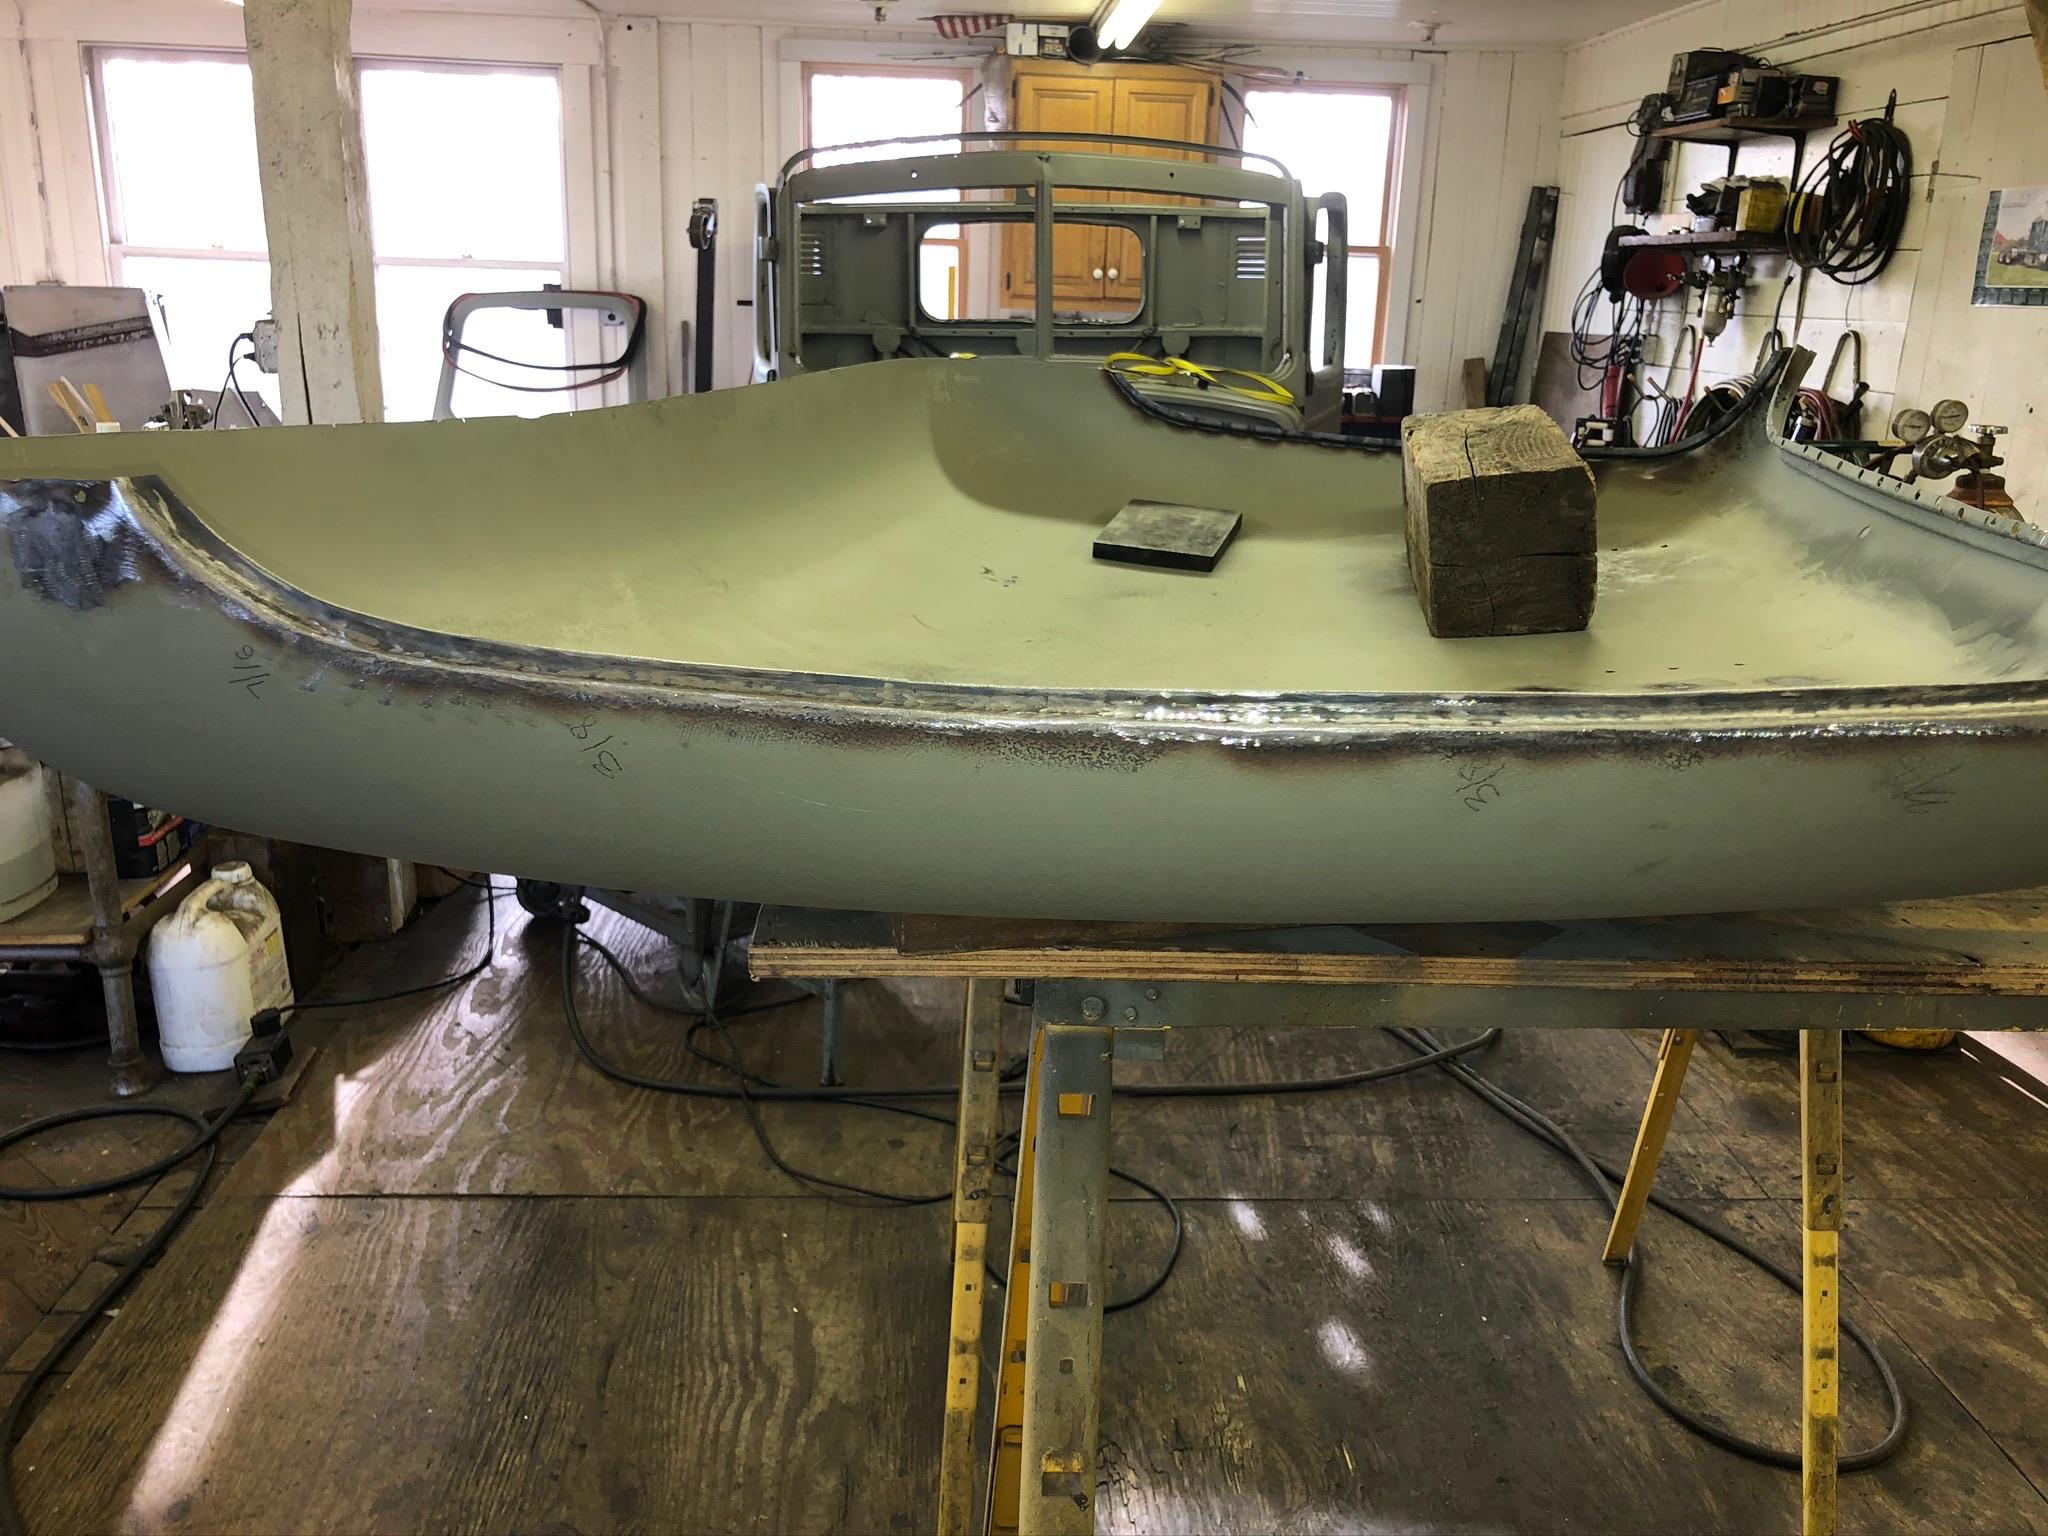
mattb73lt replied to mattb73lt's topic in Antique and Classic Mack Trucks General Discussion
Into the daylight and off to the fabricator to build some gutters for it. Just a few more things to complete then bodywork/paint. Getting close to making some major progress and having this looking like a truck instead of a huge pile of parts spread everywhere.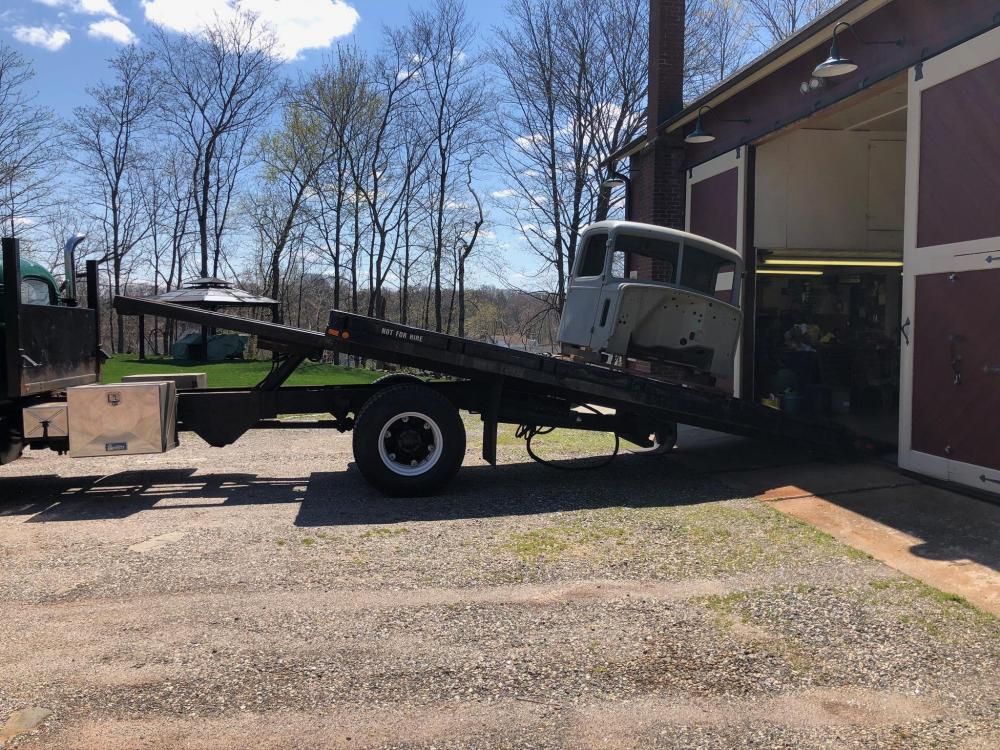
-
Out for a stroll in the RS700L
mattb73lt replied to Lmackattack's topic in Antique and Classic Mack Trucks General Discussion
Nice, I guess I'm not the only one driving around! I burned up a whole tank of gas driving in circles "exercising" my truck as there's nowhere to go, yet.......... -
Gulfway insurance
mattb73lt replied to davehummell's topic in Antique and Classic Mack Trucks General Discussion
Interesting they're with Hagerty, now. I tried to insure with them a couple of years ago with my B model and they refused me on the grounds that the truck had a roll-back body. I contacted Hagerty about it and sent them pictures. After a little back and forth due to what they said was that they usually don't insure those types of vehicles. I stated to both companies that the truck was only for my vehicles and that if they would insure I had five other restored antique vehicles that I wanted to put on the same policy. Gulfway still didn't want my business. Hagerty was more than happy to insure my "collection" and they have my policy now. I'm very happy with Hagerty, their coverage and costs. I did explain to both companies the purpose and usage of the truck to support the cars on club events and tours, as I belong to several and do events over a fairly large region of the Northeast. The reason for that was that I wanted to ensure coverage for what I do and not be left holding the bag if an accident occurred. Hagerty is very friendly to work with and really supports the antique vehicle group. -
I did this a while back with a '63 B-42. I used a B-61SX as a donor truck. The frame on the B-42 was pre-drilled to accept gas or diesel cross members and transmission mounts, so both will bolt right in. I would think that the B-30 frame would be pre-drilled as well, although it is a much lighter truck. The springs may be an issue up front with the added weight of the eng & trans. Having a donor would really help for all the bits and pieces you'll need to hook everything up. I have a 237 in mine now, hooked to a triplex. Started with a END-673. The five speed might take the same mounts, but I'm not sure. The engine will fit and you'll need the bigger B-61 radiator to cool it. It will handle the 237. Somebody, here, may have done this to a B-30 and have more info on the pros and cons of that particular model. It can be done, though.
-
Though not as comfortable to drive. A much better overall truck in many ways. Hence, the very long service life. Several production runs and upgrades over its life. i would say the only thing the M715 has over it are driver comfort, larger cargo bed and capacity. one of my favorite trucks. Purpose built and military through and through.
-
Oh, yeah, and civilian tires. The non-directional military tires look neat, but they can be dangerous in wet conditions and don’t wear well.
-
4 bolt SBC 350, Wagoneer power steering, power brakes, 12 volt electrics, bench seat inside the cab vs the buckets. 4.11 gears vs 5.86 stock. Repositioned rear driveshaft on the transfer case to quiet it at speed. Updated combination lights. Three color woodland camouflage paint in the pattern of the ‘80’s Chevy CUCV. All that made it pretty much a daily driver.
-
Epoxy or regular primer?
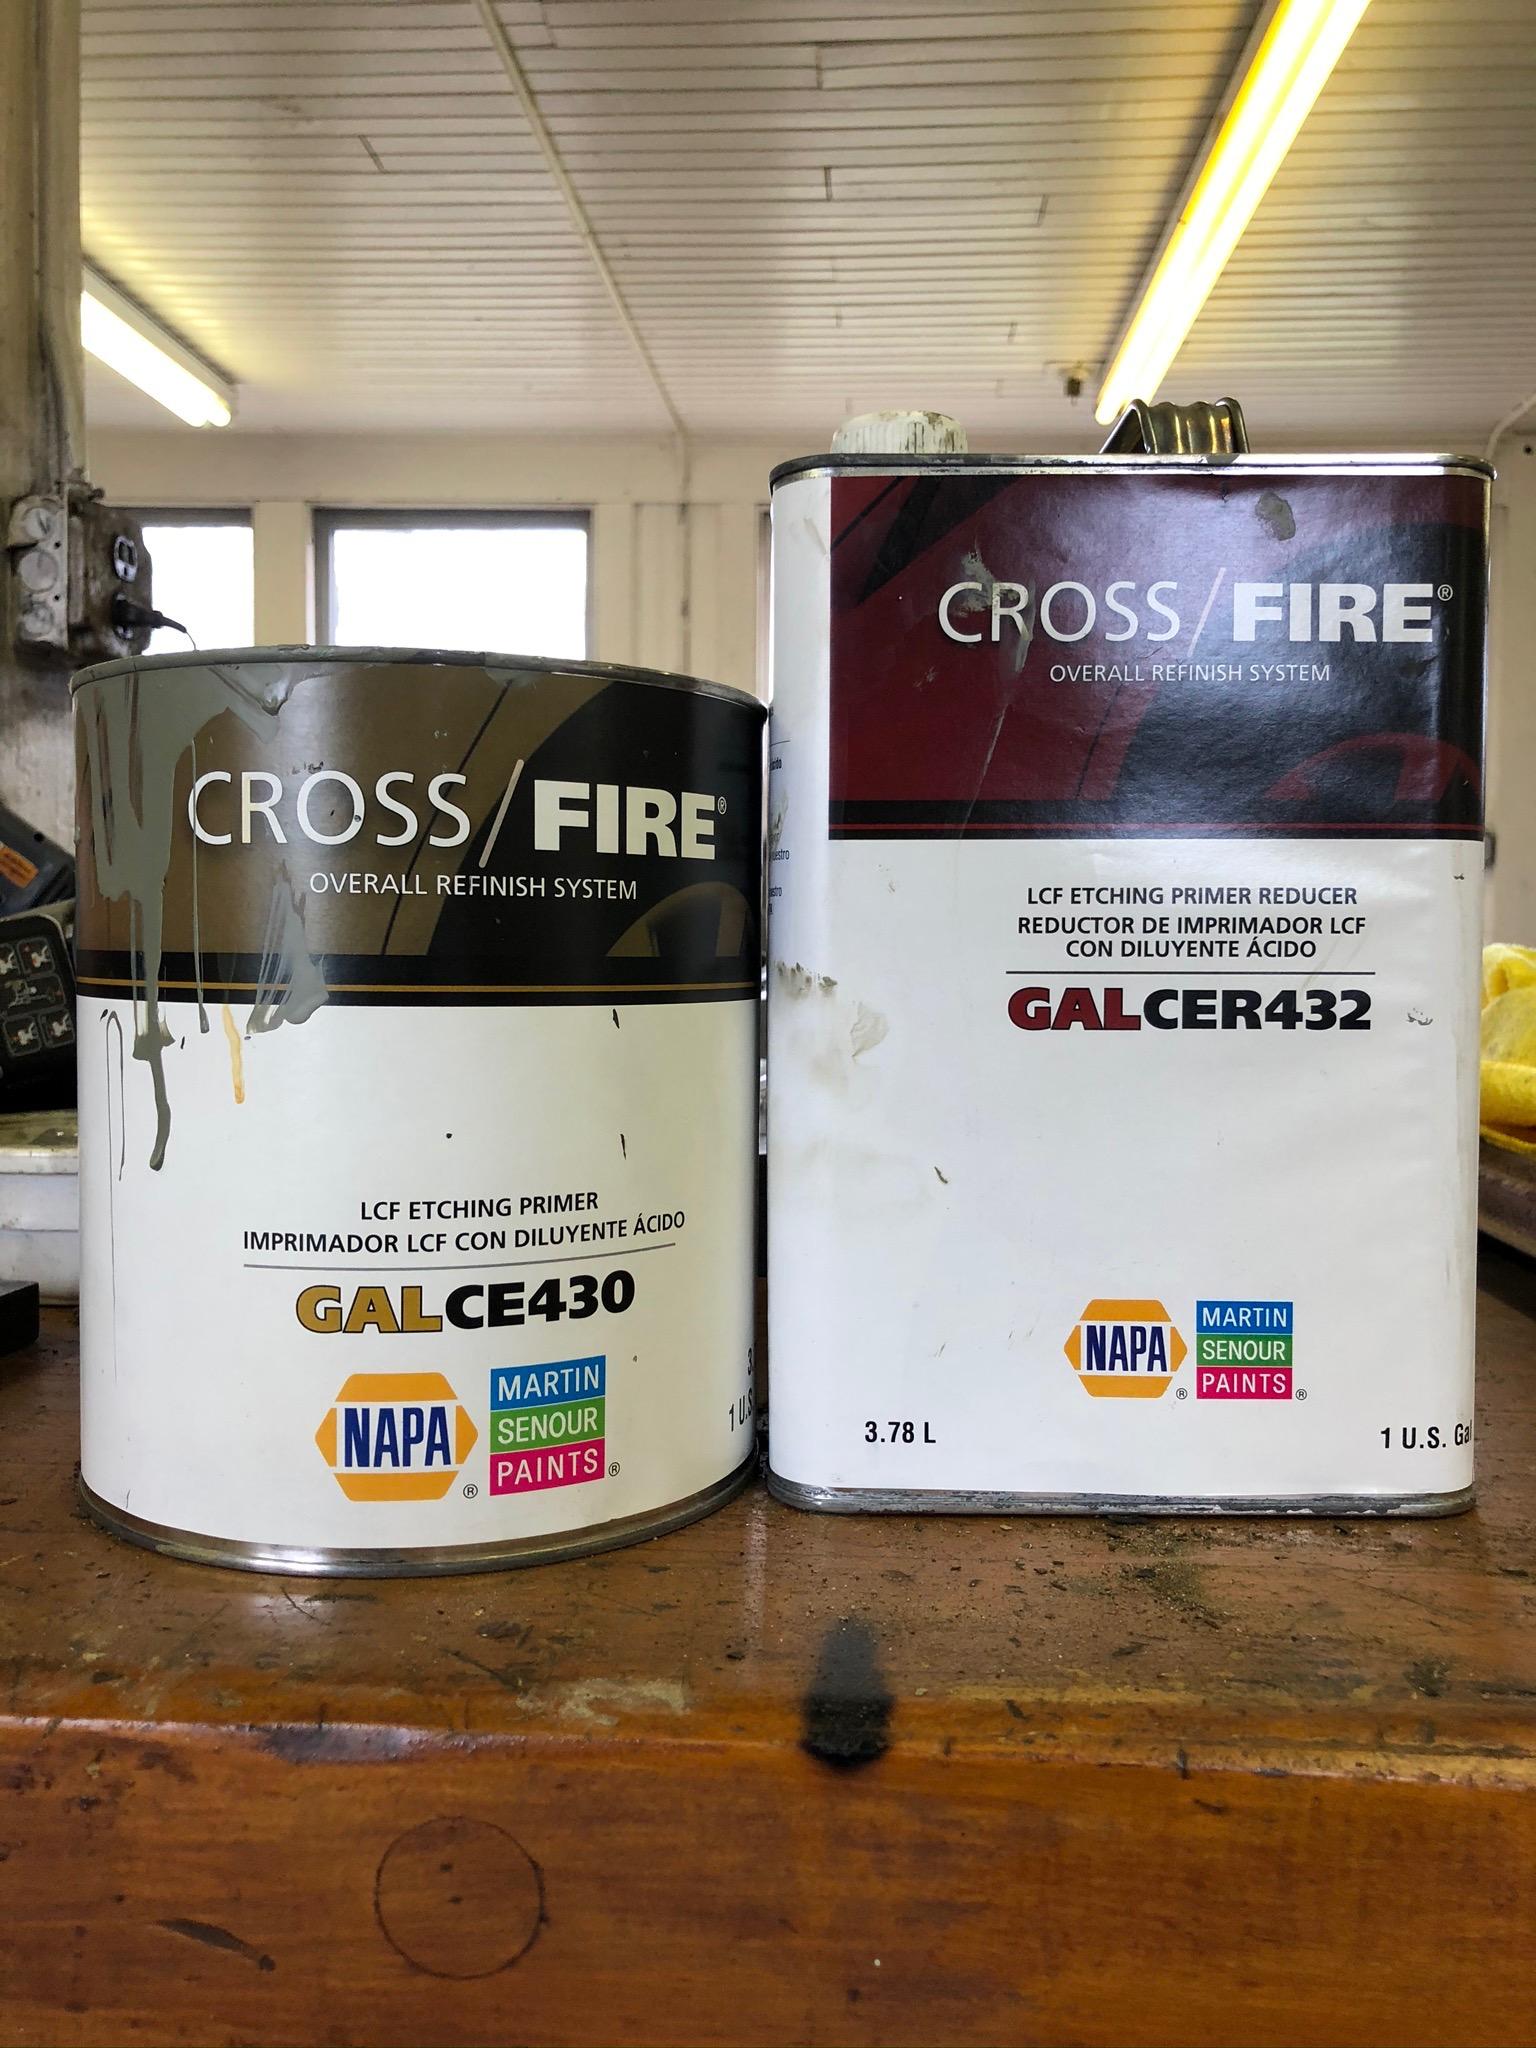
mattb73lt replied to h67st's topic in Exterior, Cab, Accessories and Detailing
I've been using this etching primer from NAPA on everything, including the aluminum parts/castings. I'm going to use PPG Concept in "Fleet Red", paint code 75674, as a top coat. This was based on a talk with Matt Pfahl on what he's been using. My past experience has been mostly with Dupont Centari enamel. I need to ask the PPG vendor about an epoxy/primer/sealer I used on my other B model project, as for compatibility. I had very good luck with my last job, and its lasted over 20 years with a lot of outside exposure. I don't do major projects like this often, so I ask a lot of questions leading up to painting and not wanting to have a very expensive screw up come out of it.
-
B-73 Restoration
mattb73lt replied to mattb73lt's topic in Antique and Classic Mack Trucks General Discussion
Yes, I can. I have all the gears to do so and all the other attachments. It’s old(1920’s?), but fine for my projects.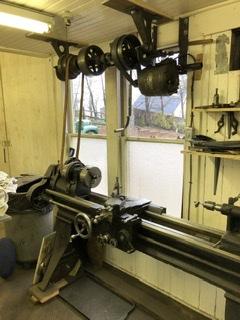
-
B-73 Restoration
mattb73lt replied to mattb73lt's topic in Antique and Classic Mack Trucks General Discussion
One more, overhead, for the heck of it.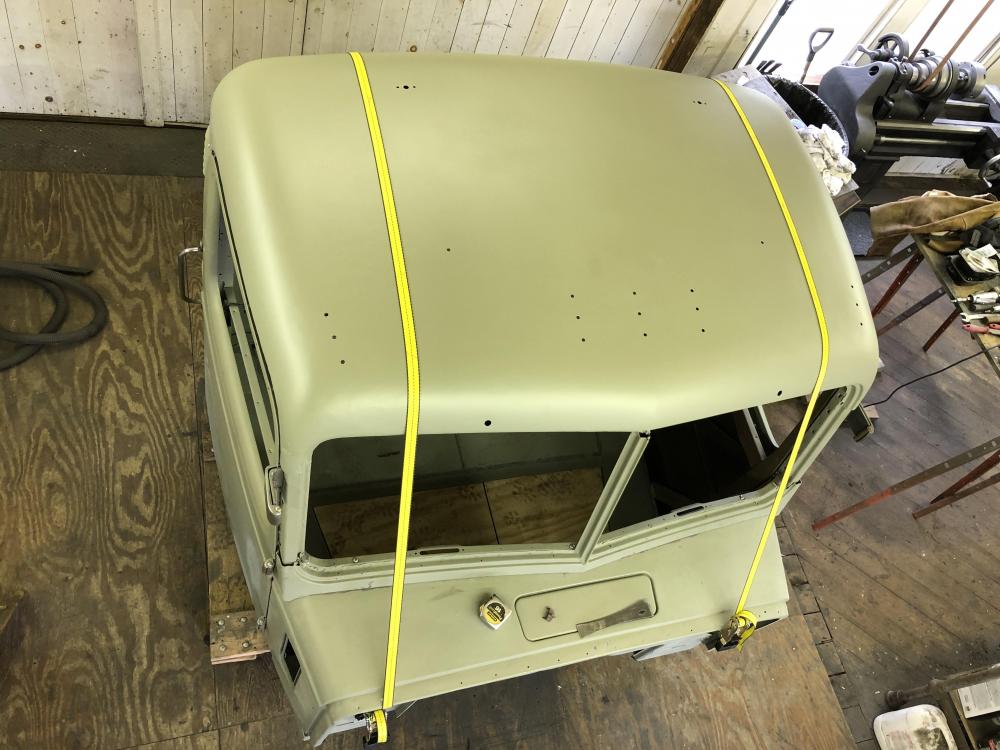
-
B-73 Restoration
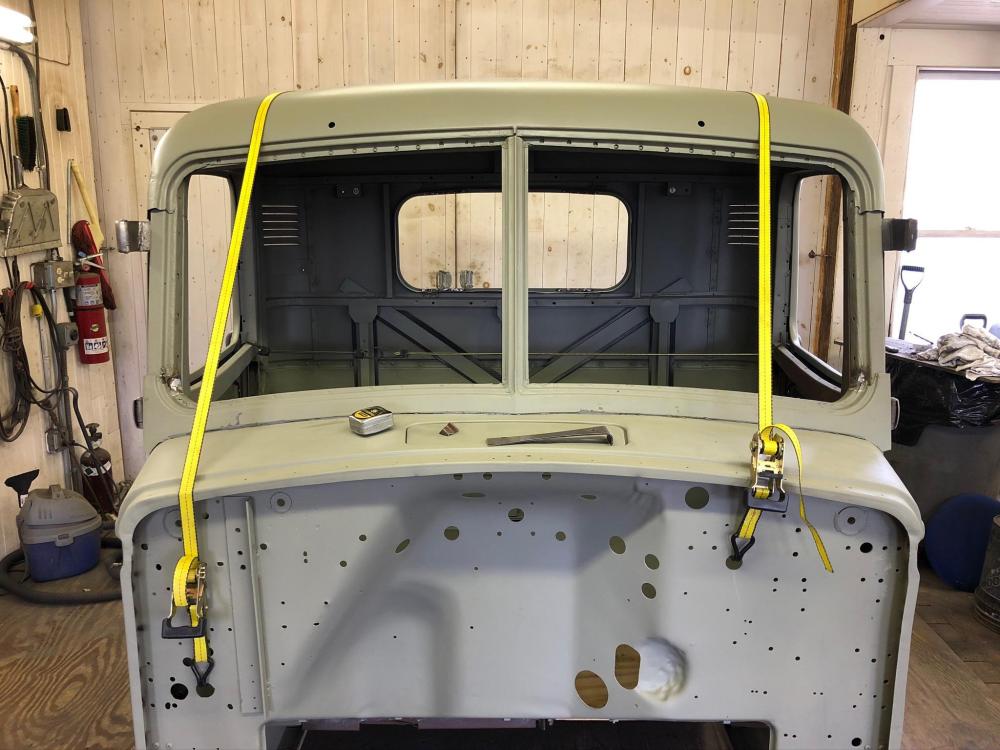
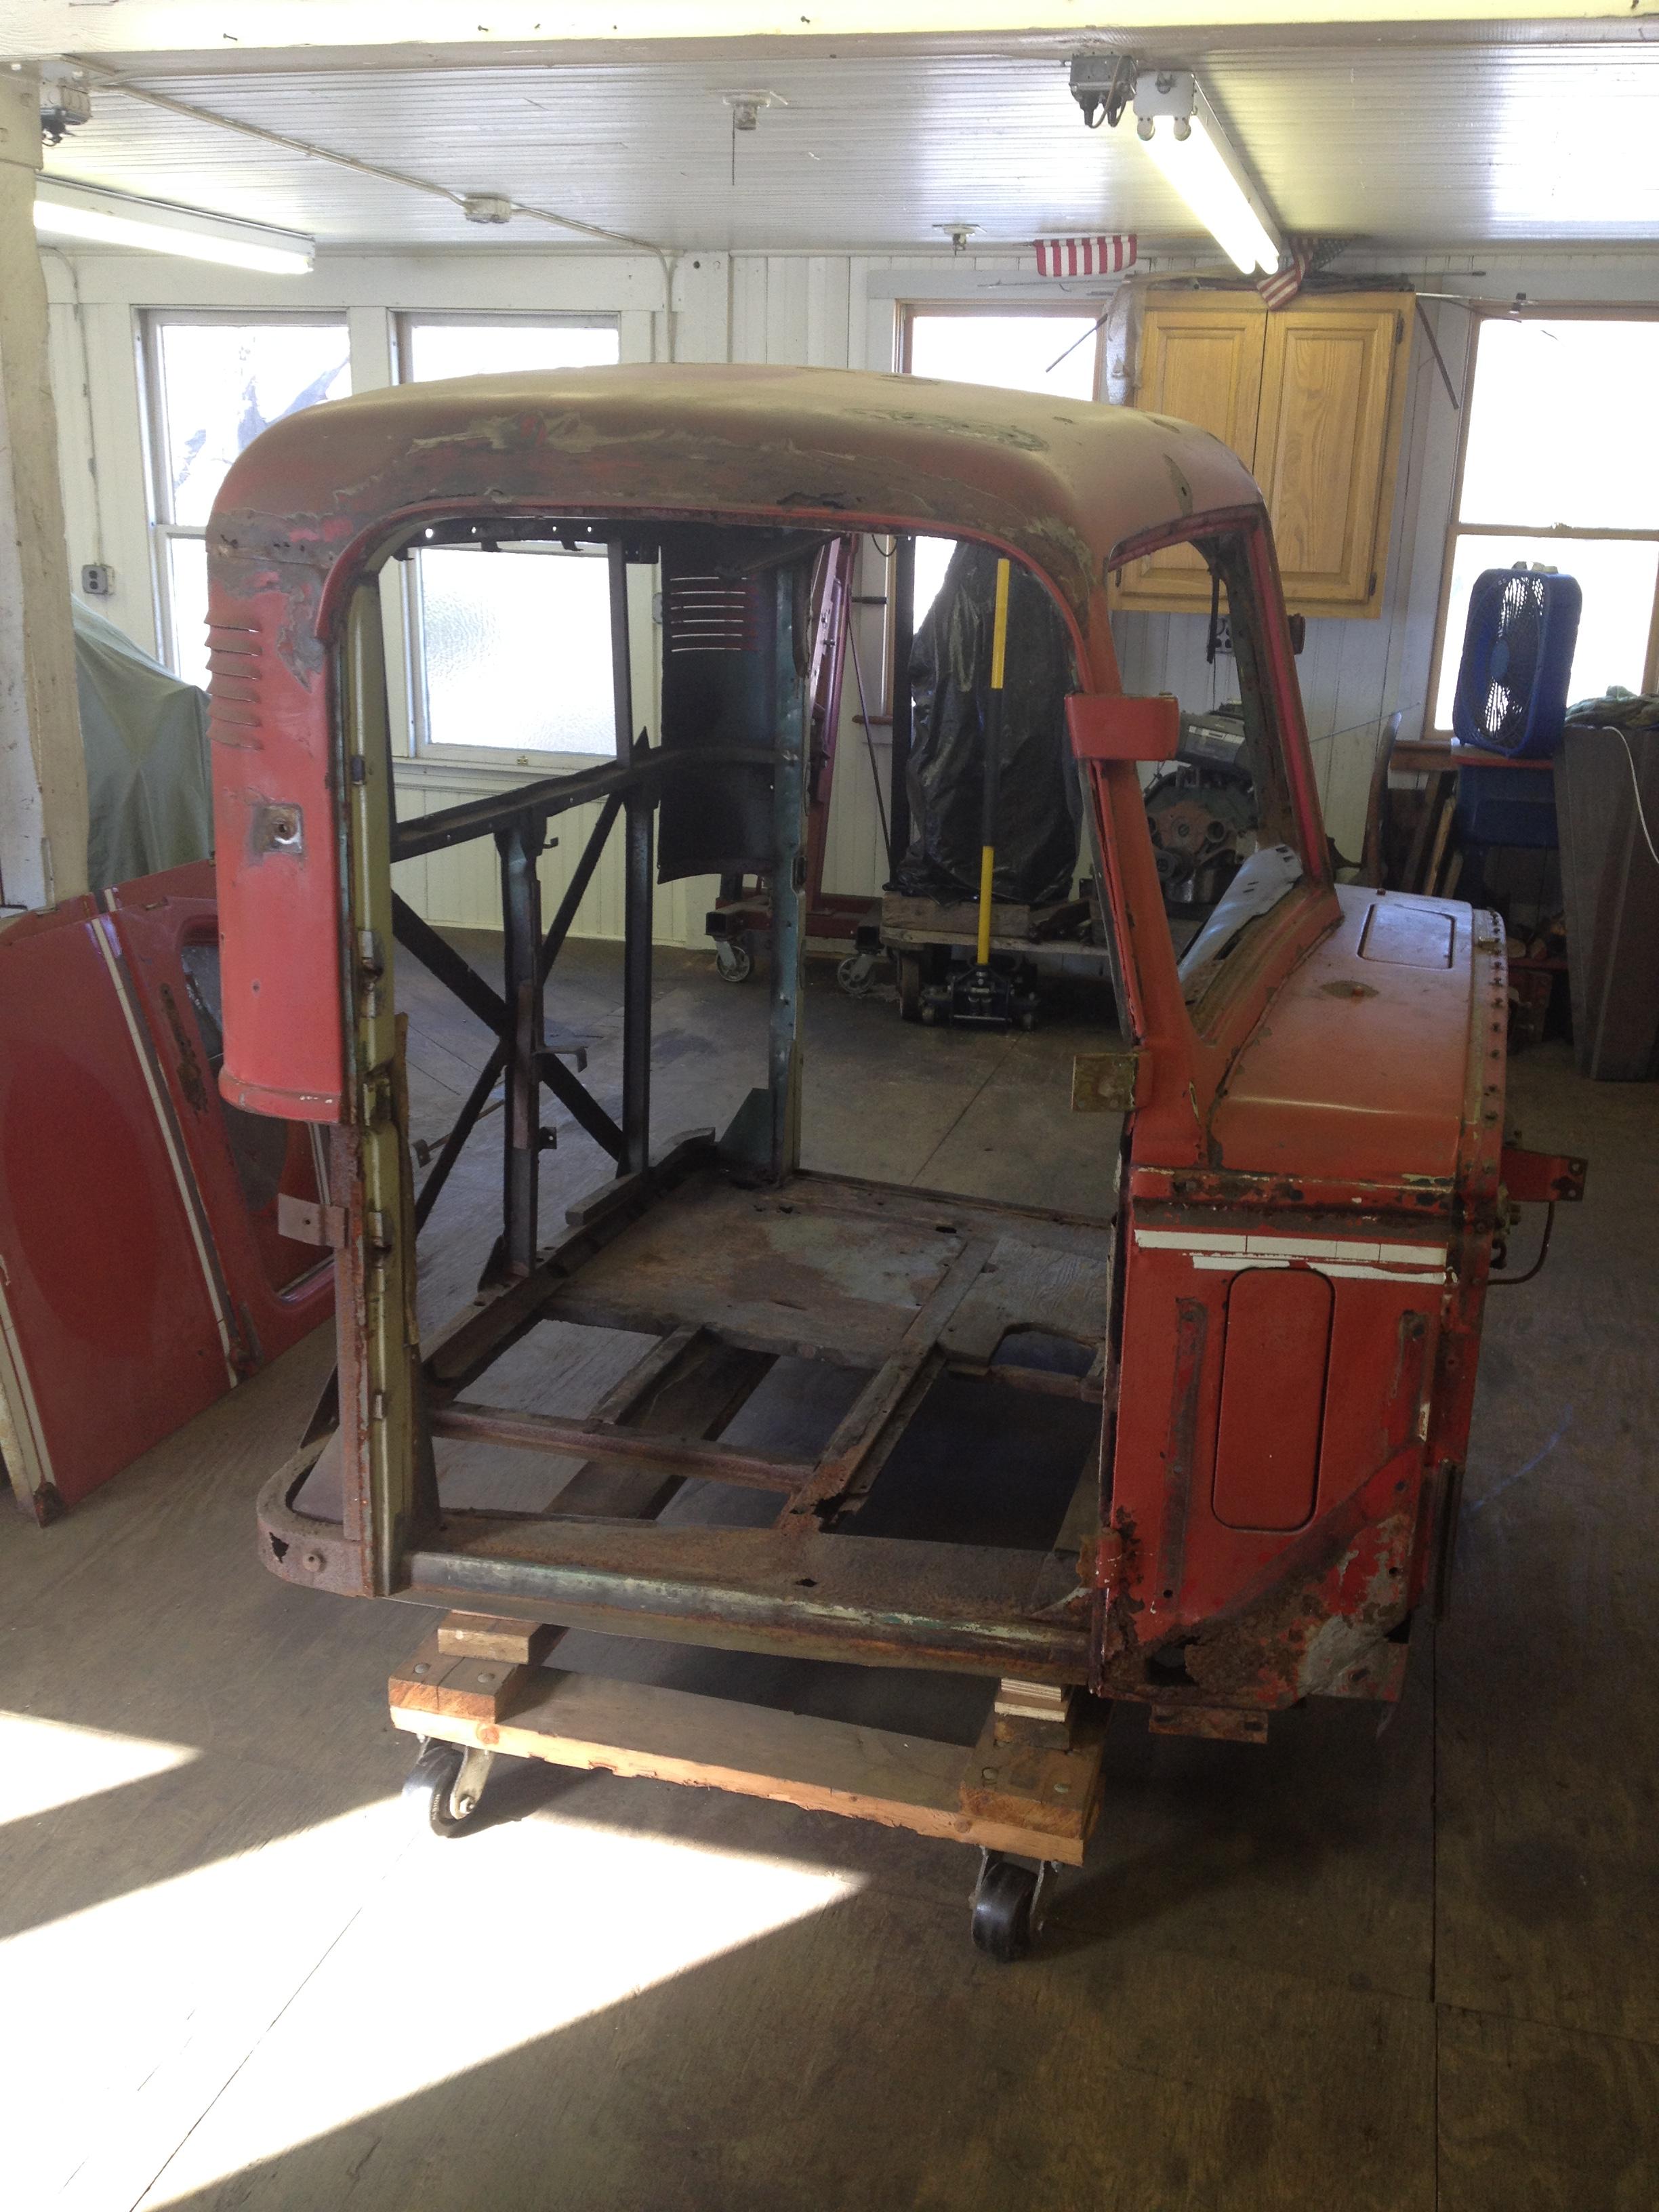
mattb73lt replied to mattb73lt's topic in Antique and Classic Mack Trucks General Discussion
Over the life of this cab model, I don’t think they ever deleted a single hole or attachment. So many unused holes, the old radiator support rod holes are still there for an LJ radiator, plus the bigger ones for the B radiator. A piece of angle iron added, I think that’s to support the big heater on the inside. A lot will get reused, but man there’s a lot. I guess if you bought it for an earlier truck, as a replacement, it would all still fit no matter the year. -
B-73 Restoration
mattb73lt replied to mattb73lt's topic in Antique and Classic Mack Trucks General Discussion
No kidding. You’d think they would’ve deleted them as they weren’t needed. Nope, let’s just drill more!,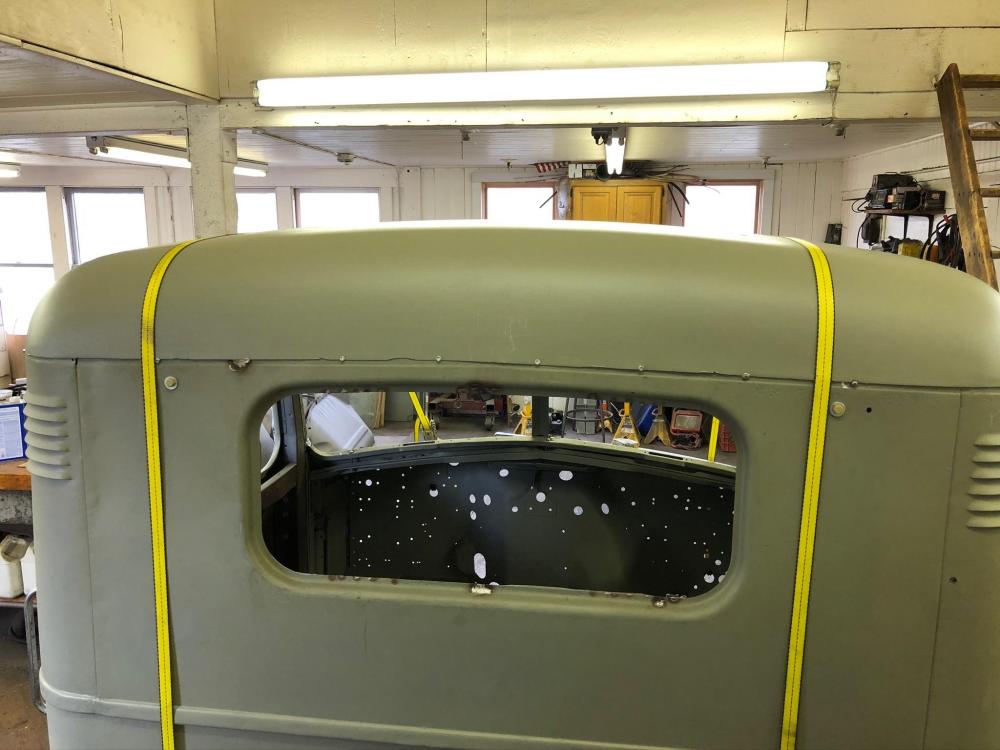
-
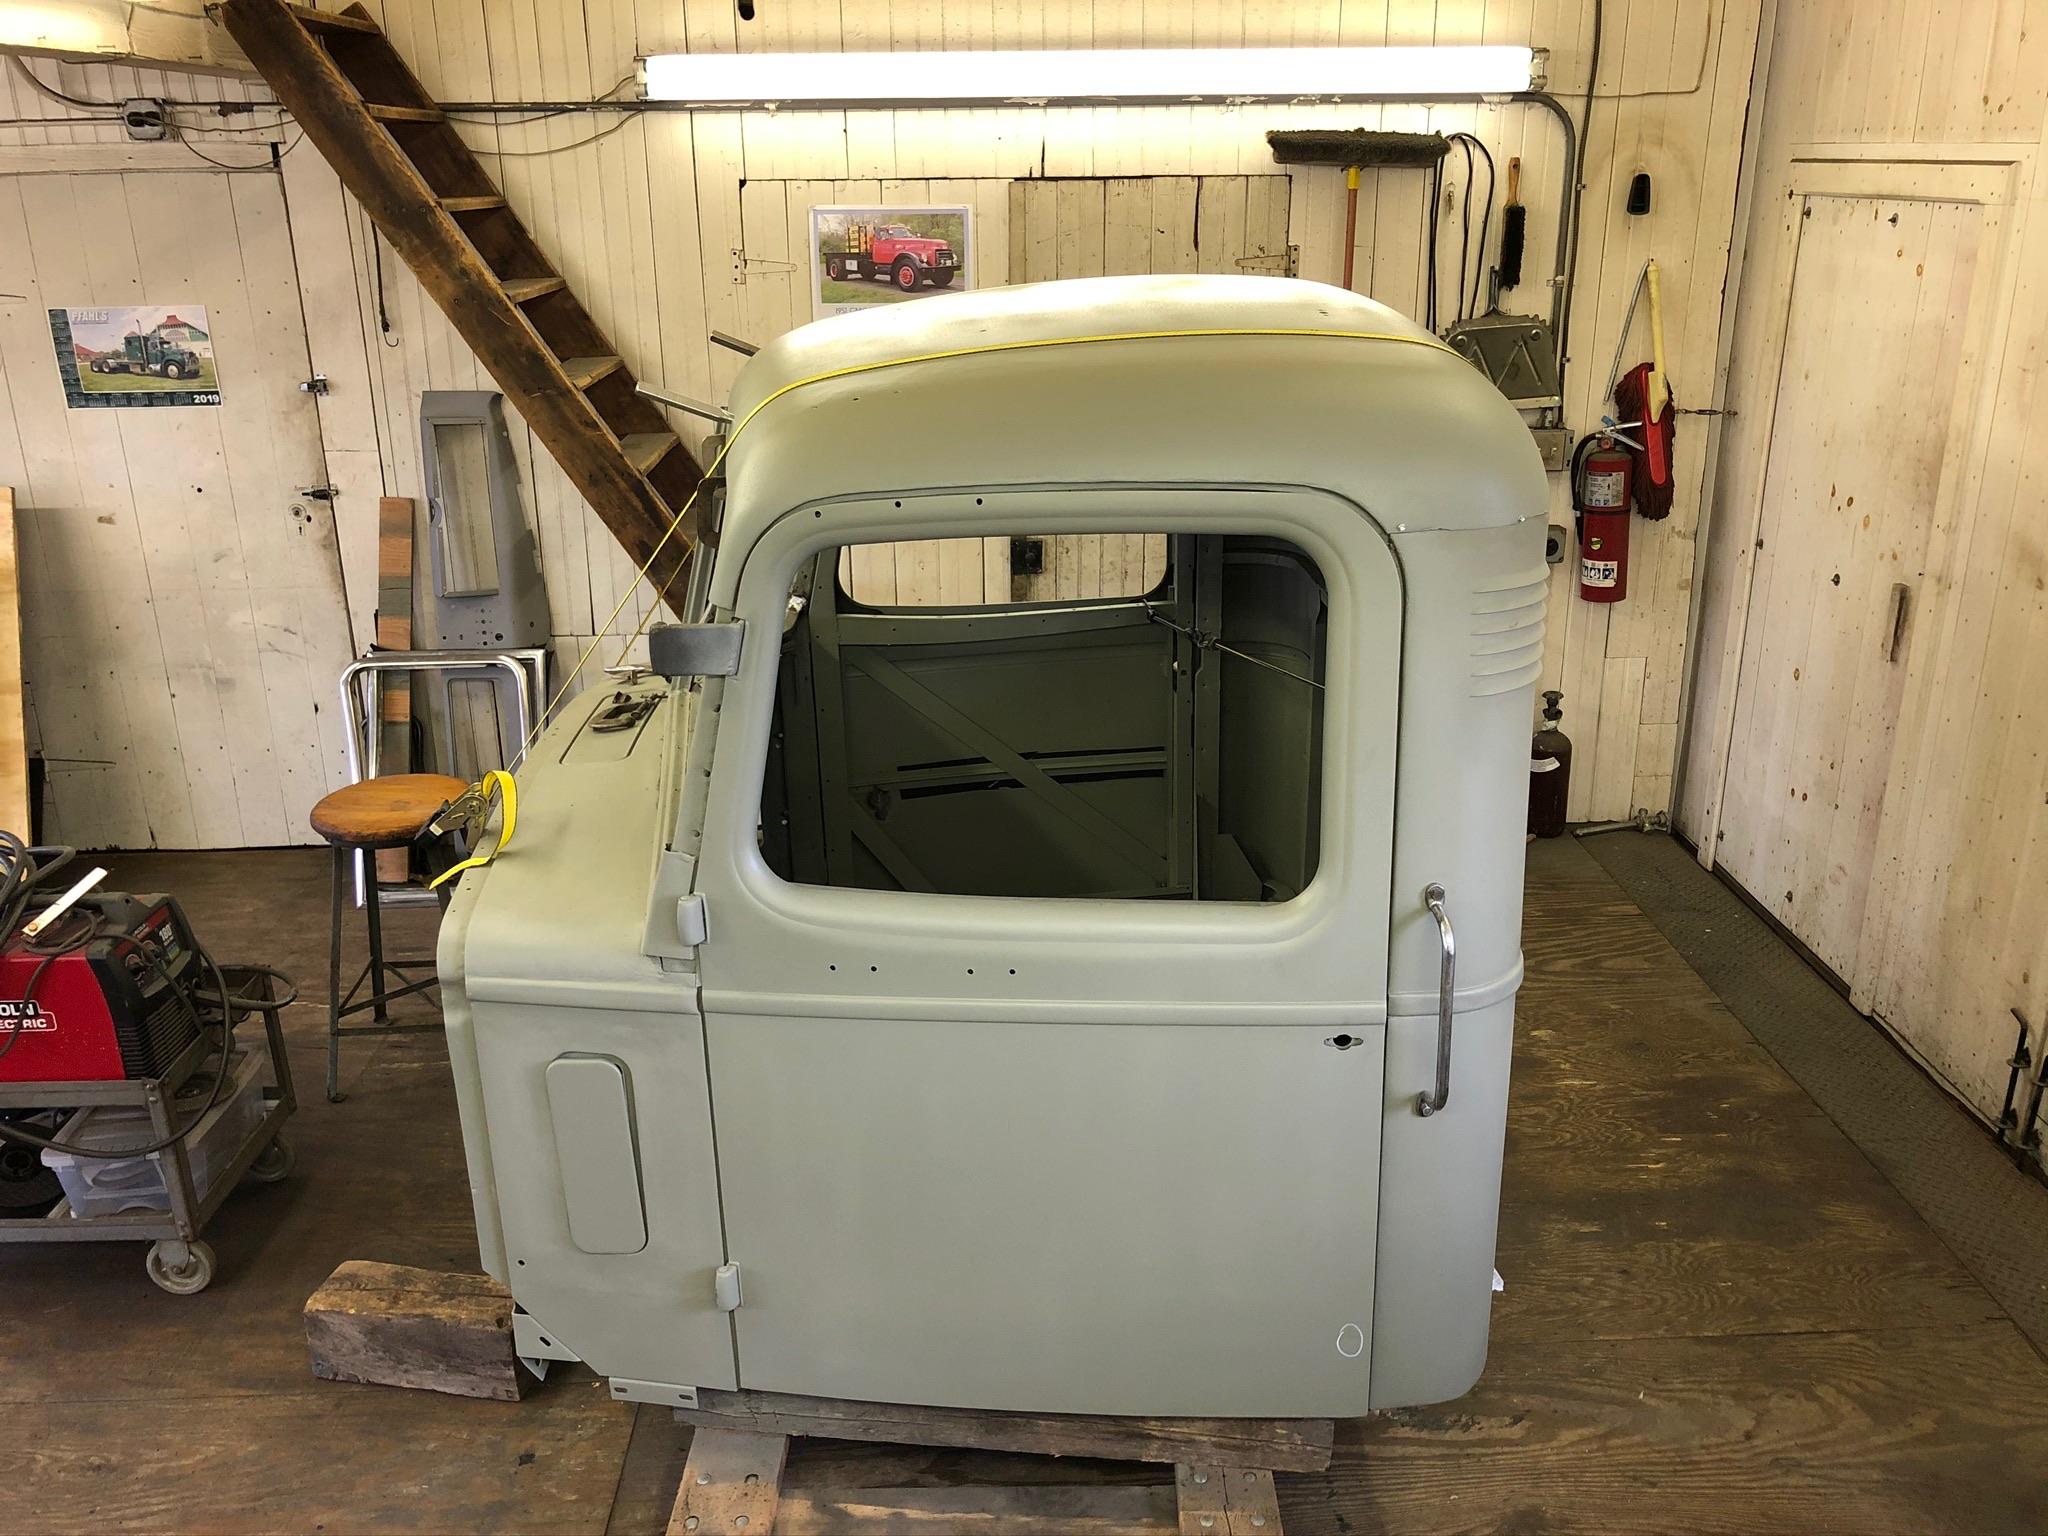
B-73 Restoration
mattb73lt replied to mattb73lt's topic in Antique and Classic Mack Trucks General Discussion
Final time putting the roof on, permanently this time. What a huge, tedious, pain in the ass getting the edges repaired. Took me about two weeks of fiddling and fussing to get it right and leave enough room for the gutters. The results were good, though. Door gaps look good and neither door binds or rubs. Just the front pillars to do and a bunch of small fixes to do and then on to bodywork and paint. I really can’t believe I brought this rusty, banged up cab back.

-
If he displayed the same attitude, no wonder he got popped. If you're driving a rolling cobbed up POS that wouldn't pass a dumpster, you're just asking to get stopped, ticketed and towed.


BMT Forum Logo
