


mattb73lt
-
Posts
1,421 -
Joined
-
Last visited
-
Days Won
146
Content Type
Profiles
Forums
Gallery
Events
Blogs
BMT Wiki
Collections
Store
Everything posted by mattb73lt
-
 Never had any issues hauling anything anywhere with classic plates for 20+ years. In and out of state all the way to Colorado and Virginia.
 -
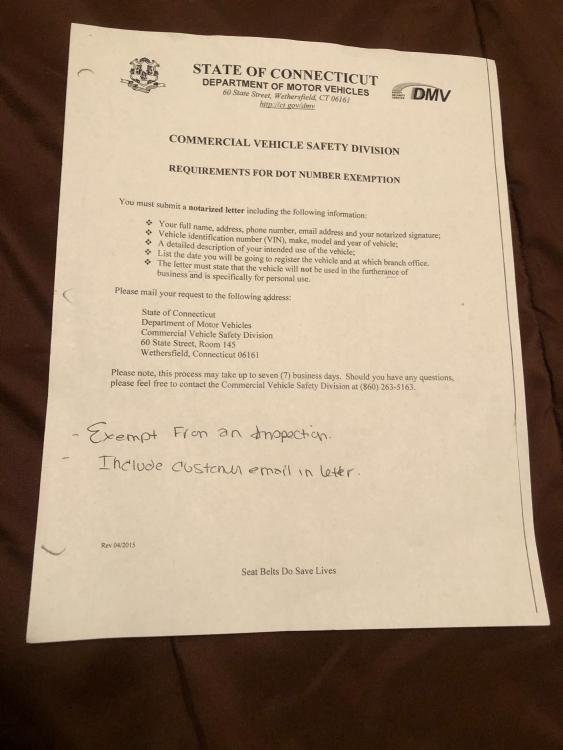
The one change in CT I need to add to the above info I stated is that you need a DOT # exemption letter filled out for the application. Attached is a letter directly from CT DMV with the requirements of the letter that must be Notarized. Other than that, all remains the same as it has been for the last several years. I am amazed at the lack of knowledge that exists behind the counter at DMV offices and the variety of answers you can get from branch to branch. You can search through Title 14 of the Connecticut General Statutes to arm yourself in preparation to going there. VALS327, I would agree with you on that and the vehicle, mechanically, should be able to pass that. But, it is an added expense for most people at the hobby level to get one done. Hopefully, this will help those of us who live and register in Connecticut.
-
You shouldn't need the inspection. Just a vin verification. Have all your paperwork squared away and proof of ownership/insurance and registration application. I just coached someone having issues at the Danbury branch basically saying the same thing. I had them go to the Norwalk branch and they walked out with classic plates without issue. There's lots of misinformation out there within DMV. The vehicle will be used for personal non-commercial purposes, classic plates are appropriate.
-
1962 Mack B-77 Tractor
mattb73lt replied to j hancock's topic in Antique and Classic Mack Trucks General Discussion
One of my favorites. Saw it a few times at shows. I use it as my inspiration on how I want mine to look, but with red fenders. -
B-73 Restoration
mattb73lt replied to mattb73lt's topic in Antique and Classic Mack Trucks General Discussion
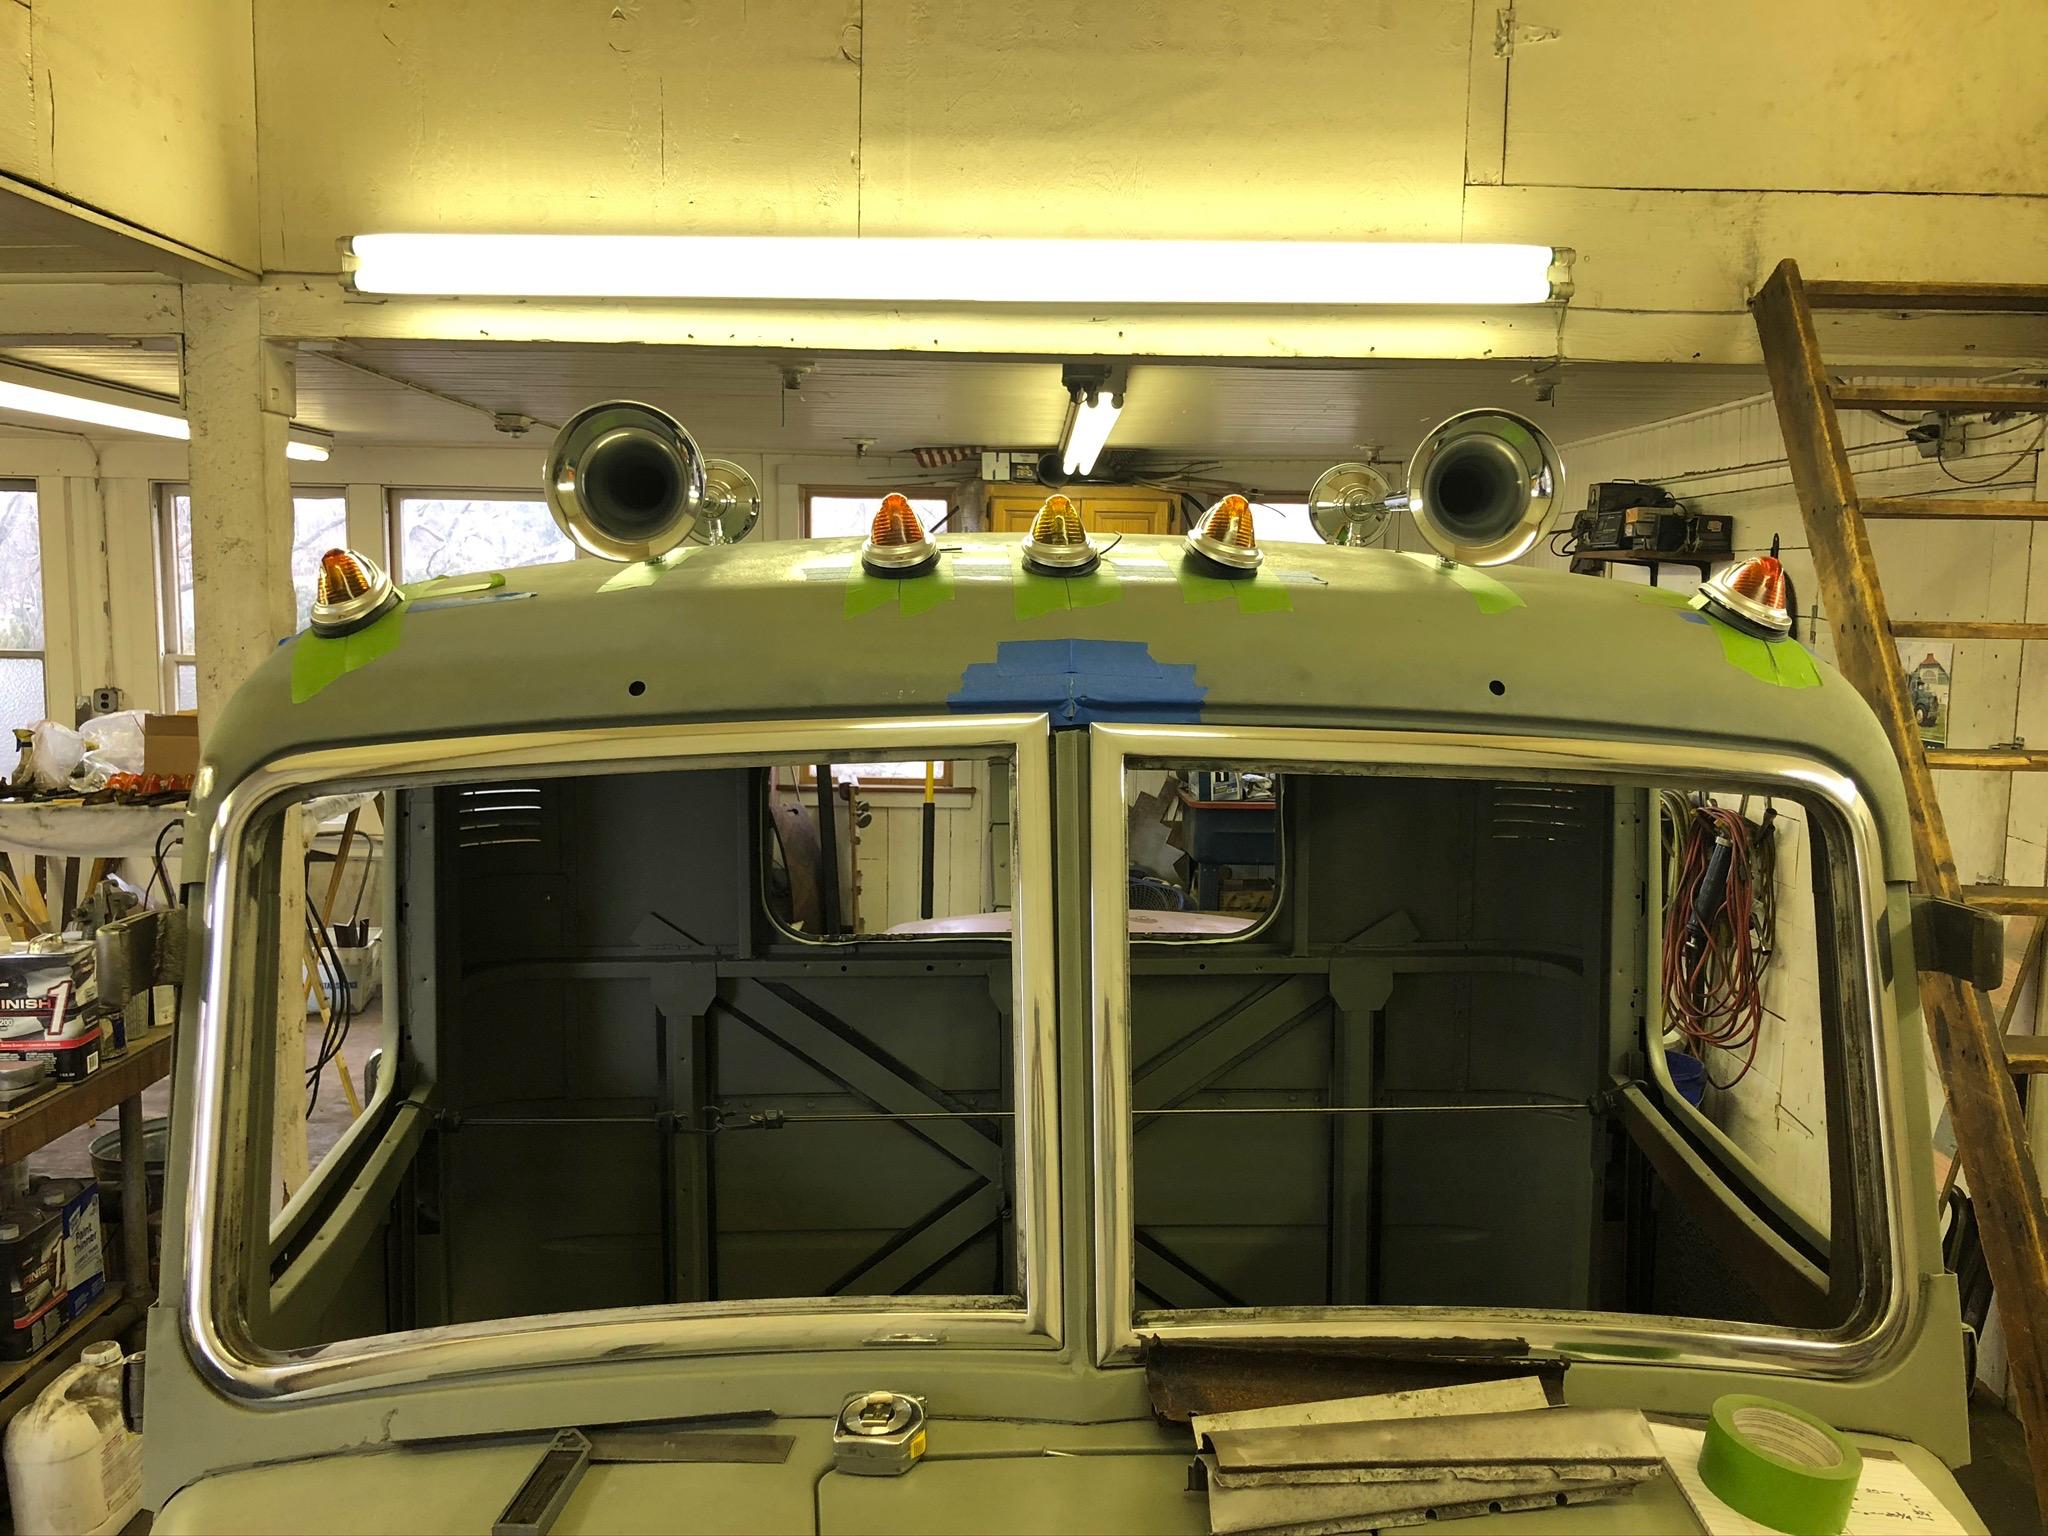
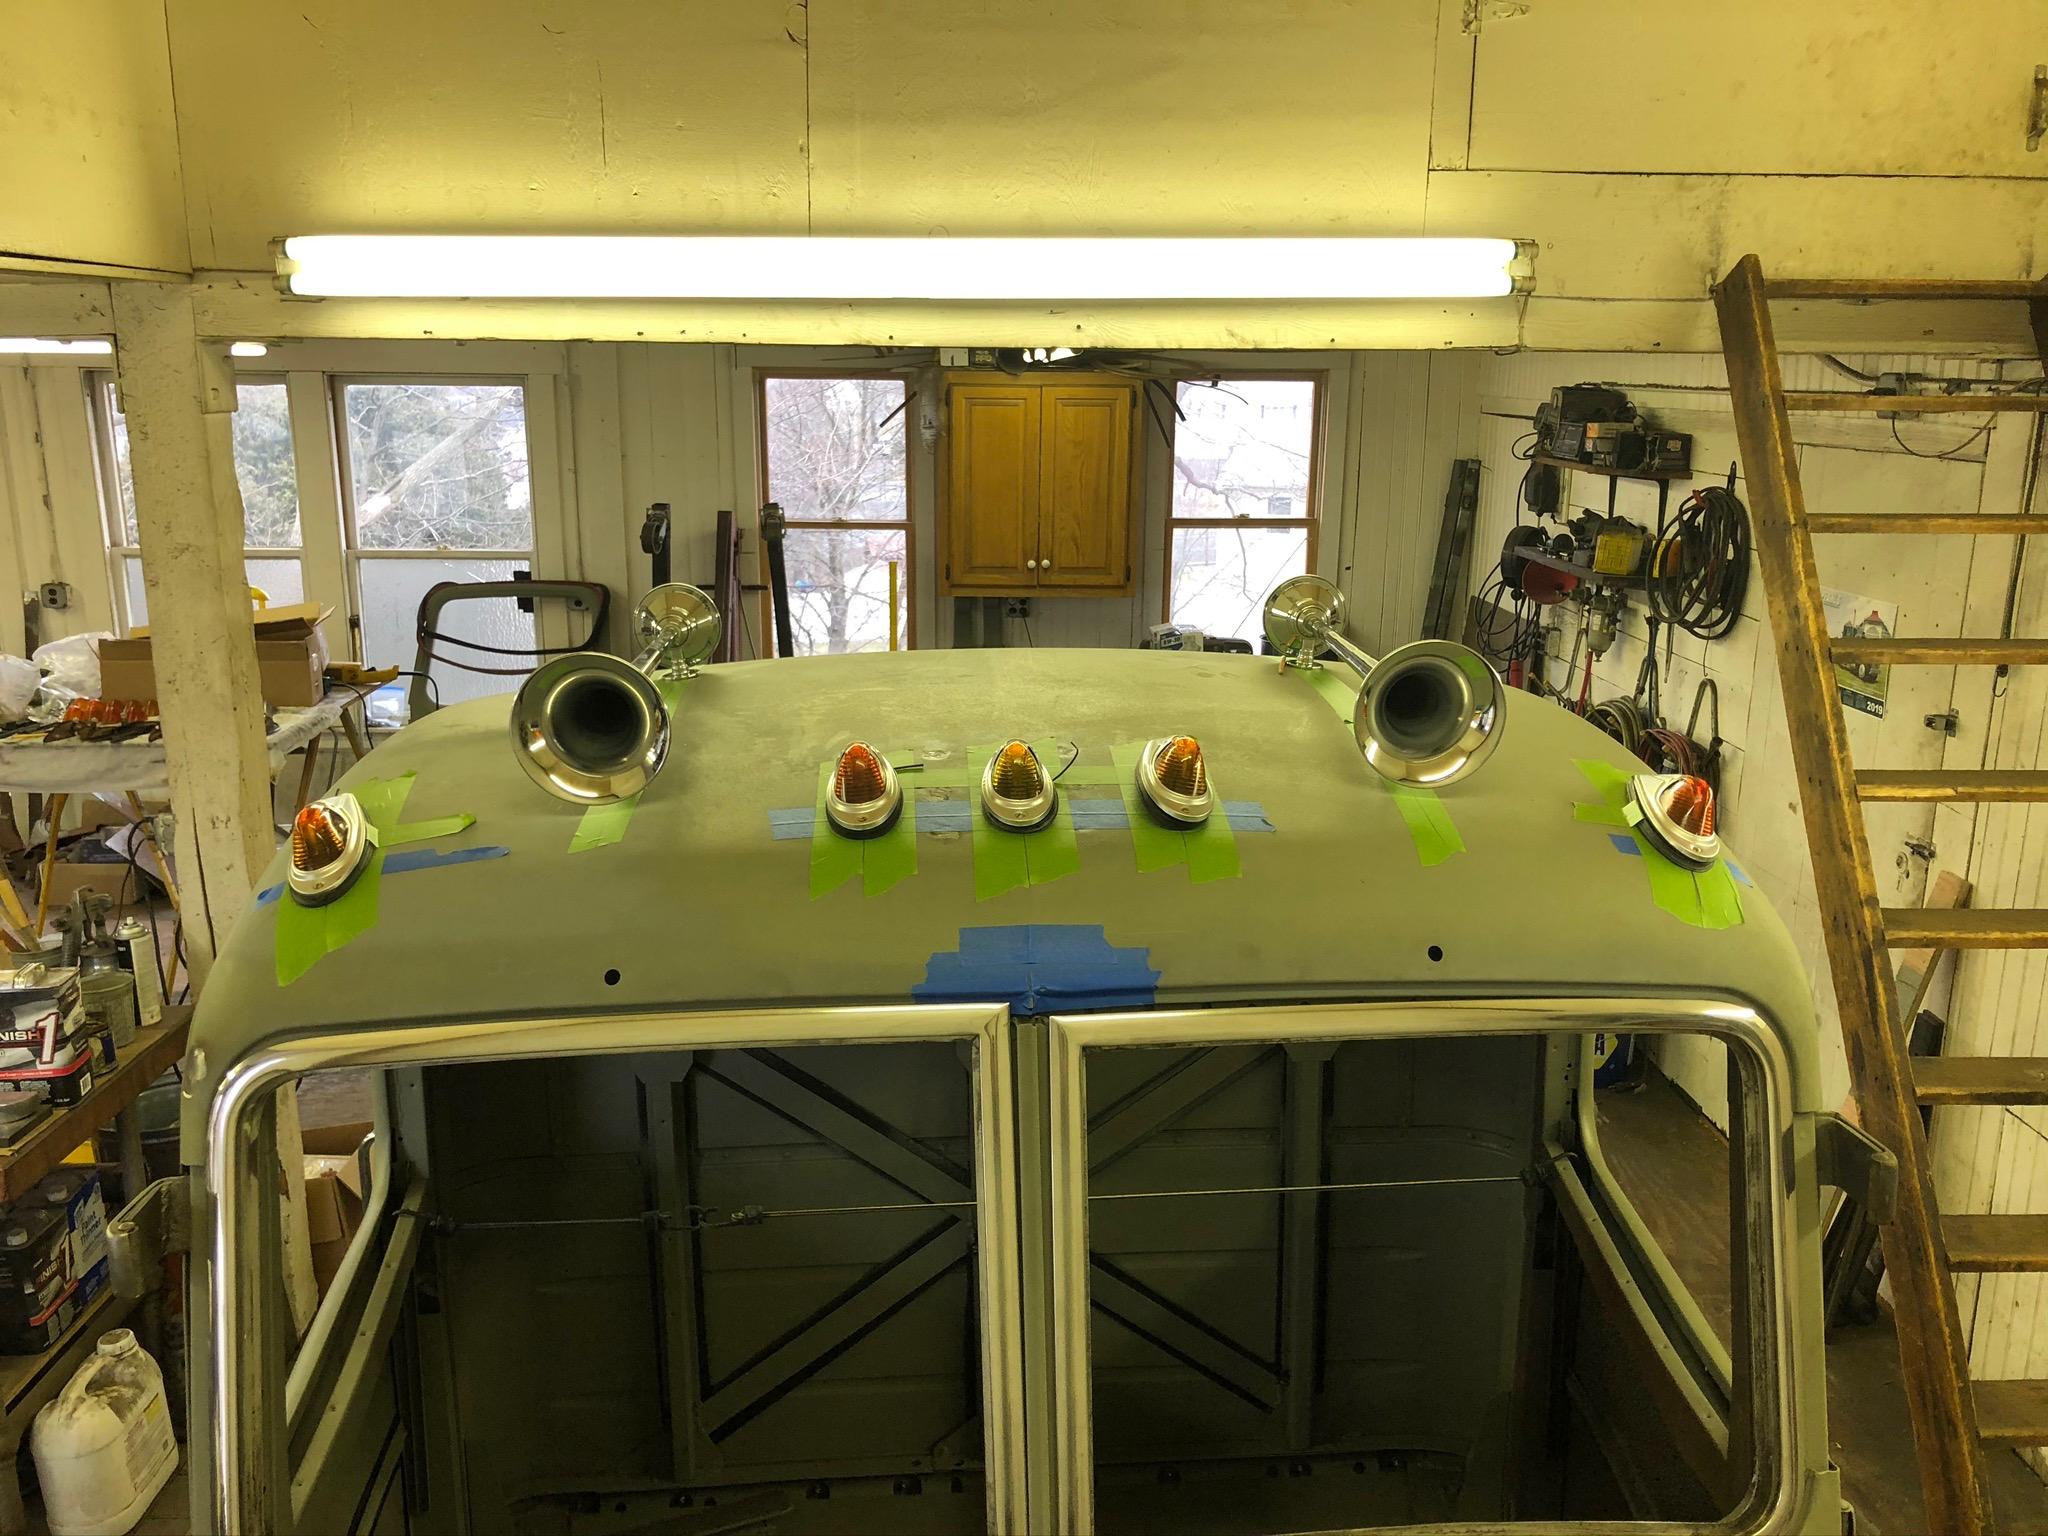
These are the “Emergency”version for fire trucks. They should be loud!. -
B-73 Restoration
mattb73lt replied to mattb73lt's topic in Antique and Classic Mack Trucks General Discussion
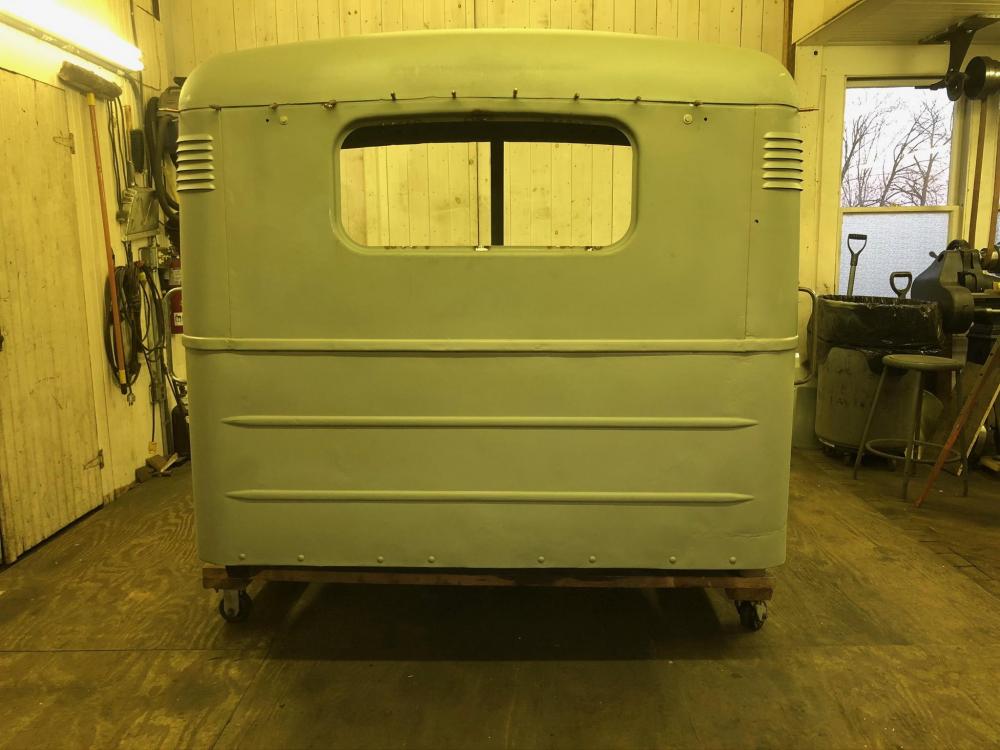
Laid out the new roof and drilled 23 holes to mount the clearance lights and dual horns. The roof was off a fire truck and had no clearance lights, just evidence of two different rotating beacons. Every now and then there's a little light that this is going to get done.

-
L Fire Engine Restoration
mattb73lt replied to CaptainCrutch's topic in Antique and Classic Mack Trucks General Discussion
Nice to see this back together and running!! -
BM restoration
mattb73lt replied to mackdaddy's topic in Antique and Classic Mack Trucks General Discussion
That's really sharp!! -
B-73 Restoration
mattb73lt replied to mattb73lt's topic in Antique and Classic Mack Trucks General Discussion
Big improvements from last year on 2/18/19 to now!

-
B-73 Restoration
mattb73lt replied to mattb73lt's topic in Antique and Classic Mack Trucks General Discussion
I have my days like that, too. But, I keep moving on. Went out to clean up today and still ended up fixing things. There are times I go out and think what should I work on? There's hardly anything I don't pick up that doesn't need some sort of repair. So I cut it, weld it, machine it, prime it and put it on the done shelf for installation. Even if it's something small, it get's done. I have several shelves in the hayloft of completed parts waiting for assembly, once I get this cab painted. That'll be a huge corner to turn and then, to me, this project will get fun. I can't wait for that time. -
B-73 Restoration
mattb73lt replied to mattb73lt's topic in Antique and Classic Mack Trucks General Discussion
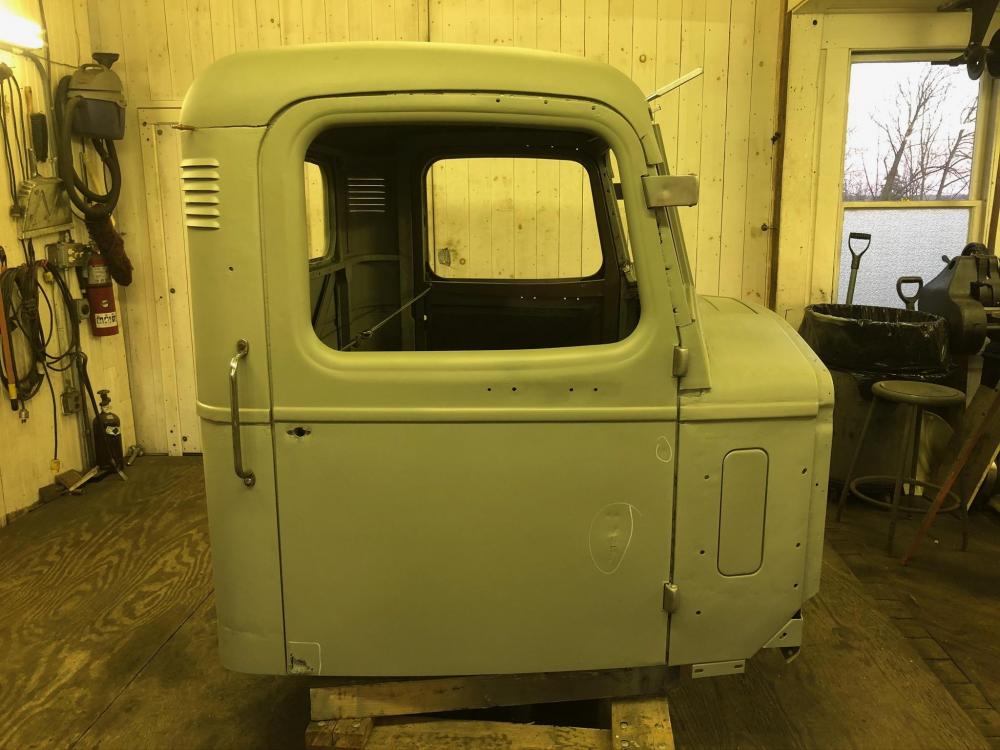
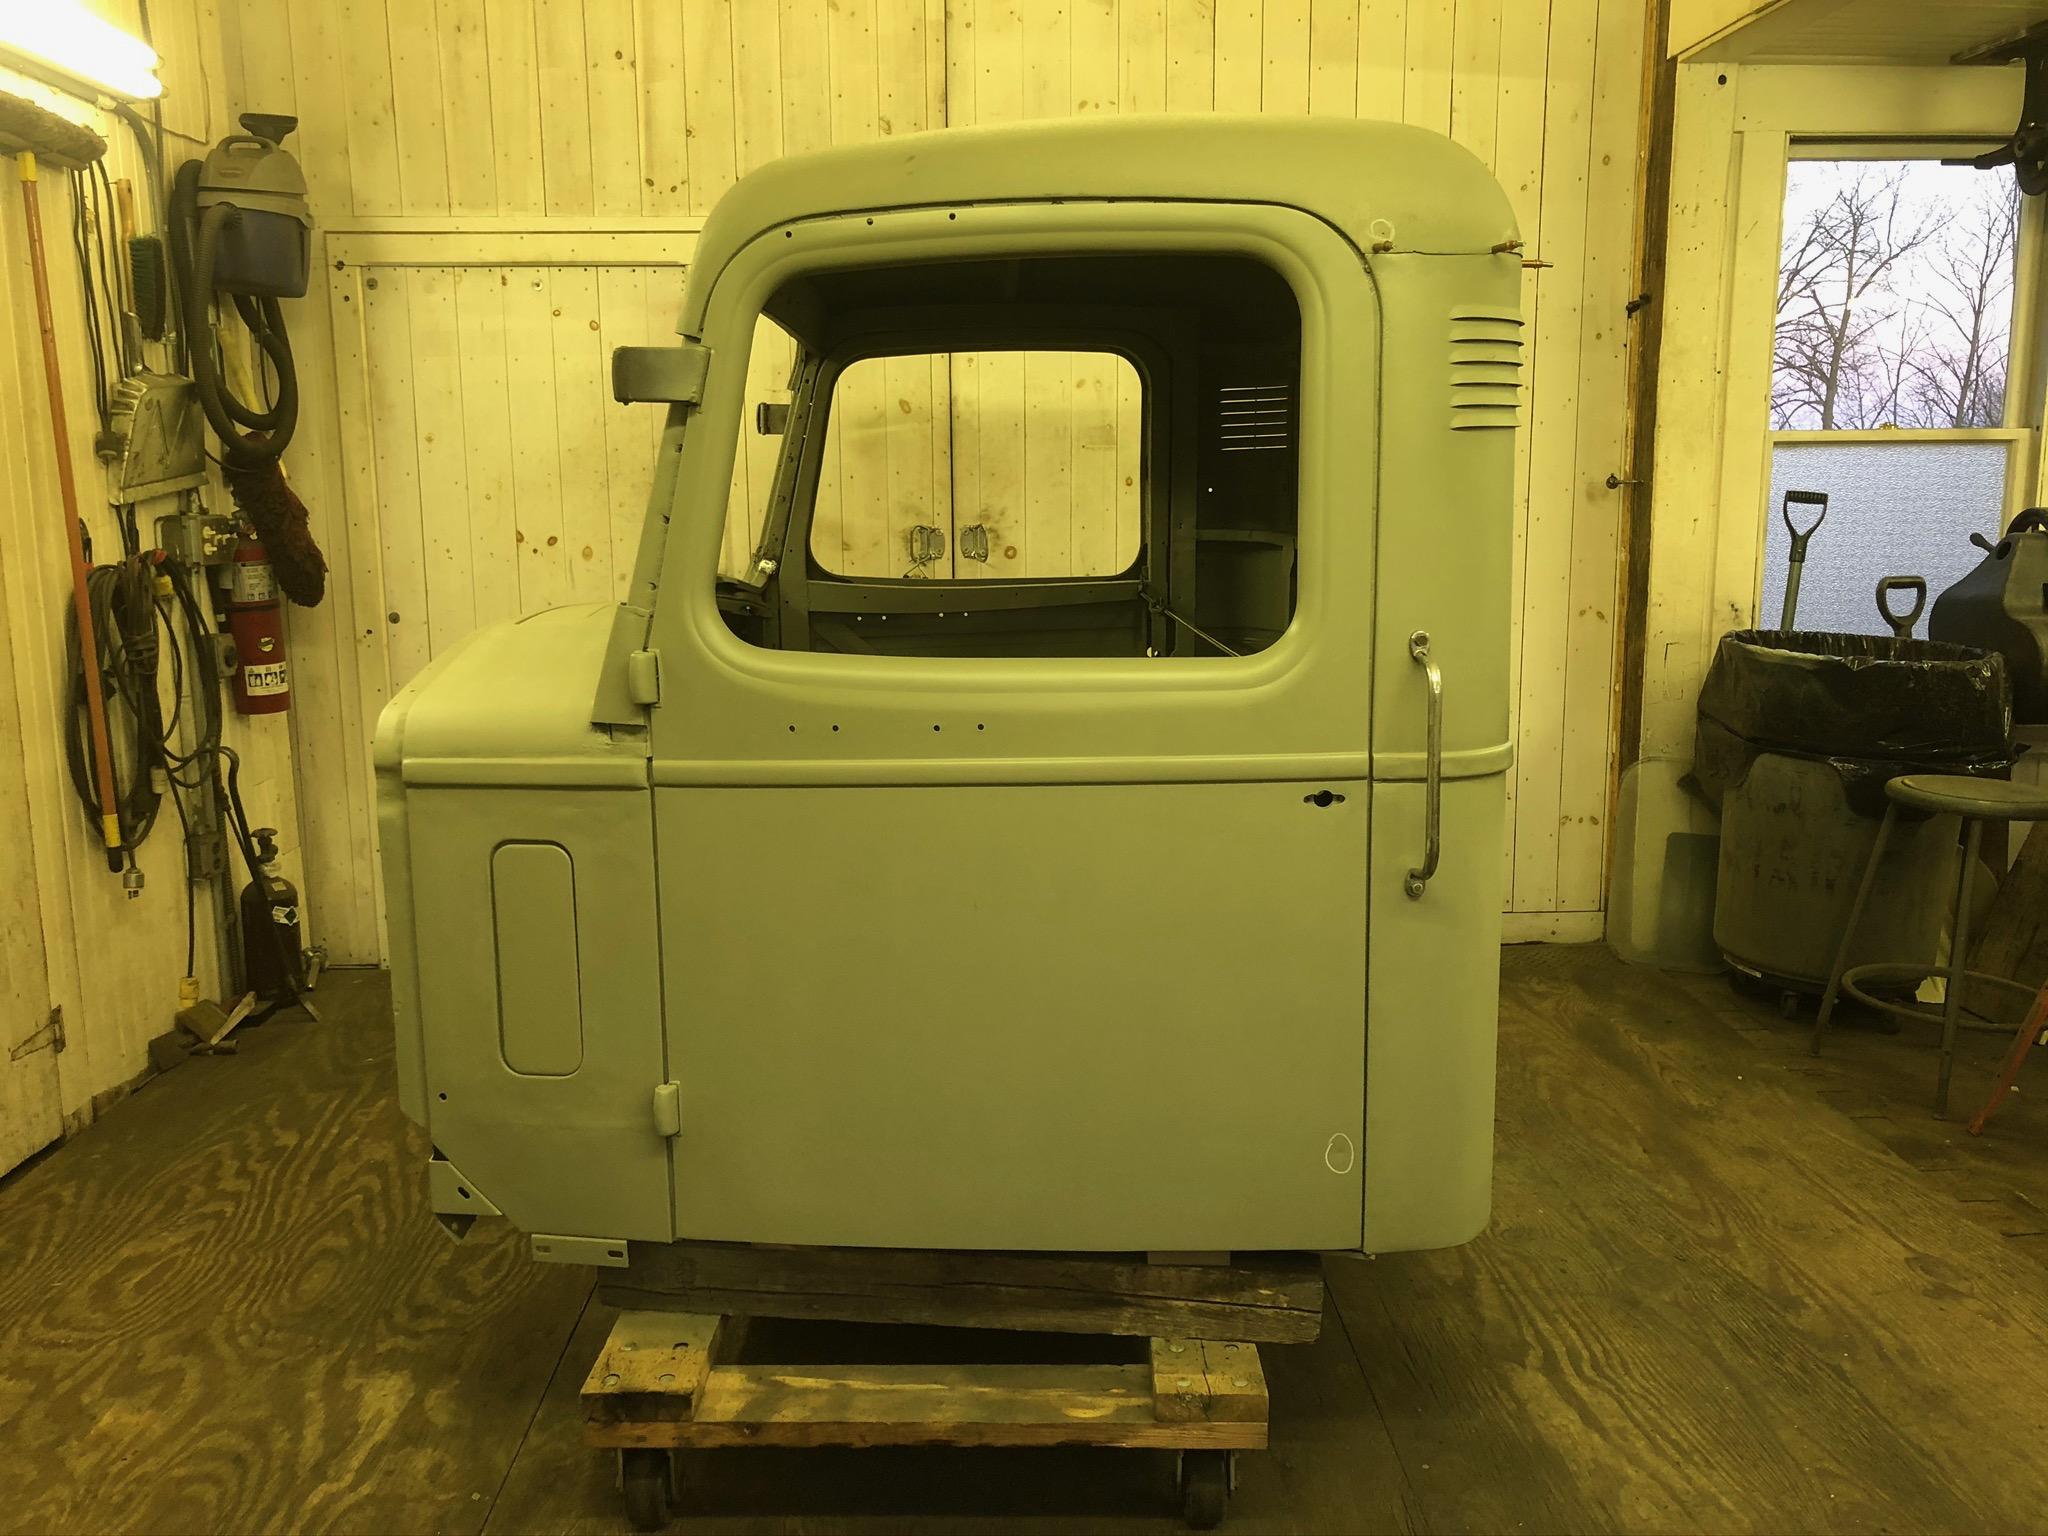
Believe it or not, it took a bout 10 minutes to fit the new door. Massage the upper hinge and lower right corner and no binding. Now I still have to get some sort of weather stripping to seal it, but I need a shock cord to keep both doors closed. -
B-73 Restoration
mattb73lt replied to mattb73lt's topic in Antique and Classic Mack Trucks General Discussion
Finally, on to the roof and gutters!! Some fabricating and repair to it and the gutters before they get re-attached. But man, it's starting to look good!! Door gaps seem to be no better or worse than the factory. Some of the stuff Mack did putting these cabs together...leaves a lot to be desired. My door jambs came out good, it's tough working with used metal. So nice to work with the fresh stuff I've had fabricated.
-
B-73 Restoration
mattb73lt replied to mattb73lt's topic in Antique and Classic Mack Trucks General Discussion
Not likely, although I could bring some of it on the back of the B42. -
B-73 Restoration
mattb73lt replied to mattb73lt's topic in Antique and Classic Mack Trucks General Discussion
Thanks for that. It's been a long time since I dragged this truck home. Tough at times to stay motivated, especially with this part of the restoration. It is great getting positive comments and different opinions and ideas as the whole thing is kind've fluid as I move along. Some things I'm set on, but others like products or methods people have used really help. I'm also amazed how long this thread is since I started it way back in 2015. The momentum is definitely building as things get completed. -
B-73 Restoration
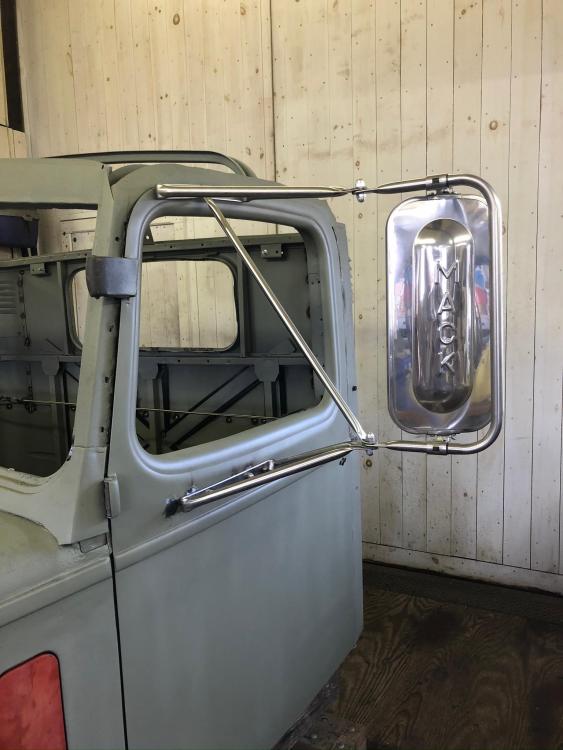
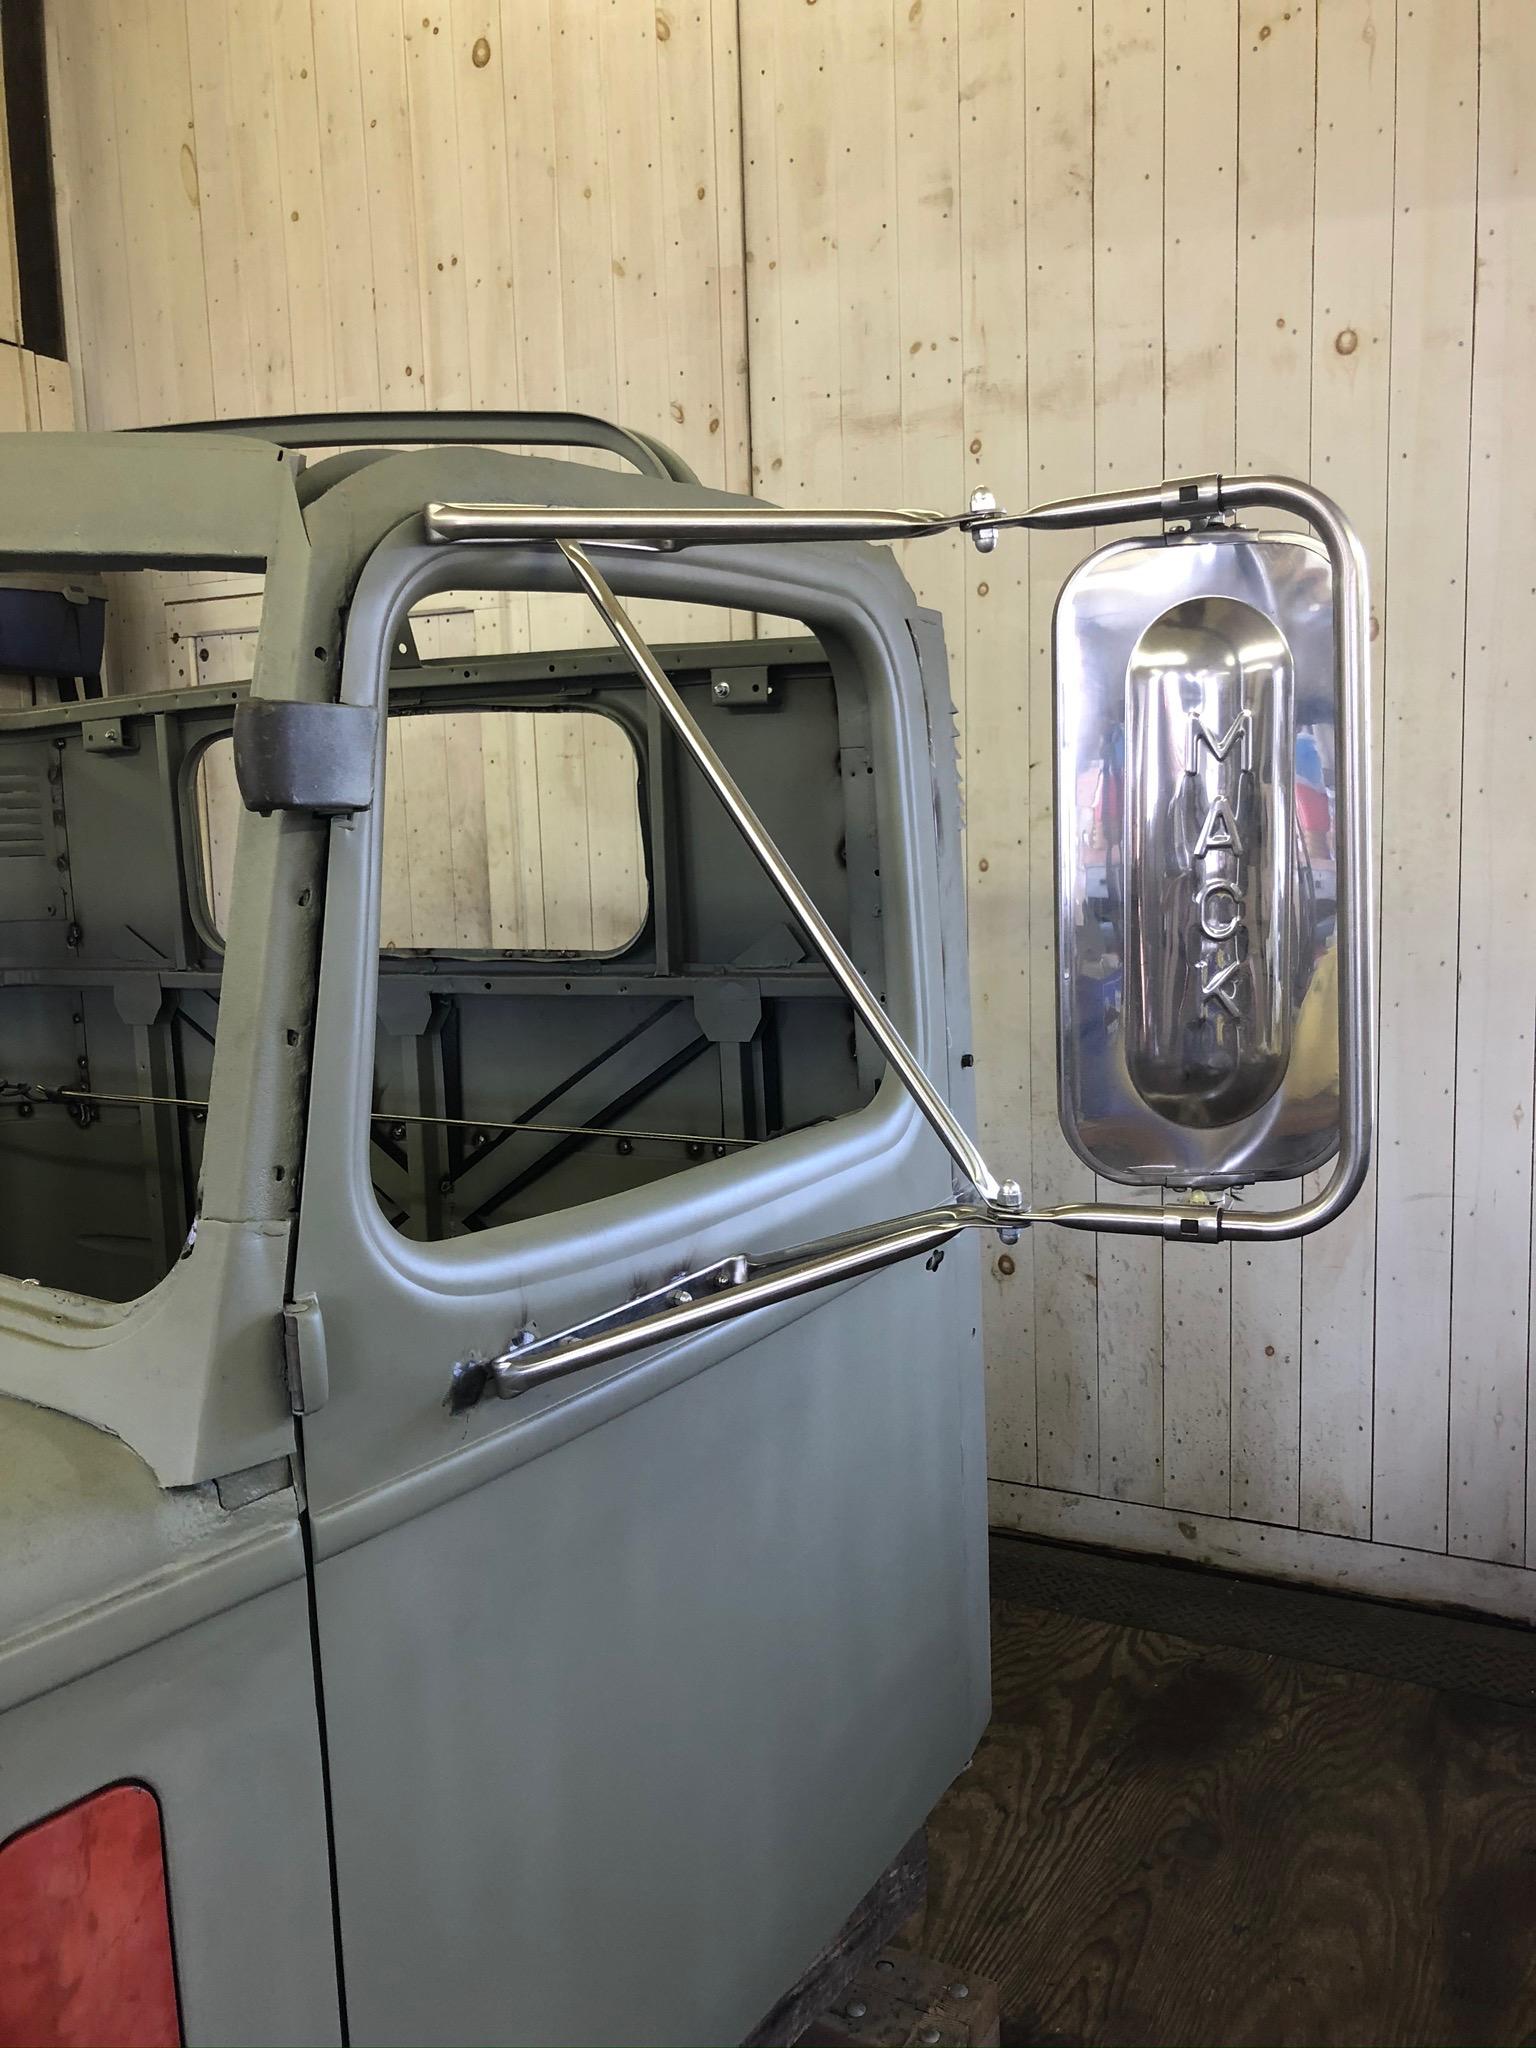
mattb73lt replied to mattb73lt's topic in Antique and Classic Mack Trucks General Discussion
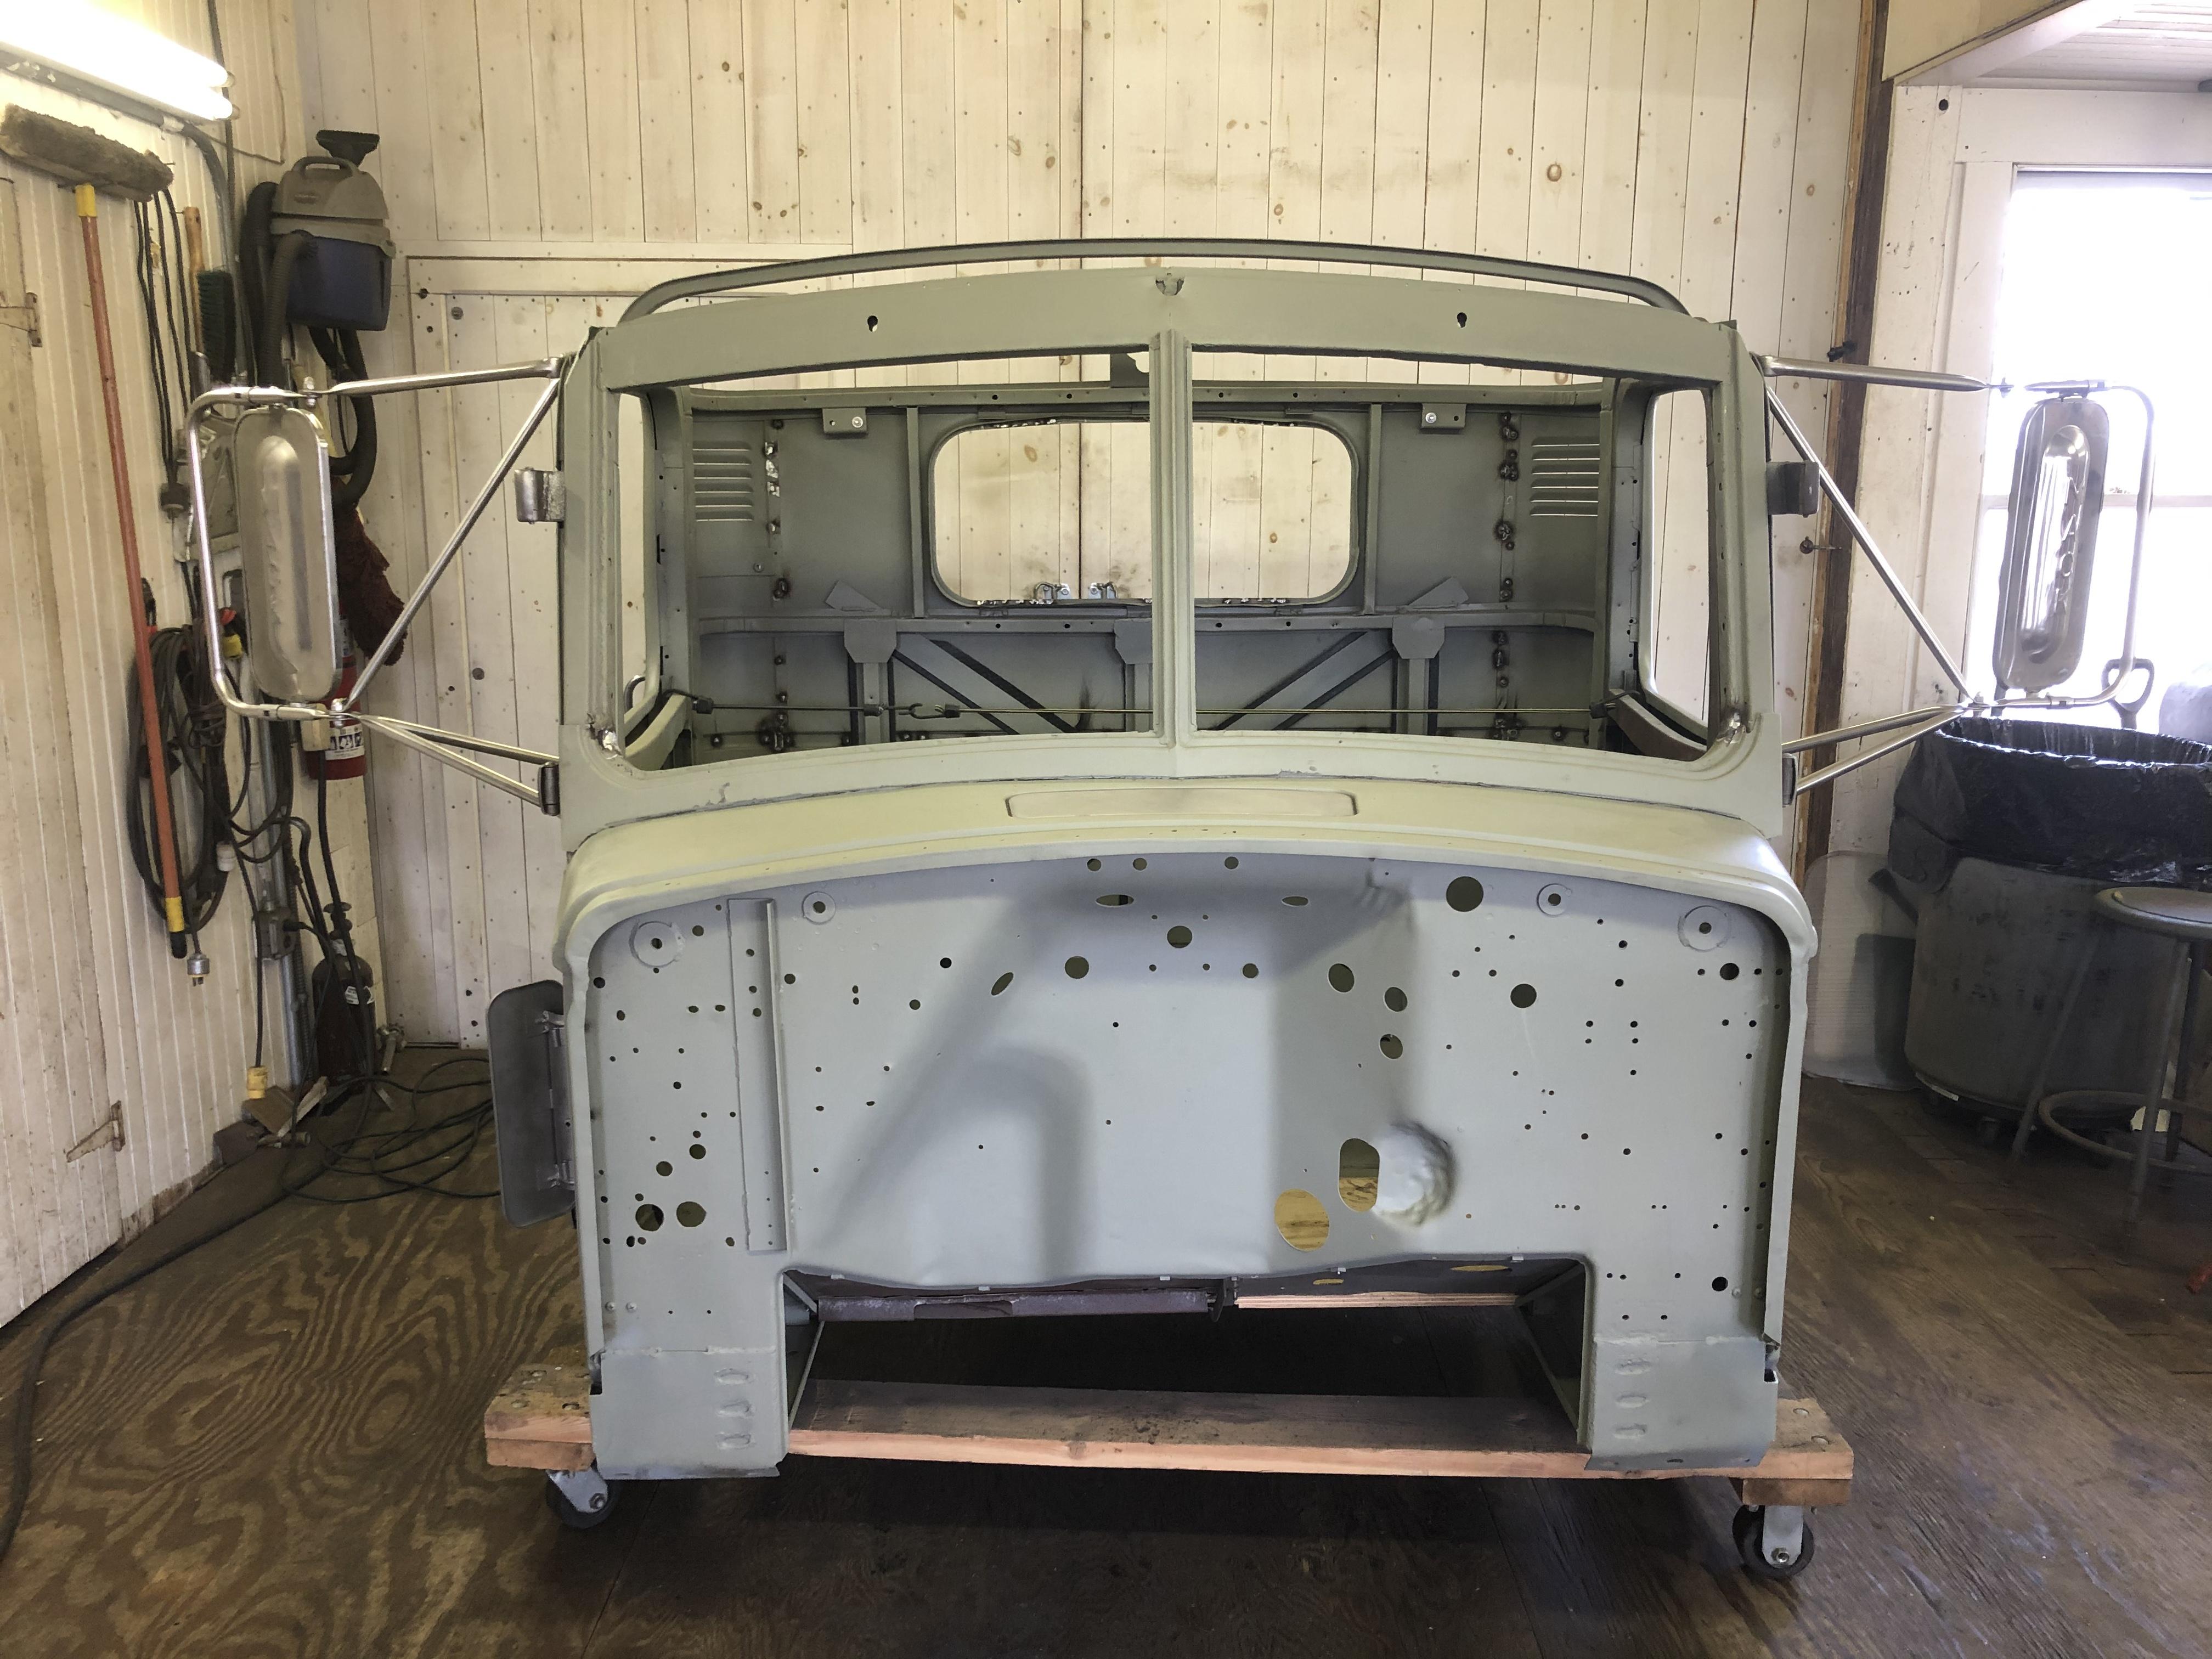
A little teaser of things to come. Mocked up my mirrors and drilled holes in my brand new door and relocated the holes on the passenger door. Boxed up the mirrors, they shouldn’t be sitting too long!
-
1965 Mack B-75
mattb73lt replied to j hancock's topic in Antique and Classic Mack Trucks General Discussion
That's really nice. Would that have the drop floor cab on it, just curious? -
B-73 Restoration
mattb73lt replied to mattb73lt's topic in Antique and Classic Mack Trucks General Discussion
I had the idea, at one time, to fix the mechanicals and put it on the road as is. I think the cab would have fallen apart quickly and I would've had nothing to work with. Plus everything was coming apart. This was really the only way to do it. -
B-73 Restoration
mattb73lt replied to mattb73lt's topic in Antique and Classic Mack Trucks General Discussion
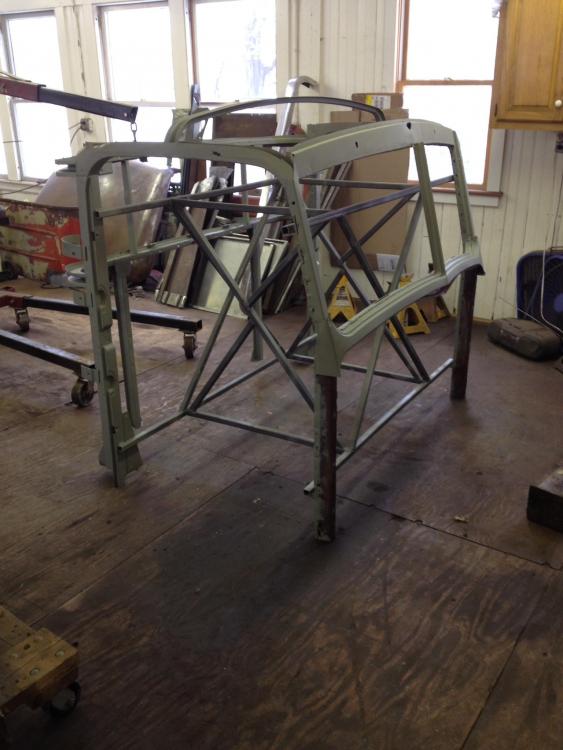
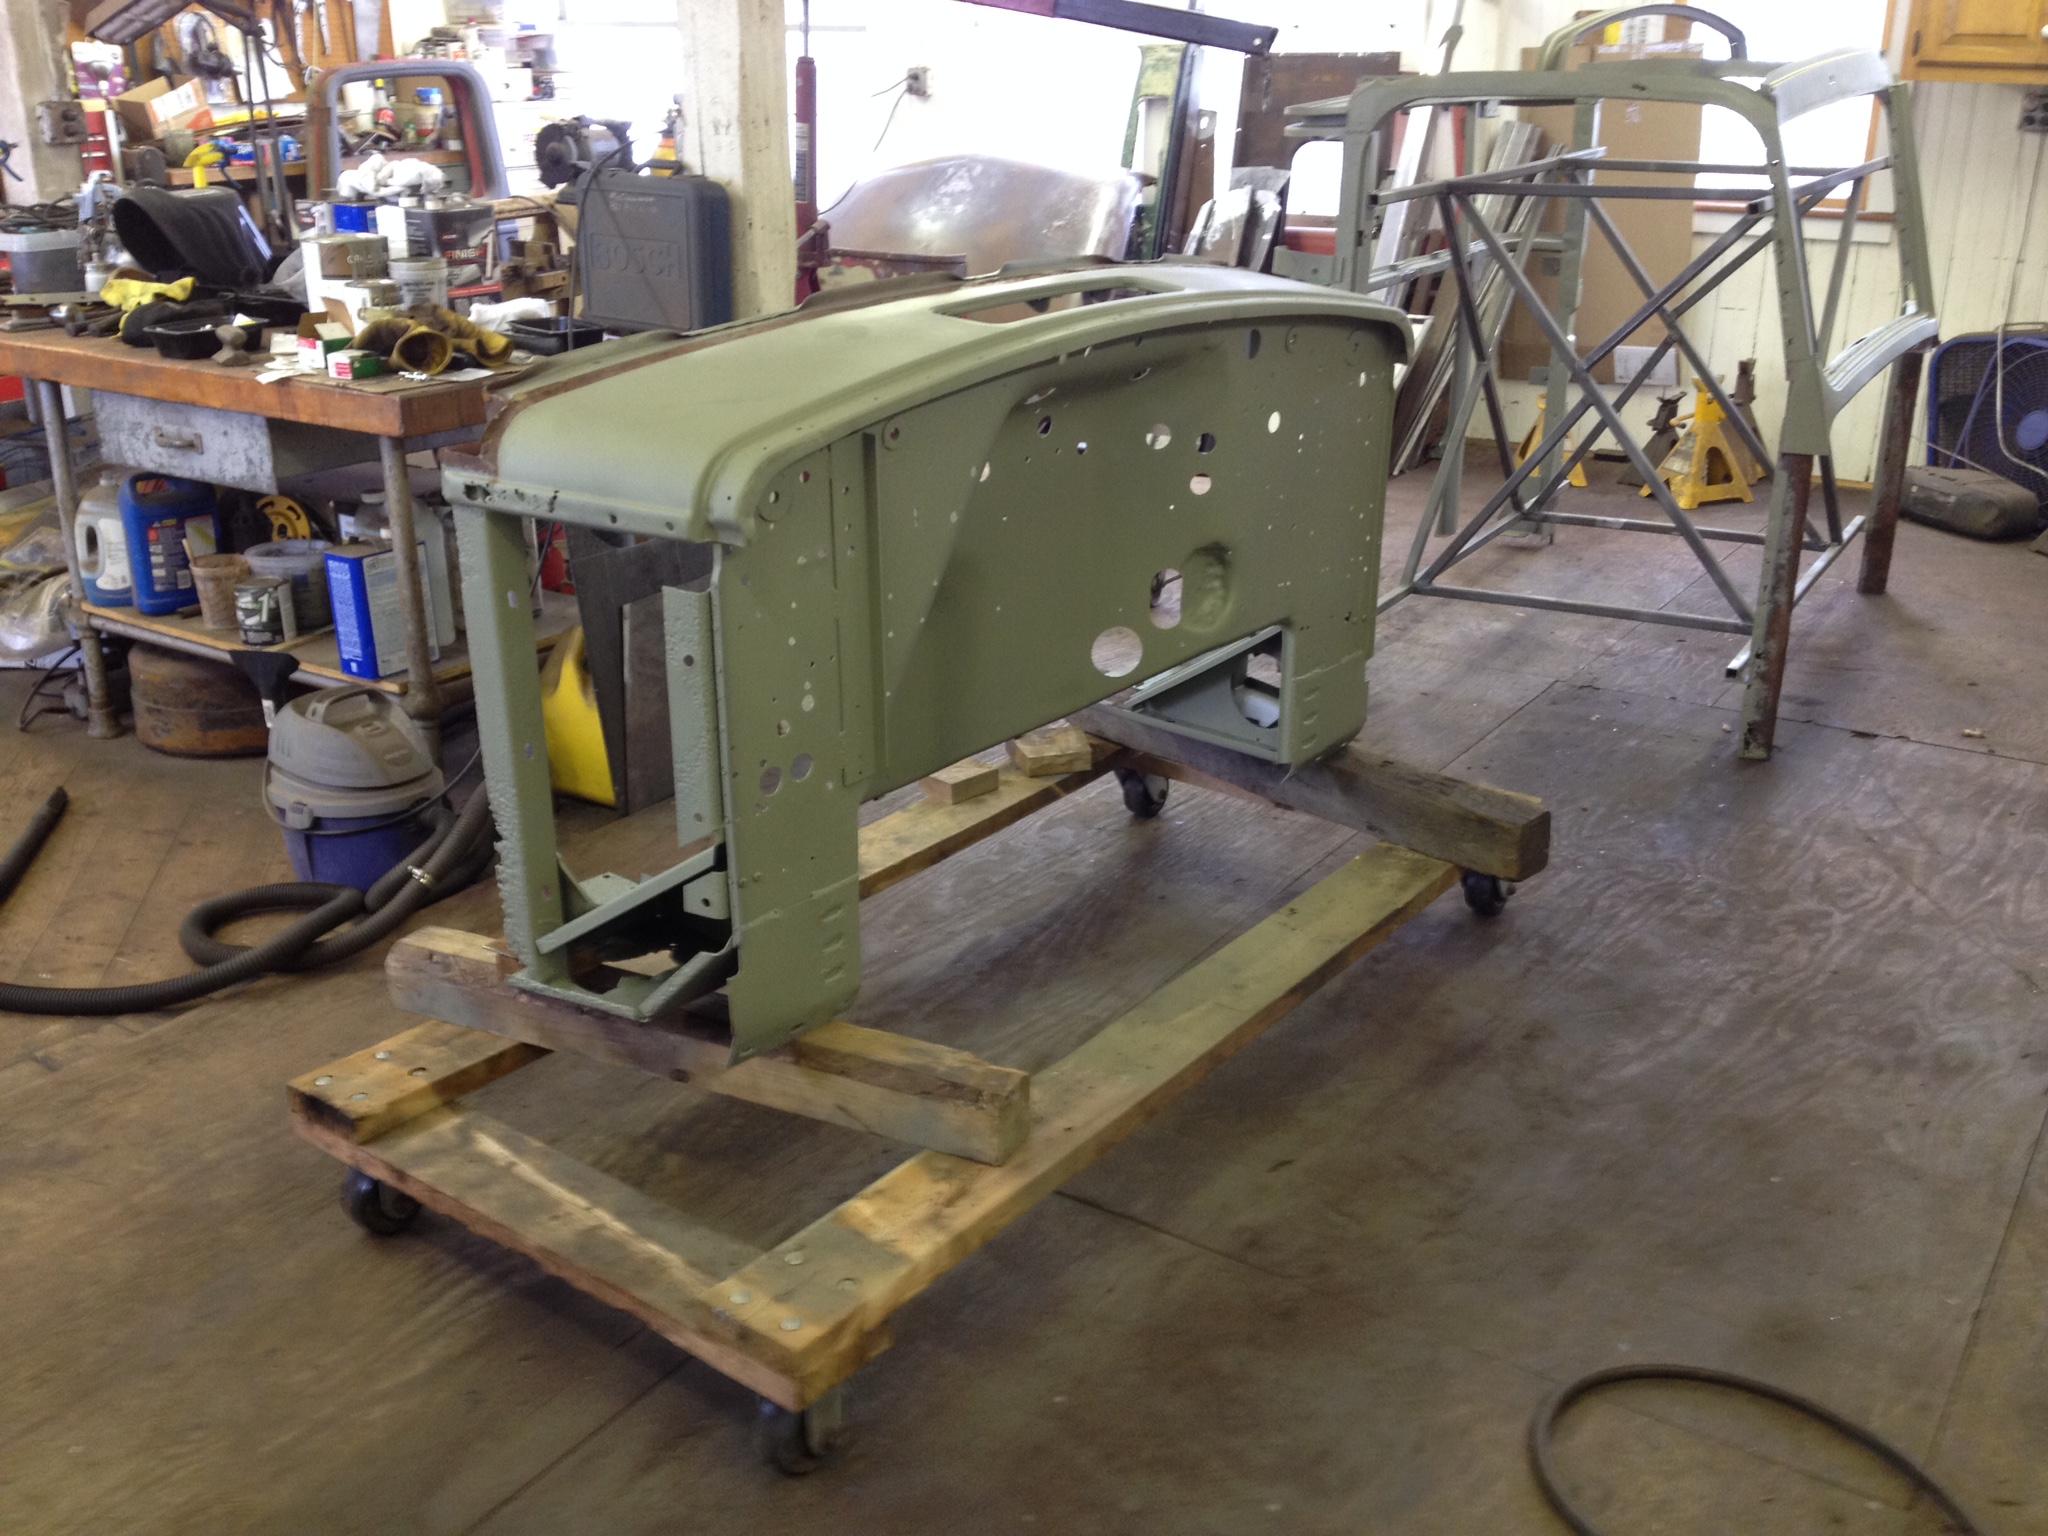
It did do a lot of damage. The lower and upper center panels were replaced. It crushed the center vertical cab support, bent the center horizontal support and broke the lower rear frame of the cab. All of which have been replaced or straightened. The owner never said how fast he was going, but it had to of been hard or a fast hit. -
B-73 Restoration
mattb73lt replied to mattb73lt's topic in Antique and Classic Mack Trucks General Discussion
The original owner told me the story. He came to get his trailer on a Sunday evening to start his week and he thinks some kids cranked it up higher after he left it. -
There’s a L model cab, fenders and hood off a fire truck on EBay in Egypt, NJ(?) right now. Don’t know where your located, but there’s stuff out there.
-
I would say very tough to come by. Once in a while you'll see some pieces come up, a radiator shell, hood. I haven't seen fenders in a while. Cabs are tough, there was one (it was complete) on Ebay last year in Canada. Cabs can be rebuilt and parts fabricated, but it's slow and costly. I'm rebuilding a L cab for my B-73, it's hard and takes a lot of patience. But, keep hunting, you'll stumble on stuff.
-
B-73 Restoration
mattb73lt replied to mattb73lt's topic in Antique and Classic Mack Trucks General Discussion
Neither can I. Never thought I'd go this far into it. I always liked this cab on the B. I think what saved it and allowed me to go this route was the shoddy repair that was done after the original owner crashed into his trailer after missing the fifth wheel. It was literally pop riveted back together and the two replacement panels were falling off. They did a lot of damage too, as they chiseled the spot welds apart instead of using a cutter. Like i said, I can't wait to get this part done. -
B-73 Restoration
mattb73lt replied to mattb73lt's topic in Antique and Classic Mack Trucks General Discussion
I’m pretty well equipped, but once in a while I come up short. It would be nice to have a shear and a brake for fabrication, but I don’t usually get this deep into a vehicle. -
B-73 Restoration
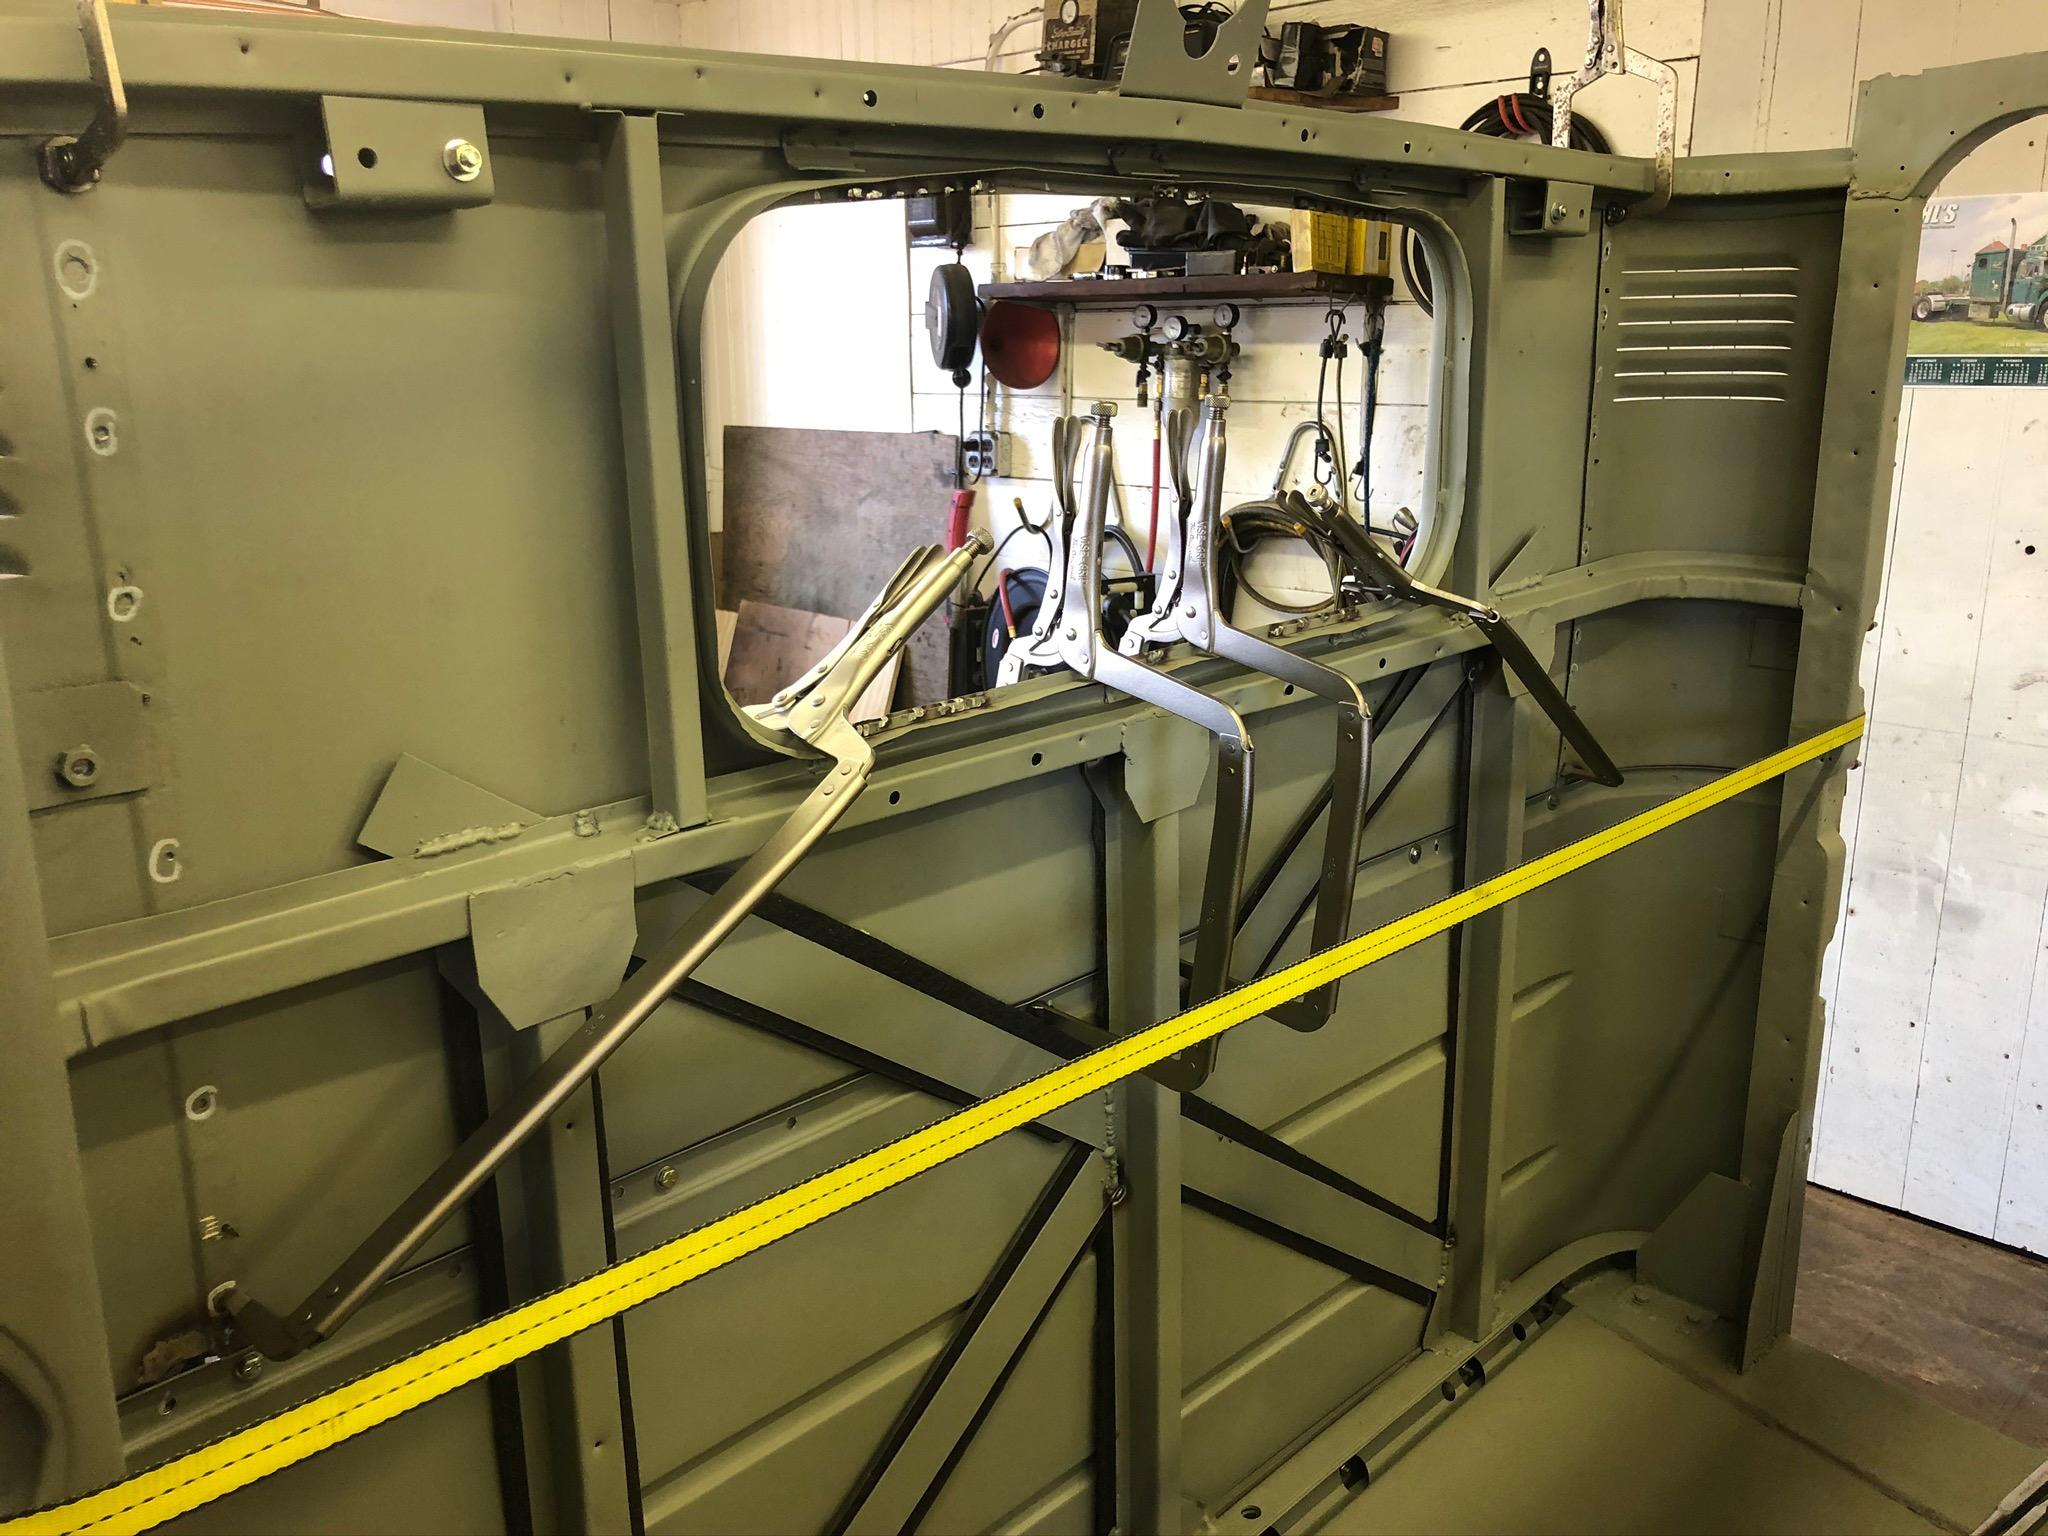
mattb73lt replied to mattb73lt's topic in Antique and Classic Mack Trucks General Discussion
I had to special order them. needed them to reach the hard spots. 24" reach!! -
B-73 Restoration
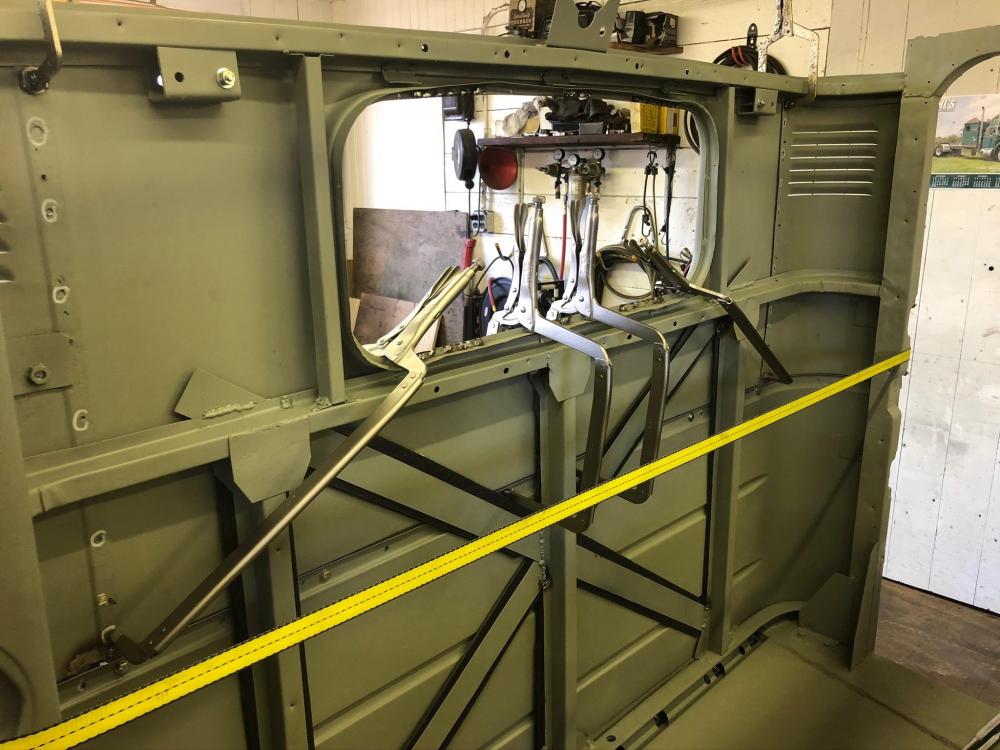
mattb73lt replied to mattb73lt's topic in Antique and Classic Mack Trucks General Discussion
Strapped, clamped, bolted and pinned together. Gaps and panels all lined up and now all welded together in one big piece. Just the roof to attach and a whole bunch of fine tuning before bodywork. Big progress in the last few weeks and can't wait to have this part behind me.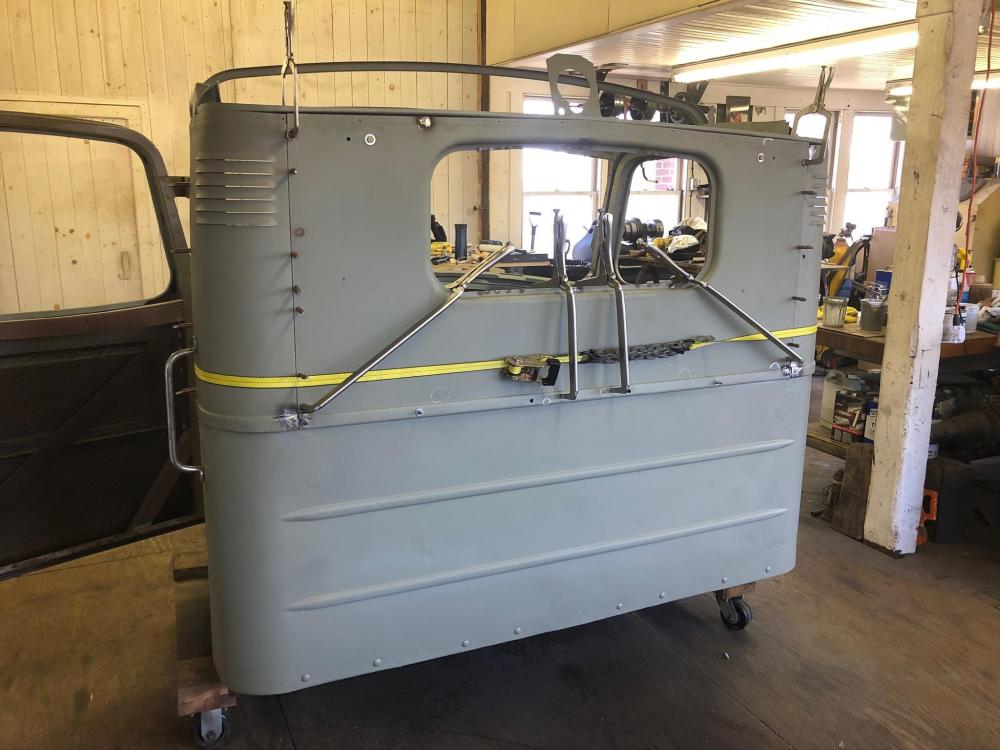


BMT Forum Logo
