


mattb73lt
-
Posts
1,431 -
Joined
-
Last visited
-
Days Won
146
Content Type
Profiles
Forums
Gallery
Events
Blogs
BMT Wiki
Collections
Store
Everything posted by mattb73lt
-

B-73 Restoration
mattb73lt replied to mattb73lt's topic in Antique and Classic Mack Trucks General Discussion
You’re quite welcome. It’s actually helped keep me motivated. I’ve read through it many times, rereading comments and thinking of my next move or improving what I had originally thought how to get something done. Glad you’re enjoying it. Matt -
B-73 Restoration
mattb73lt replied to mattb73lt's topic in Antique and Classic Mack Trucks General Discussion
Hauled the cab to the upholsterer, yesterday. Avoided dropping or damaging it, thankfully. Another step closer. Lots of parts on order to finish the frame, along with painting it. The heat the past week slowed me down, now that I’m outside for this work. Hood is almost done having some repairs done. Good progress on a lot of fronts.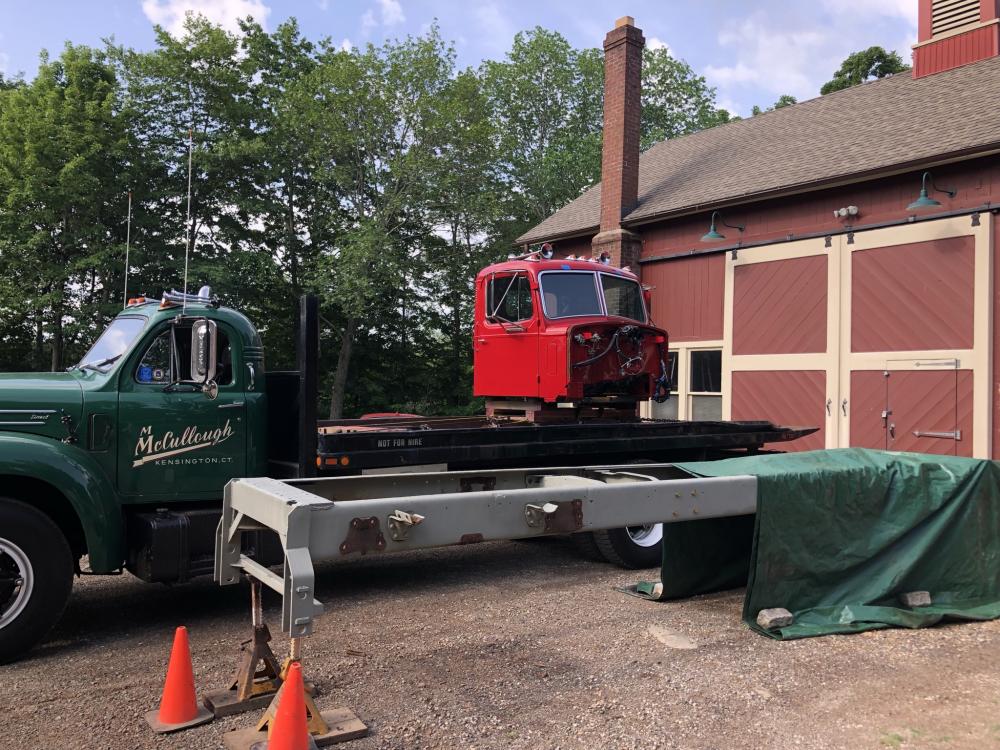
-
B-73 Restoration
mattb73lt replied to mattb73lt's topic in Antique and Classic Mack Trucks General Discussion
Maybe 2022? This year would be a stretch. -
B-73 Restoration
mattb73lt replied to mattb73lt's topic in Antique and Classic Mack Trucks General Discussion
Thank you!! Hard to express. Personally, I am amazed! It's been an incredible amount of effort to come this far. After all the years of storing this truck and hunting for parts, it's finally coming together. The best part is it really looks good. I had my doubt's at times, especially cutting so deep into the cab. I can't wait to drive it!! -
B-73 Restoration
mattb73lt replied to mattb73lt's topic in Antique and Classic Mack Trucks General Discussion
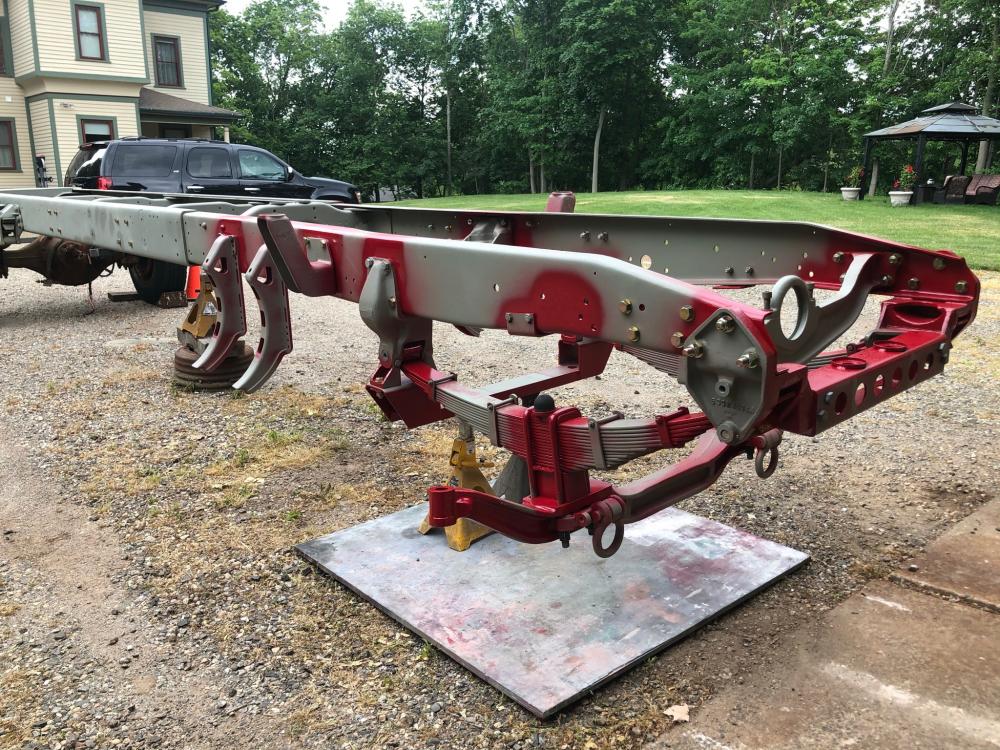
Oh, Yeah!! Added a few hundred pounds of parts to the frame. It adds up quickly.
-
B-73 Restoration
mattb73lt replied to mattb73lt's topic in Antique and Classic Mack Trucks General Discussion
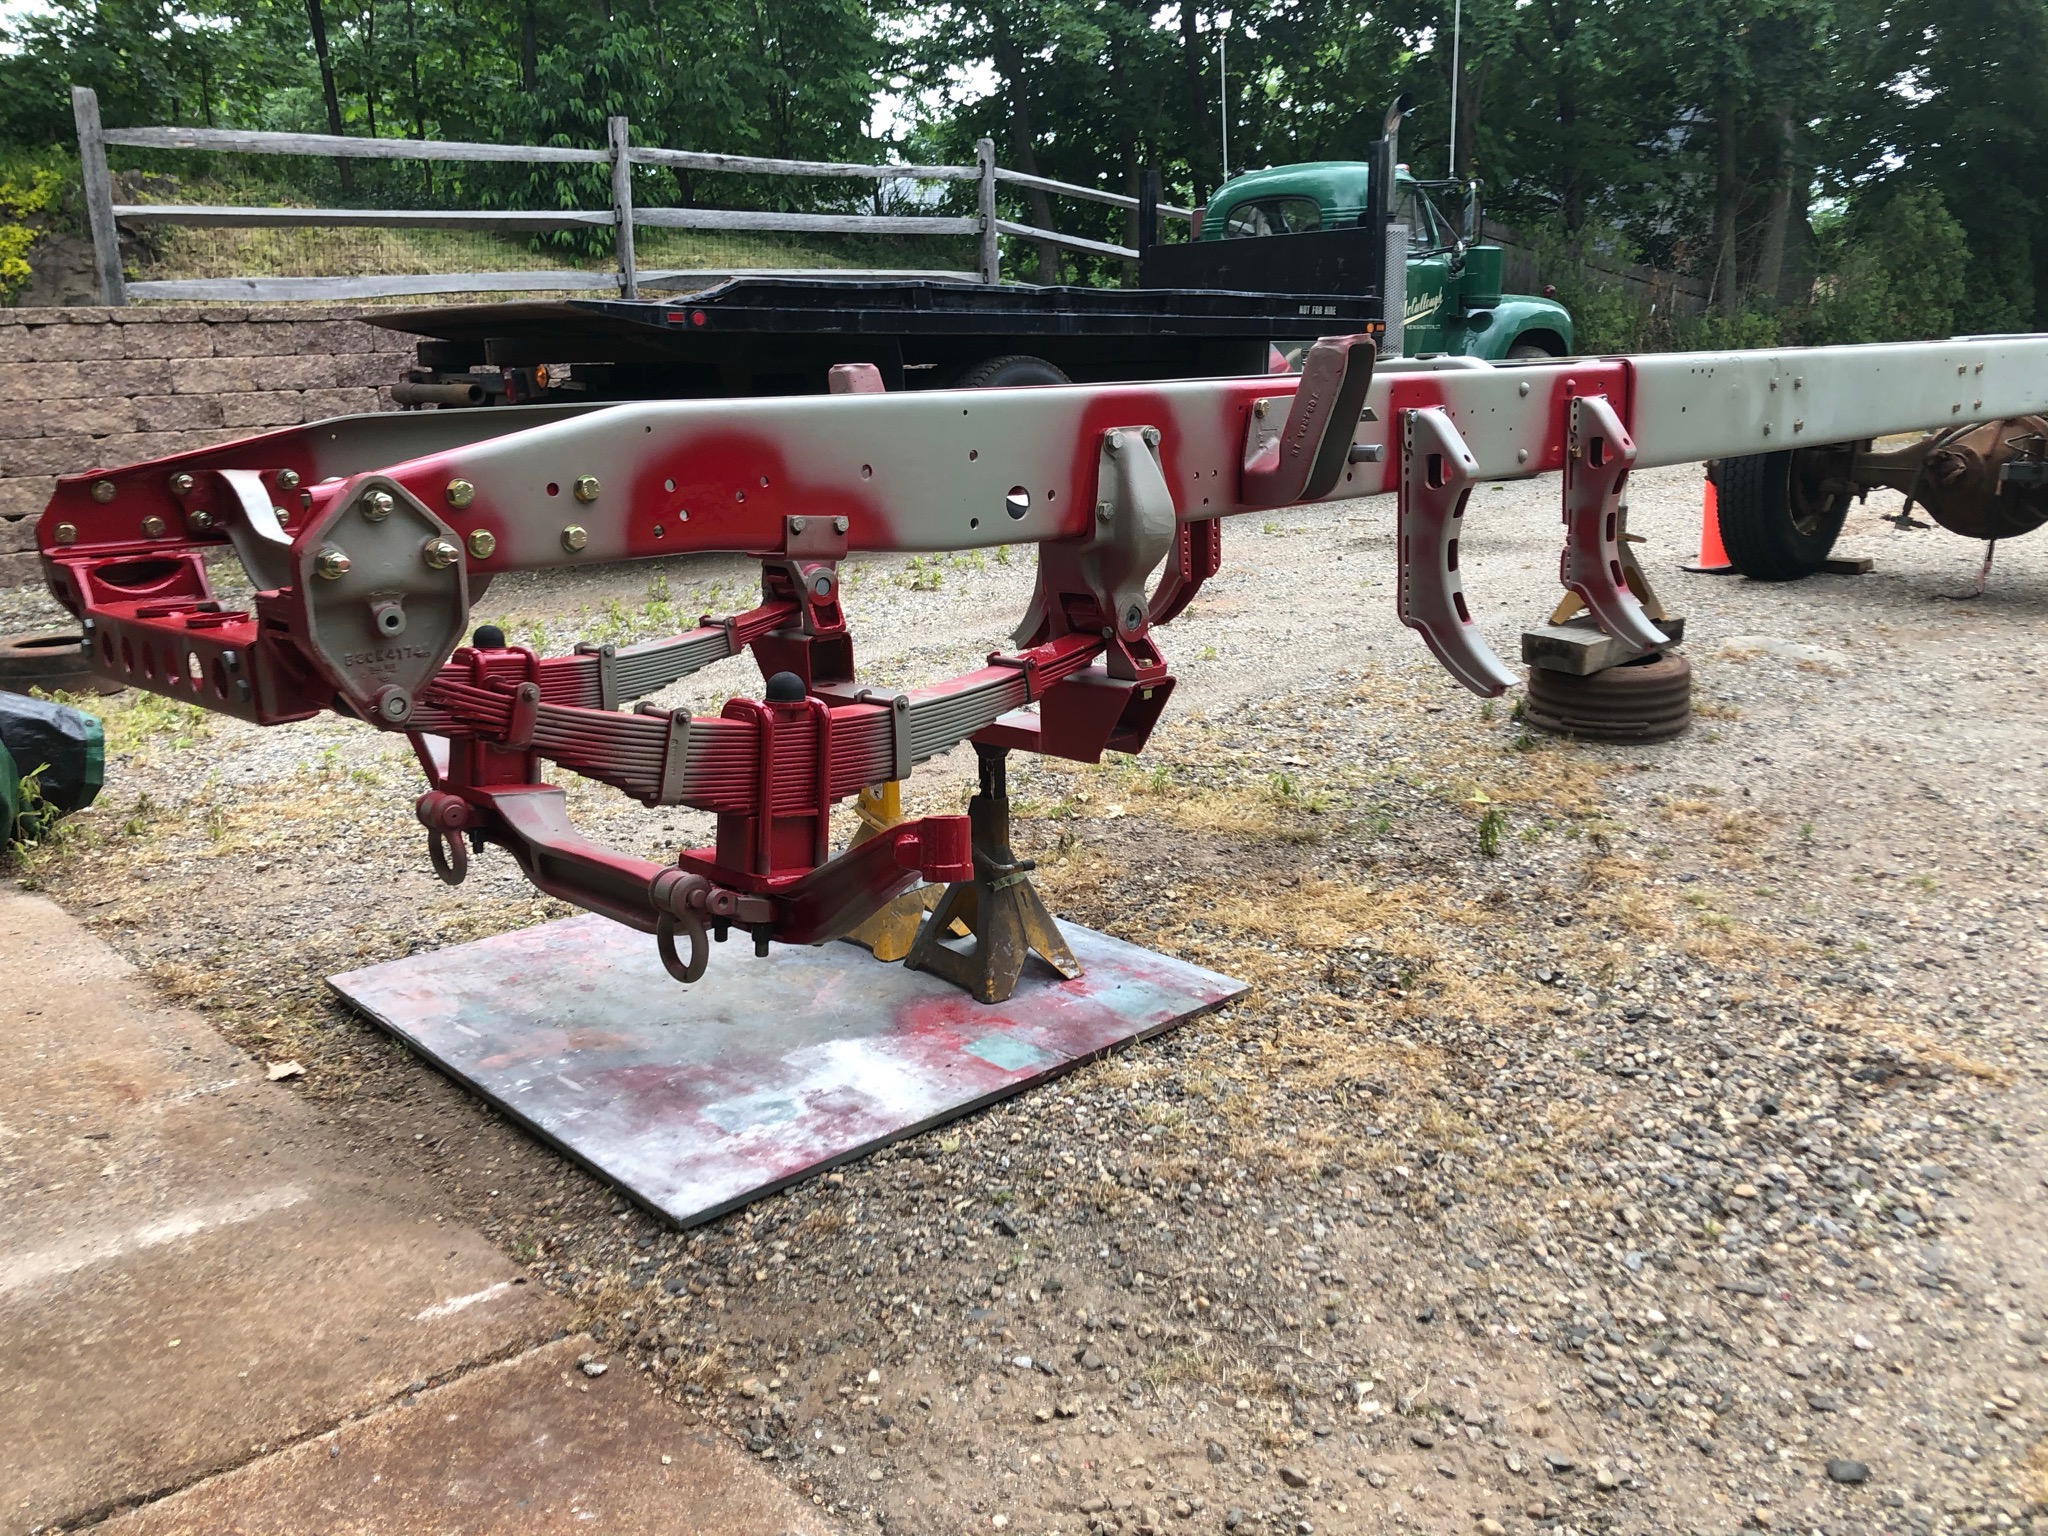
Made some good progress today. Cleaned and reprimed the front half of the frame, the spot painted the mounting areas for the parts I painted last week. Finally, I started re-assembly. Got a lot put back together. Hopefully, the front springs and axle tomorrow!!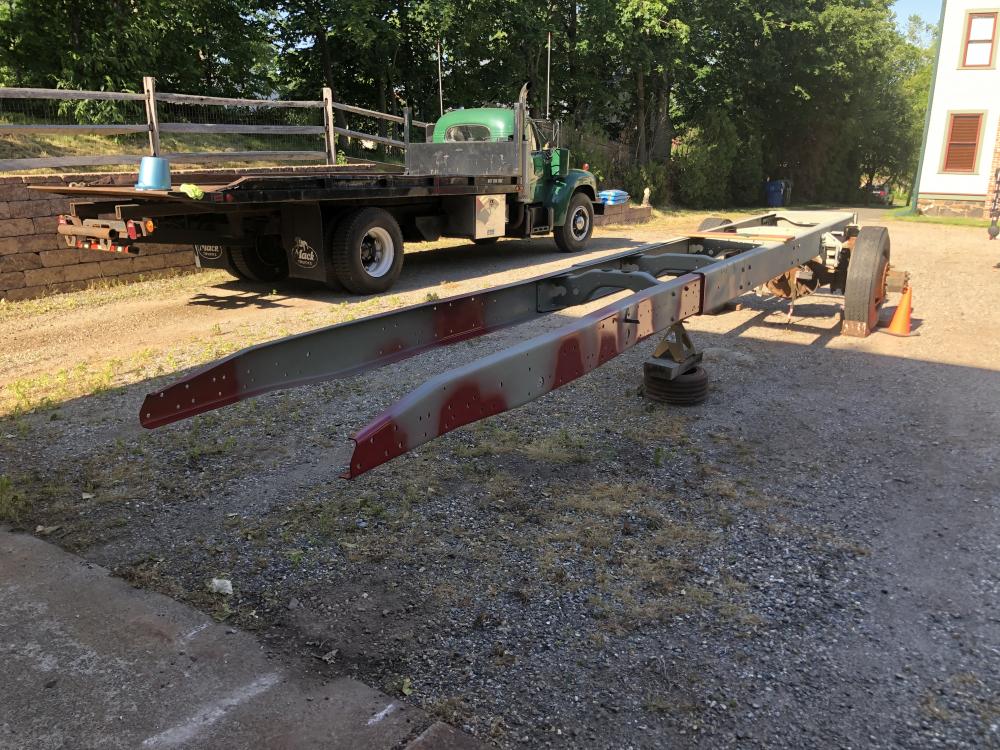


-
B-73 Restoration
mattb73lt replied to mattb73lt's topic in Antique and Classic Mack Trucks General Discussion
I was gonna, but what would I do with all the other parts I have laying around???LOL -
B-73 Restoration
mattb73lt replied to mattb73lt's topic in Antique and Classic Mack Trucks General Discussion
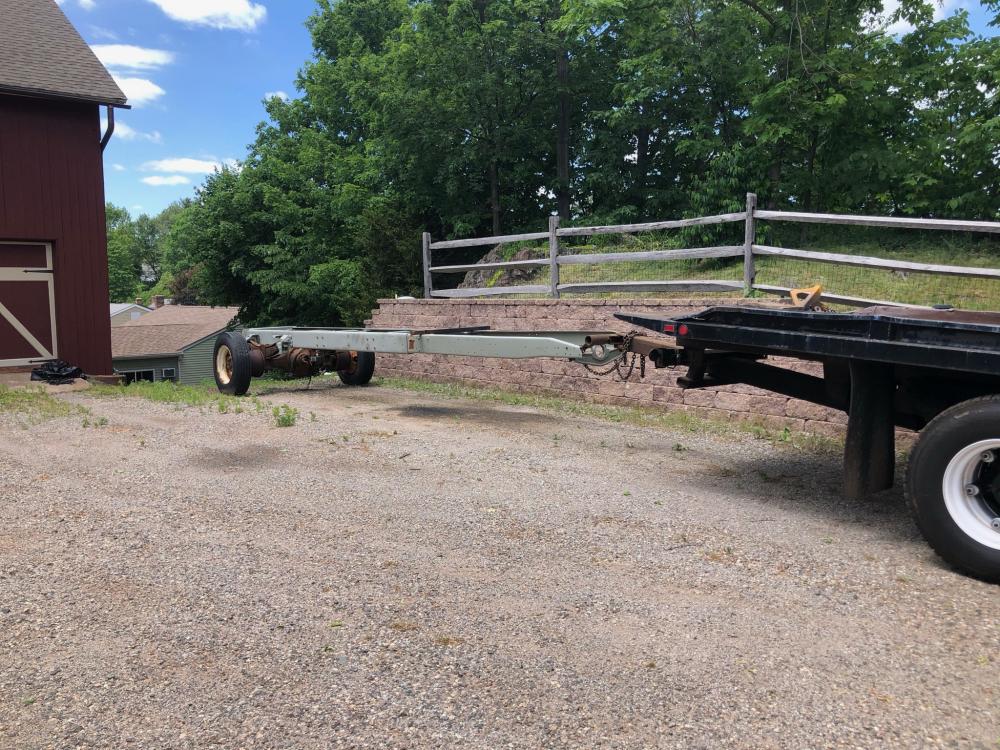
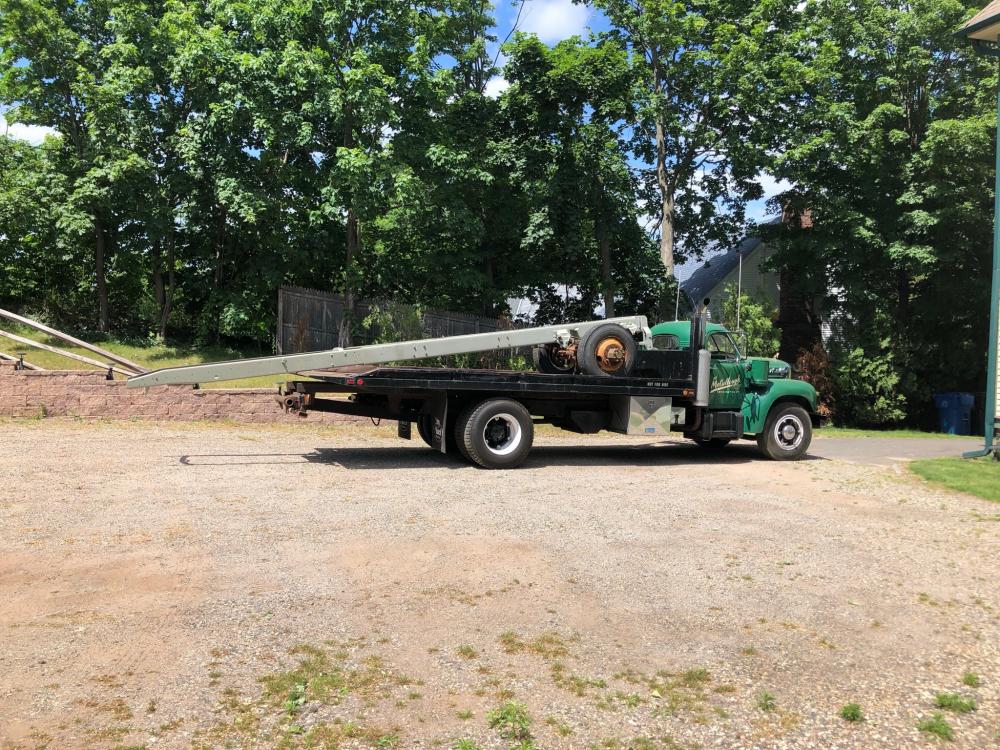
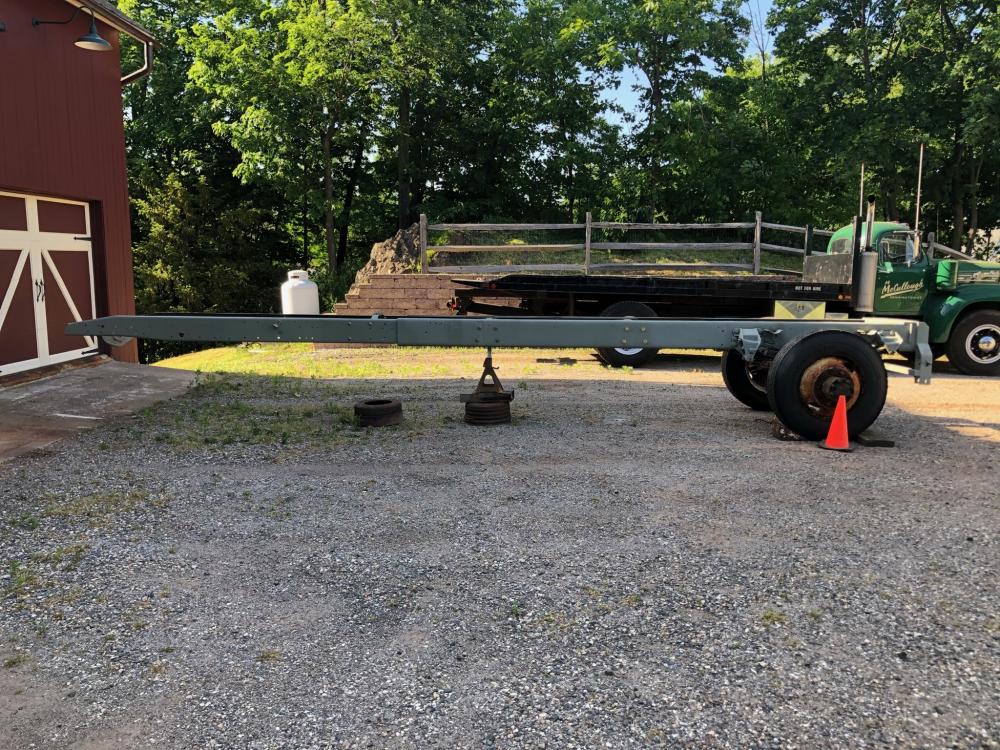
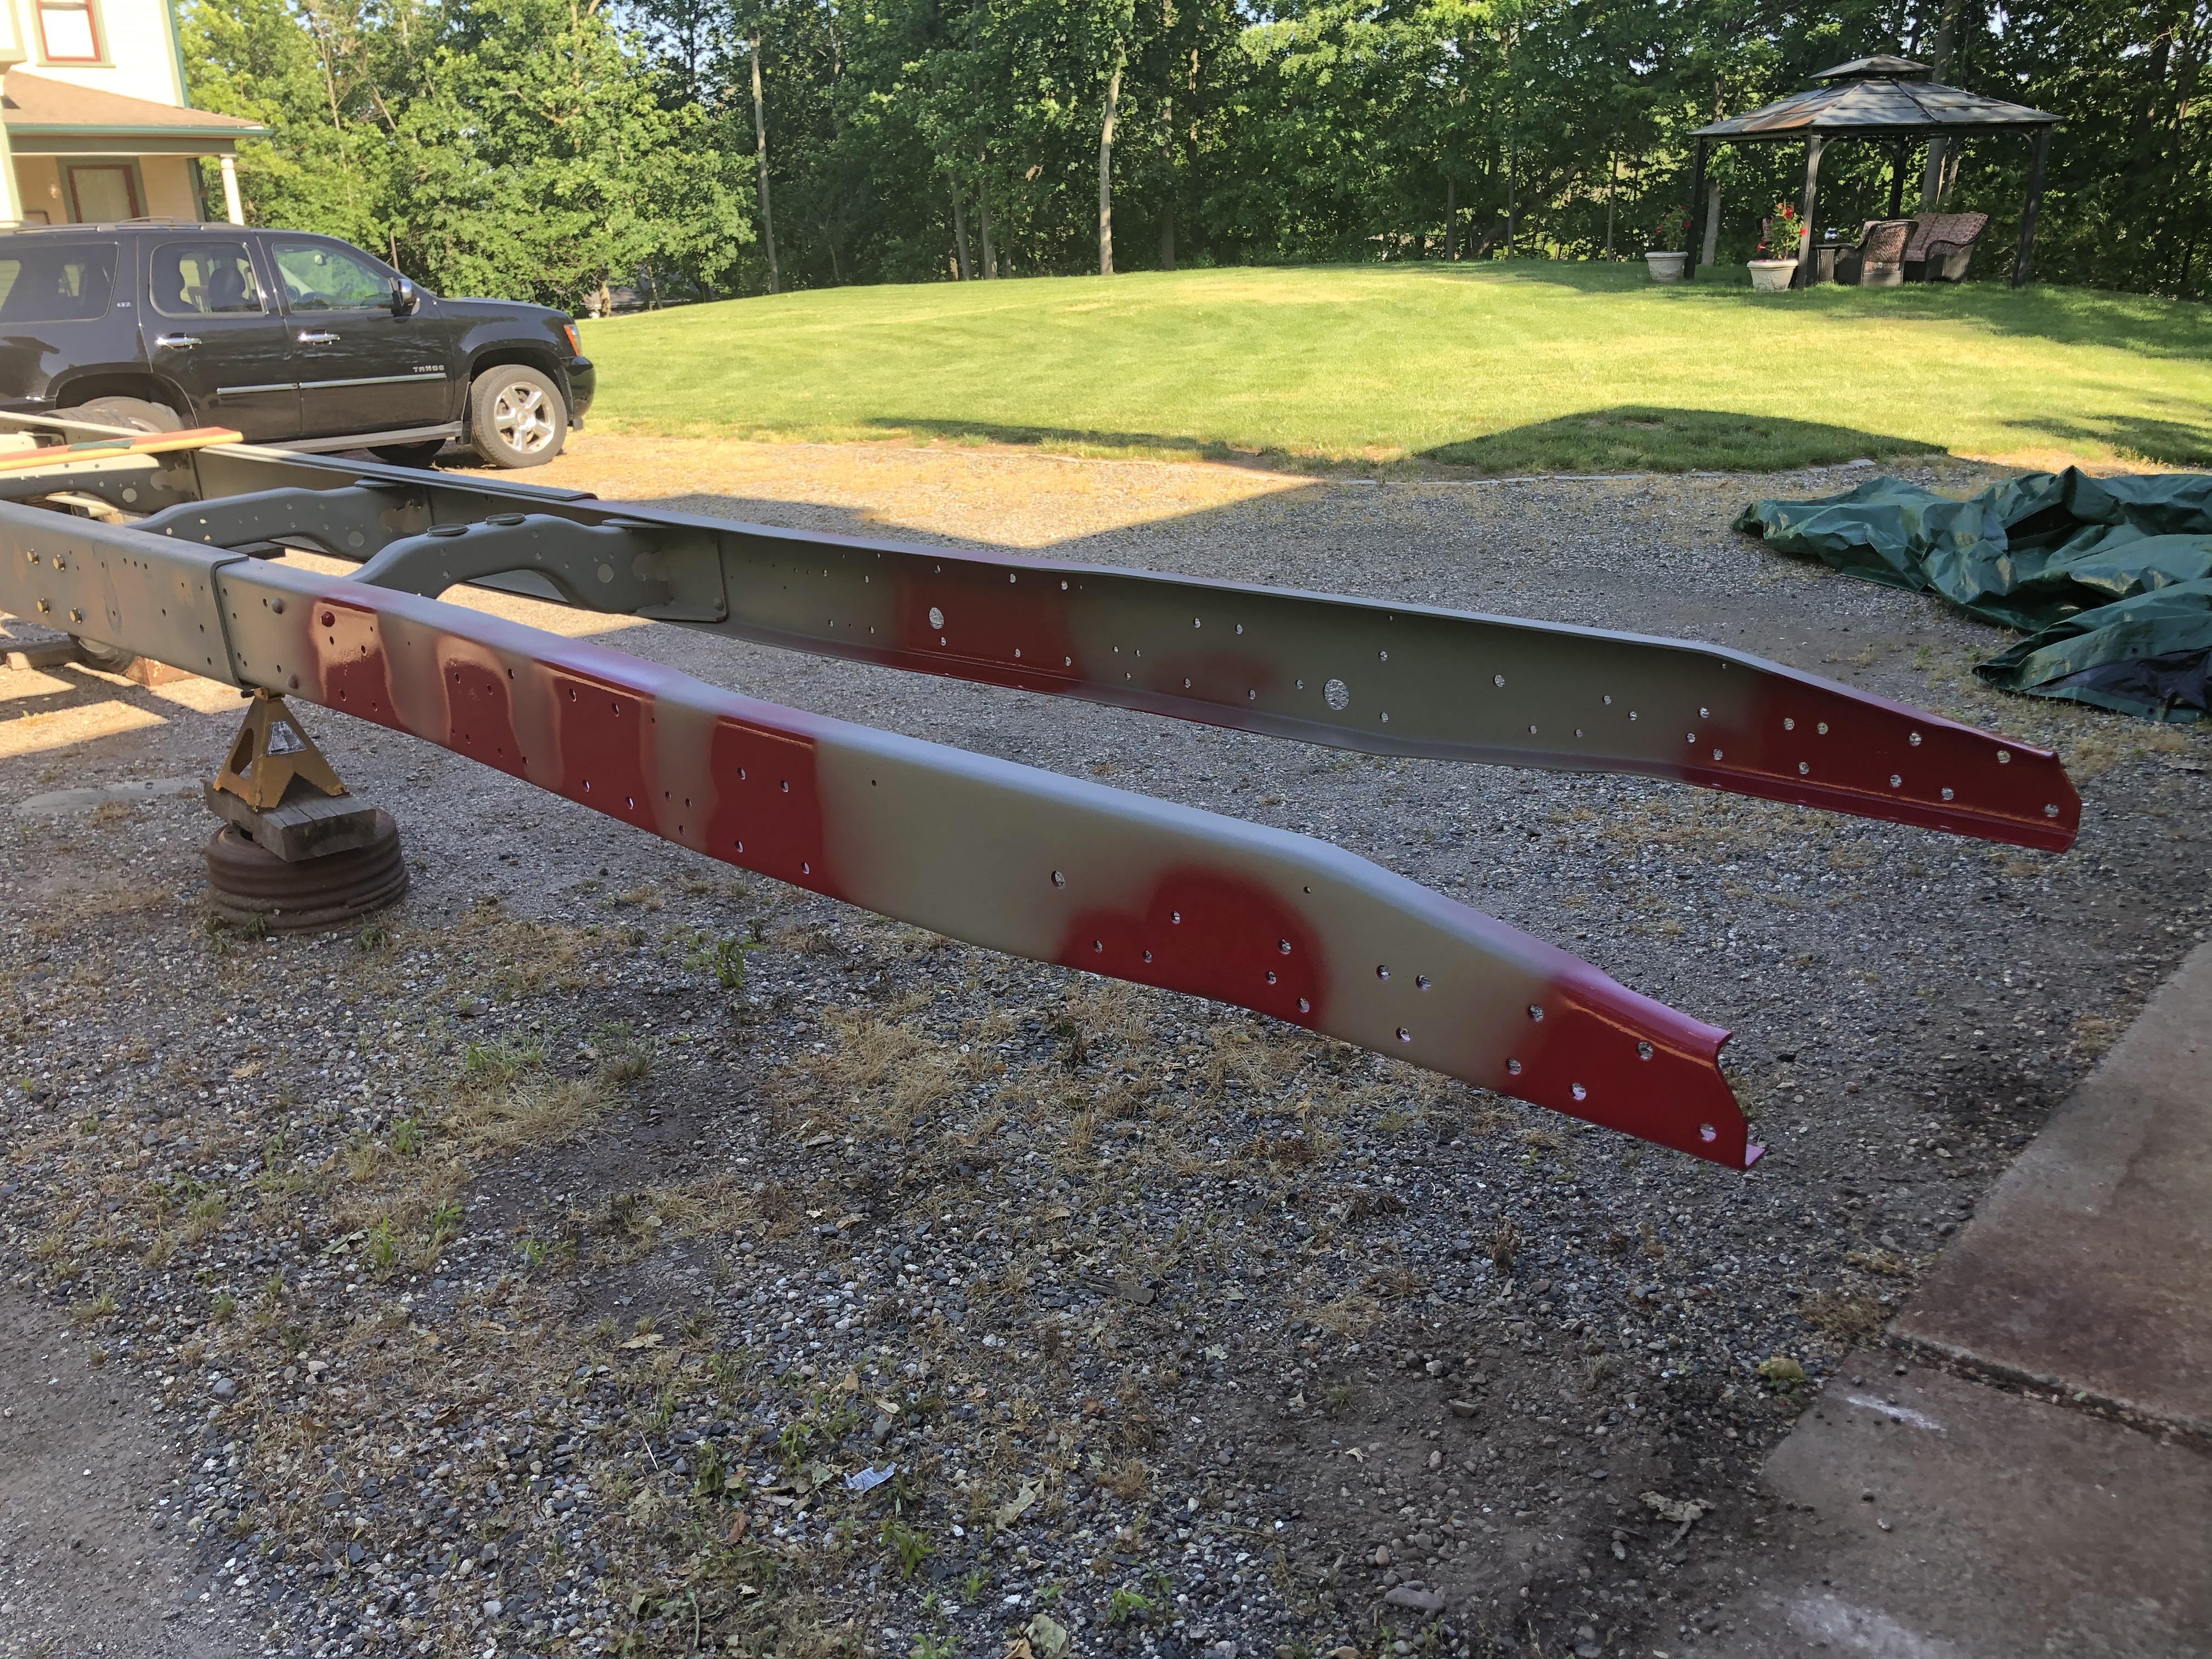
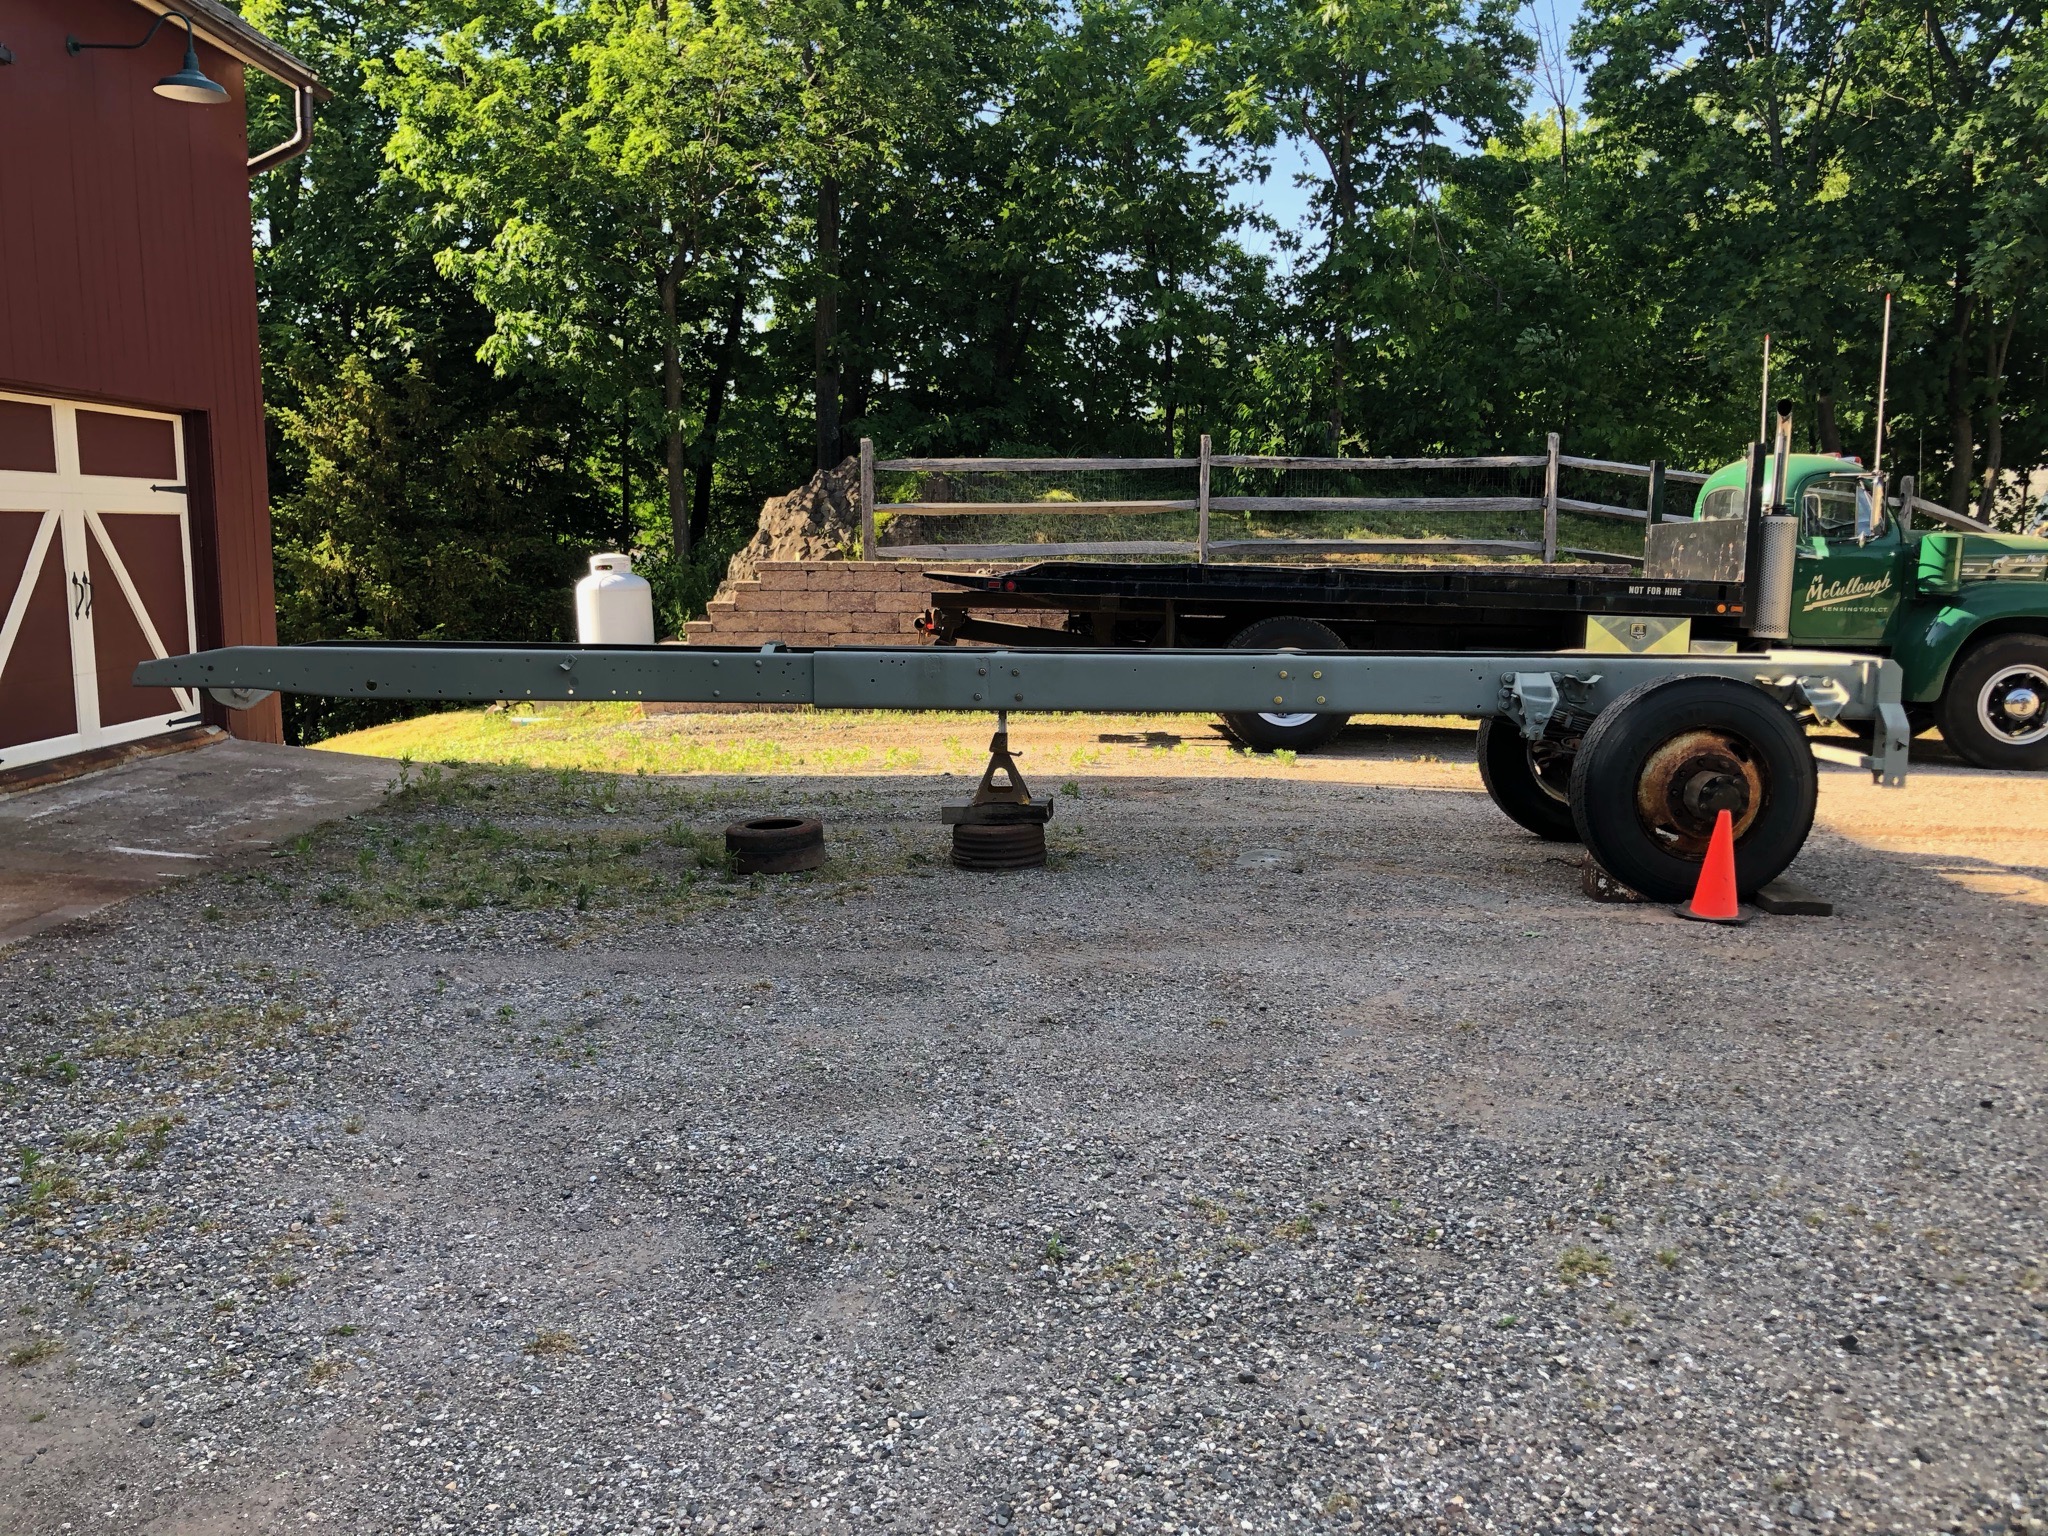
It’ll be a single drive/axle. I gave it a fairly big stretch to accommodate a 24’ Jerr Dan roll back bed that I picked up. I don’t haul anything too heavy, mostly antique cars and trucks. Wheelbase for it is around 249”. The frame does seem long in the photos, but will shorten up as it’s reassembled. It’ll be 4’ longer than the truck it’s resting on, that has a 20’ deck. -
B-73 Restoration
mattb73lt replied to mattb73lt's topic in Antique and Classic Mack Trucks General Discussion
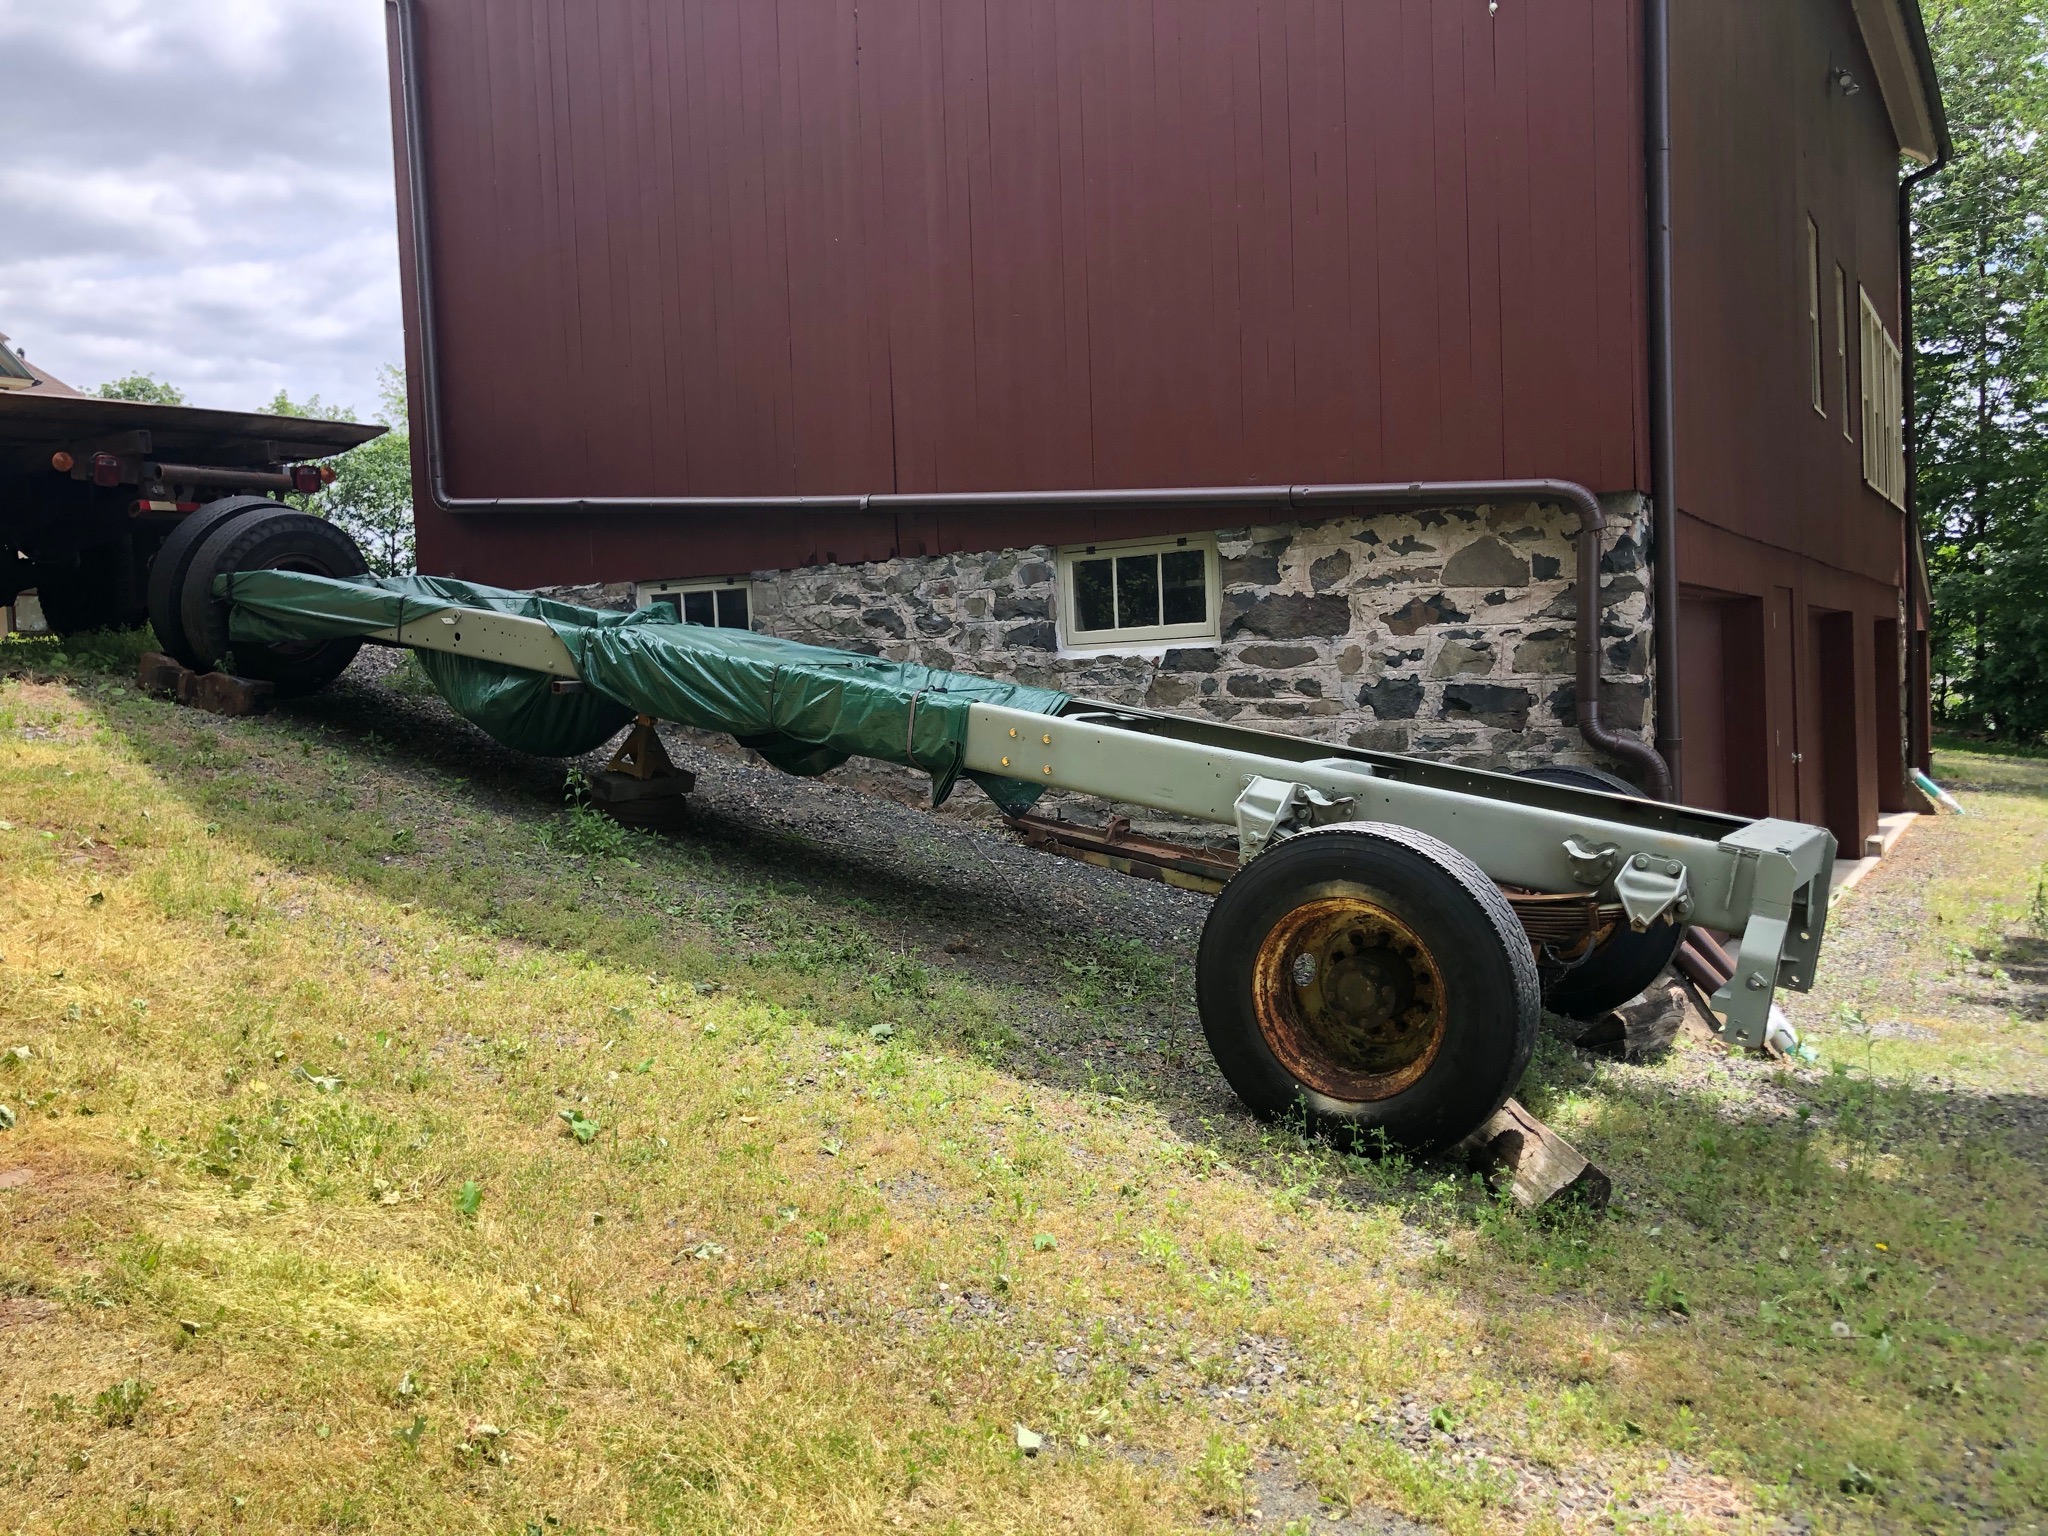
Moving day. Brought the frame up in front of the barn, from it's hiding place alongside it. A little bit of effort to get it there after pulling it up, turning it 180 degrees then positioning it between the bays so I still have access. All those freshly painted parts will be reunited with the frame soon!!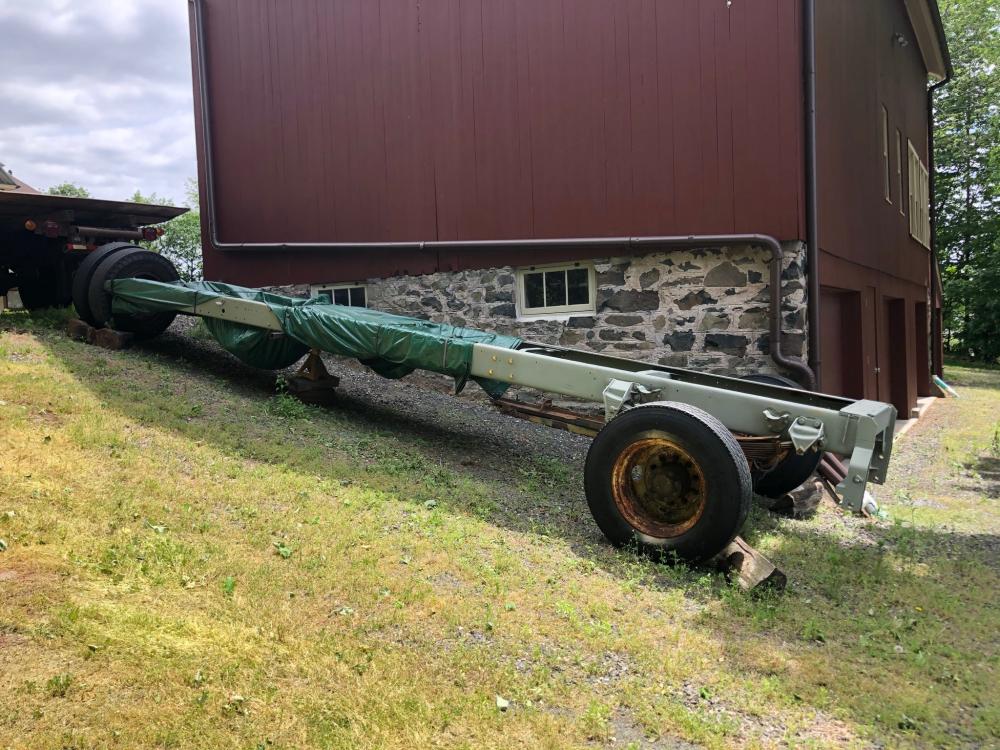
-
That’s really starting to look good! I like the colors.
-
B-73 Restoration
mattb73lt replied to mattb73lt's topic in Antique and Classic Mack Trucks General Discussion
Thanks, I’ll buy the beer. At some point I’m going to have to call in some markers as the parts get bigger and require at least two people. -
B-73 Restoration
mattb73lt replied to mattb73lt's topic in Antique and Classic Mack Trucks General Discussion
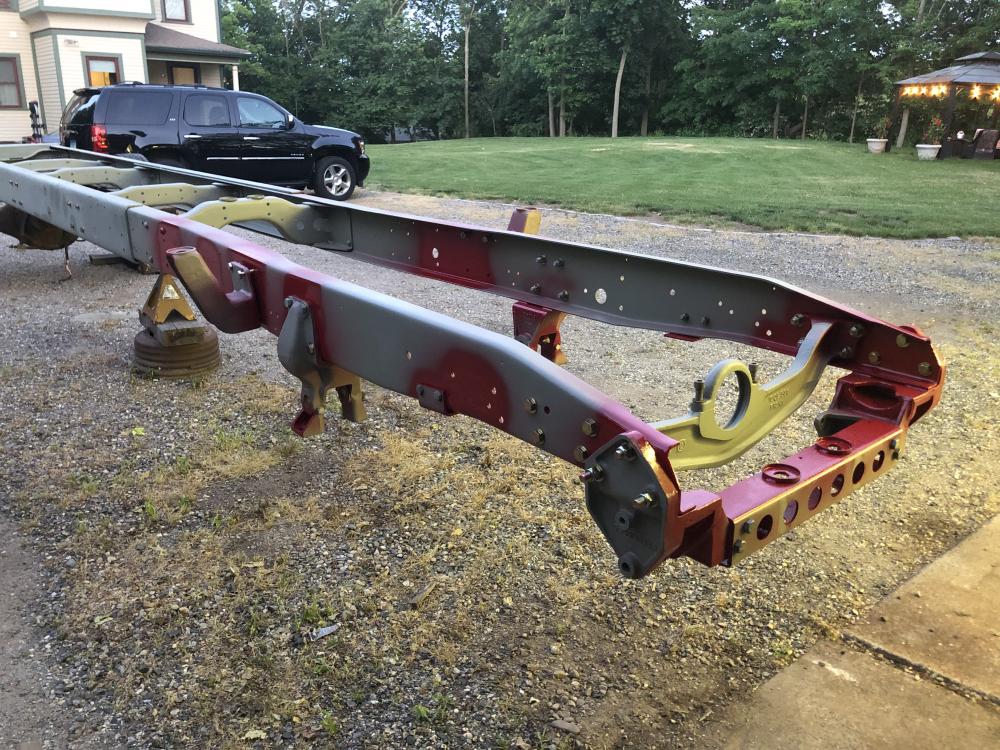
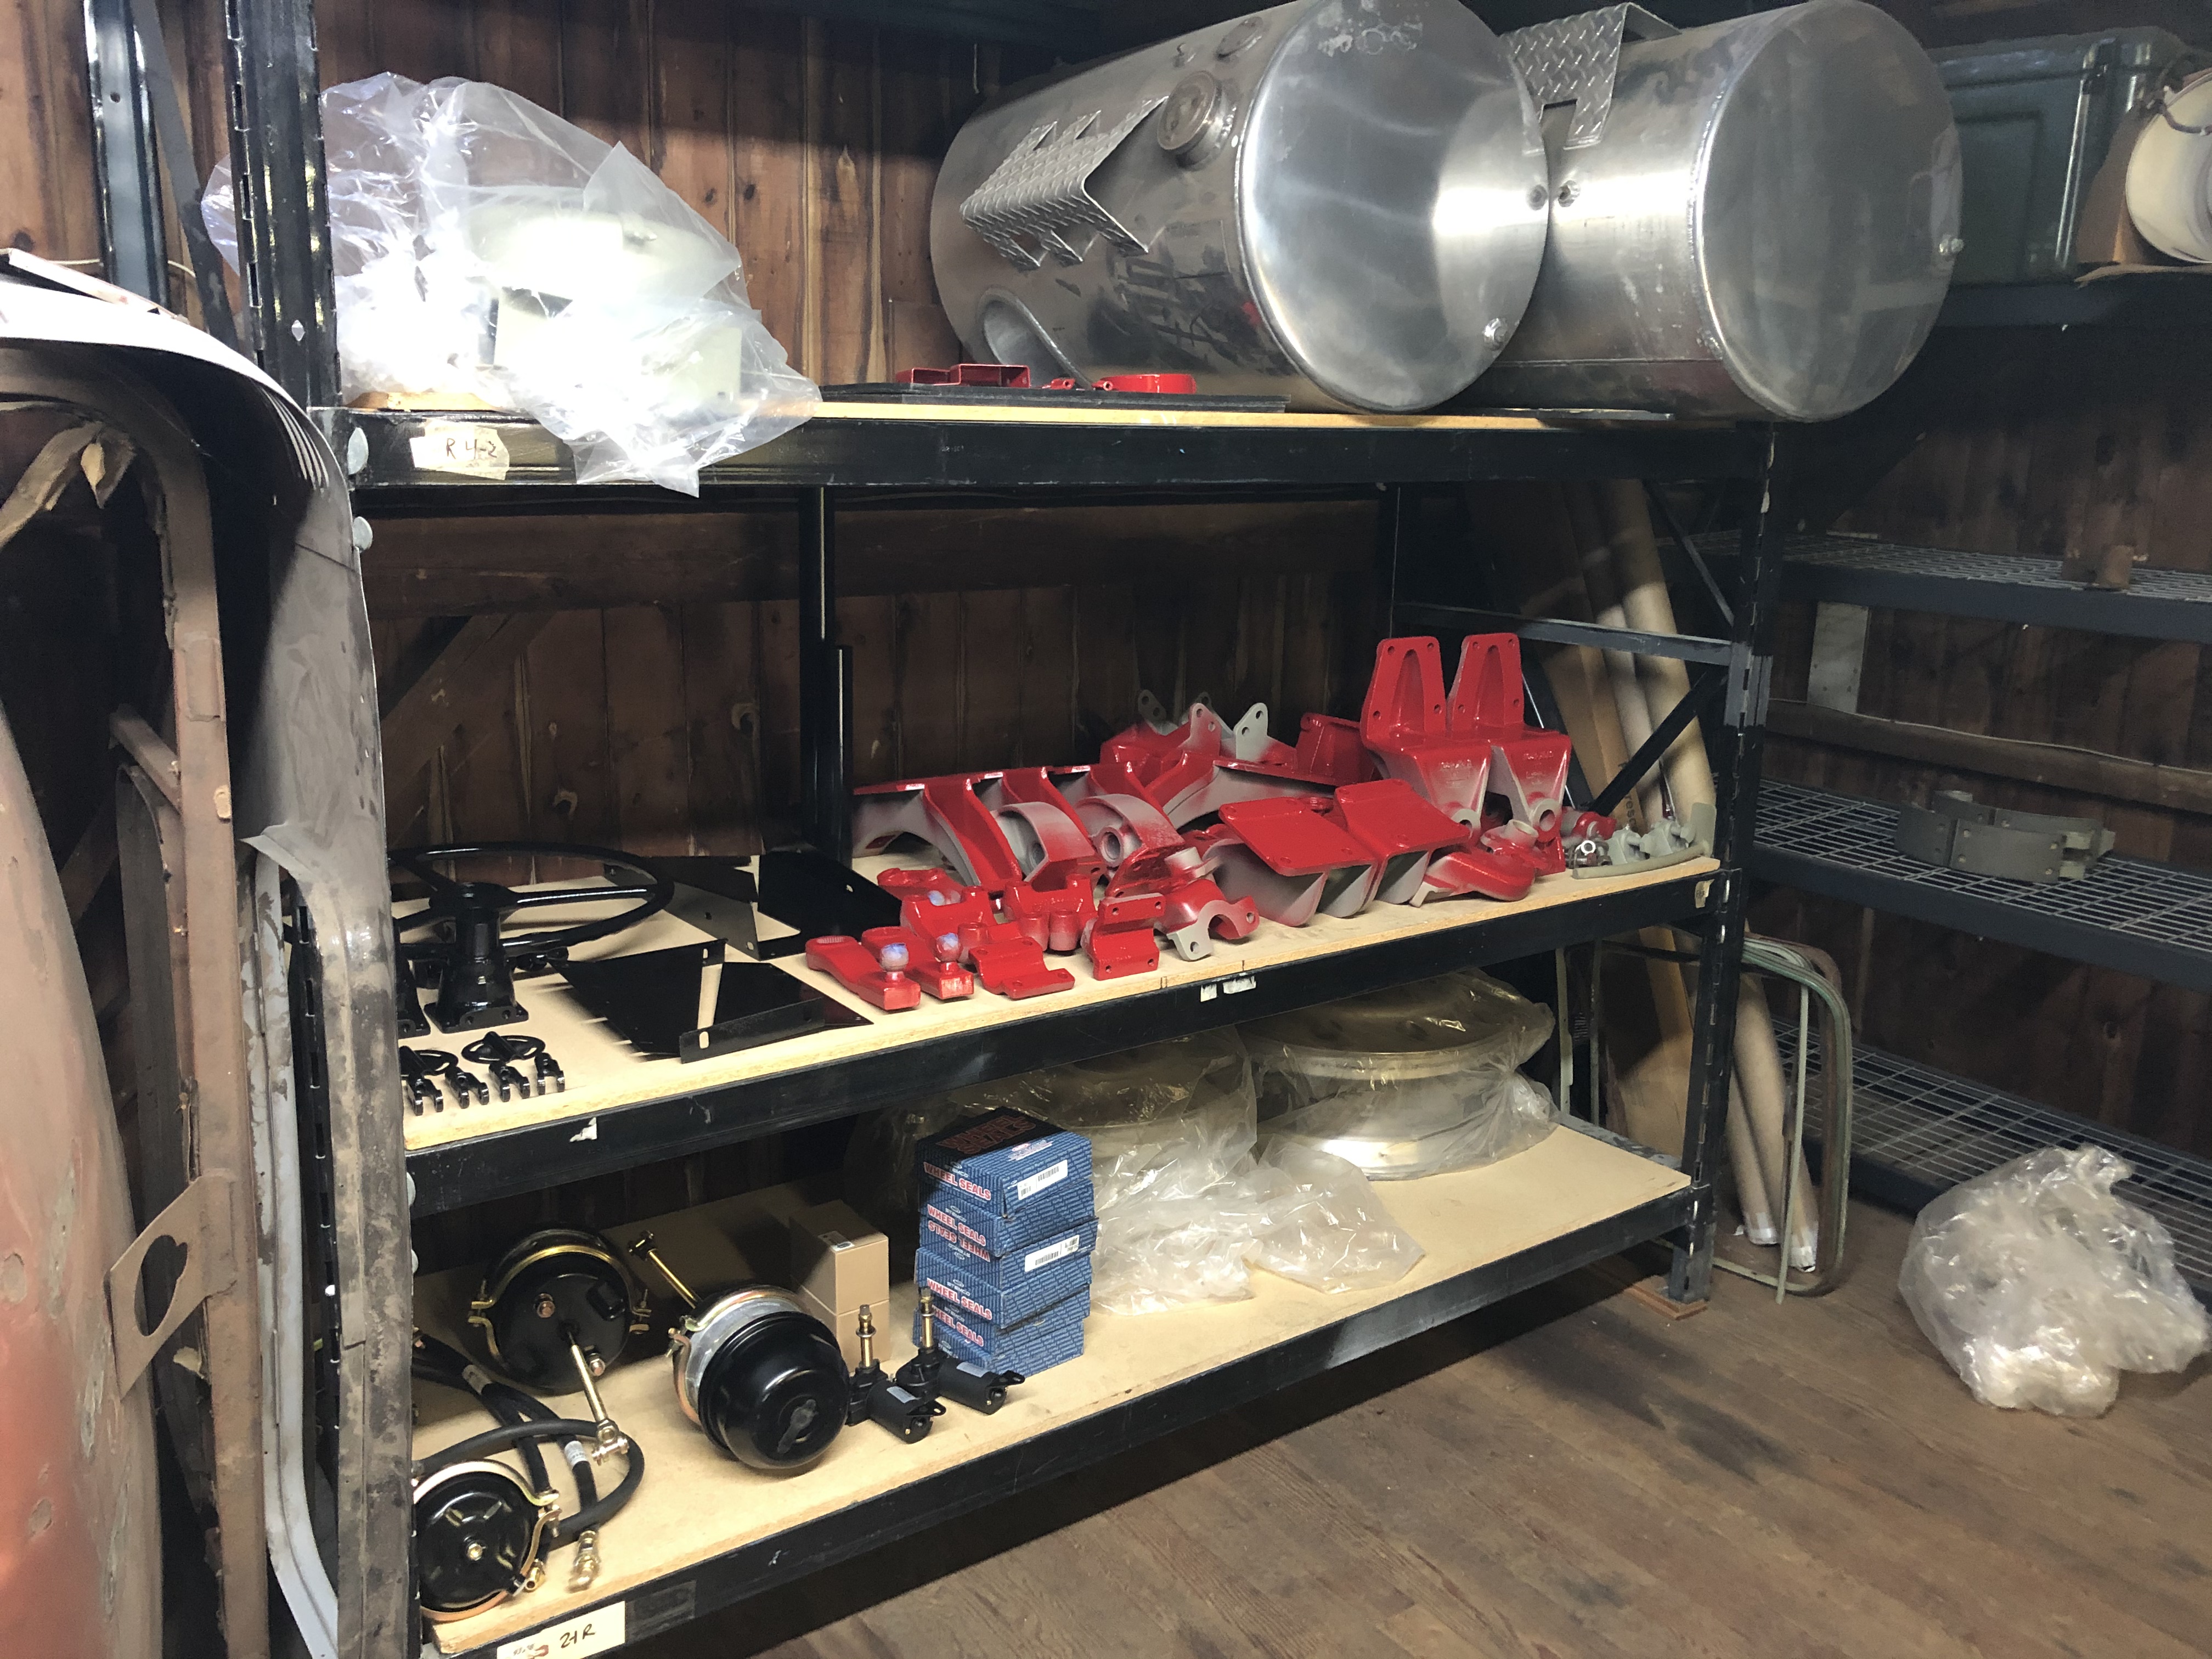
The amount of completed and new parts is really starting to accumulate. These shelves are getting full of parts that are ready to assemble. Assembly should go pretty quickly, all the hardware is ready for it. Still have more bodywork and paint to do for the hood and fenders, but just happy to be gaining some momentum!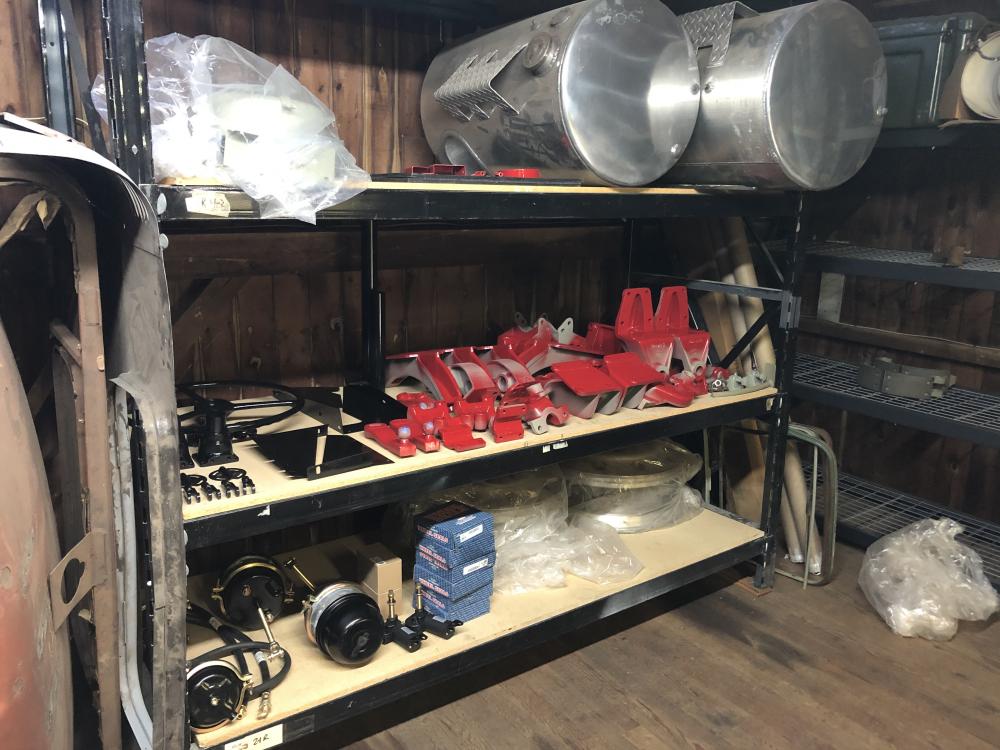
-
That might be an easier way to run the pipe back and clear a lot of obstructions. Several military trucks run the exhaust out like that, but then up through the fender in front of the cab. You could pass down over the frame rail, then 90 degrees straight back then up to your stack?
-
B-73 Restoration
mattb73lt replied to mattb73lt's topic in Antique and Classic Mack Trucks General Discussion
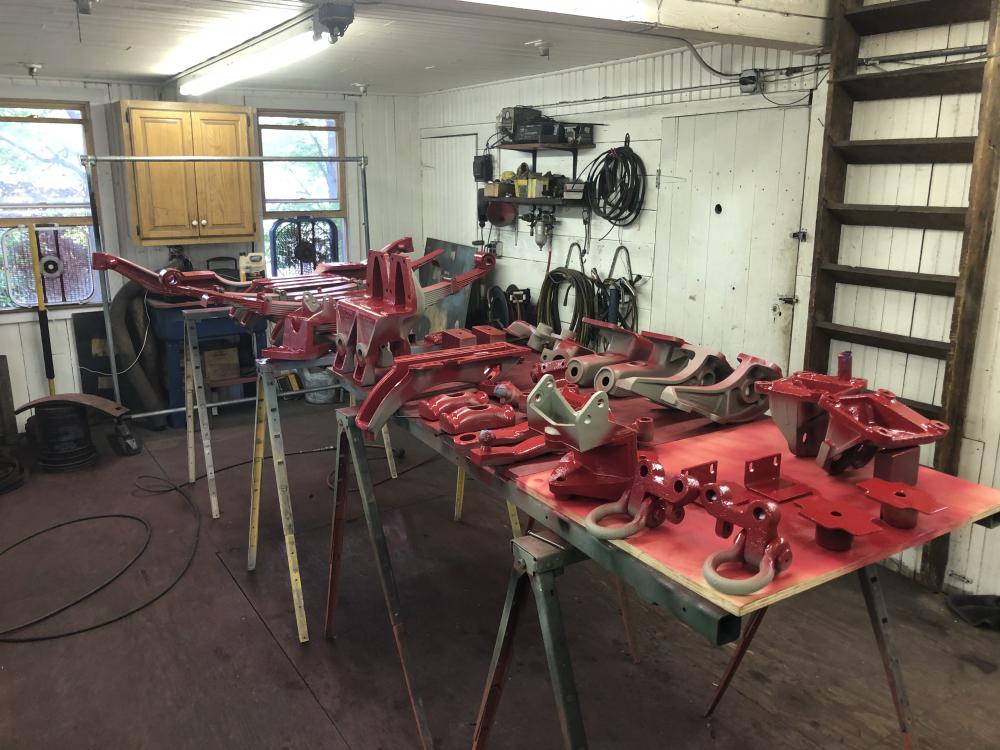
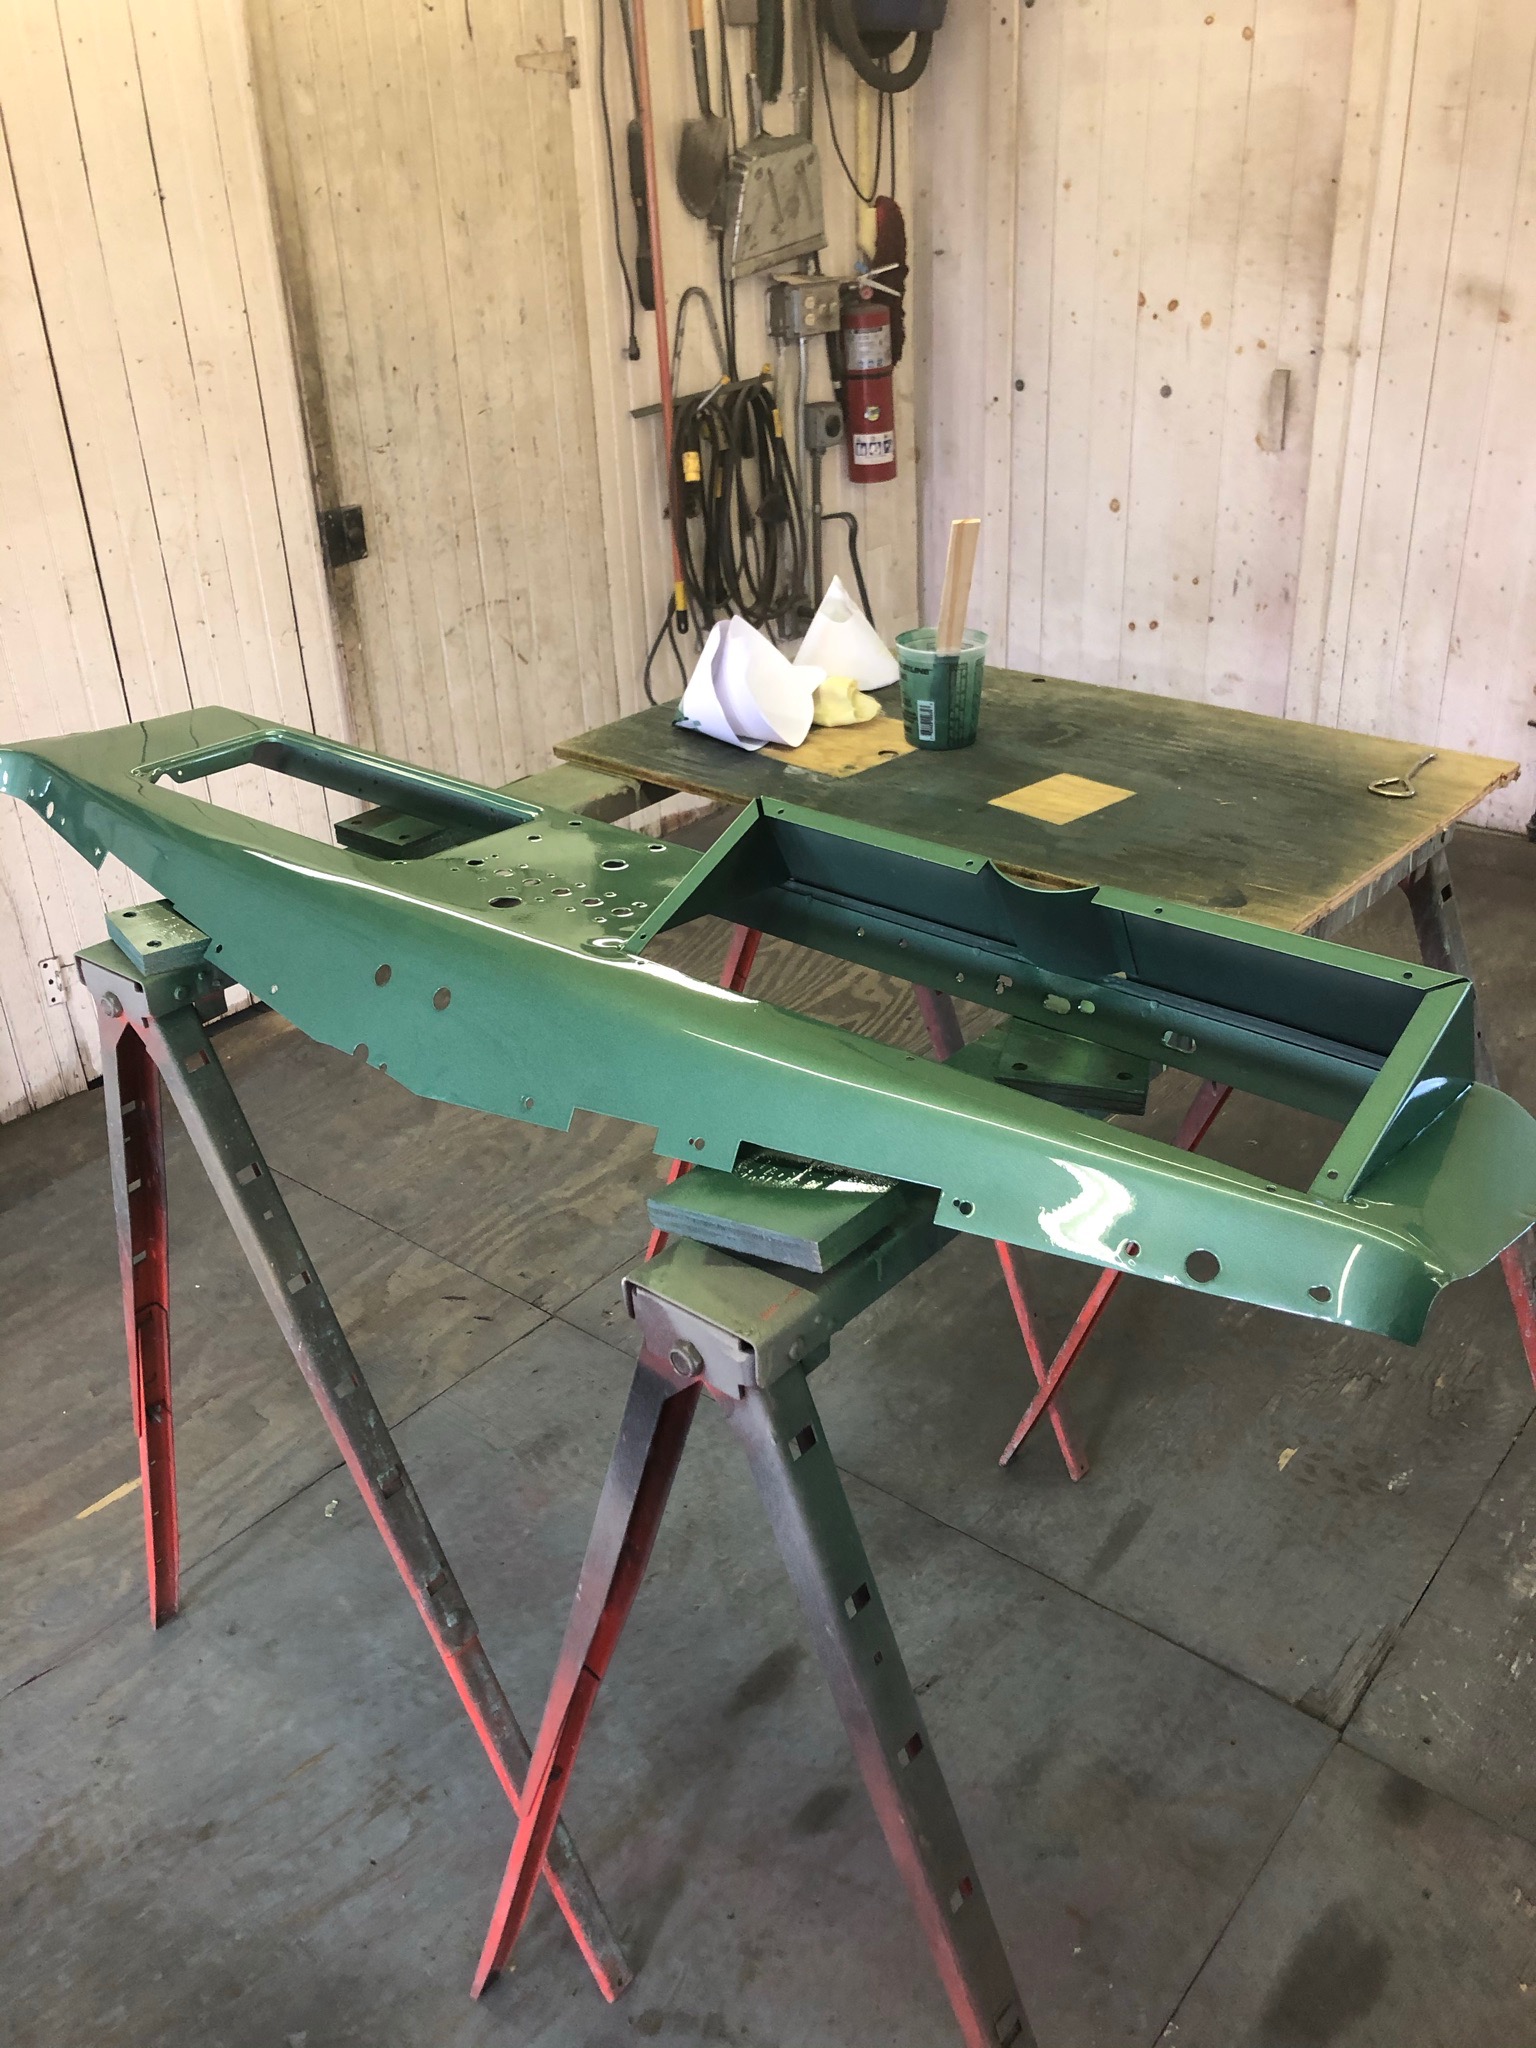
Lots of red today. Shot most of the frame pieces on their mating surfaces and areas that are hard to get when assembled. Couldn’t get all the pieces as I only had so much space to lay them out and they were getting pretty crowded. So, a partial load tomorrow to finish up. That’s a lot of parts when you break a truck down this far. Frame assembly is not too far off from here.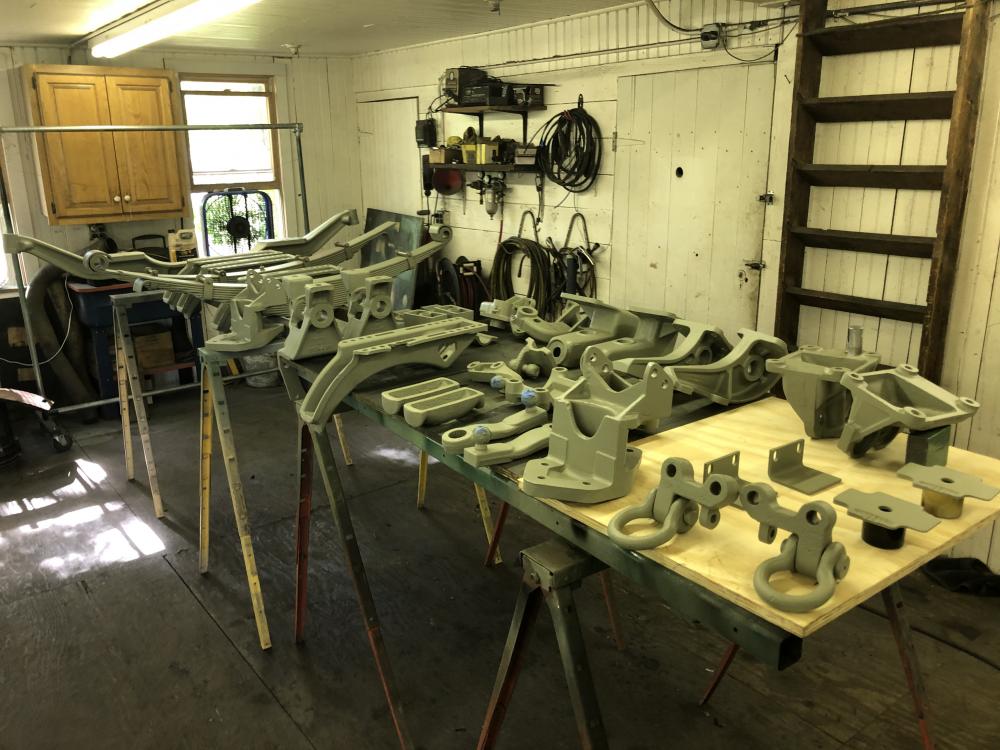
-
H Model Restoration
mattb73lt replied to h67st's topic in Antique and Classic Mack Trucks General Discussion
Really nice work!! It’s really starting to come together. -
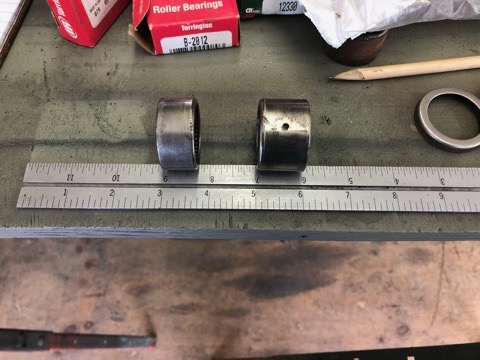
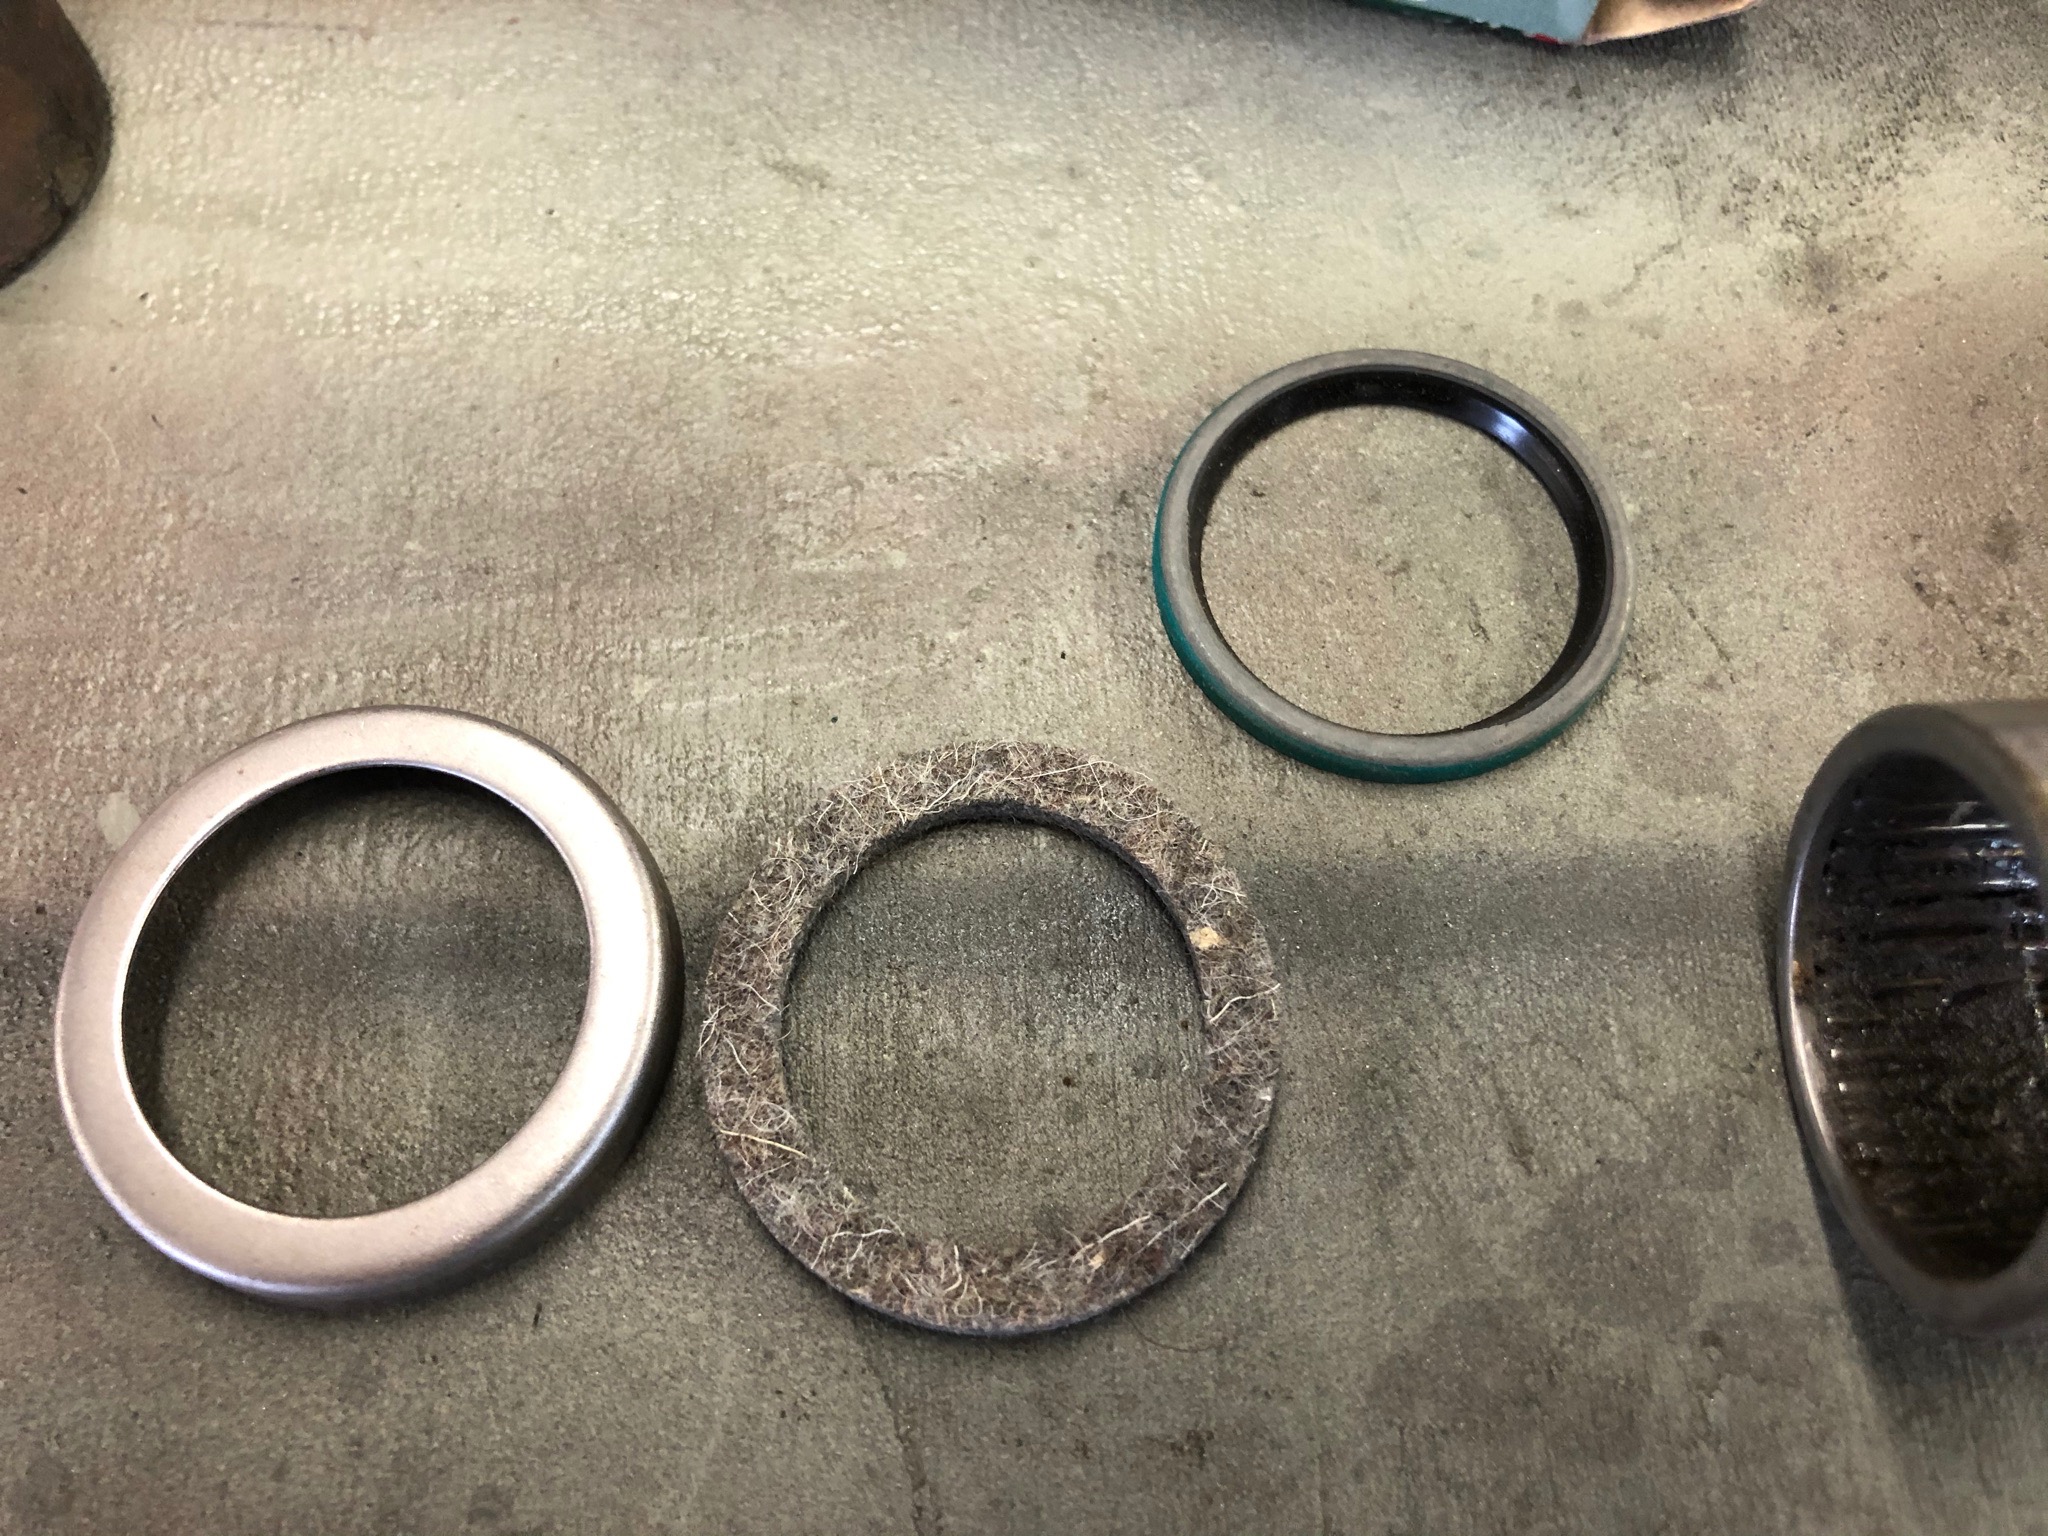
I did some digging into my archives and found the left over parts when I rebuilt the clutch cross shaft on my B-73. I'm not sure if the shaft is the same diameter but these part numbers should get you in the ball park. First, I think you'll need a new shaft if you're going to use ball bearings on it. The brinnelling will not run smoothly over the new bearings. If you put some oil light bronze bushings in, that may do on that shaft. I found two different size bearings for the application, both from Torrington Bearing Company: B-2012, which is 3/4" wide. B-2016, which is 1" wide. Both are readily available or will cross to other manufacturers. There are also two types of grease seals for the application, one is felt with steel retainer and the other is a neoprene lip seal. I don't have a part number for the felt one but the neoprene one is: Chicago Rawhide P/N 12330. When you press the new bearings in, ensure you line up the grease hole to the fitting. Here are some pics for what I have.


-
B-73 Restoration
mattb73lt replied to mattb73lt's topic in Antique and Classic Mack Trucks General Discussion
I don’t know about painting the top black, but I’ll trade for the rear you beat me to? LOL. I did solve my rear carrier issue by finding another with a 4.62R. The one I had with a 4.68R, had three corroded teeth I didn’t trust. -
B-73 Restoration
mattb73lt replied to mattb73lt's topic in Antique and Classic Mack Trucks General Discussion
That drip was centered directly above the glovebox door and there was no hiding it. On a good note, after all that work, the paint came out even better than the first time. -
L Model Glovebox Liners
mattb73lt replied to mattb73lt's topic in Exterior, Cab, Accessories and Detailing
The retro came out pretty good.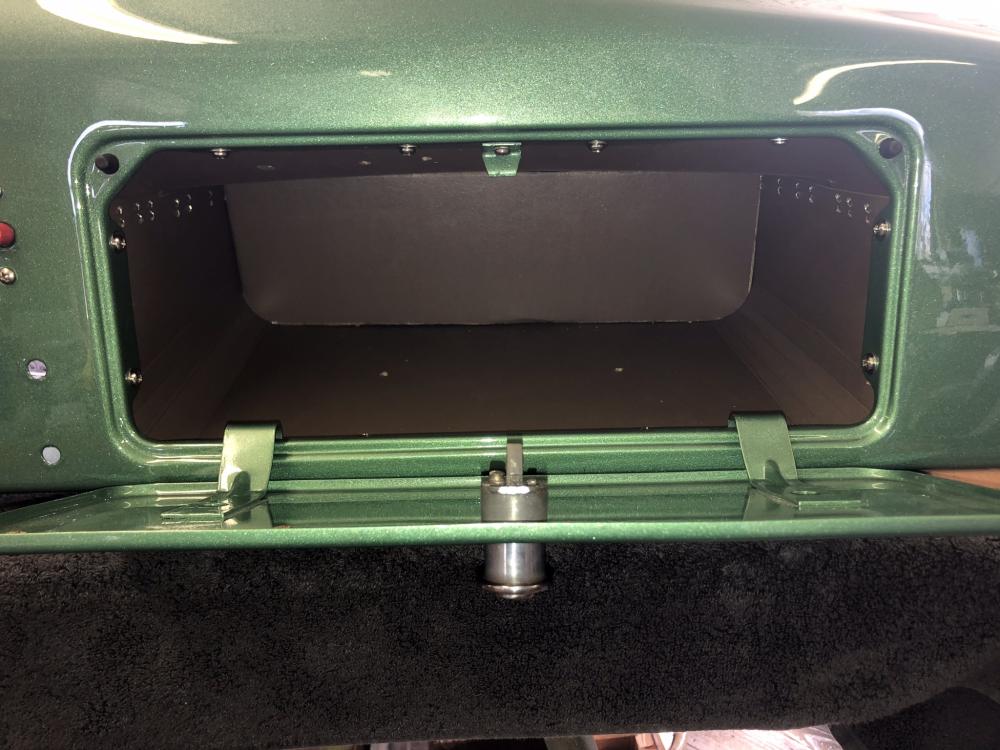

-
B-73 Restoration
mattb73lt replied to mattb73lt's topic in Antique and Classic Mack Trucks General Discussion
I don’t know. It was easy enough to do, the only thing that might be harder to get to is the nut for the radiator support rod. There’s also a drain plug on the bottom of the heater core that couldn’t be accessed. The floorboards and carpet are easily removed now. I had to remove the ashtray, but no one’s going to smoke in it anyway!! -
L Model Glovebox Liners
mattb73lt replied to mattb73lt's topic in Exterior, Cab, Accessories and Detailing
These are made of cardboard, I don't know if they would do them in other materials. You could contact them to see? -
B-73 Restoration
mattb73lt replied to mattb73lt's topic in Antique and Classic Mack Trucks General Discussion
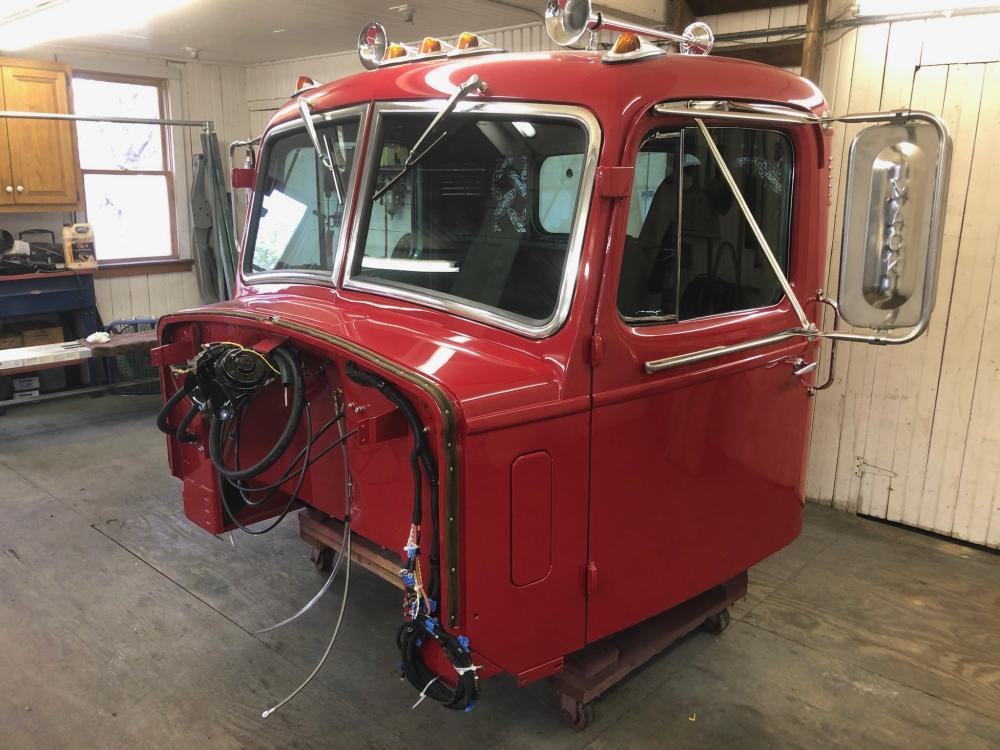
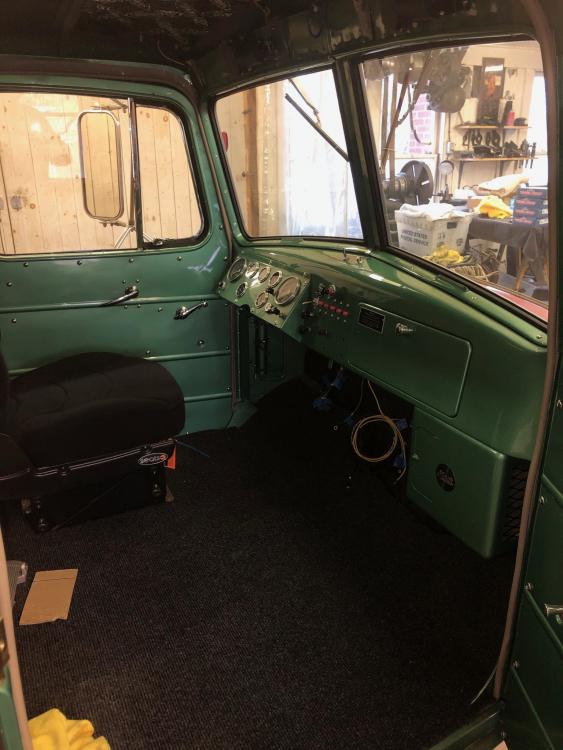
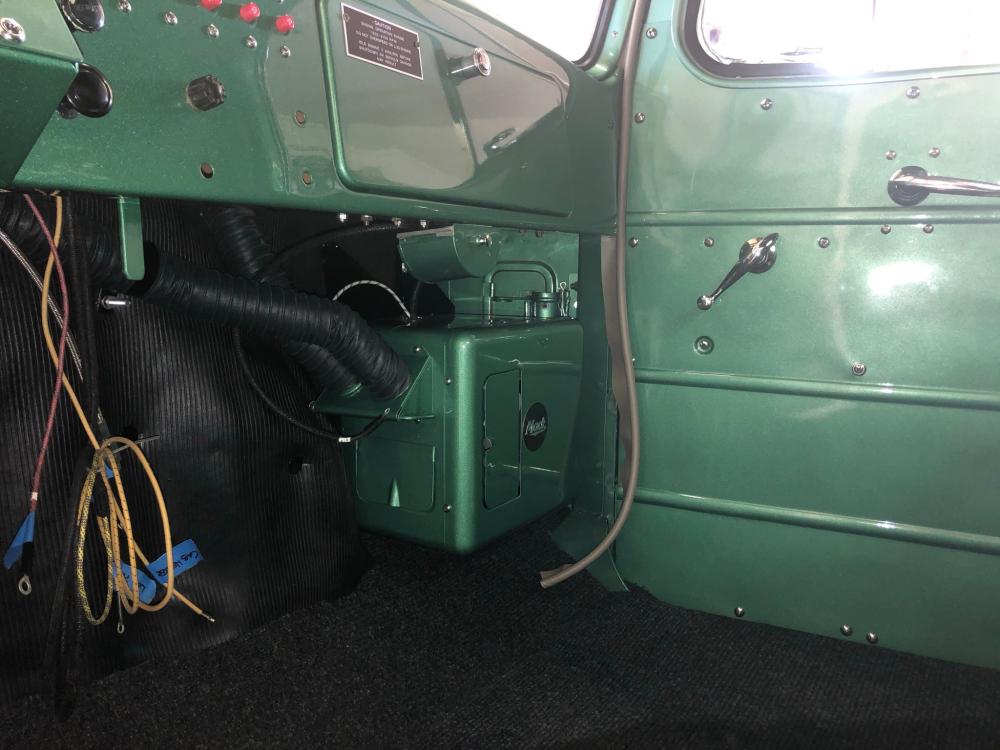
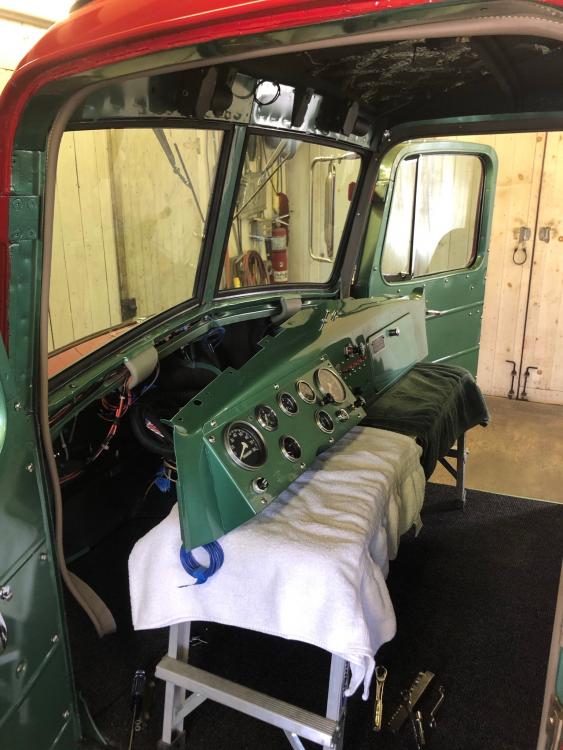
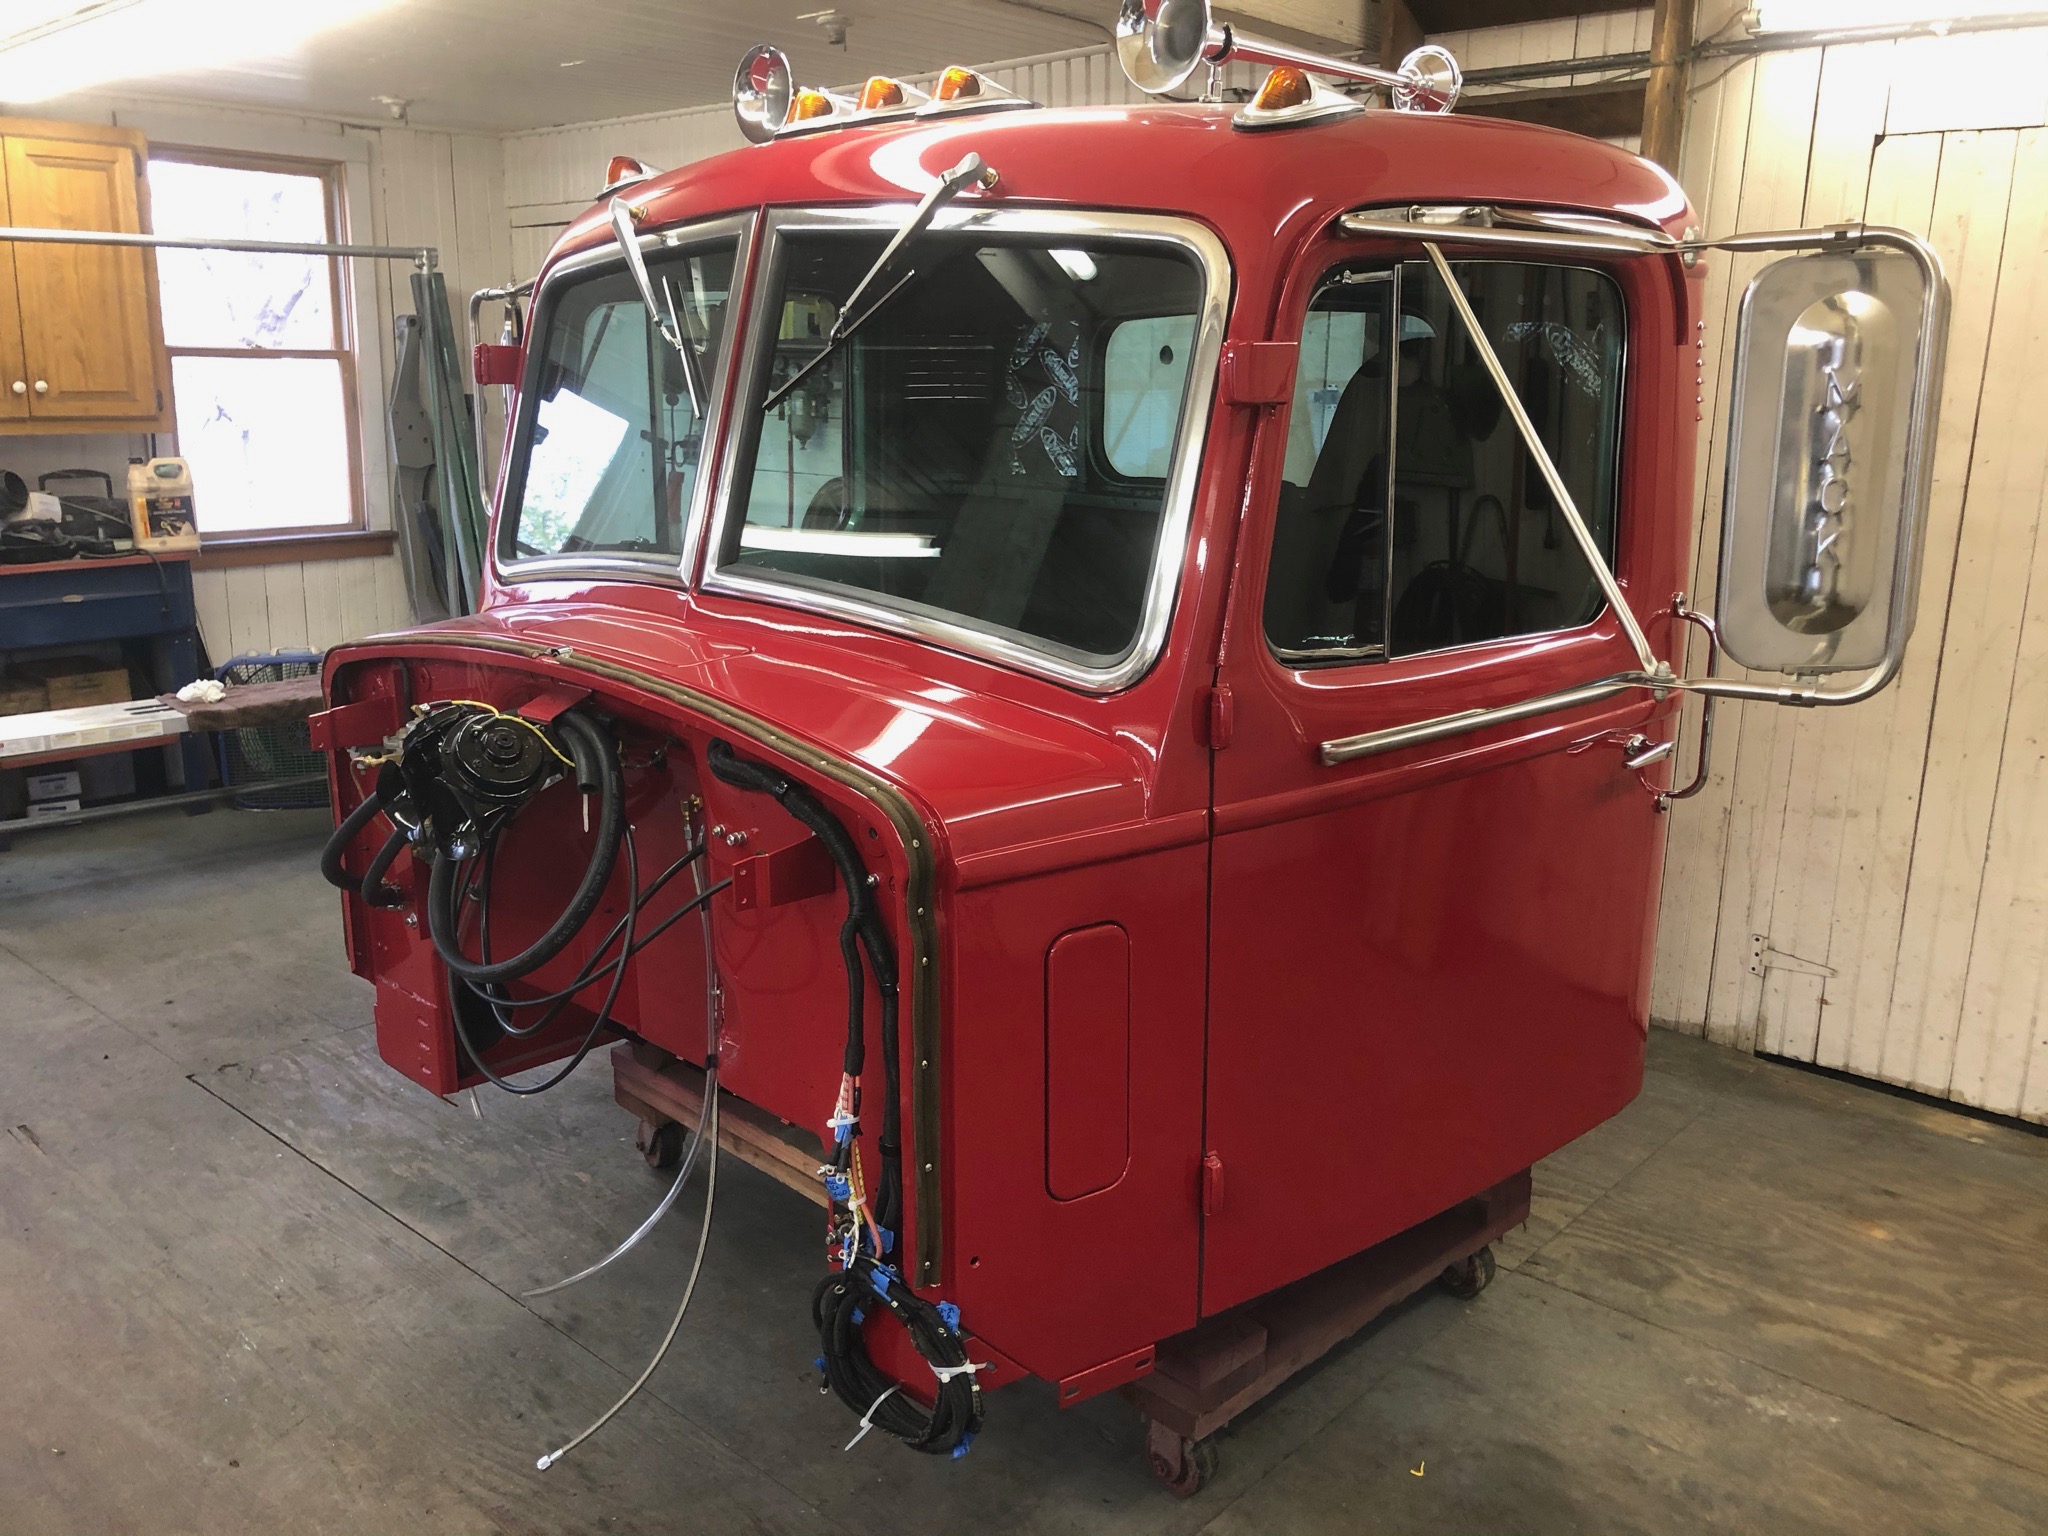
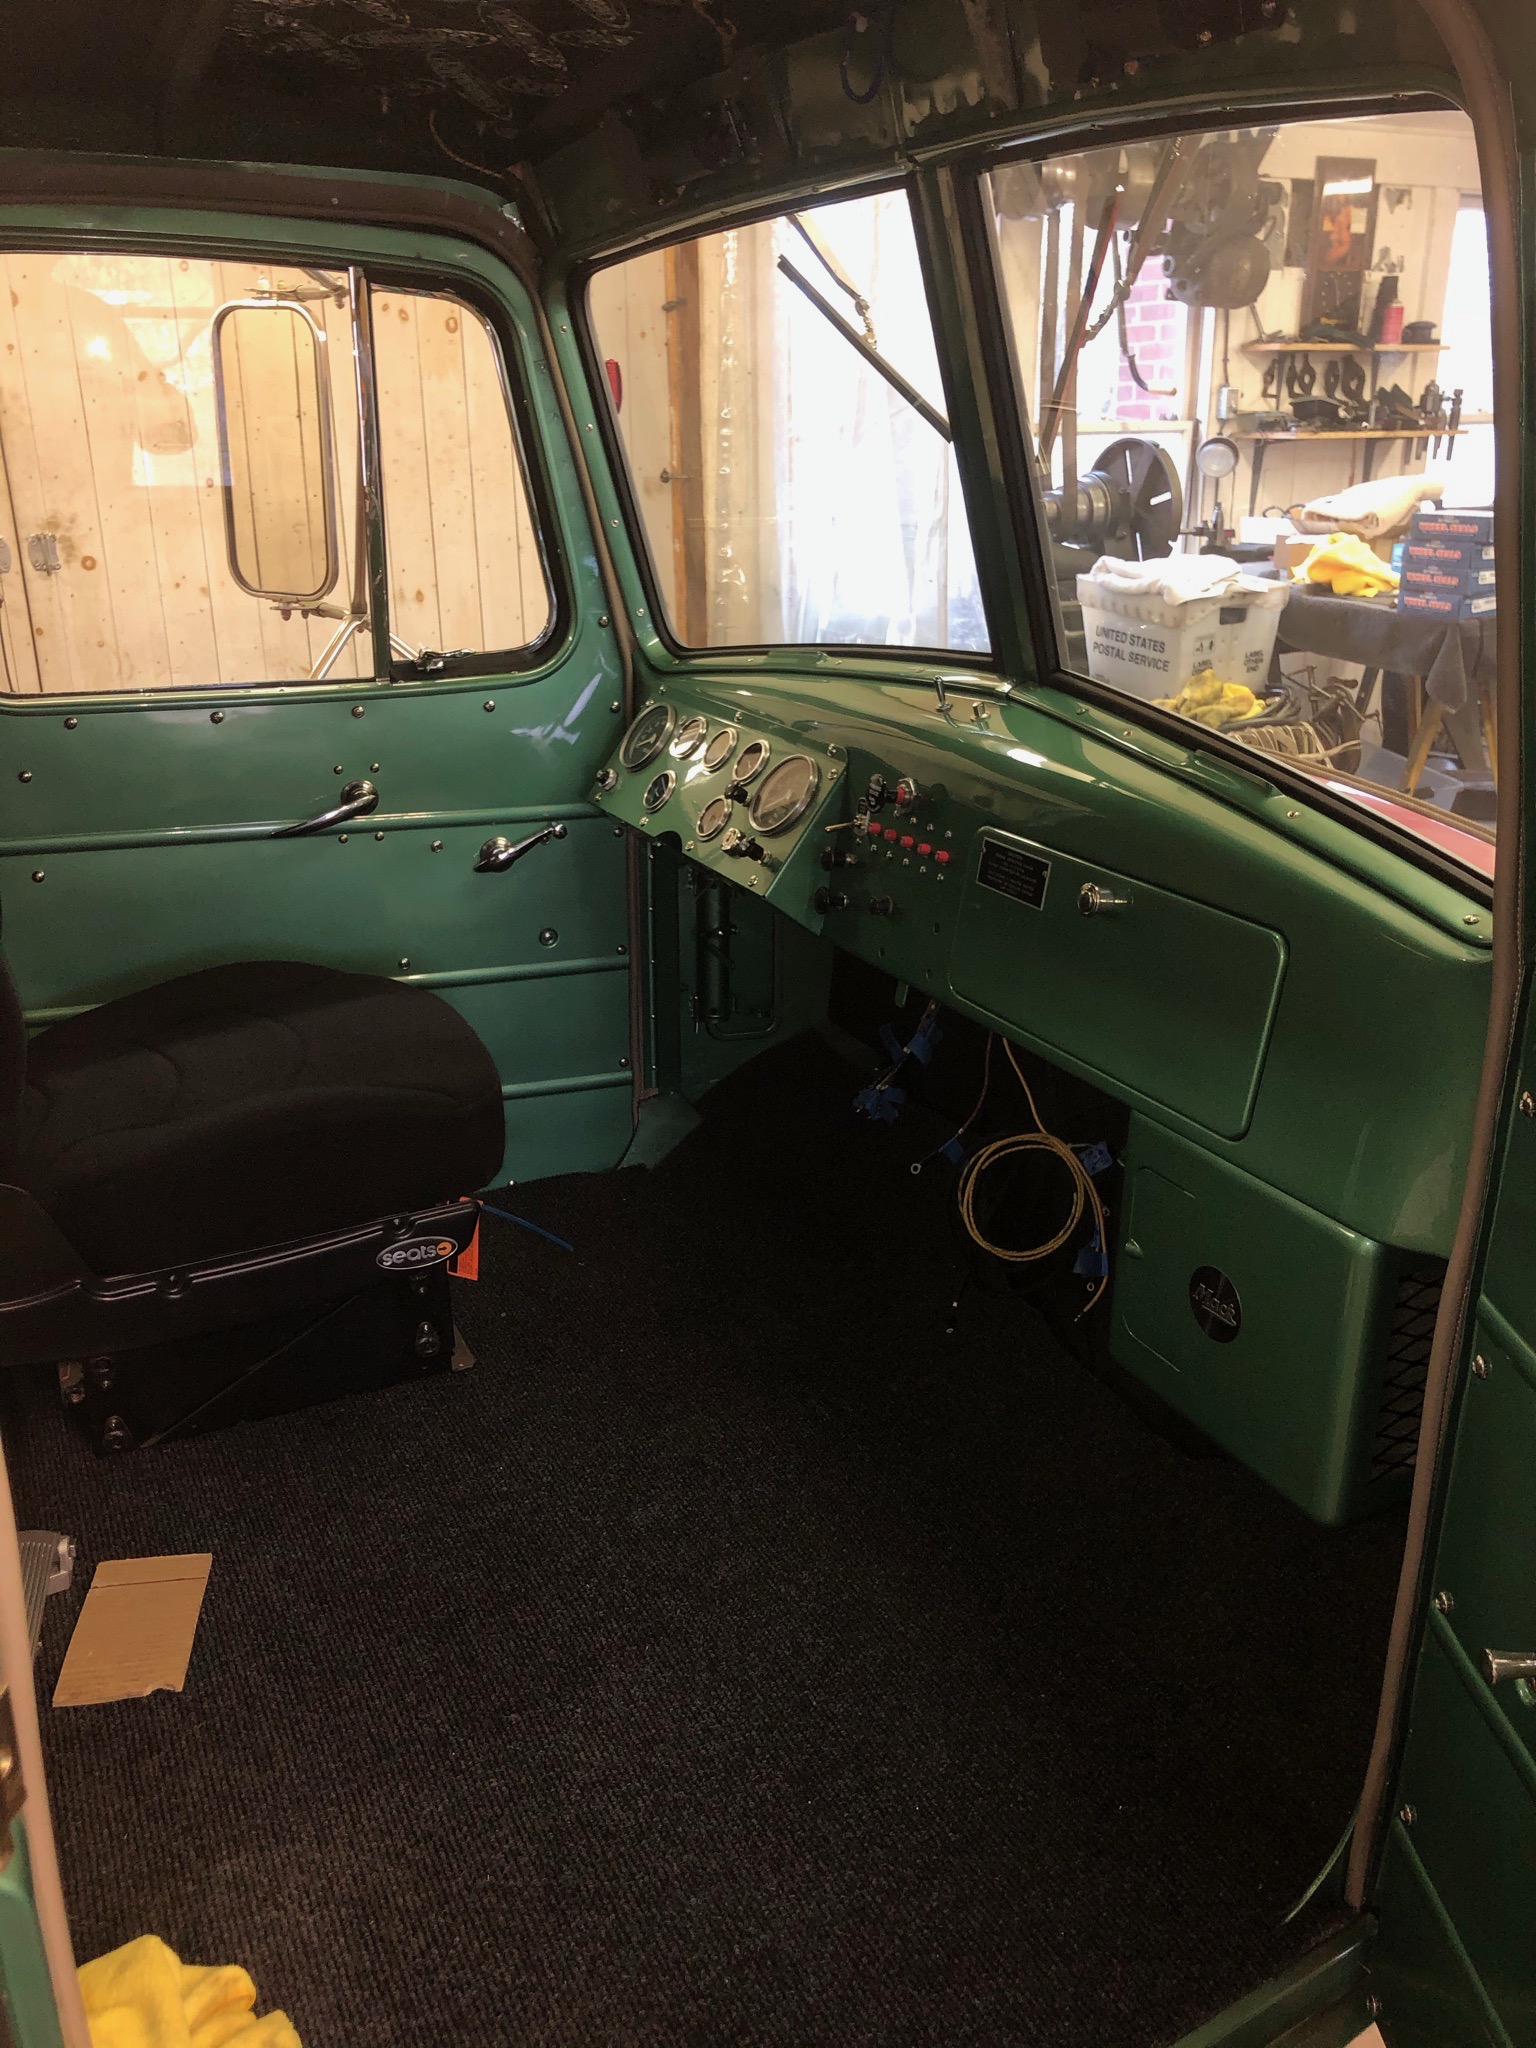
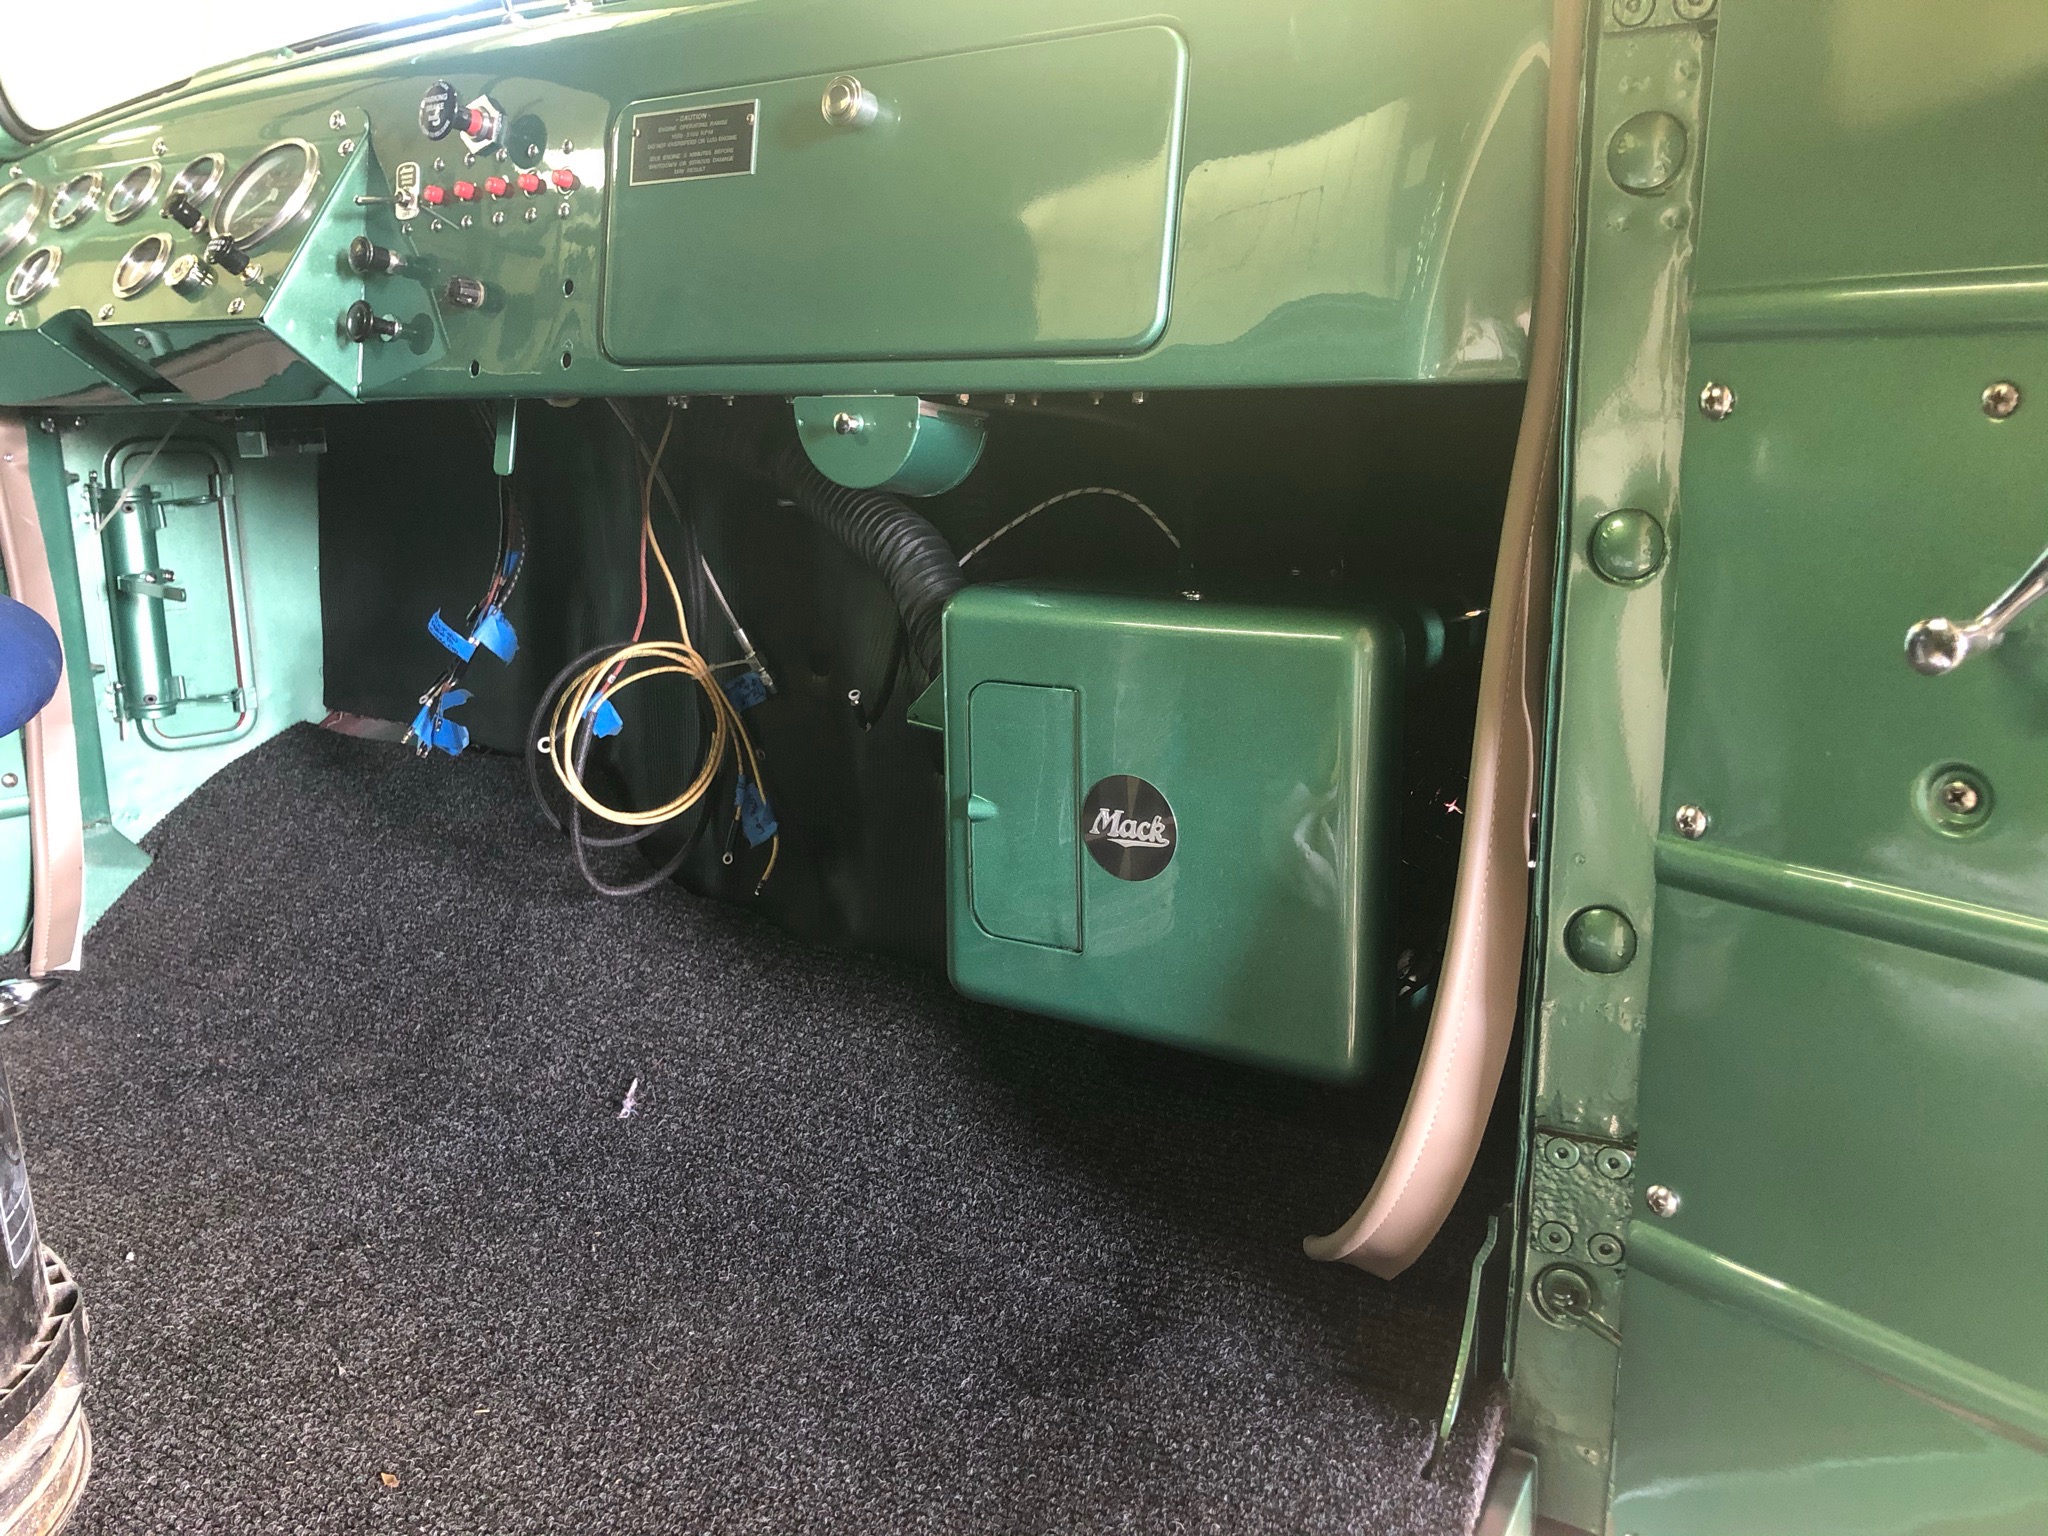
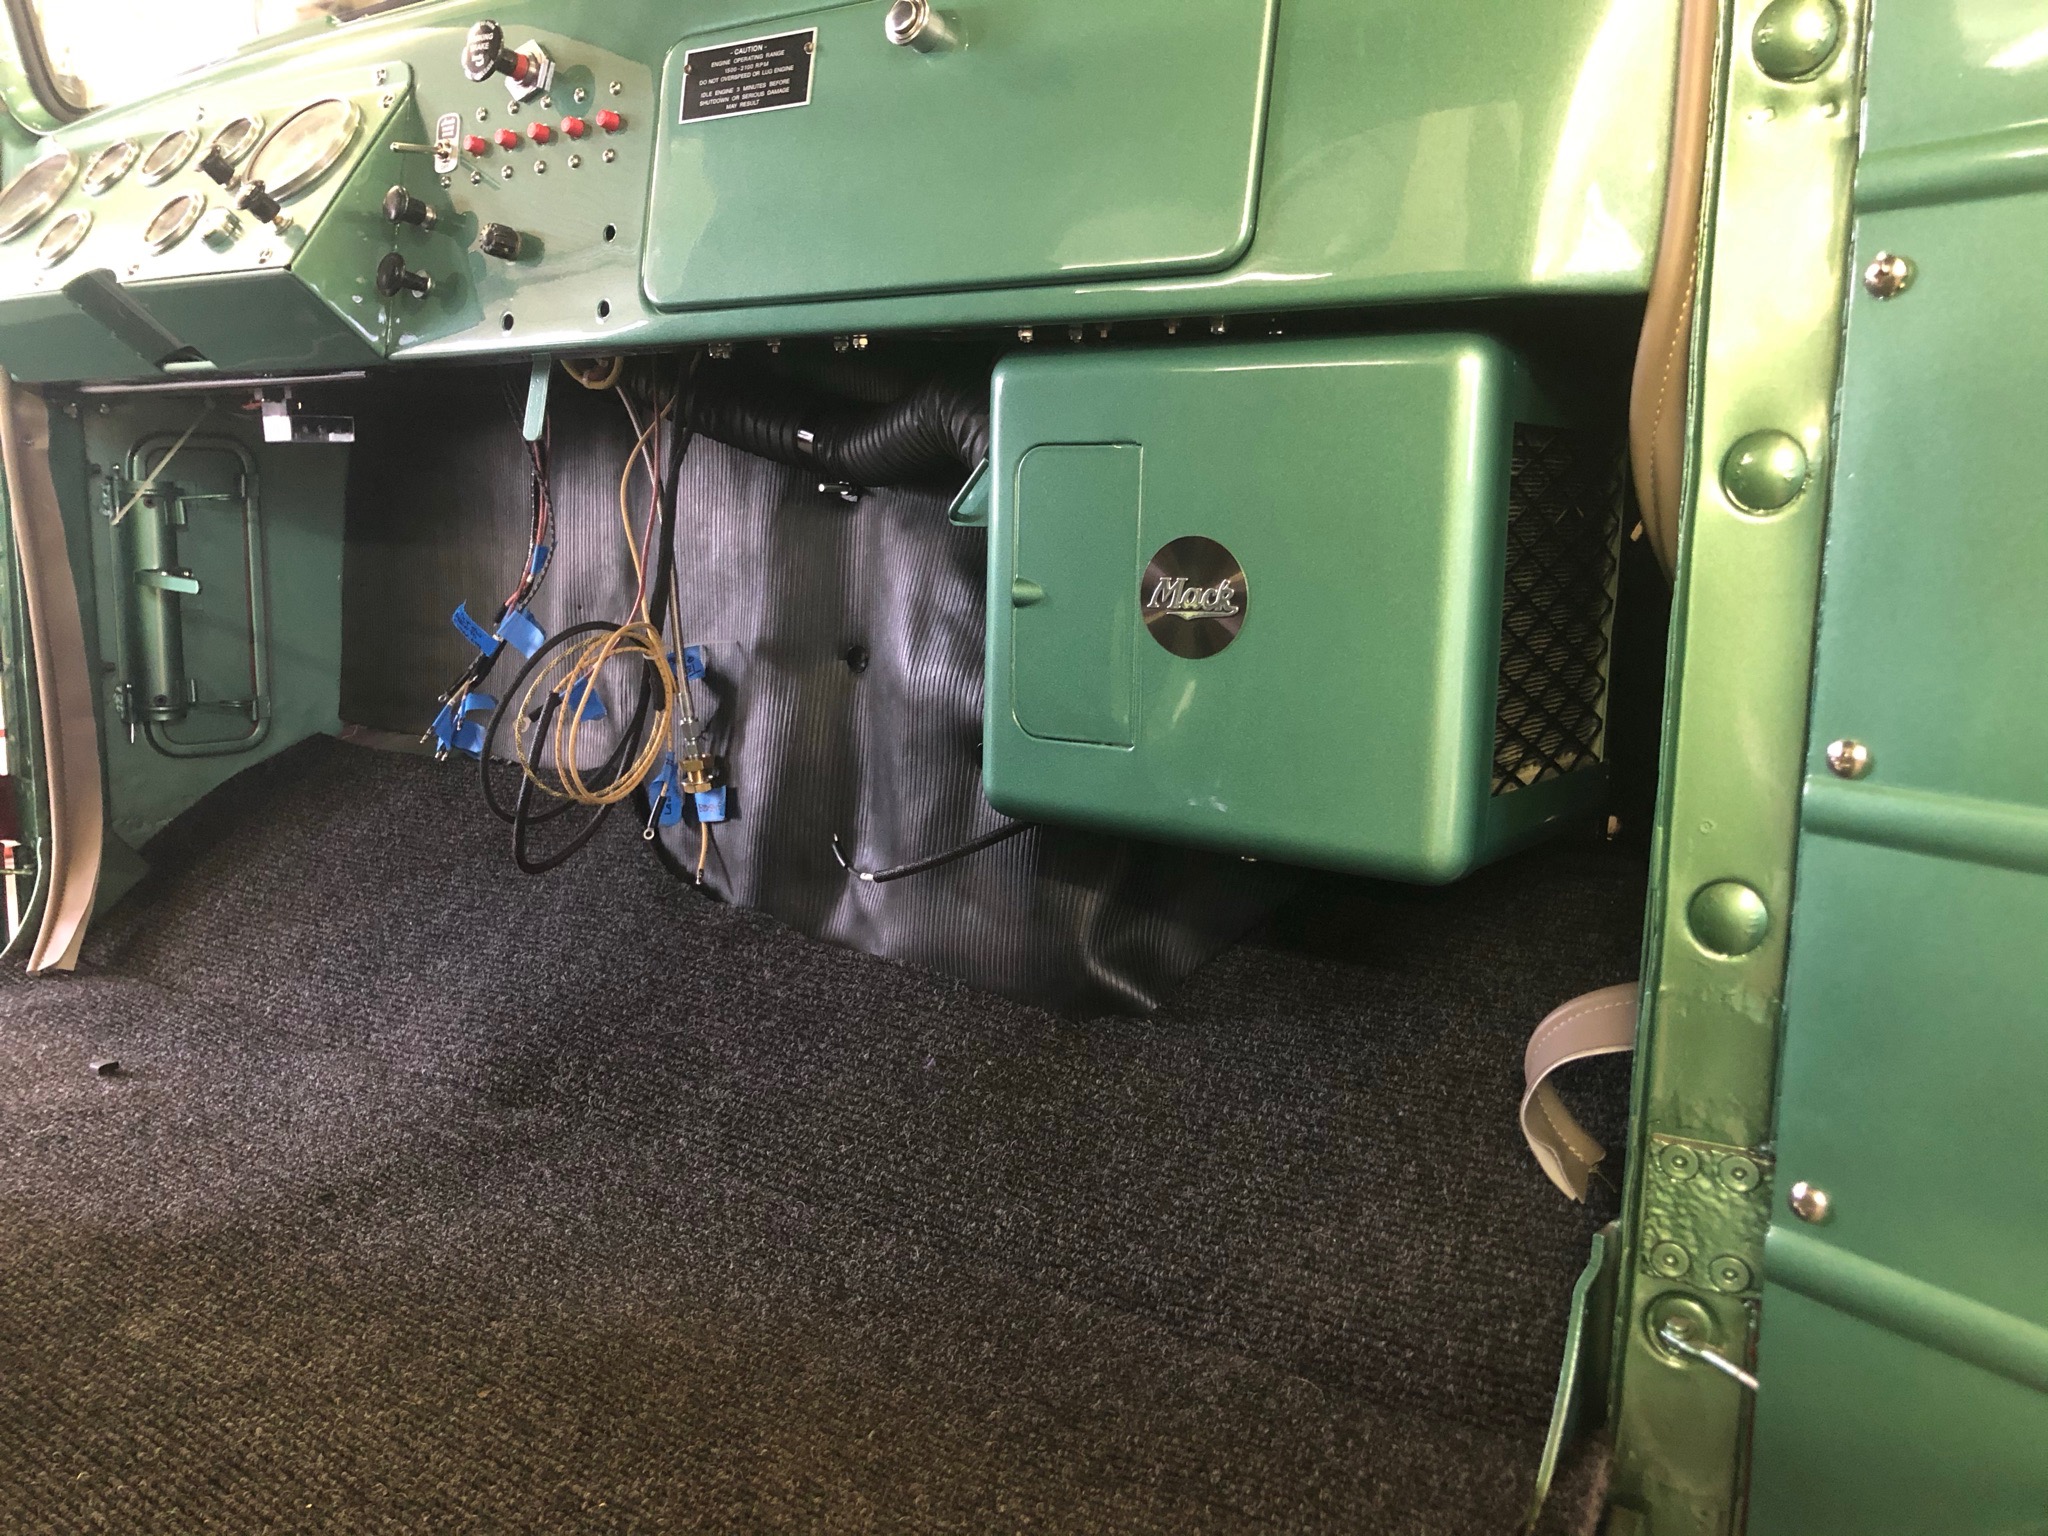
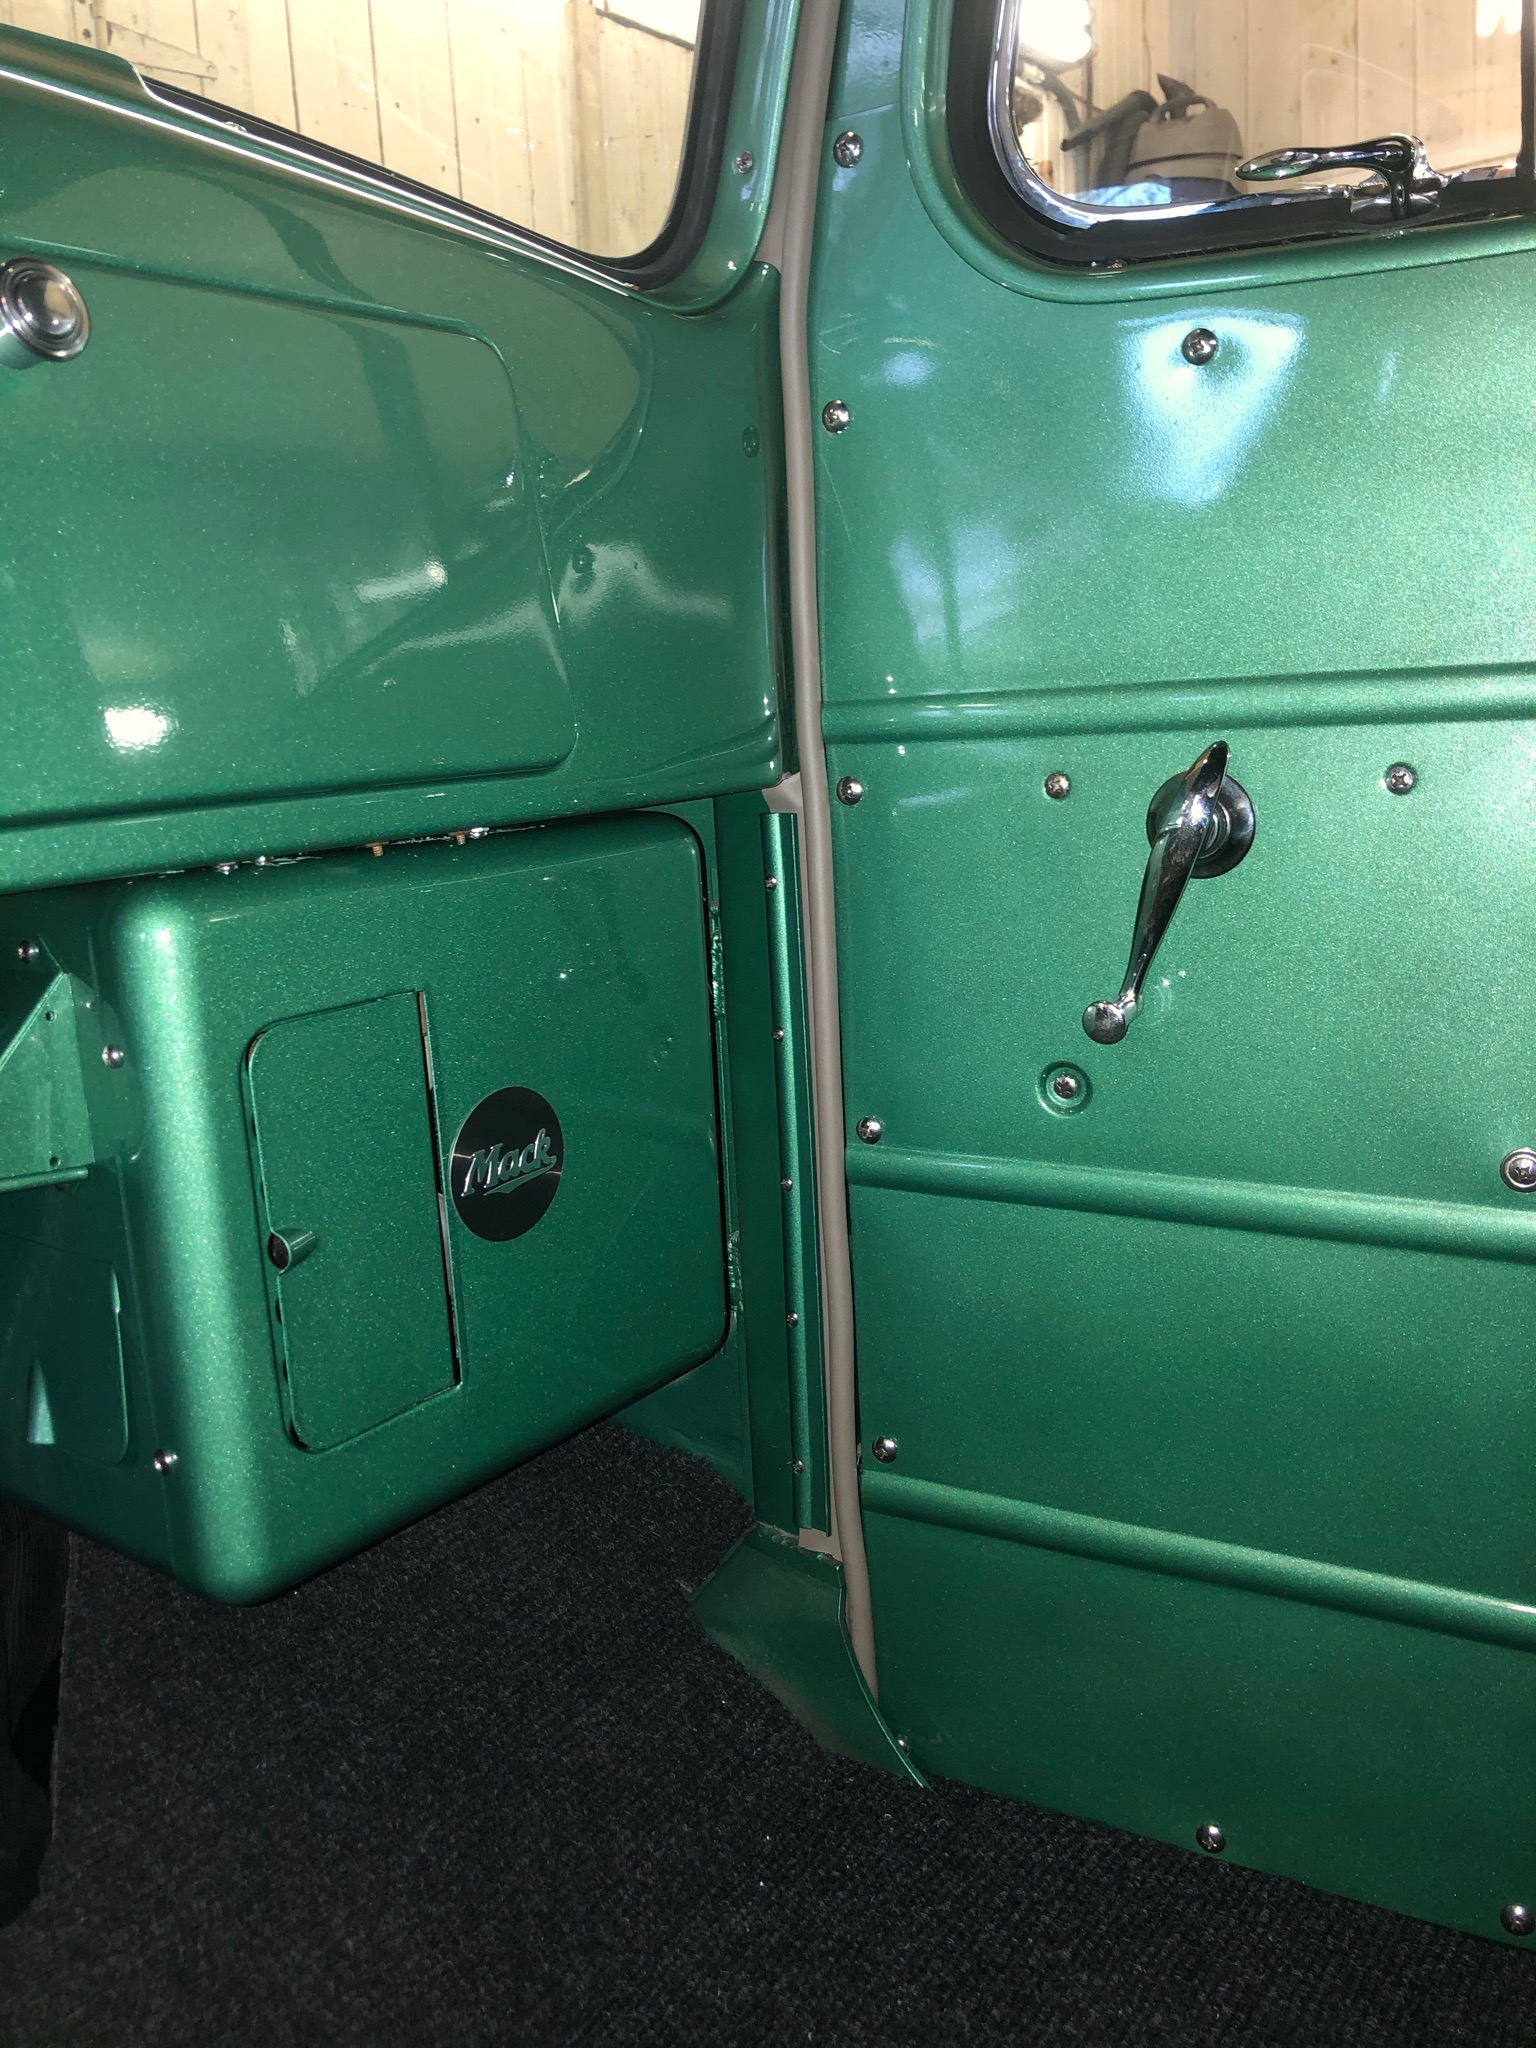
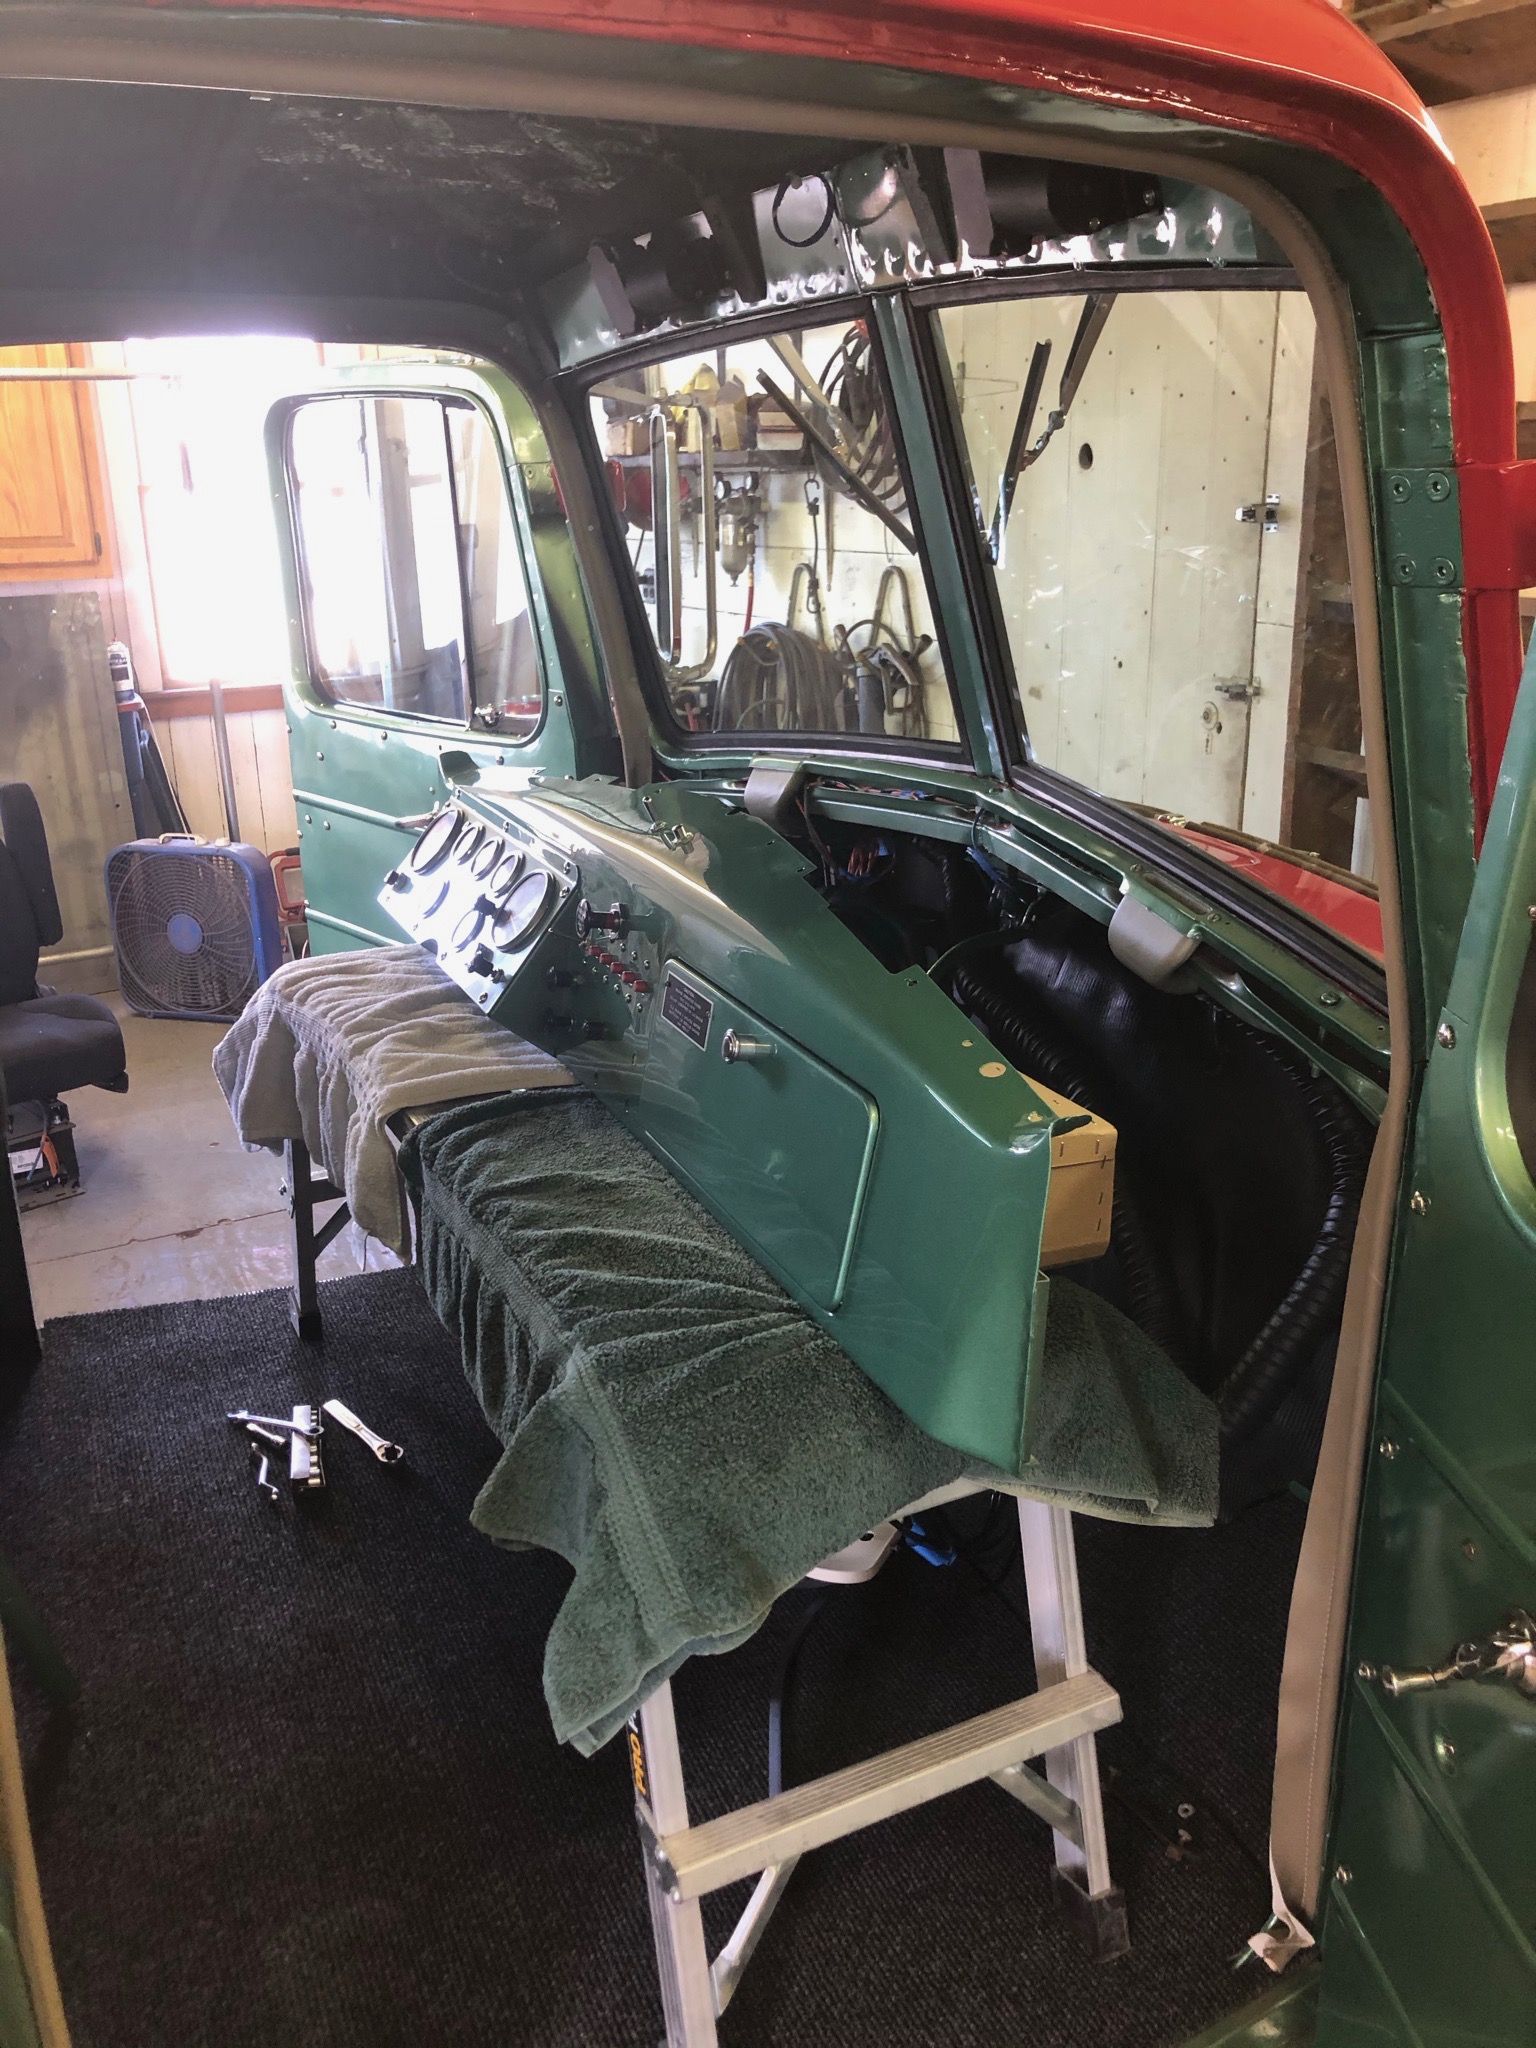
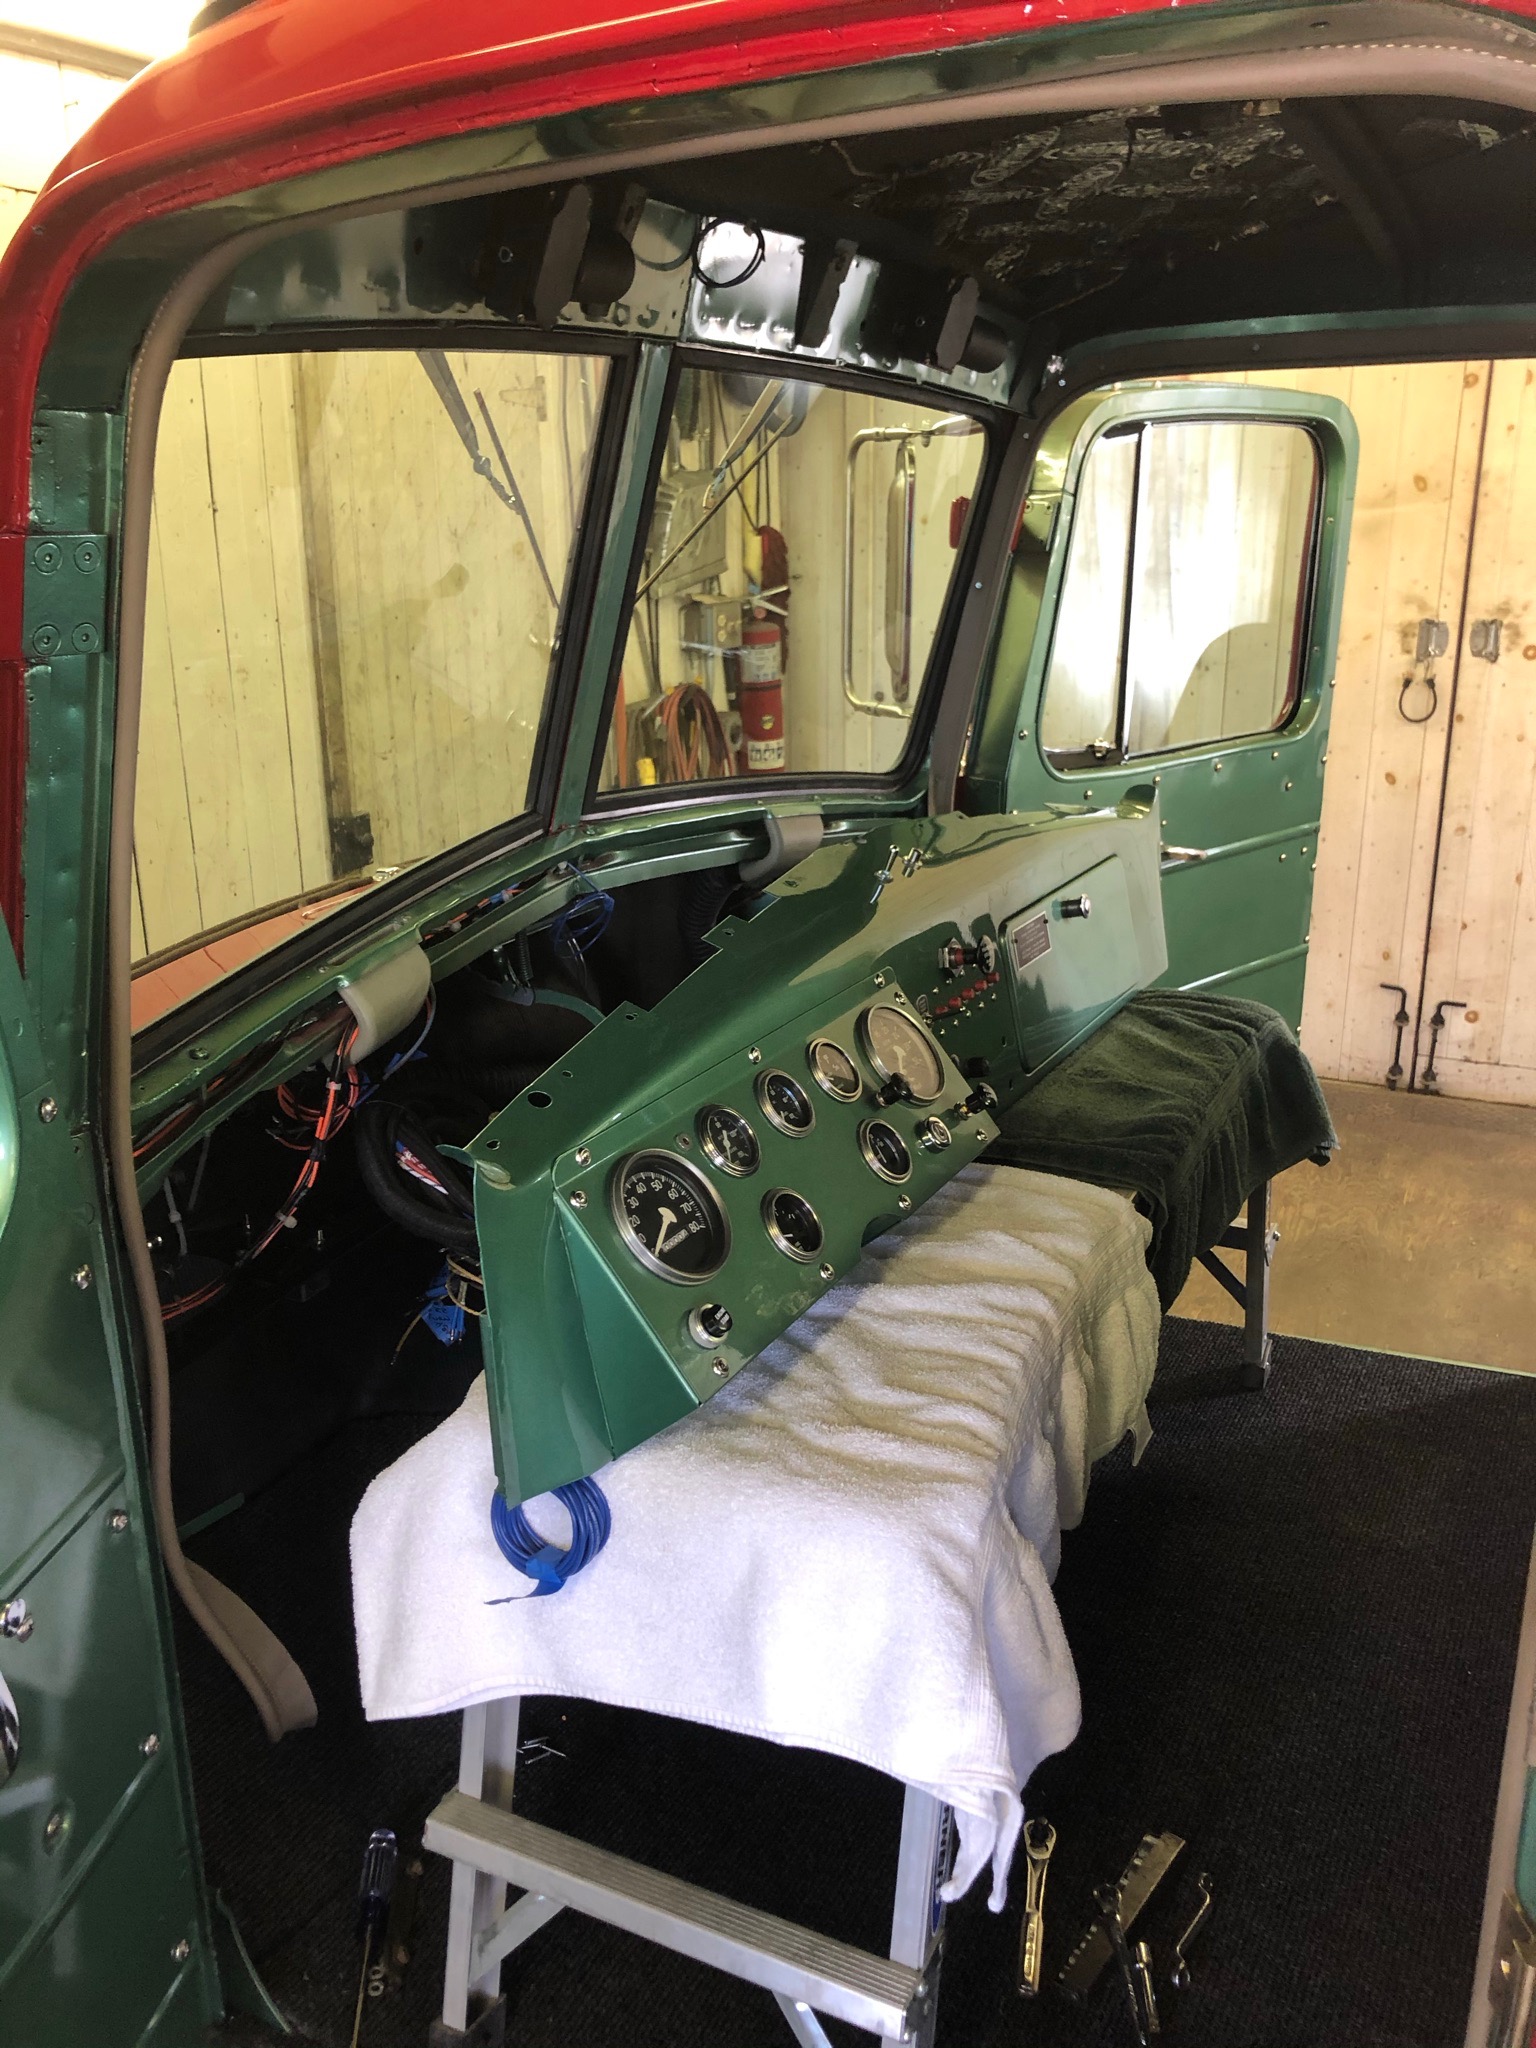
Fixed my posting issues without deleting most of my pictures by becoming a VIP member. (Thanks, Barry!!). Finished up a lot of detail work on the cab and it's now ready for the long awaited trip to get the headliner and back wall installed. I'm just waiting for the upholsterer to call back that he's ready. The whole cab is ready for mounting and hookup. Lots of hours spent getting all of those tedious things wrapped up. I was going to leave the factory heater out to have more passenger foot room, it was mounted so close to the floor you can't get your feet under it and getting at the floorboards was extremely difficult. I couldn't find a reasonable replacement to do it's job. After fixing it all up, I reinstalled it and found that I could move it upwards 4". So, I made up some extra 10" brackets and the issue was solved. I also had to fab up some retainers for the door windlace, down by the footwells. A little bit of thinking, some 1/2' half round brass stock and some time on the Bridgeport created news ones. These are now held in by stainless screws, not the original spring clips. Another issue solved. I also found a Facebook page that a lot of my club members are on and people that know me or the truck are on, that's for LT,LTL,LTH & B-73/75/77's, so I've been posting there as well to keep them updated on the restoration. So, the hardest part so far and hopefully the worst, is about to be be hind me!! Doing some Spring maintenance to the rest of the fleet for the summer, but about to turn this page and start in on the long waiting frame assembly. Really pleased with the quality, fitment and look of this cab and can't wait to see it run and to drive it. Thank you to everyone their for support, encouragement and comments so far on this project, it is very much appreciated!!!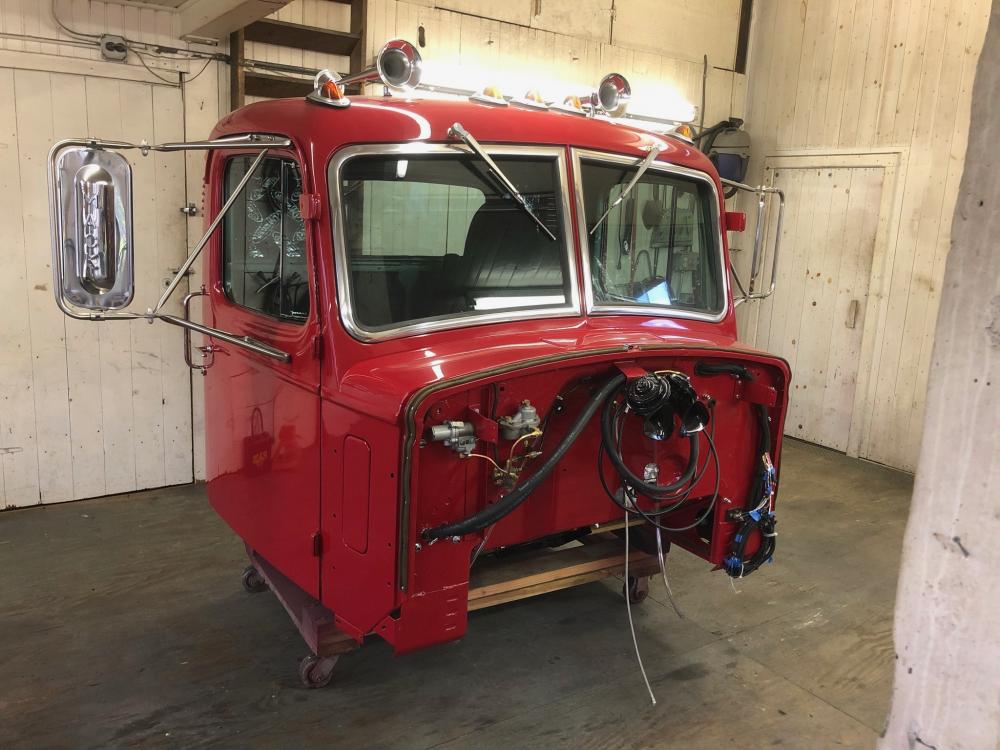


-
B-73 Restoration
mattb73lt replied to mattb73lt's topic in Antique and Classic Mack Trucks General Discussion
No A/C, yet. Planning for a back wall unit later on, when it's assembled. Maybe a Red Dot unit or something similar. I think what you're seeing is the defroster hoses. I pre-ran those as they're hard to do later. -
B-73 Restoration
mattb73lt replied to mattb73lt's topic in Antique and Classic Mack Trucks General Discussion
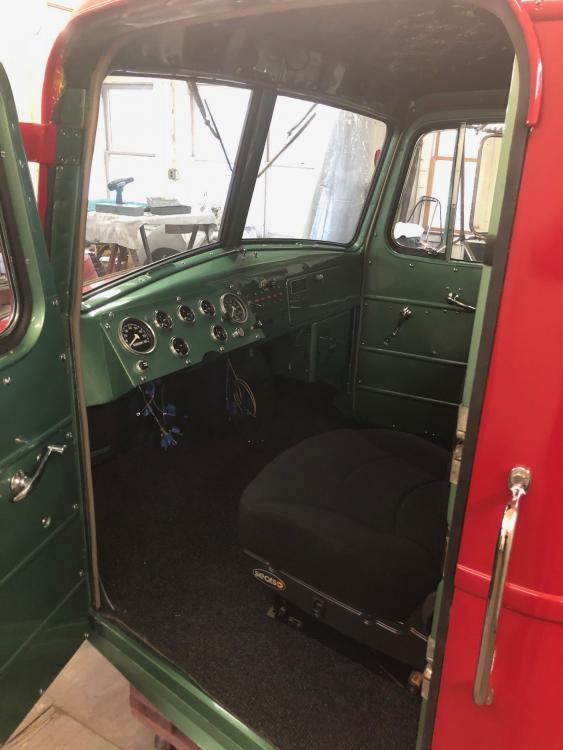
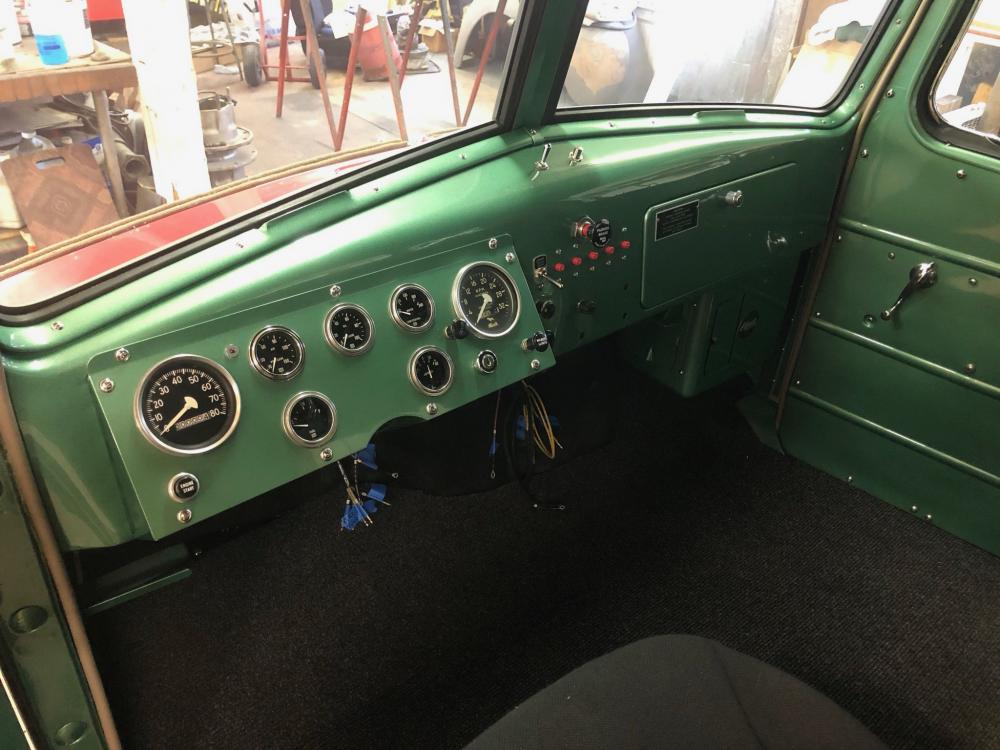
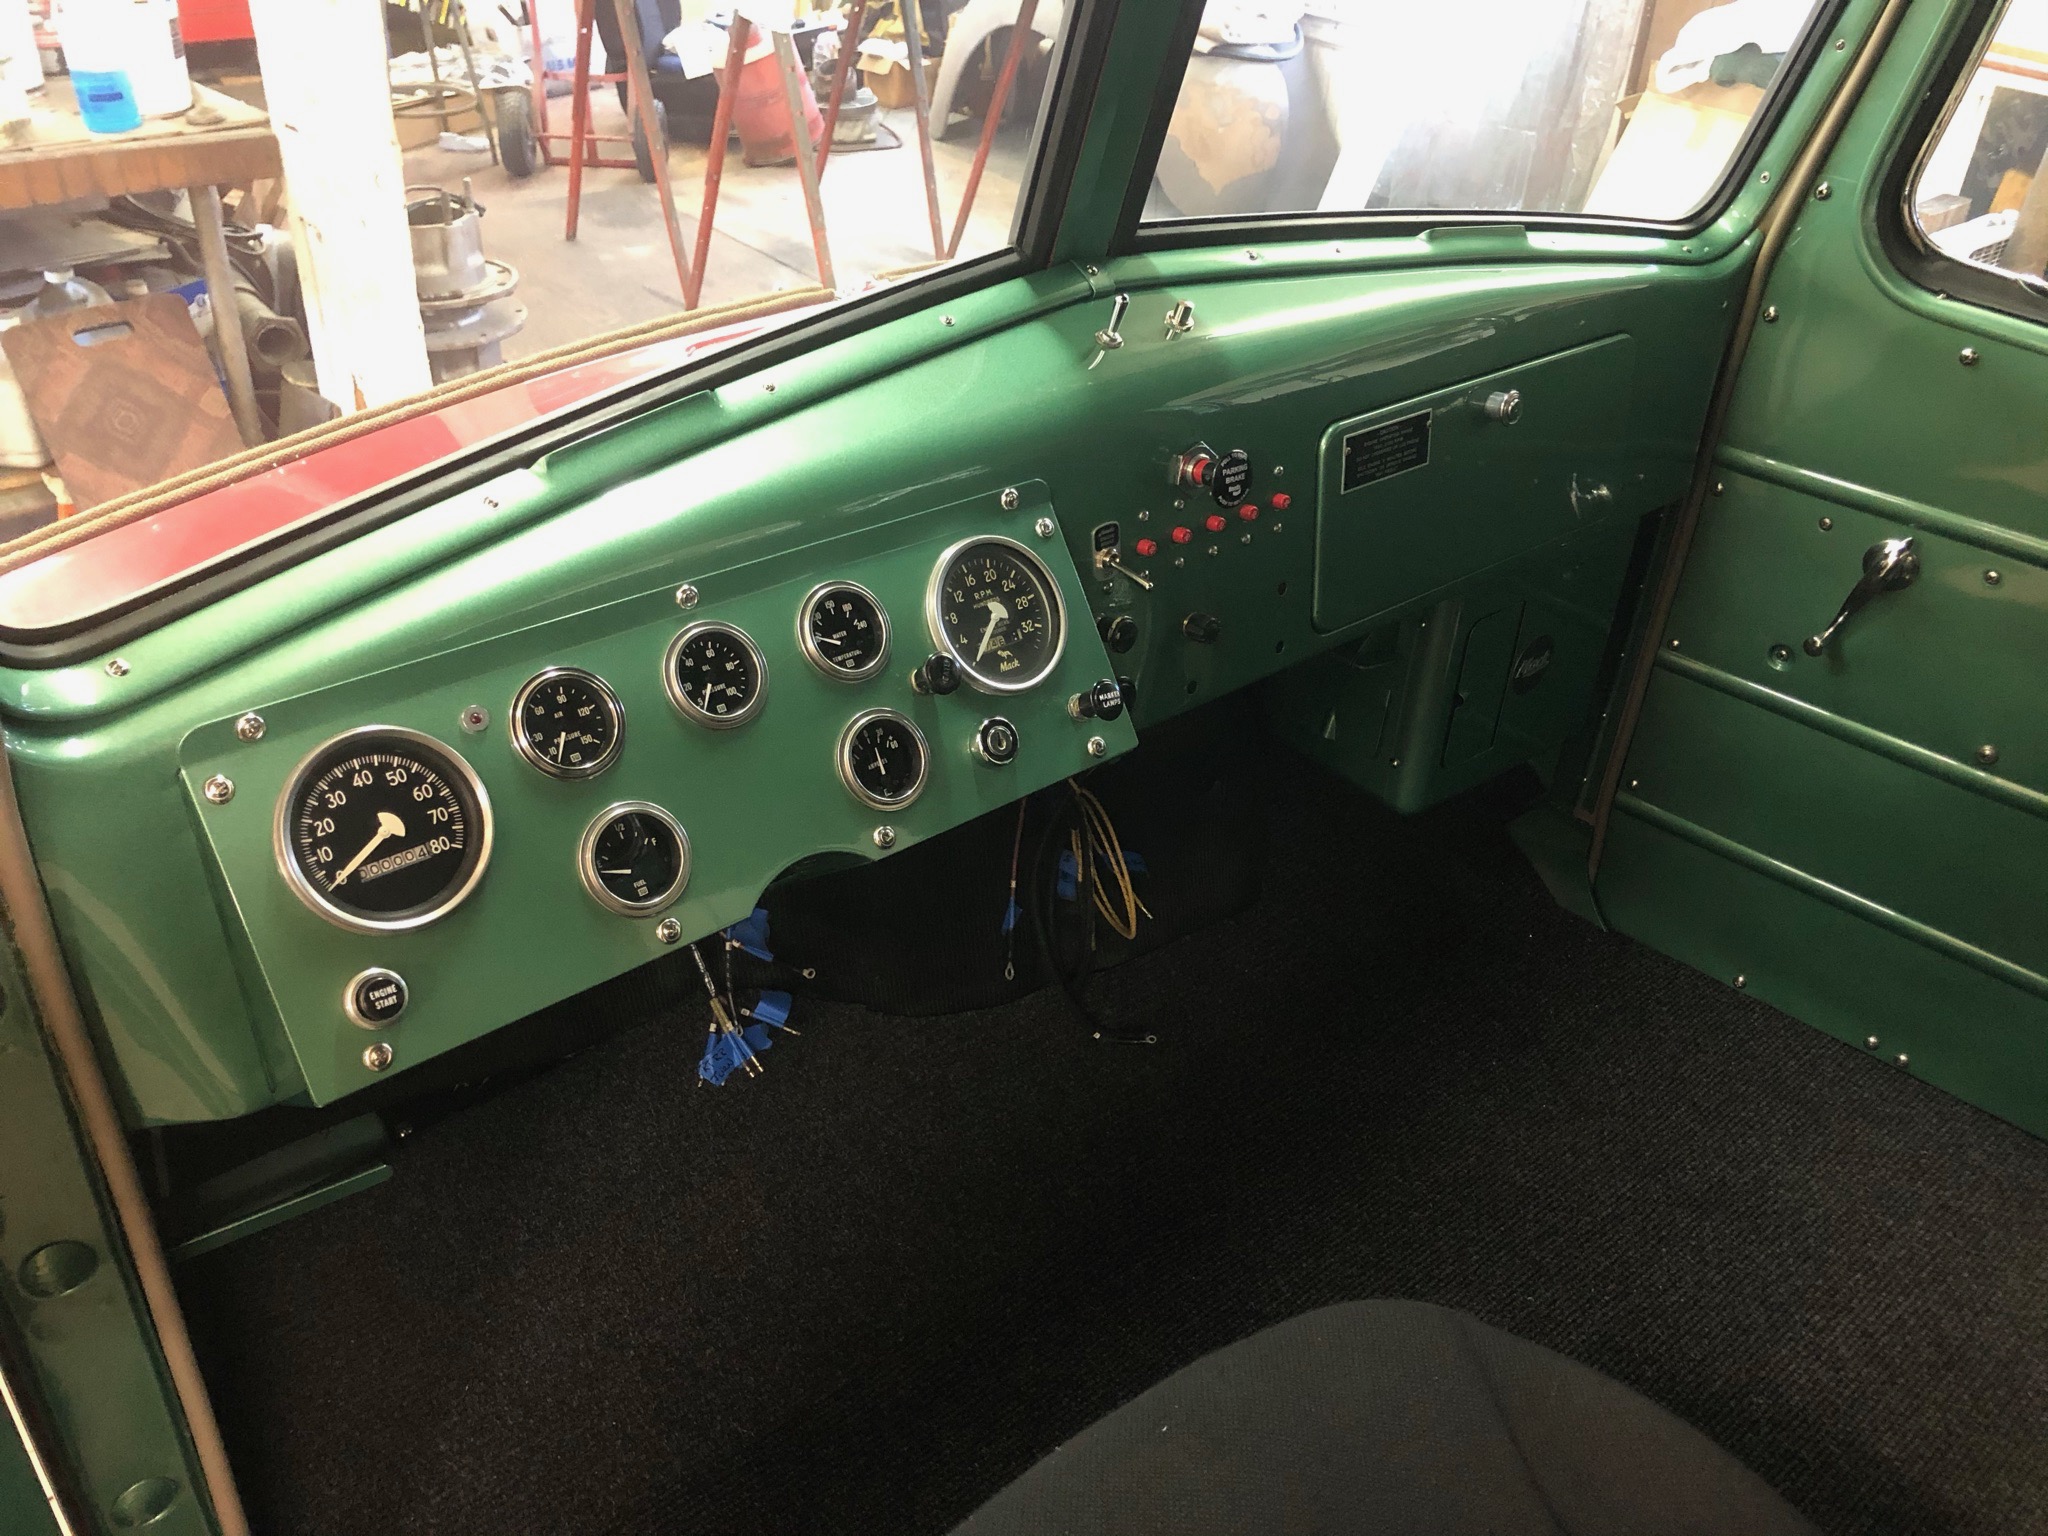
The dash finally went in today. Wasn't too bad, hardest part was threading the harness through the firewall. Another item off the long list of To-do's.
-
B-73 Restoration
mattb73lt replied to mattb73lt's topic in Antique and Classic Mack Trucks General Discussion
Sometimes you have to go backward to go forward. When I painted the dash, a drip landed on it from my gun cup. Thought I'd let it harden and wet sand it out. Well it sanded out, but it still left a mark in the metallic paint. Made a spot repair and thought I could blend that with some wet sanding. That didn't do it either. Sooo, disassemble the whole thing (It was ready to bolt in, dammit!!), wet sand and repaint the whole thing. A huge pain, but it's done and looks a lot better. It would have driven me nuts to leave it, the rest of it was looking so good. Never been a fan of metallic paints.


BMT Forum Logo
