


mattb73lt
-
Posts
1,424 -
Joined
-
Last visited
-
Days Won
146
Content Type
Profiles
Forums
Gallery
Events
Blogs
BMT Wiki
Collections
Store
Everything posted by mattb73lt
-

B-73 Restoration
mattb73lt replied to mattb73lt's topic in Antique and Classic Mack Trucks General Discussion
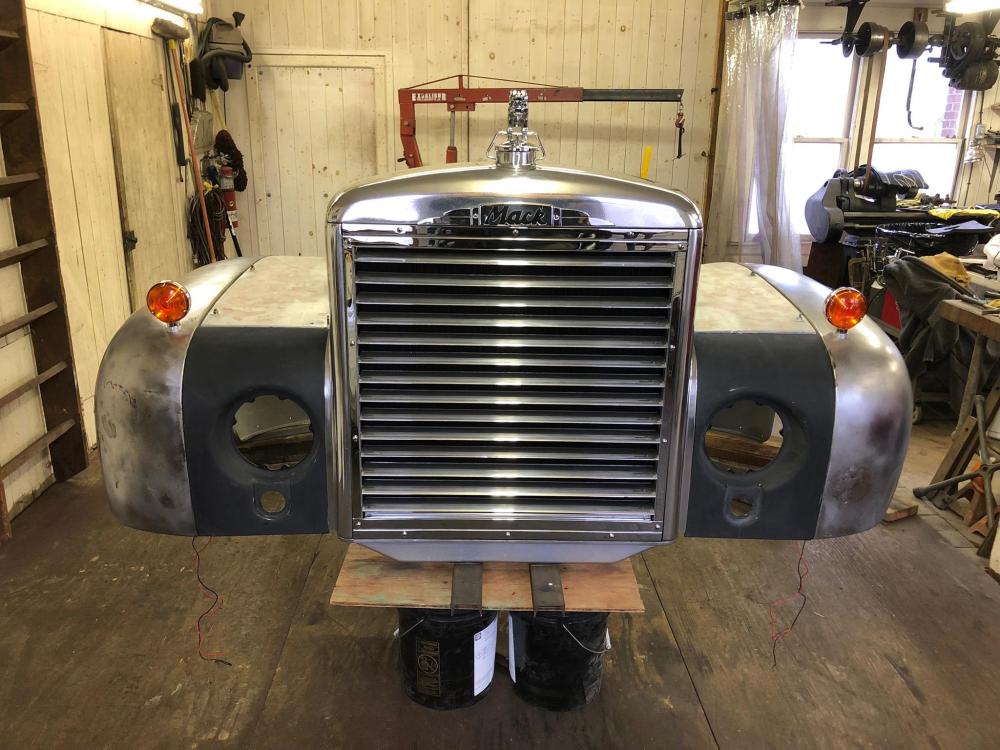
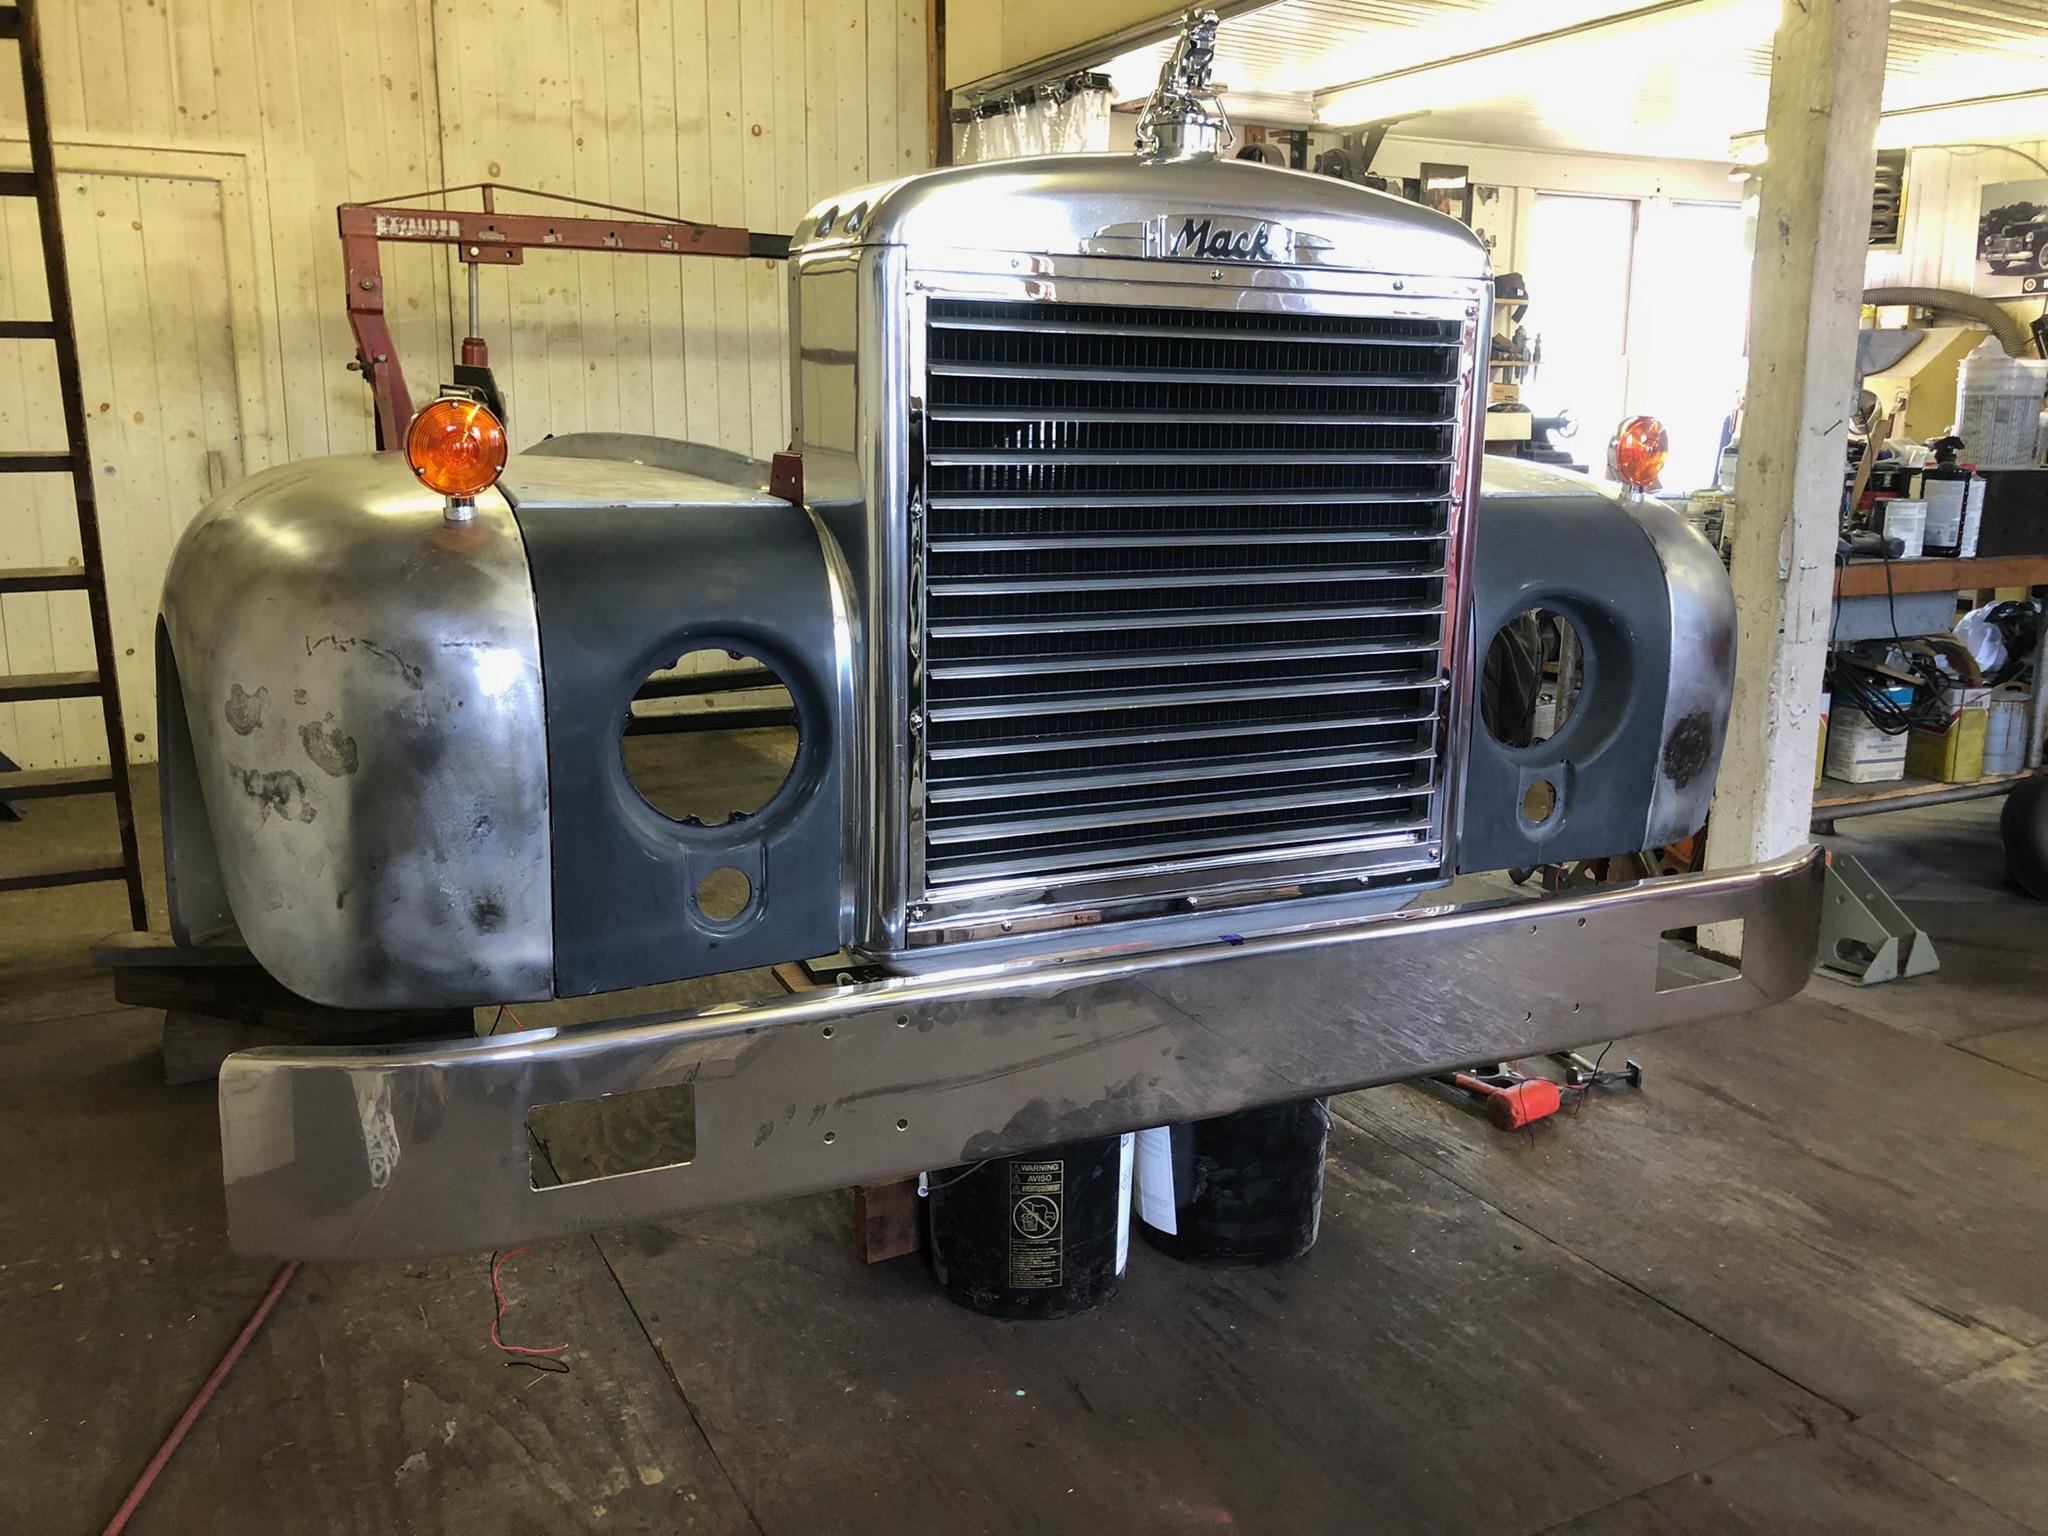
One more picture, with the new bumper propped up on it. Now onto the primer and body work!!
-
B-73 Restoration
mattb73lt replied to mattb73lt's topic in Antique and Classic Mack Trucks General Discussion
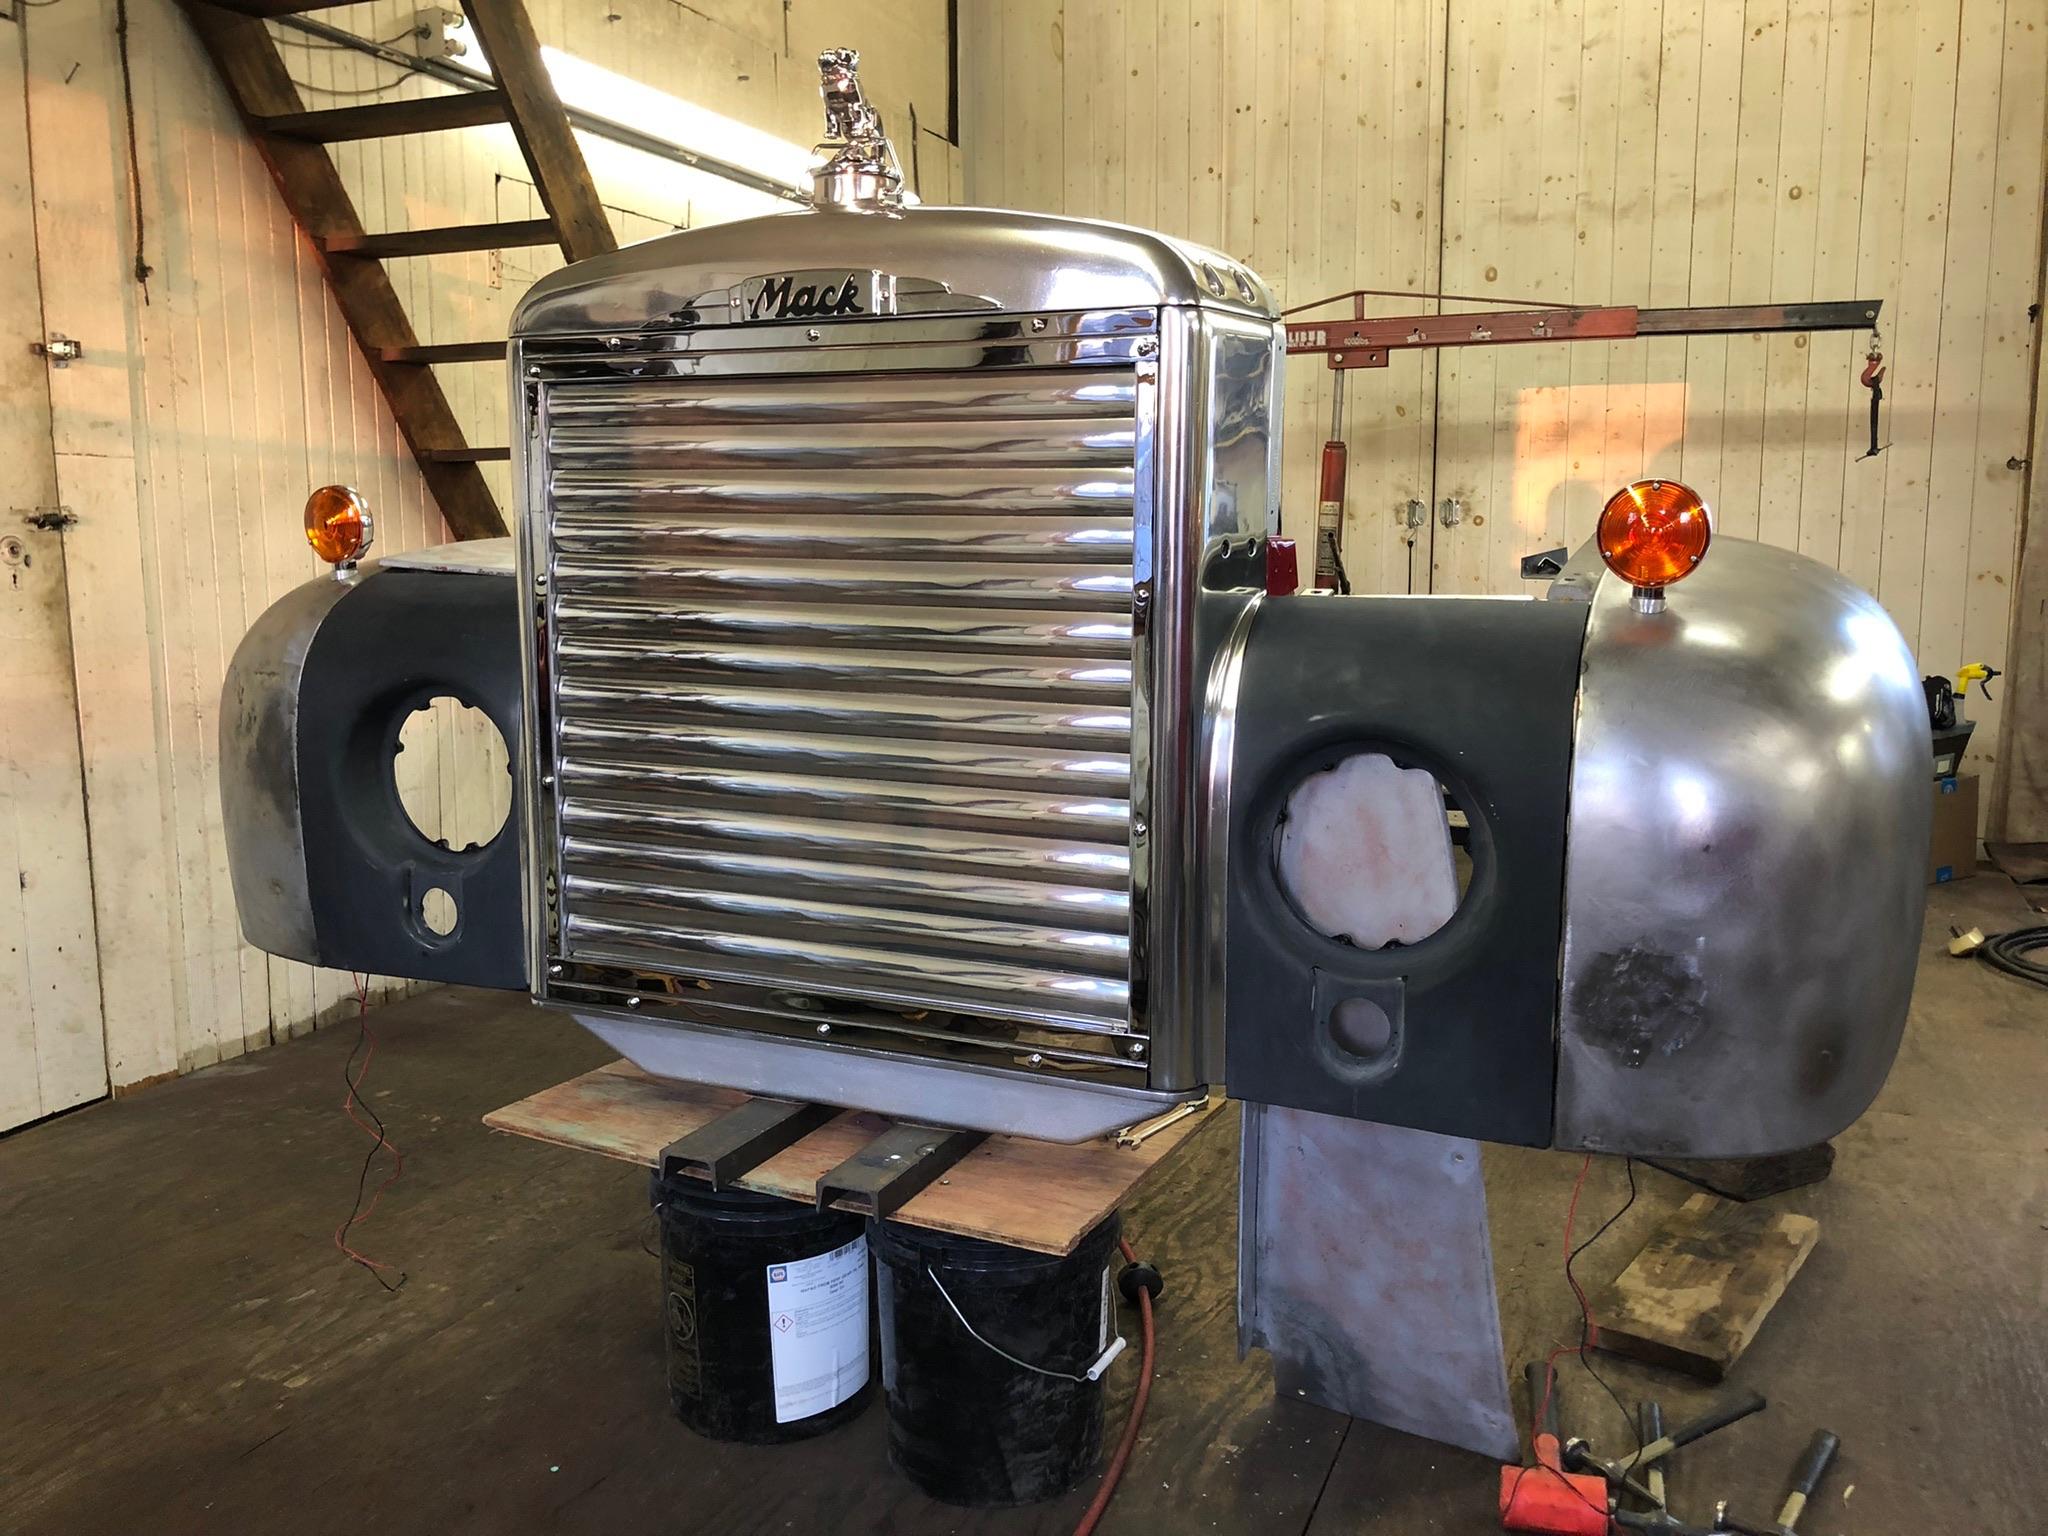
One of my favorite things about this truck is this huge radiator. I gave it a little cleaning today, as I really haven’t touched it since I finished it a few years ago. Put some air to it to close up the shutters and damn, it looks even better! I like these later model shutters over the earlier ones with the divider, they just look sleeker. The fenders look good and align well. This will all come apart tomorrow and work will continue... Again, I’d like to thank everyone for their comments. I never thought this story would be this long, but it’s getting towards some big assembly work in the very near future.
-
B-73 Restoration
mattb73lt replied to mattb73lt's topic in Antique and Classic Mack Trucks General Discussion
Wow, that’s awesome! I’m so glad that those parts are helping you out. The work looks great, by the way. -
B-73 Restoration
mattb73lt replied to mattb73lt's topic in Antique and Classic Mack Trucks General Discussion
Thanks!! It really finished off the cab and was well worth sending it out to get done. -
B-73 Restoration
mattb73lt replied to mattb73lt's topic in Antique and Classic Mack Trucks General Discussion
Thanks for the complements! Probably from massaging them. These were donor fenders from a truck I parted out. Better than what was on it due to rot, but the repair work that was done to them was less than stellar. There's also some pitting from corrosion that discolors the metal. That'll all be fixed before paint, though. -
B-73 Restoration
mattb73lt replied to mattb73lt's topic in Antique and Classic Mack Trucks General Discussion
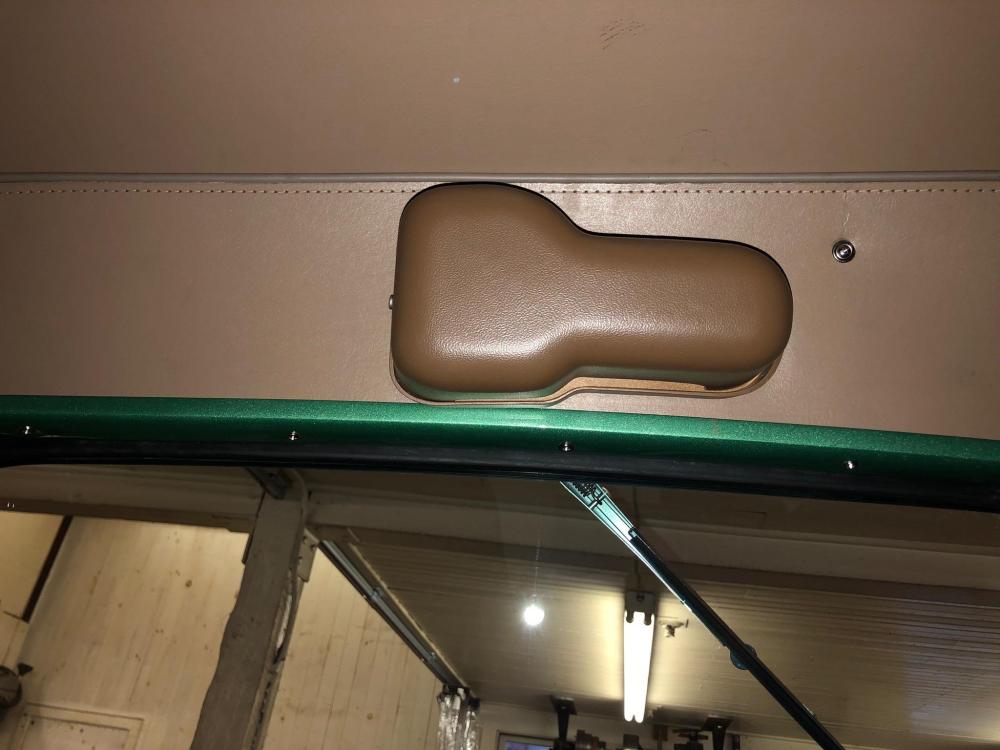
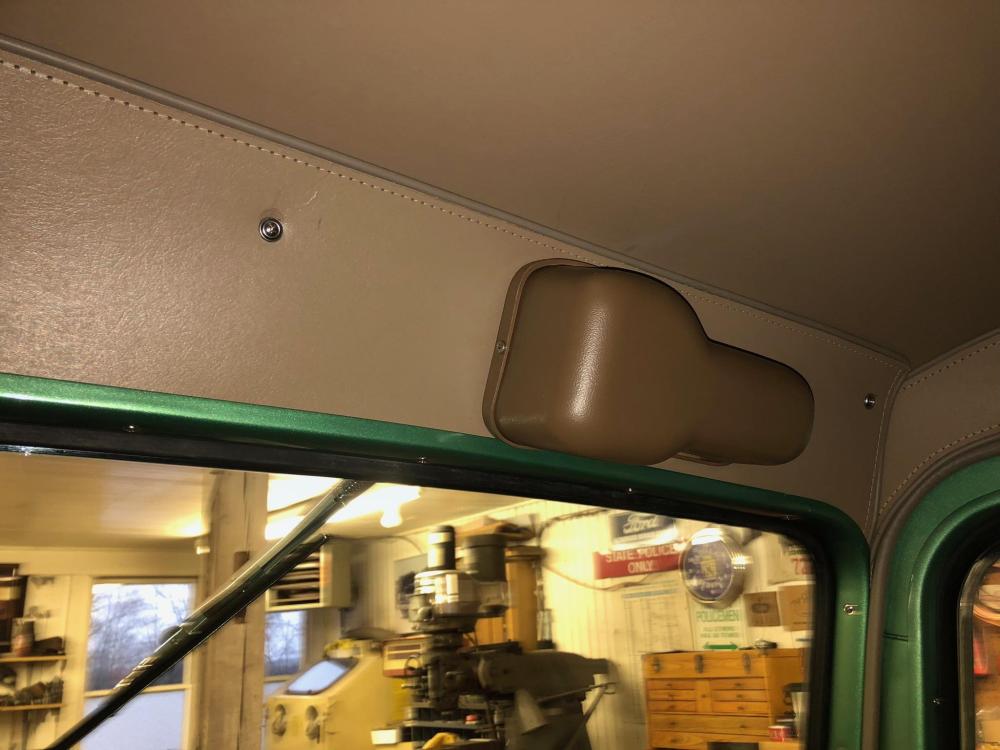
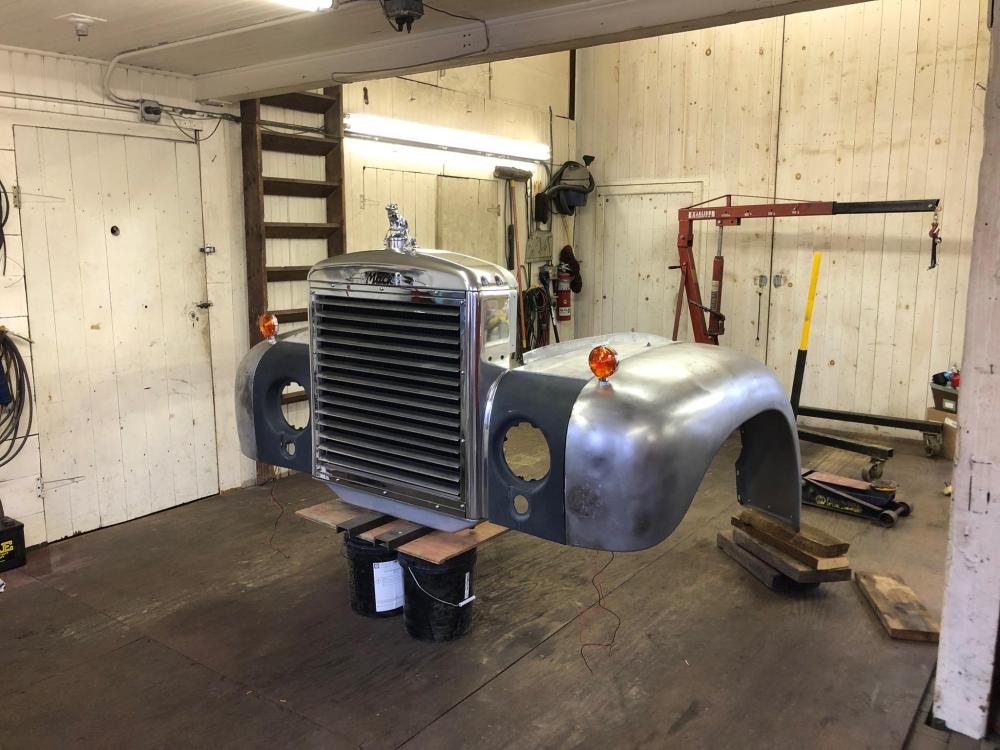
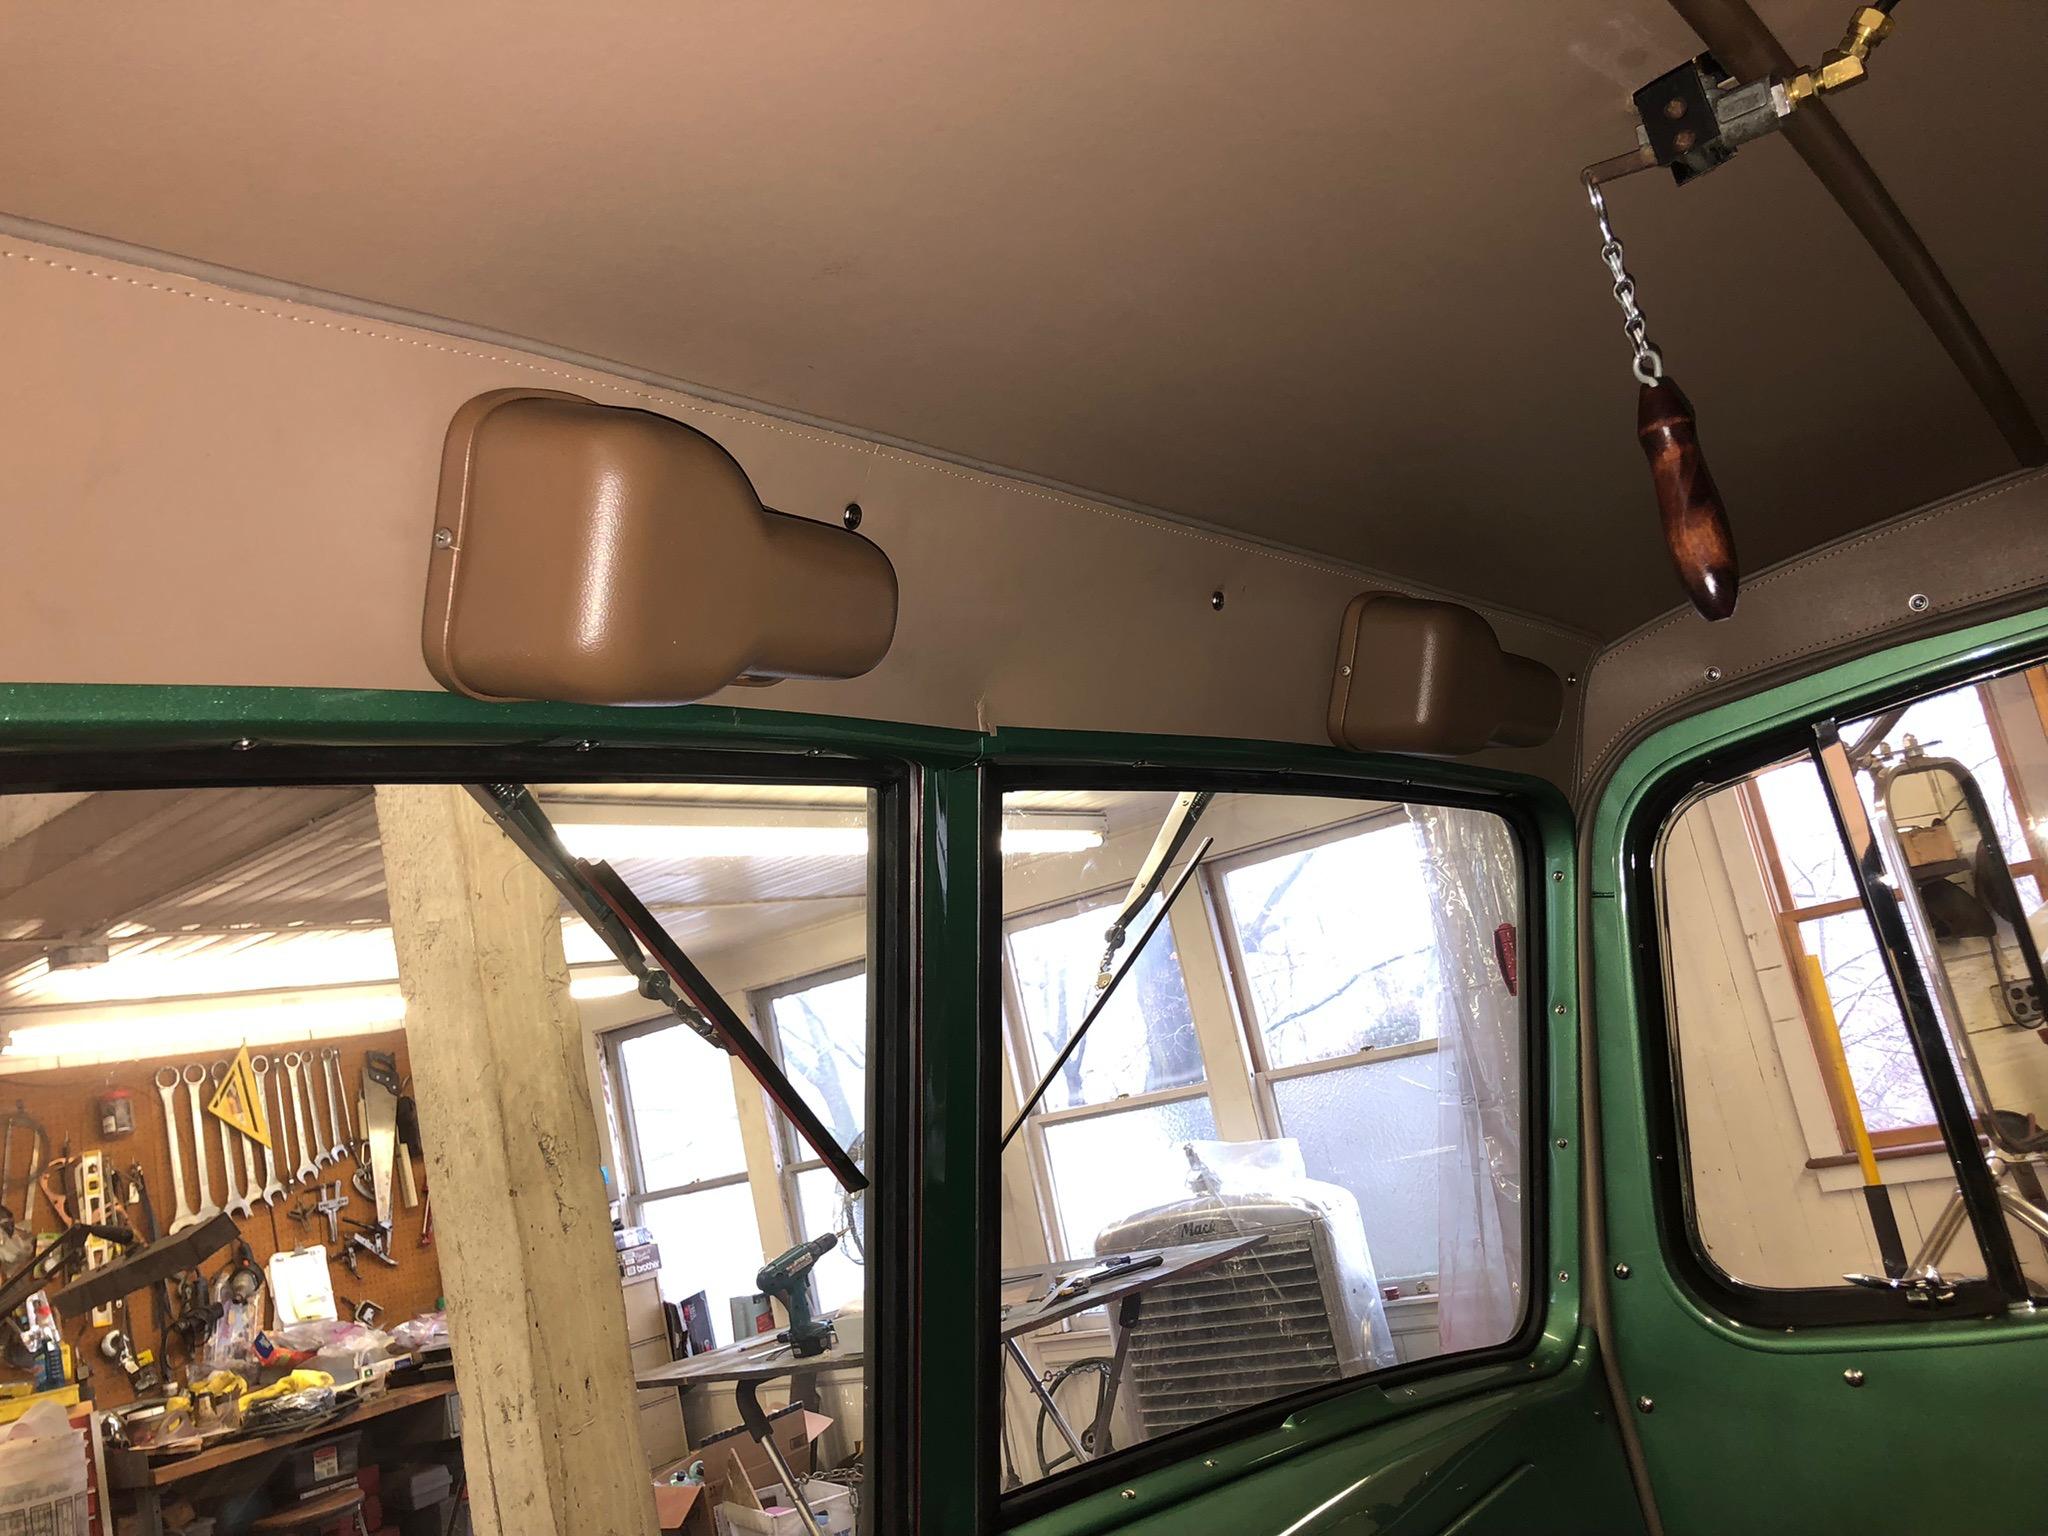
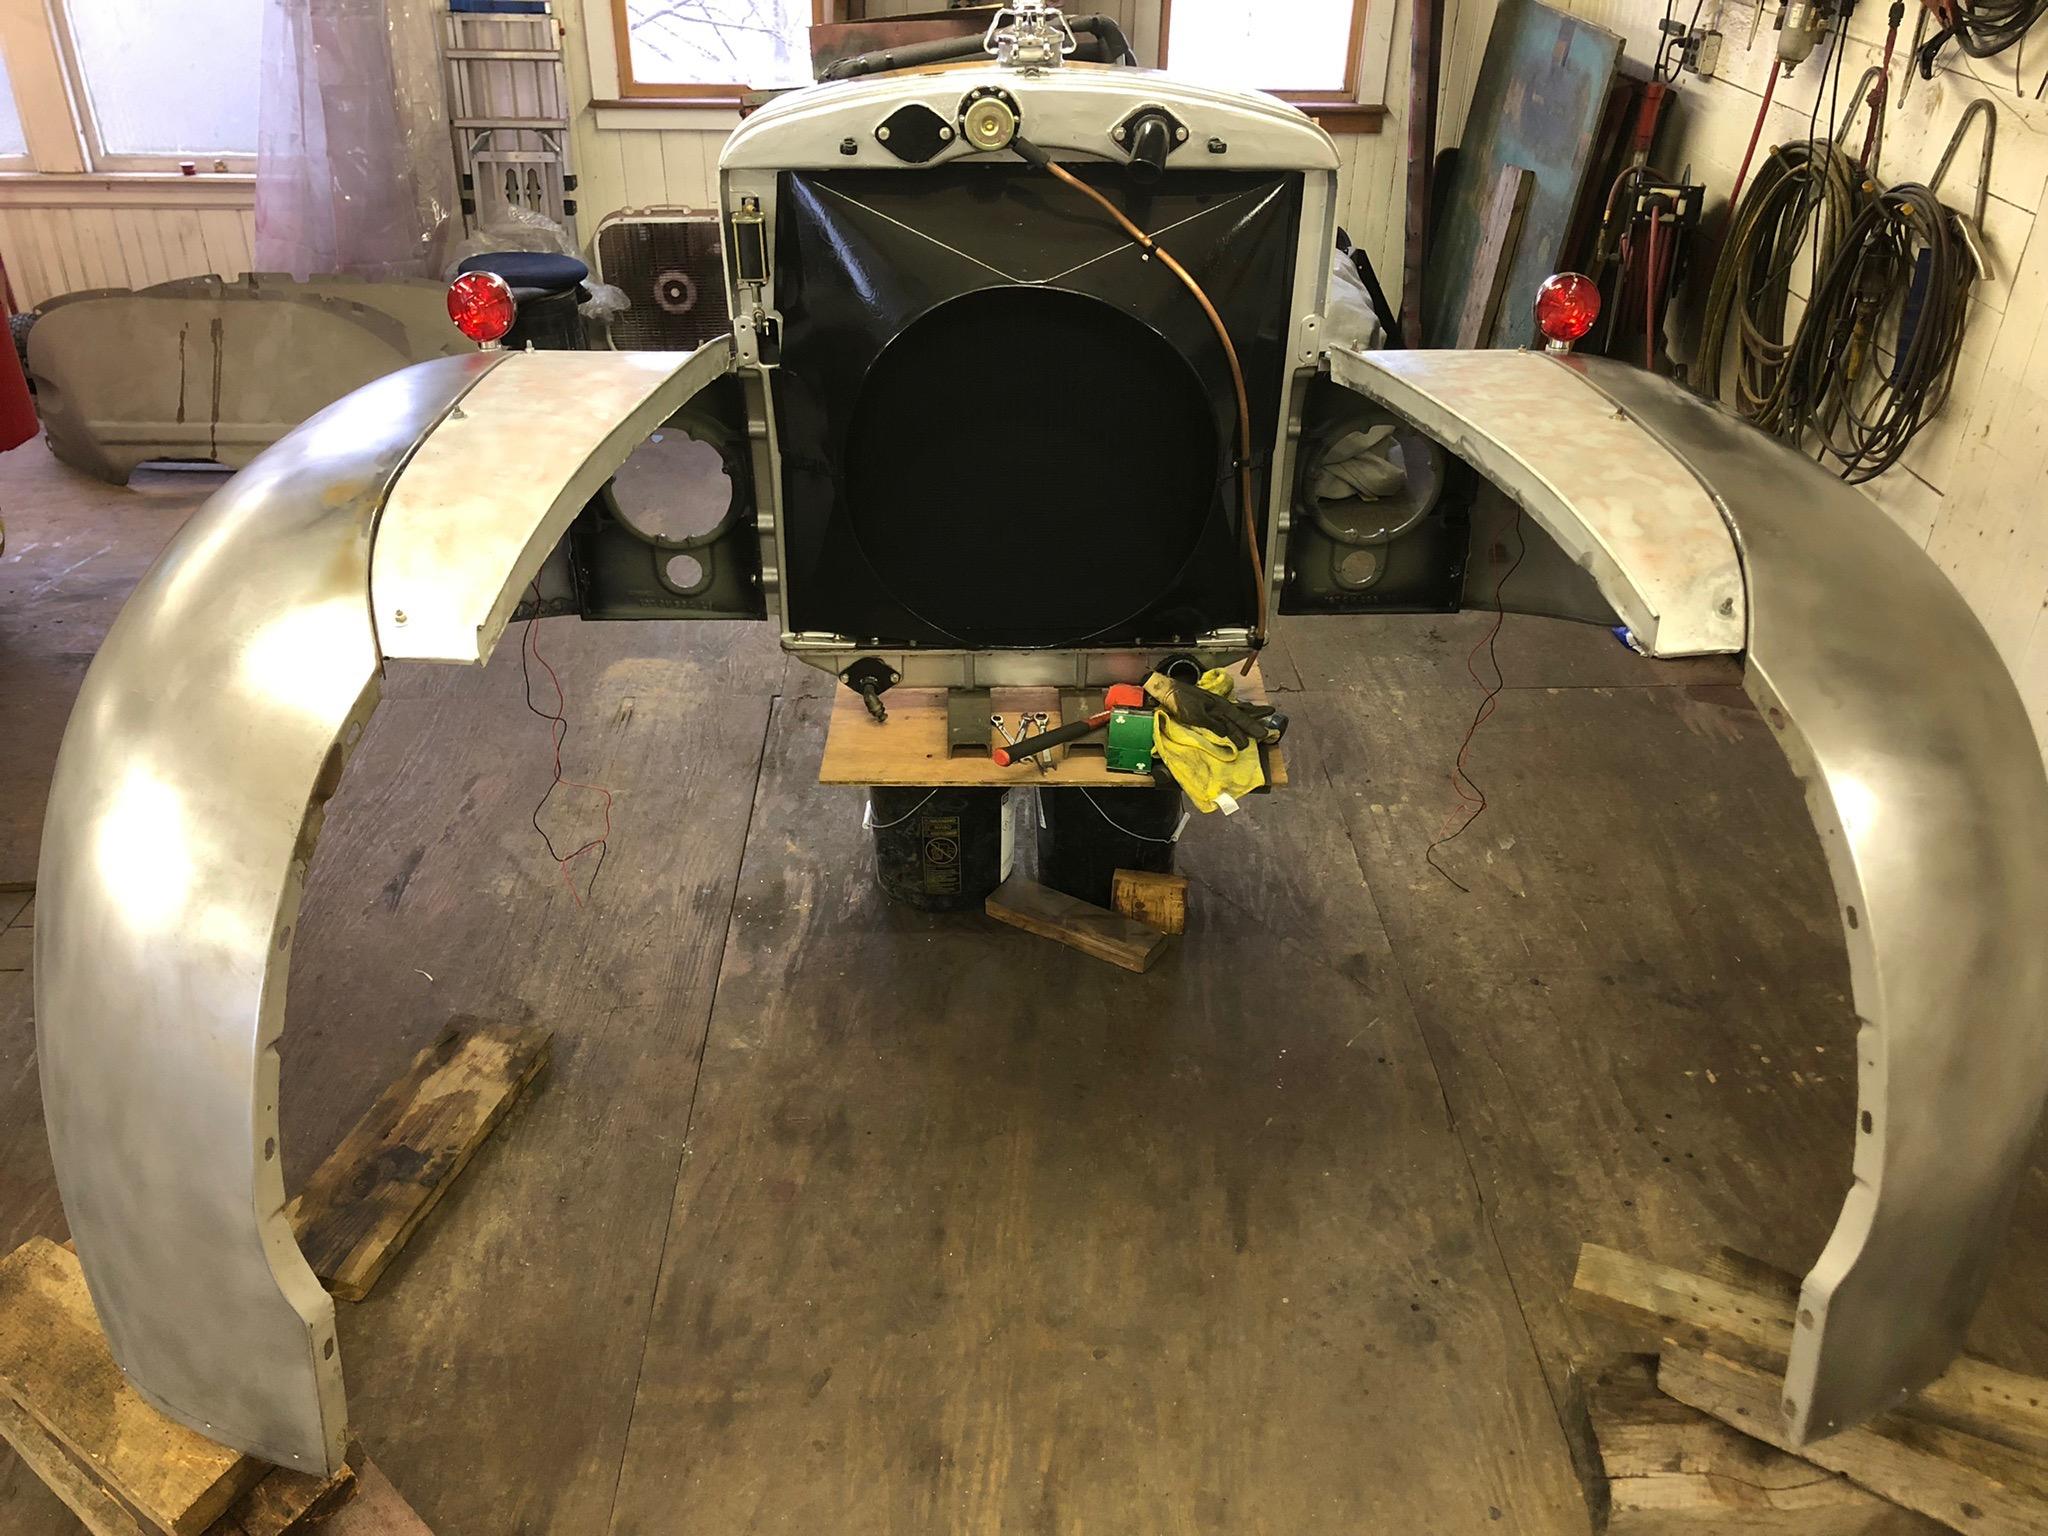
Lots of irons in the fire, parts on order, hardware coming in and some stuff still on order or awaiting return from being repaired. Accomplishing a lot of little detail stuff and finishing off some smaller projects on it. Waiting for the weather to warm up a little for body work and paint, but have been doing a lot of metal work on the front end items and fenders. I've got a couple of loads of paint to do, also. The goal is to get all this stuff done so when the weather improves to work outside, I can jump back on the frame to finish all the plumbing, wiring and mechanical work and then start final assembly!! So much to get done. I did finish off my wiper system by adding some covers to the motors. All the wiring is hidden and they really neaten up the installation. Today I was mocking up the front end to get the fender profiles right before final body work. The front end looks pretty cool temporarily back together. Nothing really earth shattering, but a lot of little stuff done.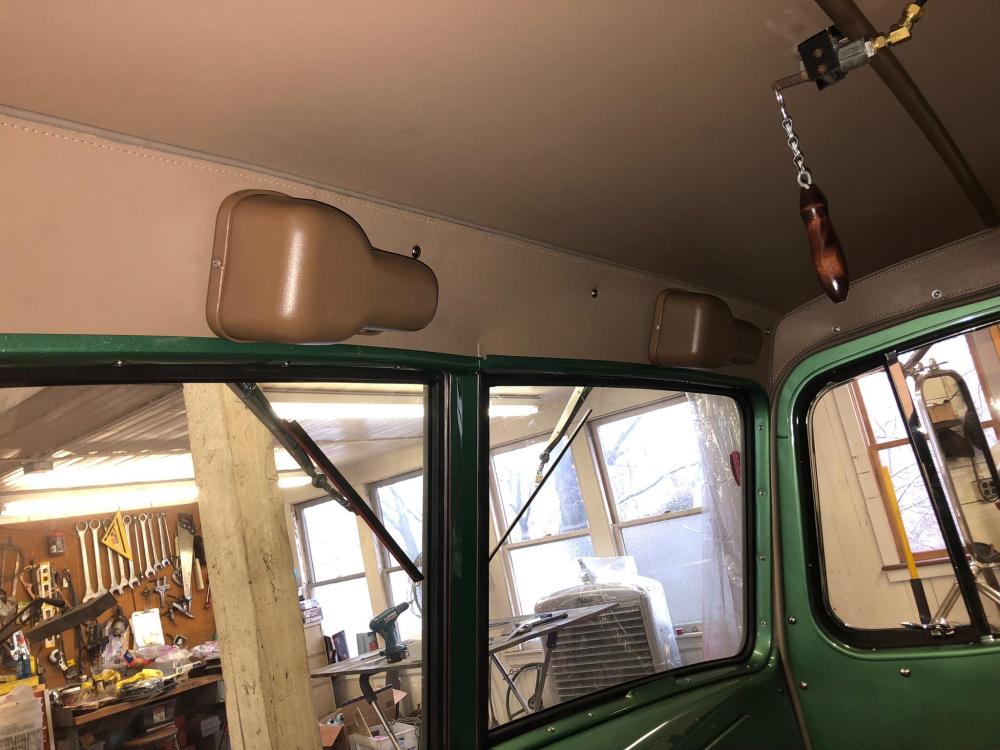

-
H Model Restoration
mattb73lt replied to h67st's topic in Antique and Classic Mack Trucks General Discussion
It's starting to look more complete!! Nice work! -
Nice work.
-
B-73 Restoration
mattb73lt replied to mattb73lt's topic in Antique and Classic Mack Trucks General Discussion
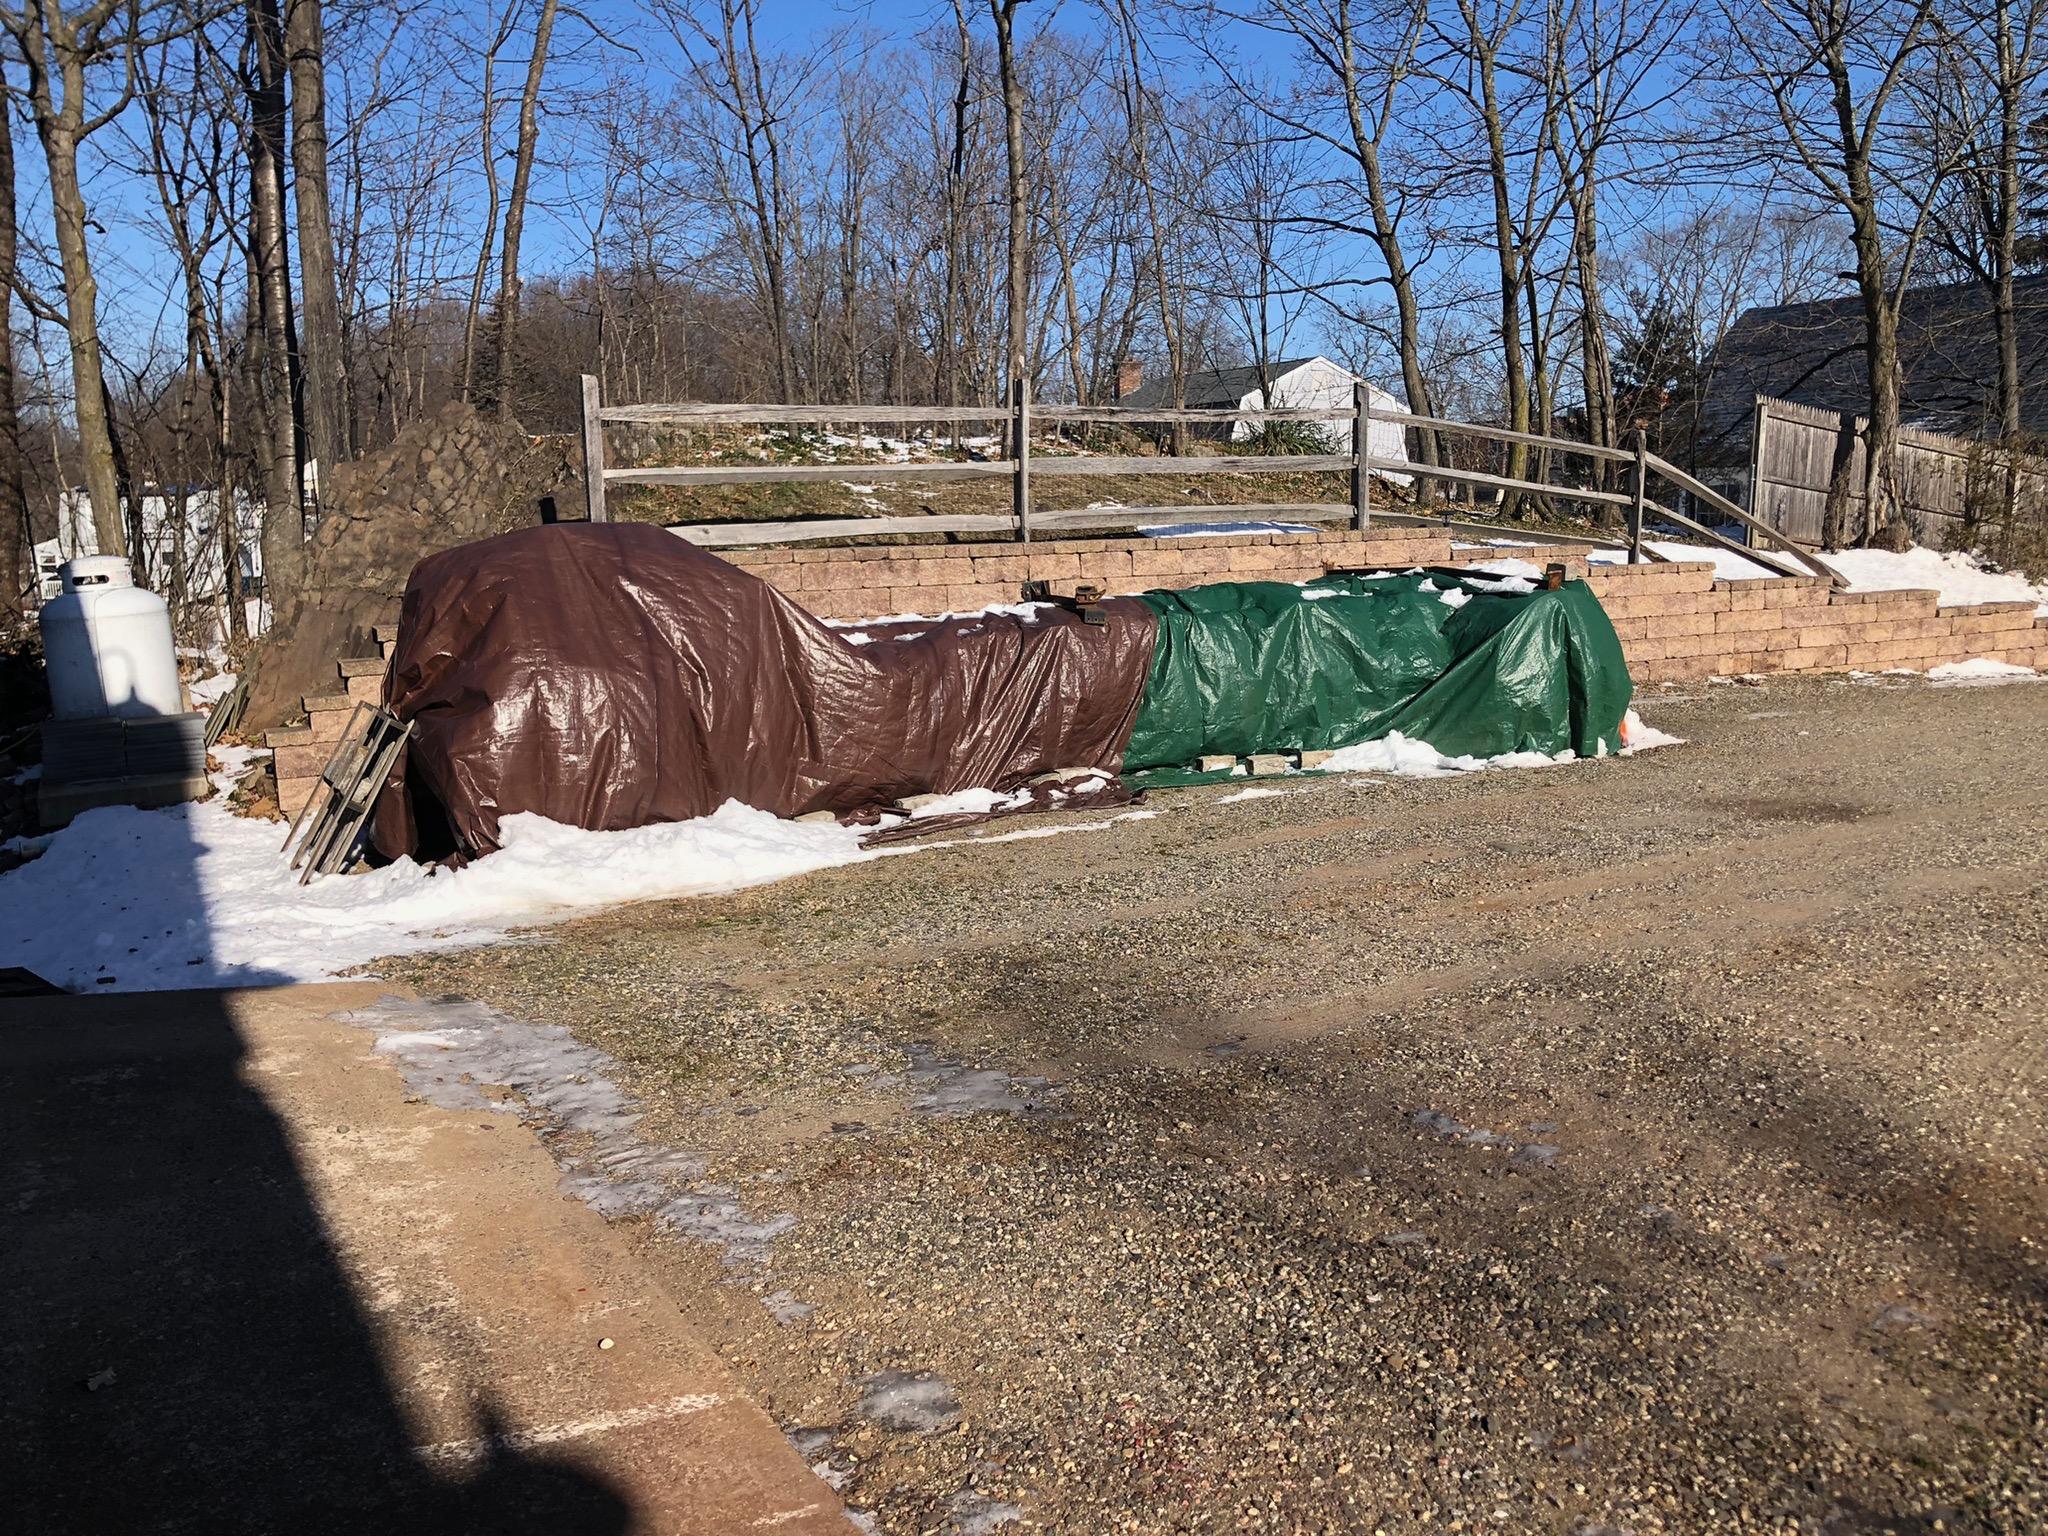
Trying to be productive, but when it's about 10*F everything is cold and takes so long to warm up!! Getting some small stuff done and if it were little warmer, I could be doing some work on the hood and fenders. Waiting on some parts from the hydraulic shop for the power steering unit and got the shop cleaned and a little more organized after the fall push on the frame. But there it sits, all wrapped up and waiting for more work to be done to it.
-
G Mack next problem
mattb73lt replied to D2Denny's topic in Antique and Classic Mack Trucks General Discussion
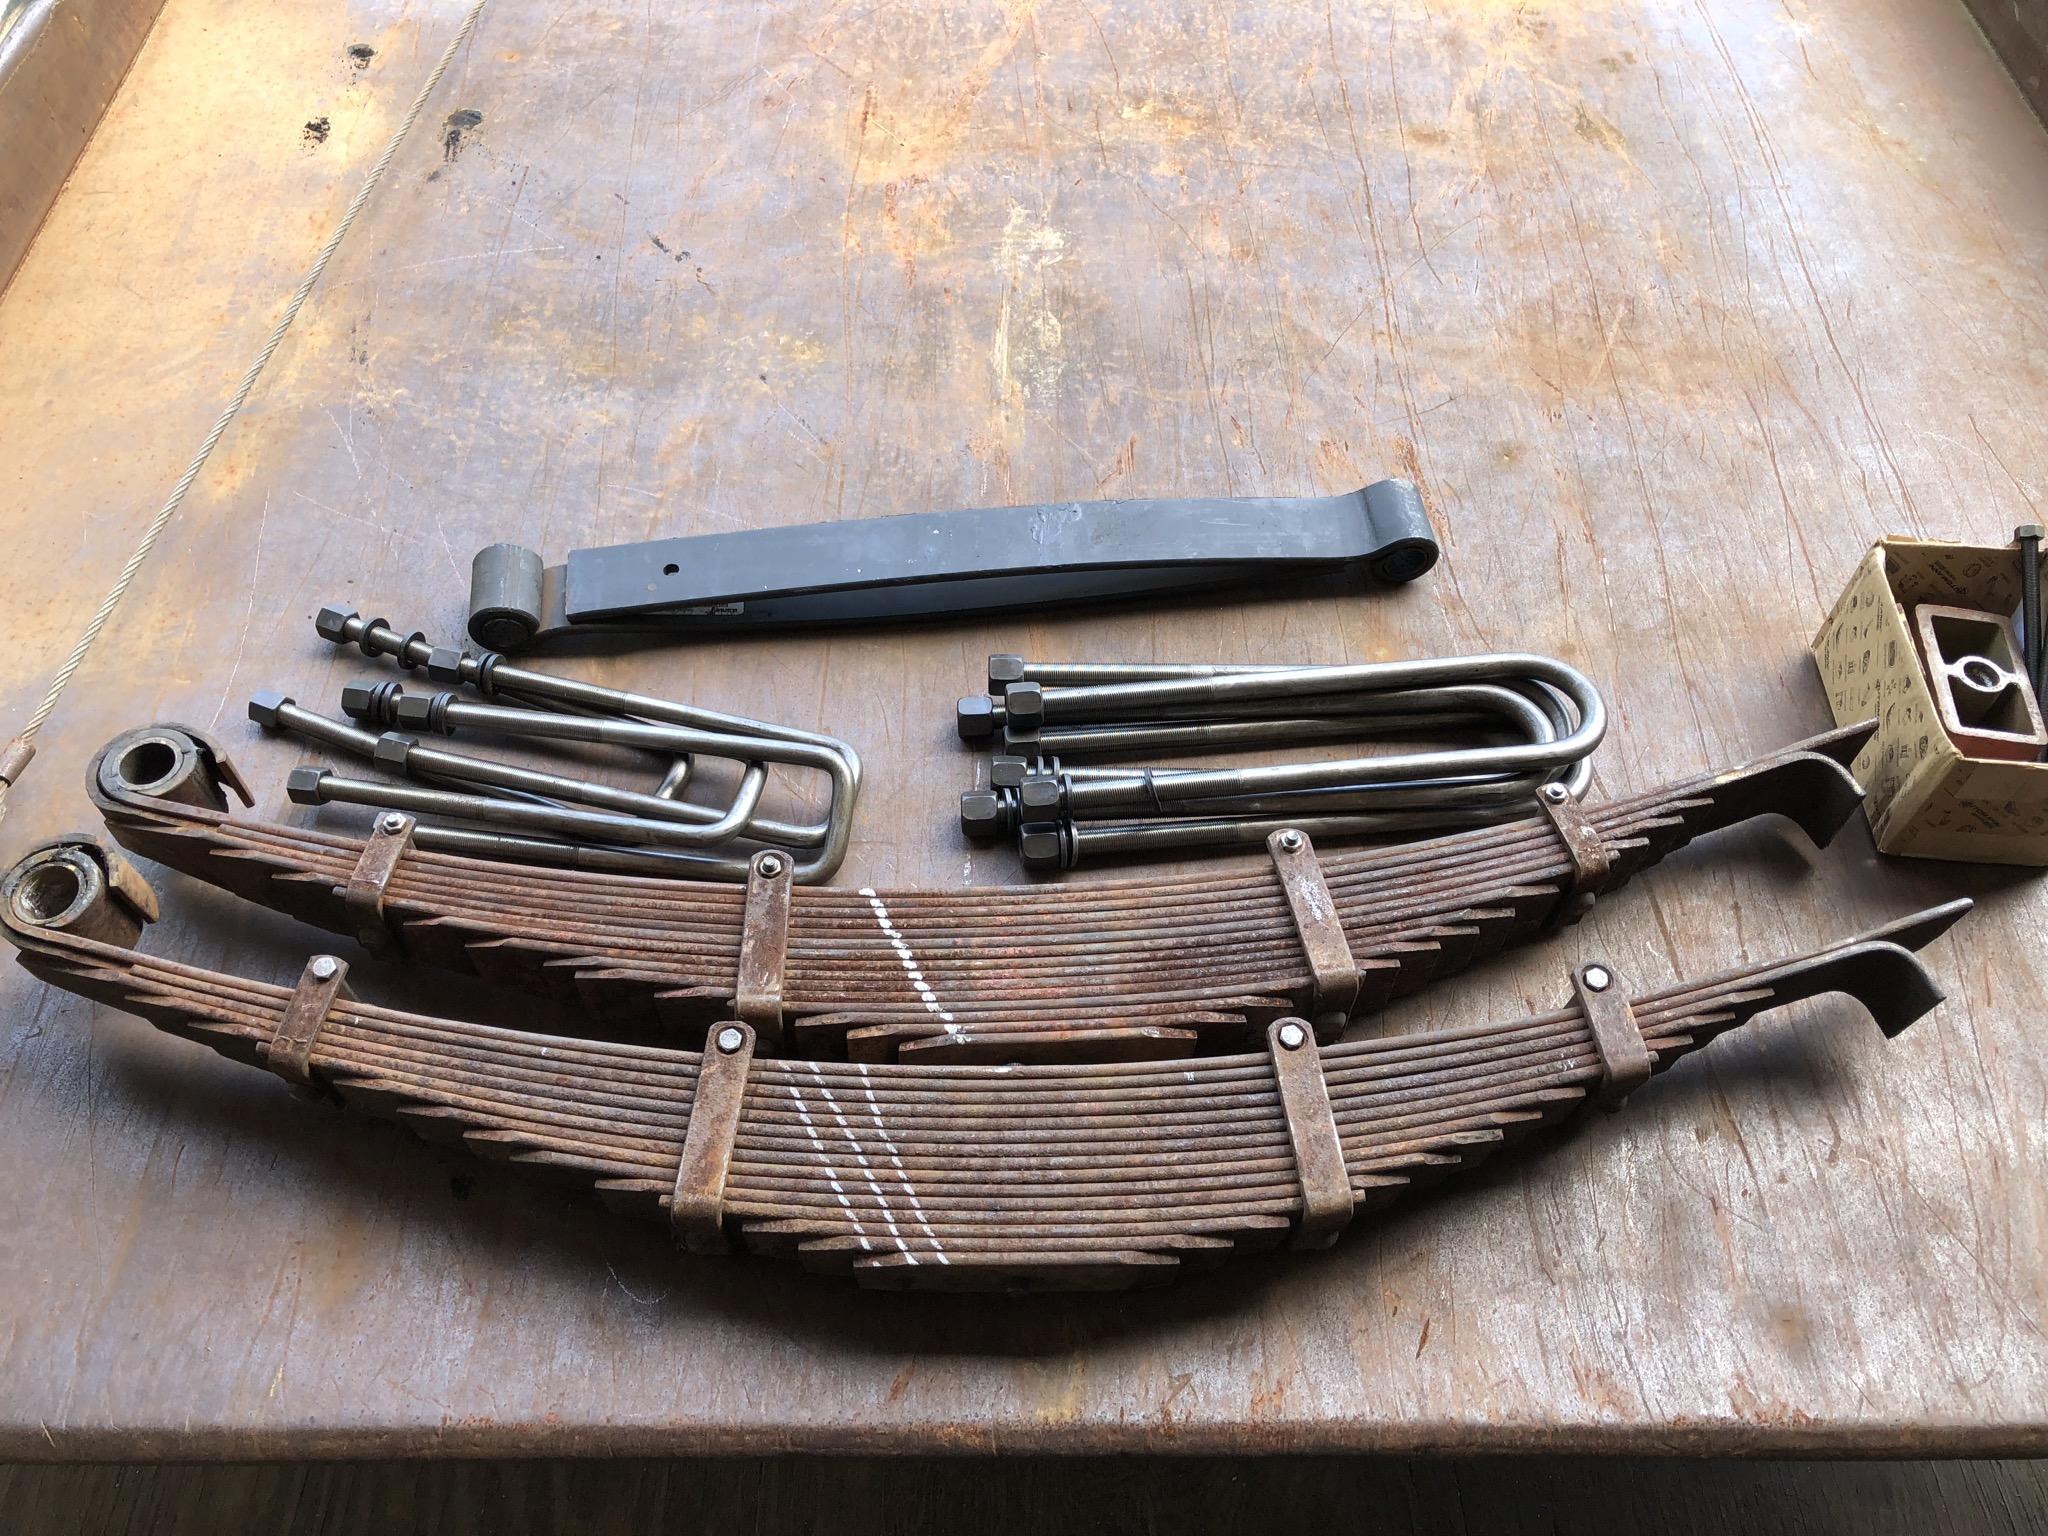
I’ve had good luck with Perreault Spring in Waterbury, Ct.(203-753-2147) That’s still pretty far from you, though. They re-arched my front springs to match as the right one had the two main leaves bent pretty good. They’ve also located parts no one els could.
-
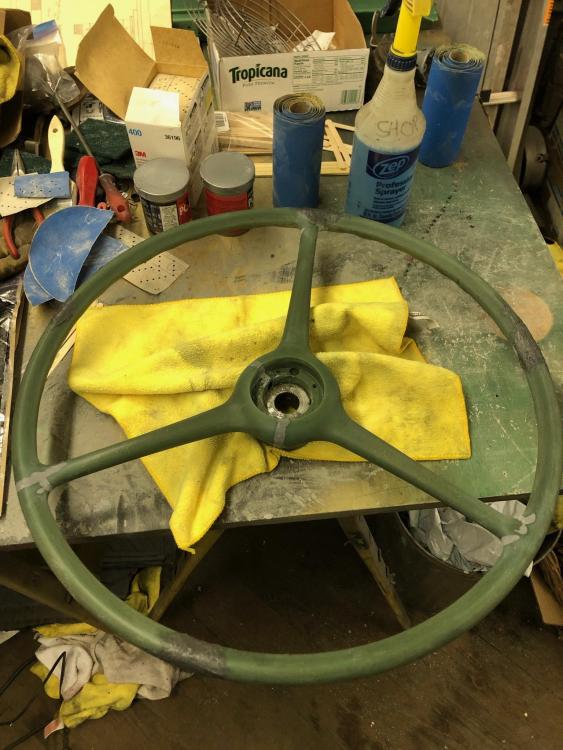
Steering Wheel
mattb73lt replied to h67st's topic in Antique and Classic Mack Trucks General Discussion
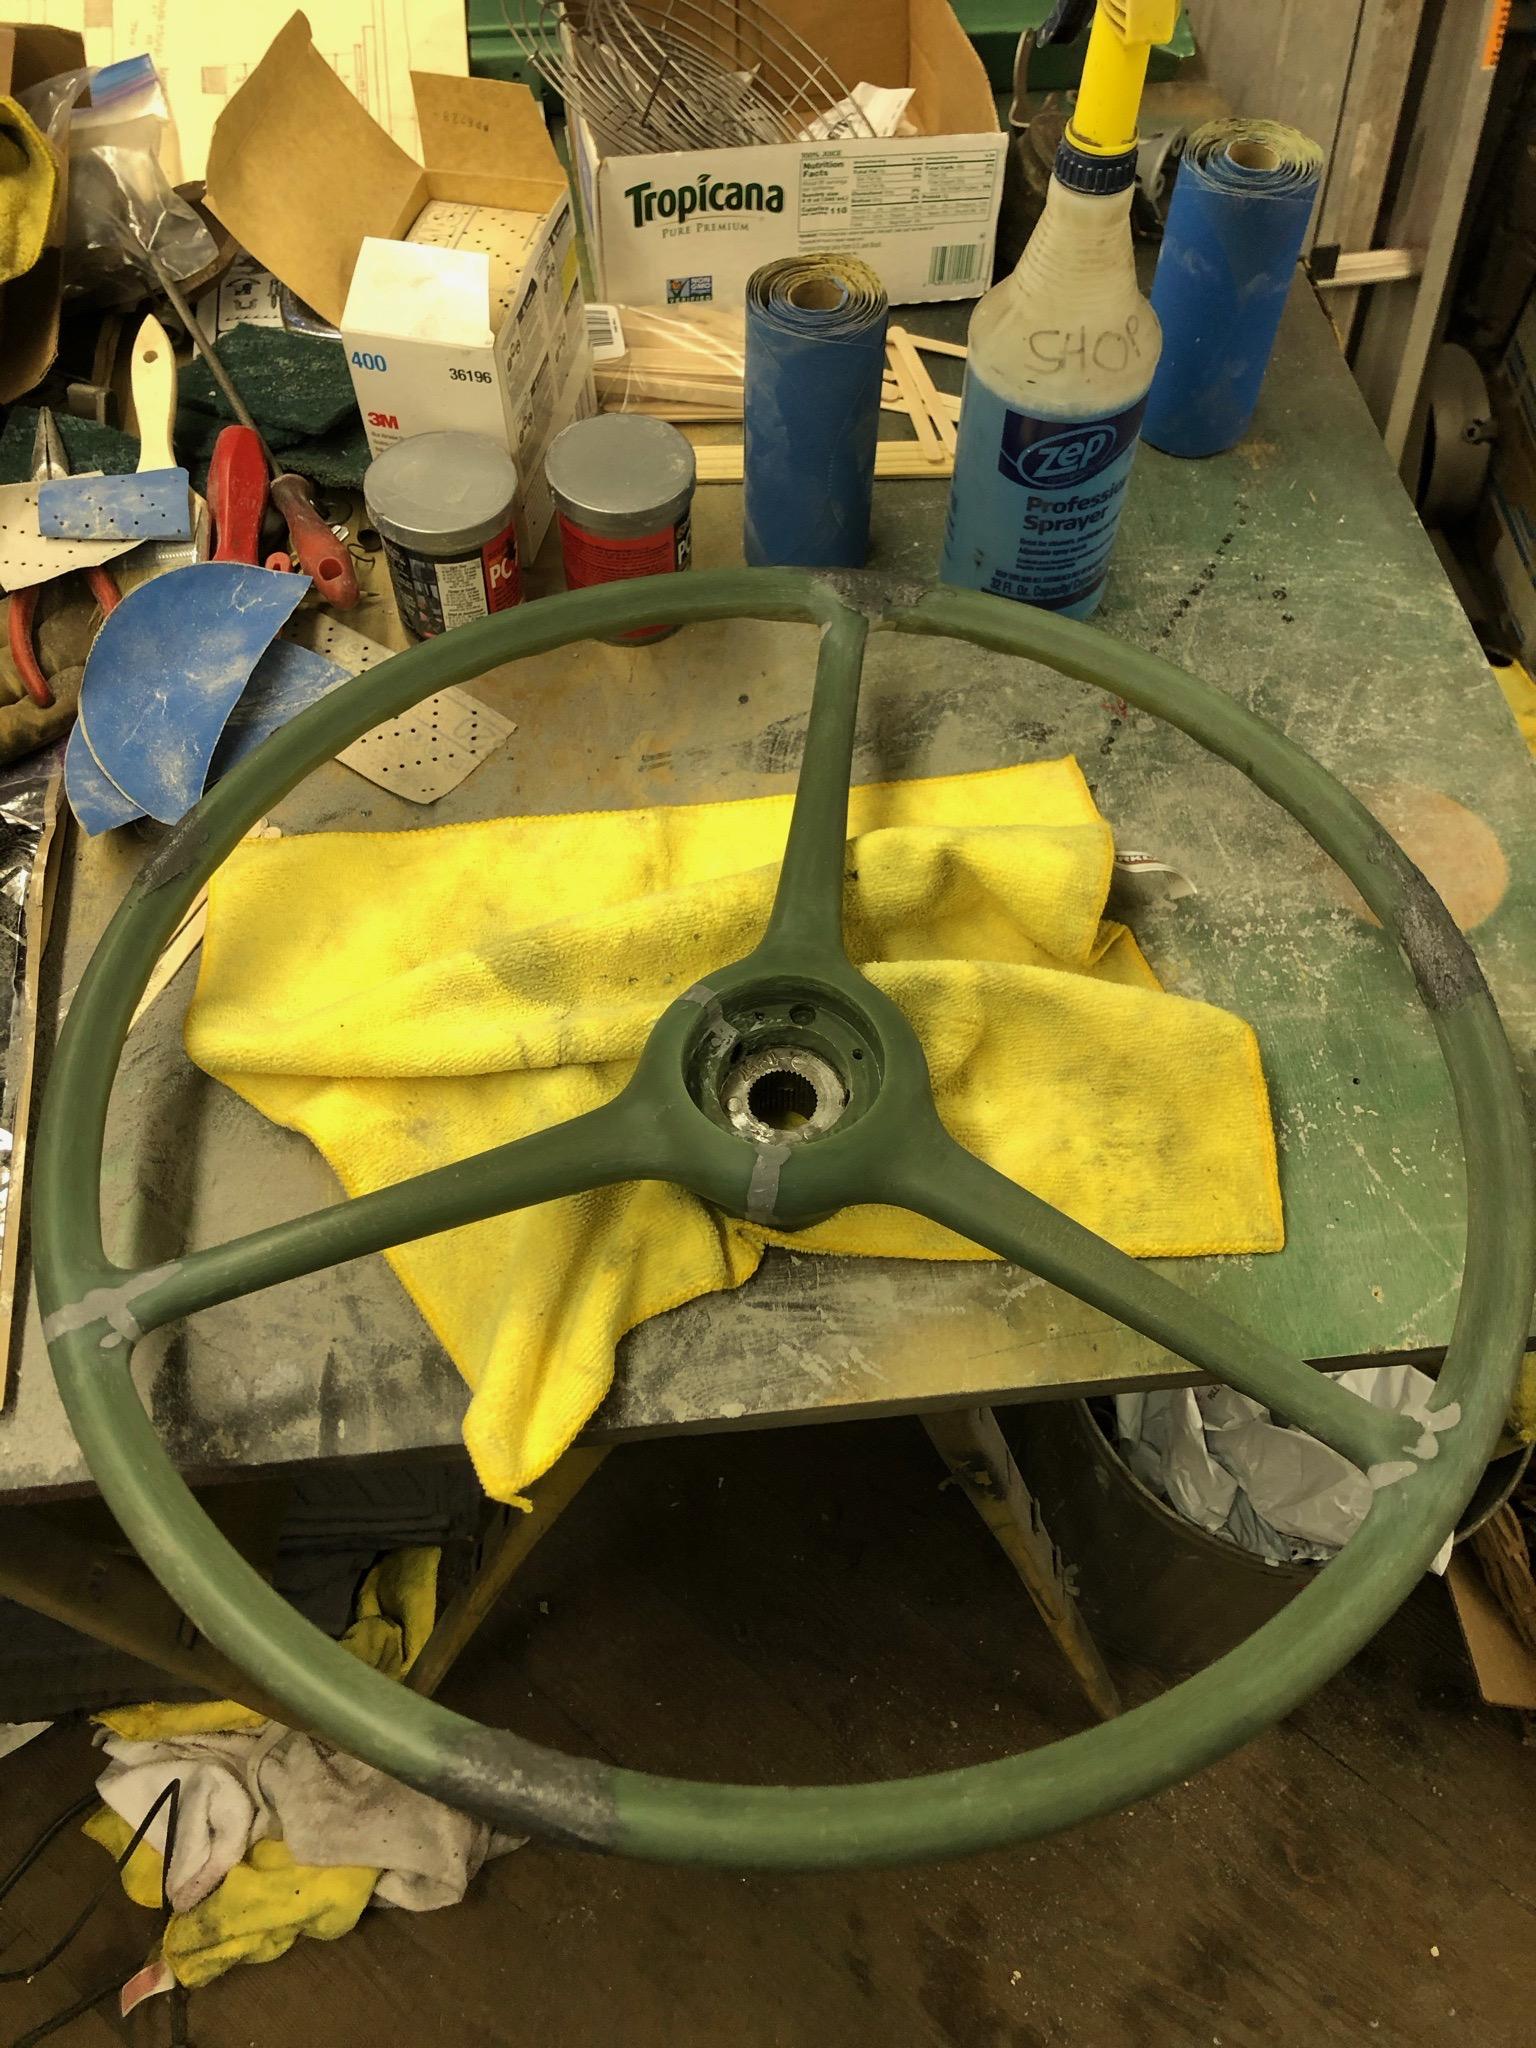
I did the PC-7 epoxy on mine. I've looked at all the above options(military, re-pro, restored & new)and I ended up painting it black when done, I couldn't get a satisfactory color to match the original tint. Mine wasn't horrible, but had several decent age cracks. The kicker is I was saving a really nice 22" one from my B-42, when I put power steering in it with a 20" wheel. When I dug it out I discovered that there is a difference in the splined hub area and it wouldn't fit the B-73 shaft. I would send it out to have the hub modified to fit, but I don't know of anyone who can do that. If any one has a paint code that closely matches the original plastic tint, I love to get it.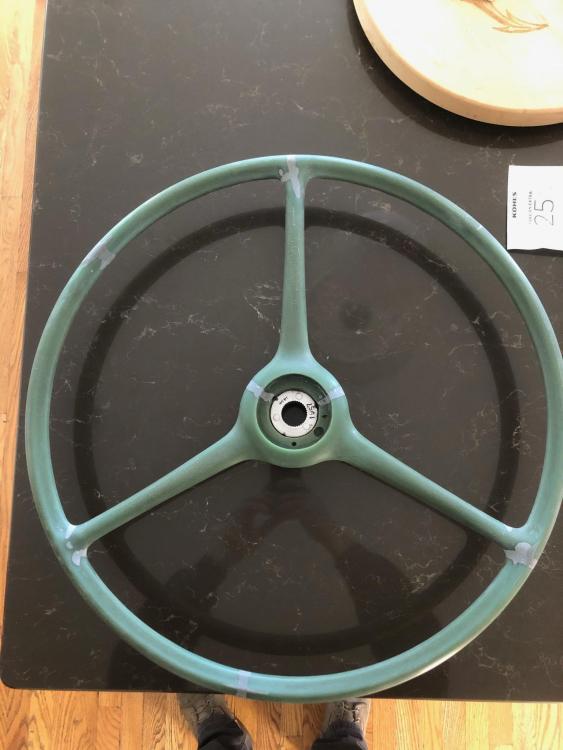
-
H Model Restoration
mattb73lt replied to h67st's topic in Antique and Classic Mack Trucks General Discussion
That's really looking great!! A lot of work behind you and the first test drive doesn't look too far off!! -
FBA83098-F03B-4E22-8BA5-F3B4E1936118.jpeg
mattb73lt commented on 1961H67's gallery image in BMT Member's Gallery - Click here to view our member's albums!
 Glad they helped. I f you need pictures, I still have about 600+ that I took while doing mine.
 -
FBA83098-F03B-4E22-8BA5-F3B4E1936118.jpeg
mattb73lt commented on 1961H67's gallery image in BMT Member's Gallery - Click here to view our member's albums!
That view looks familiar. Are you going to brace it before you cut much further? -
B-73 Restoration
mattb73lt replied to mattb73lt's topic in Antique and Classic Mack Trucks General Discussion
No one else might see it, but it does help when you need to work on it or helps keep it clean over time. -
B-73 Restoration
mattb73lt replied to mattb73lt's topic in Antique and Classic Mack Trucks General Discussion
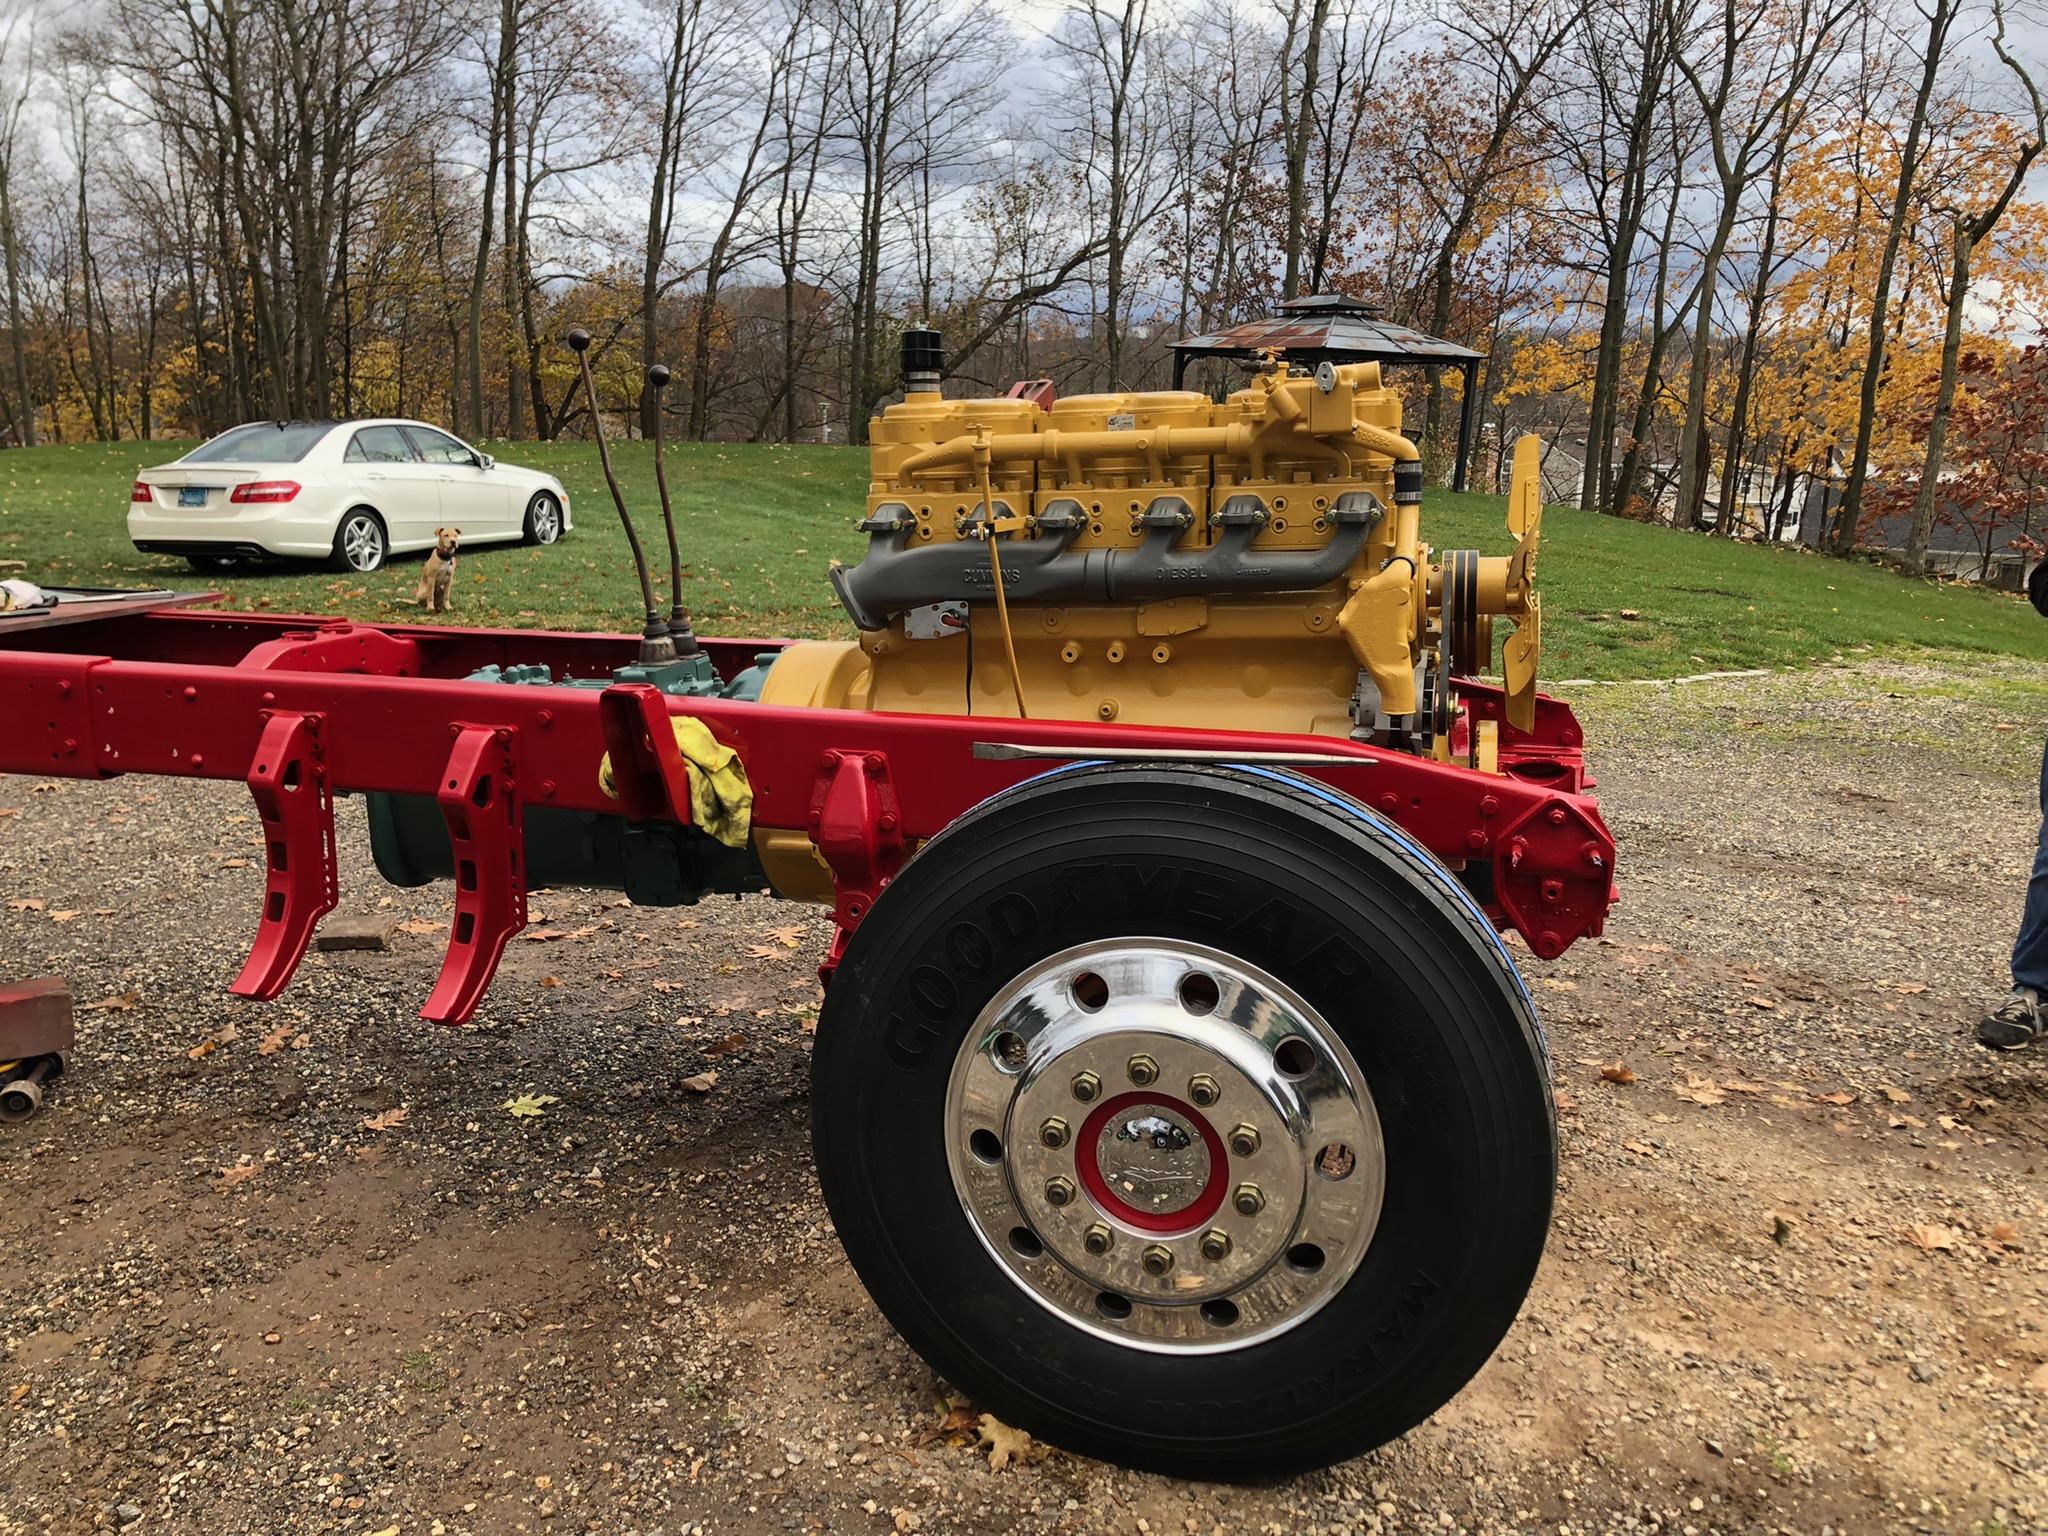
The magic baffle/divider within the rear half of a NH220 backdrop. I finally got a picture of it when I pulled the engine out of it's hiding spot. It's my understanding that the same manifold without the baffle/divider was meant for the 855 CI, 250 HP version.
-
B-73 Restoration
mattb73lt replied to mattb73lt's topic in Antique and Classic Mack Trucks General Discussion
Yes, I'm still saving all of that for you. I've been busy too and was about to reach out to you to see where you were with your truck. I'll message you directly and we'll get things set up shortly. -
B-73 Restoration
mattb73lt replied to mattb73lt's topic in Antique and Classic Mack Trucks General Discussion
I heard it run before I bought it. It was supposed to be a low mile in frame overhaul and from the markings on it it appears to be. That was about 20 years ago. I pickled it and drained it a while ago and turn it over now and again. I'll have to prime the oil system as all the external lines have been replaced before I try to run it. I was going to do the cab at the same time, but I'll wait and do all the plumbing and electrical work that I can when the weather permits. Also need to get the driveshaft done. But, plenty inside the barn to do this winter to get ready for the final push this spring. -
B-73 Restoration
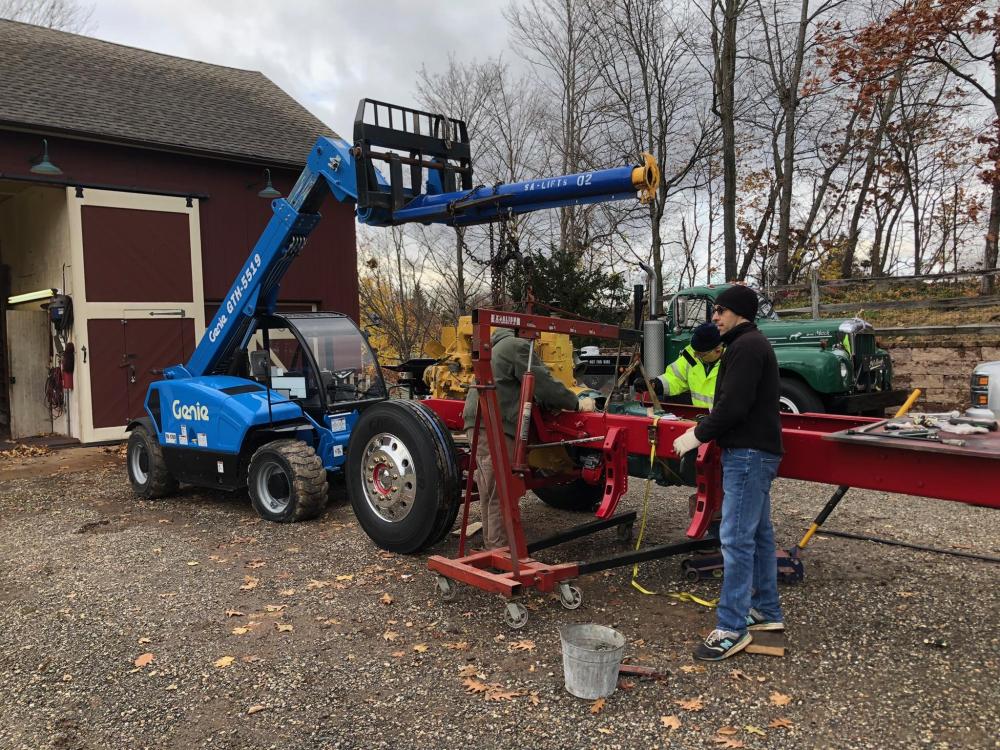
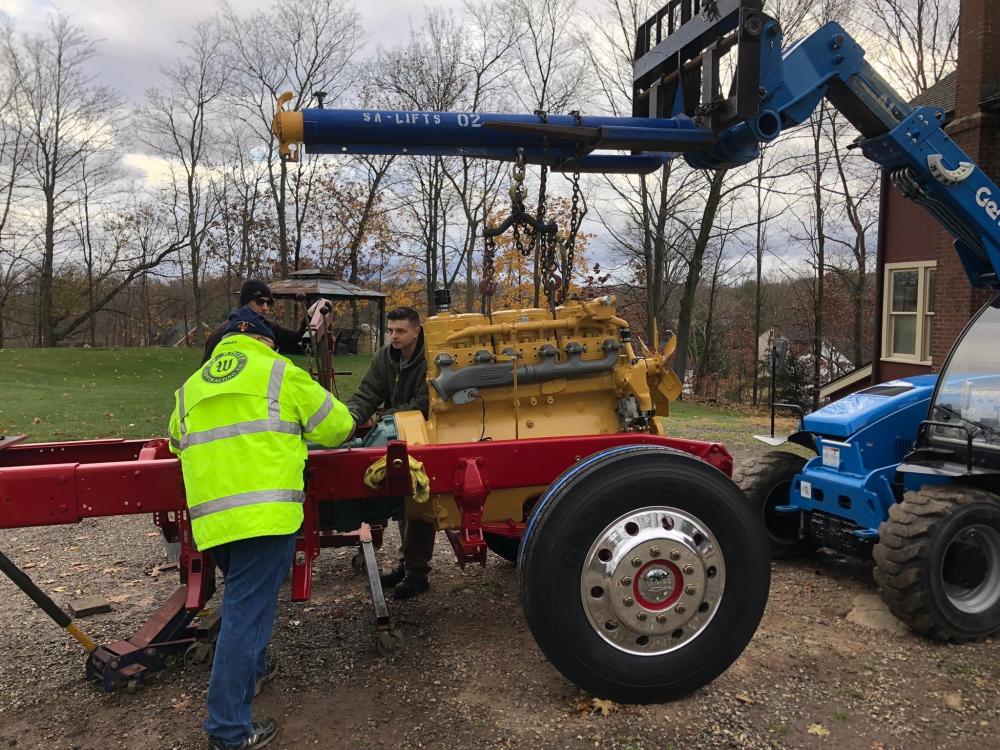
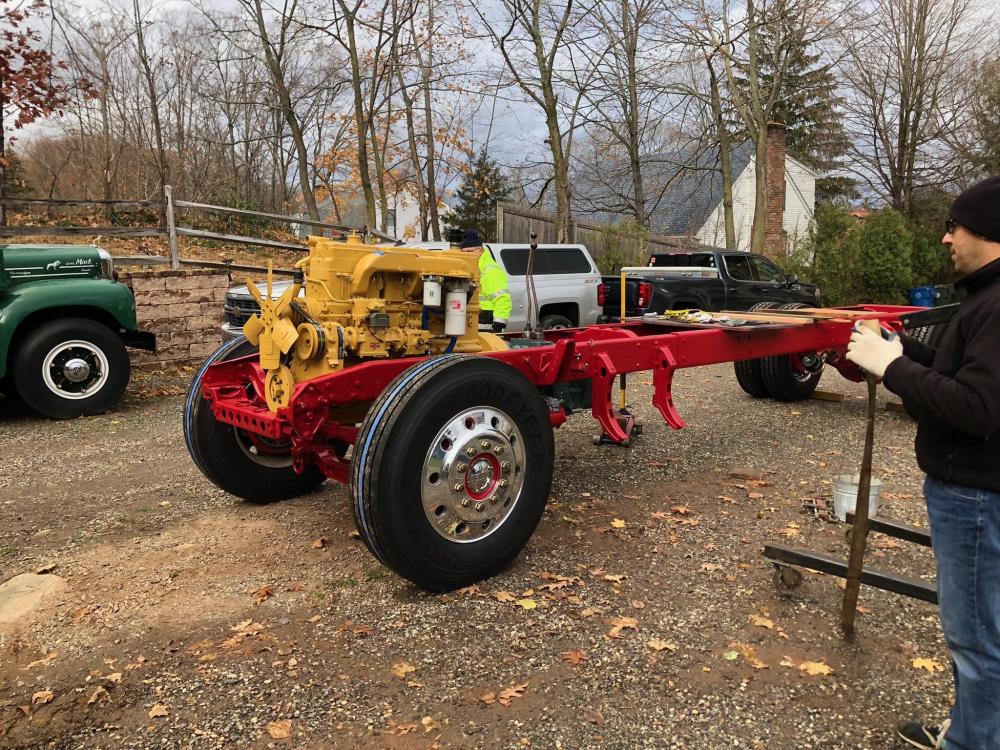
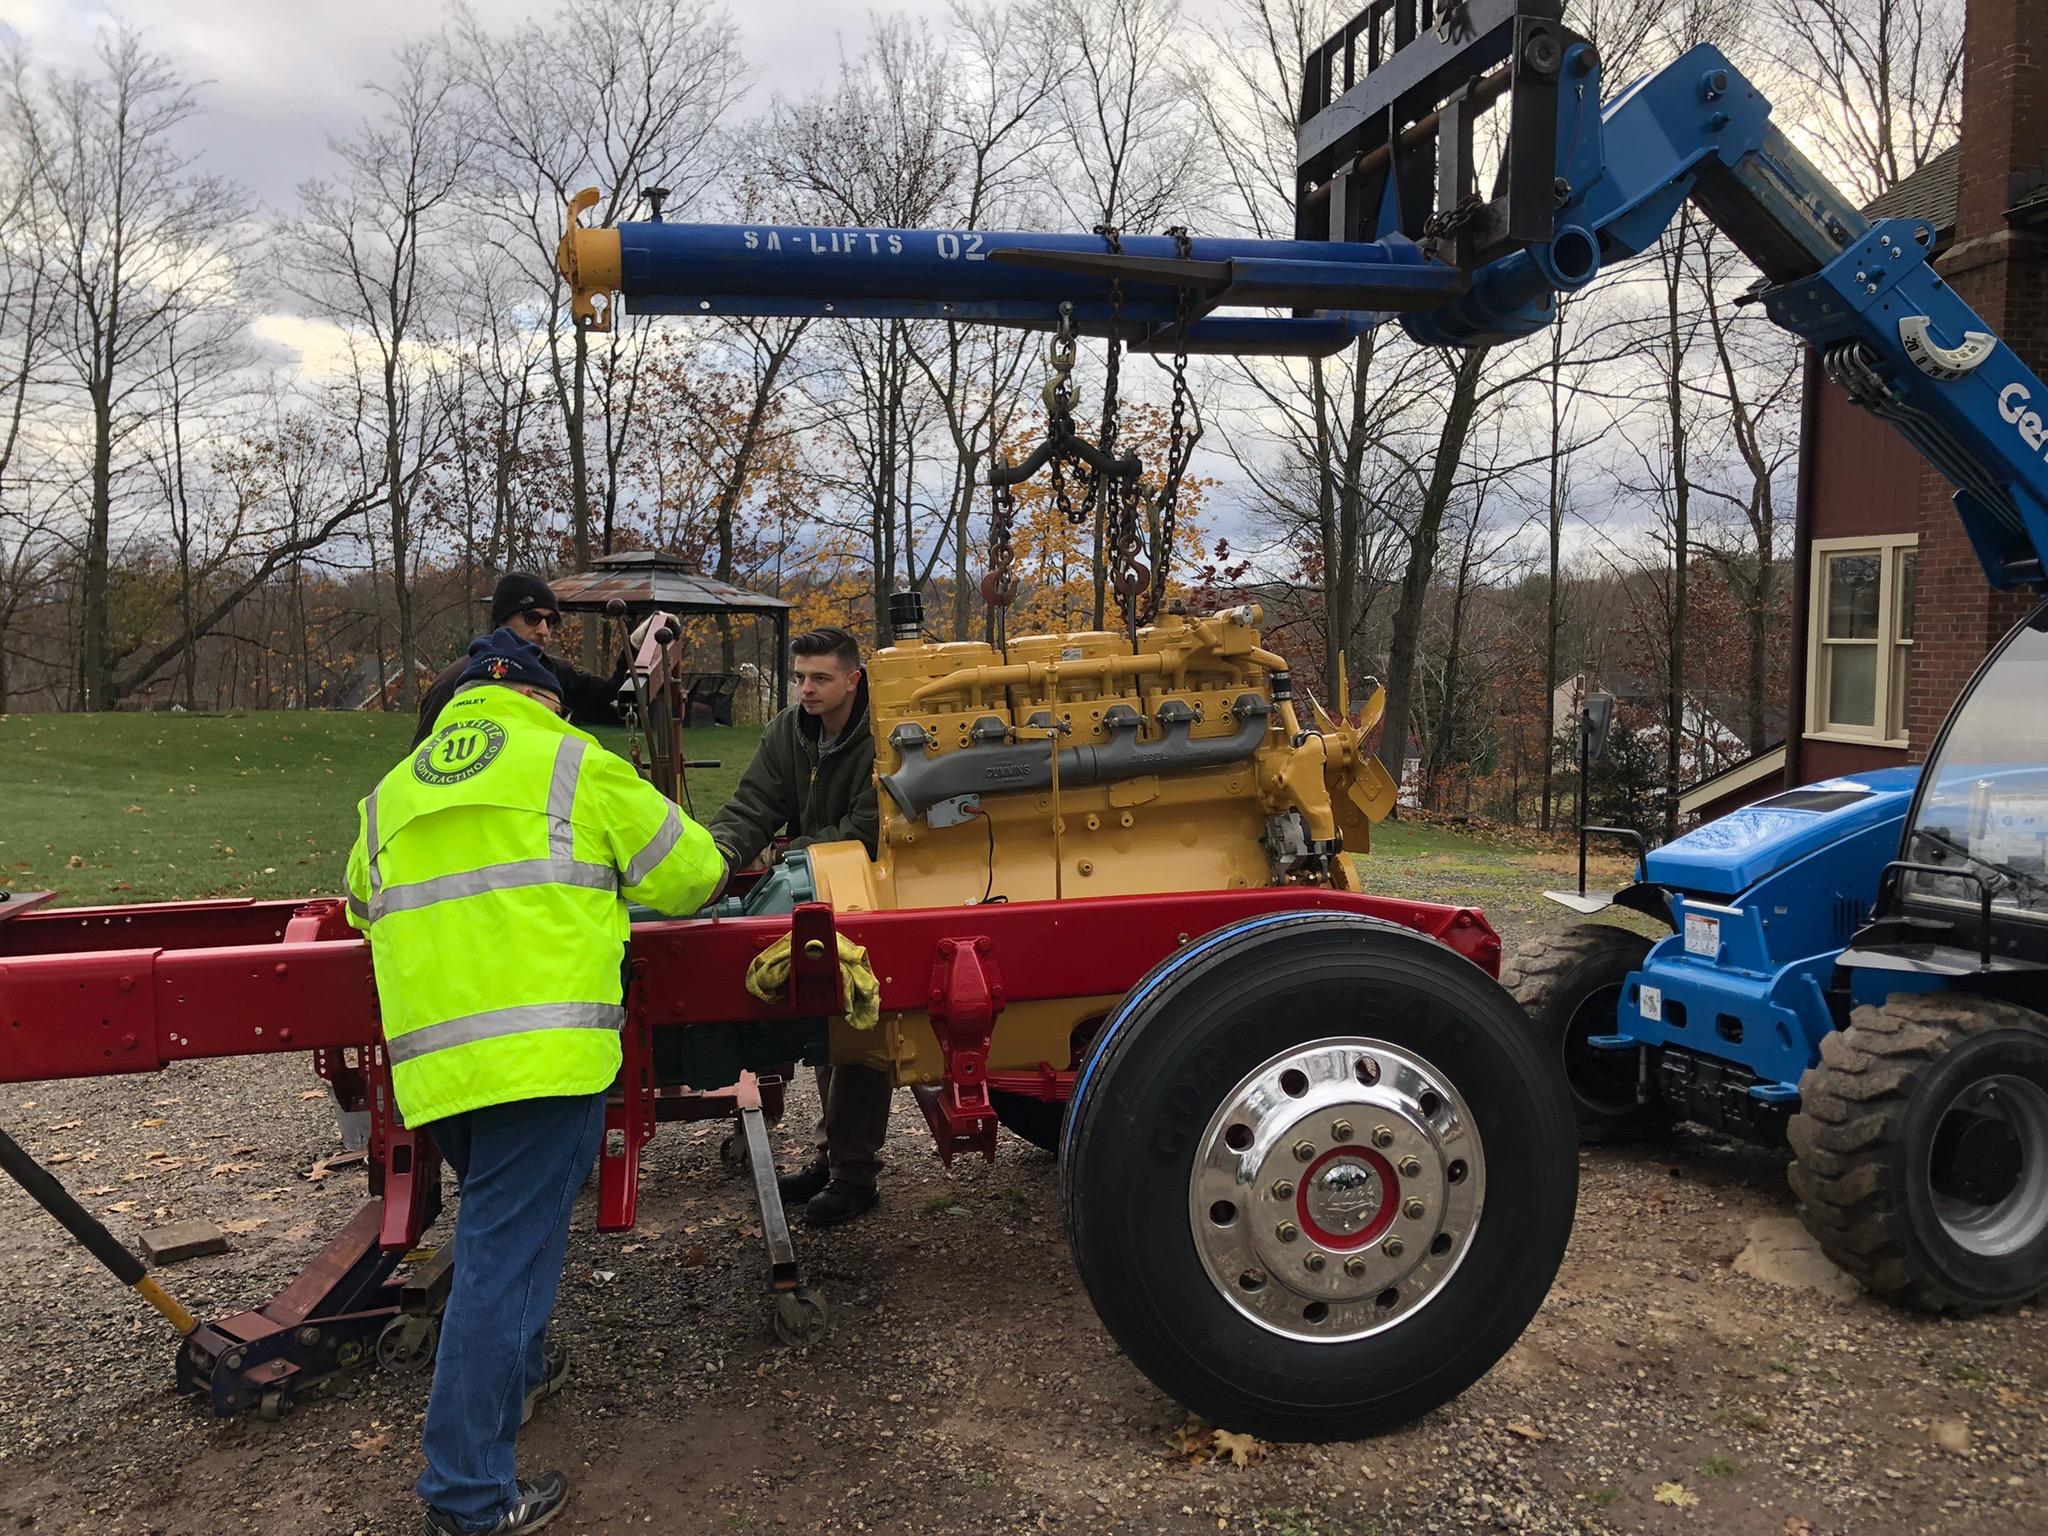
mattb73lt replied to mattb73lt's topic in Antique and Classic Mack Trucks General Discussion
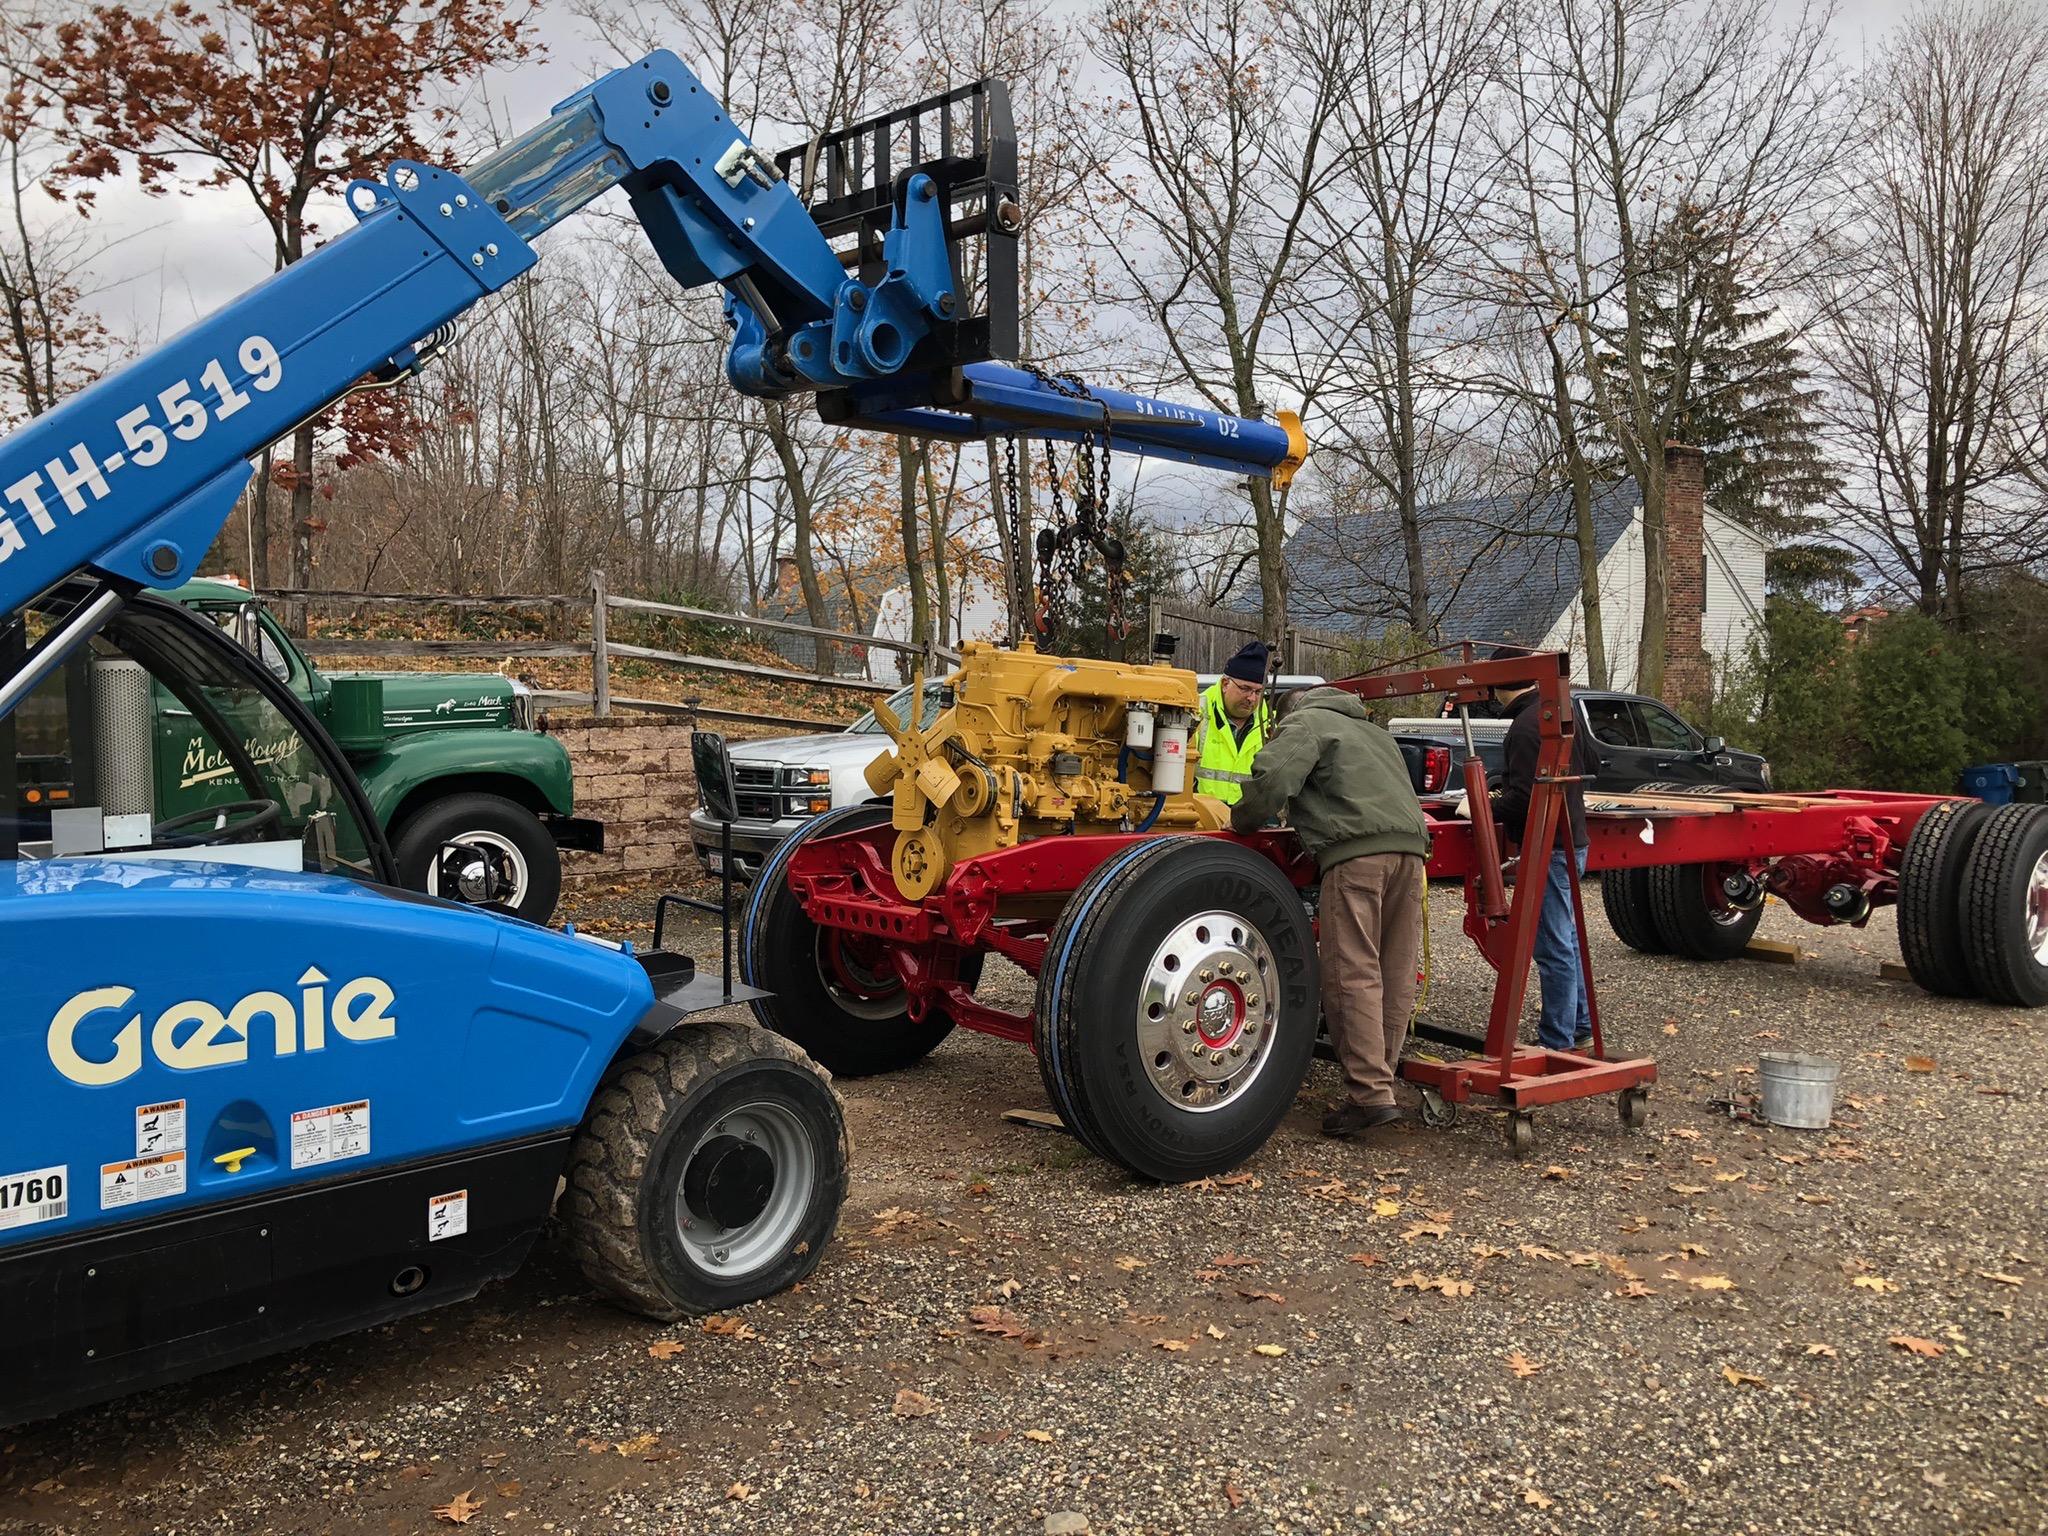
WOW, its in!!! I had some help from my brother, nephew and a friend from the truck club I belong to. Plus another friend that loaned the lift to do it. Having the extra hands was a big help and really sped things up. A huge amount of anticipation about getting this engine in after seeing it sitting around so long. Having it in will allow me to do a lot of the plumbing and wiring before the cab goes on. No real battle mating the transmission, we did have to disconnect it from it's mounts and raise it with my engine hoist to get the right angle to get the input shaft through the two clutch plates. It's in and another step forward!!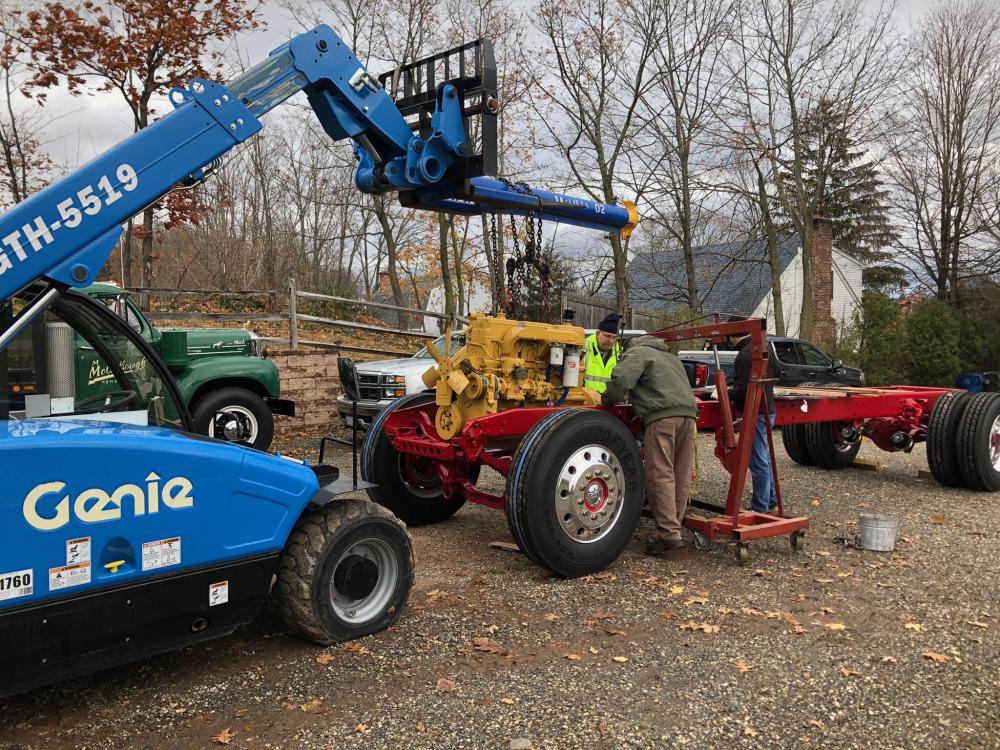

-
B-73 Restoration
mattb73lt replied to mattb73lt's topic in Antique and Classic Mack Trucks General Discussion
Yeah, that was the plan. It’s tough to find an alternator to fit that area. The oil cooler is above it and the water inlet pipe runs down beside it. Generators are narrower in general. This is a 100 amp AC Delco unit, which should supply enough juice to run everything. -
B-73 Restoration
mattb73lt replied to mattb73lt's topic in Antique and Classic Mack Trucks General Discussion
Wow, nice detail work!! -
B-73 Restoration
mattb73lt replied to mattb73lt's topic in Antique and Classic Mack Trucks General Discussion
I think it’s pretty close. It’s Bill Hirsch engine enamel in “Equipment Yellow”. I like the paint for its durability and longevity and have used it on numerous engines. There were some spots on the engine with some paint that seemed original that I painted some test spots on. It was a decent match to those spots. It certainly looks better than what it was. -
B-73 Restoration
mattb73lt replied to mattb73lt's topic in Antique and Classic Mack Trucks General Discussion
Ok, let me get my stuff!! -
B-73 Restoration
mattb73lt replied to mattb73lt's topic in Antique and Classic Mack Trucks General Discussion
Well, I guess I’ll have to scrap the whole project then? On to the next thing to screw up. -
B-73 Restoration
mattb73lt replied to mattb73lt's topic in Antique and Classic Mack Trucks General Discussion
Because the engine is so big!!🤣🤣


BMT Forum Logo
