


mattb73lt
-
Posts
1,422 -
Joined
-
Last visited
-
Days Won
146
Content Type
Profiles
Forums
Gallery
Events
Blogs
BMT Wiki
Collections
Store
Everything posted by mattb73lt
-

B-73 Restoration
mattb73lt replied to mattb73lt's topic in Antique and Classic Mack Trucks General Discussion
My one concession, other than the electric wipers. I needed a little bit of comfort. -
B-73 Restoration
mattb73lt replied to mattb73lt's topic in Antique and Classic Mack Trucks General Discussion
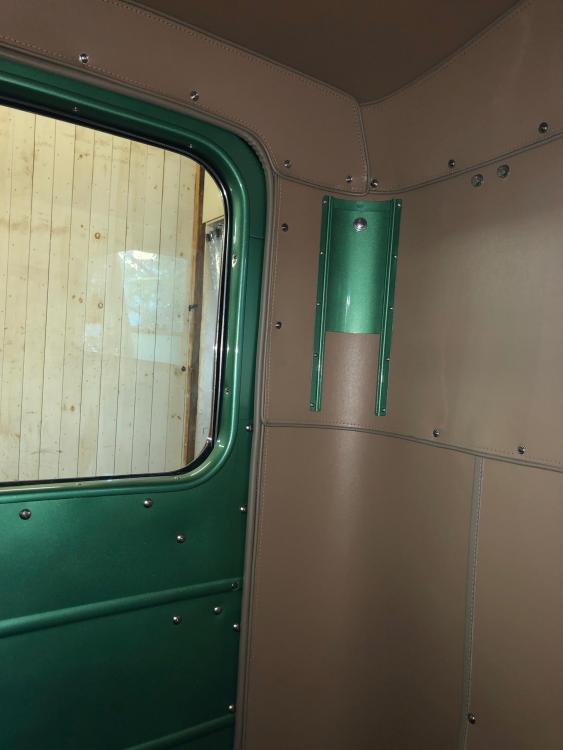
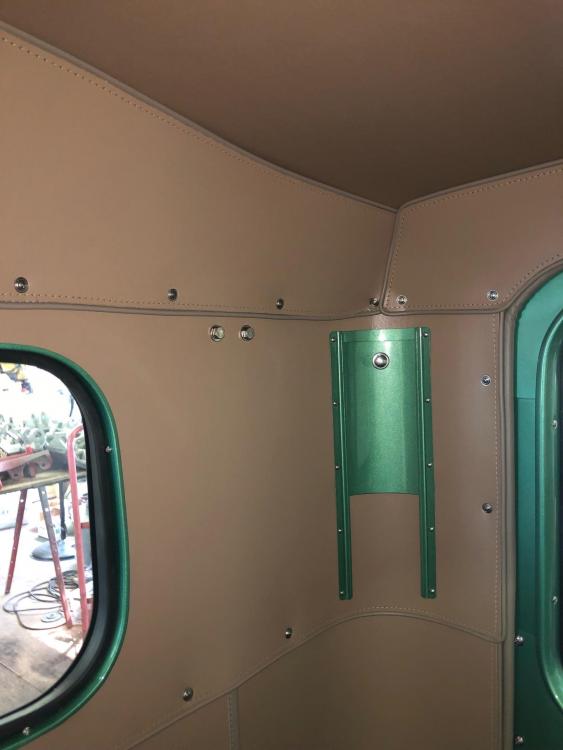
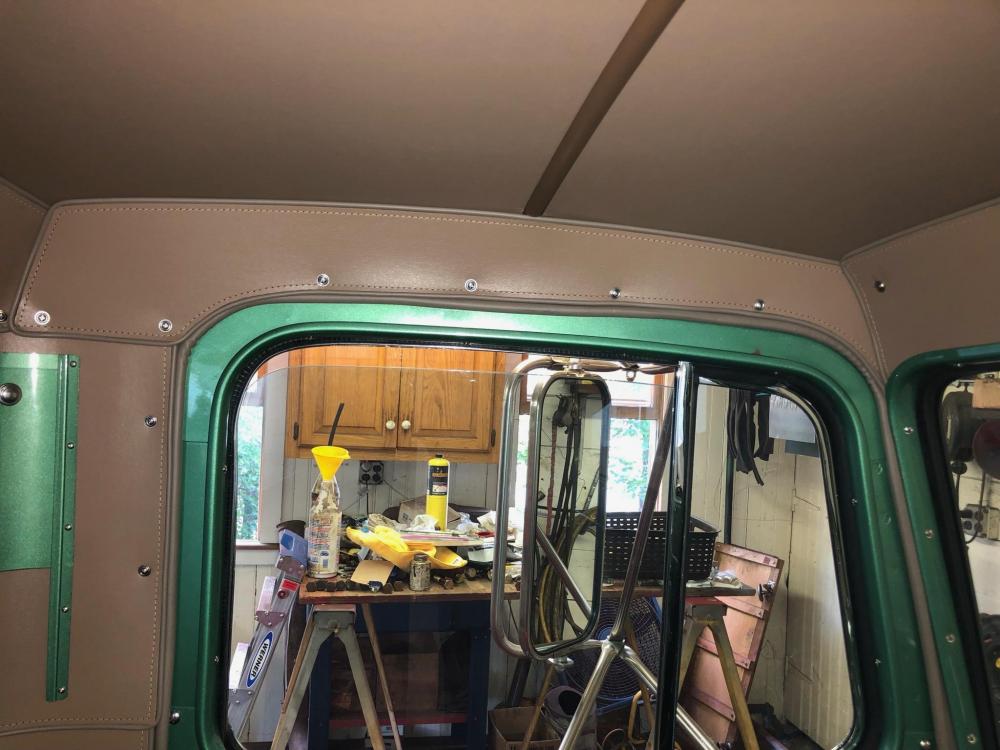
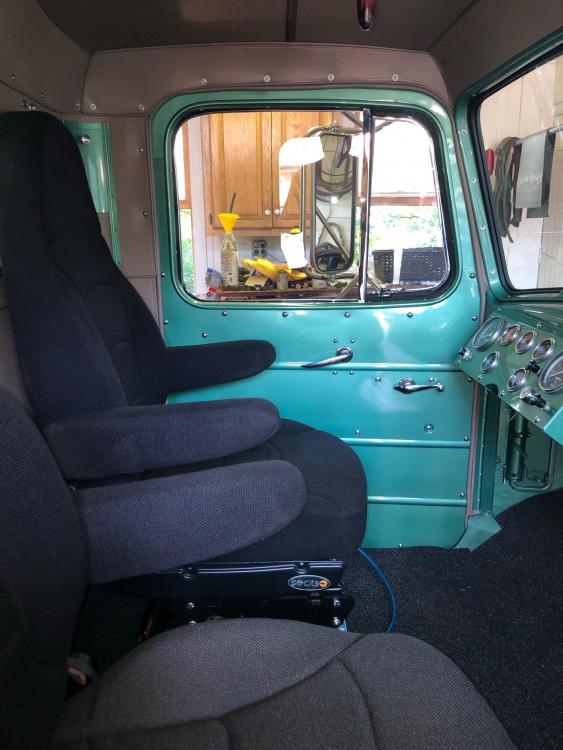
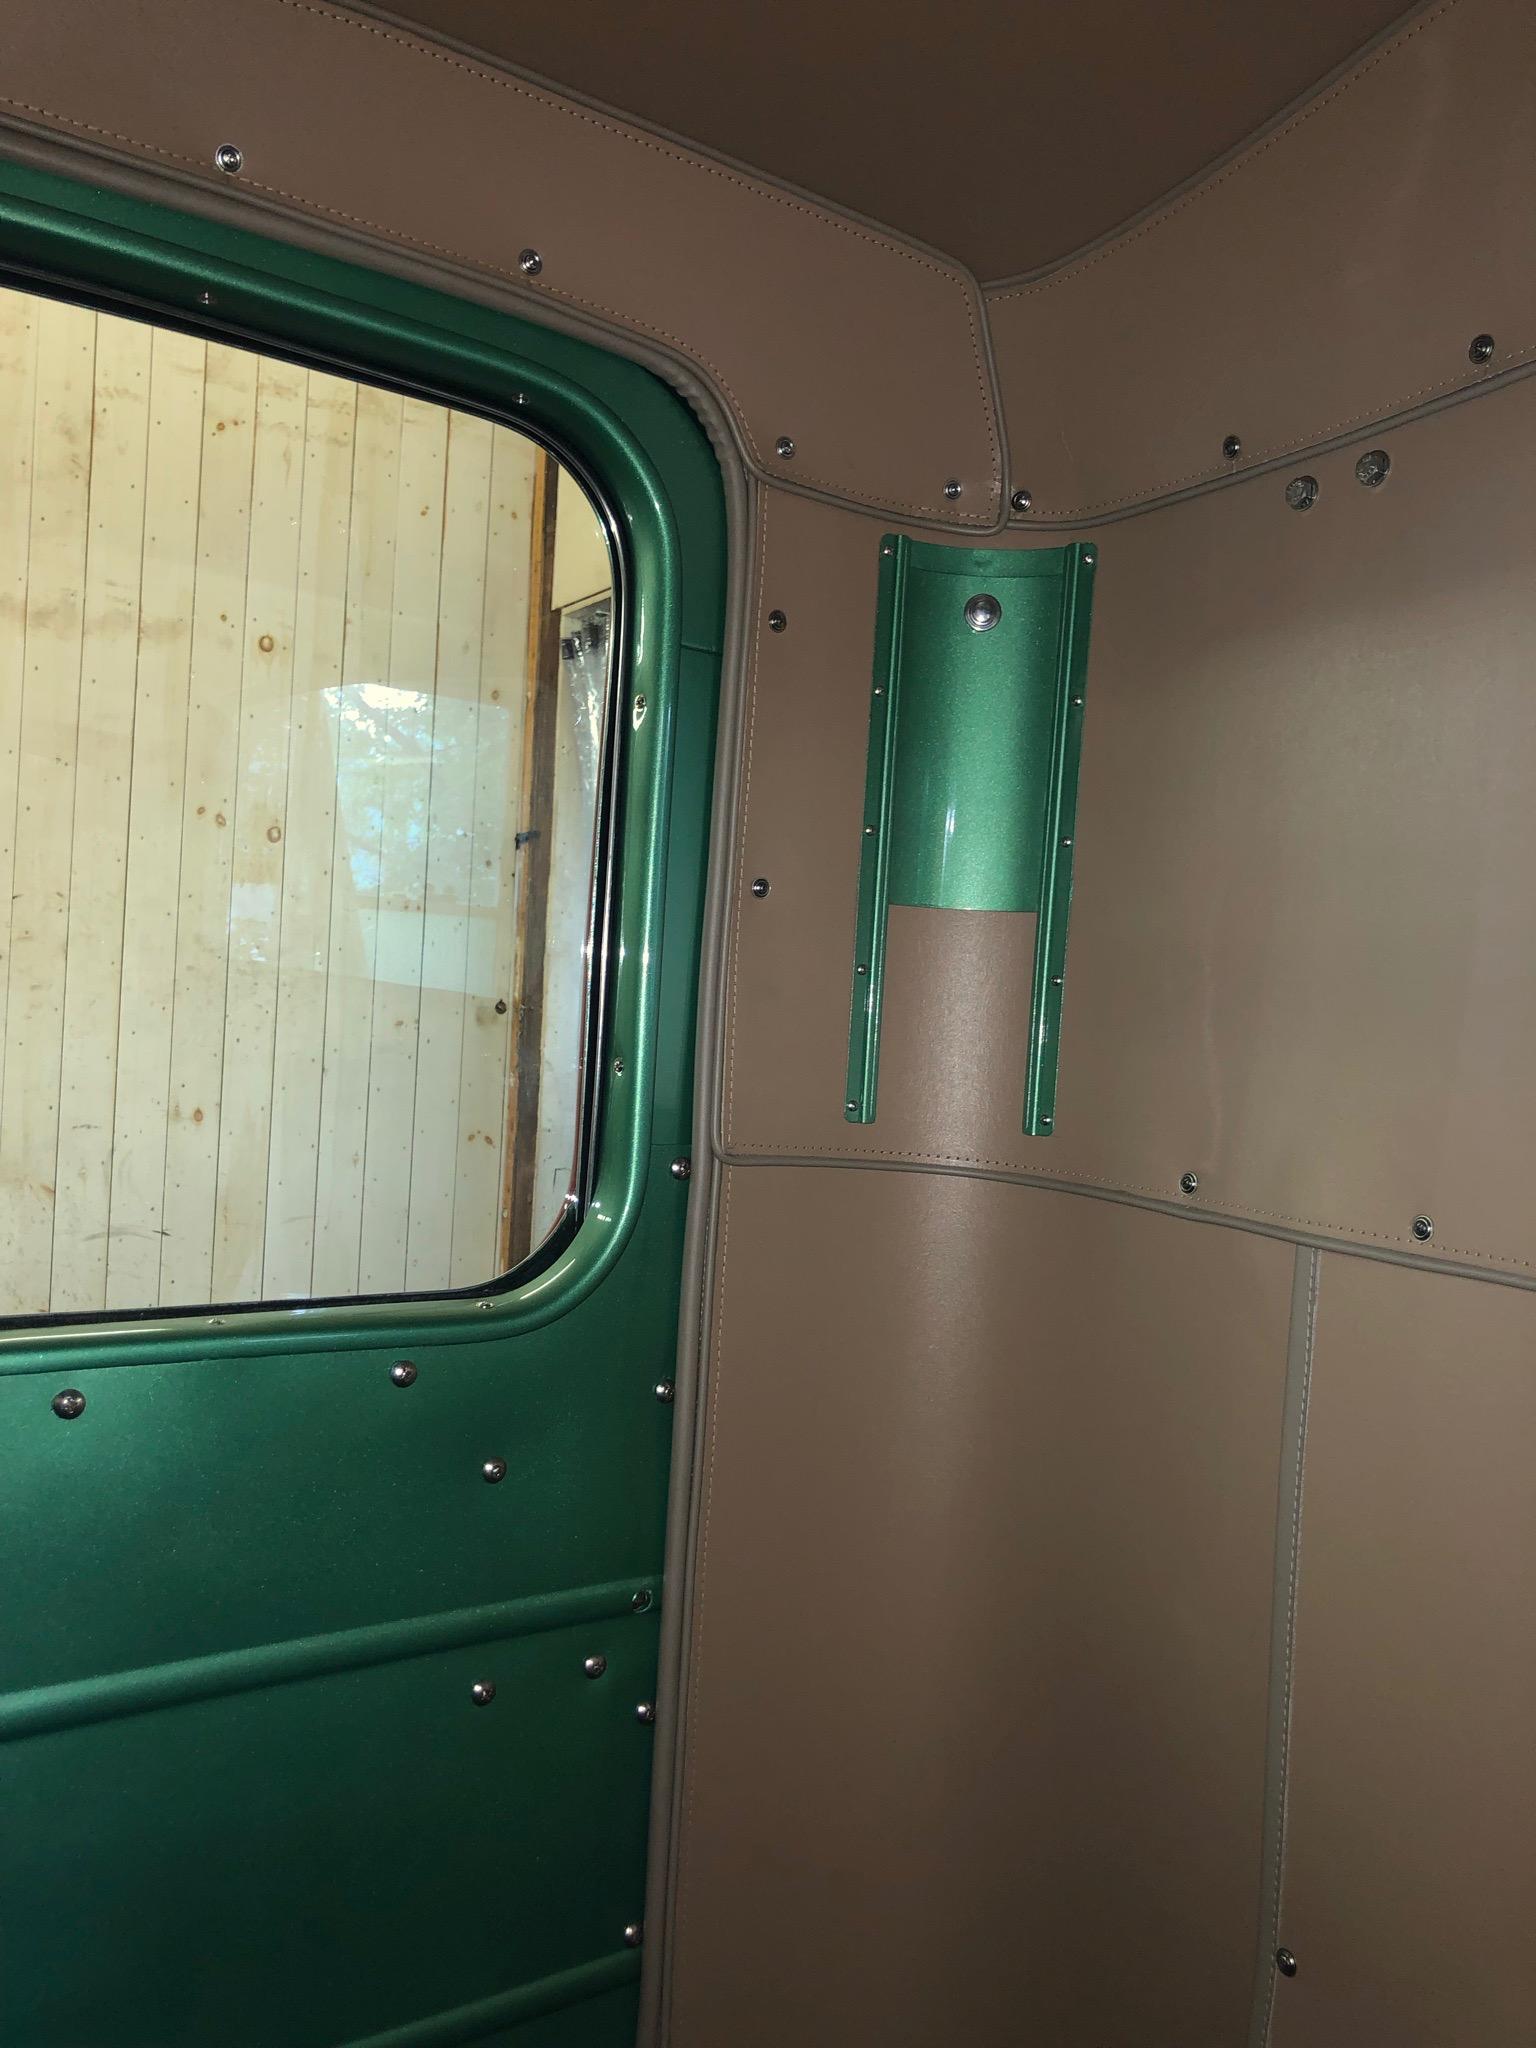
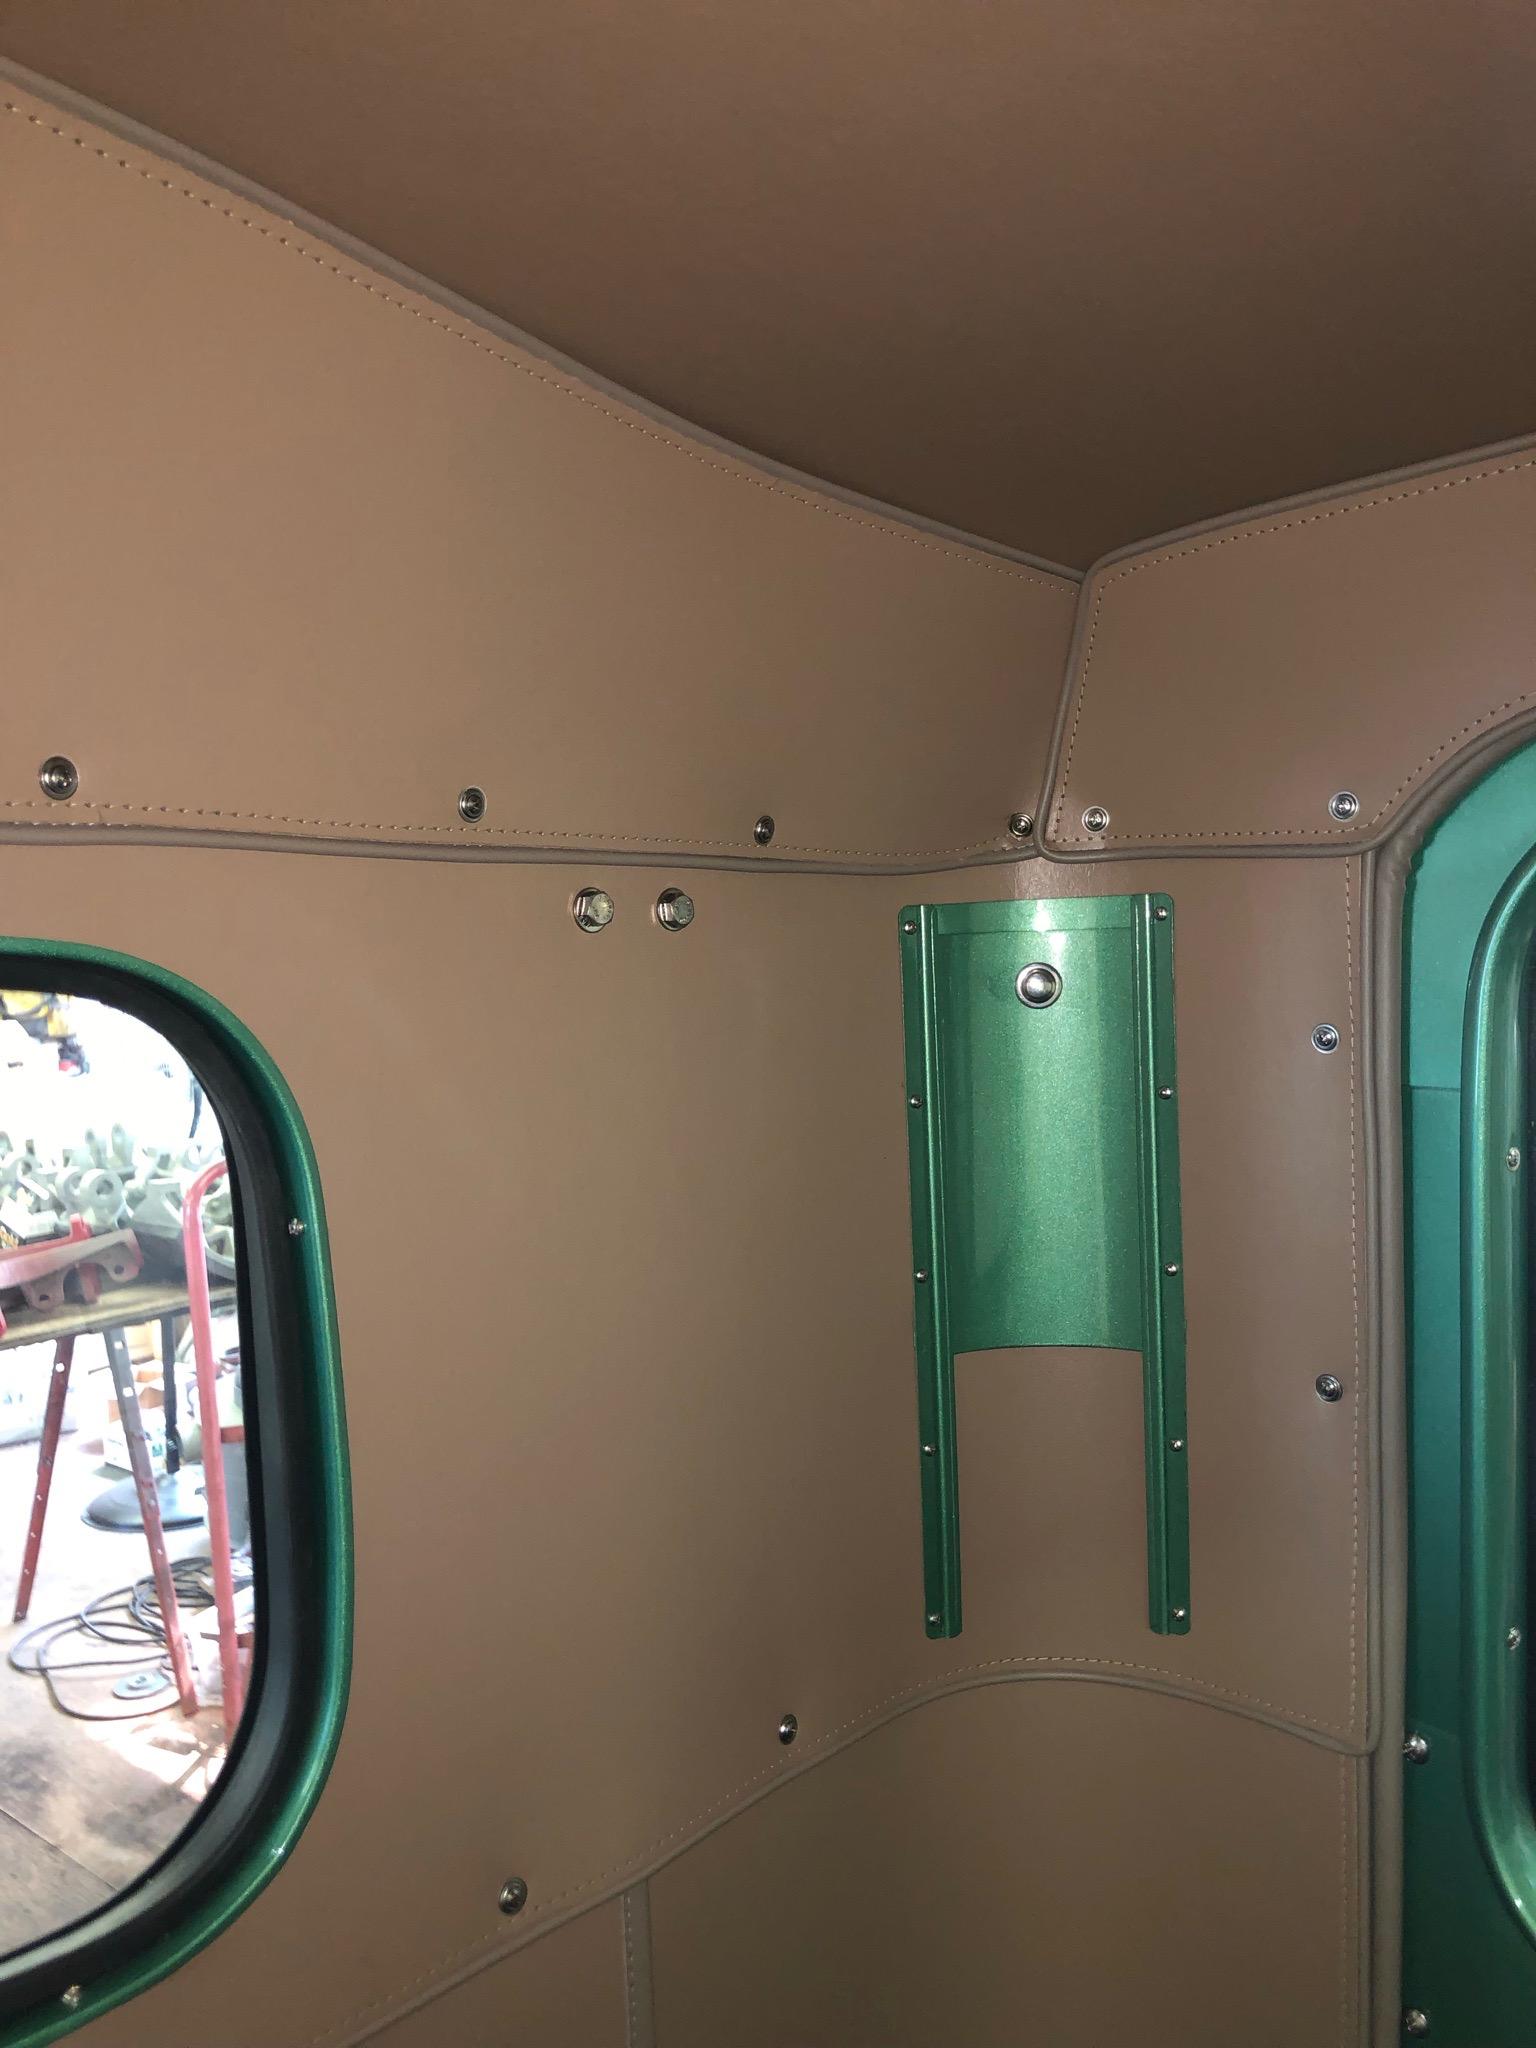
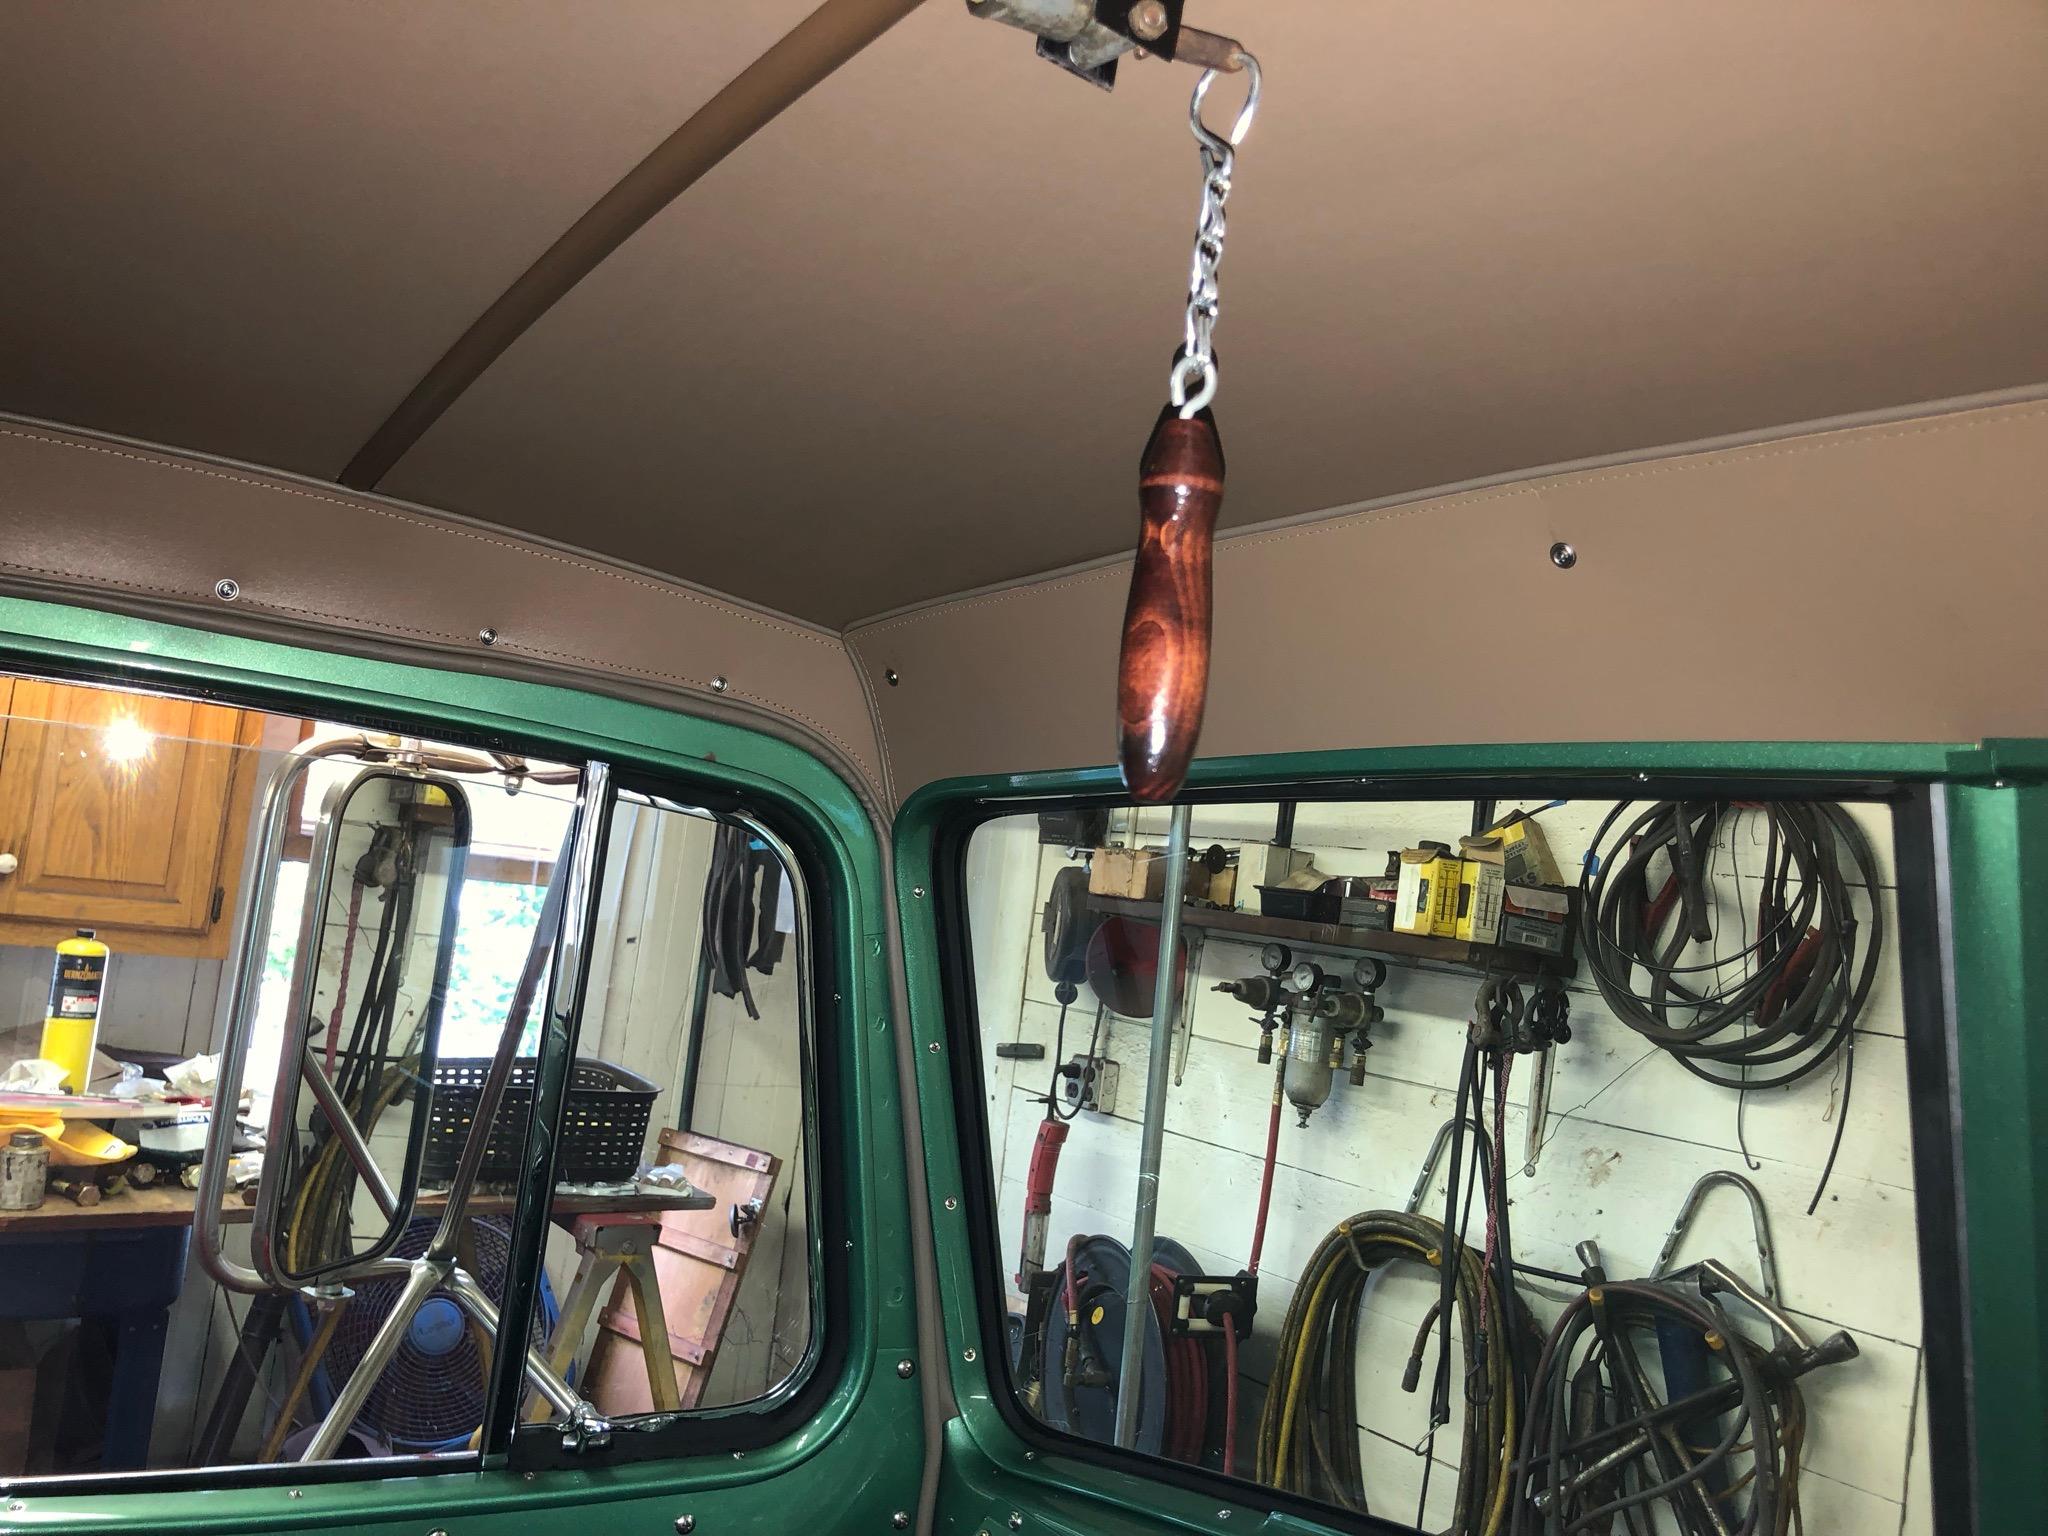
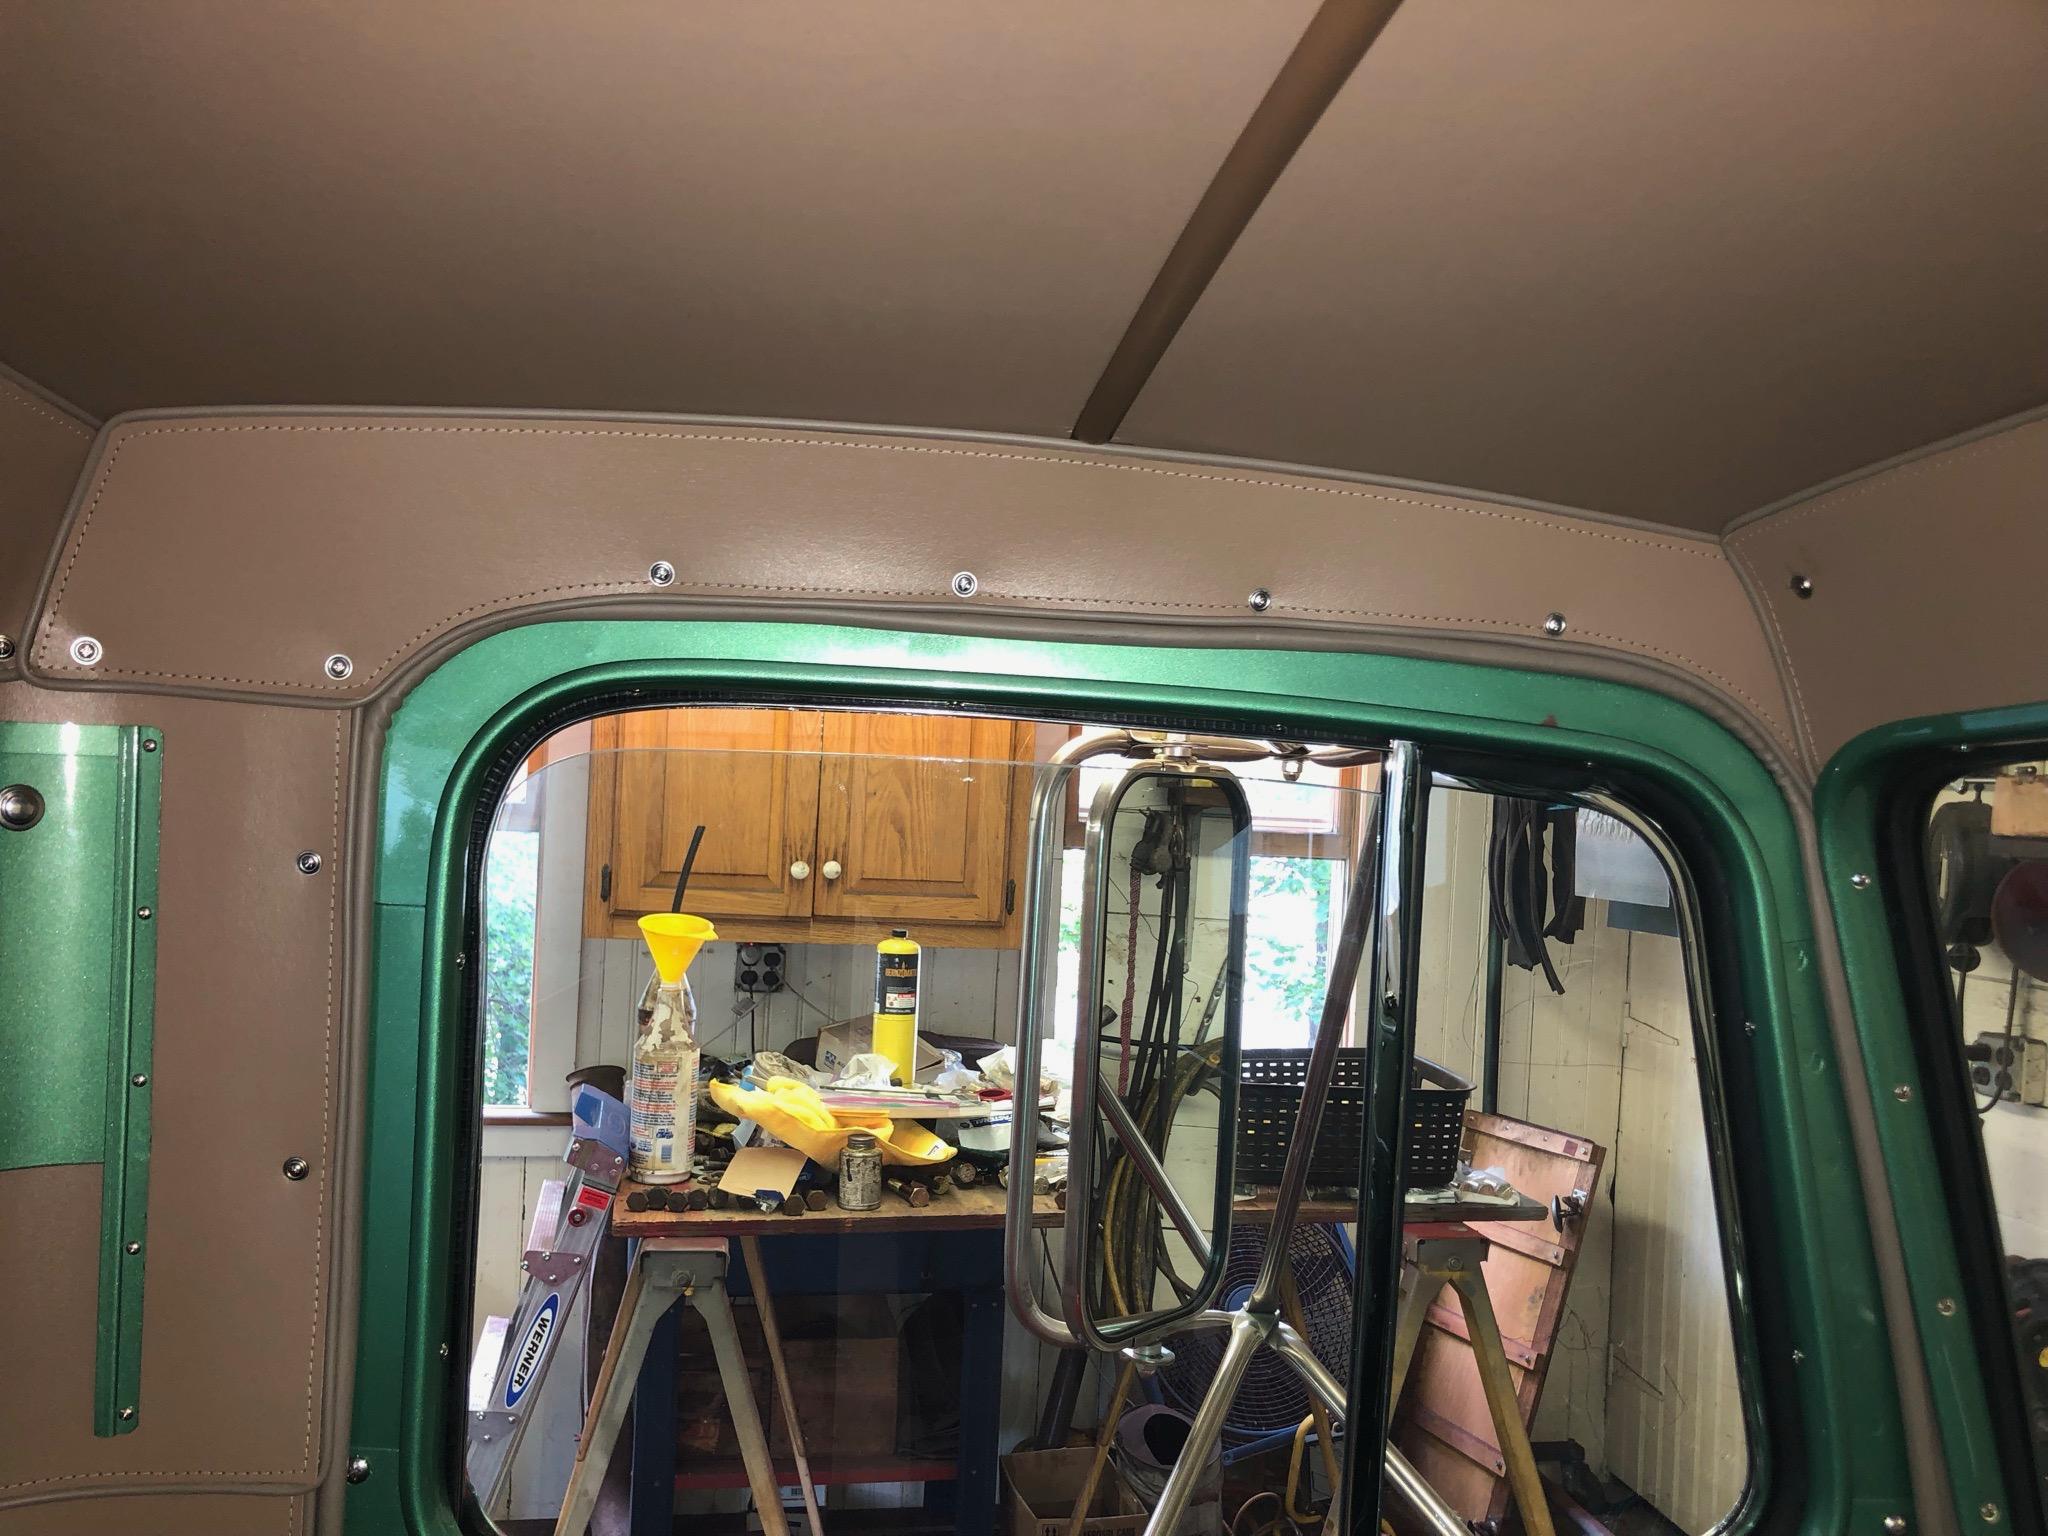
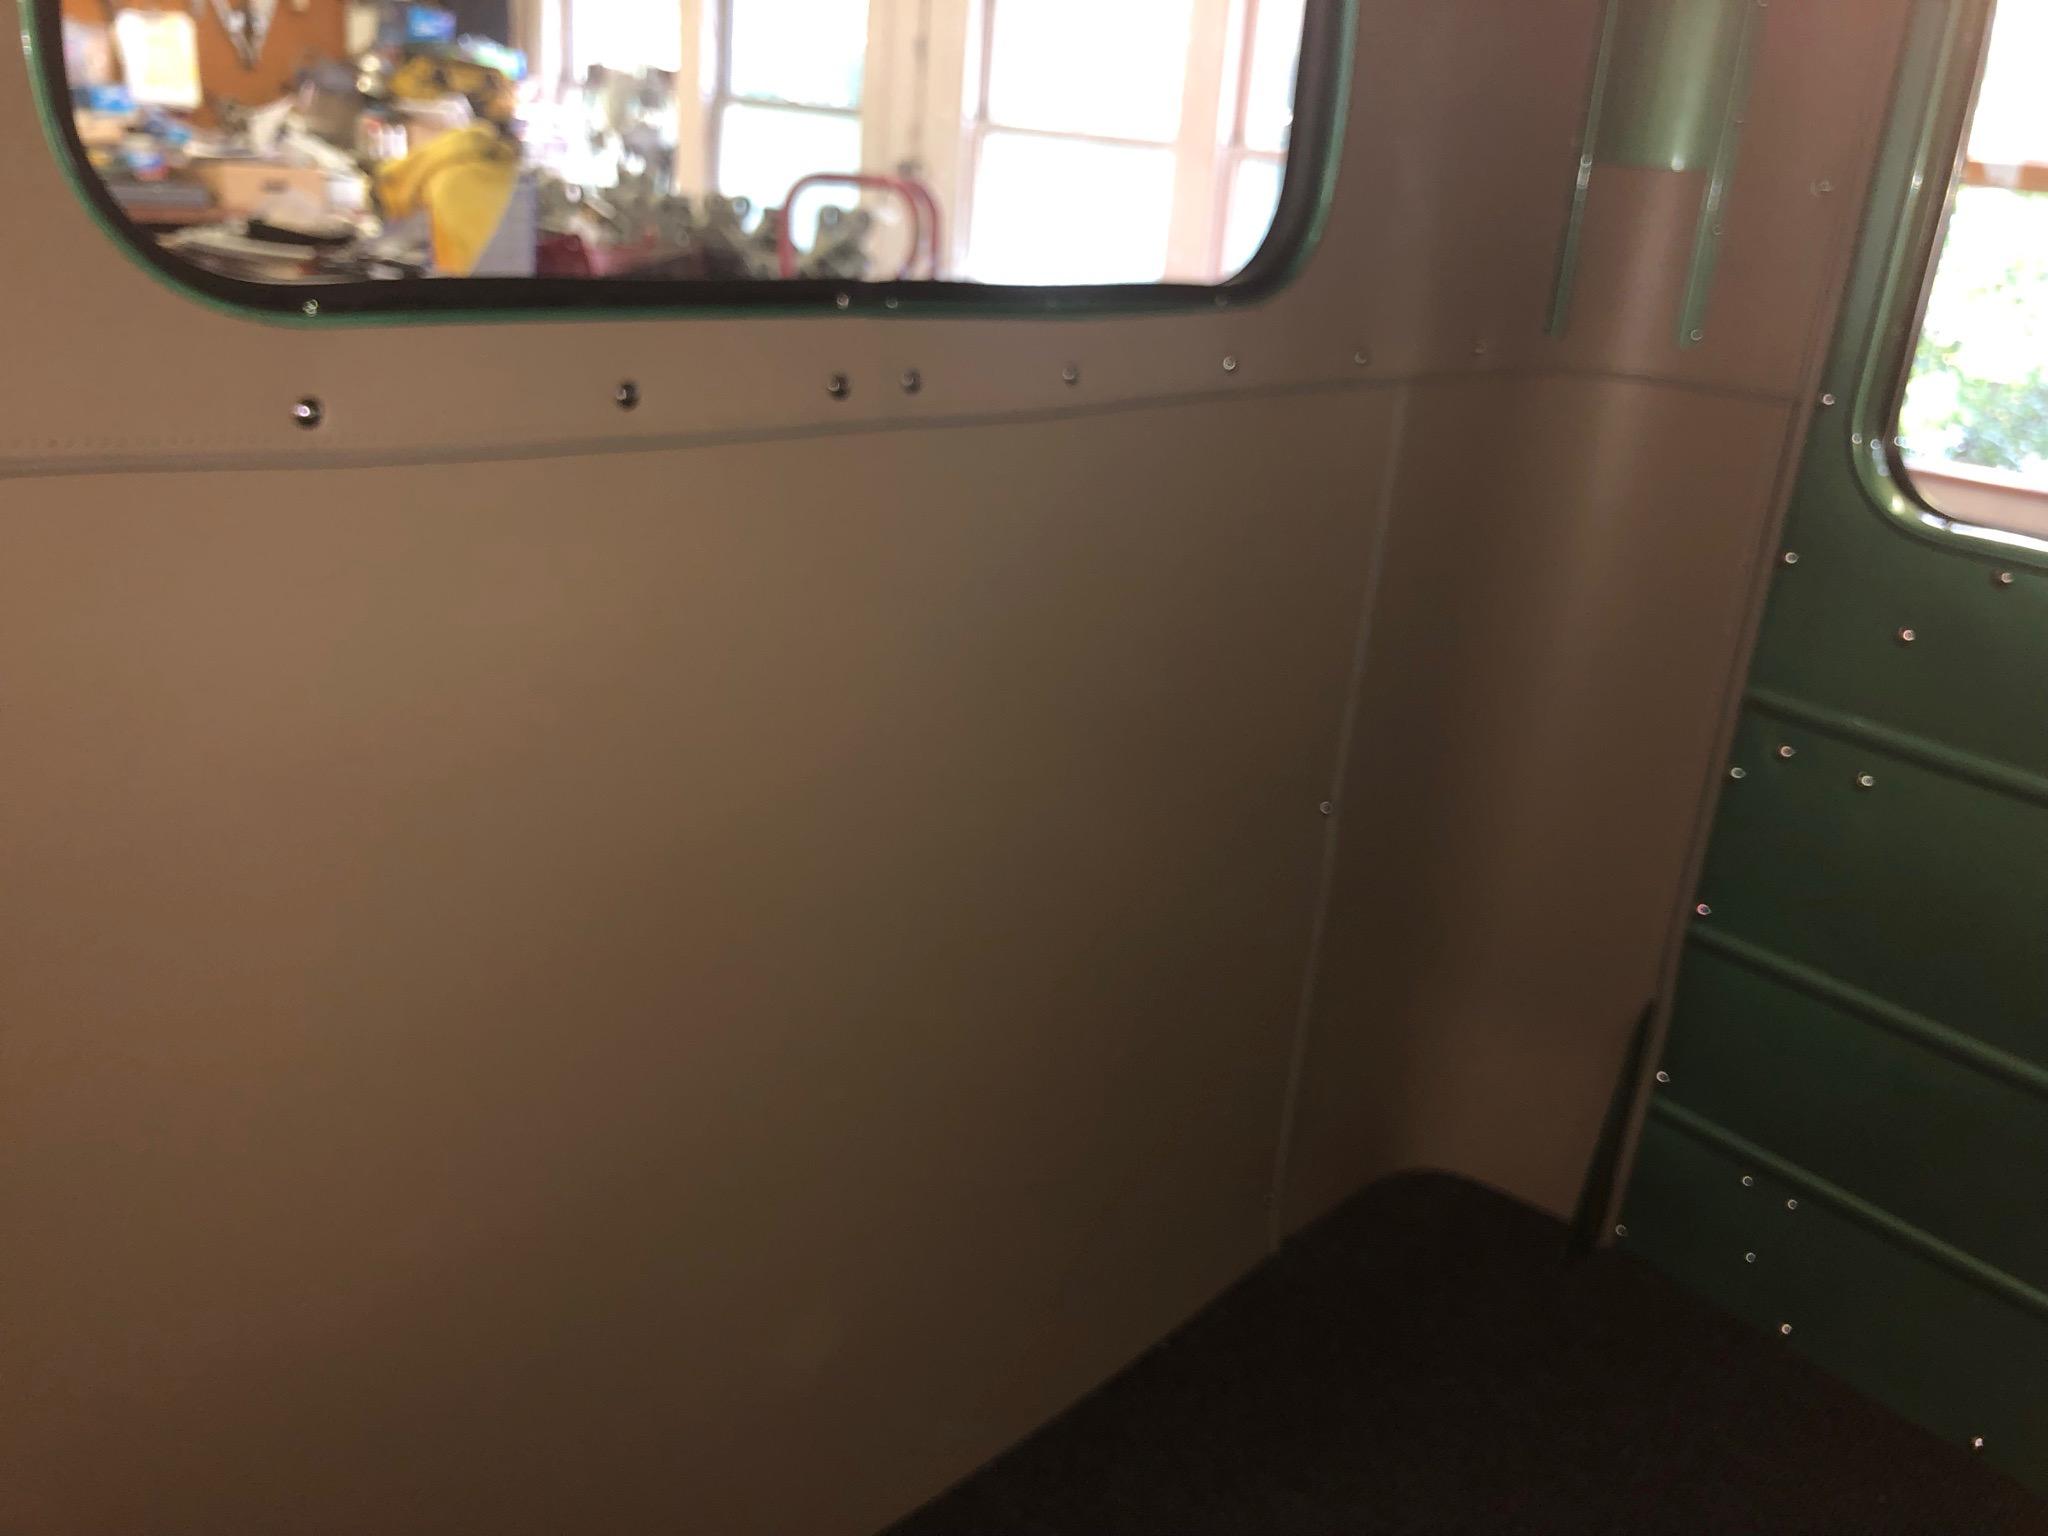
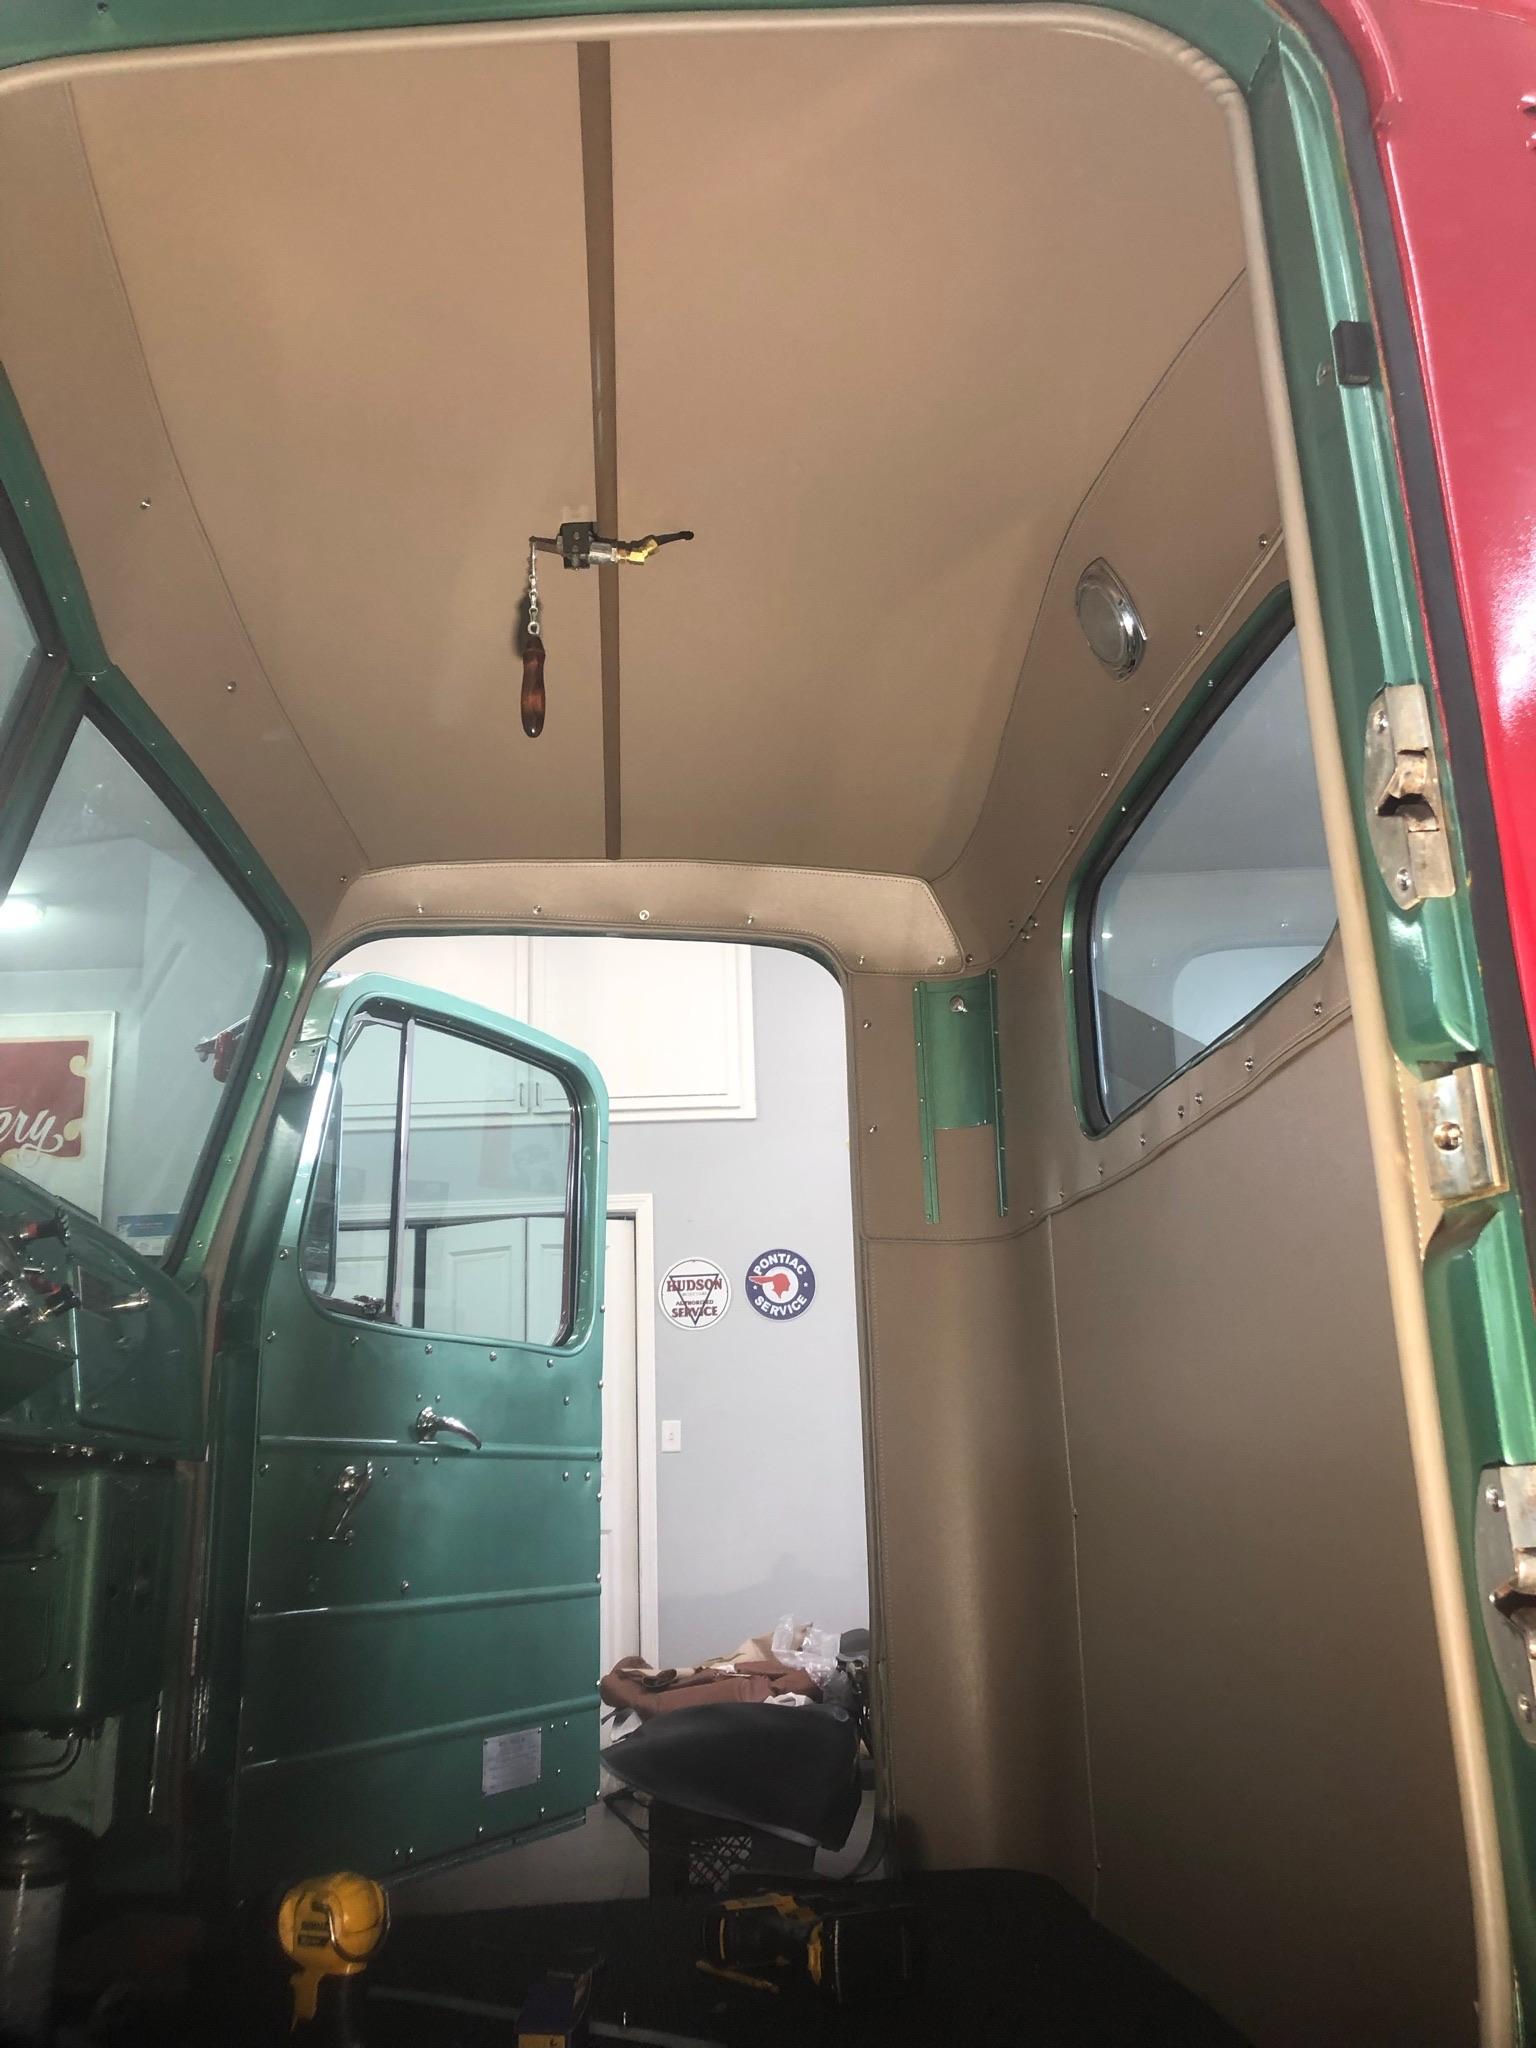
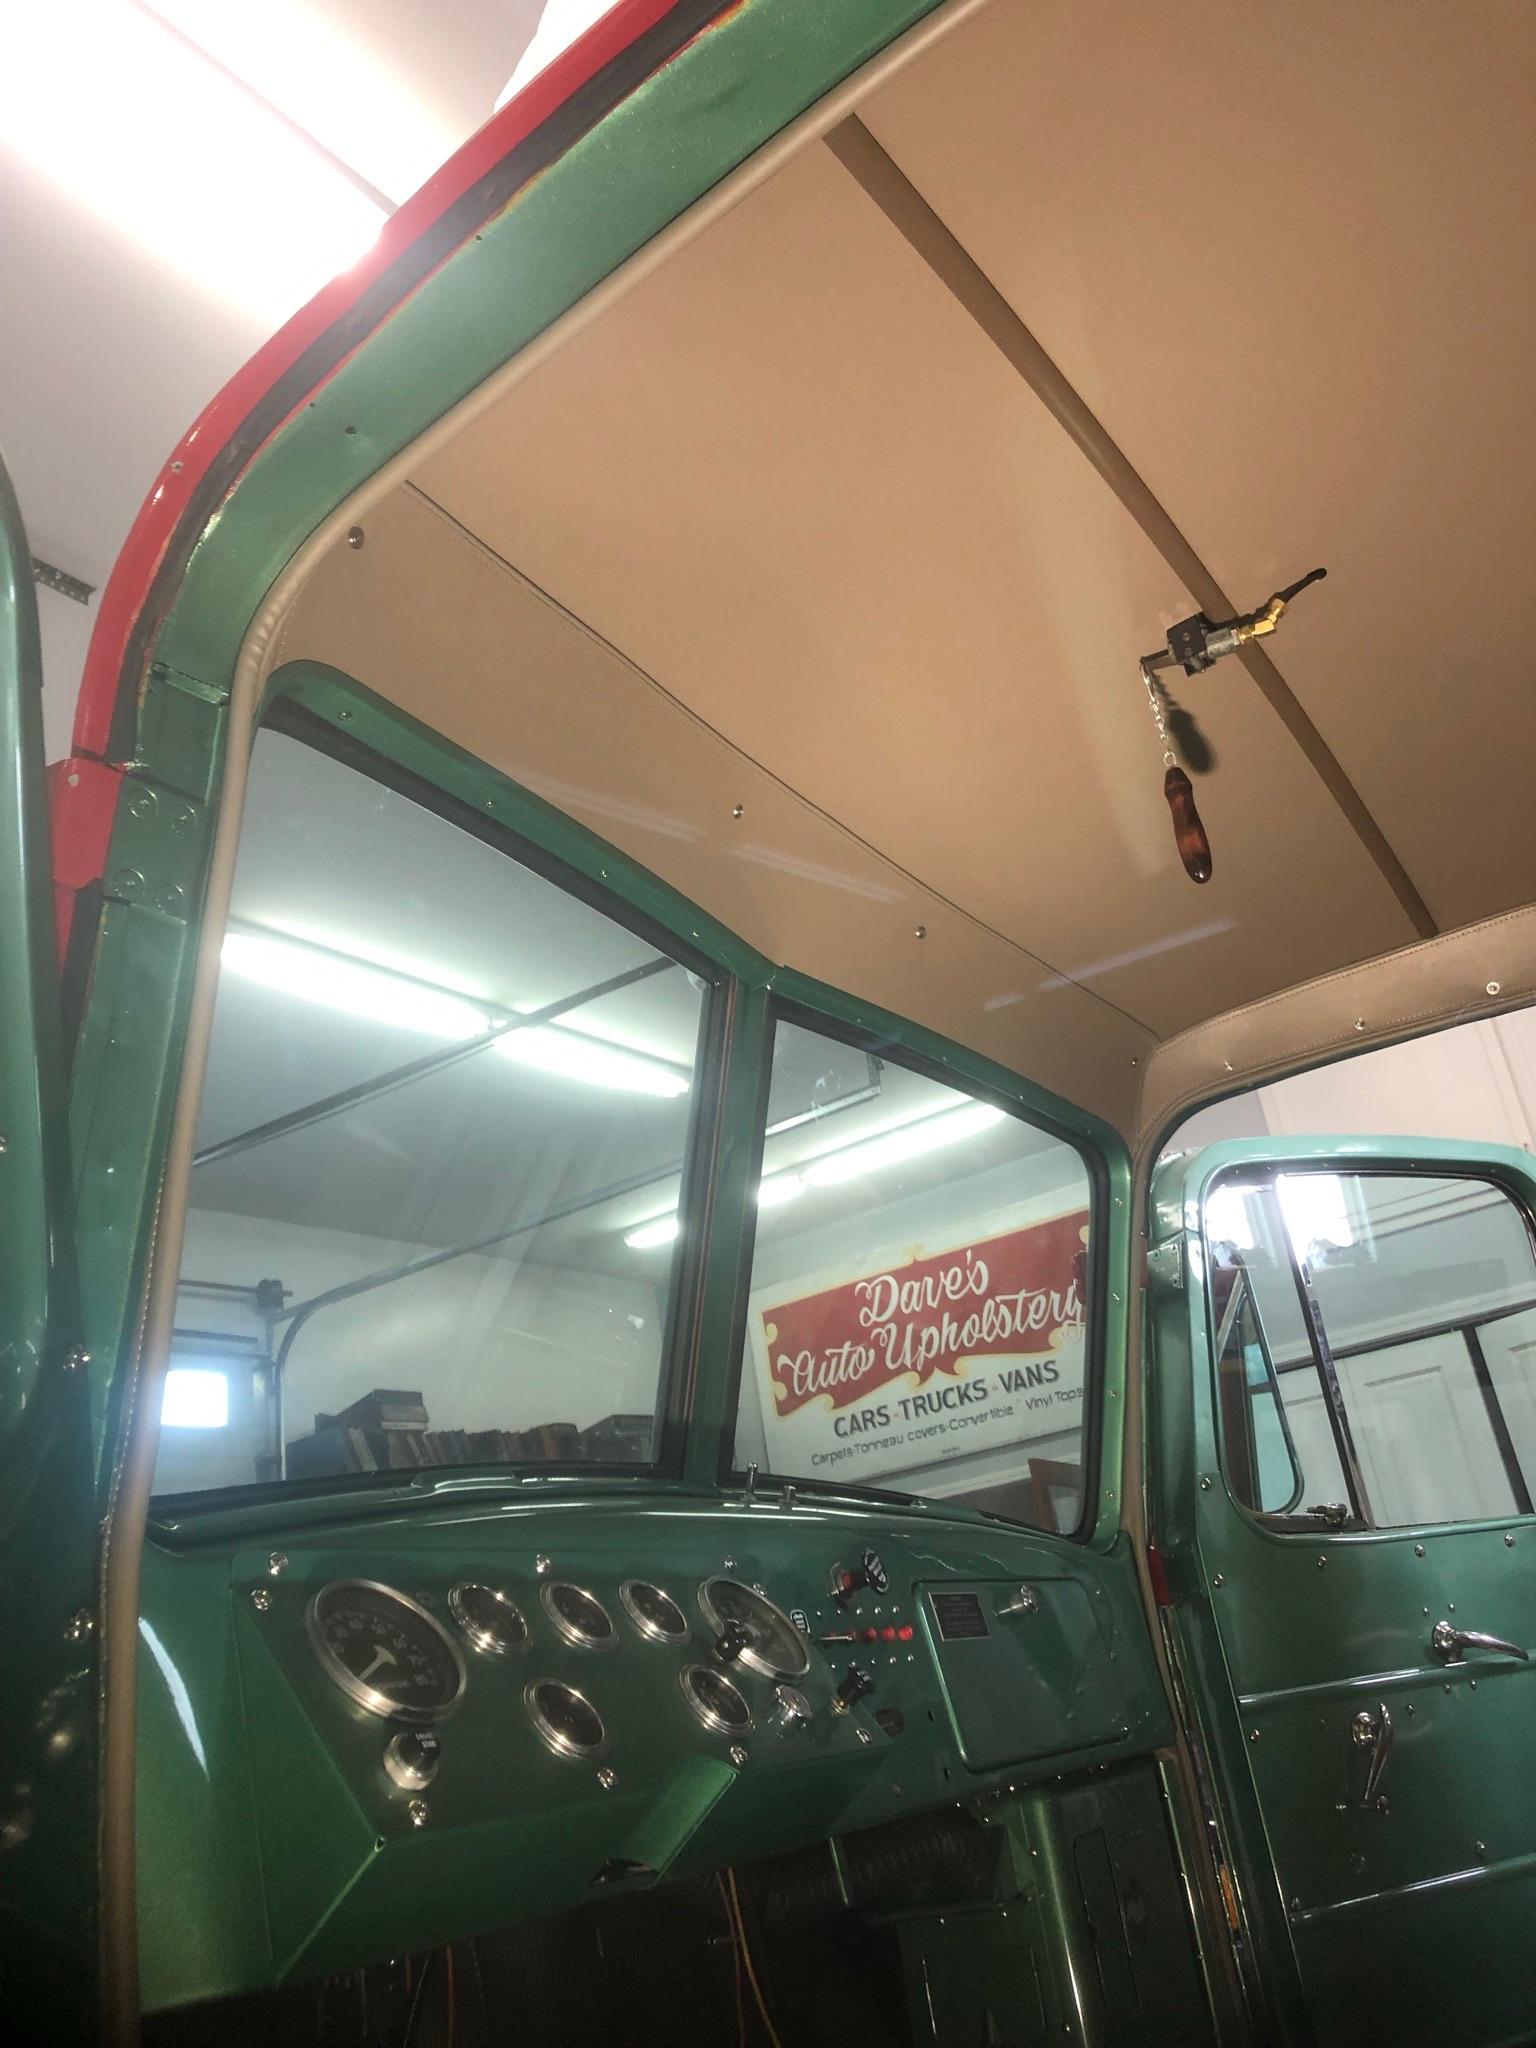
Picked up the cab today and made it back home without damage or dropping it on the highway, again. That was a huge relief and yes, I drove like an old lady. The work finishes off the cab and really makes it look great. Took some pictures with and without the seats. I just wanted to see how they looked with the headliner in place. Such a huge difference from when I dragged it home all those years ago. It truly looks brand new!!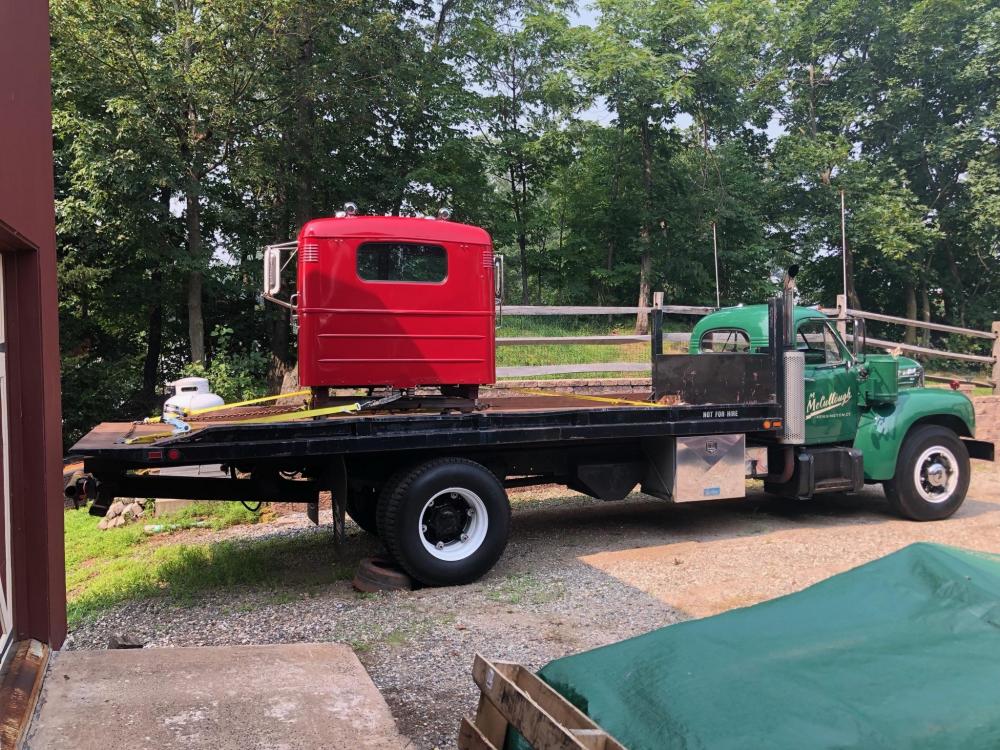


-
Mack Cab Ridges
mattb73lt replied to james j neiweem's topic in Antique and Classic Mack Trucks General Discussion
Most times bead lines, embossments, dimples are placed to strengthen a panel to add rigidity. A supplemental benefit is to dampen the harmonics, as previously stated. Floor panels are another good example of this process. The panel can be much thinner, i.e lighter, but have the same strength of a much thicker and heavier panel. -
B-73 Restoration
mattb73lt replied to mattb73lt's topic in Antique and Classic Mack Trucks General Discussion
Yes, quite a bit. The entire interior was sprayed in both types of Lizard Skin (heat & sound), then supplemented by patches of Dynamat where I thought it would help. Anywhere you wrap on the cab results in a dull thud. -
B-73 Restoration
mattb73lt replied to mattb73lt's topic in Antique and Classic Mack Trucks General Discussion
I’ll take more pics when I get it back. -
B-73 Restoration
mattb73lt replied to mattb73lt's topic in Antique and Classic Mack Trucks General Discussion
Yes, they made a pattern from mine when they asked to send it to them. If you look back there should be a post with the phone number and part number. If you look on eBay Motors, there’s another vender selling them from the same source. They used my picture in the ad. They’re going for $50. -
B-73 Restoration
mattb73lt replied to mattb73lt's topic in Antique and Classic Mack Trucks General Discussion
Thank you for those words. It certainly has been a labor of love getting this cab done. The pace is really picking up towards completion in the near future. Matt -
B-73 Restoration
mattb73lt replied to mattb73lt's topic in Antique and Classic Mack Trucks General Discussion
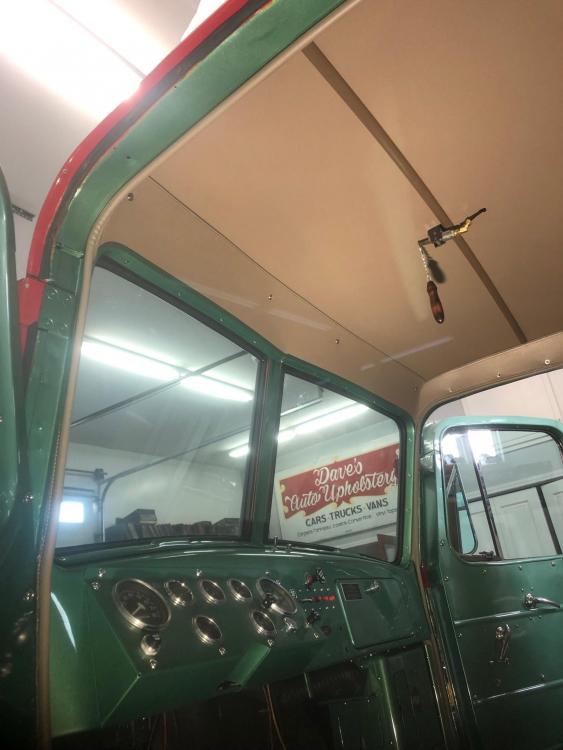
WOW!! I haven’t seen it in person yet, but my upholsterer sent these pics to me late today of his progress. I should be picking up the cab early next week and I can’t wait. What a beautiful job!!!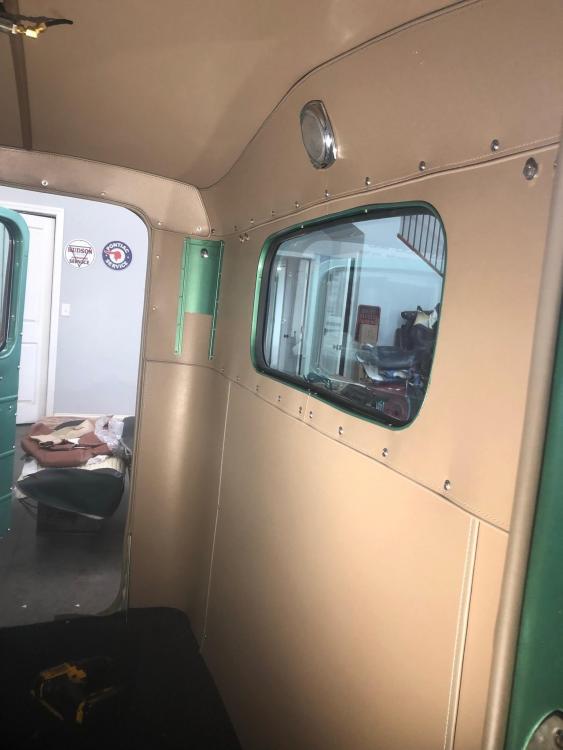

-
B-73 Restoration
mattb73lt replied to mattb73lt's topic in Antique and Classic Mack Trucks General Discussion
OK, give me a couple of days and I’ll get some photos of what I have. Probably sending you a thumb drive with the cab photos might be best, due to the volume. I’ve got two cab backs, one is pretty good that had some work done to it and is in primer. -
B-73 Restoration
mattb73lt replied to mattb73lt's topic in Antique and Classic Mack Trucks General Discussion
That sounds great!! So you’re back to the straight backdrop, it does look like there’s plenty of room. Do you need parts for the cab? I have some parts left over, nothing new, but parts that could be used as templates or patterns for fabrication. I can send you some pictures of what I have. Also, I have almost 500 photos of the work on my cab I could send you? They were very helpful to review as I was cutting up and repairing my cab. -
B-73 Restoration
mattb73lt replied to mattb73lt's topic in Antique and Classic Mack Trucks General Discussion
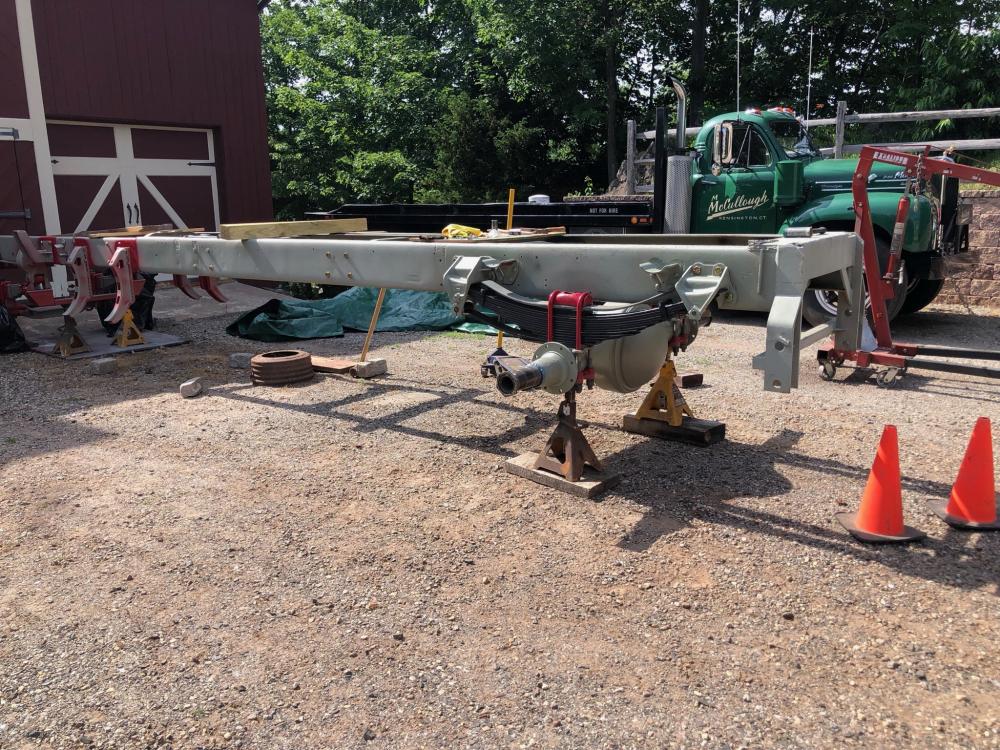
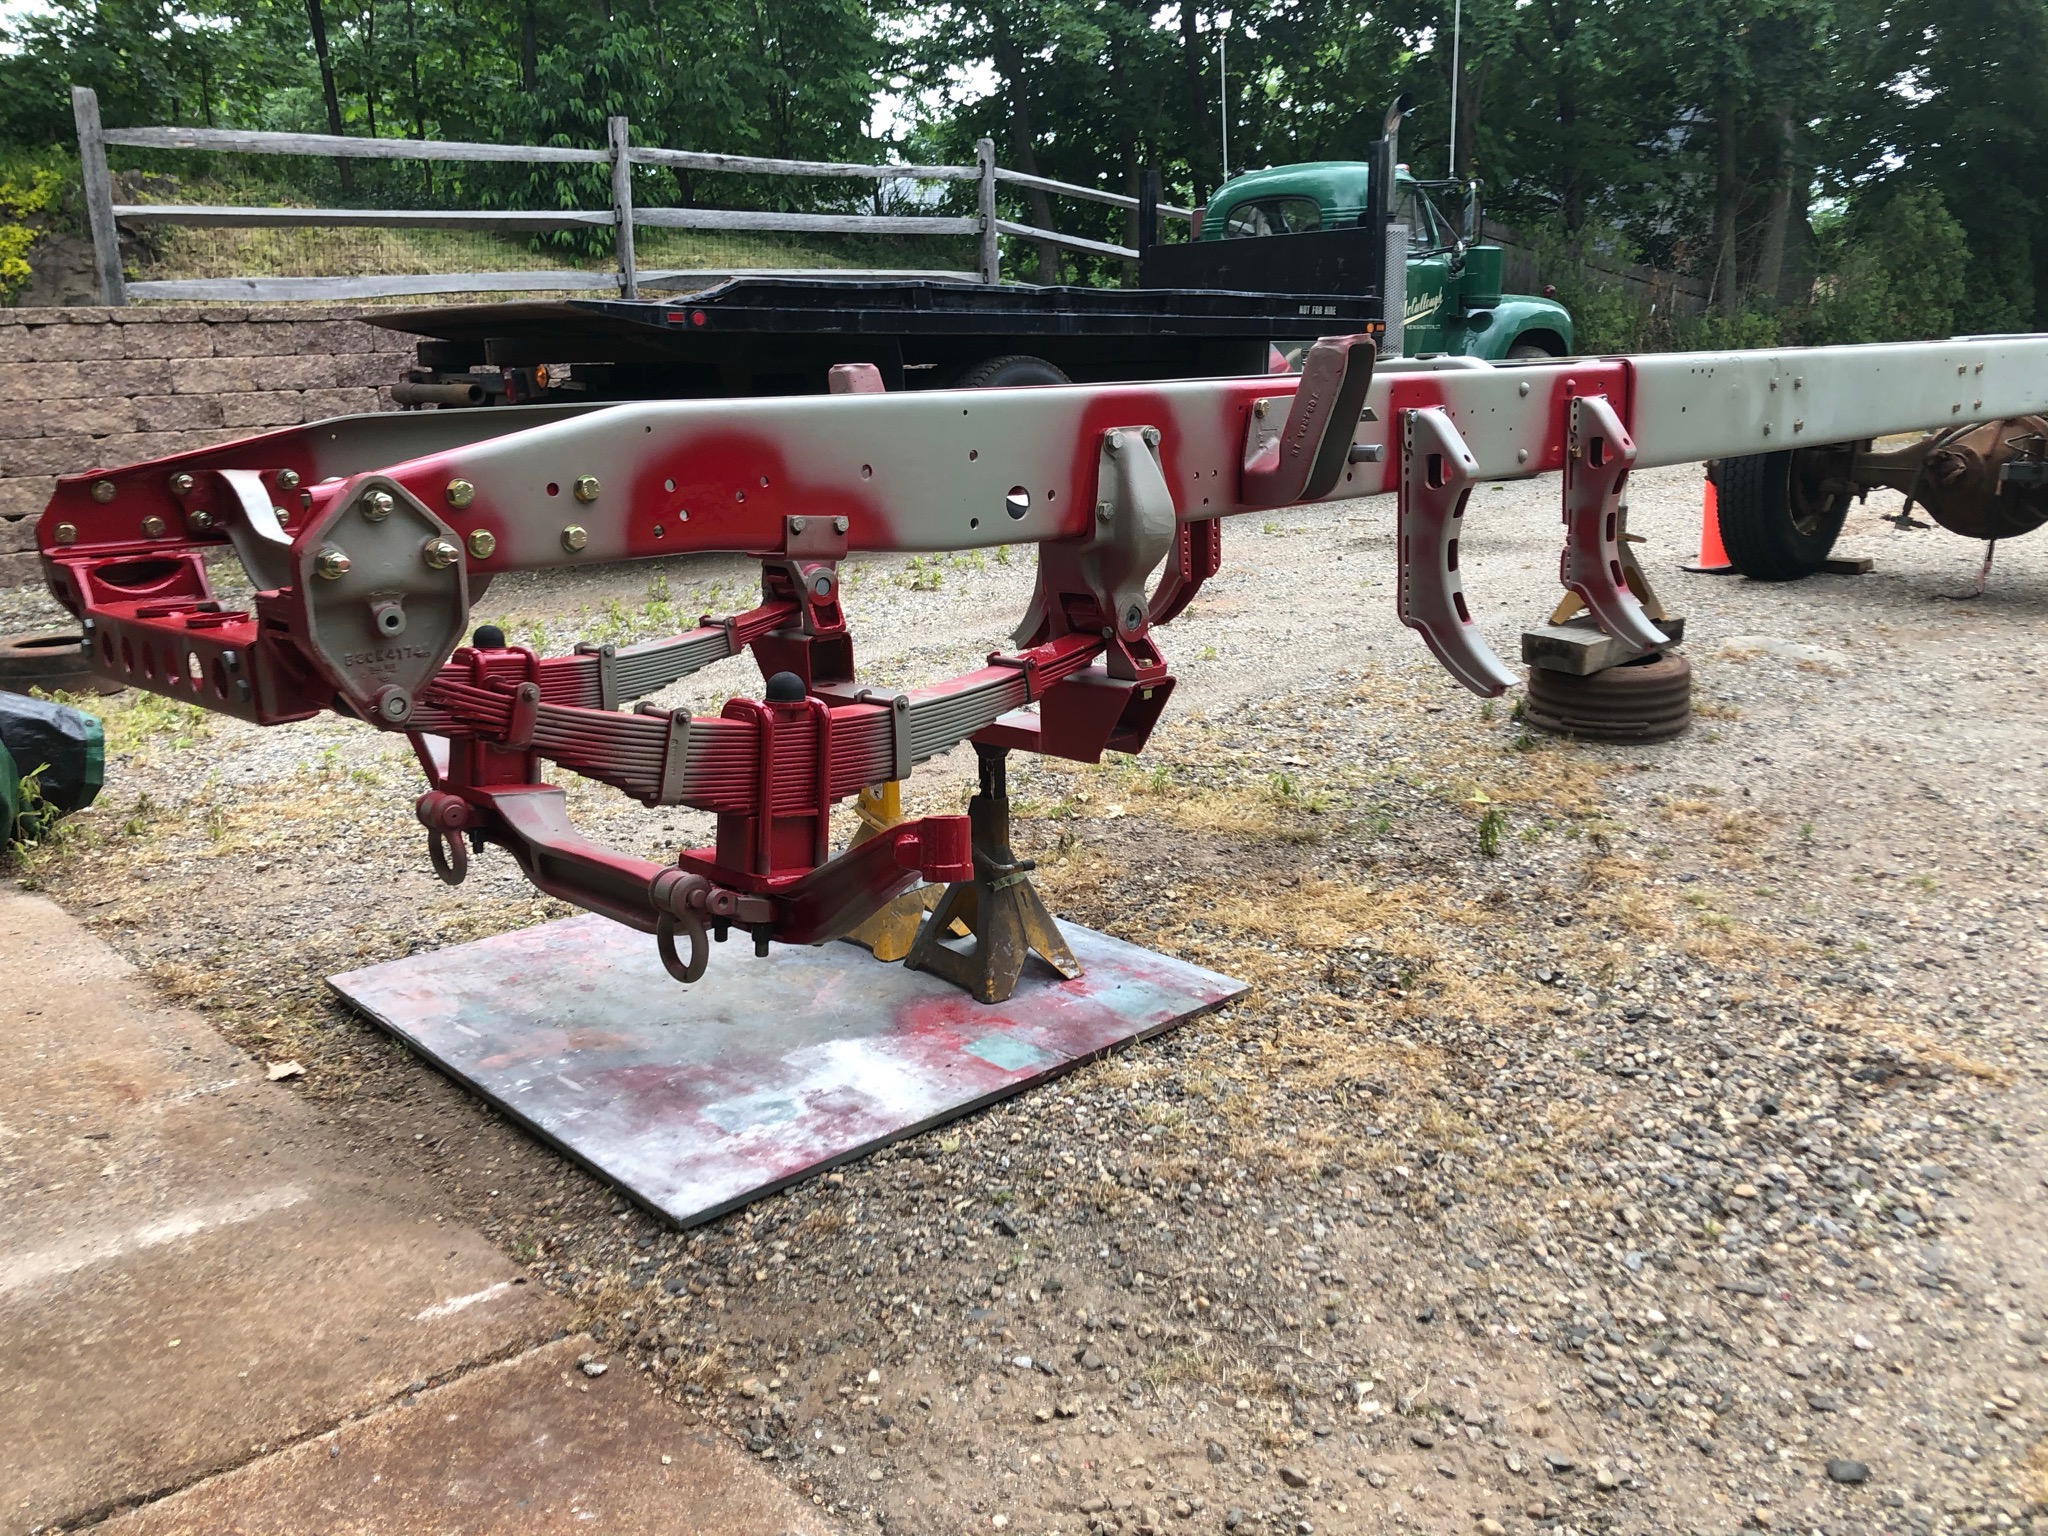
Another big chunk installed. Put the carrier in yesterday. Wasn't much of a struggle, just heavy. That should be the last part installed without the need for a fork lift. Still a bunch of small assembly work to do, before paint. I'm thinking paint might only be a few weeks off, vacation will cause a two week gap in July.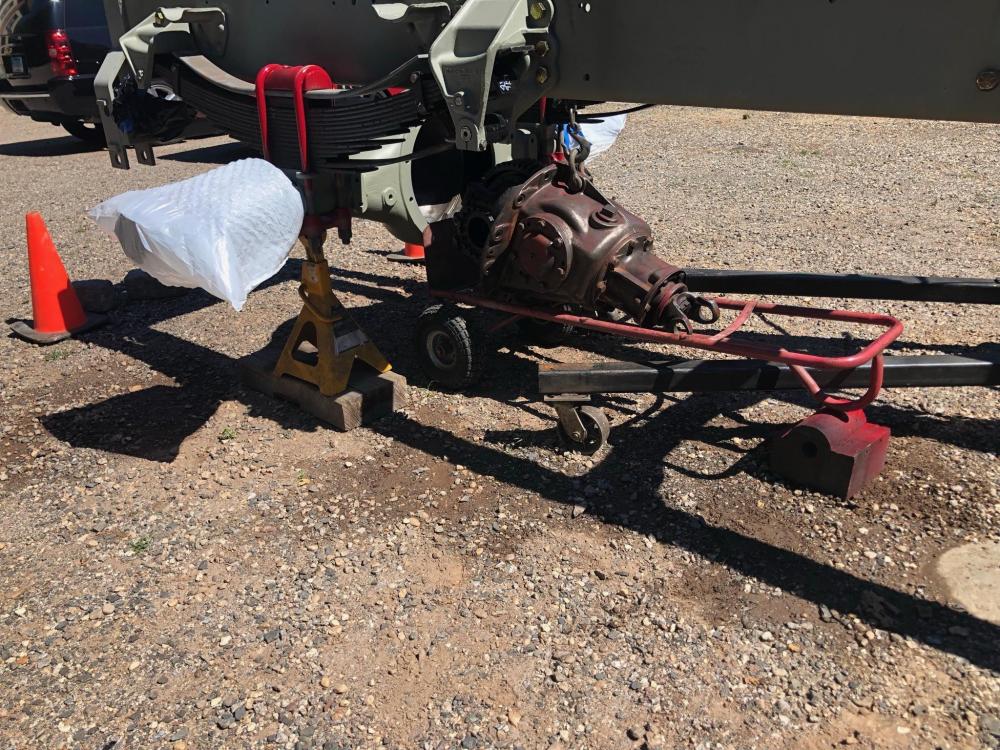

-
That’s really starting to look great! Awesome work and detail.
-
B75 rebuild
mattb73lt replied to FBGNO's topic in Antique and Classic Mack Trucks General Discussion
Love the comments in the second block for owner and shipper!! -
B-73 Restoration
mattb73lt replied to mattb73lt's topic in Antique and Classic Mack Trucks General Discussion
Paul, you're absolutely right. You need to be smart and plan each move out, so as not to hurt yourself or break something. I wish my driveway was at least paved. The frame misses going into the barn by just 4"s. -
B-73 Restoration
mattb73lt replied to mattb73lt's topic in Antique and Classic Mack Trucks General Discussion
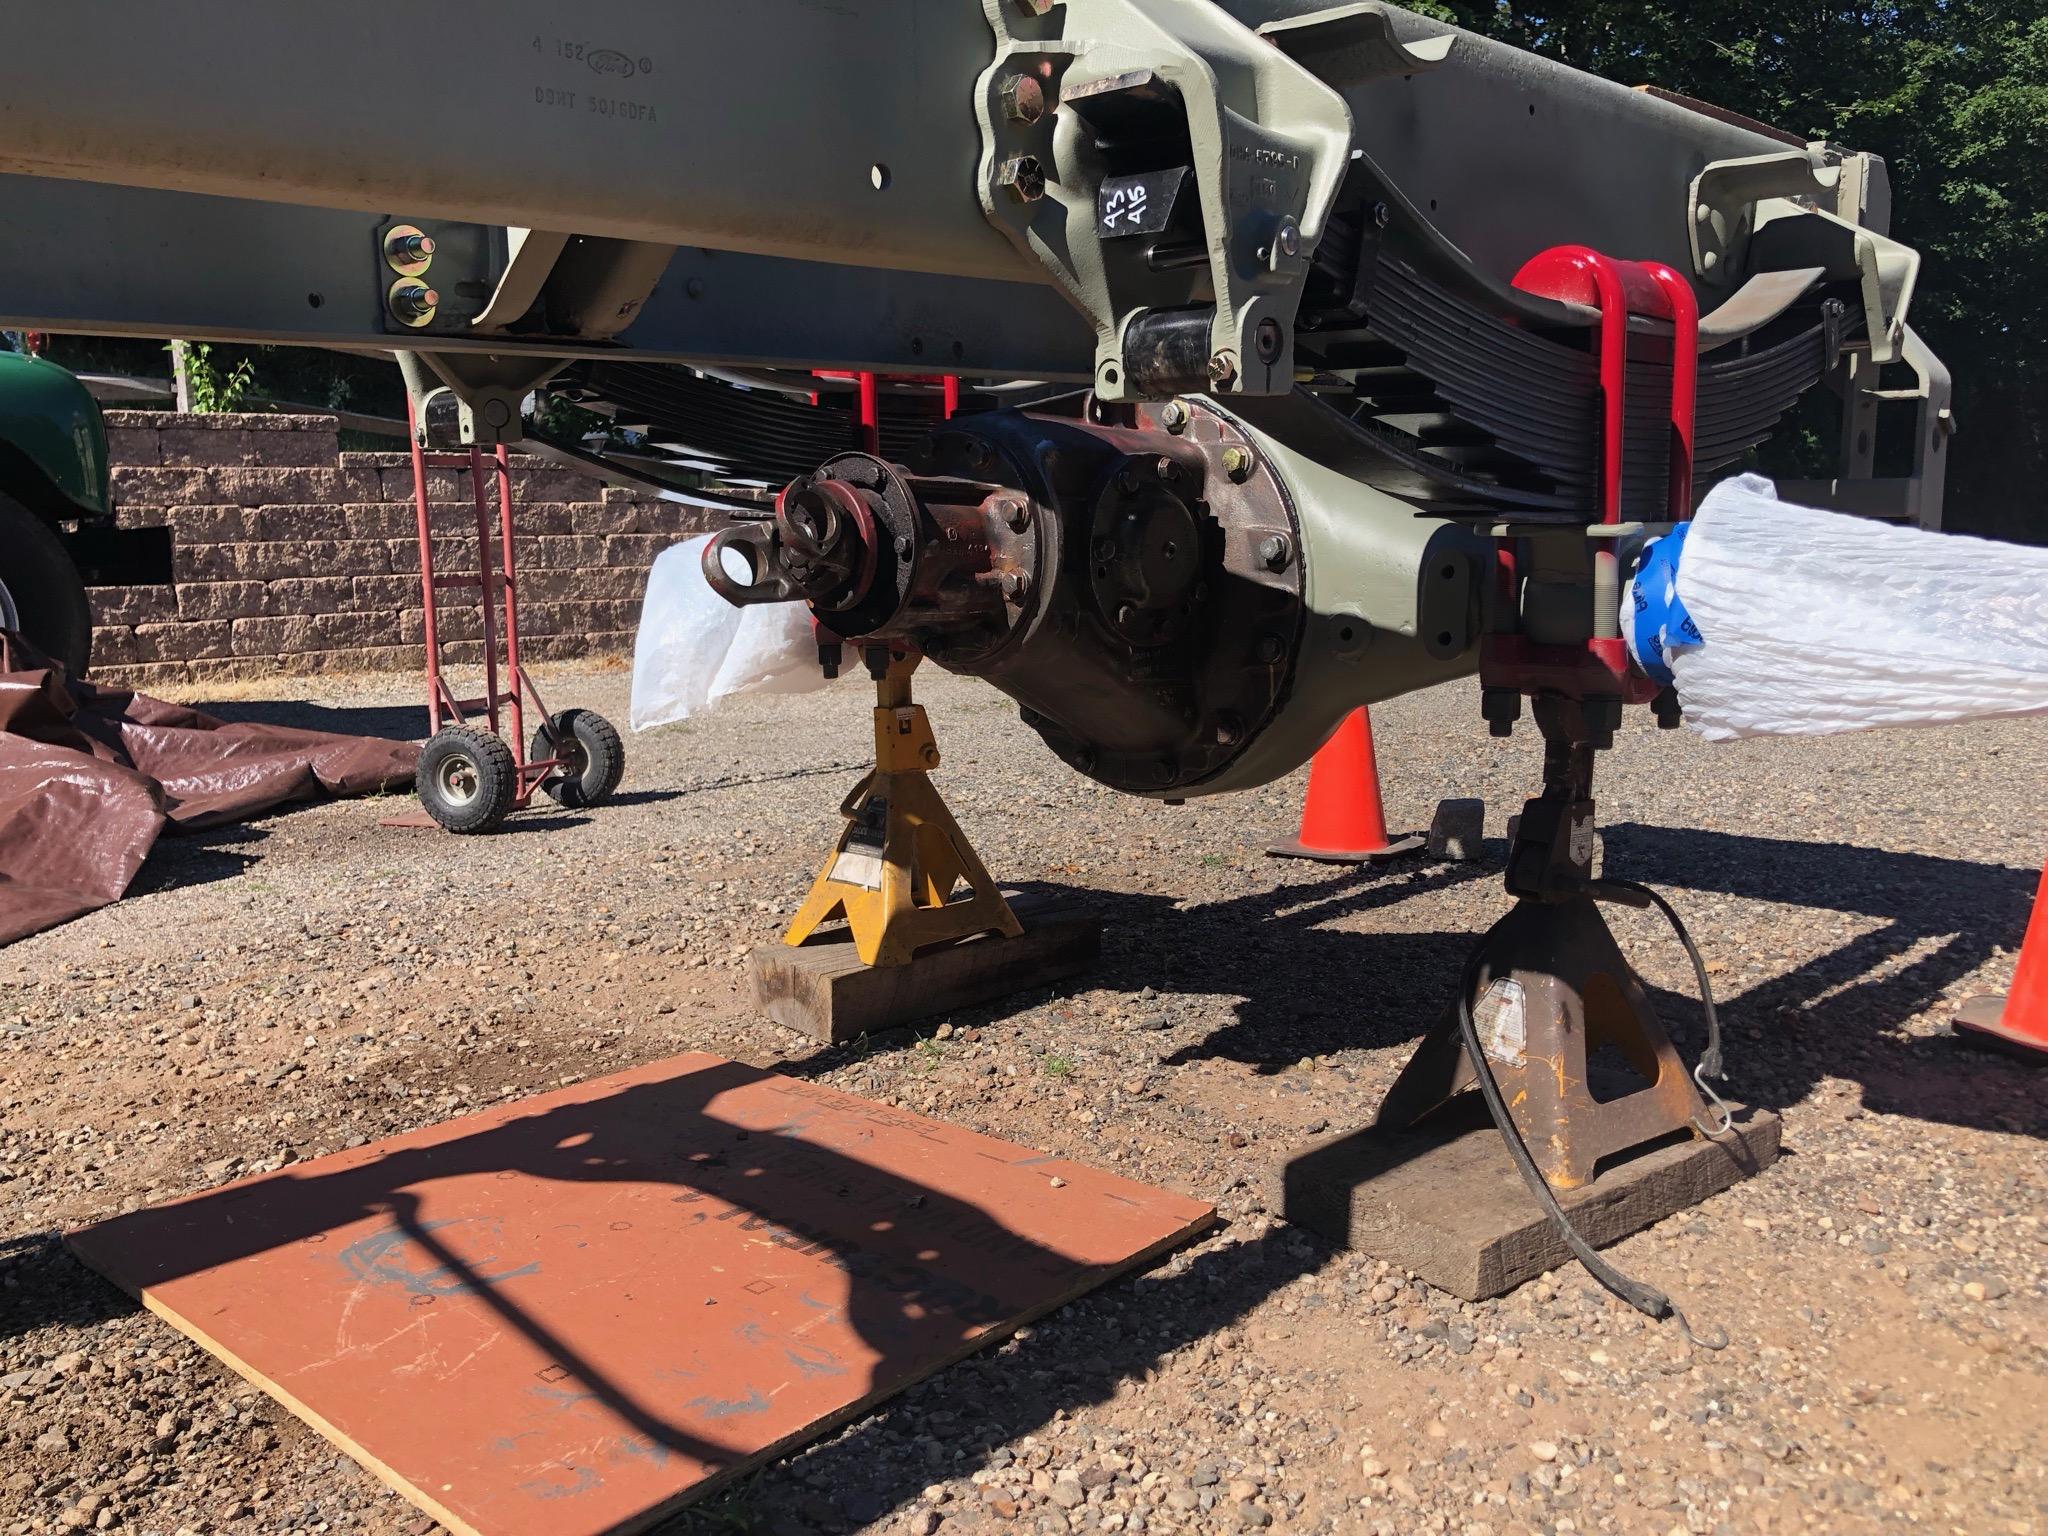
For the first time since I stretched it, it now rests on Mack axles. Big parts when you're working by yourself.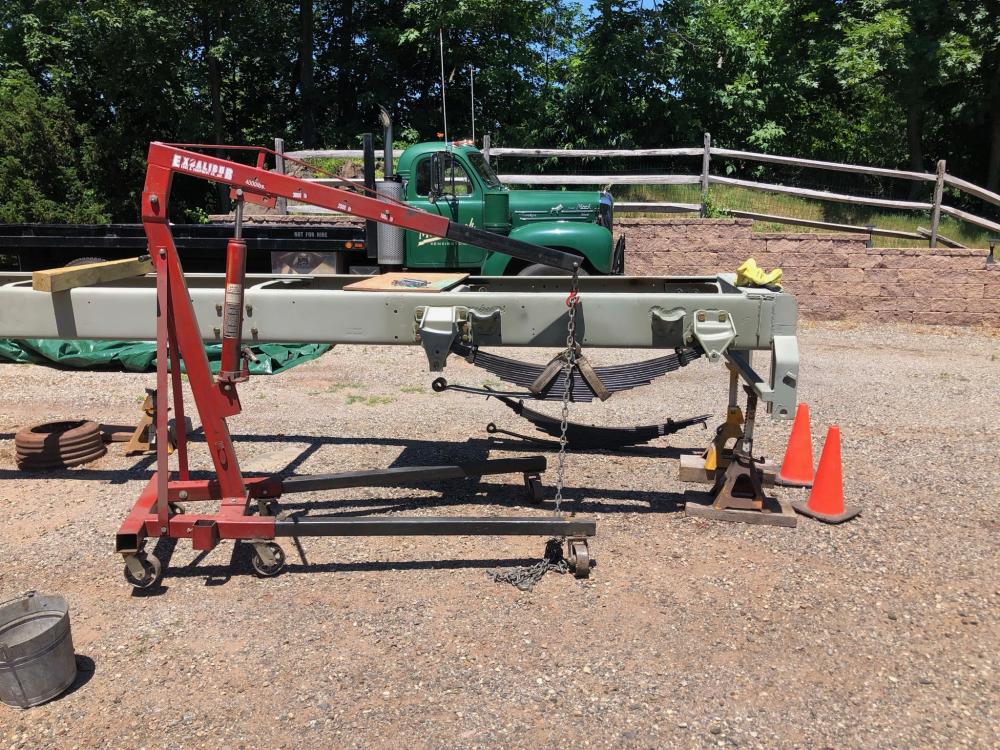
-
Steering Question
mattb73lt replied to zlawson's topic in Antique and Classic Mack Trucks General Discussion
The entire system. You can’t convert the Air-O-Matic to hydraulic. One add on system is from Garrison. Similar in nature to the Air-O-Matic, but hydraulic and has its own pump and reservoir. Another way is to replace the steering box with a power box. Sheppard was a supplier that made them and I’ve seen two sizes for the B model from them. I have the large unit Sheppard box from a B-61SX transplanted in my diesel powered B -42. I’m putting a Garrison assist unit in my B-73. My B-42 came with an Air-O -Magic unit, which I still have. It was fine but had the limitations spelled out in the earlier posts. -
B-73 Restoration
mattb73lt replied to mattb73lt's topic in Antique and Classic Mack Trucks General Discussion
You’re quite welcome. It’s actually helped keep me motivated. I’ve read through it many times, rereading comments and thinking of my next move or improving what I had originally thought how to get something done. Glad you’re enjoying it. Matt -
B-73 Restoration
mattb73lt replied to mattb73lt's topic in Antique and Classic Mack Trucks General Discussion
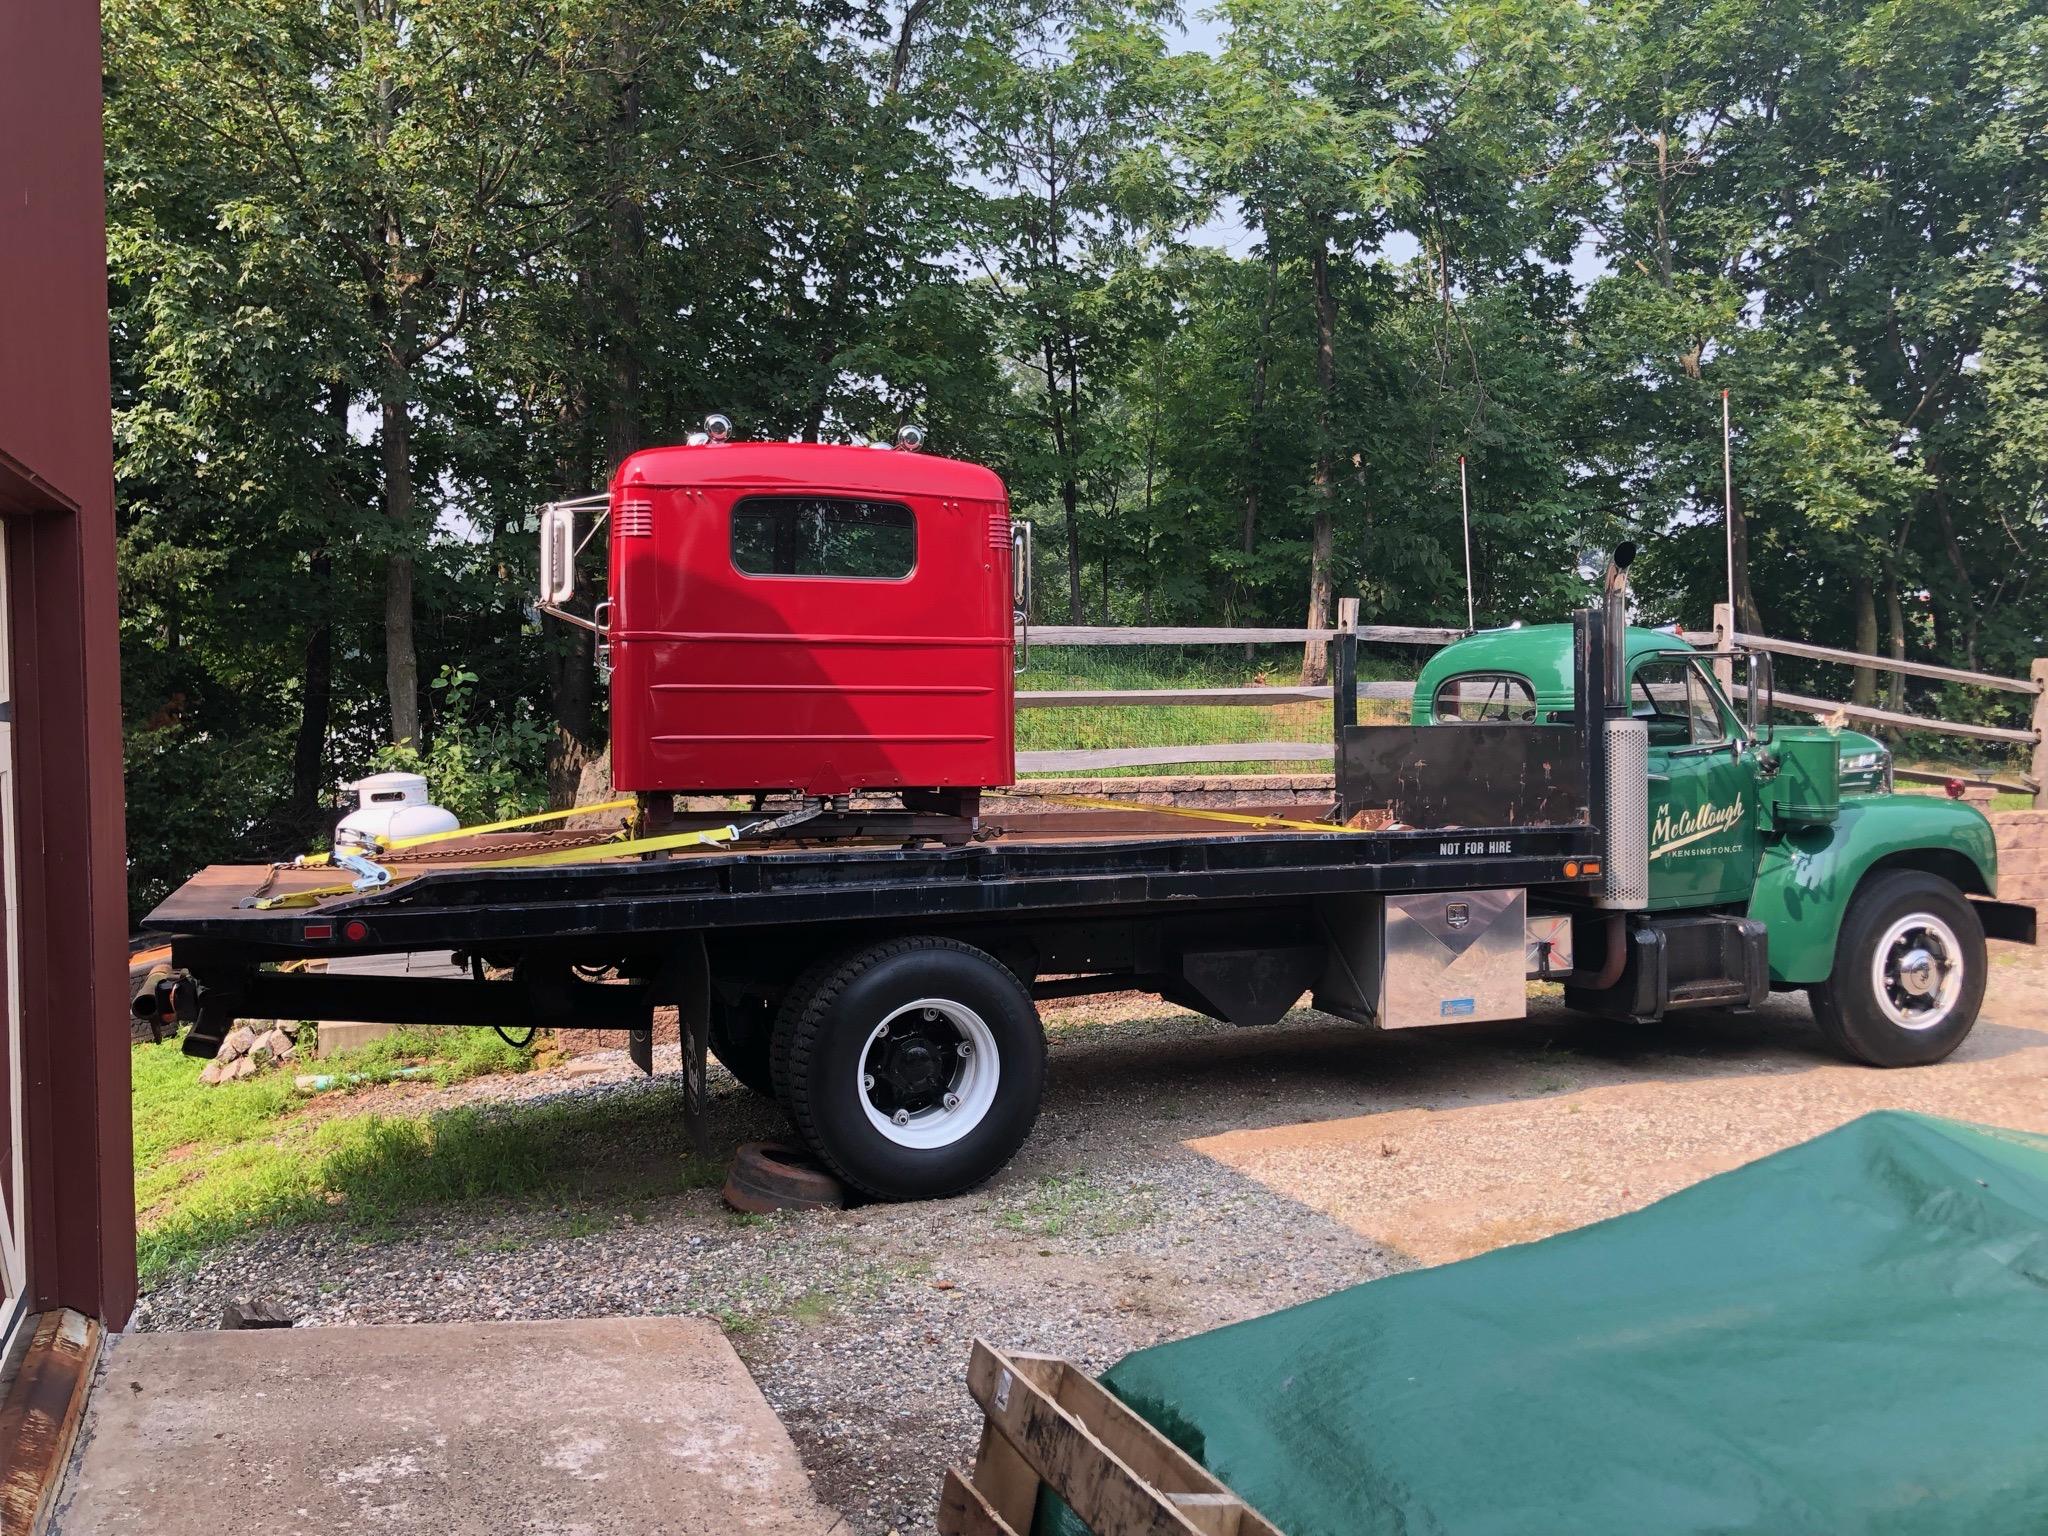
Hauled the cab to the upholsterer, yesterday. Avoided dropping or damaging it, thankfully. Another step closer. Lots of parts on order to finish the frame, along with painting it. The heat the past week slowed me down, now that I’m outside for this work. Hood is almost done having some repairs done. Good progress on a lot of fronts.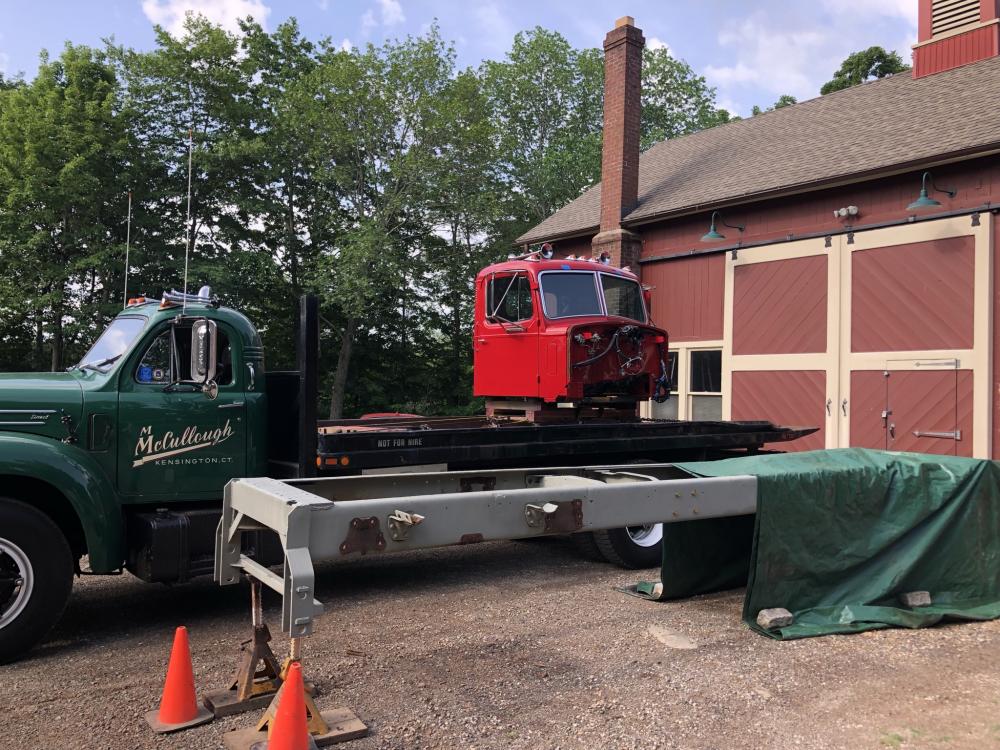
-
B-73 Restoration
mattb73lt replied to mattb73lt's topic in Antique and Classic Mack Trucks General Discussion
Maybe 2022? This year would be a stretch. -
B-73 Restoration
mattb73lt replied to mattb73lt's topic in Antique and Classic Mack Trucks General Discussion
Thank you!! Hard to express. Personally, I am amazed! It's been an incredible amount of effort to come this far. After all the years of storing this truck and hunting for parts, it's finally coming together. The best part is it really looks good. I had my doubt's at times, especially cutting so deep into the cab. I can't wait to drive it!! -
B-73 Restoration
mattb73lt replied to mattb73lt's topic in Antique and Classic Mack Trucks General Discussion
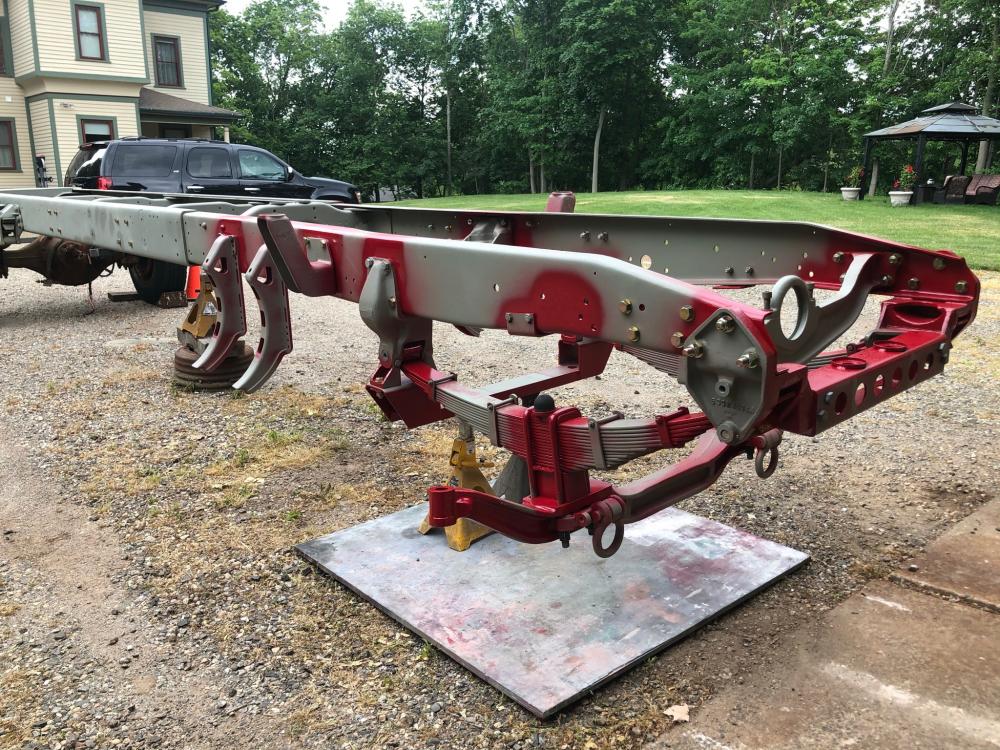
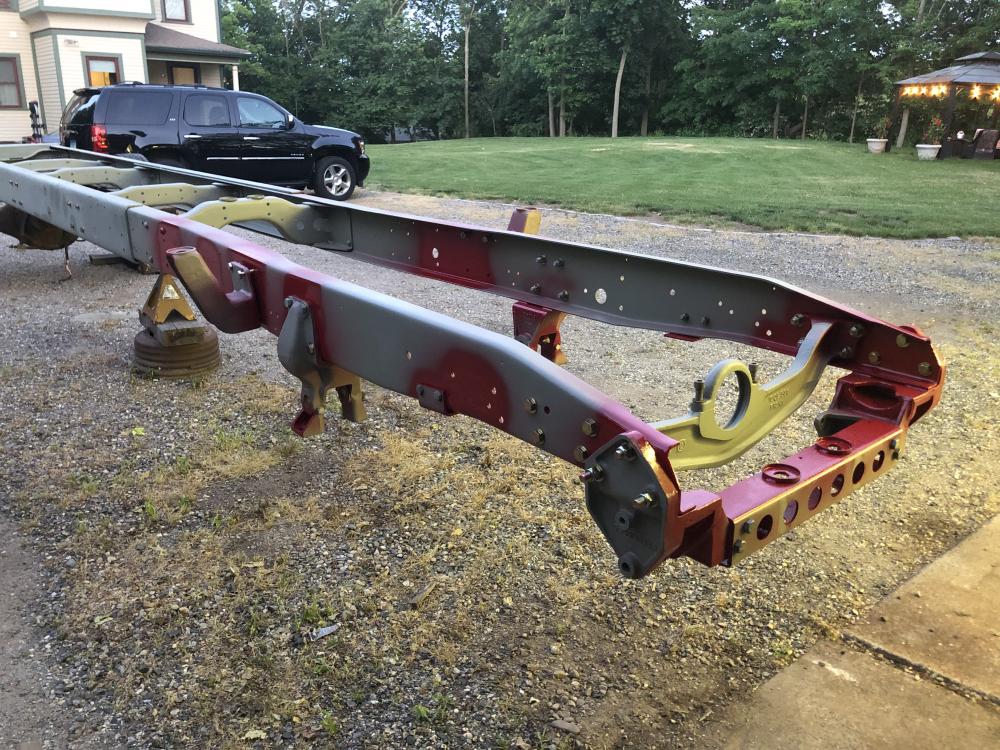
Oh, Yeah!! Added a few hundred pounds of parts to the frame. It adds up quickly.
-
B-73 Restoration
mattb73lt replied to mattb73lt's topic in Antique and Classic Mack Trucks General Discussion
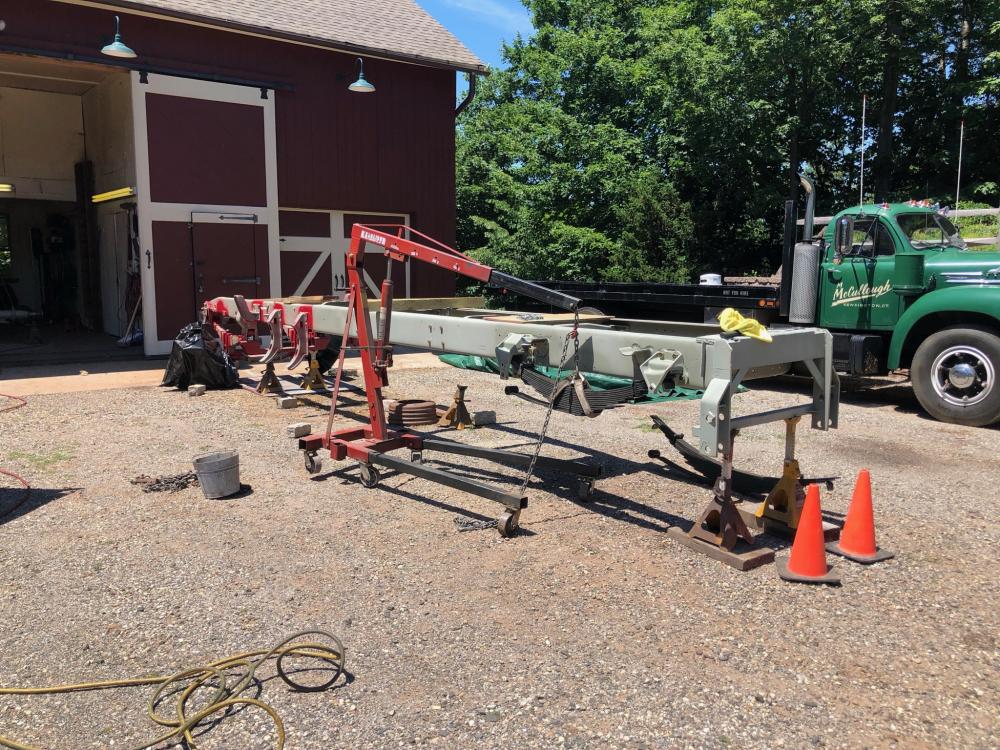
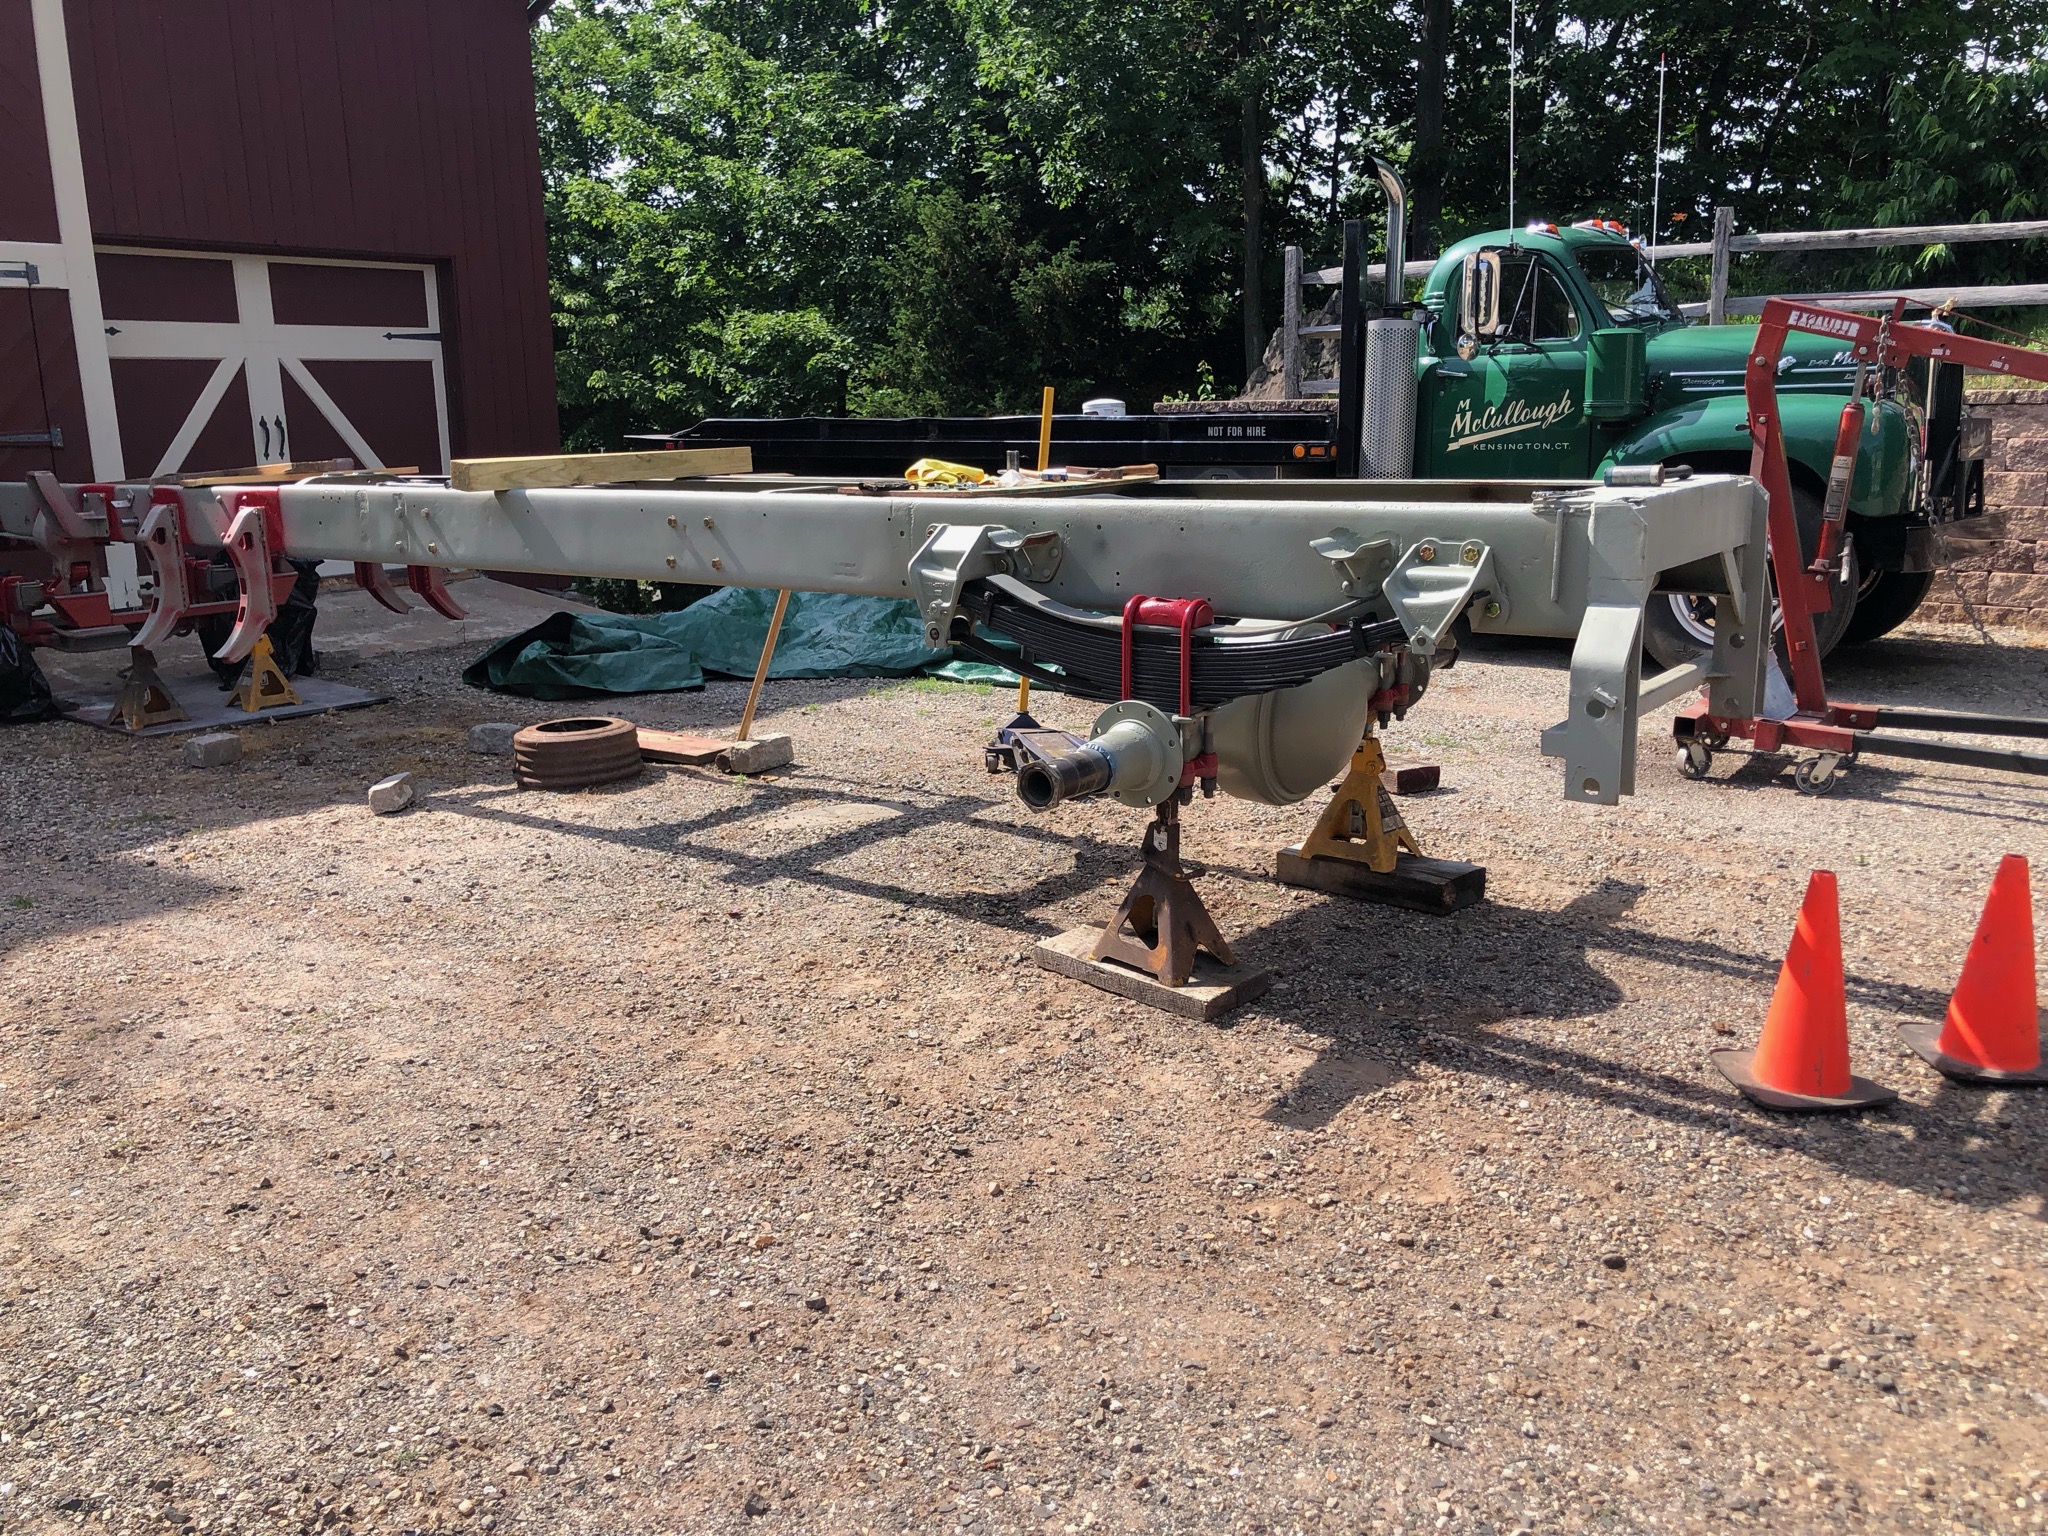
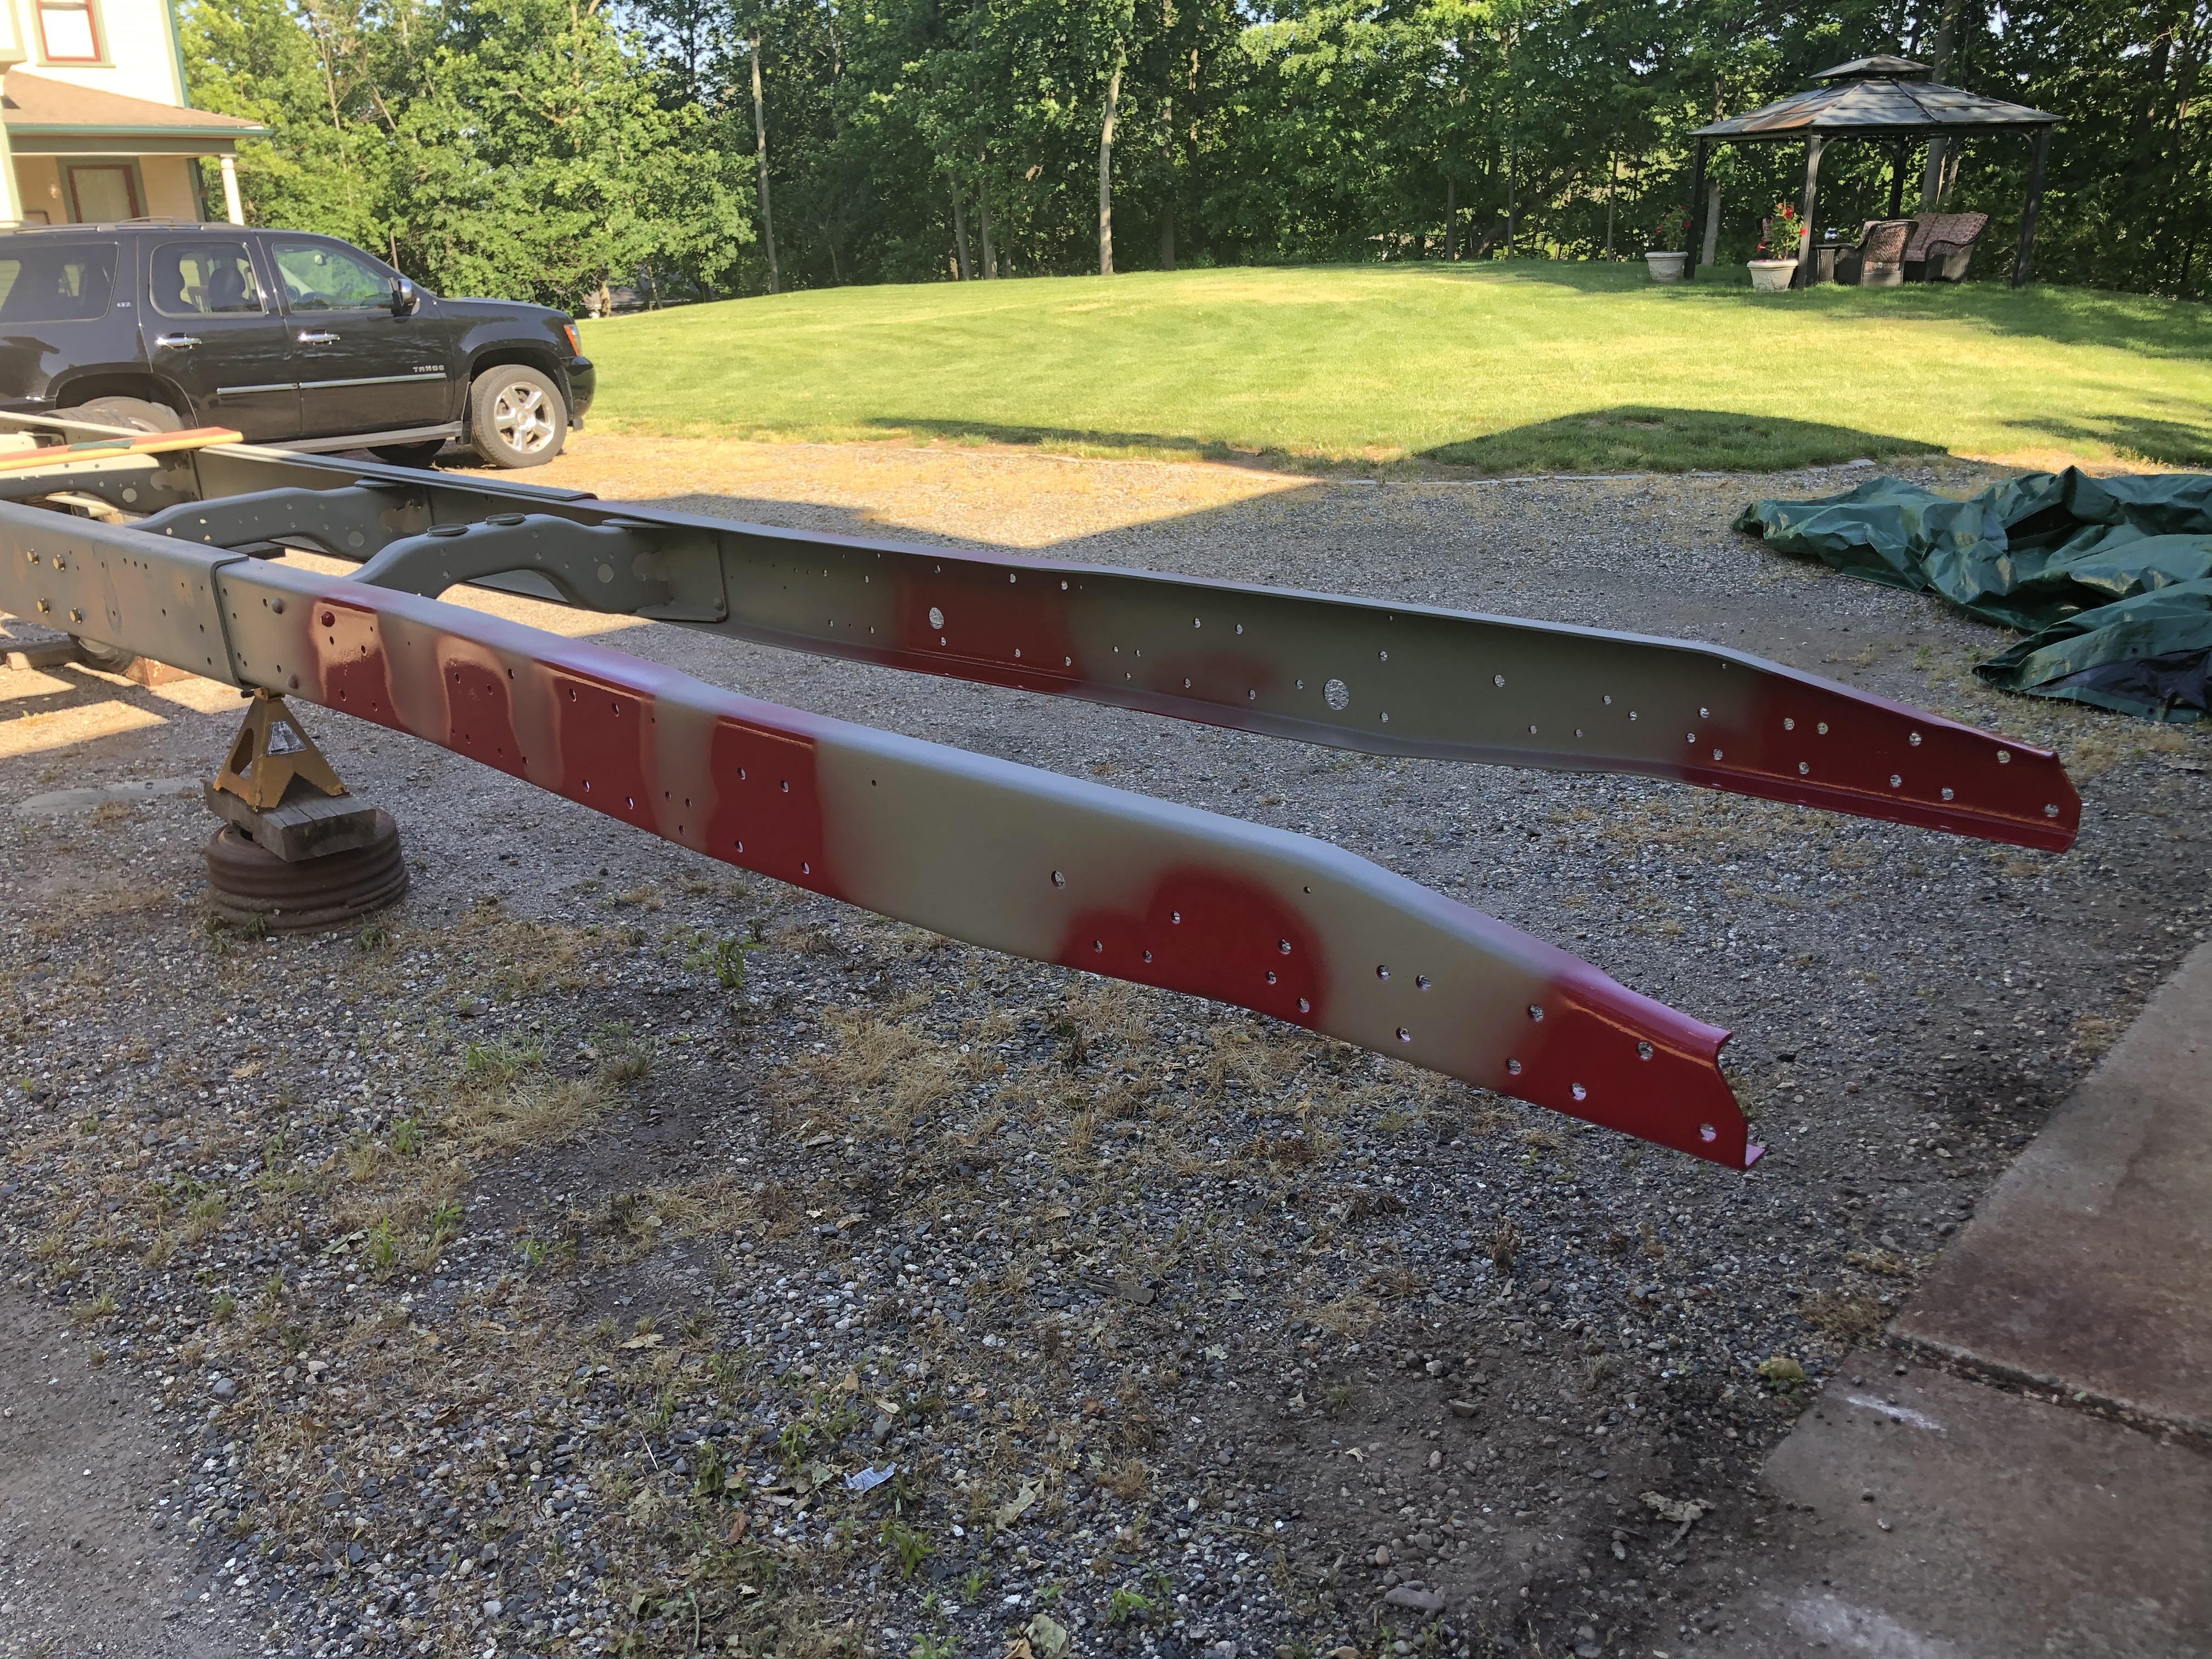
Made some good progress today. Cleaned and reprimed the front half of the frame, the spot painted the mounting areas for the parts I painted last week. Finally, I started re-assembly. Got a lot put back together. Hopefully, the front springs and axle tomorrow!!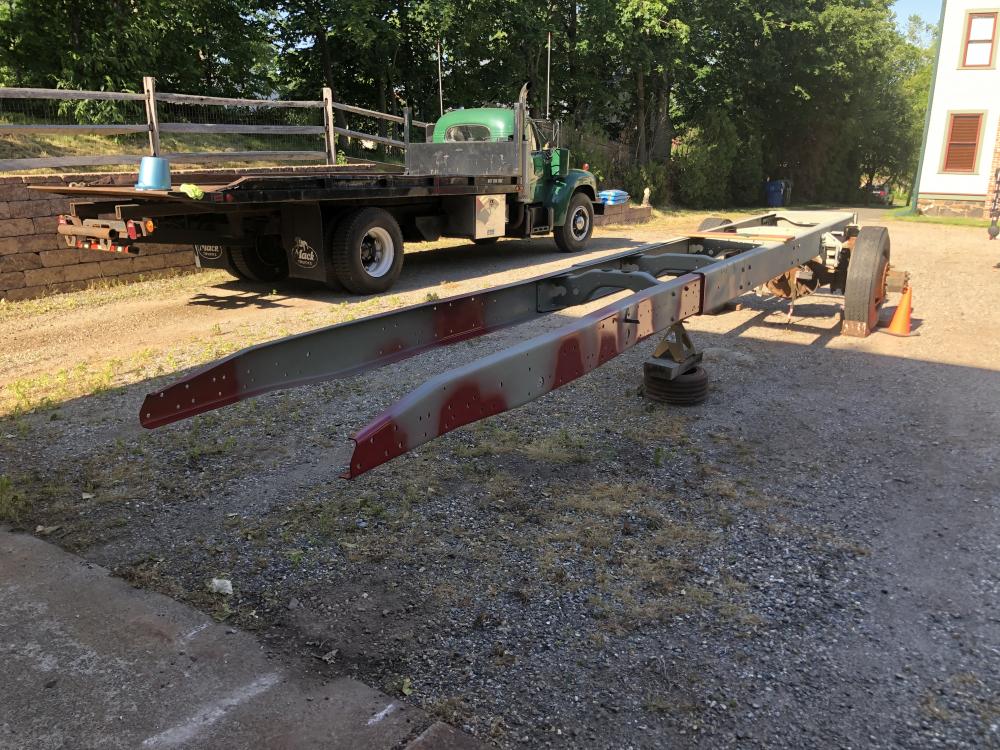


-
B-73 Restoration
mattb73lt replied to mattb73lt's topic in Antique and Classic Mack Trucks General Discussion
I was gonna, but what would I do with all the other parts I have laying around???LOL -
B-73 Restoration
mattb73lt replied to mattb73lt's topic in Antique and Classic Mack Trucks General Discussion
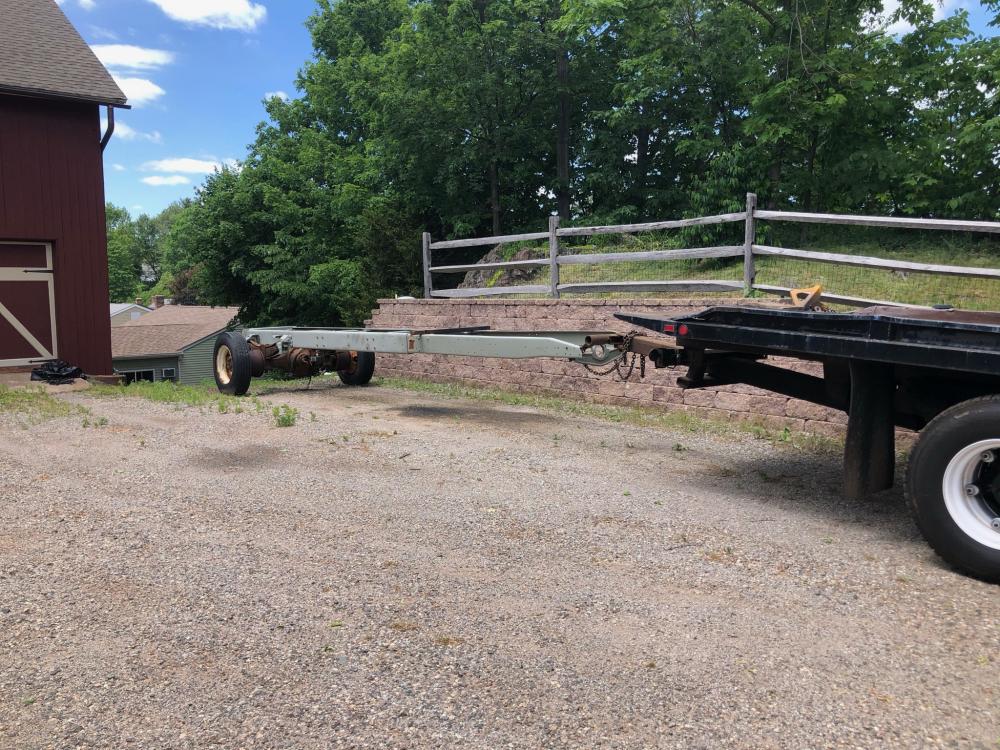
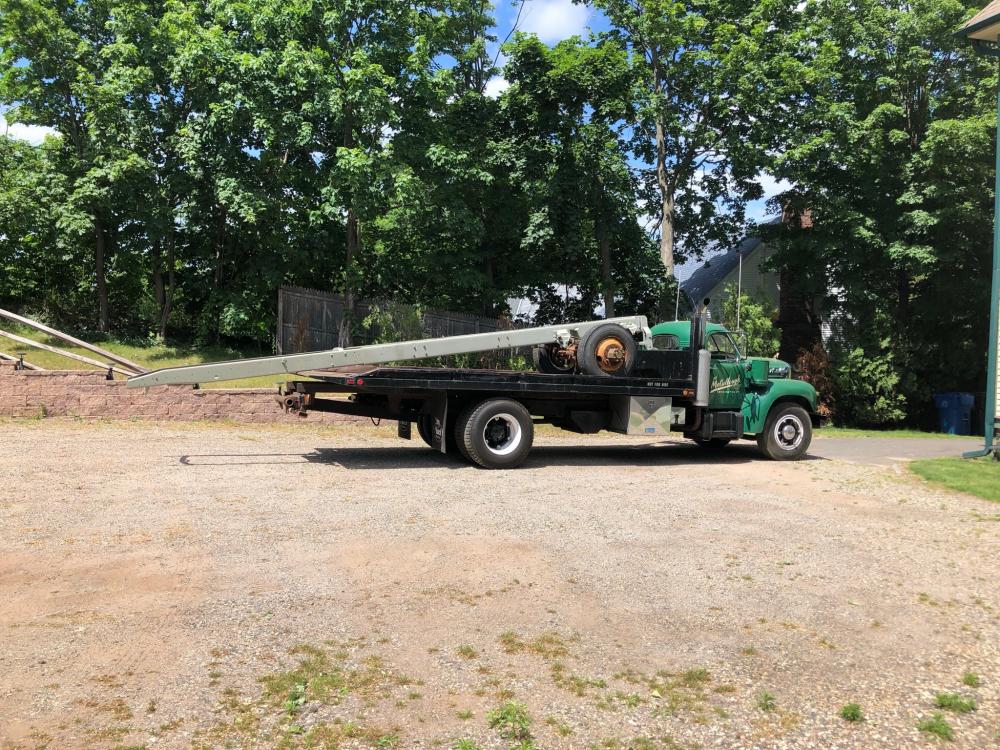
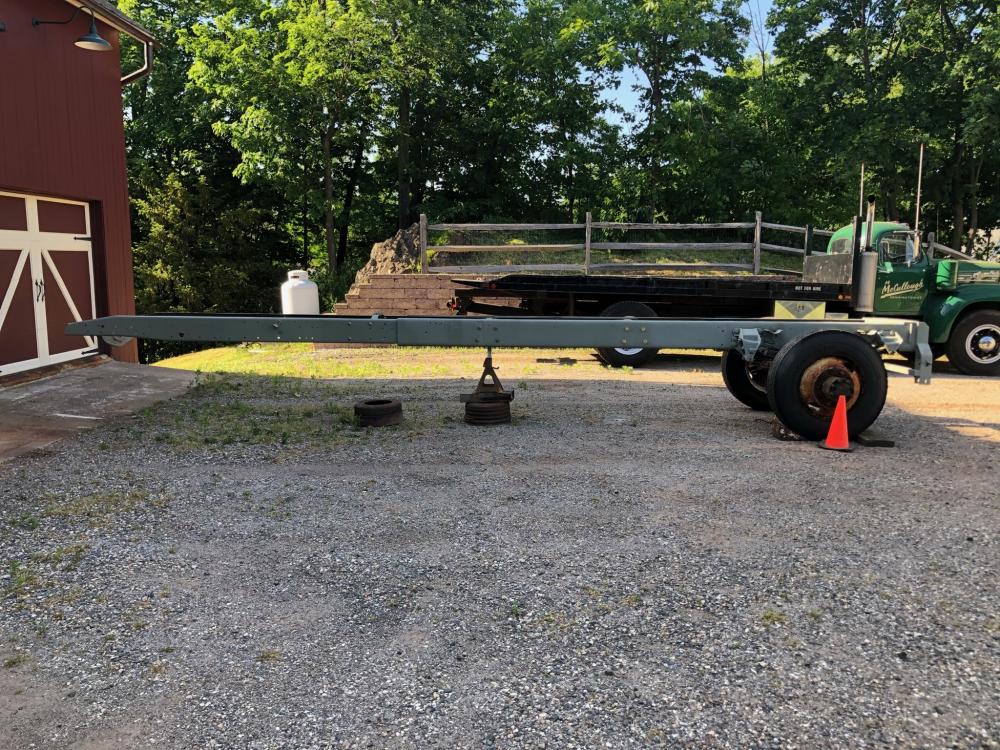
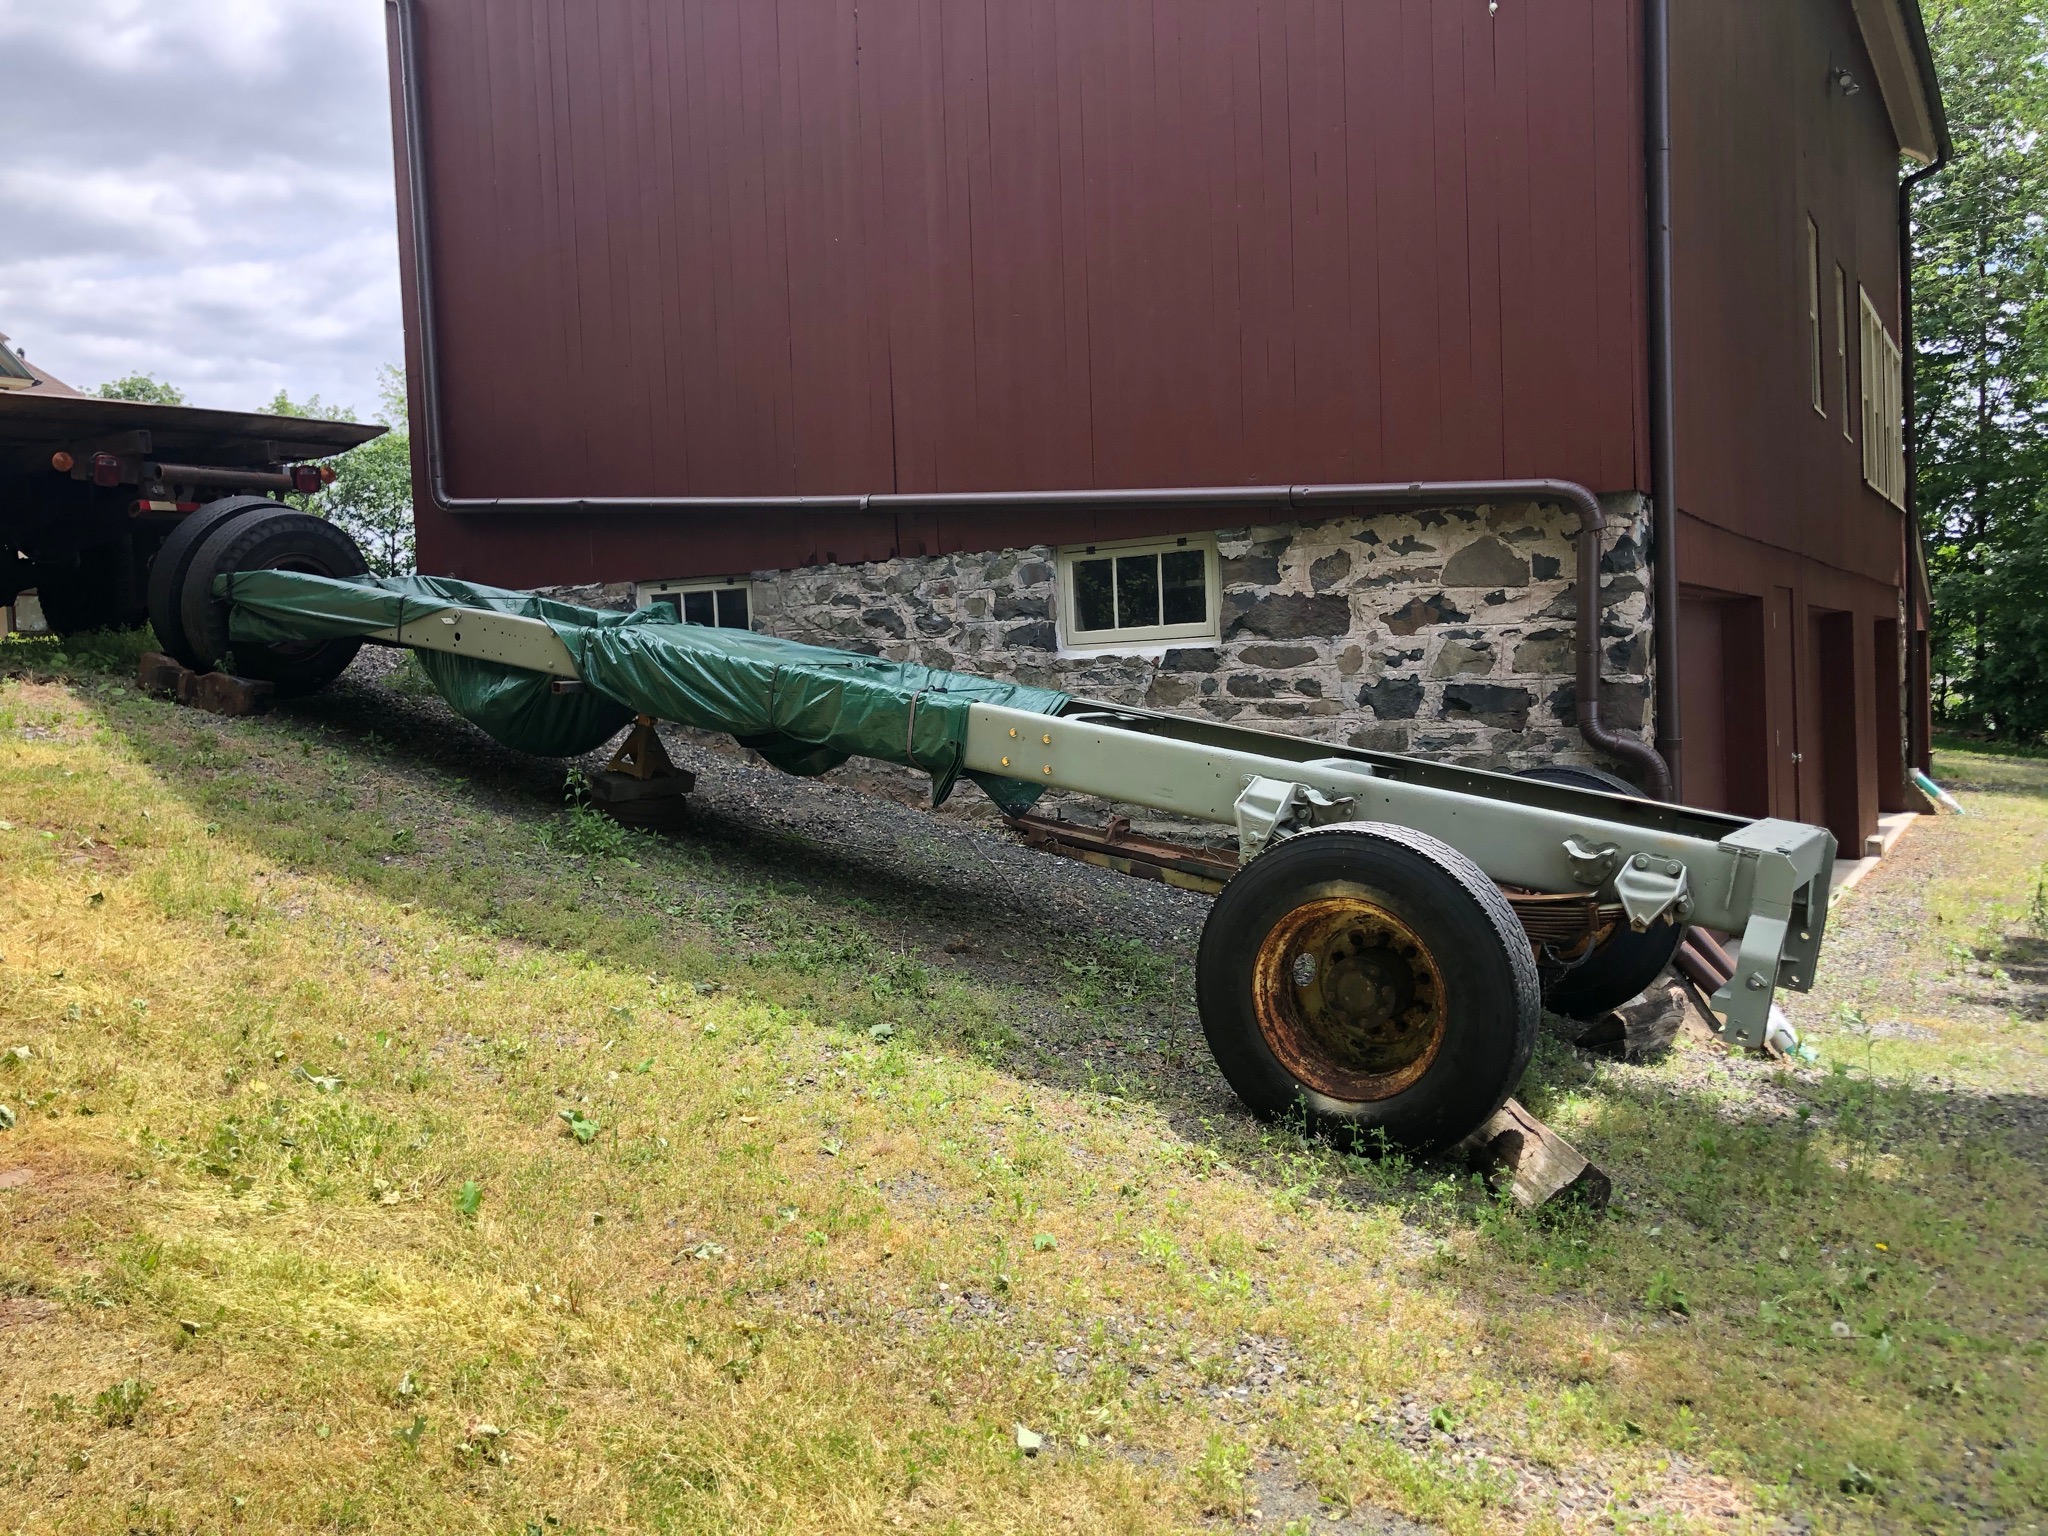
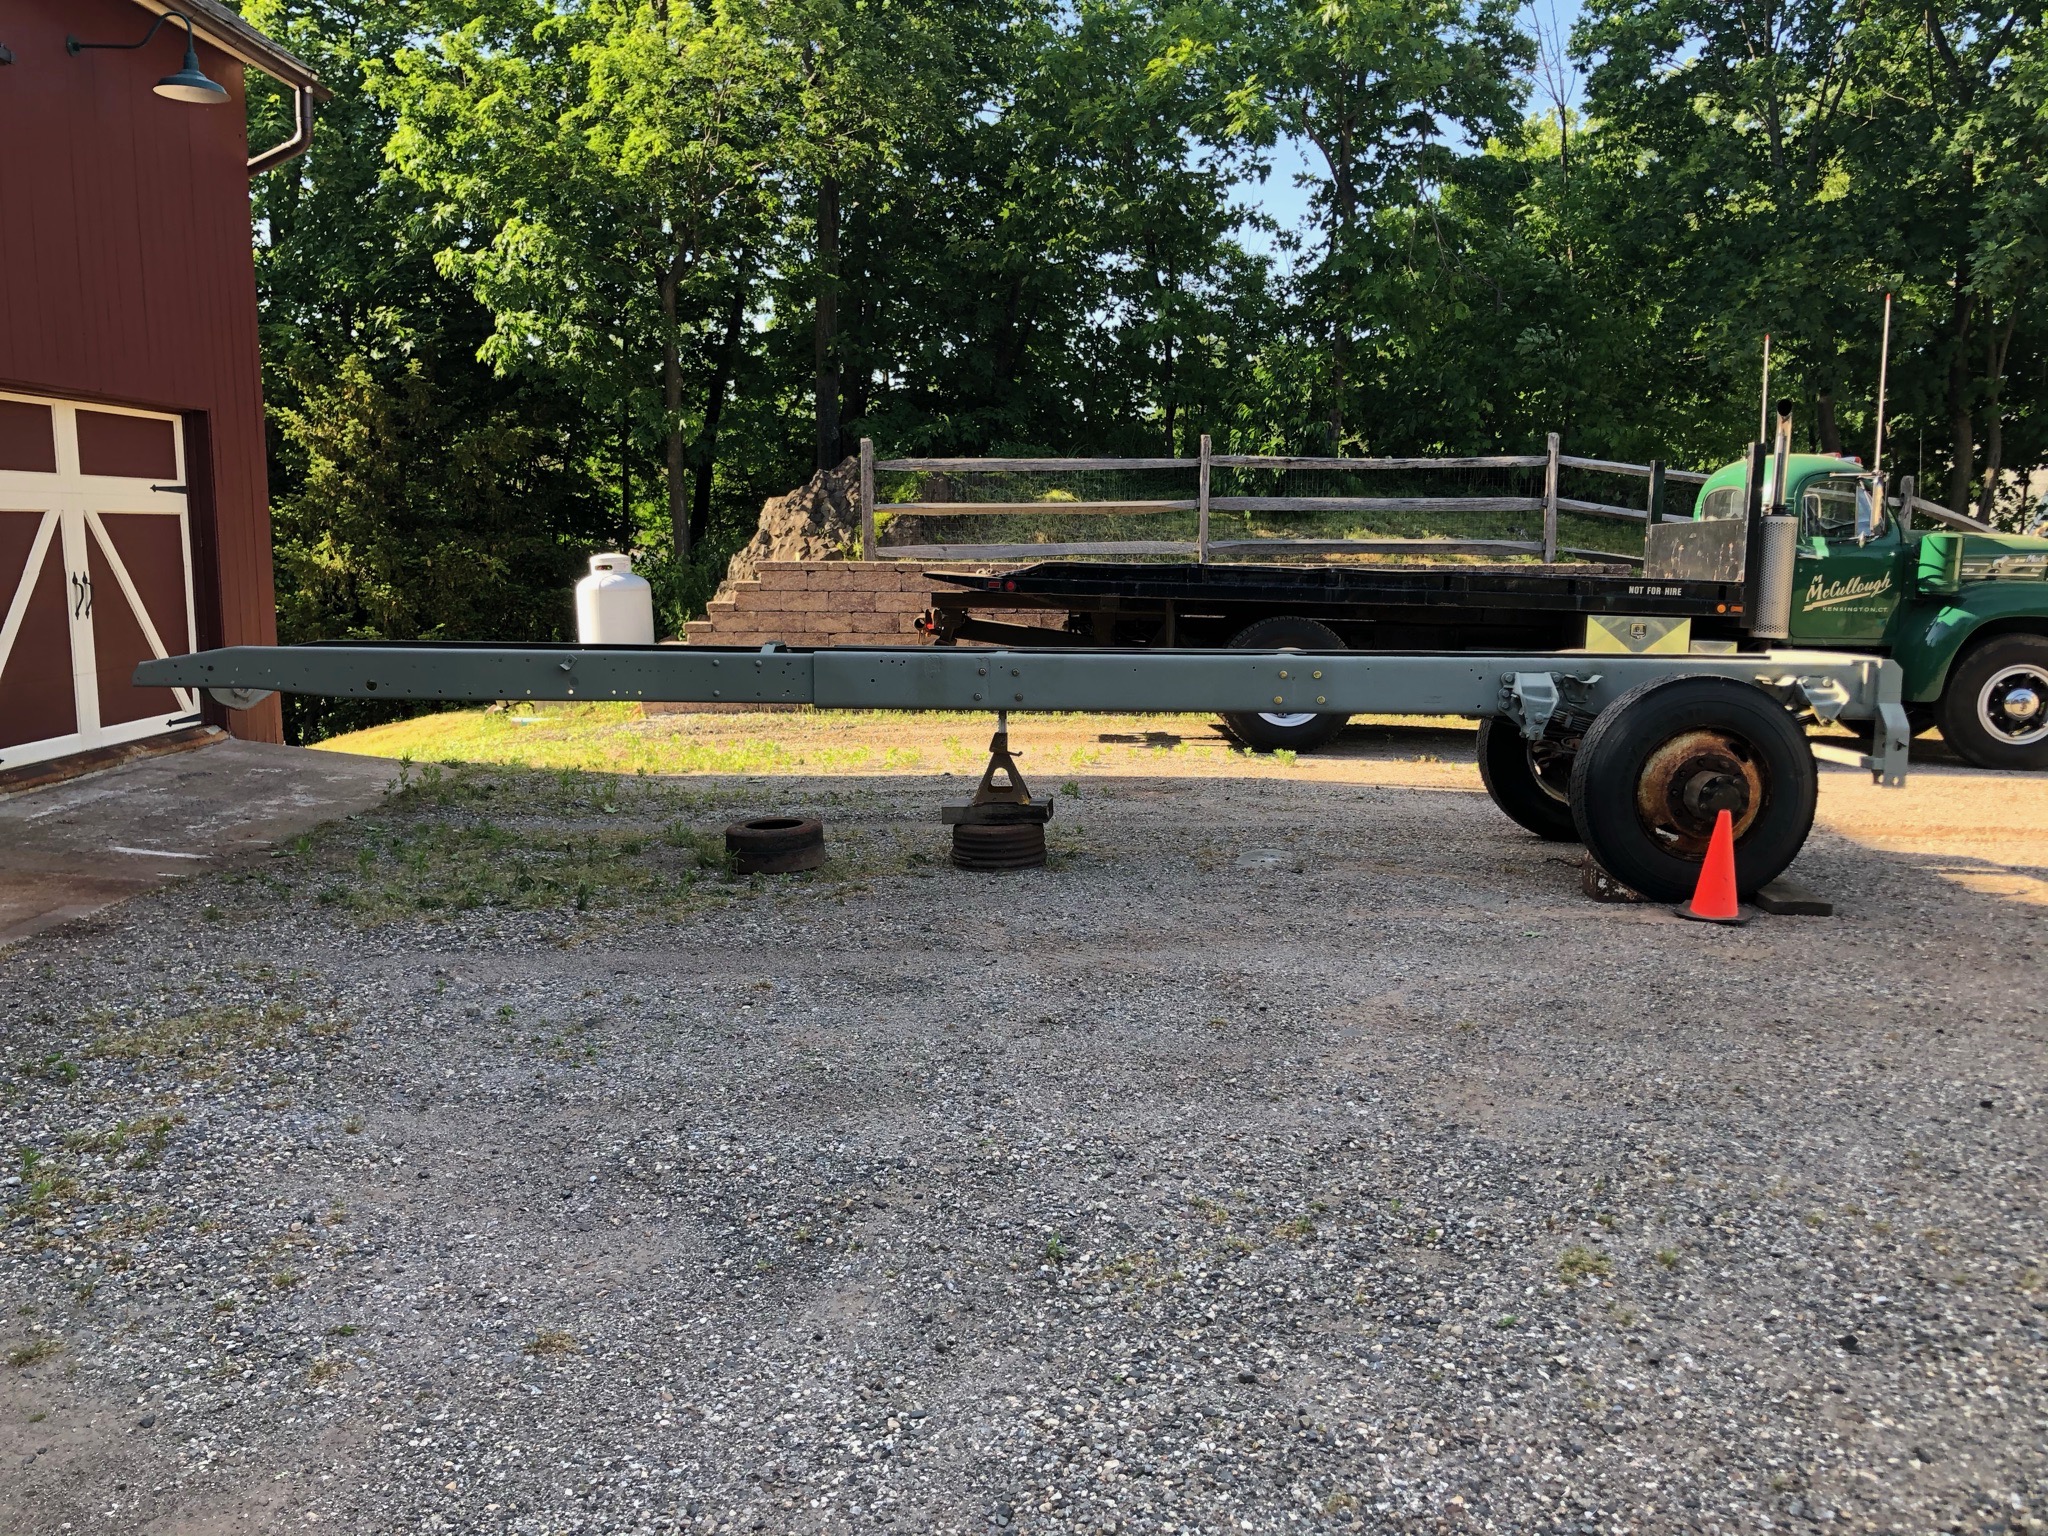
It’ll be a single drive/axle. I gave it a fairly big stretch to accommodate a 24’ Jerr Dan roll back bed that I picked up. I don’t haul anything too heavy, mostly antique cars and trucks. Wheelbase for it is around 249”. The frame does seem long in the photos, but will shorten up as it’s reassembled. It’ll be 4’ longer than the truck it’s resting on, that has a 20’ deck. -
B-73 Restoration
mattb73lt replied to mattb73lt's topic in Antique and Classic Mack Trucks General Discussion
Moving day. Brought the frame up in front of the barn, from it's hiding place alongside it. A little bit of effort to get it there after pulling it up, turning it 180 degrees then positioning it between the bays so I still have access. All those freshly painted parts will be reunited with the frame soon!!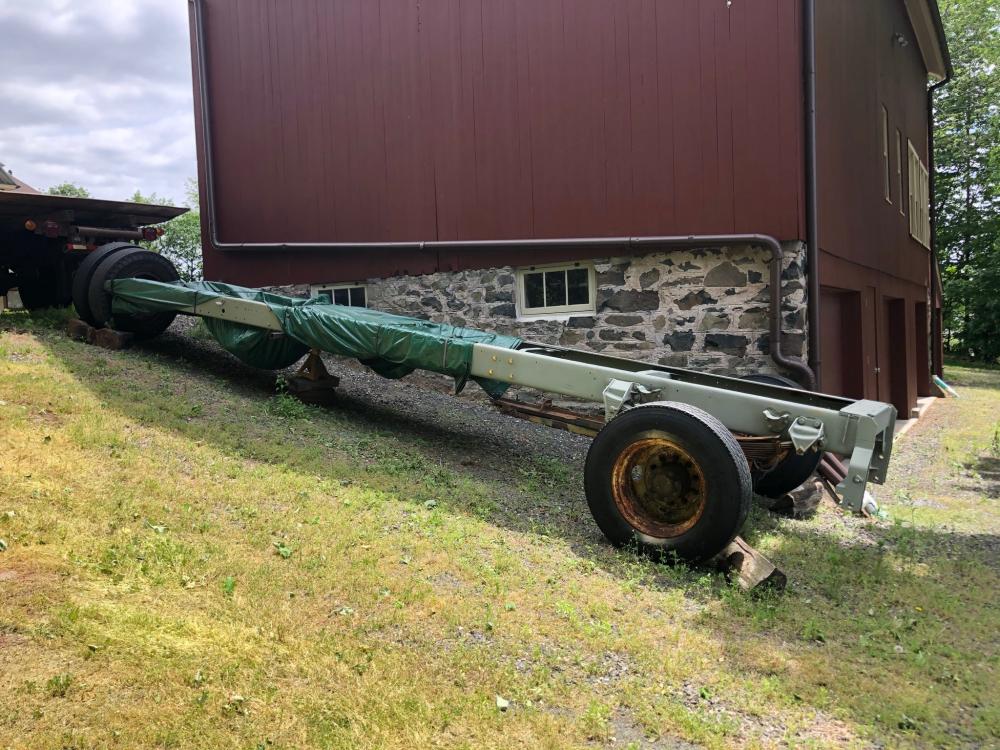


BMT Forum Logo
