


mattb73lt
-
Posts
1,422 -
Joined
-
Last visited
-
Days Won
146
Content Type
Profiles
Forums
Gallery
Events
Blogs
BMT Wiki
Collections
Store
Everything posted by mattb73lt
-

B-73 Restoration
mattb73lt replied to mattb73lt's topic in Antique and Classic Mack Trucks General Discussion
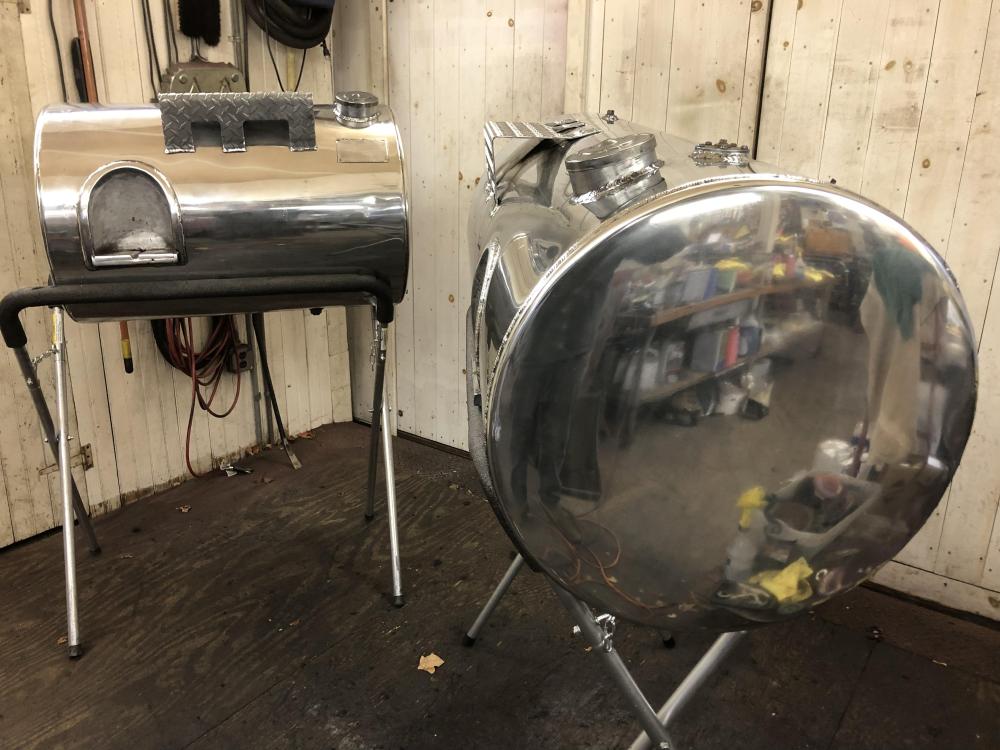
Thanks. This is actually a new pair. The ones that were on it were really beat up and not usable without a huge amount of repair work. I stumbled on this pair a few years ago on FB marketplace of all places. The short one is a good original and the long one appears to be brand new. -
B-73 Restoration
mattb73lt replied to mattb73lt's topic in Antique and Classic Mack Trucks General Discussion
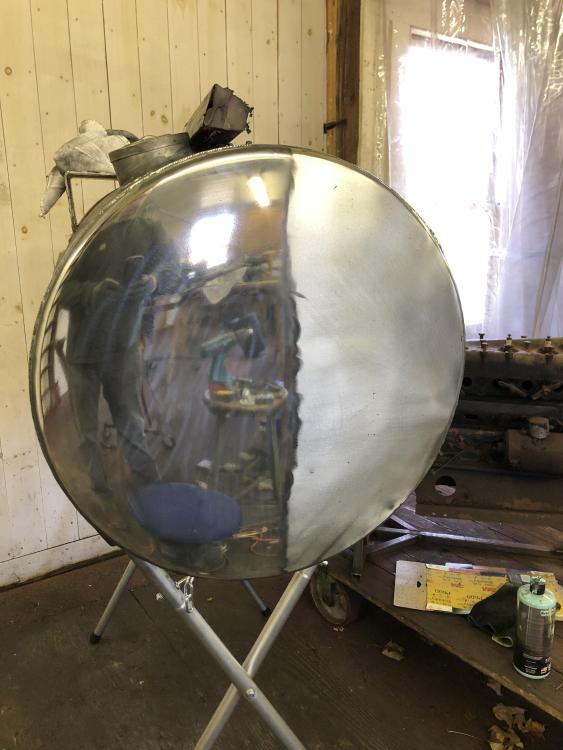
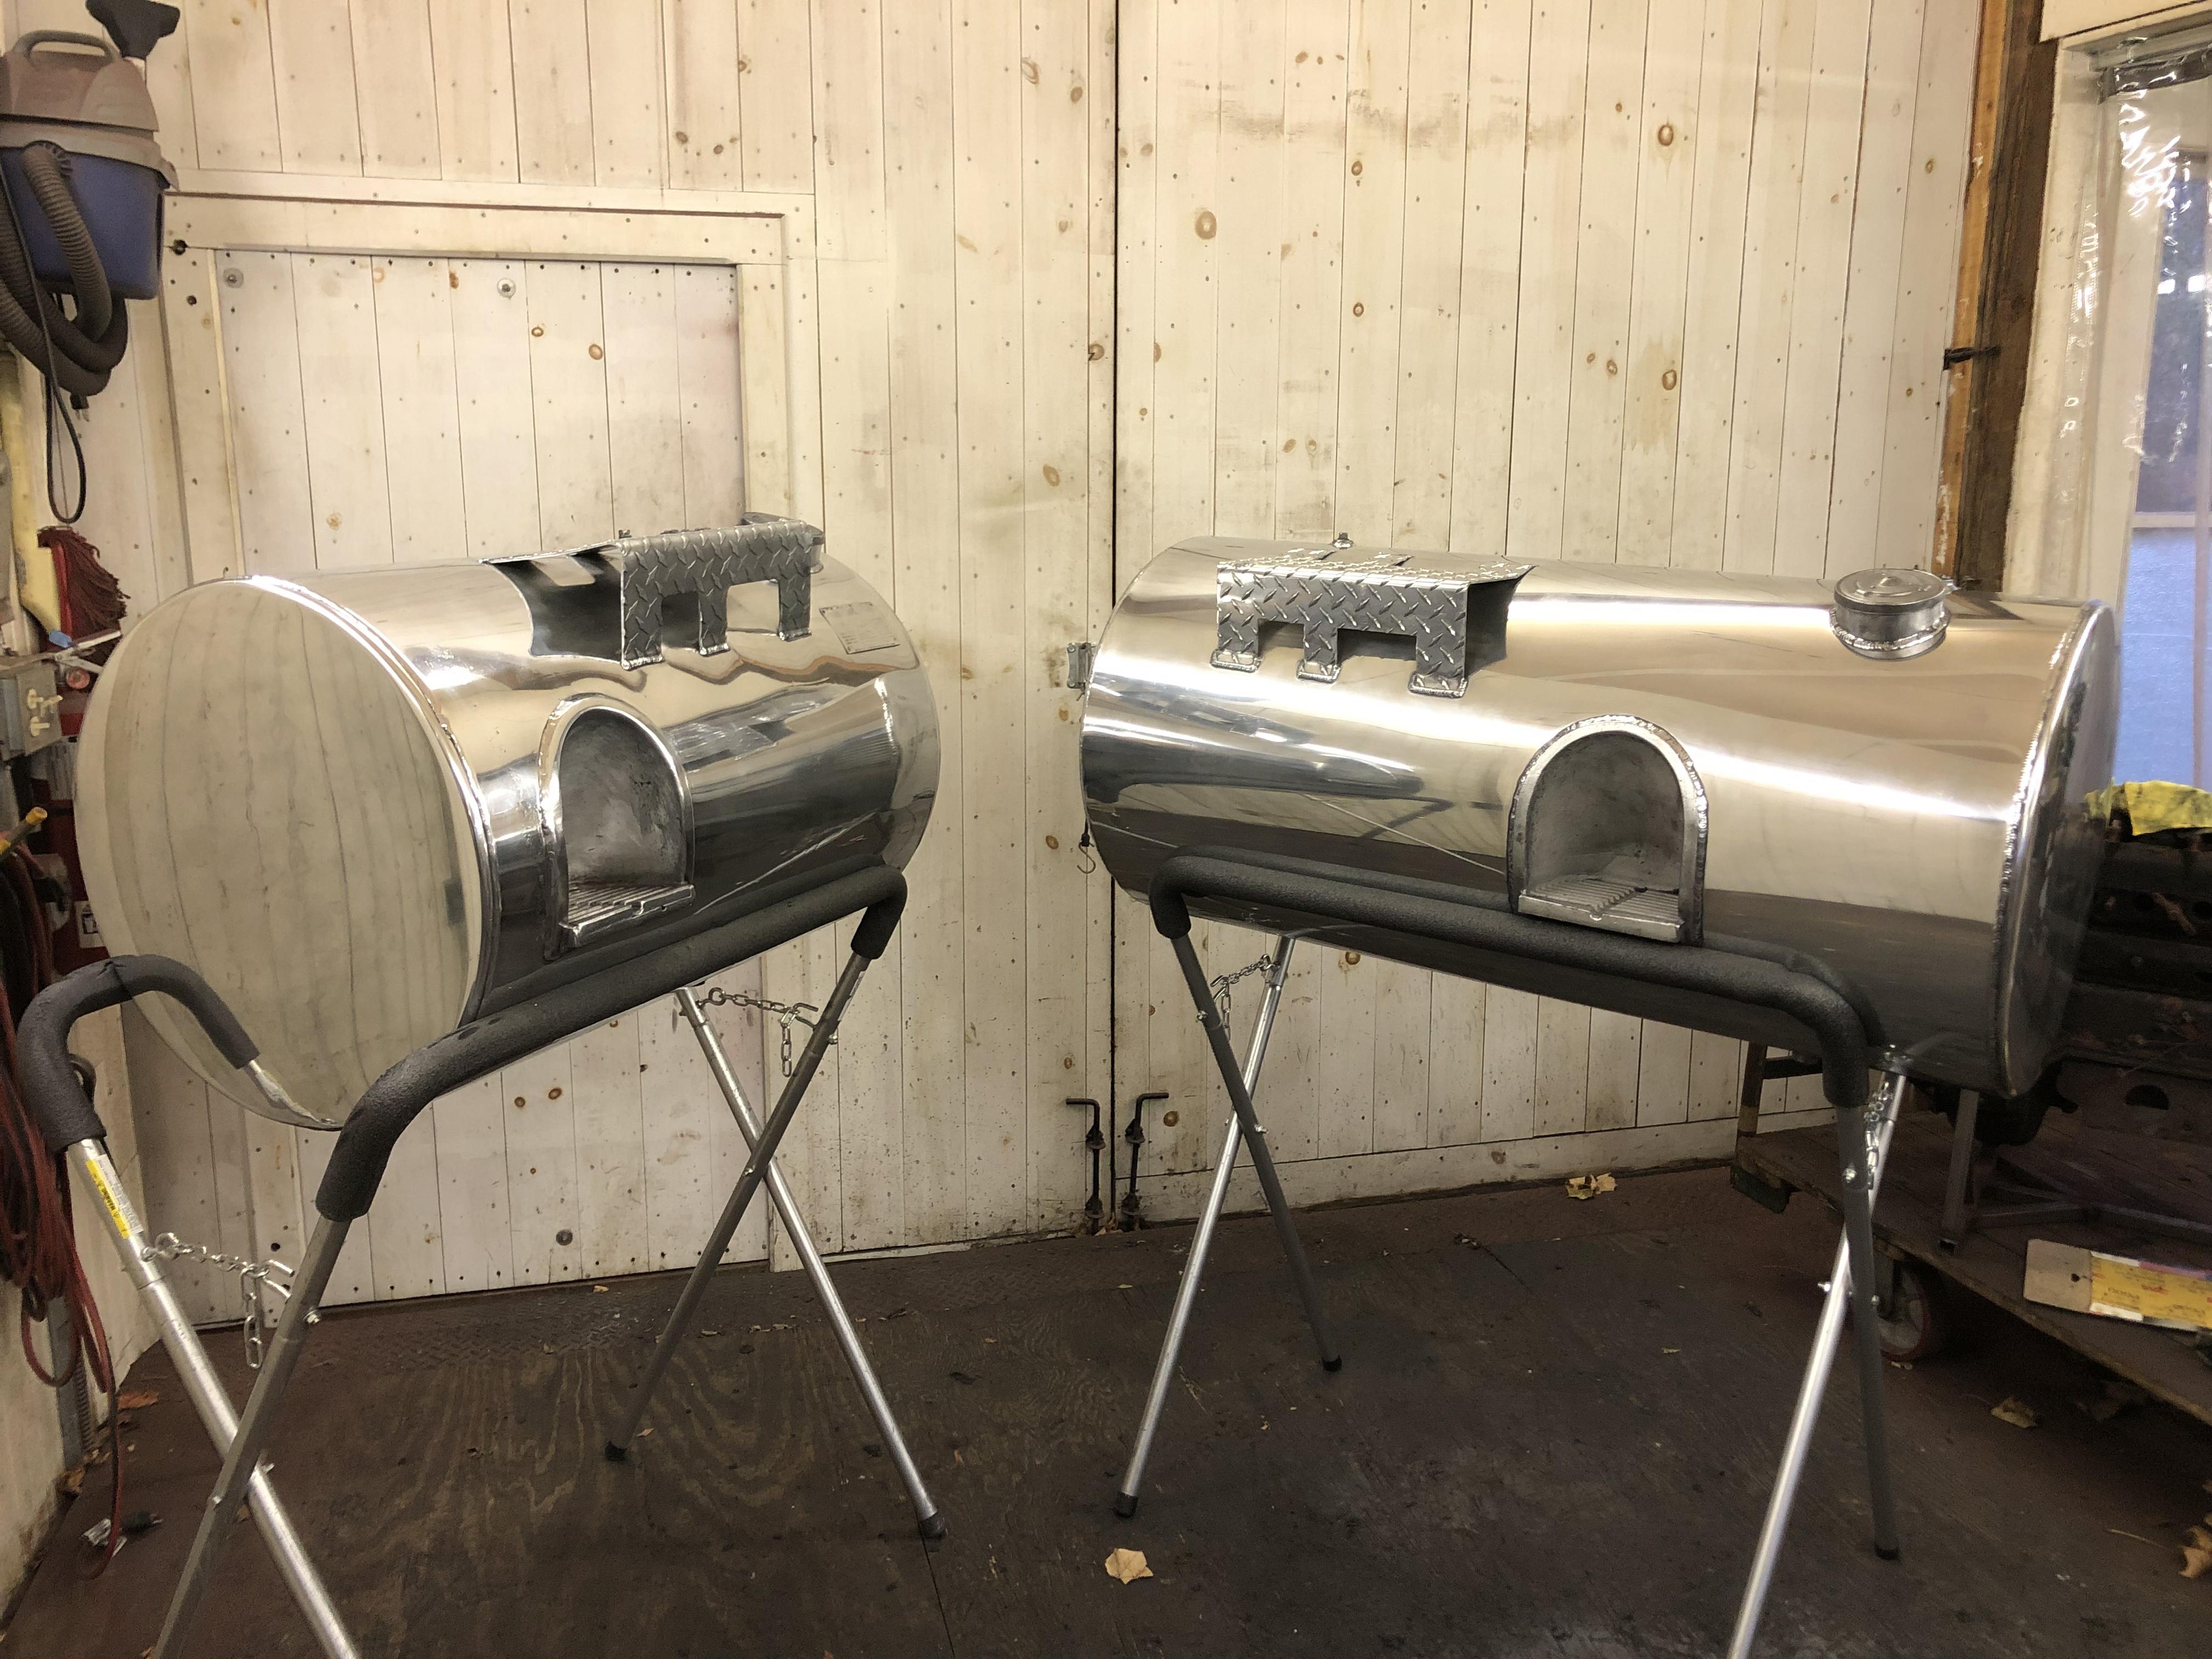
We’ll, that sucked. What a messy, time consuming job. Lots of wet sanding and a whole bunch of buffing, but WOW the tanks came out nice and are ready to go when the time comes.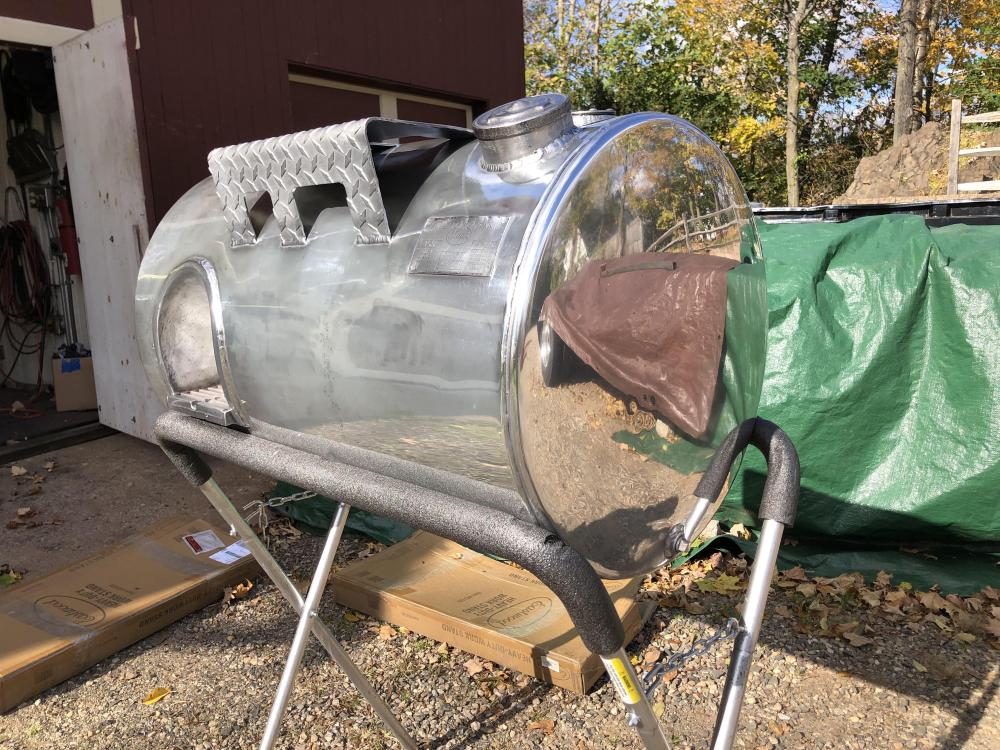

-
B-73 Restoration
mattb73lt replied to mattb73lt's topic in Antique and Classic Mack Trucks General Discussion
That was the look I was trying for and I was hoping to re-use those domed caps. -
B-73 Restoration
mattb73lt replied to mattb73lt's topic in Antique and Classic Mack Trucks General Discussion
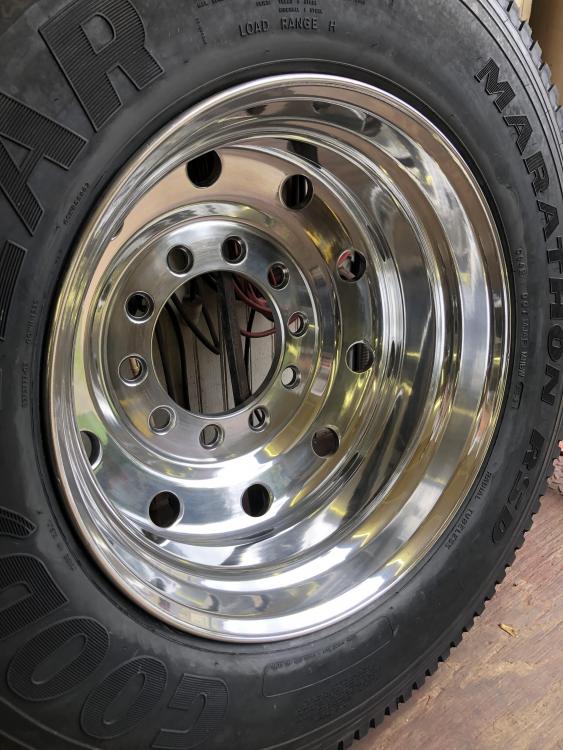
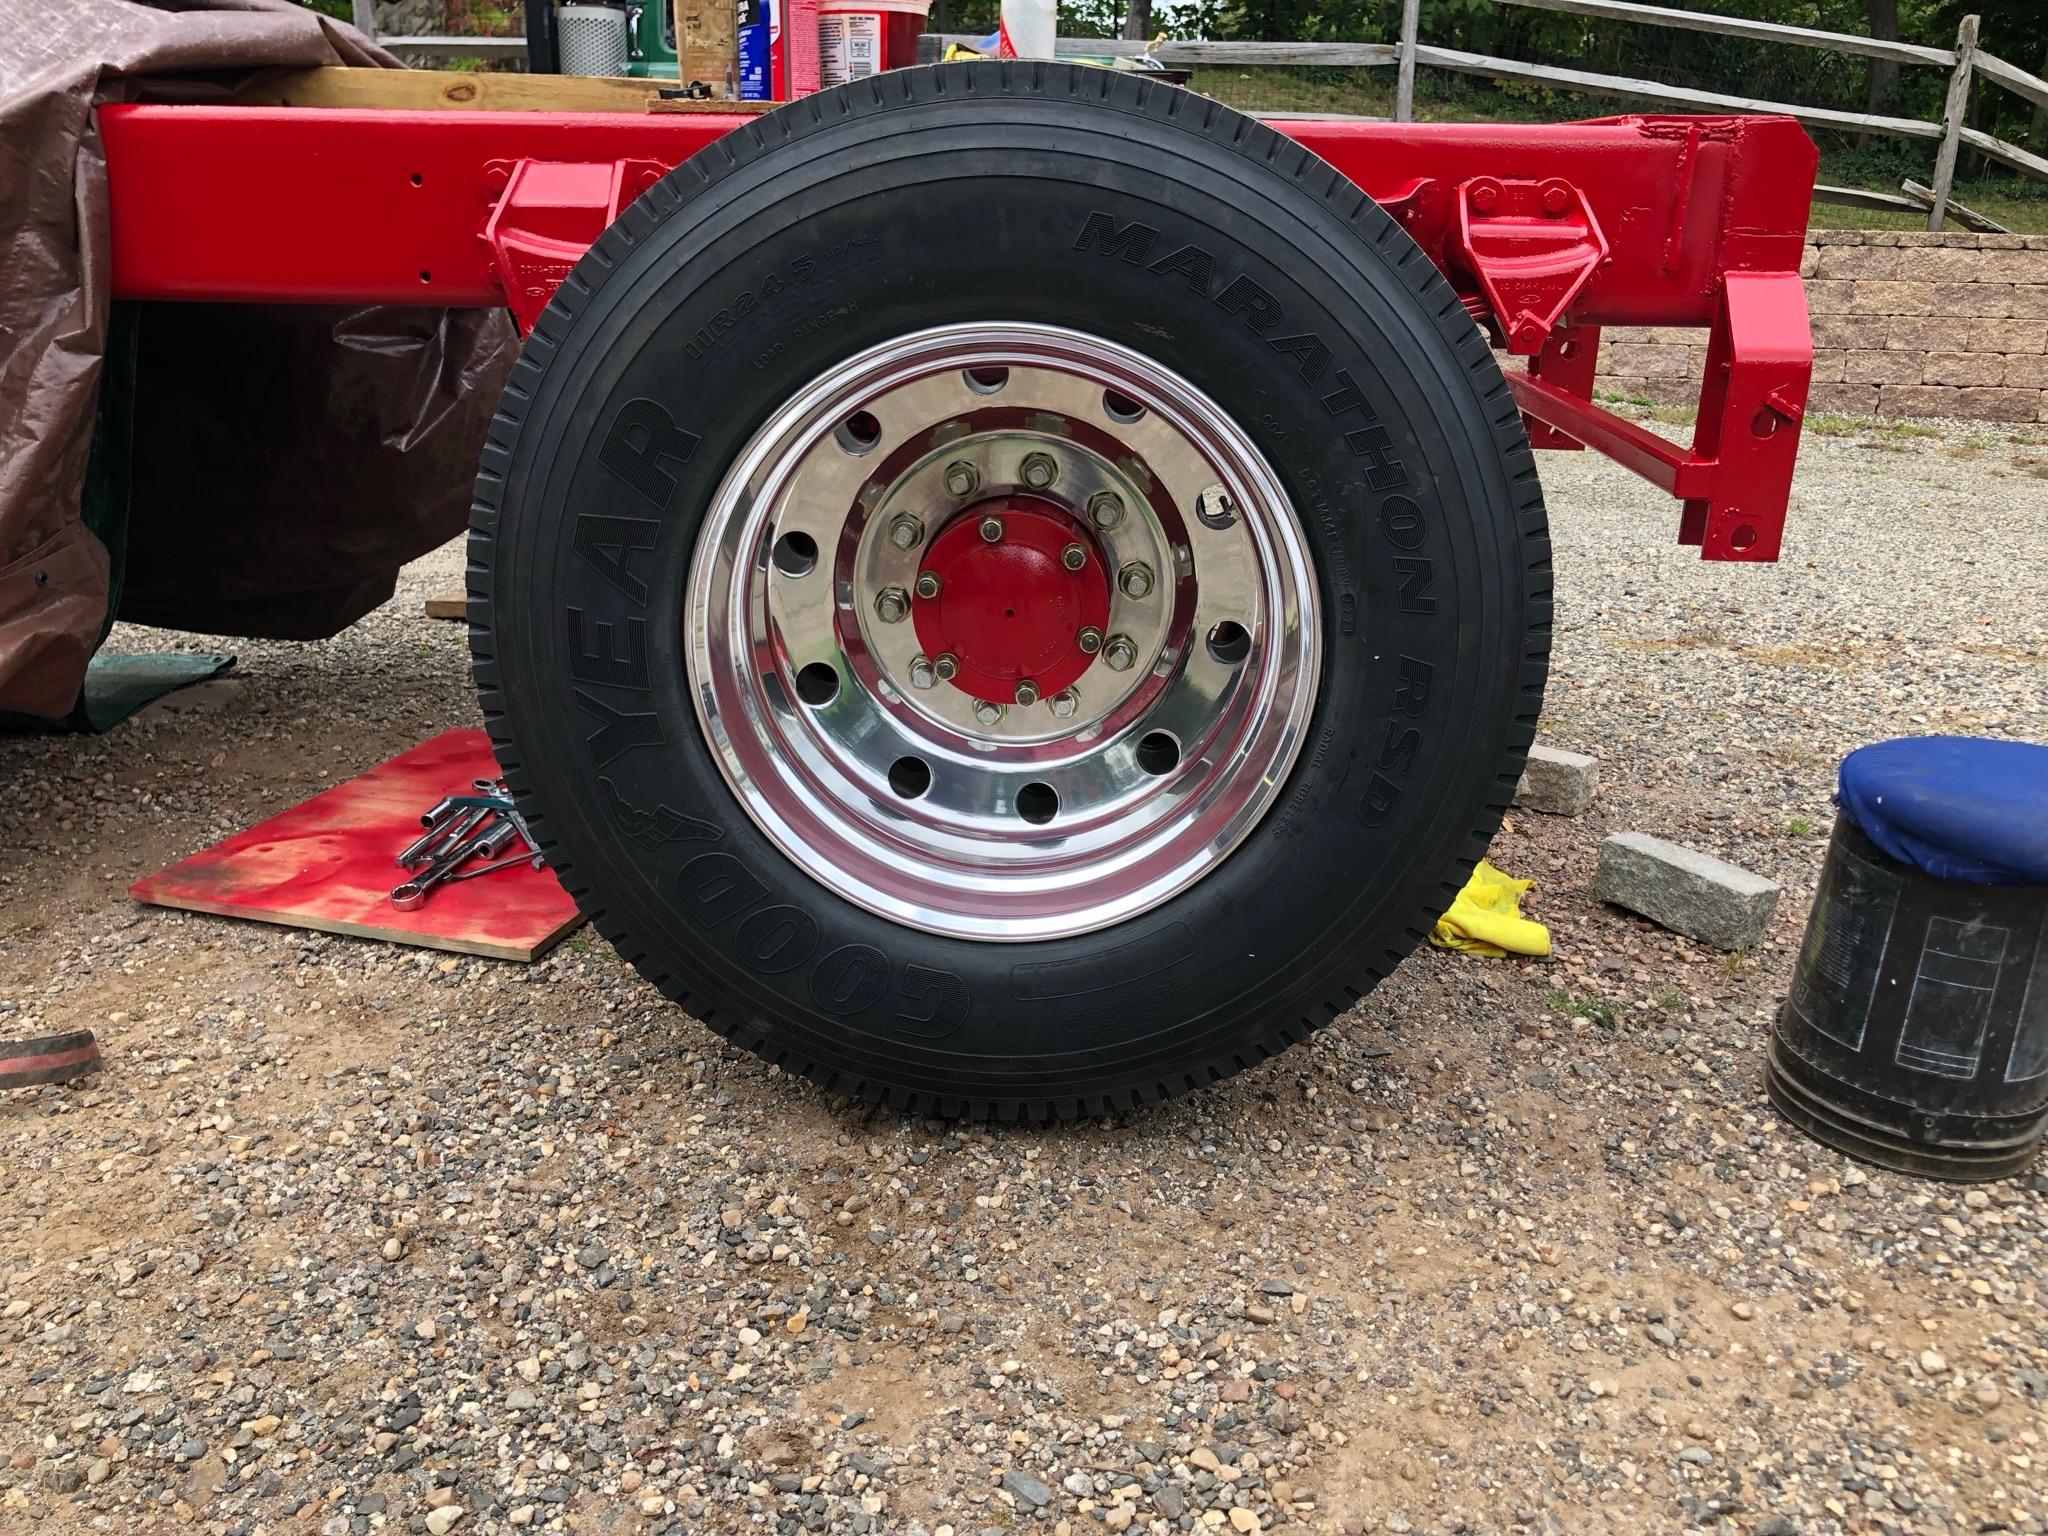
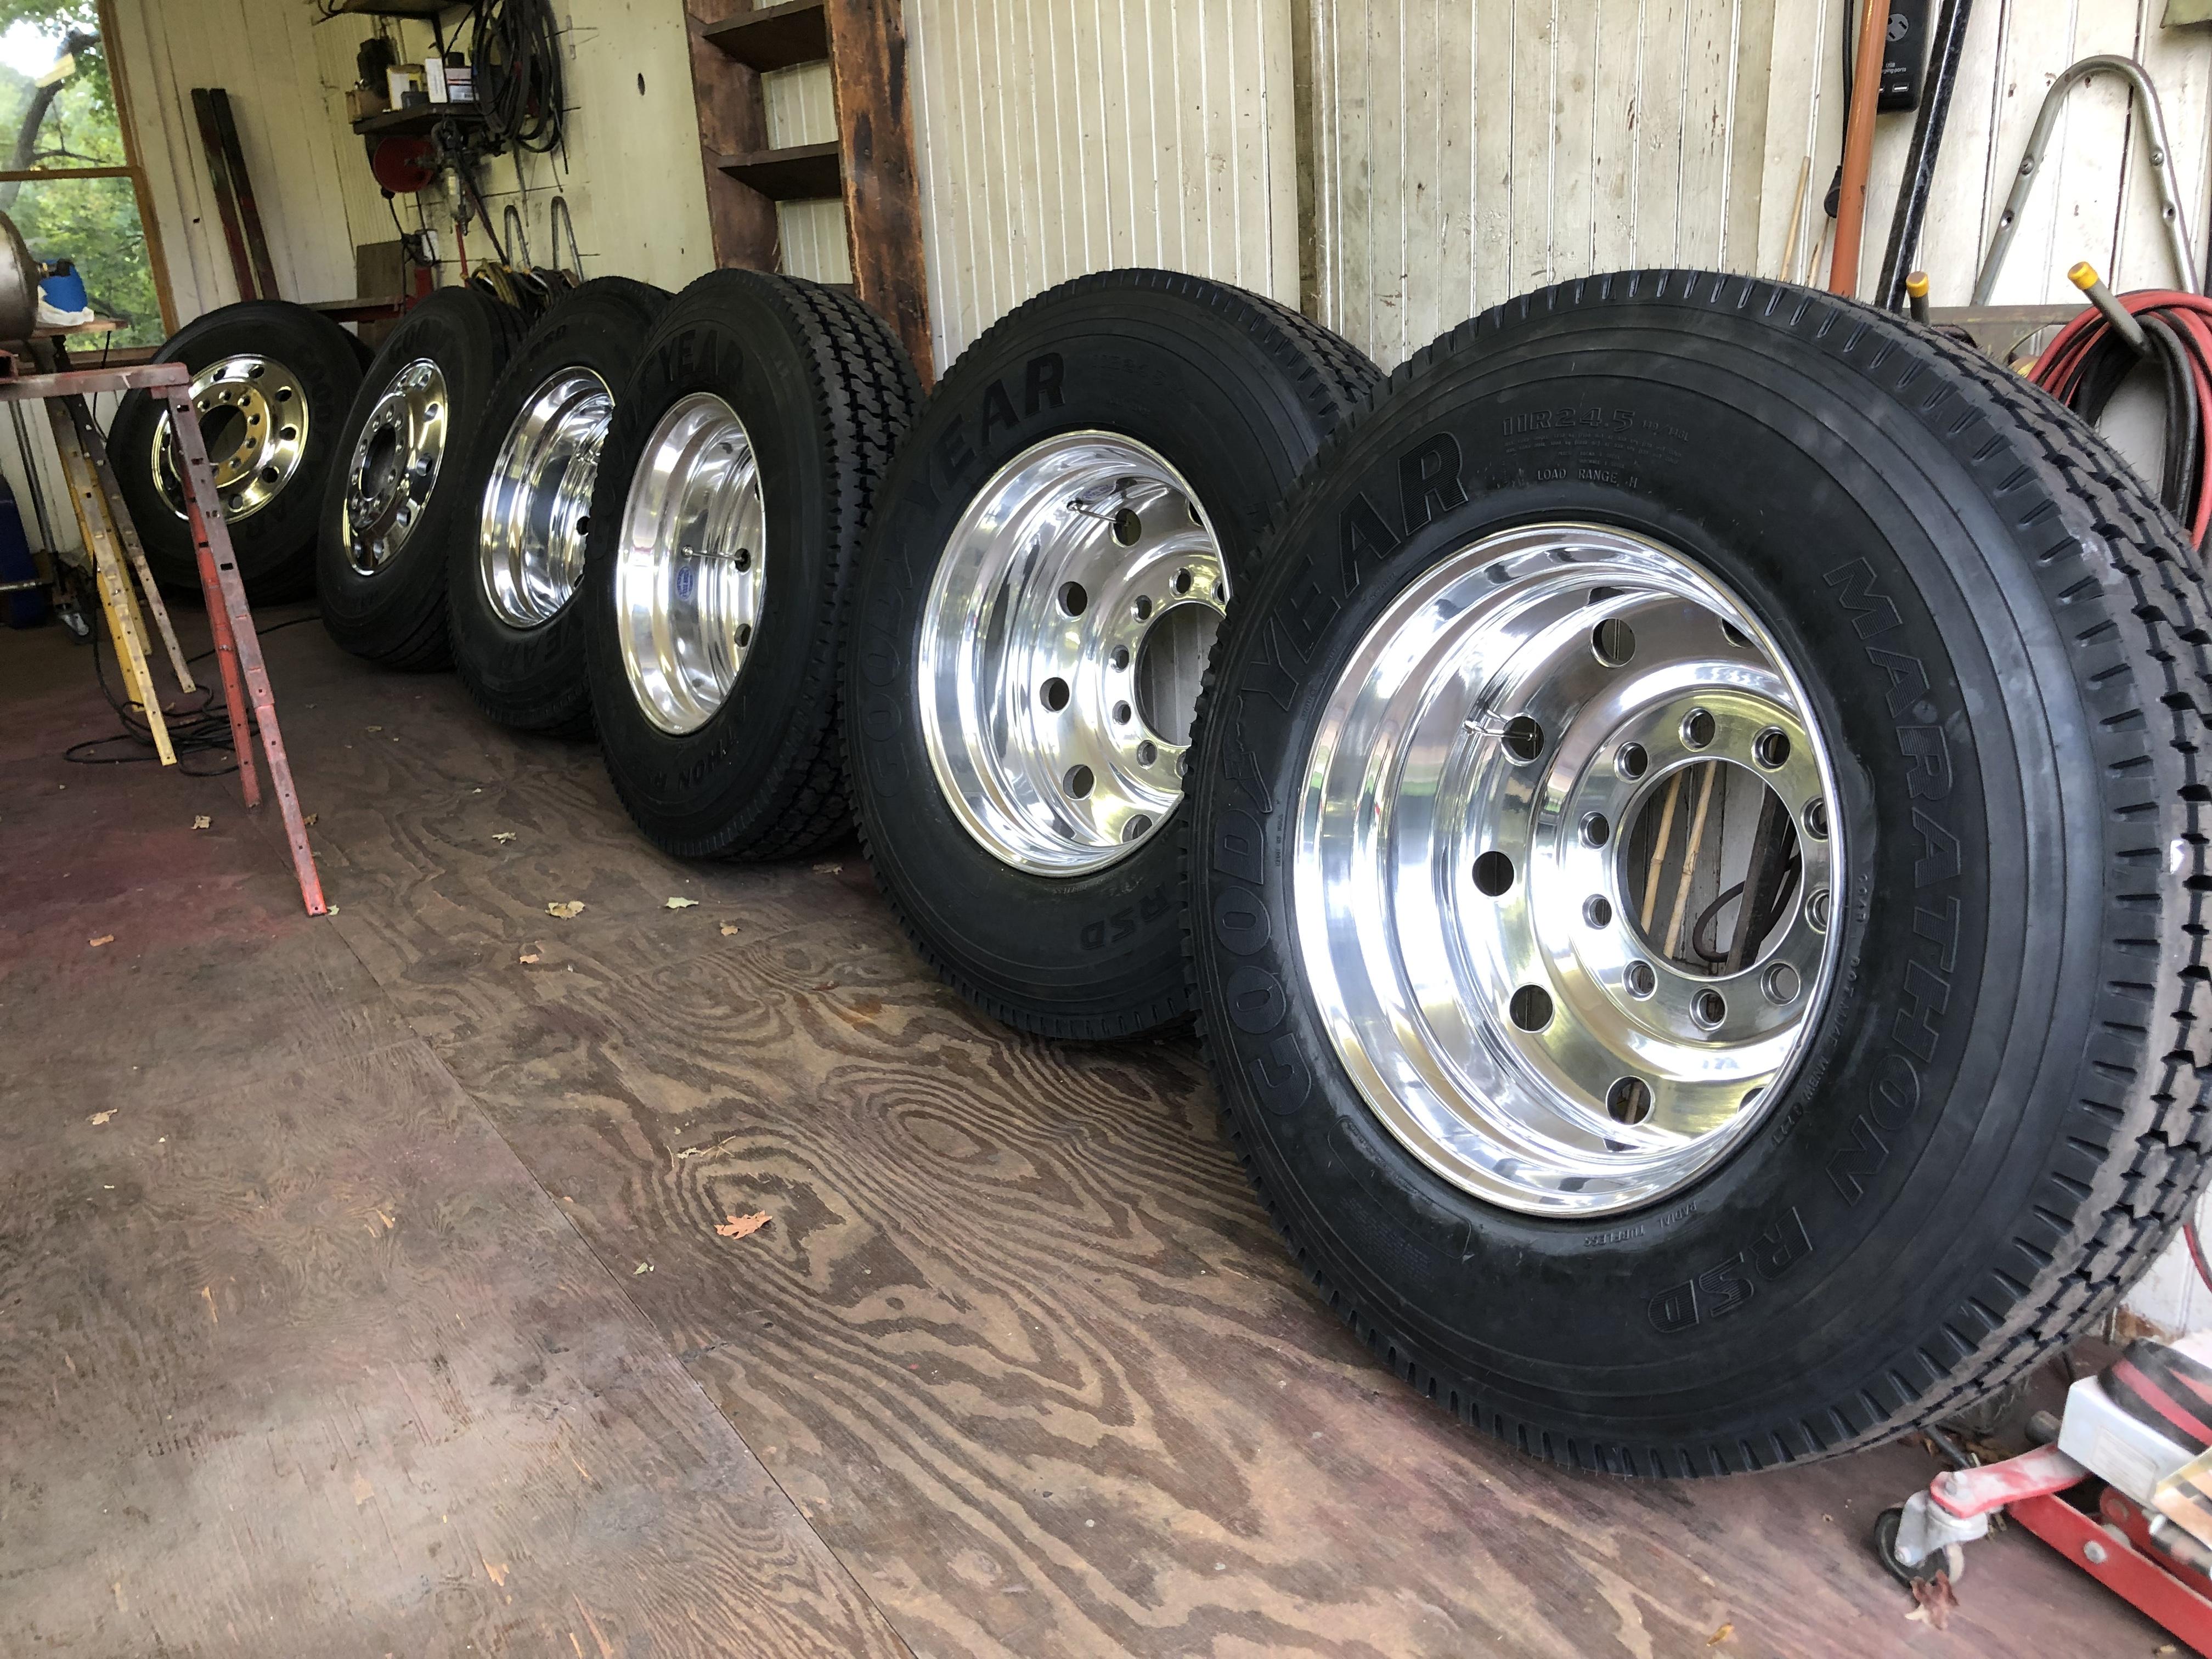
24.5" Stud Piloted, front and rear. Used, but re-polished with new sneakers.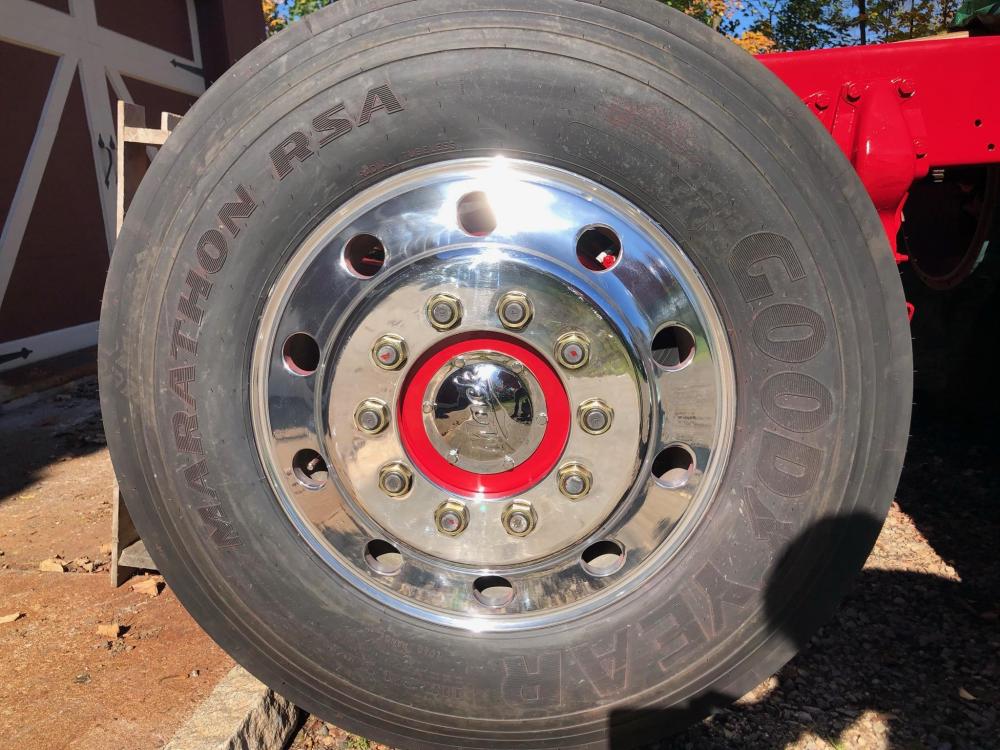
-
B-73 Restoration
mattb73lt replied to mattb73lt's topic in Antique and Classic Mack Trucks General Discussion
It's starting to look like something!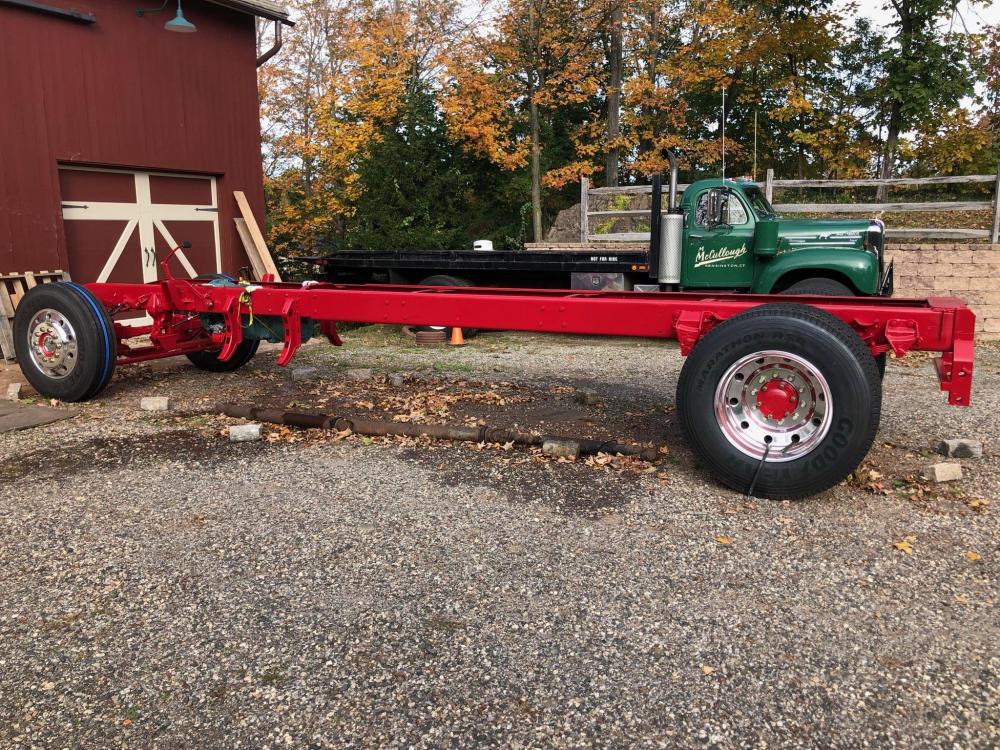
-
B-73 Restoration
mattb73lt replied to mattb73lt's topic in Antique and Classic Mack Trucks General Discussion
I don't think this one ever had any and the back axle that I got with it didn't. I put them on the new back axle, but it didn't seem to have any provisions for them on the front. -
B-73 Restoration
mattb73lt replied to mattb73lt's topic in Antique and Classic Mack Trucks General Discussion
There's a lot of variations. I realized that when I was hunting for a set. Most have a recessed hub with a small cap. Luckily, I found this set which is what I was looking for and I could use the caps that were sitting on a bookshelf since I had them chromed years ago. -
B-73 Restoration
mattb73lt replied to mattb73lt's topic in Antique and Classic Mack Trucks General Discussion
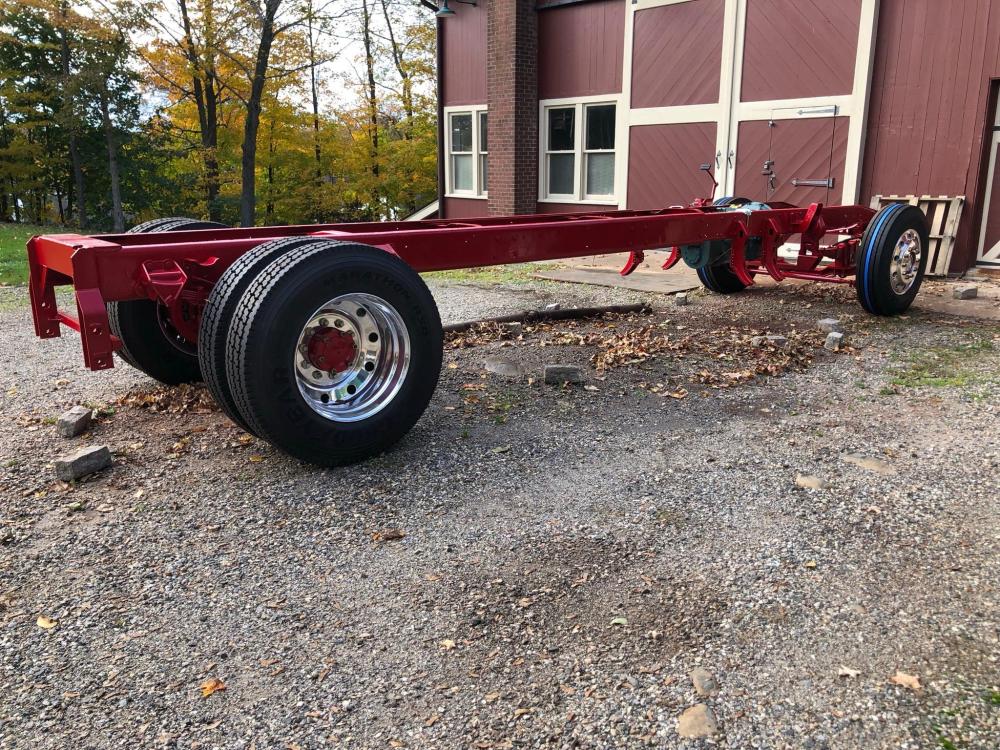
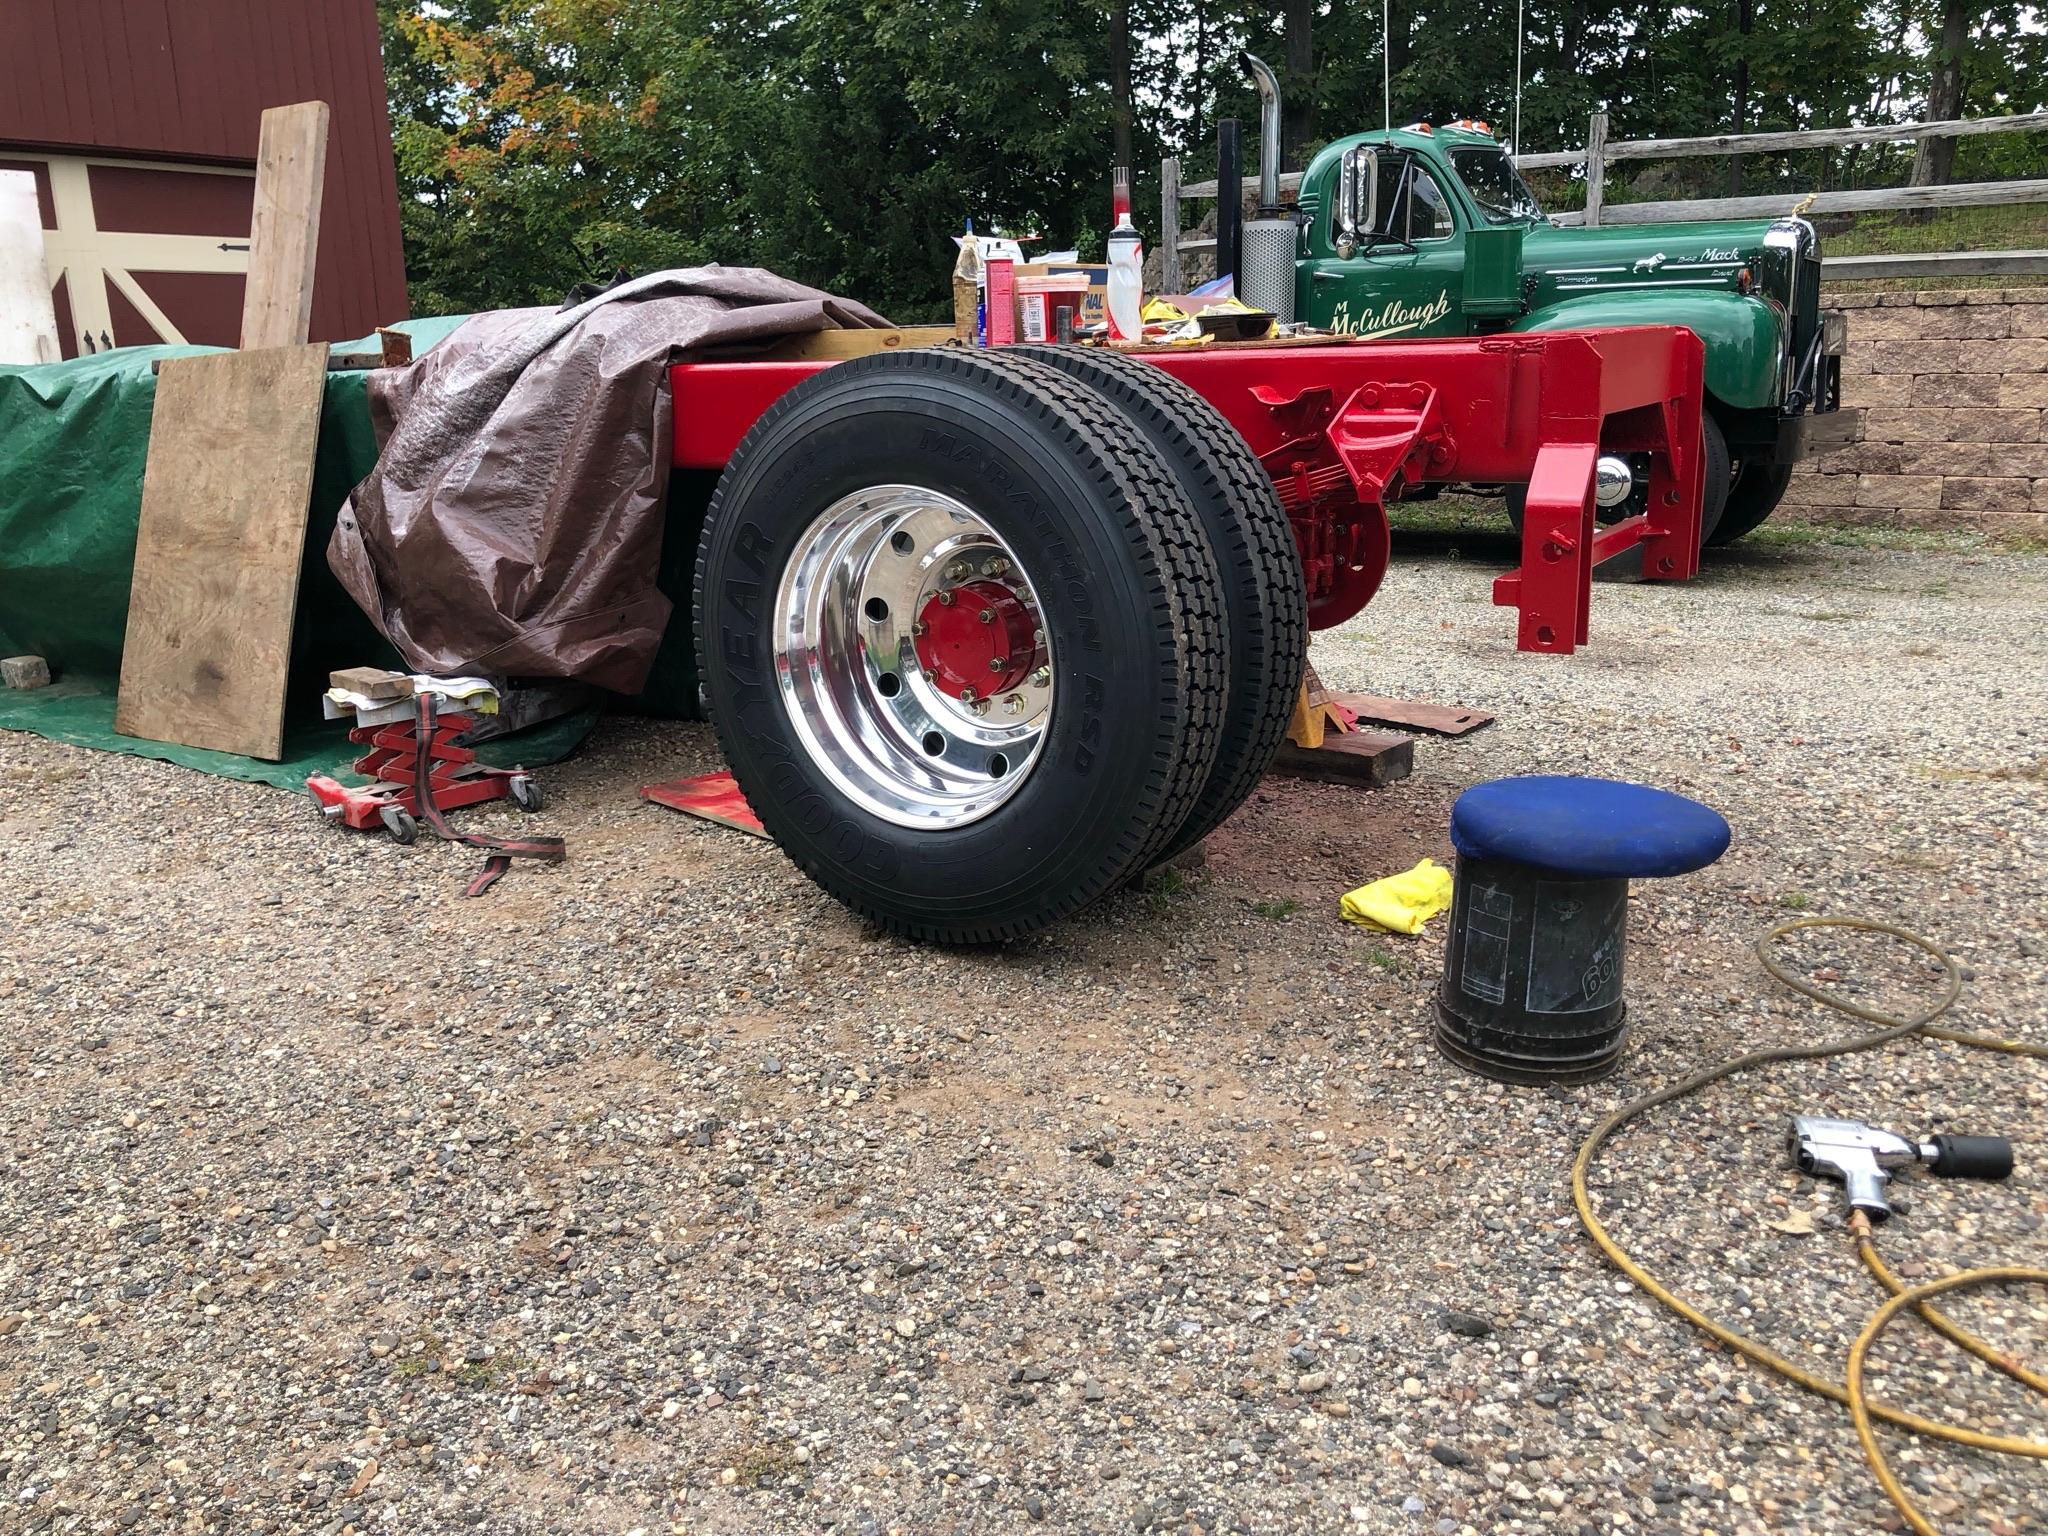
The conversion to Budd hubs is complete. Brake pins showed up Thursday and today I had some time to get the hubs and wheels assembled. I really like the look of the new hubs, with the rims, paint and the old style hub caps I saved off a truck I parted out 20+ years ago. The frame now rests on its matched wheels for the first time since I’ve owned it. I’m thinking this coming year will be it for actually driving this truck. Lots of assembly to go and more paint coming in the next few weeks.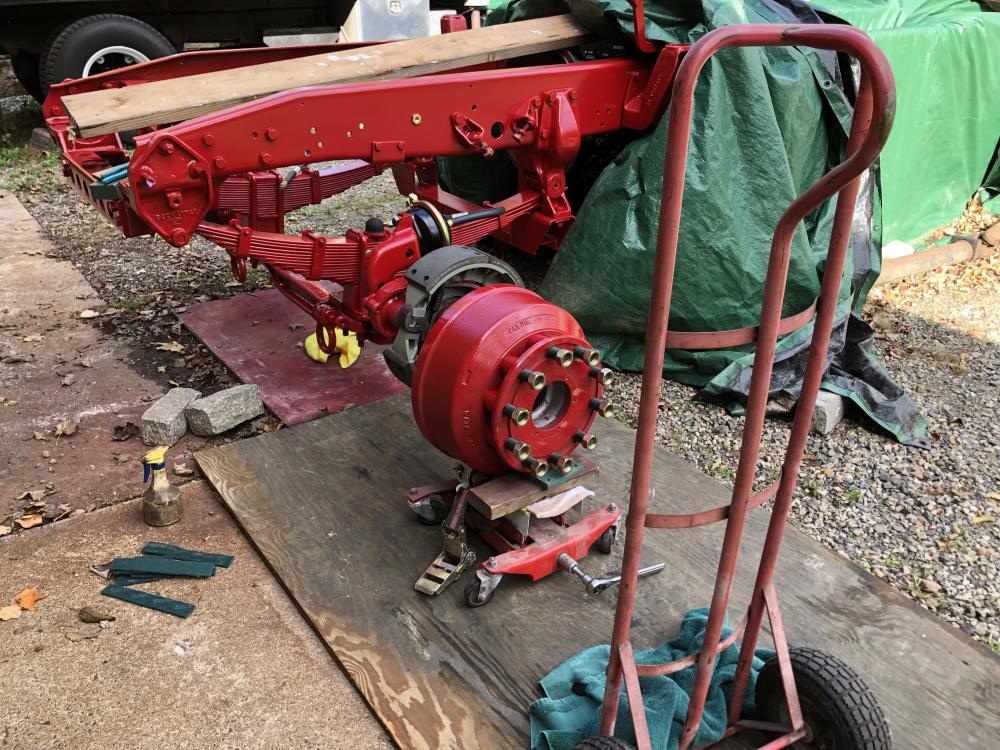


-
L-cab B-Model
mattb73lt replied to vision386's topic in Antique and Classic Mack Trucks General Discussion
It really is a beautiful truck. I'd love to see it in person someday. -
B-73 Restoration
mattb73lt replied to mattb73lt's topic in Antique and Classic Mack Trucks General Discussion
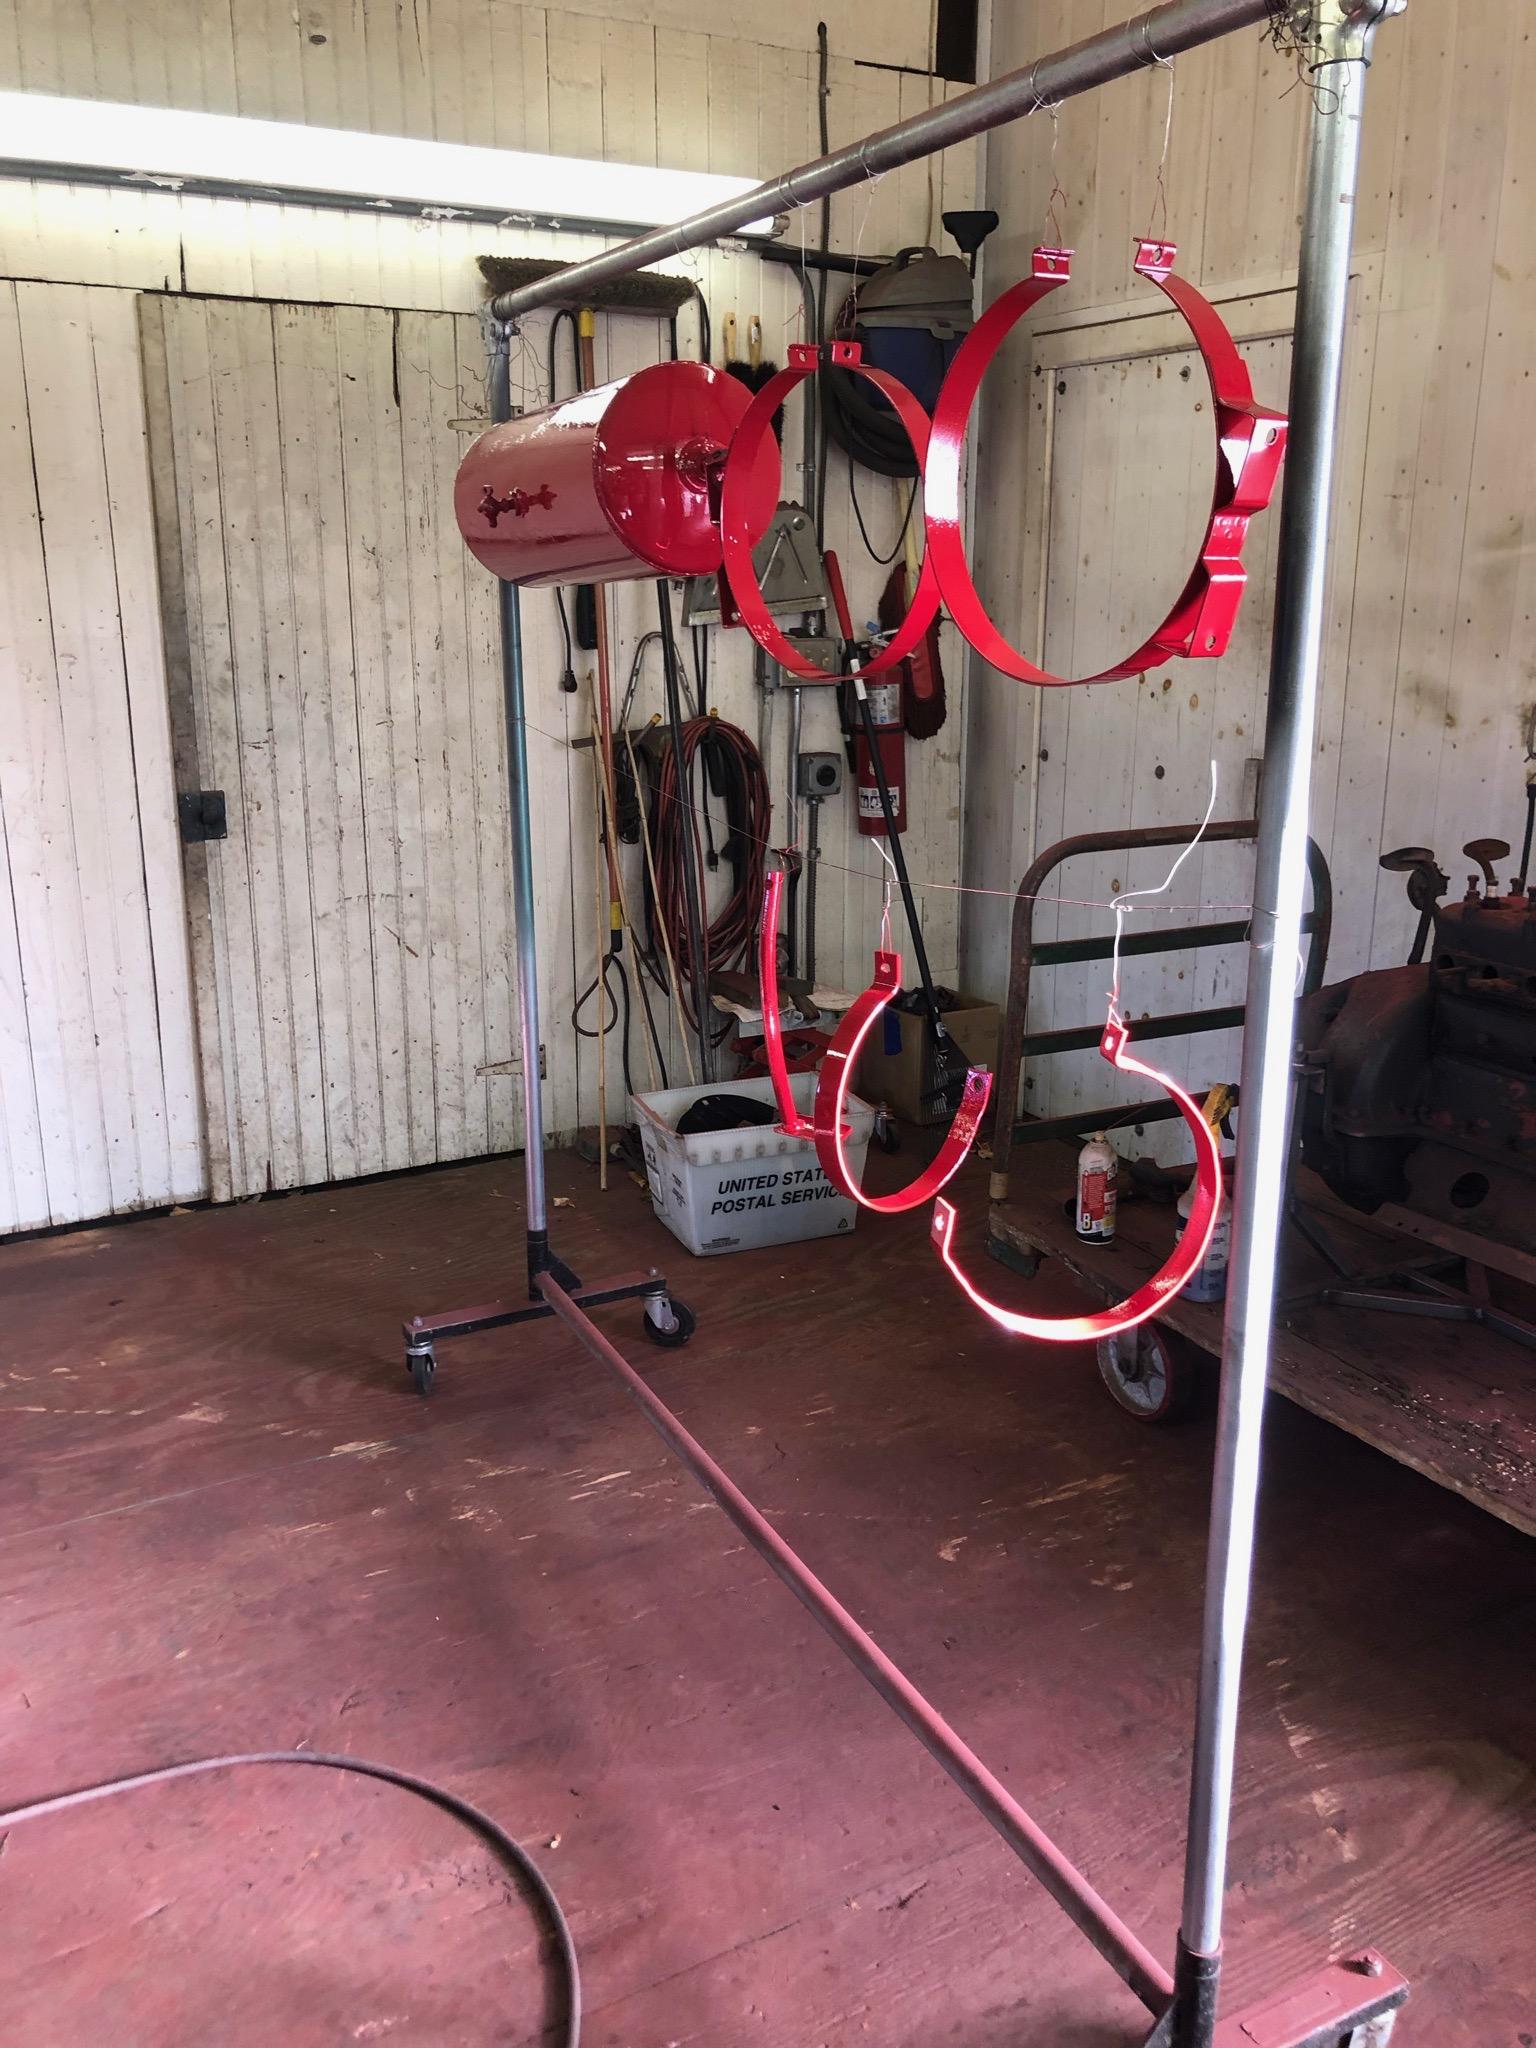
Last batch of brackets and straps. All thats left is the hood, fenders, fender extensions and headlight panels for paint. I was going to do some major assembly of the truck this fall, but the front brake parts are holding me up. The plan now is to wait until spring to do it as I don't want my cab sitting out under cover until then. Plenty to keep me busy over the Winter. I dragged the three piece drive shaft home to see if it was of use. I think by swapping the first two sections and then having the rear section shortened it is useable. I would then just need to fabricate the hanger bearing supports for it. That may save me a lot of time and money instead of having the whole thing fabricated.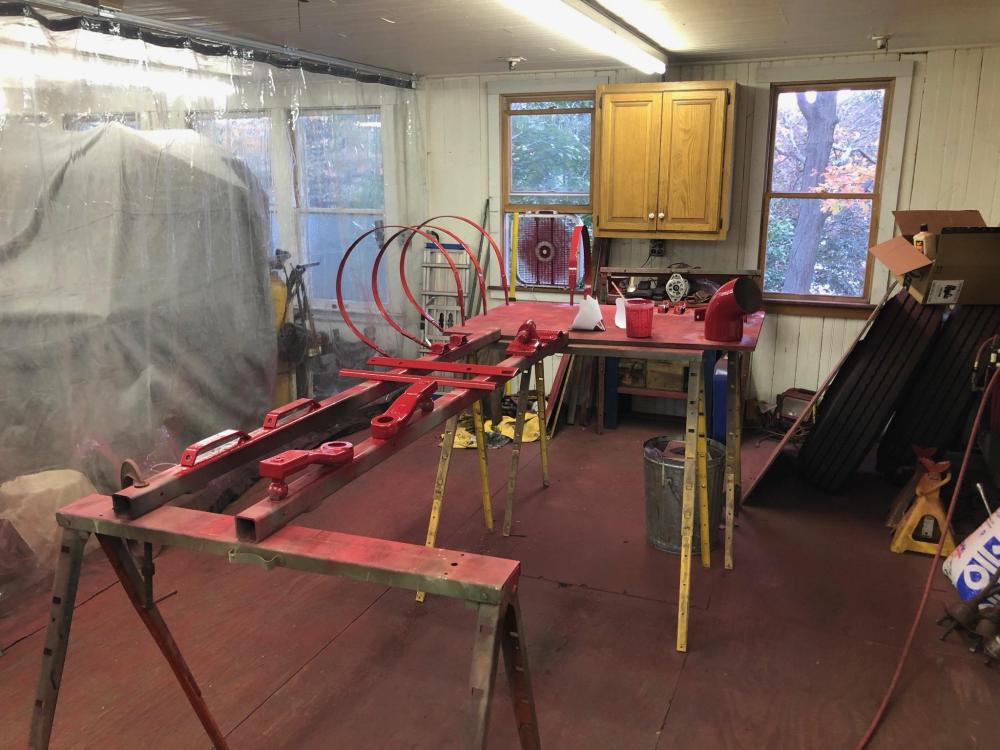

-
Connecticut Construction Trucks
mattb73lt replied to BKrois's topic in Antique and Classic Mack Trucks General Discussion
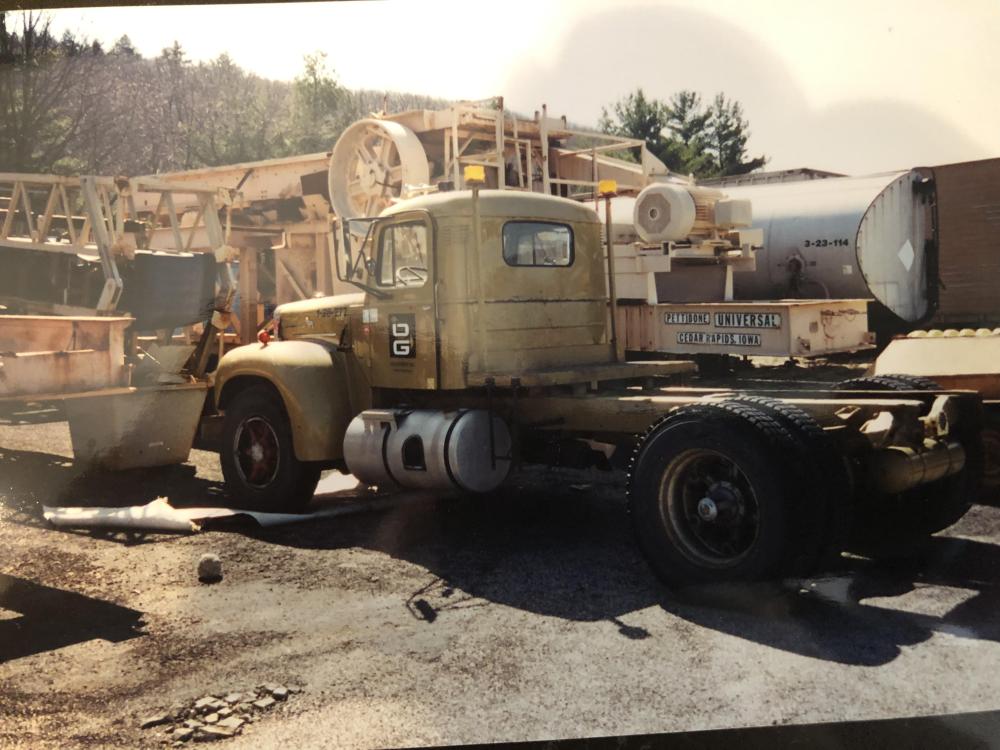
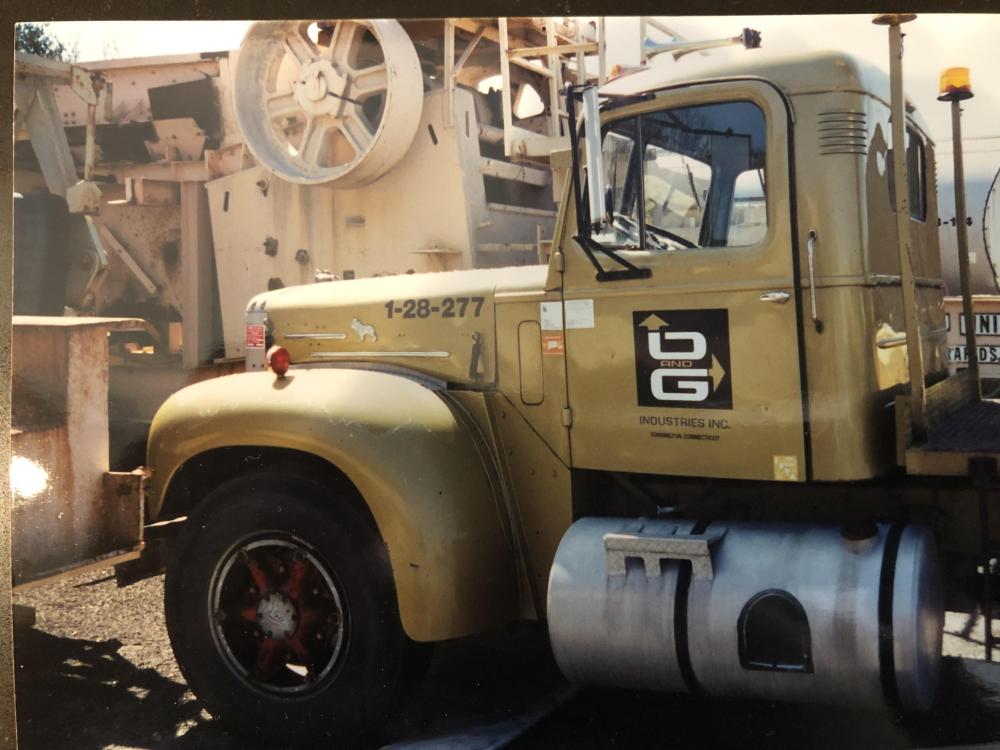
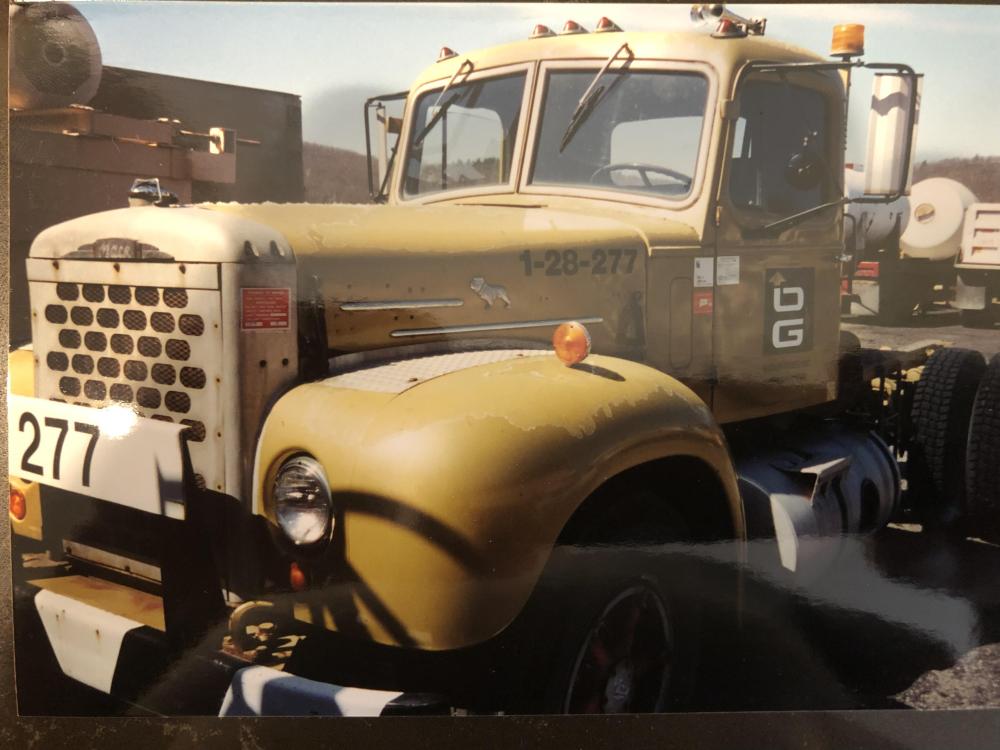
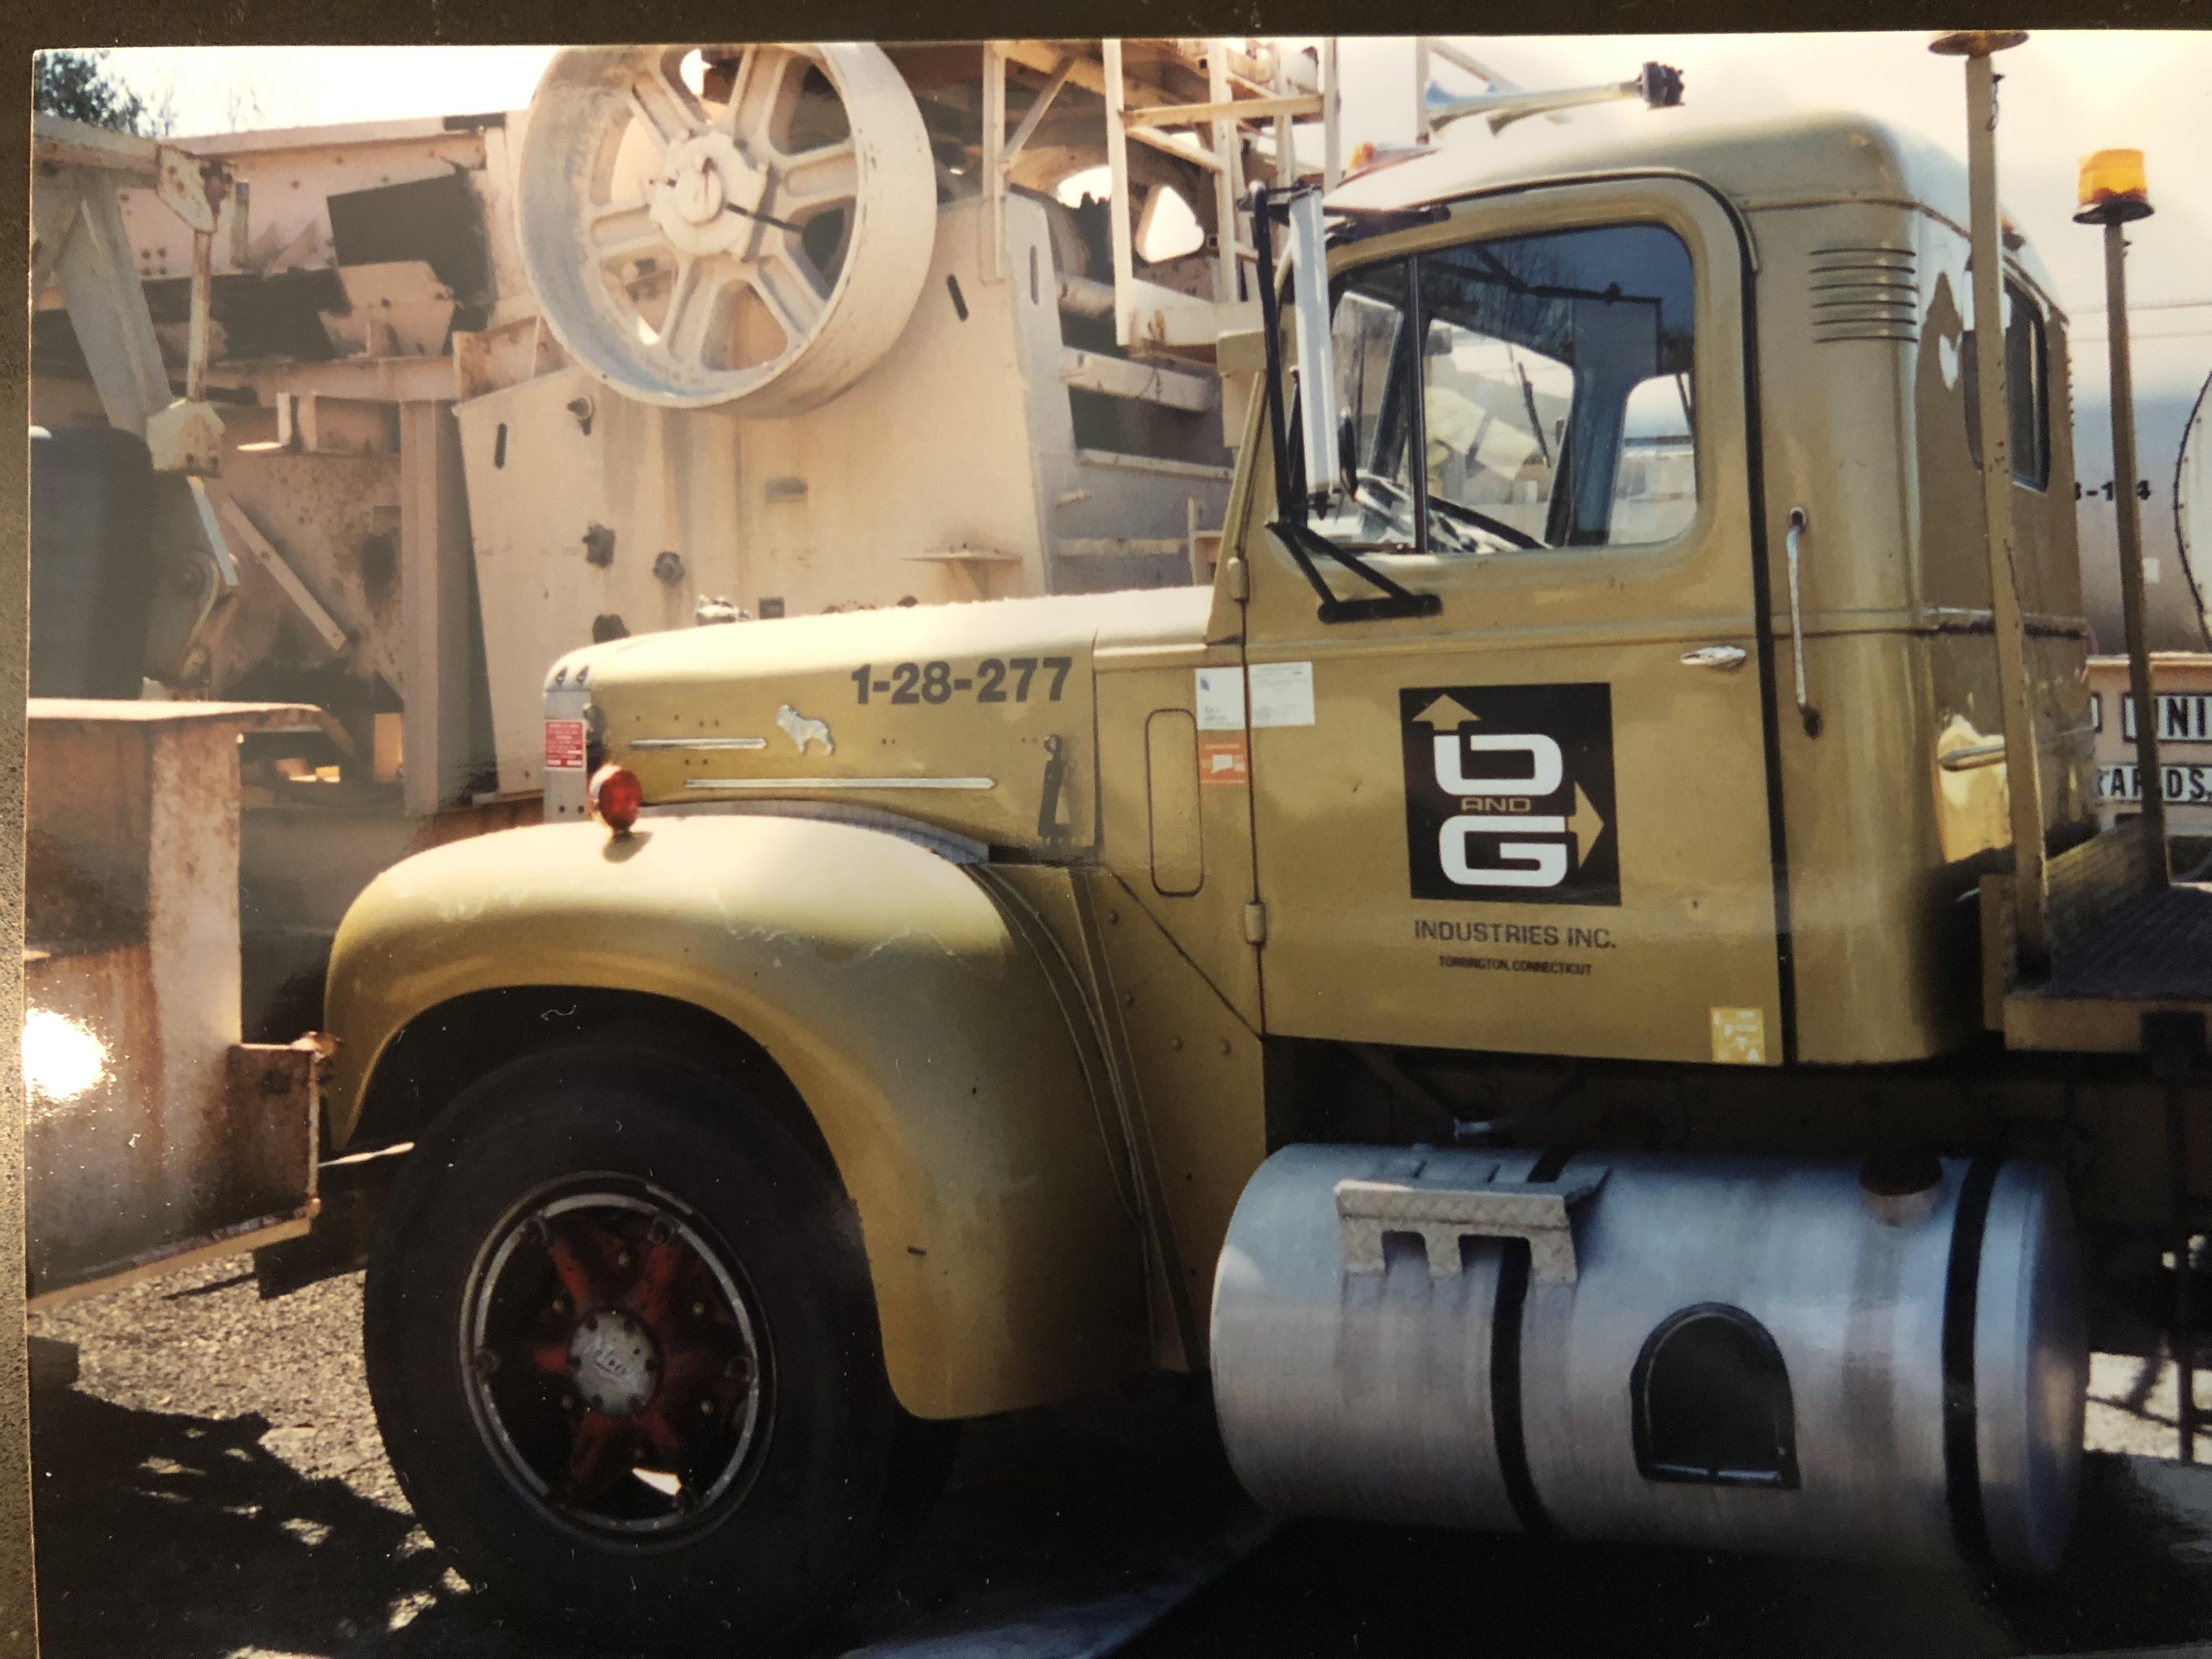
Here’s an O&G B73, in their storage yard in Torrington, CT. I took these around 2000. Just a cab and chassis, I was told the plan for it was to restore it and add a service body to it and put it back to work. I don’t know if that ever happened. Last time I saw it working was early 90’s with a large compressor mounted to it. Set up with an NH220, Triplex, double frame and a heavy rear.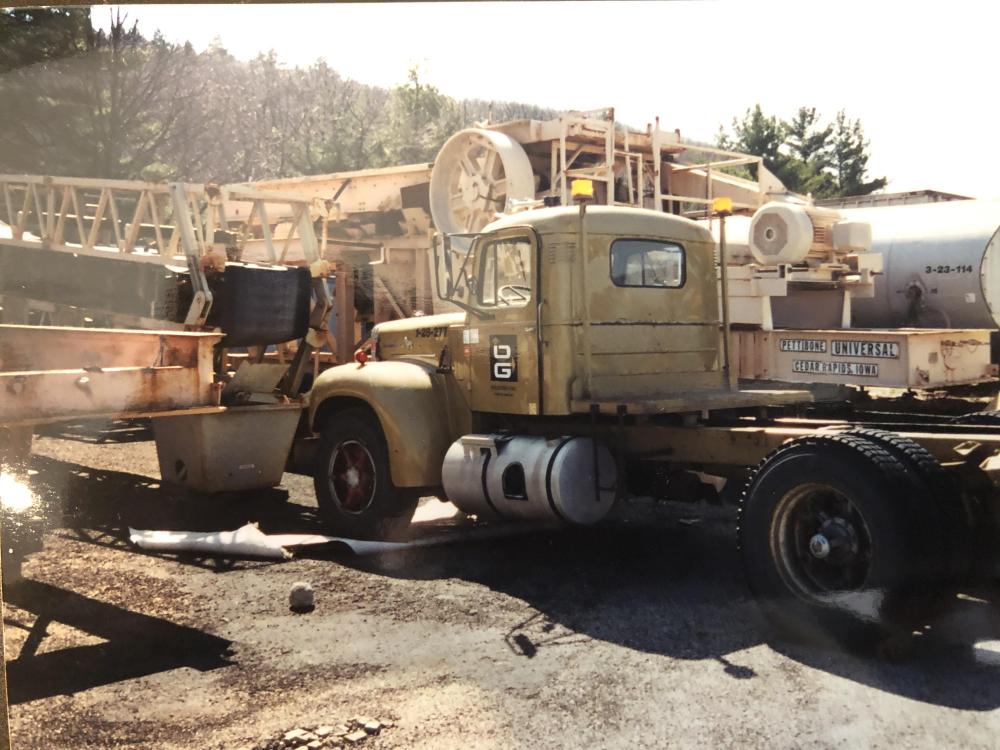
-
Rubber mounting gasket
mattb73lt replied to h67st's topic in Antique and Classic Mack Trucks General Discussion
I've purchased rubber sheets of various thickness off eBay for similar purposes. The latest was for the fuel tank frame mounts on the back side of the tanks. Not expensive and easily trimmed for what you'd need to do.- 1 reply
-
- 2
-

-

-
Finally got a B-75
mattb73lt replied to dogg rescue's topic in Antique and Classic Mack Trucks General Discussion
Great find! What are your plans for it? -
B-73 Restoration
mattb73lt replied to mattb73lt's topic in Antique and Classic Mack Trucks General Discussion
Thanks for he compliments. The NH220 should do fine, I don't carry anything too heavy, 6-7,000 lbs would be about the heaviest load. In my other truck I ran a END-673 for a long time with the same loads. It took a little bit to get it up to cruising speed, but nothing too bad. It was a much different truck when I put a 237 in it. -
B-73 Restoration
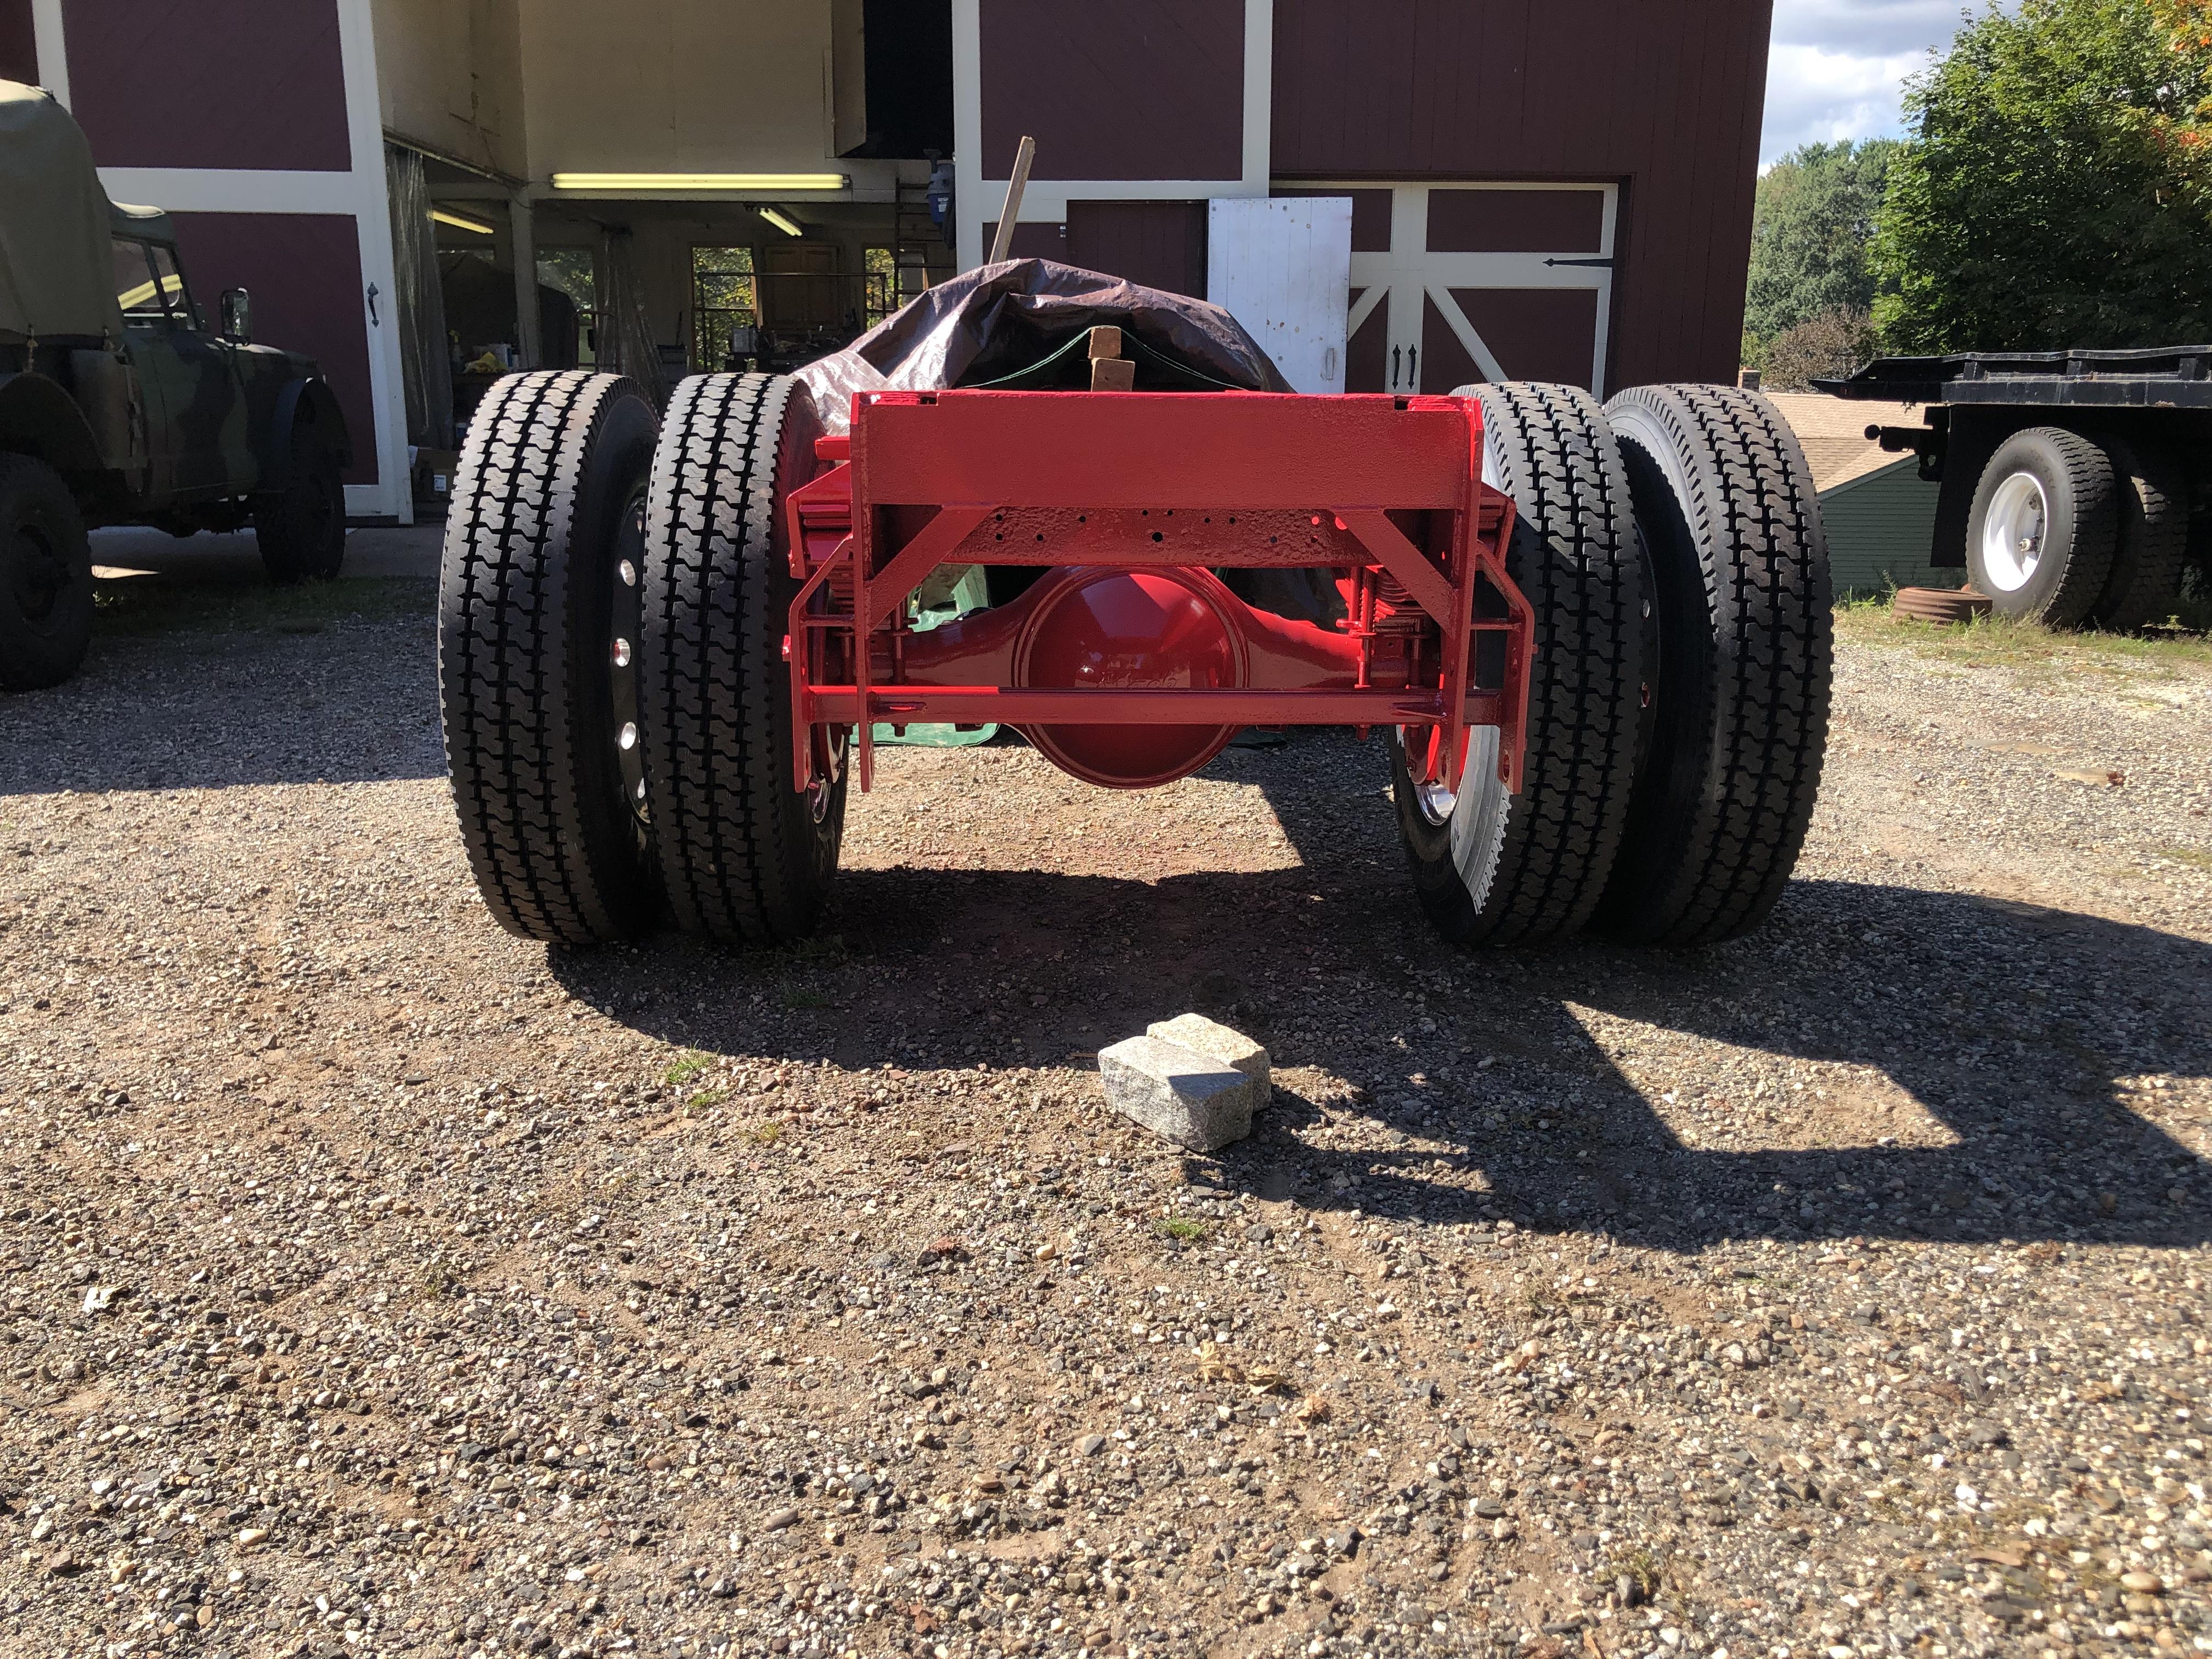
mattb73lt replied to mattb73lt's topic in Antique and Classic Mack Trucks General Discussion
The rear now has a 4.62 in it. 24.5 rubber and should cruise nicely at 65+. It's almost the same set up as my other B, but that has a 237, single disc clutch and 22.5 rubber. Top end will be about 80 against the governor. For what I do it works great. -
B-73 Restoration
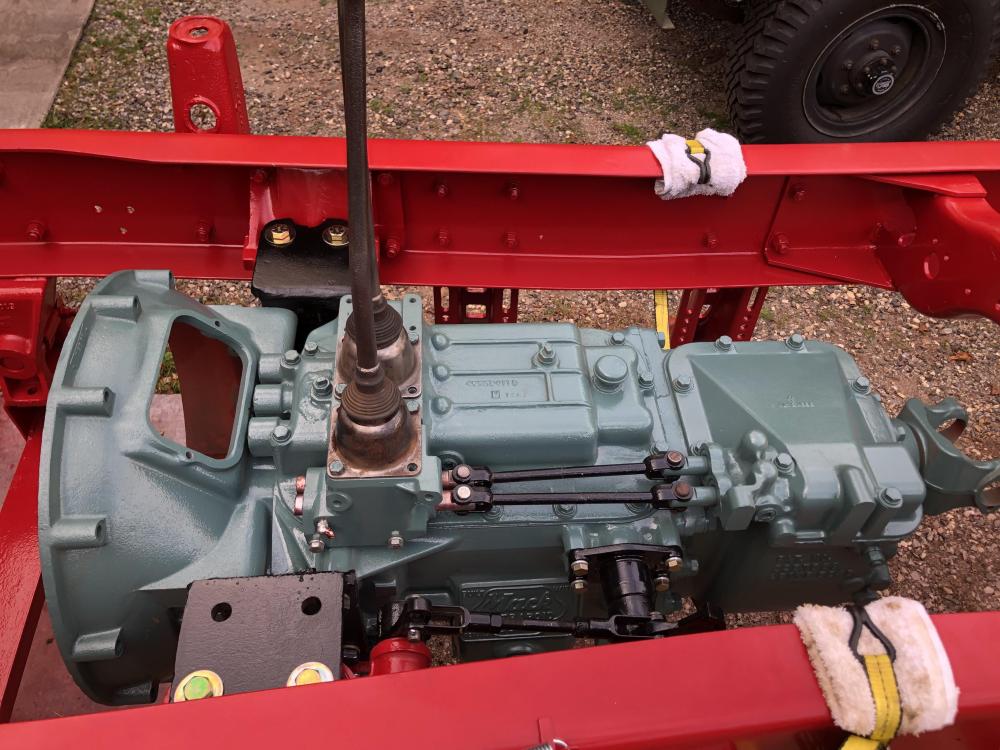
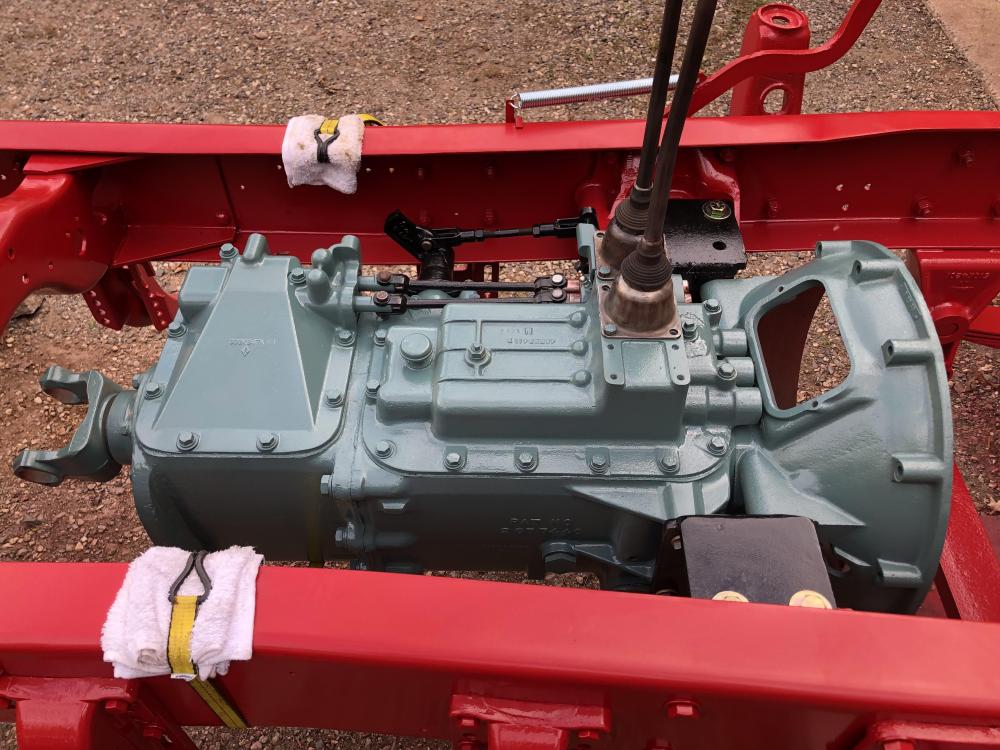
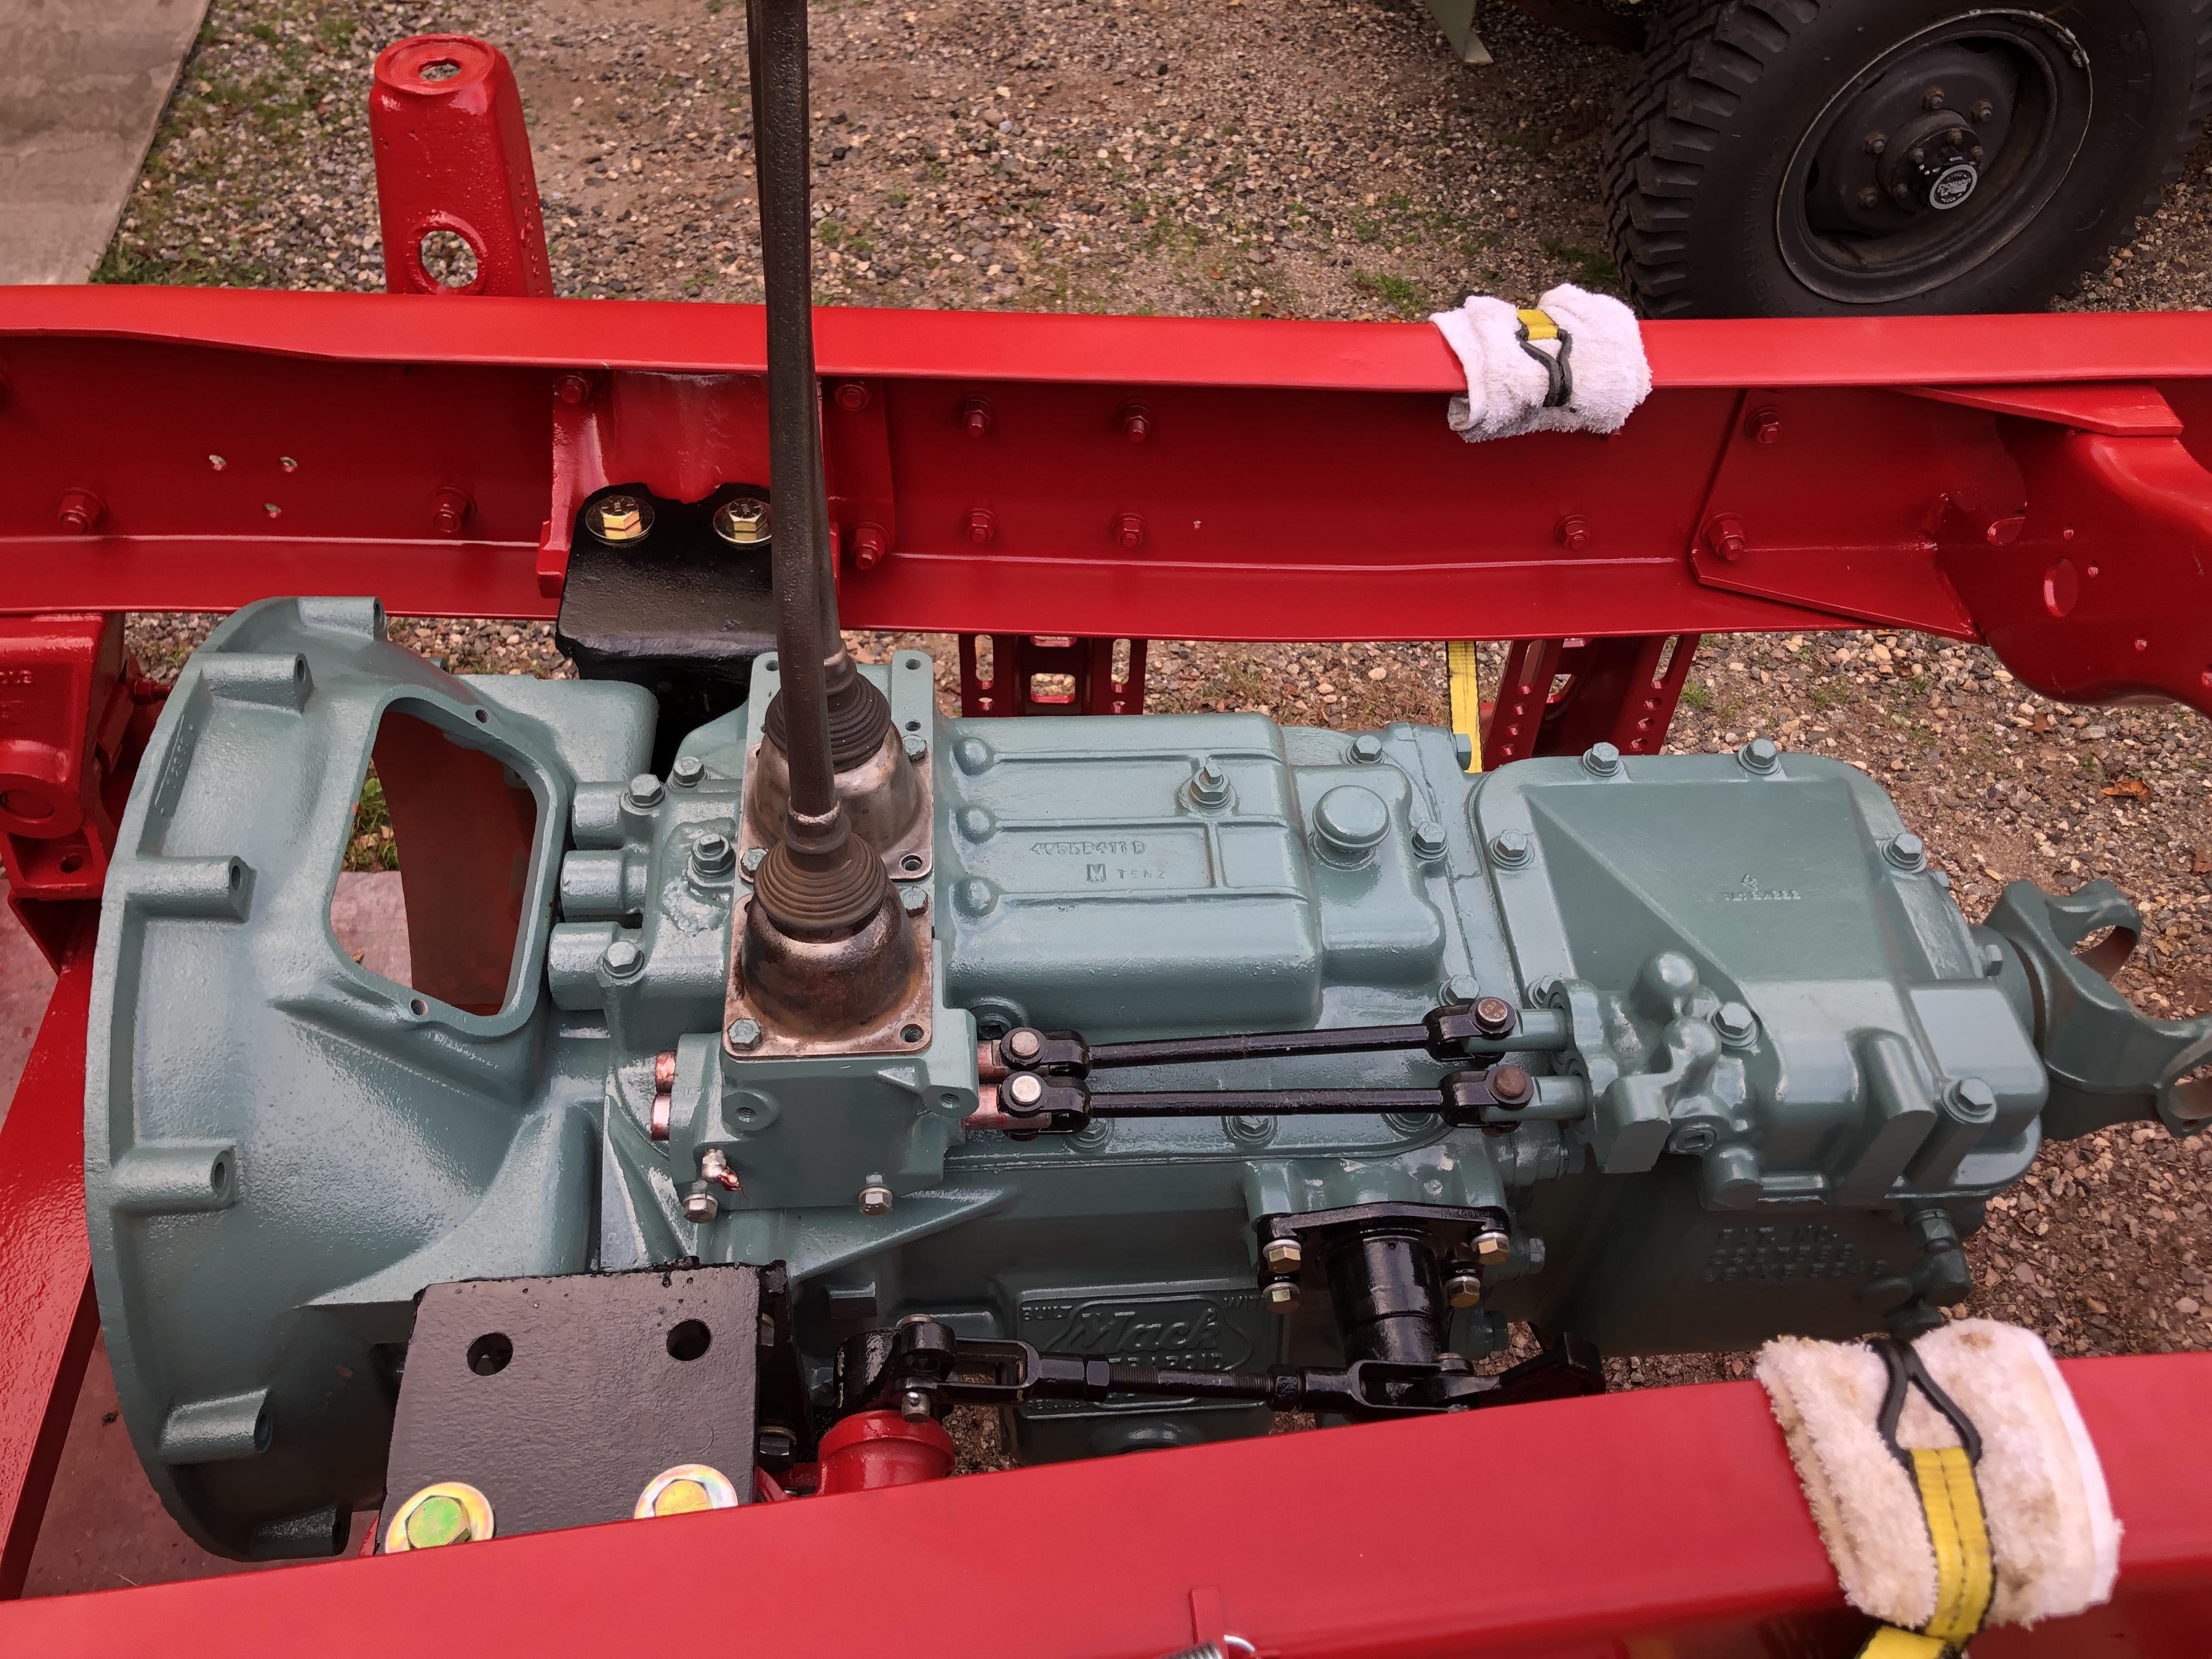
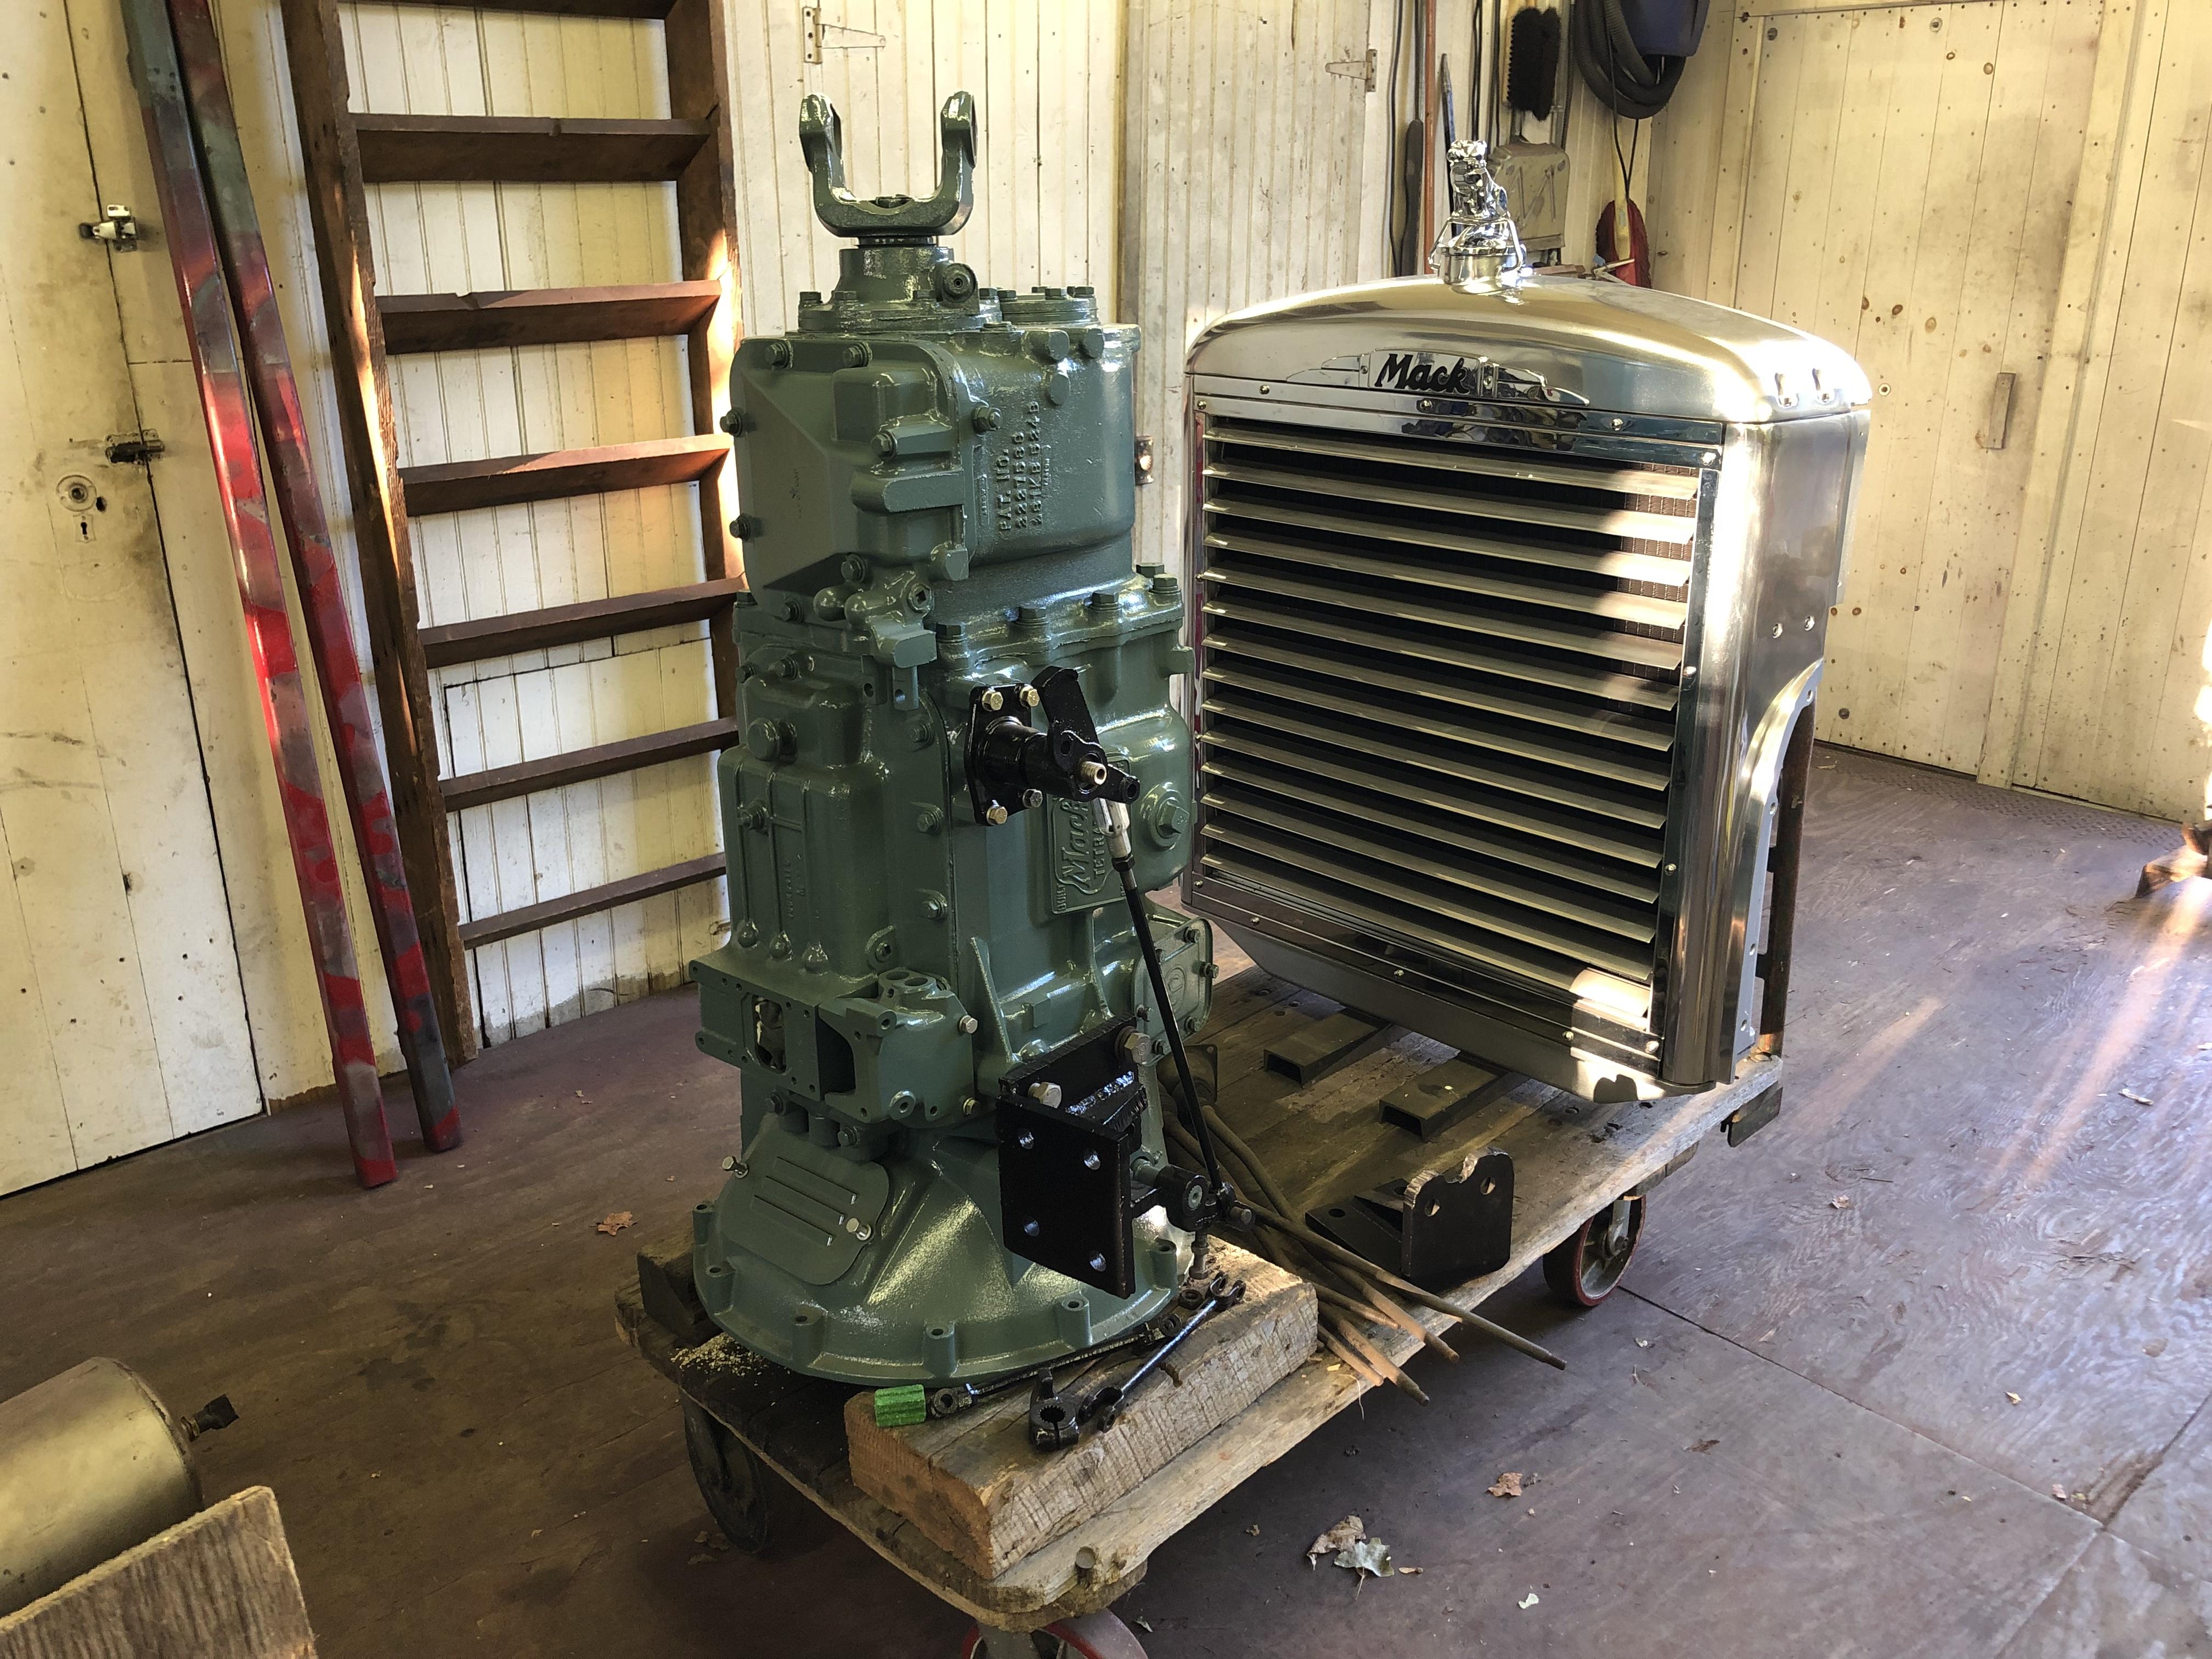
mattb73lt replied to mattb73lt's topic in Antique and Classic Mack Trucks General Discussion
No. It's a double over Triplex, double disc clutch and clutch brake. It was in it when I bought it. -
B-73 Restoration
mattb73lt replied to mattb73lt's topic in Antique and Classic Mack Trucks General Discussion
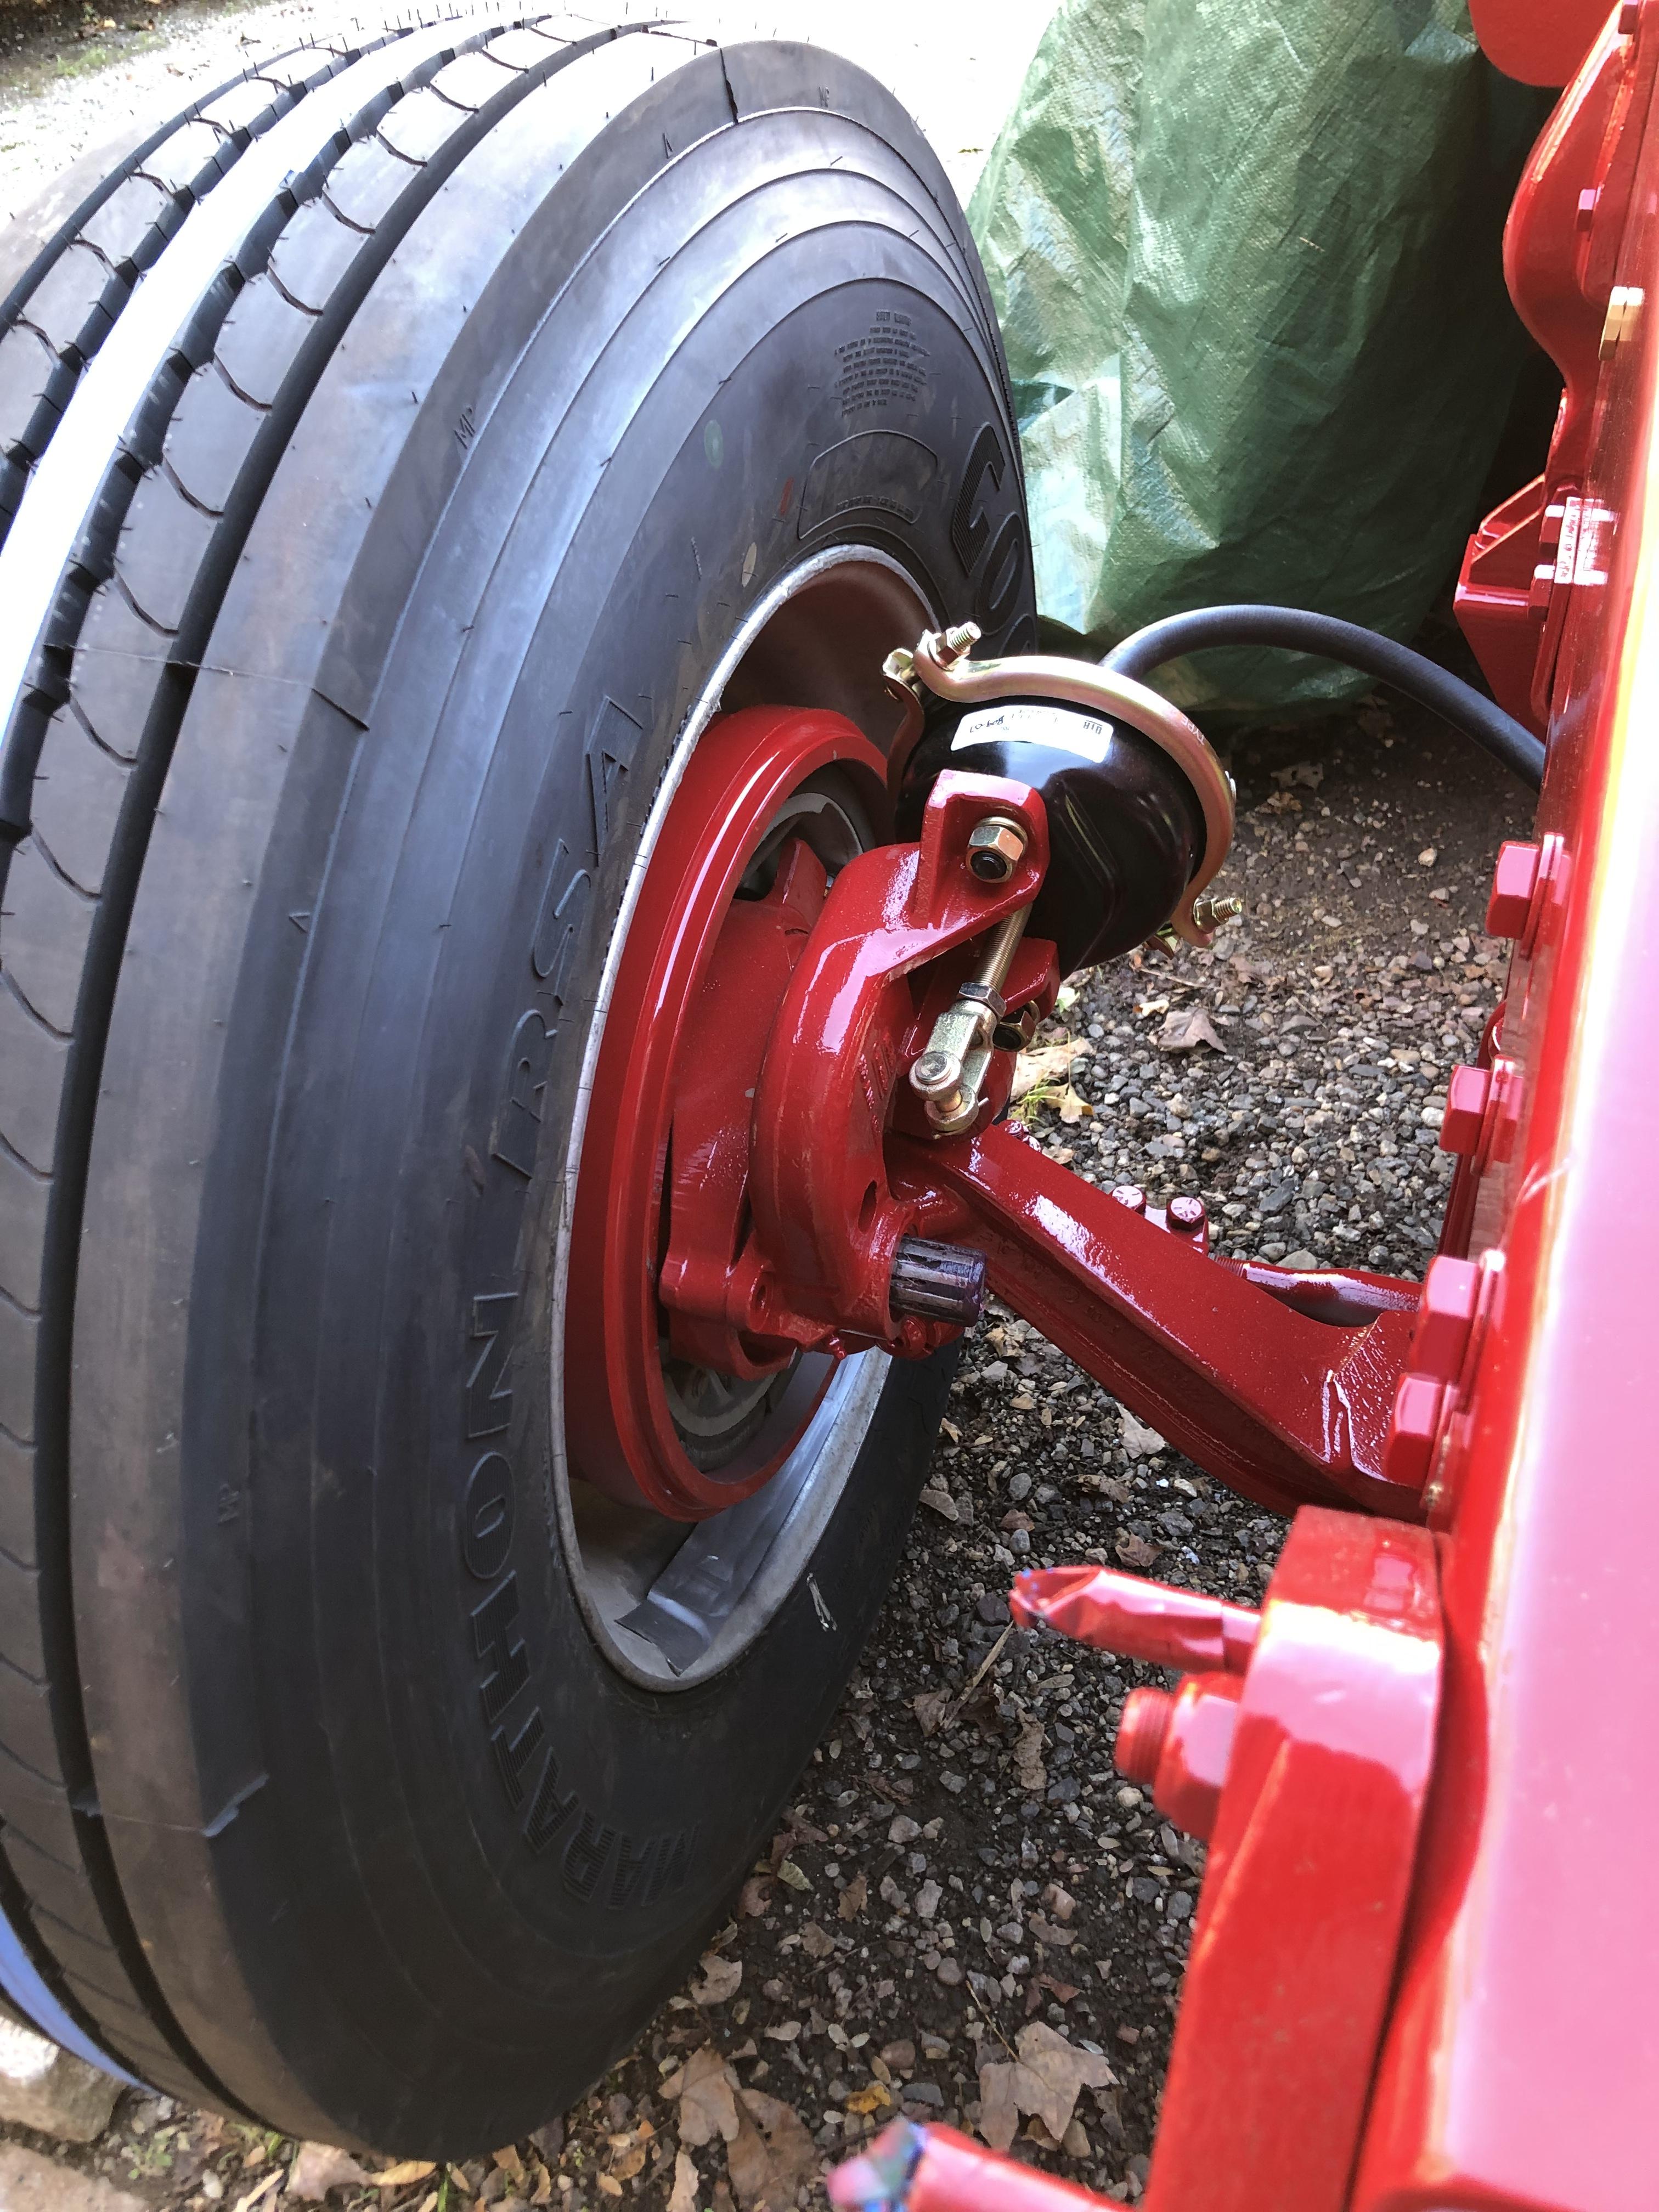
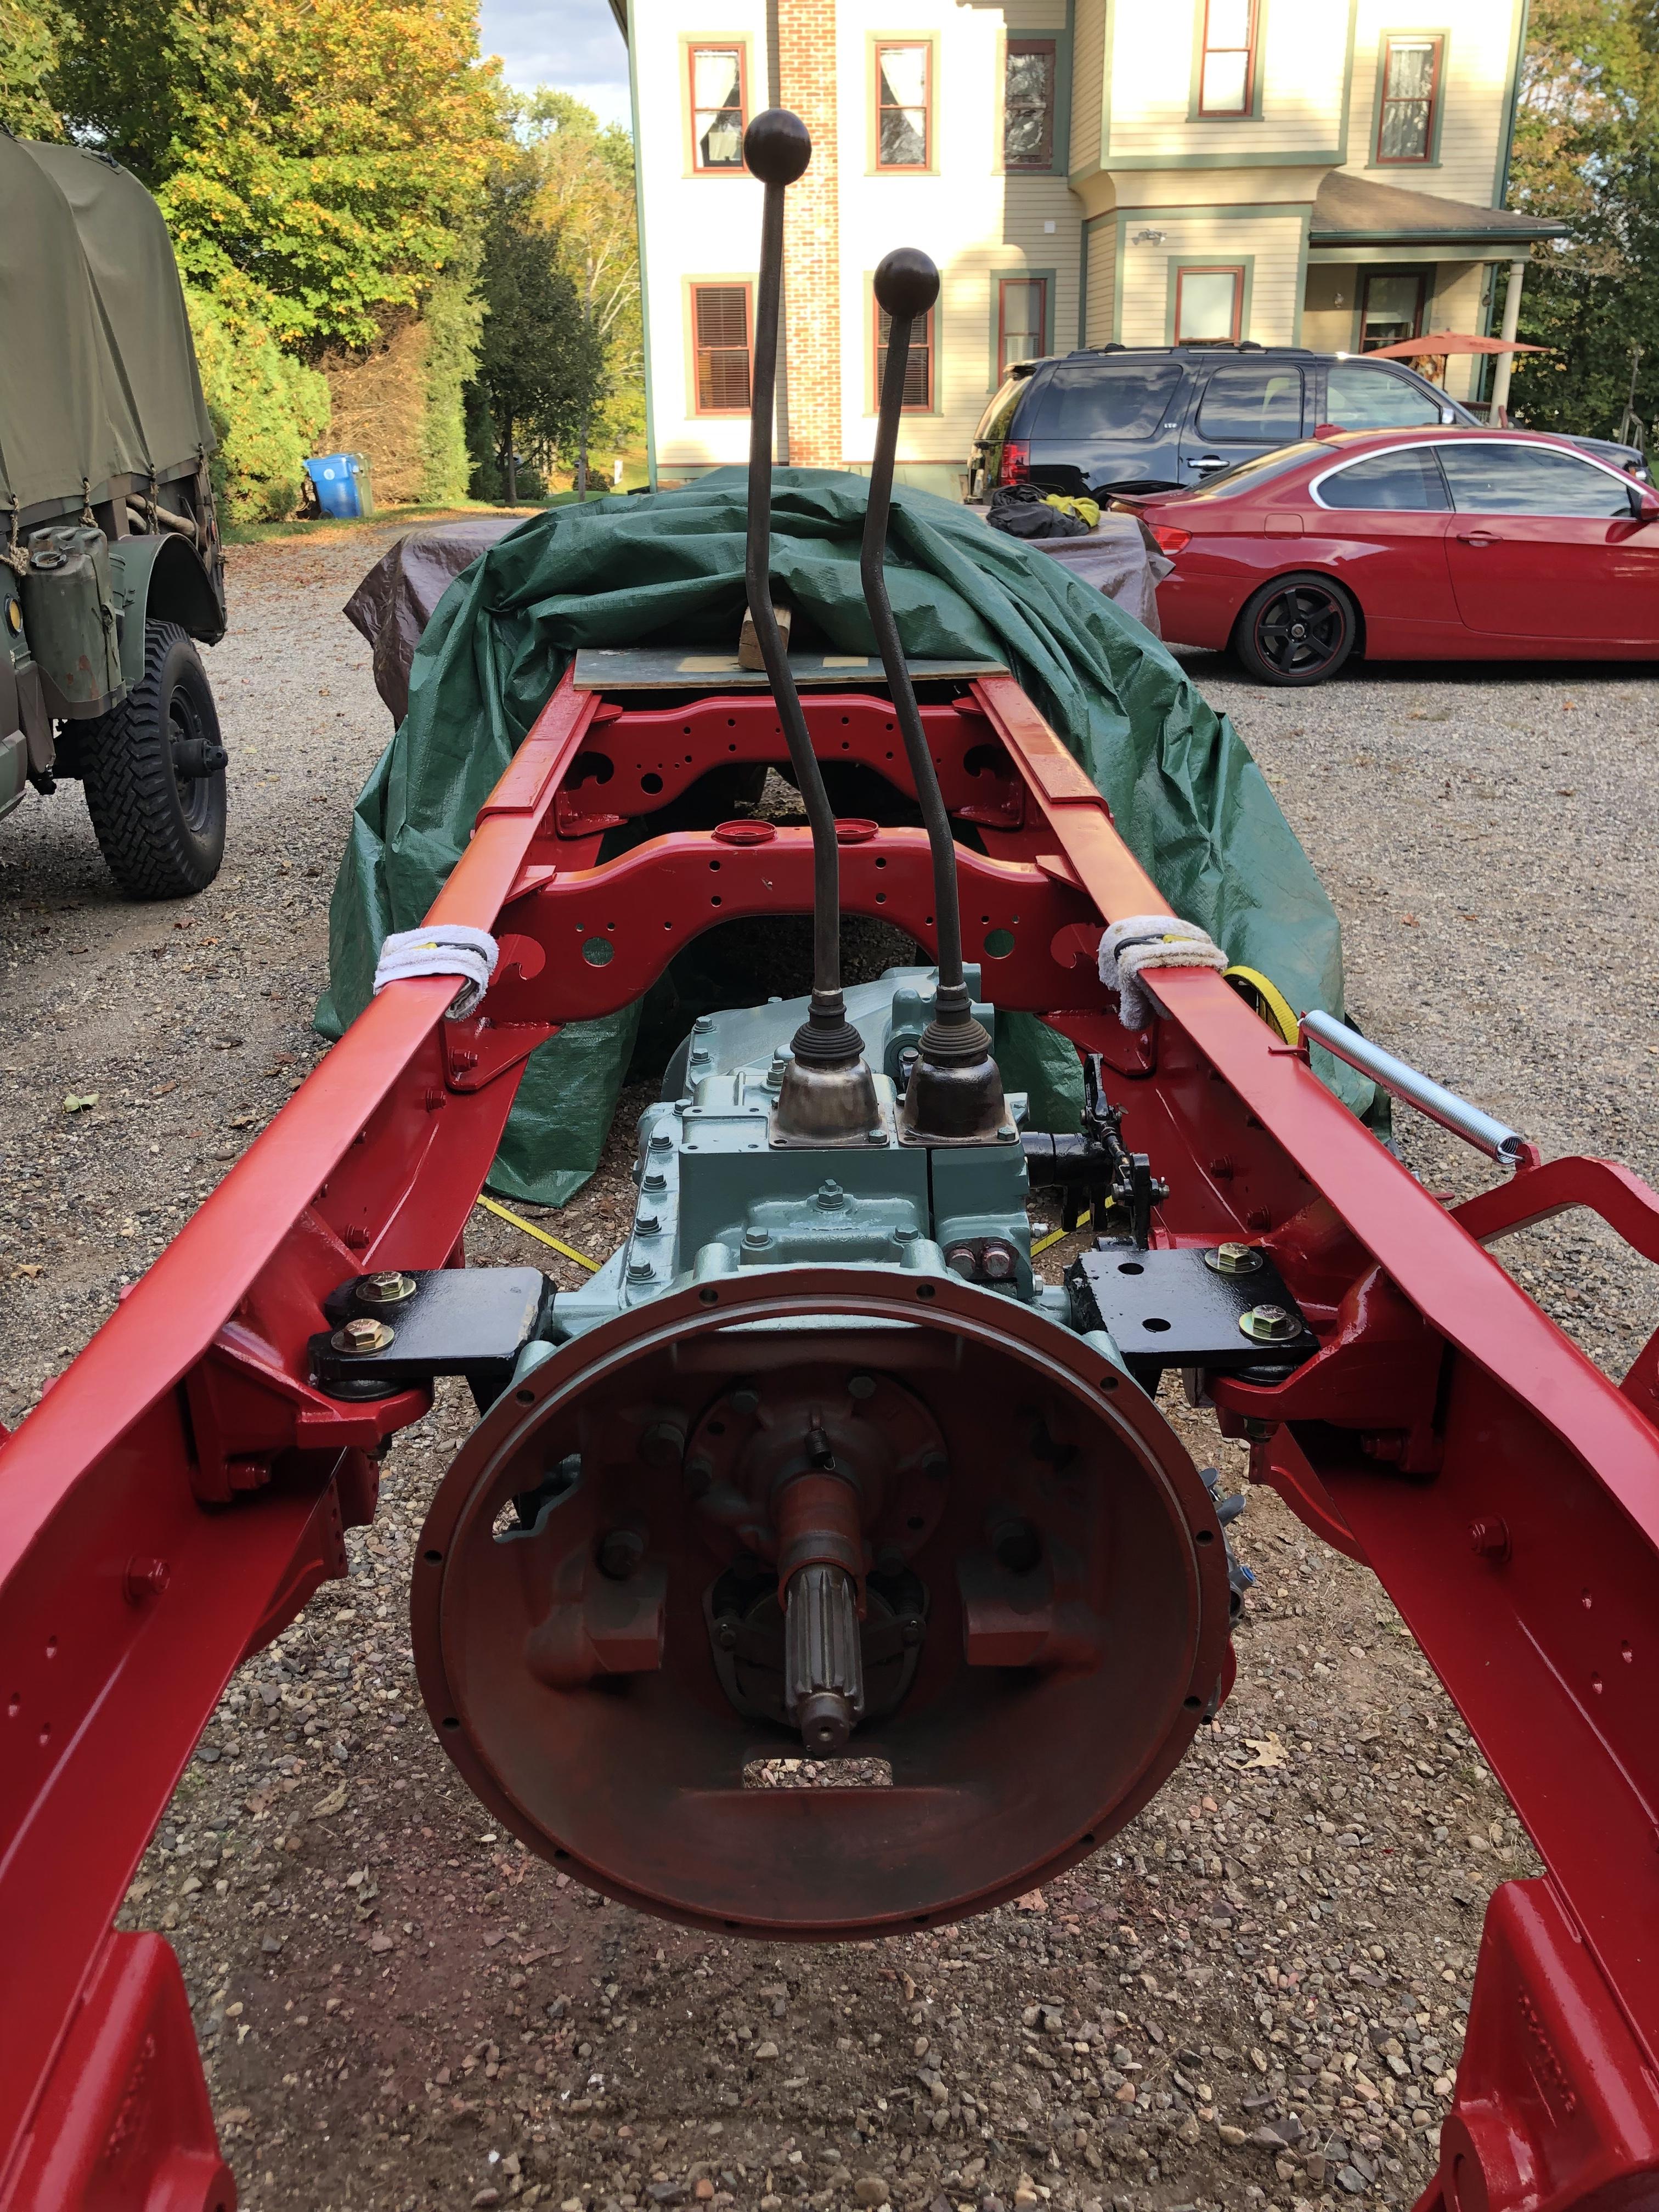
It’s good finally seeing the transmission sitting back where it belongs between the frame rails!! Removed it way back in 2004, then rebuilt it in 2005. It’s been stored since. Installed a brand new air shift PTO and hydraulic pump for the bed. Still waiting for my front brake parts, so no front wheels yet.
-
B-73 Restoration
mattb73lt replied to mattb73lt's topic in Antique and Classic Mack Trucks General Discussion
No, just a few pieces of heavy channel iron to keep it upright. -
B-73 Restoration
mattb73lt replied to mattb73lt's topic in Antique and Classic Mack Trucks General Discussion
…and just unearthed these two pieces from their hiding places. Just a few things to do to them before they go back in. Very close to the big “stack” a truck together day!!!
-
B-73 Restoration
mattb73lt replied to mattb73lt's topic in Antique and Classic Mack Trucks General Discussion
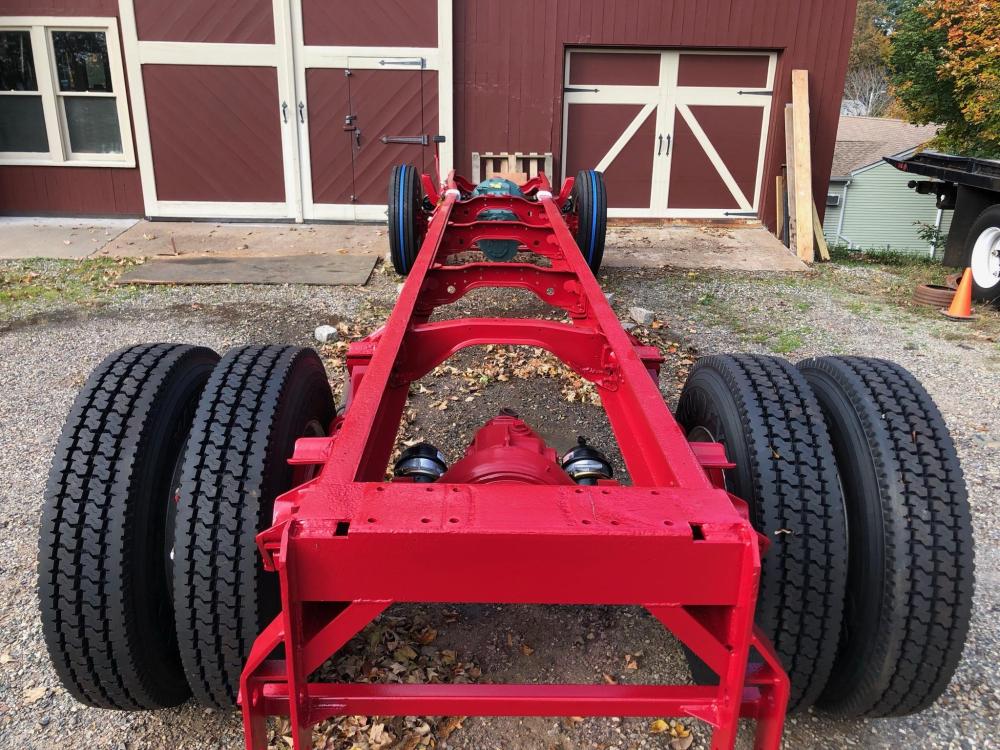
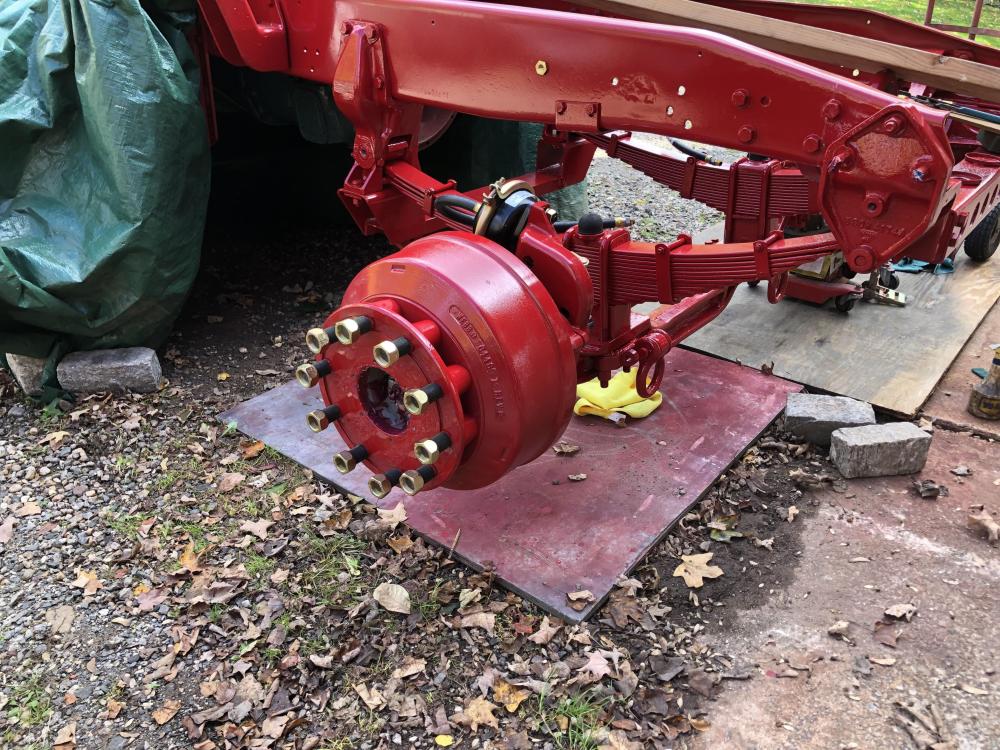
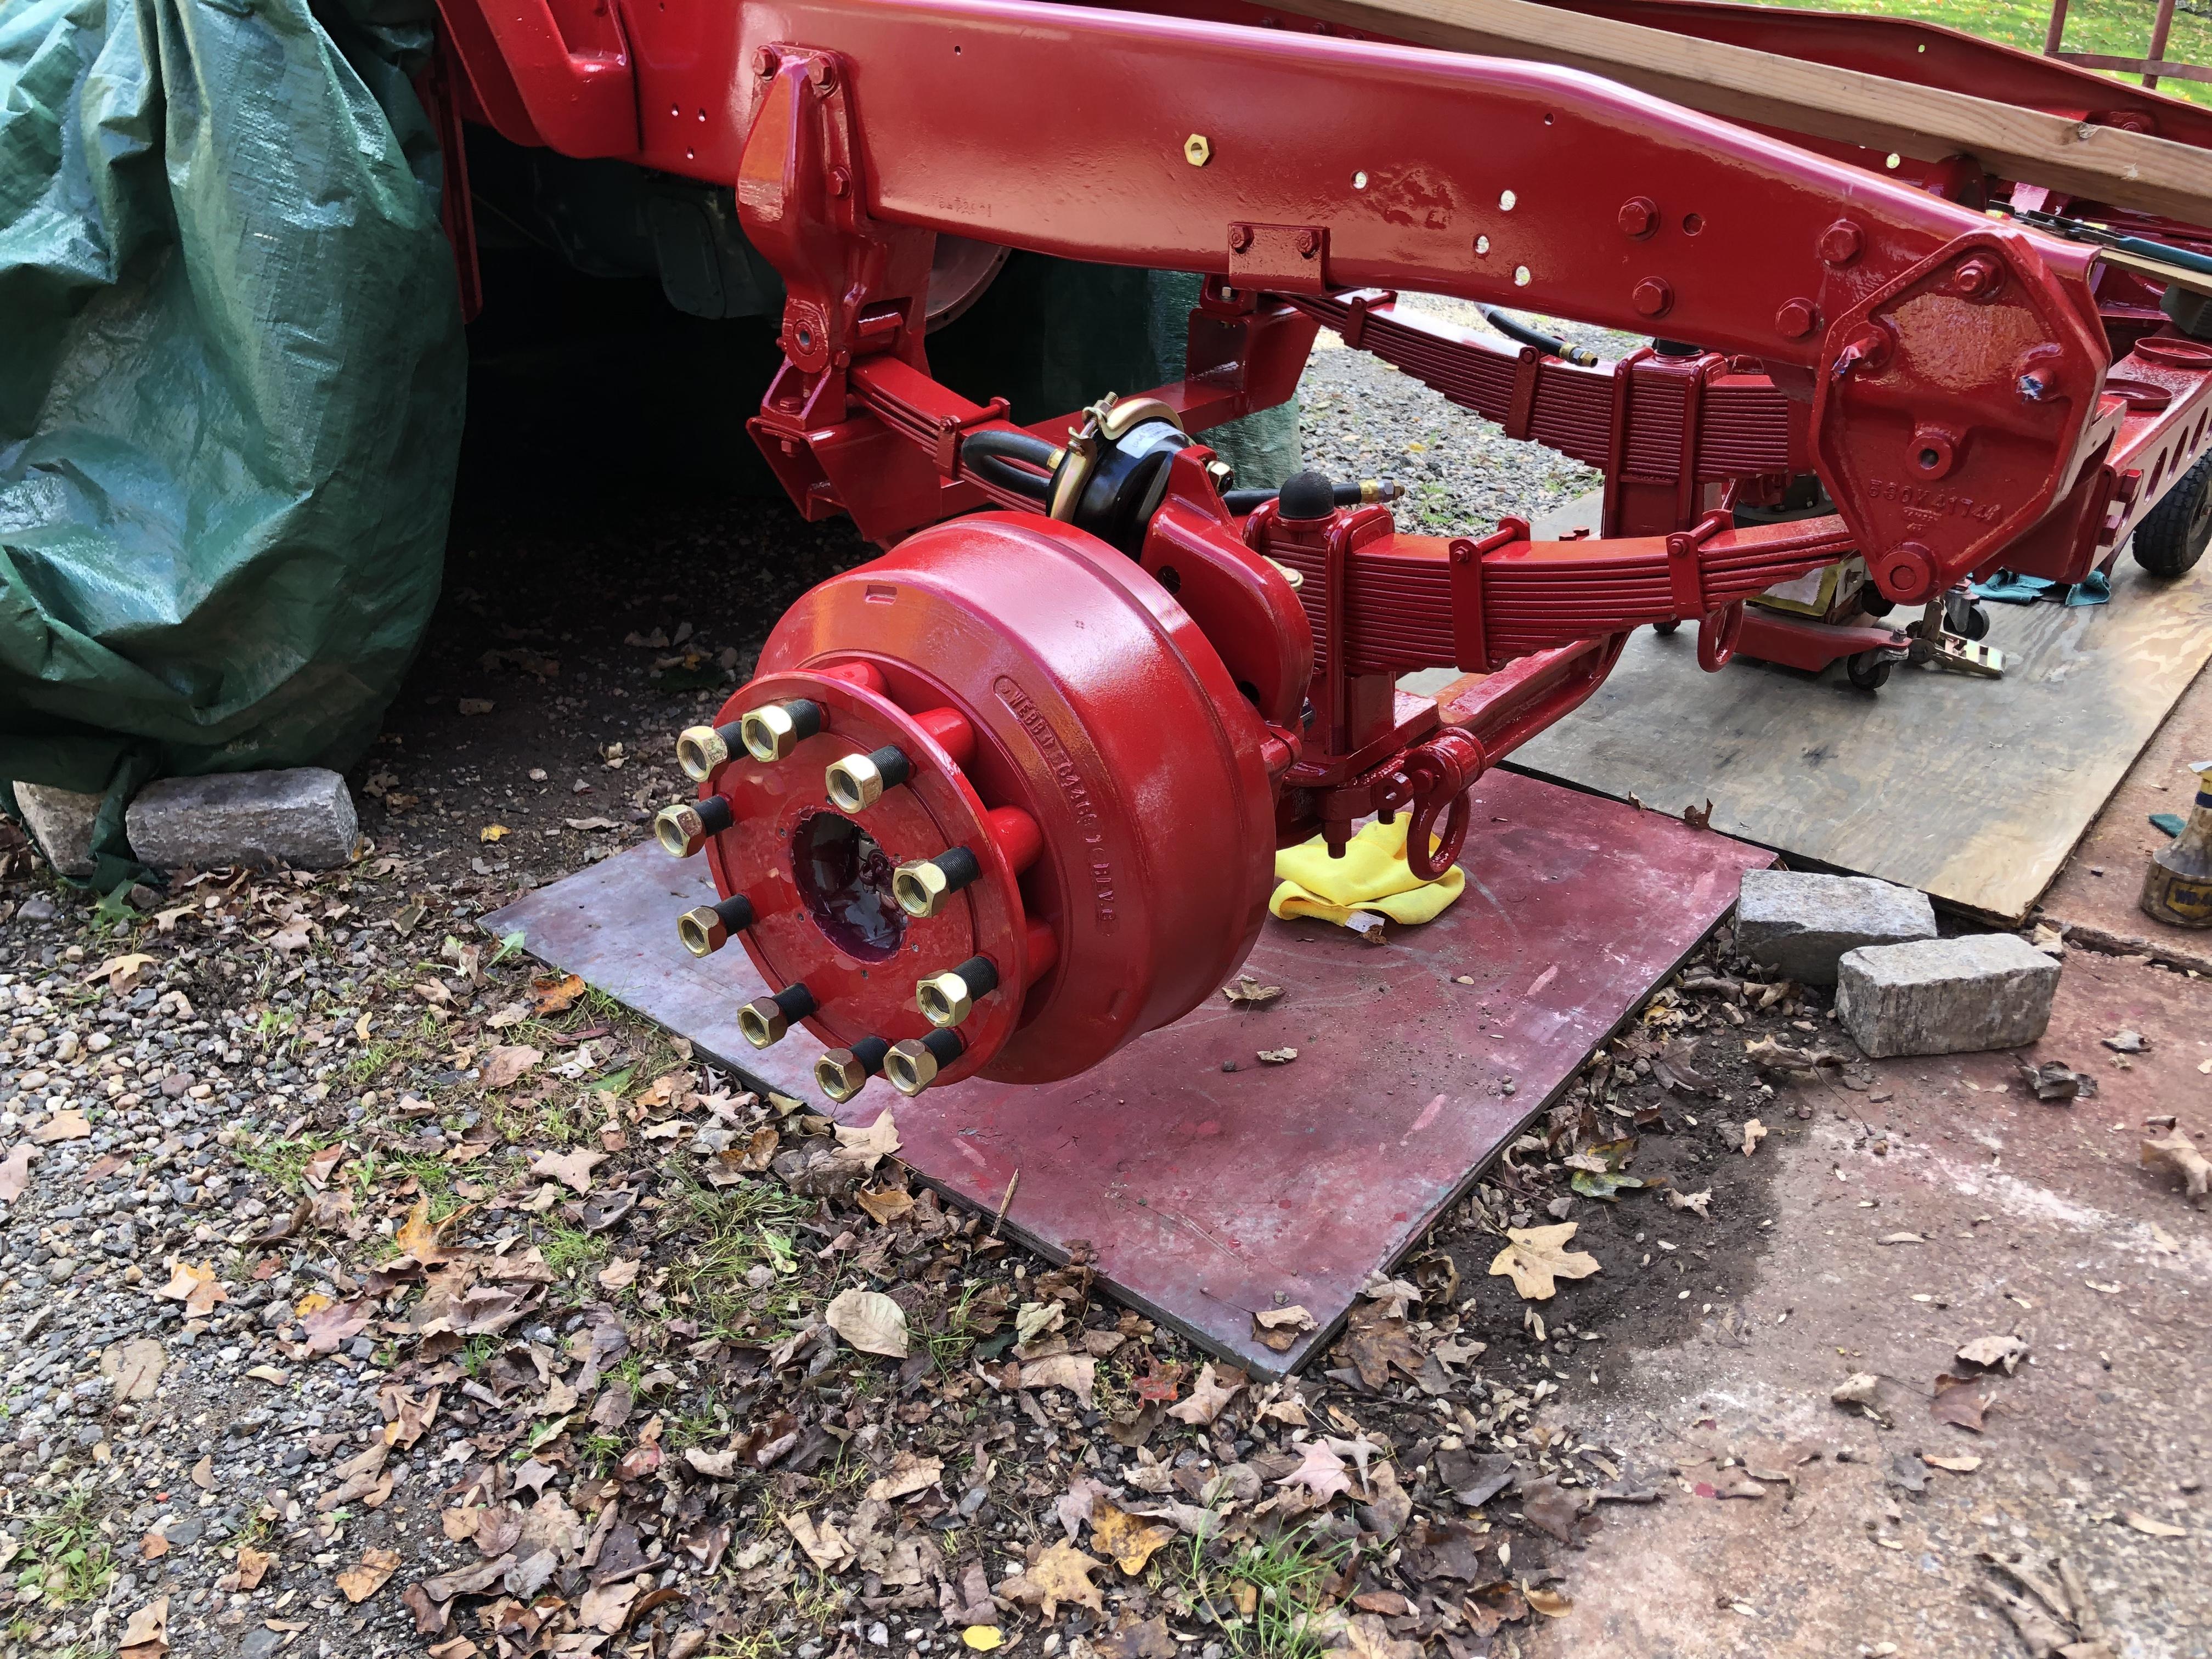
The rear axle now rests on the ground for the first time, EVER!. Just waiting on a few parts for the front brakes to put those hubs together. Progress!!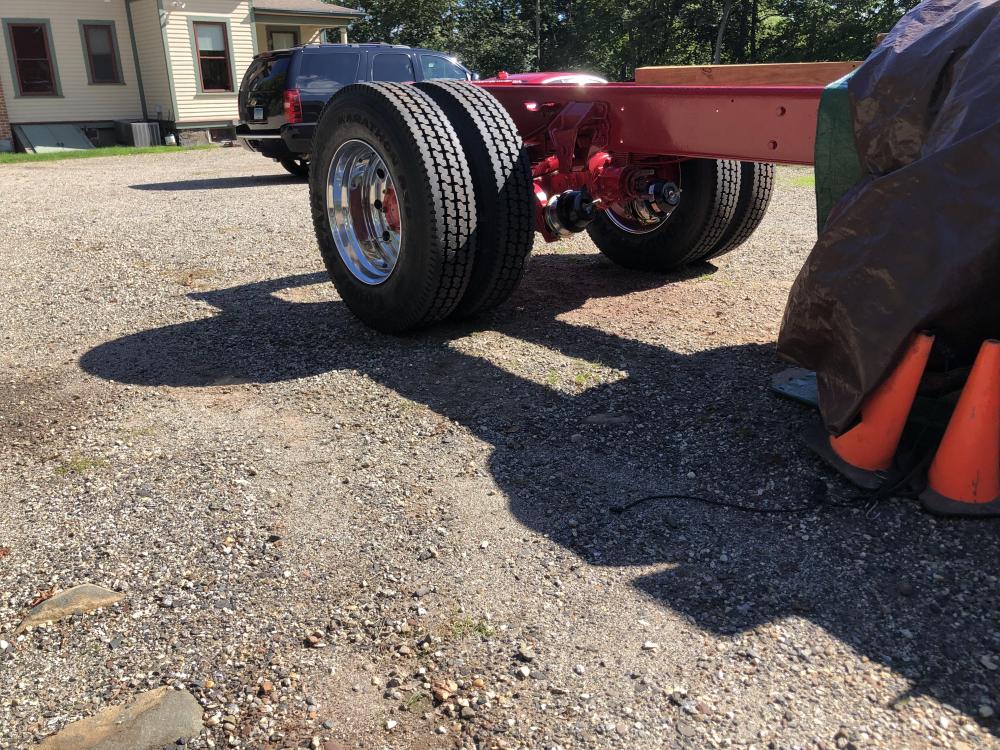

-
B-73 Restoration
mattb73lt replied to mattb73lt's topic in Antique and Classic Mack Trucks General Discussion
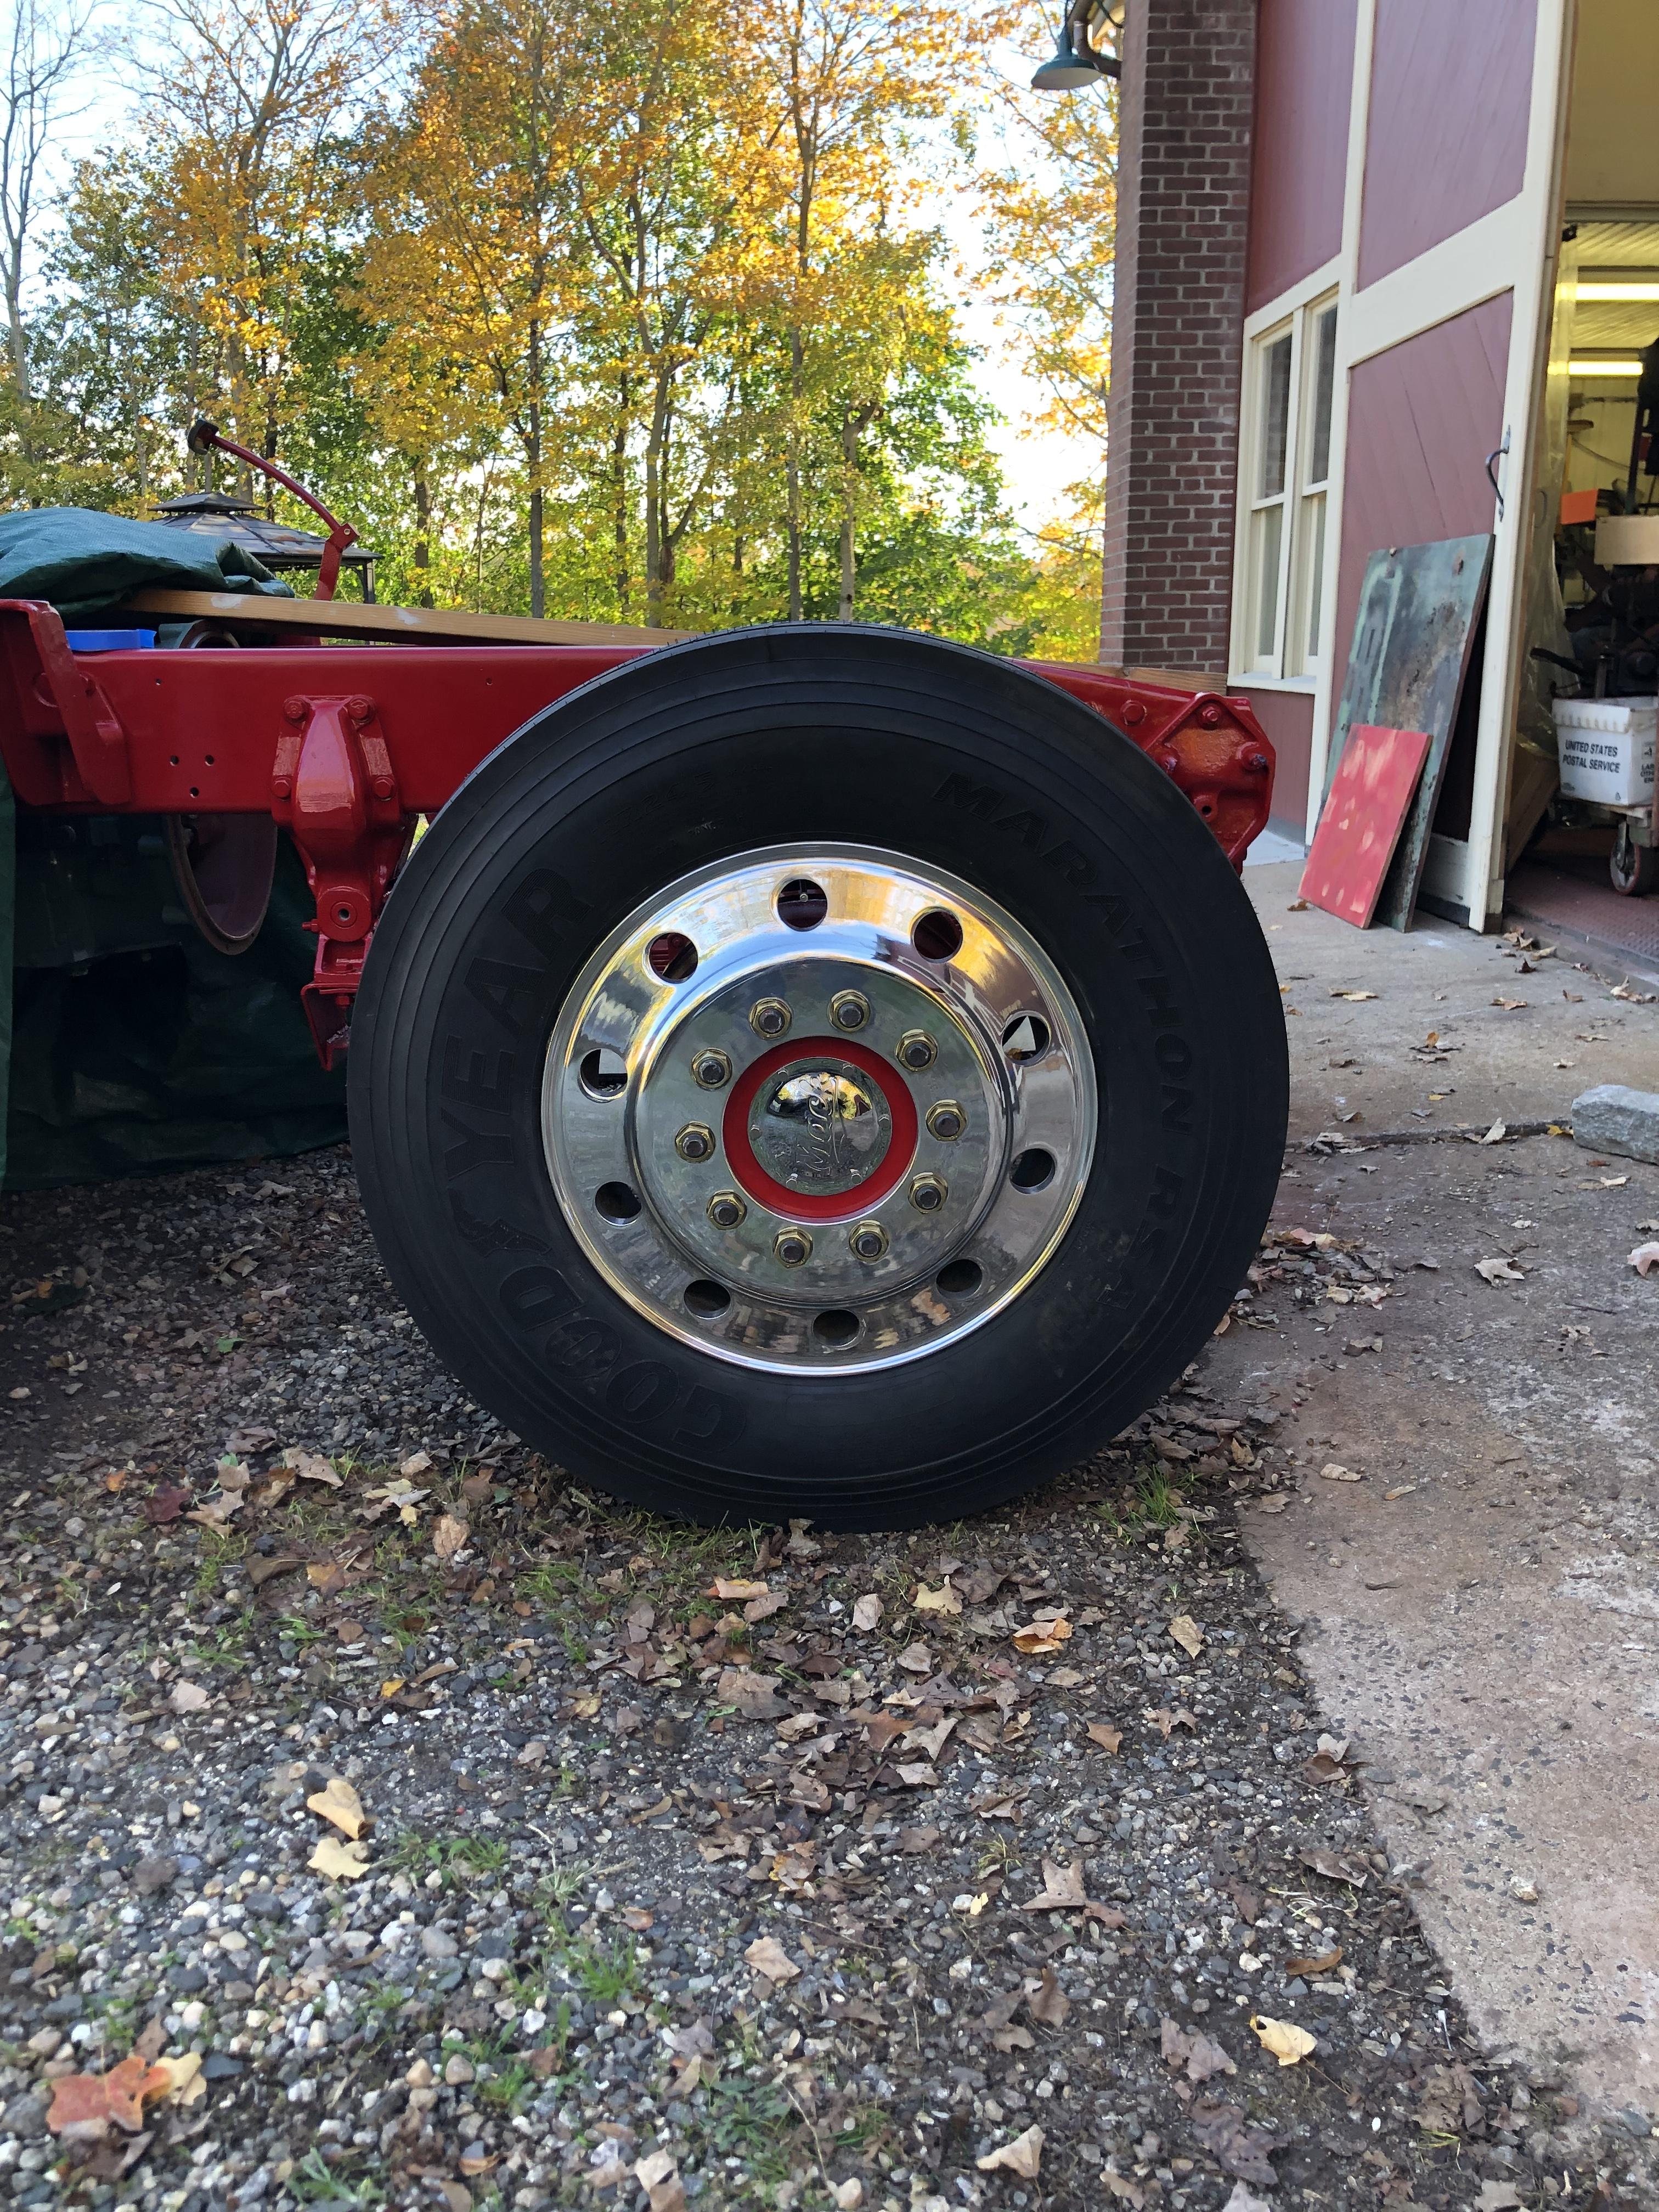
First hub complete, almost got both rears done today. A few hours tomorrow should have the right side done. I like the original spoke wheels for their classic look, but I’m very happy with the look of the Budds and polished rims. With all the polished aluminum and stainless, they really tie everything together.

-
L-cab B-Model
mattb73lt replied to vision386's topic in Antique and Classic Mack Trucks General Discussion
I know this thread is ancient, but since it popped up again I went back through it. I've never seen the black B-75 in person, but I've saved some pics of it for my reference on my build. If it does sit on a Peterbilt frame, I think the way it was widened was to extend the headlight panels, cat walks and rear fender extensions. The reason I say this is there's a lot more space between the headlight and the fender joint than other B-73/75's. It would also be a lot easier to rework those panels than to stretch the compound curves of the fenders, as they appear to be stock. Whatever is the case, it sure is a beautiful truck and is still my favorite model(s), too. -
B-73 Restoration
mattb73lt replied to mattb73lt's topic in Antique and Classic Mack Trucks General Discussion
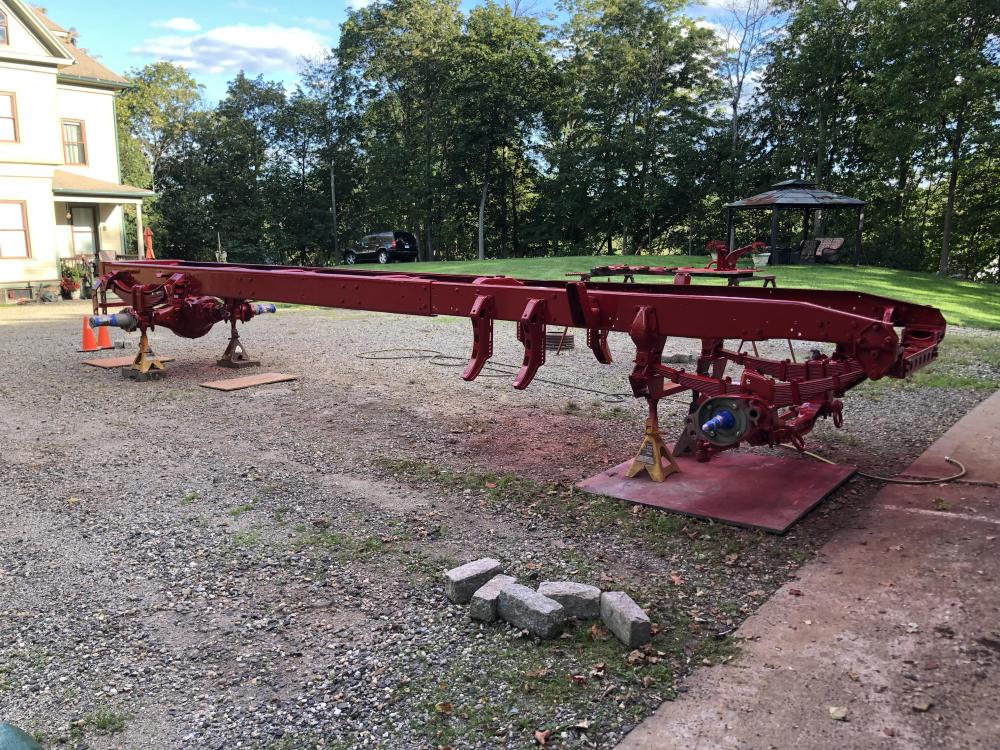
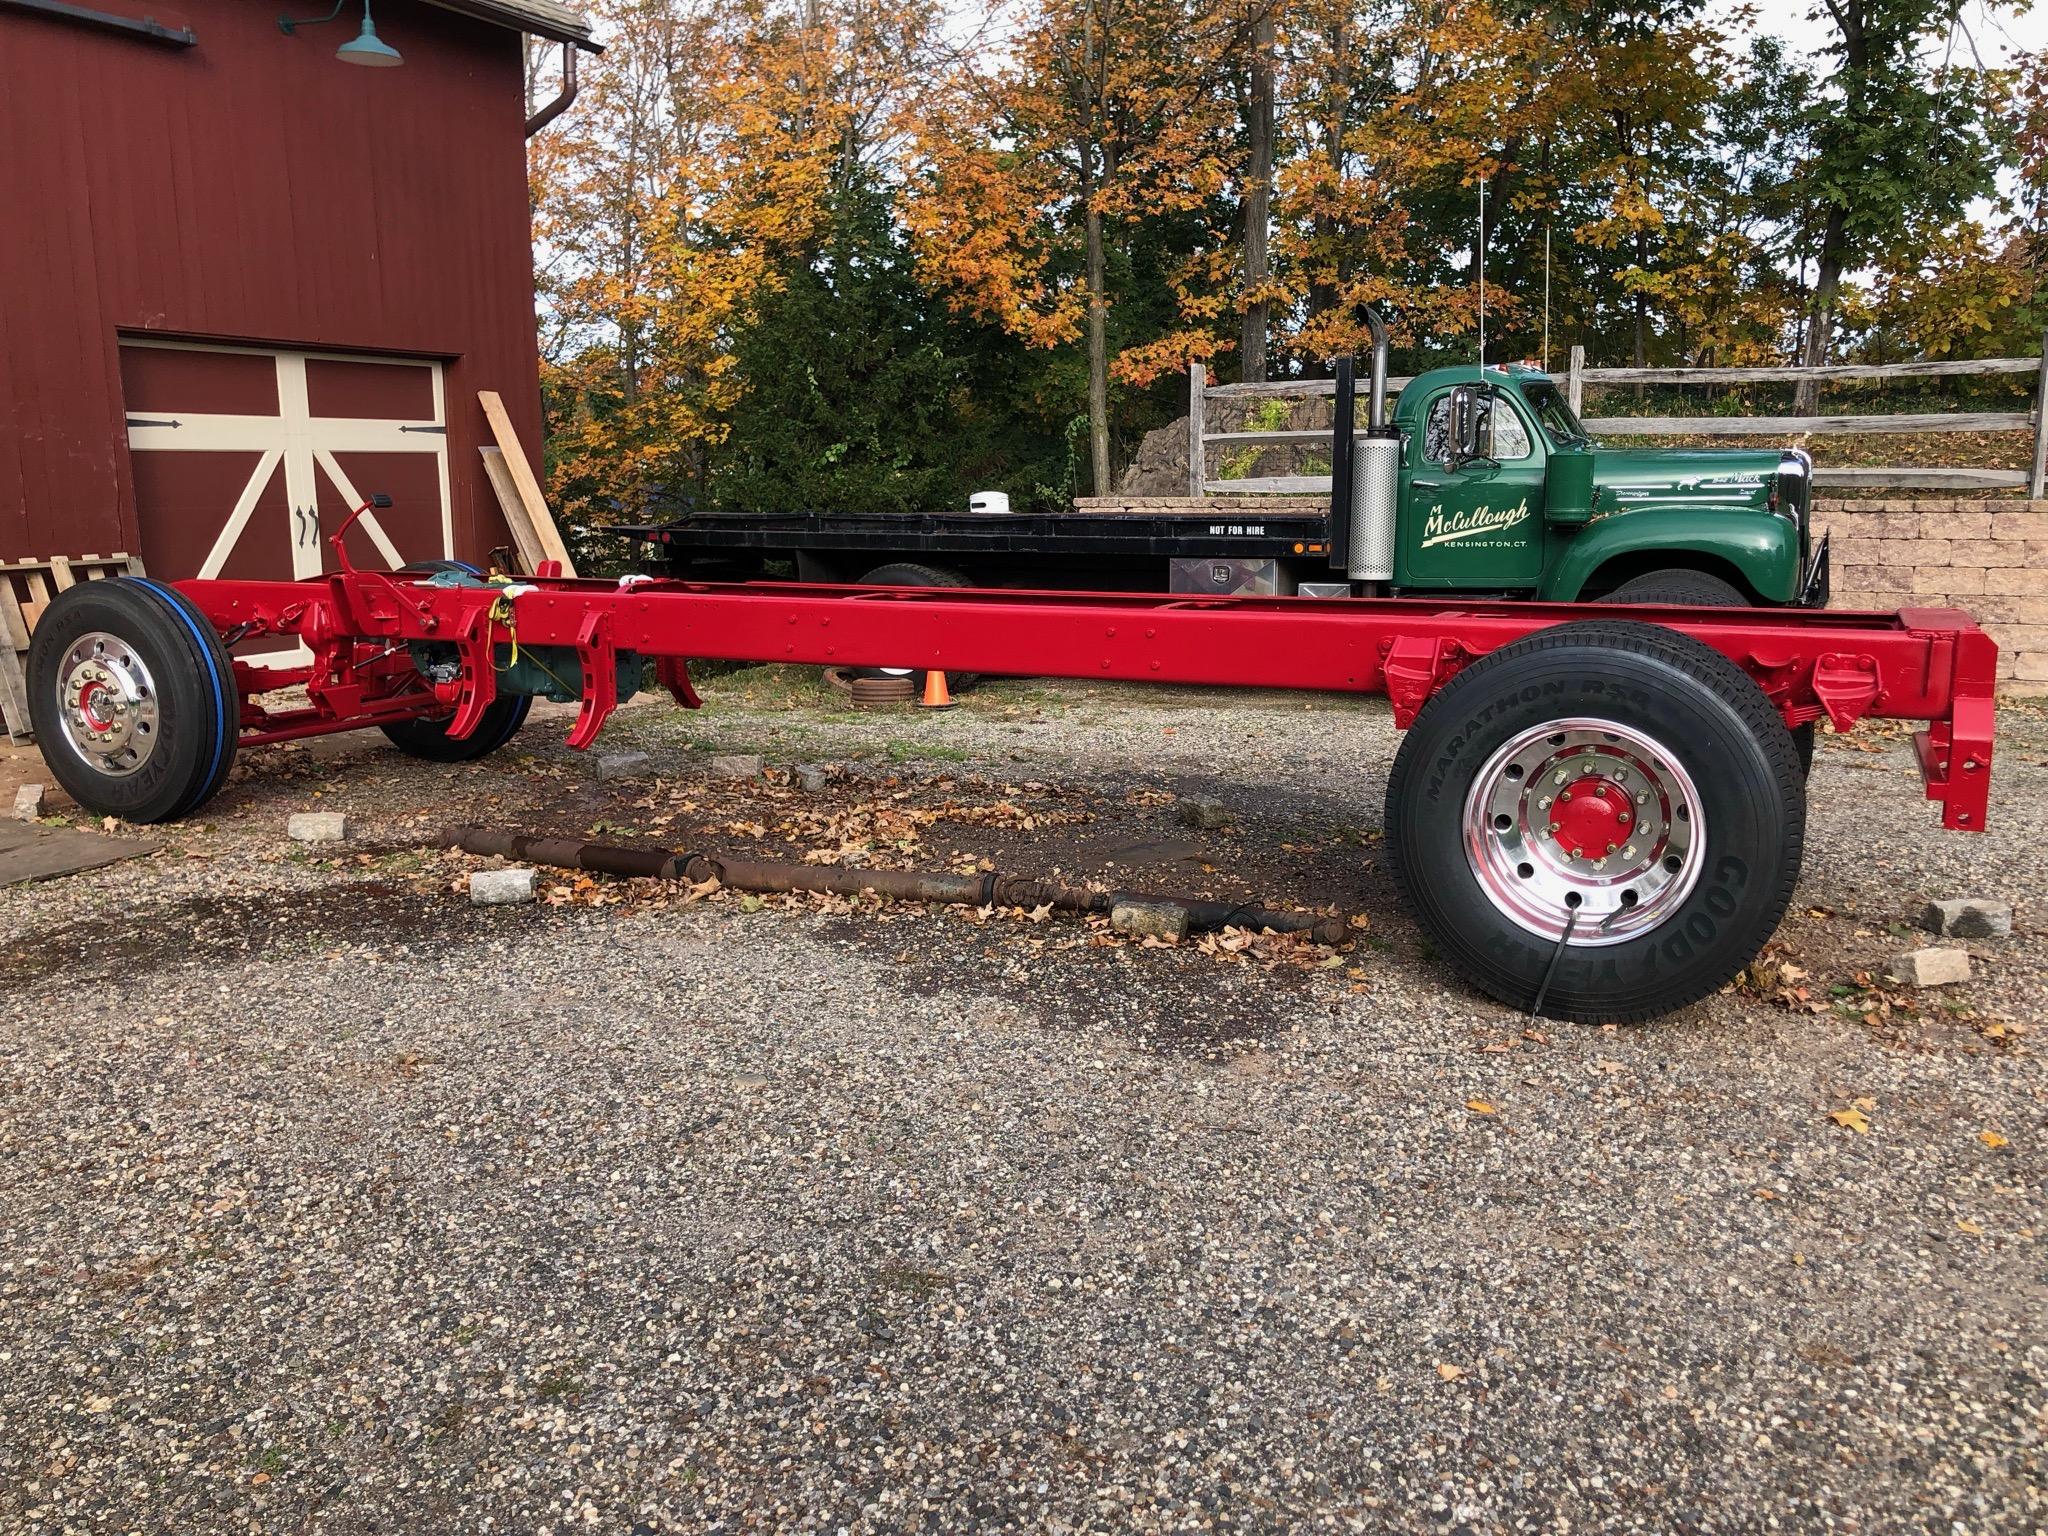
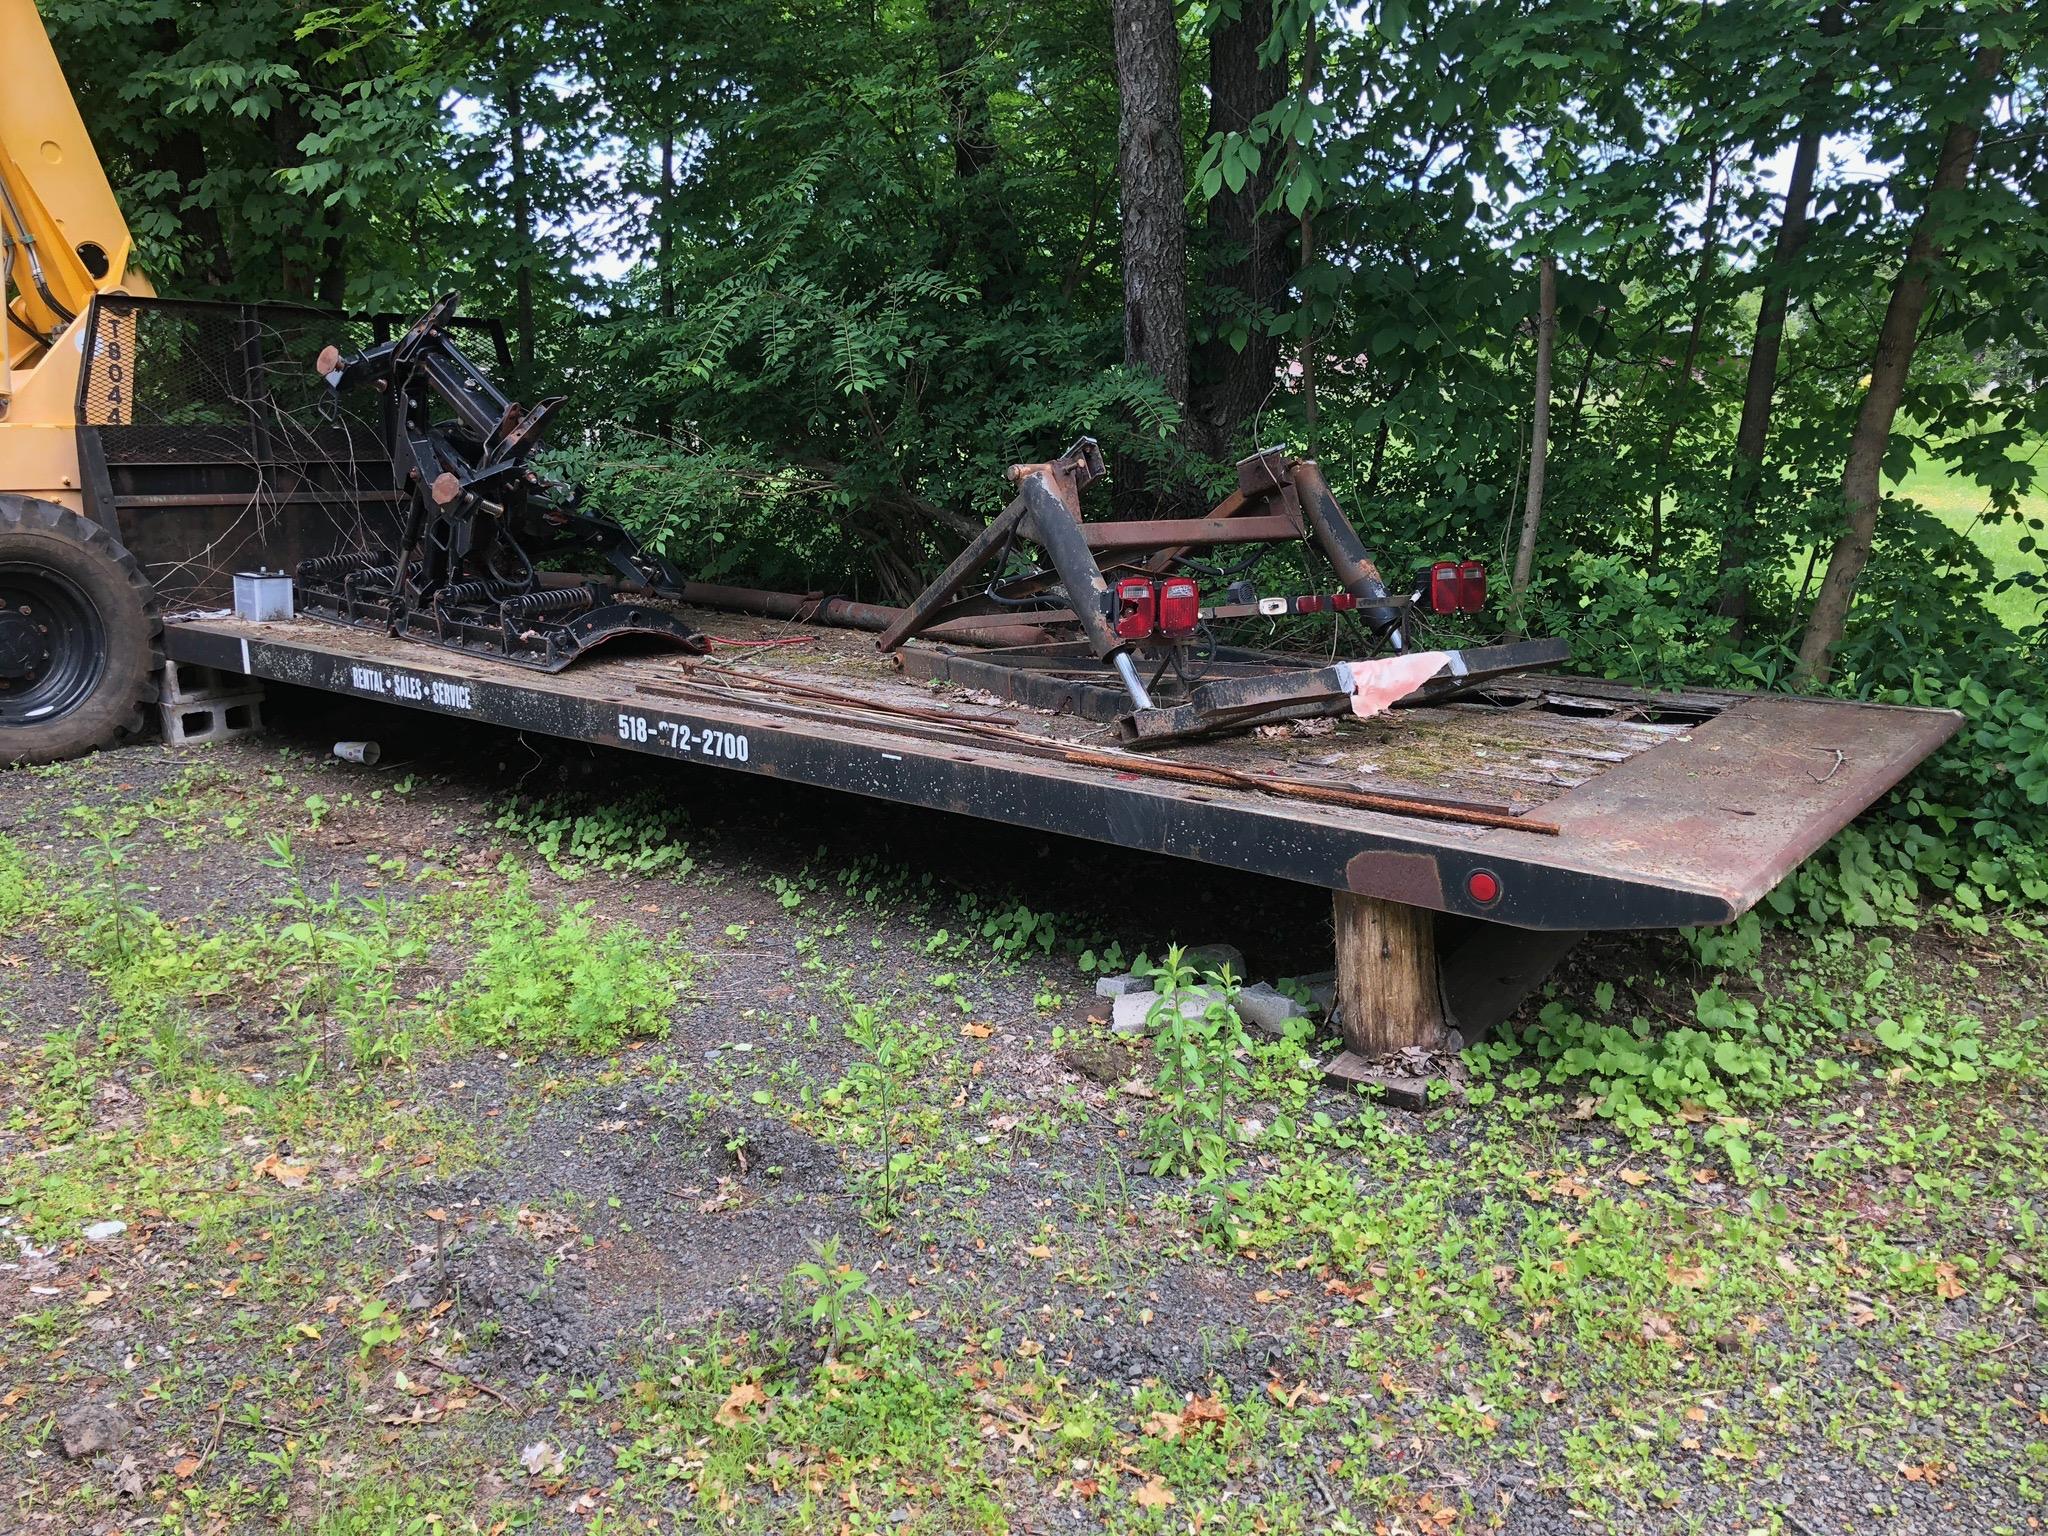
Overall, it has a 246" wheelbase. Leaving 160"s for the CA. I'm mounting a 24' Jerr Dan equipment bed to it. It's actually already mounted, just need to be reassembled.
-
B-73 Restoration
mattb73lt replied to mattb73lt's topic in Antique and Classic Mack Trucks General Discussion
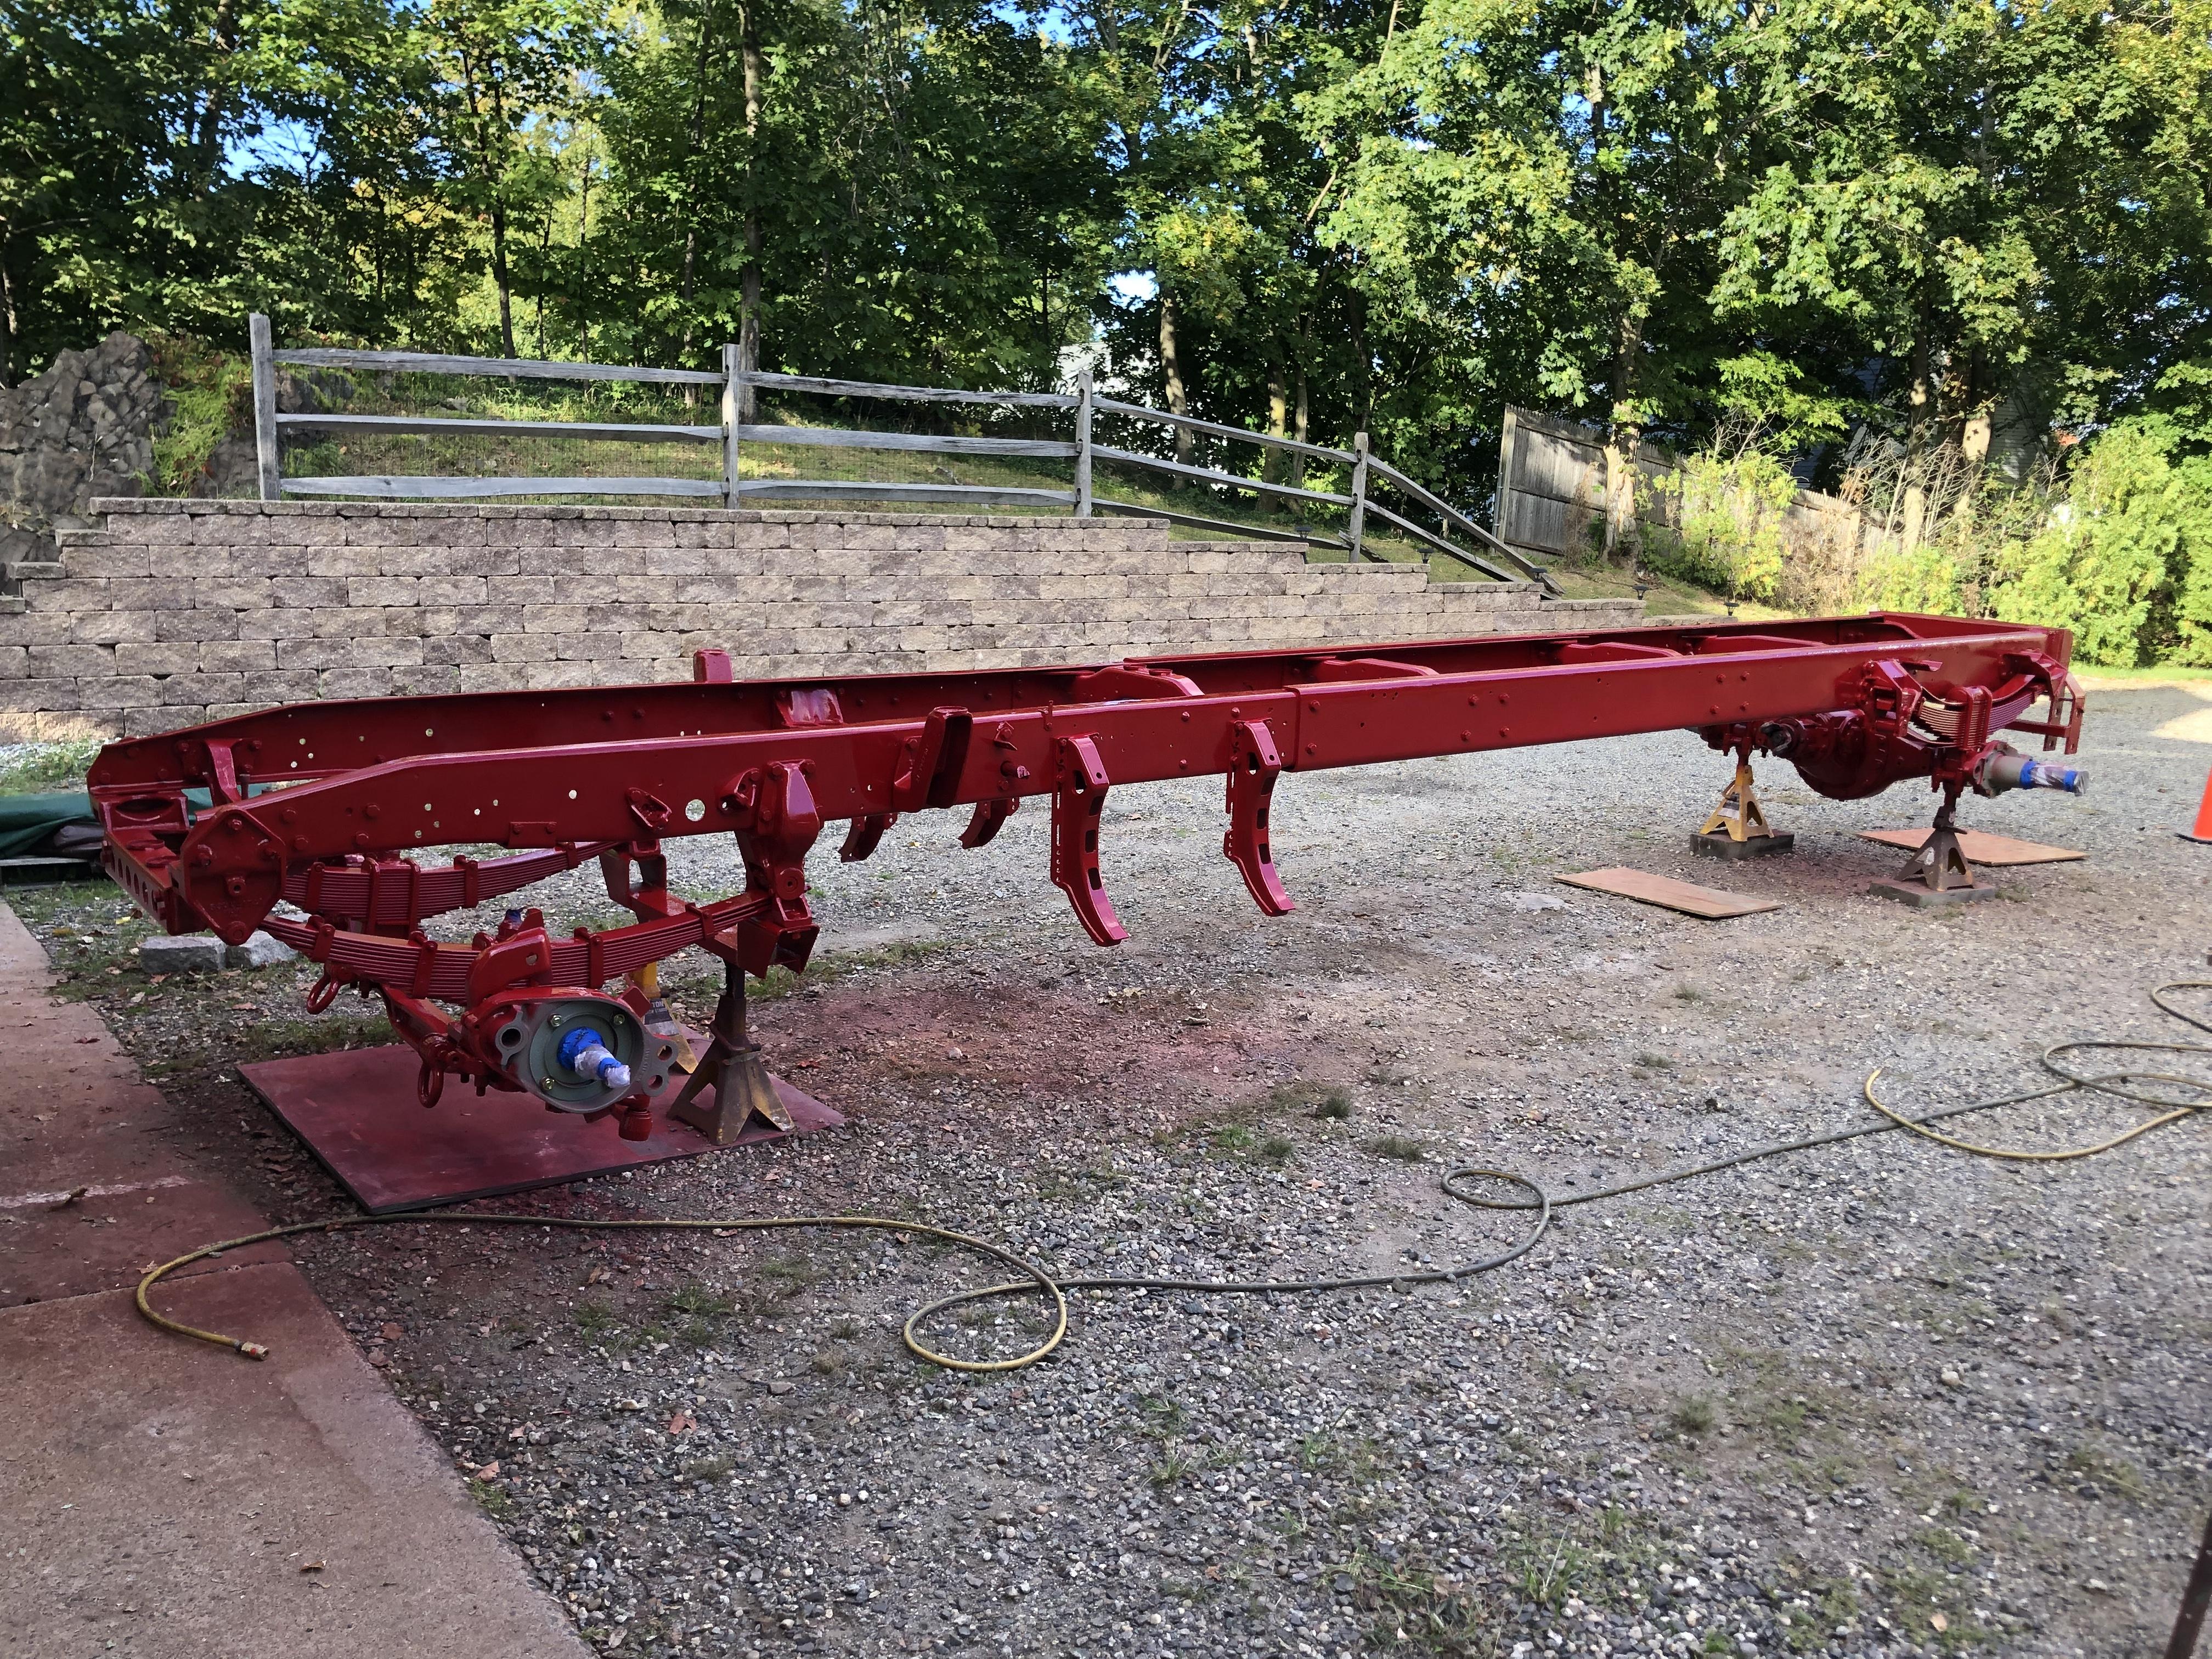
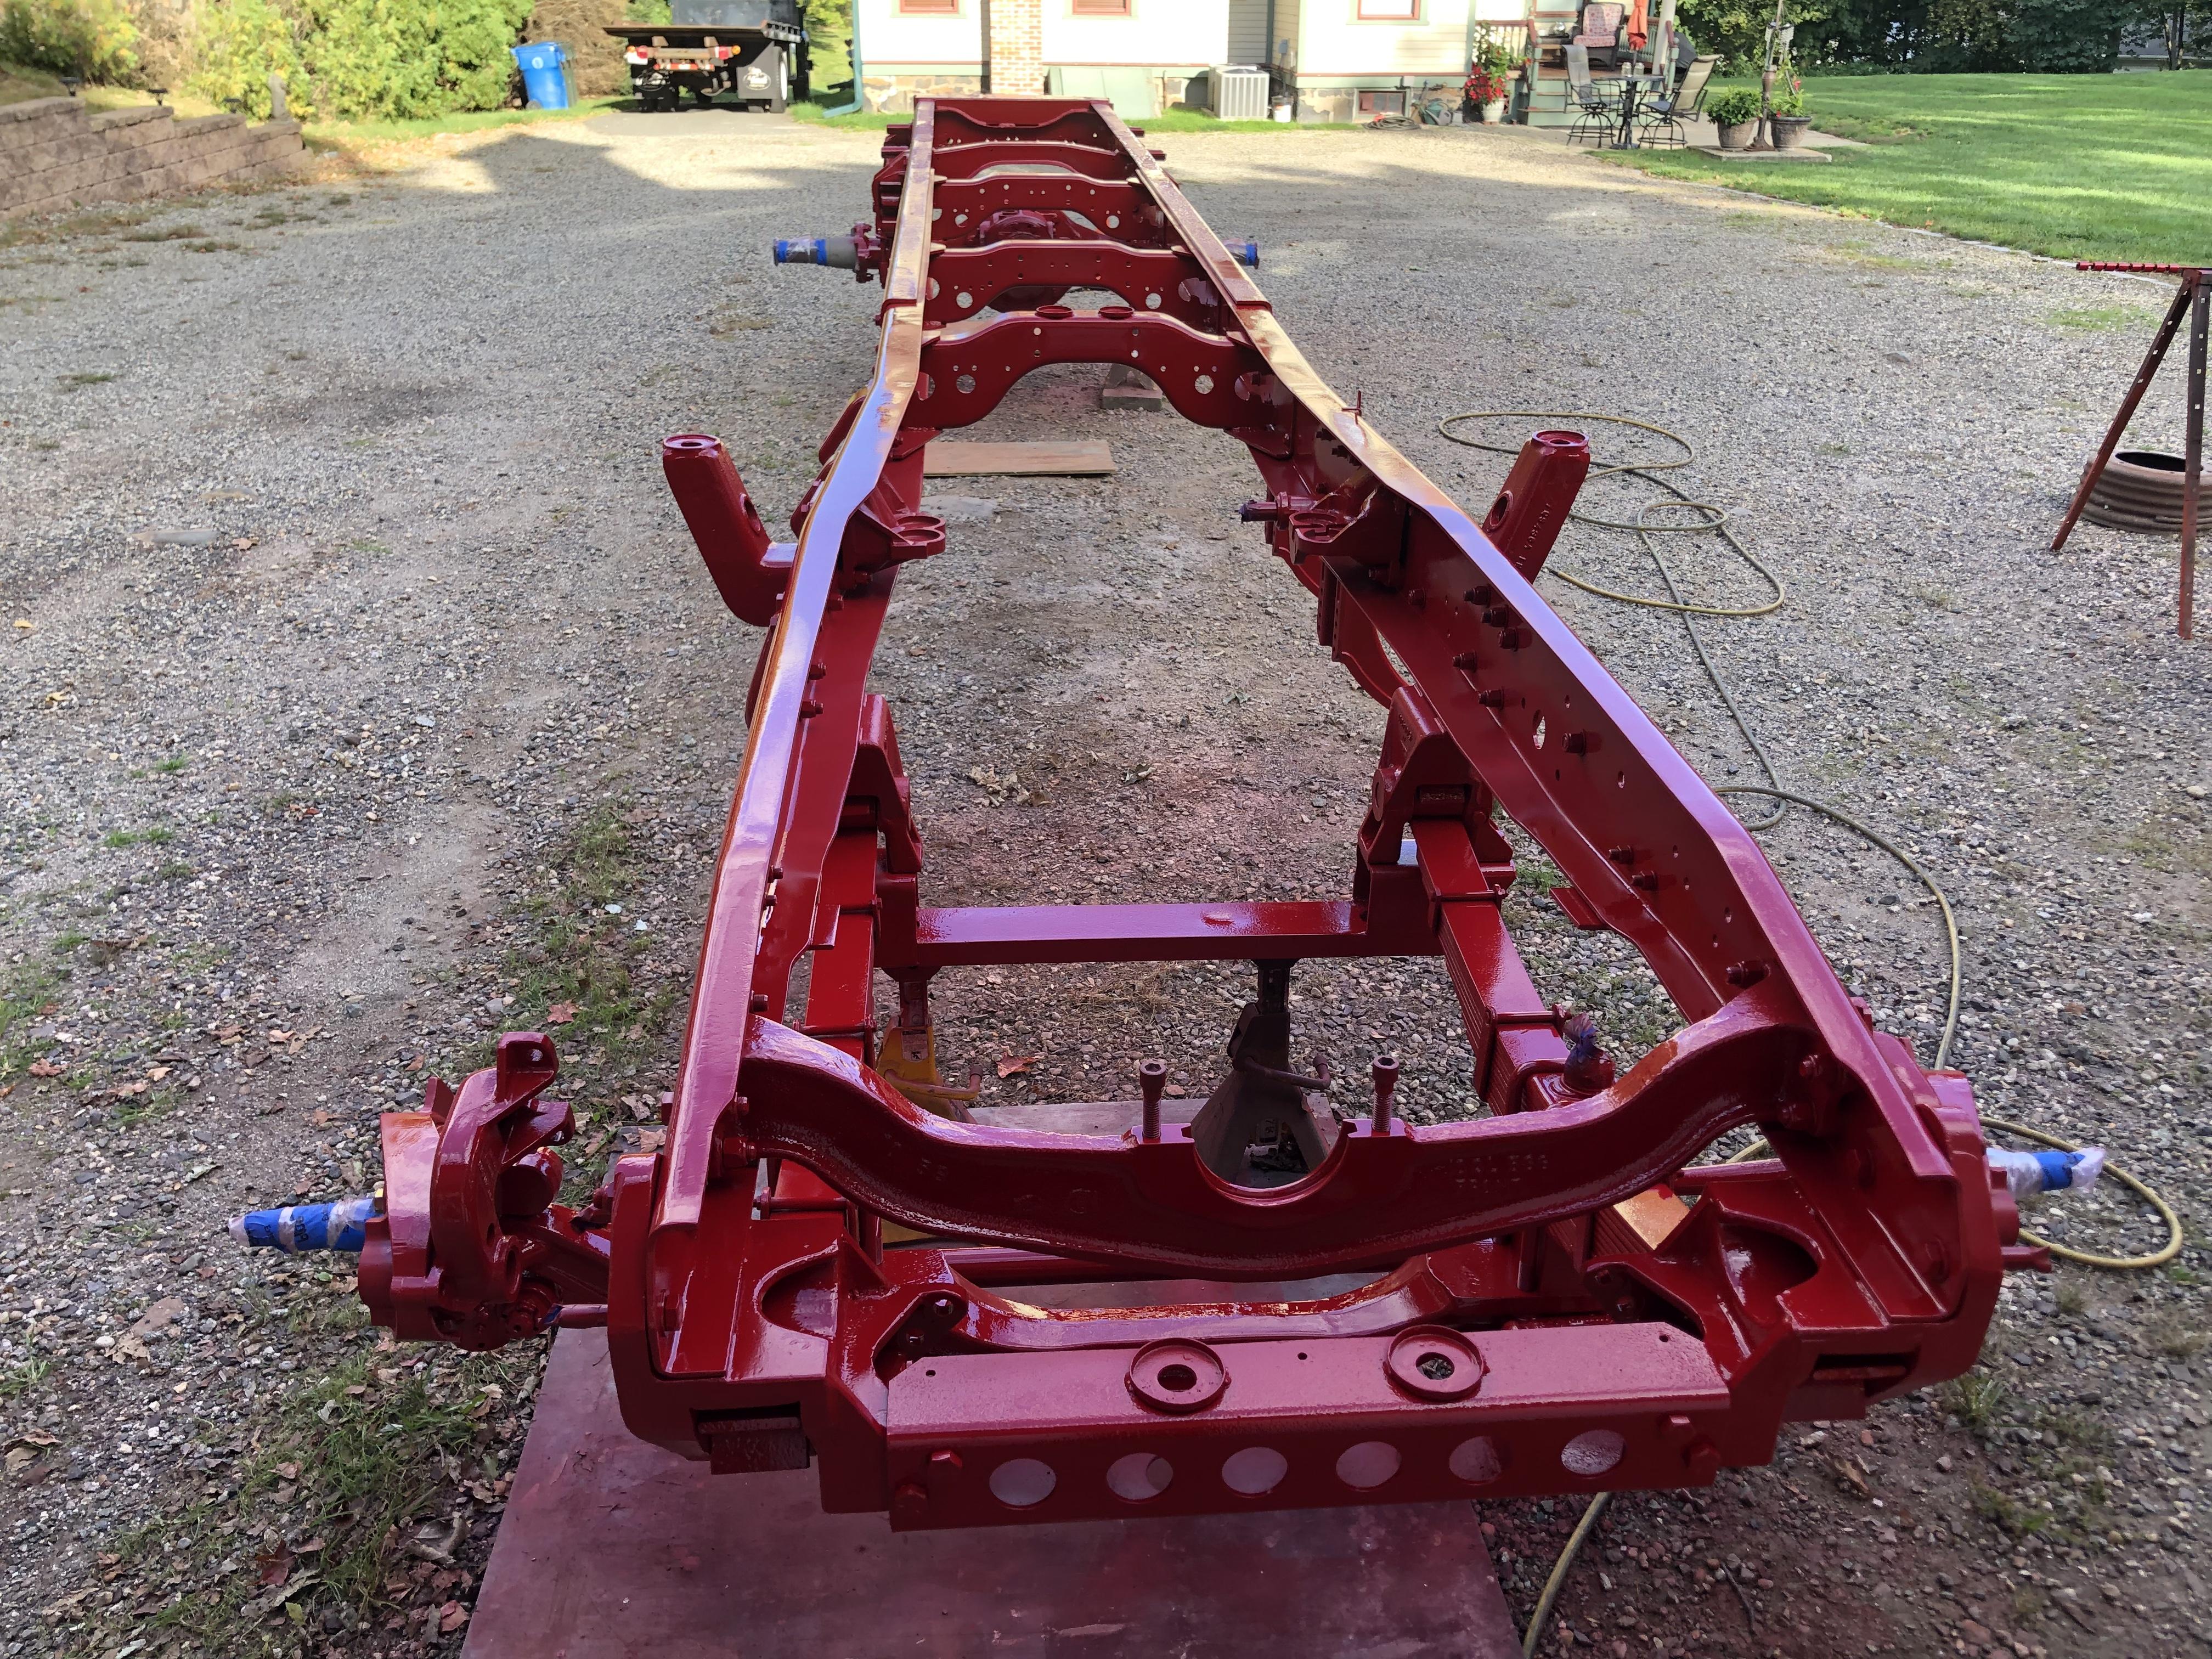
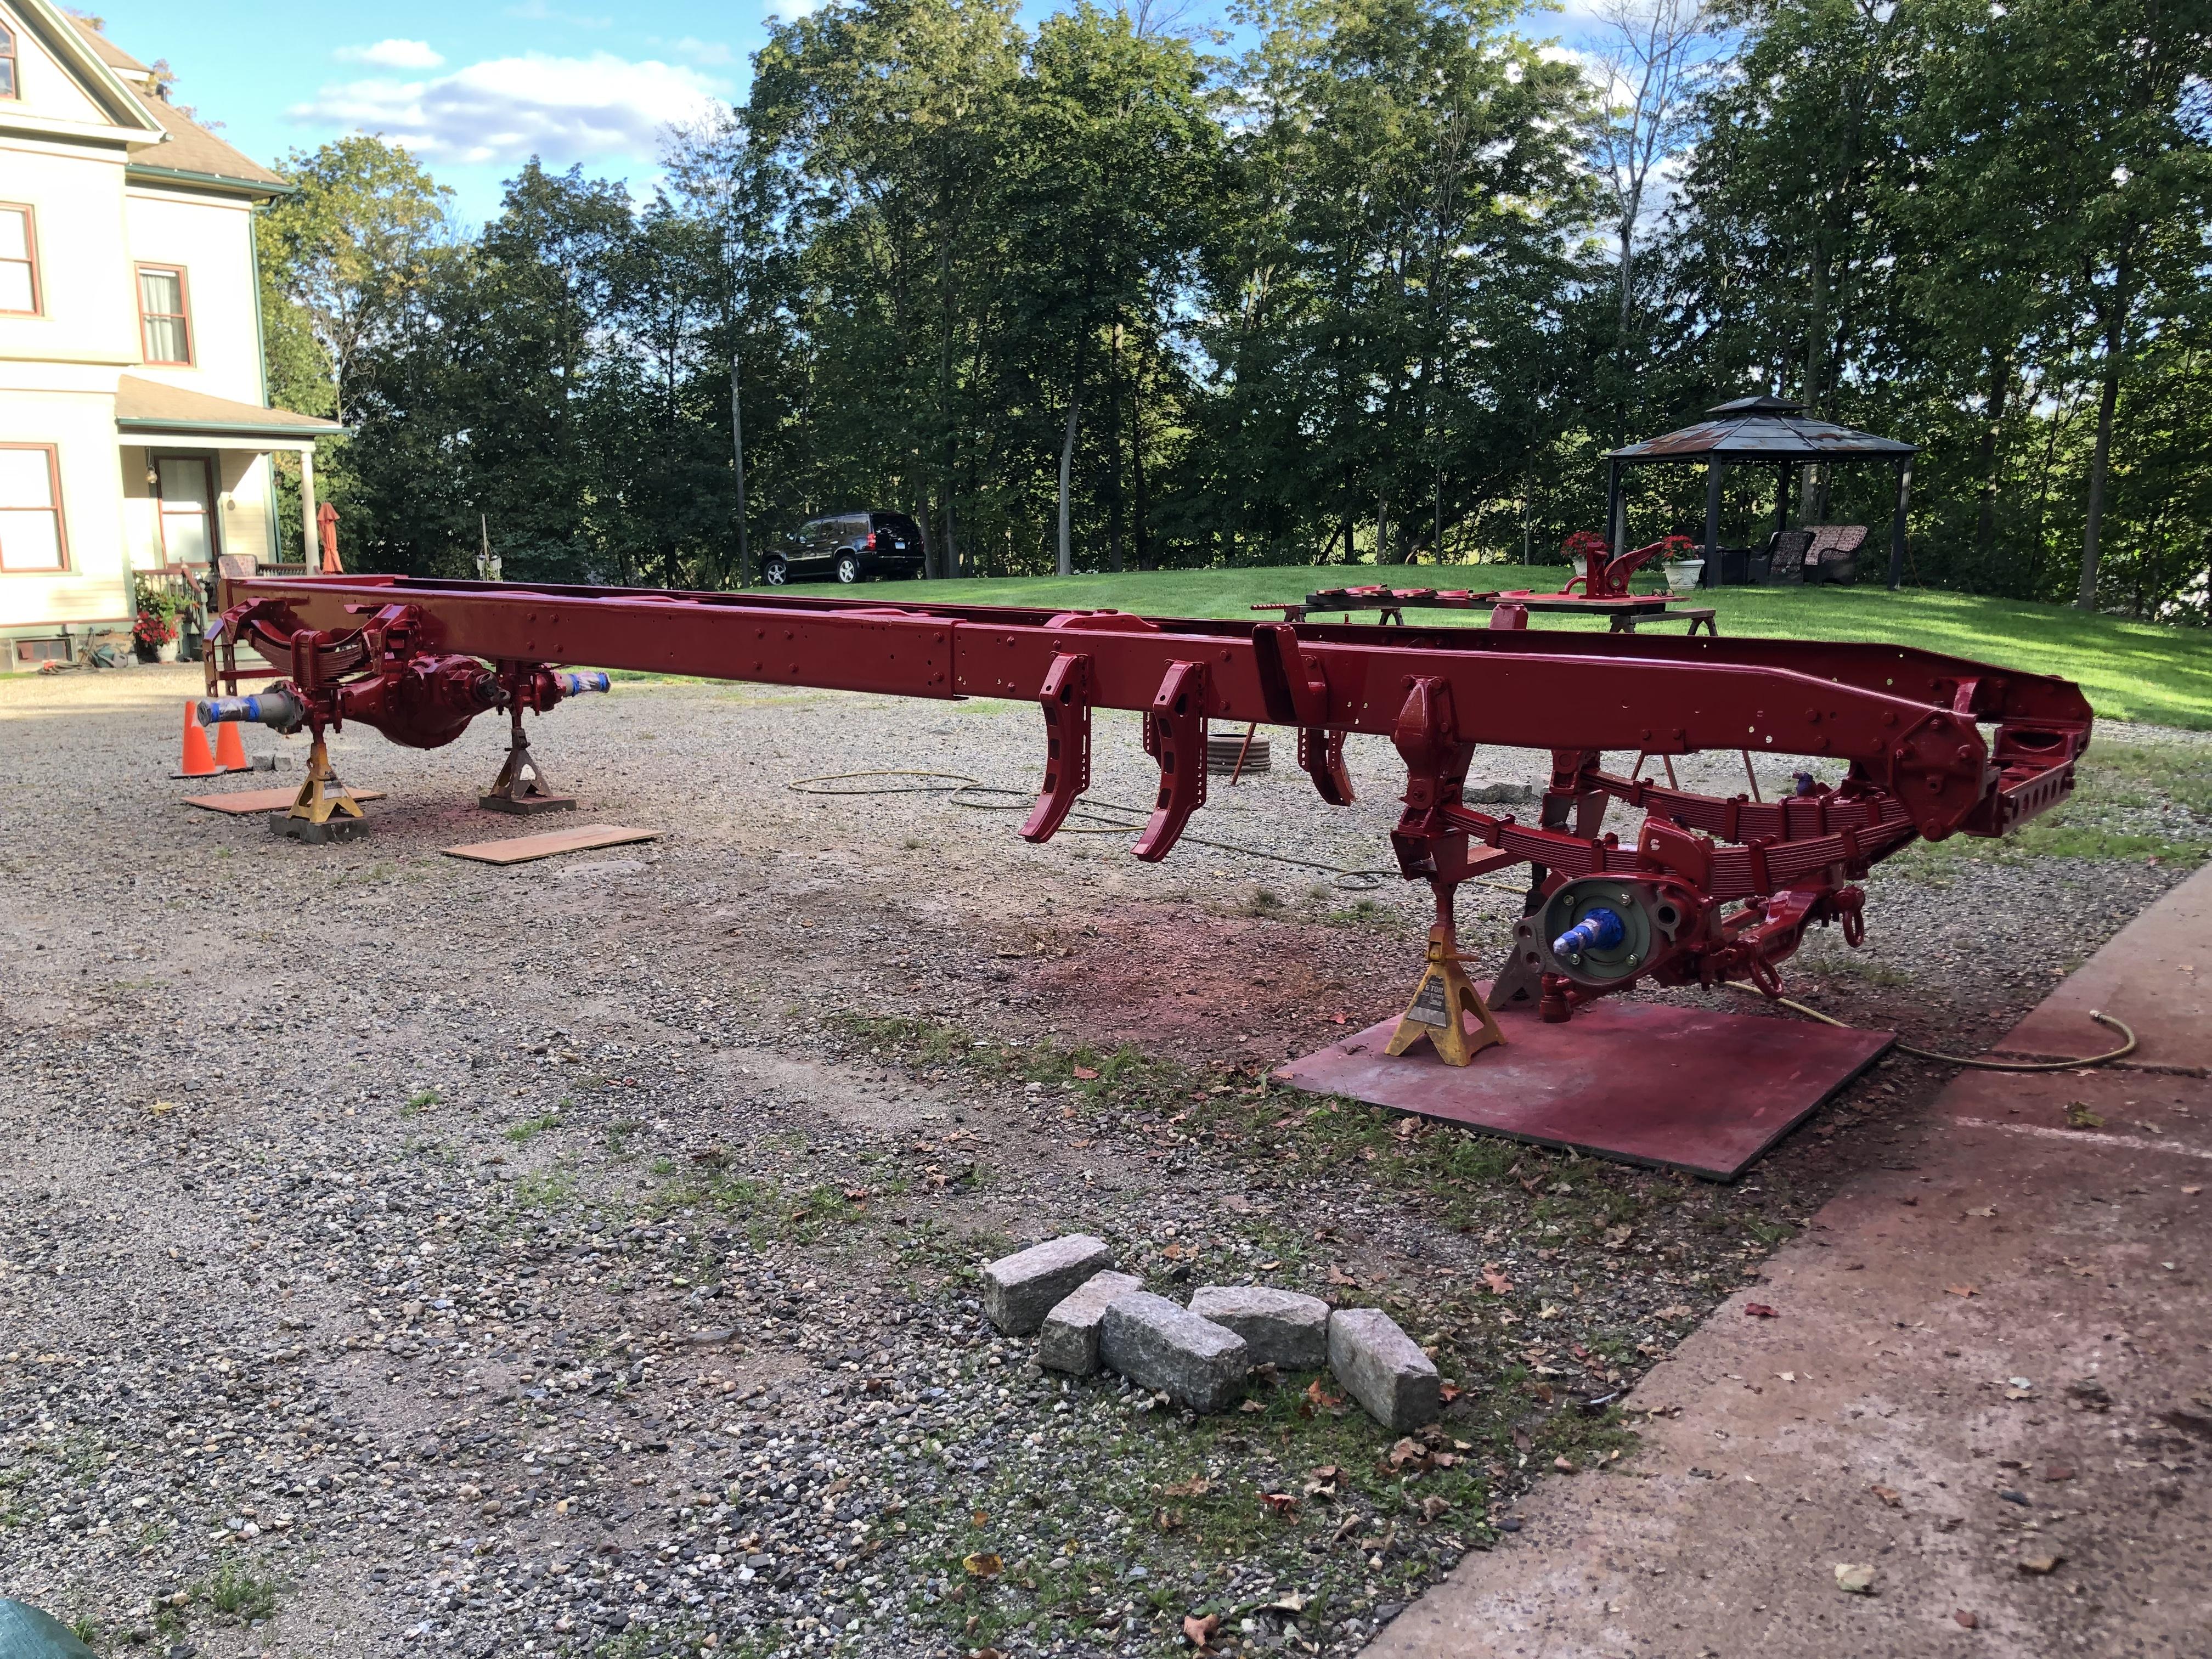
Spent yesterday prepping the frame and today was the day. Great weather, almost no wind and a solid SIX hours of spraying and mixing paint. So many nooks and crannies to get at and a LOT of paint!! It’s done and ready for more assembly.

-
B-73 Restoration
mattb73lt replied to mattb73lt's topic in Antique and Classic Mack Trucks General Discussion
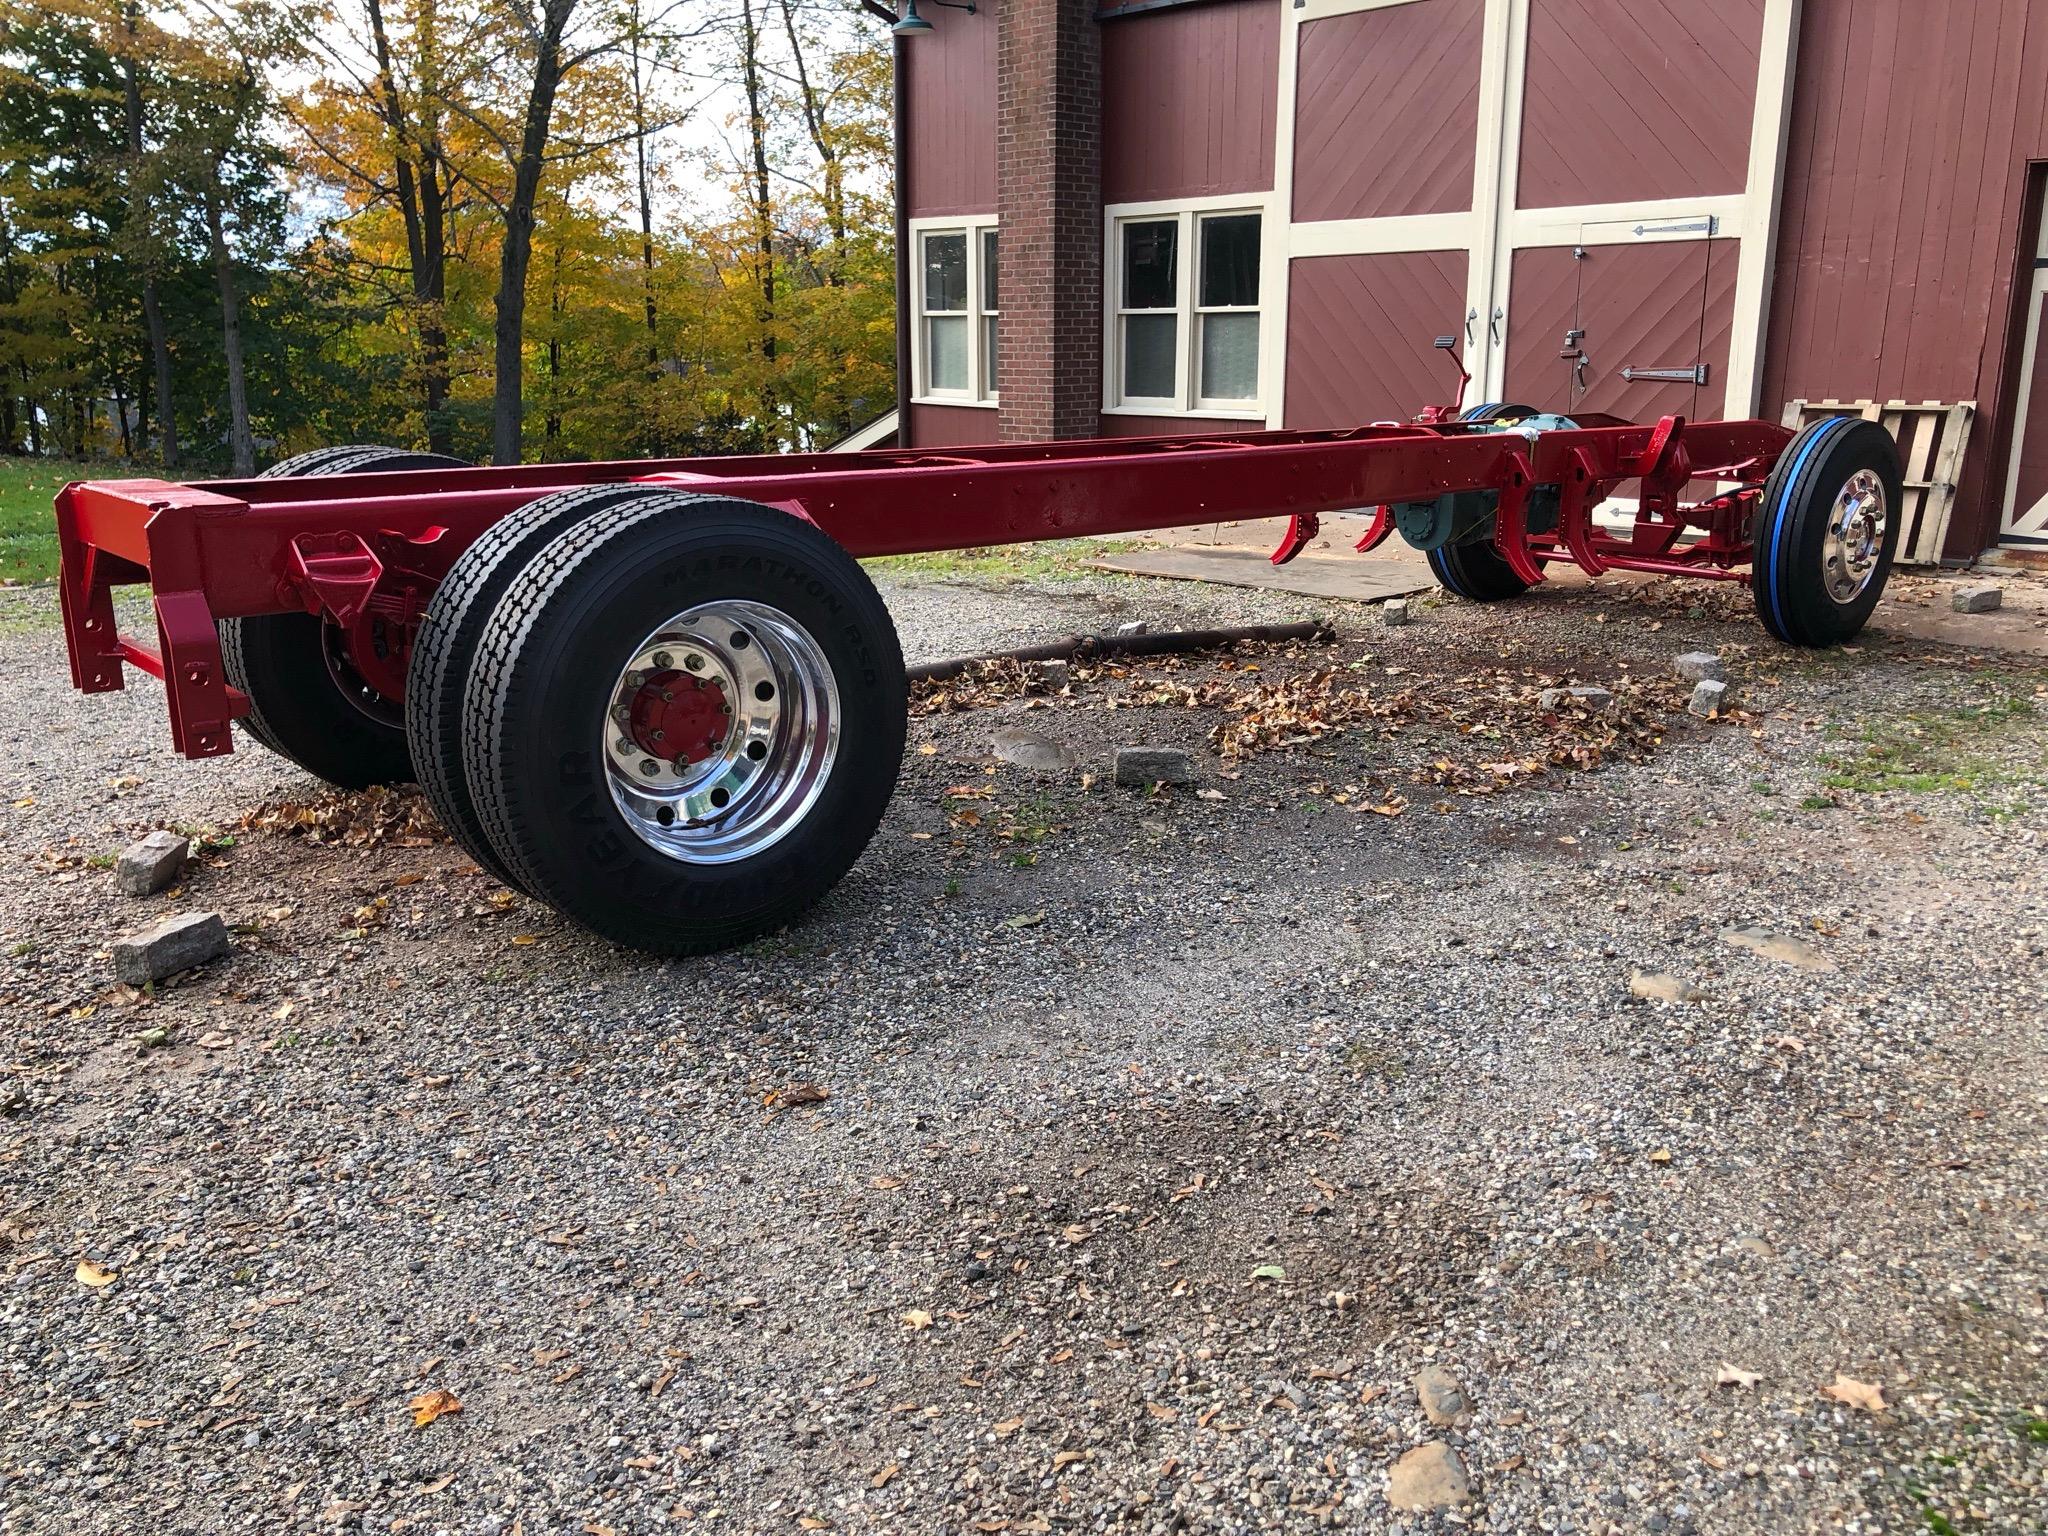
The Alcoa rims I bought were used and at a decent price. The company I got the from had them polished on the exposed sides. They did a decent job, but they needed some more work and cleaning. I’ve been getting a bunch of stuff collected up to finish the frame and get it painted, just need some cooperative weather which looks like I’ll have some soon. I had to have the front brake shoe anchor pins fabricated as none could be located anywhere. Today I spent on the rims doing some clean up and then polishing and sealing them. They’re ready to mount as soon as the hubs are on. Looks like a few large jumps forward are looming, which will be great. The rims really came out nice.


BMT Forum Logo
