


mattb73lt
-
Posts
1,427 -
Joined
-
Last visited
-
Days Won
146
Content Type
Profiles
Forums
Gallery
Events
Blogs
BMT Wiki
Collections
Store
Everything posted by mattb73lt
-

B-73 Restoration
mattb73lt replied to mattb73lt's topic in Antique and Classic Mack Trucks General Discussion
Yeah, that would’ve been a huge pain to fix with the cab on. -
B-73 Restoration
mattb73lt replied to mattb73lt's topic in Antique and Classic Mack Trucks General Discussion
Minor step backwards yesterday. I had to drop the transmission off the engine to get at the clutch because it wouldn't release. It can be tough putting things together you didn't take apart, because you don't know what is supposed to be there. My engine came from one source the flywheel from another, with a used clutch assembly, and a new clutch from Ft Wayne Clutch in Indiana. It all went together, but wouldn't function. After some questions and a call to Ft Wayne, discovered I was missing all the shims that go under the pressure plate to space it properly. Ft Wayne was VERY helpful, especially since I bought the clutch way back in 2005. So, that fix is enroute. Dropped the driveshaft off at Fleetpride for a few things and that should be back Mon or Tue. That should put the driveline in the completed column late next week or early the following. More steps forward than back, which is always good.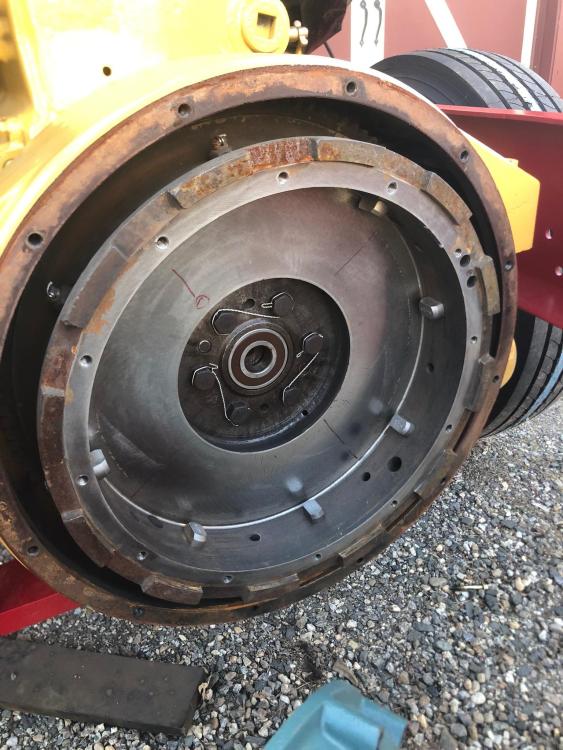
-
H Model Restoration
mattb73lt replied to h67st's topic in Antique and Classic Mack Trucks General Discussion
That looks really good and very clean. I love it!! -
B-73 Restoration
mattb73lt replied to mattb73lt's topic in Antique and Classic Mack Trucks General Discussion
Yeah, the stories I hear from my friends are frightening. The CSP aren’t even giving an entrance exam anymore. Numbers are way down and retirements are unbelievable. -
B-73 Restoration
mattb73lt replied to mattb73lt's topic in Antique and Classic Mack Trucks General Discussion
Doesn’t really get used much, now. It’s heyday was late 80’s-mid 90’s and used mostly for enforcement on passenger vehicles. Never really did much commercial enforcement with it. -
B-73 Restoration
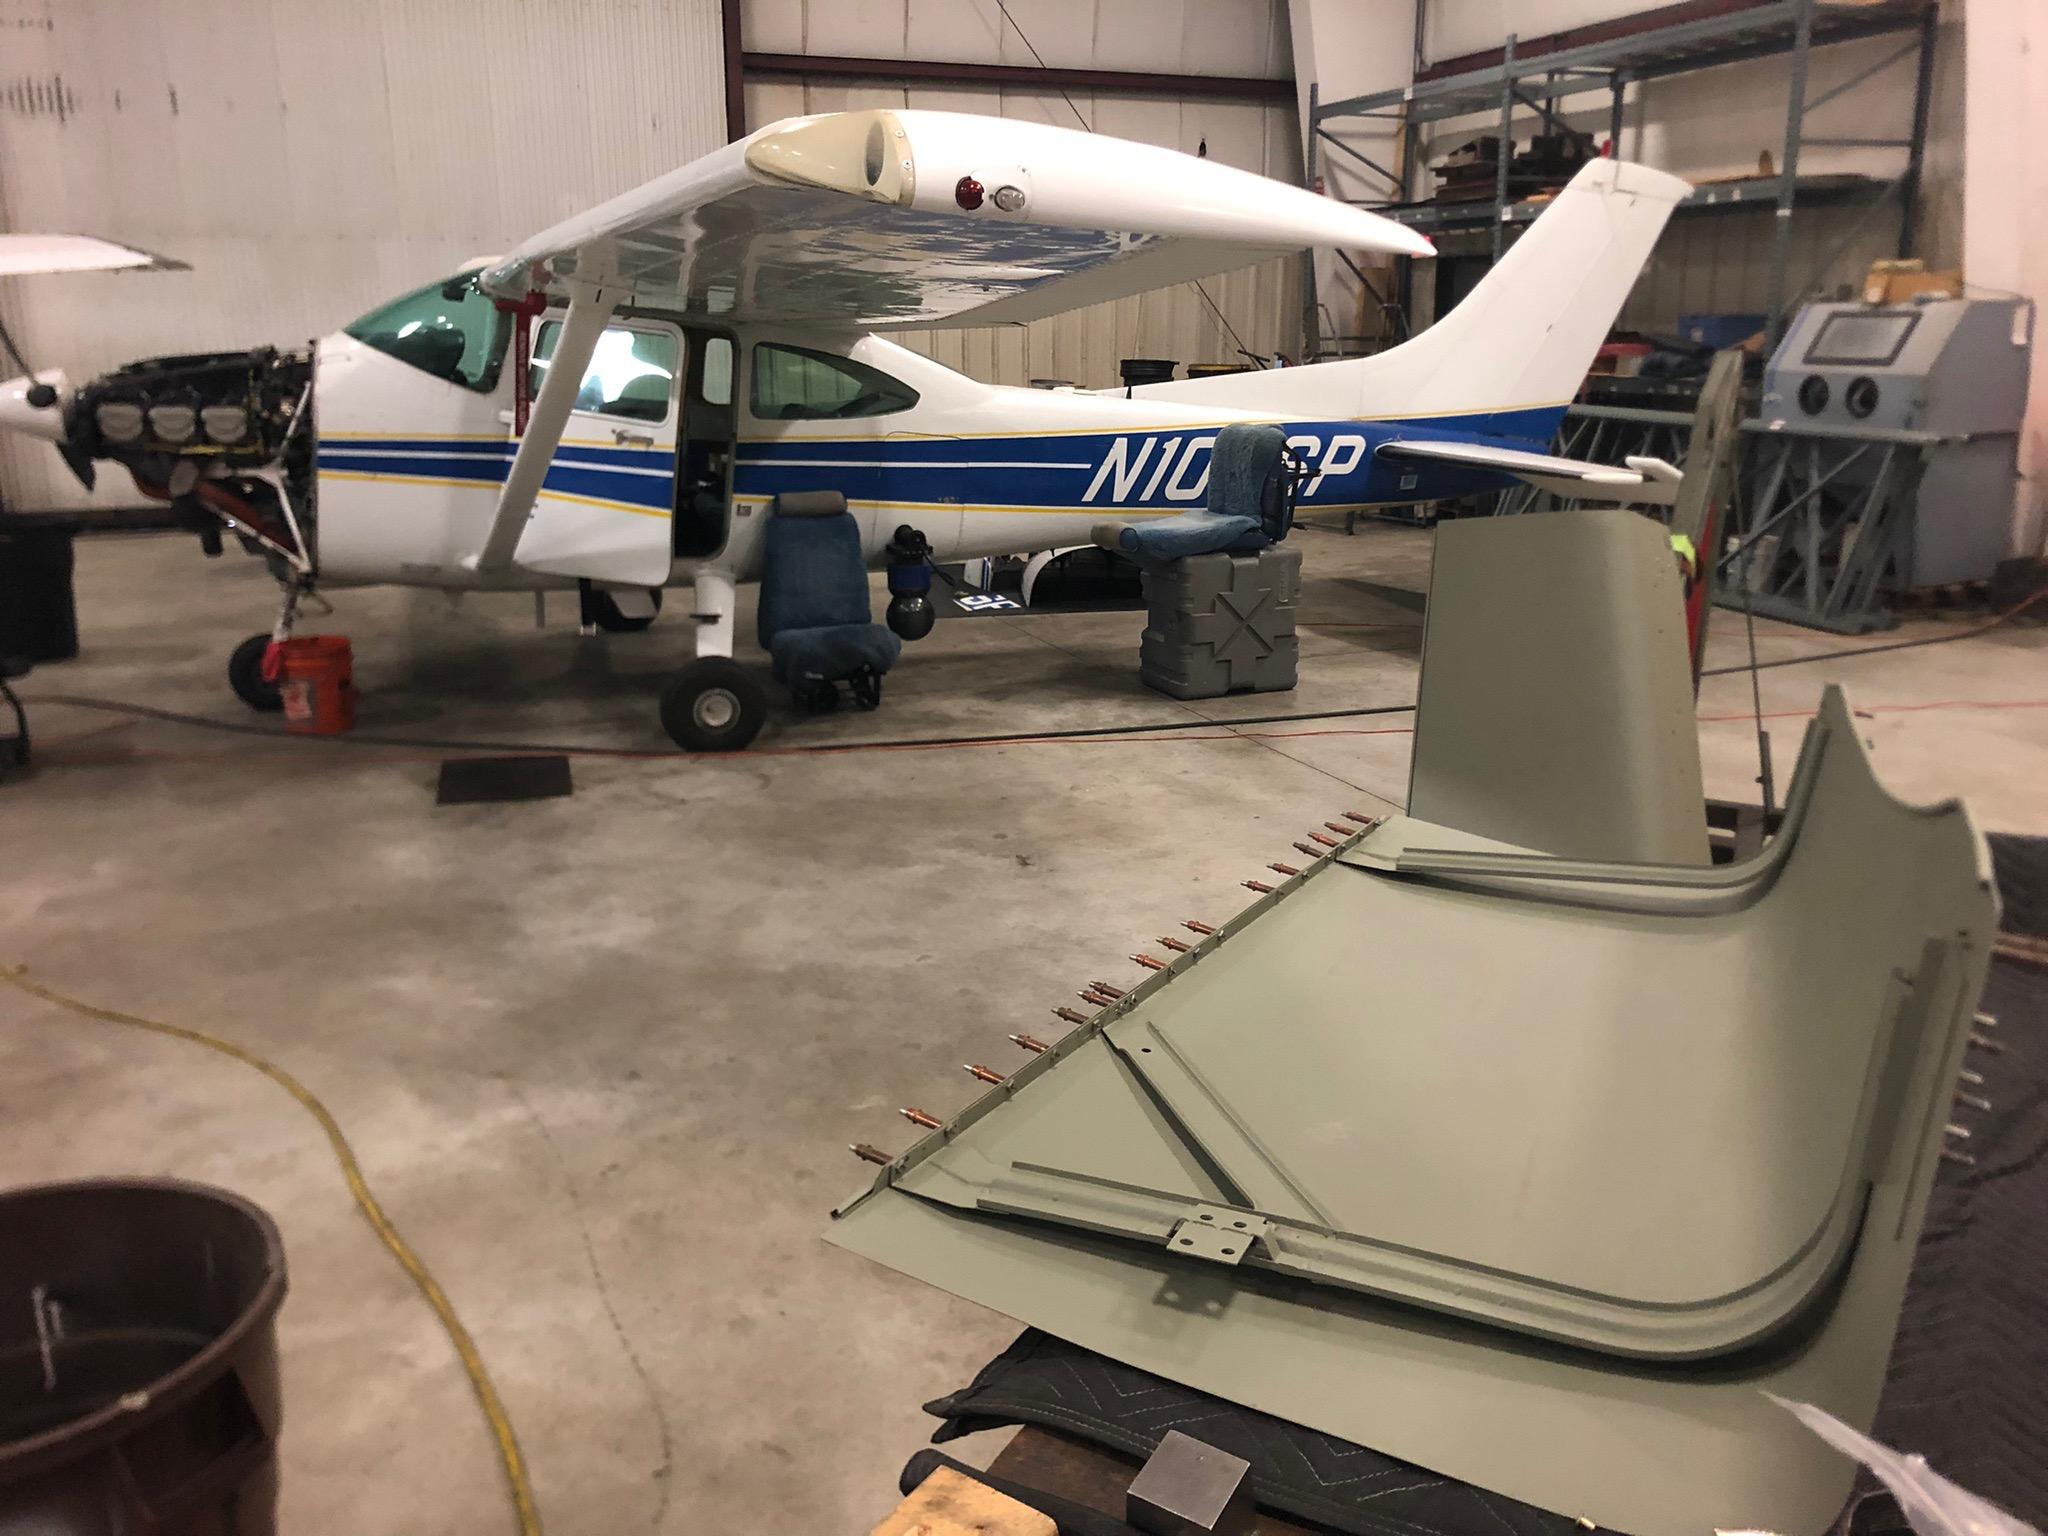
mattb73lt replied to mattb73lt's topic in Antique and Classic Mack Trucks General Discussion
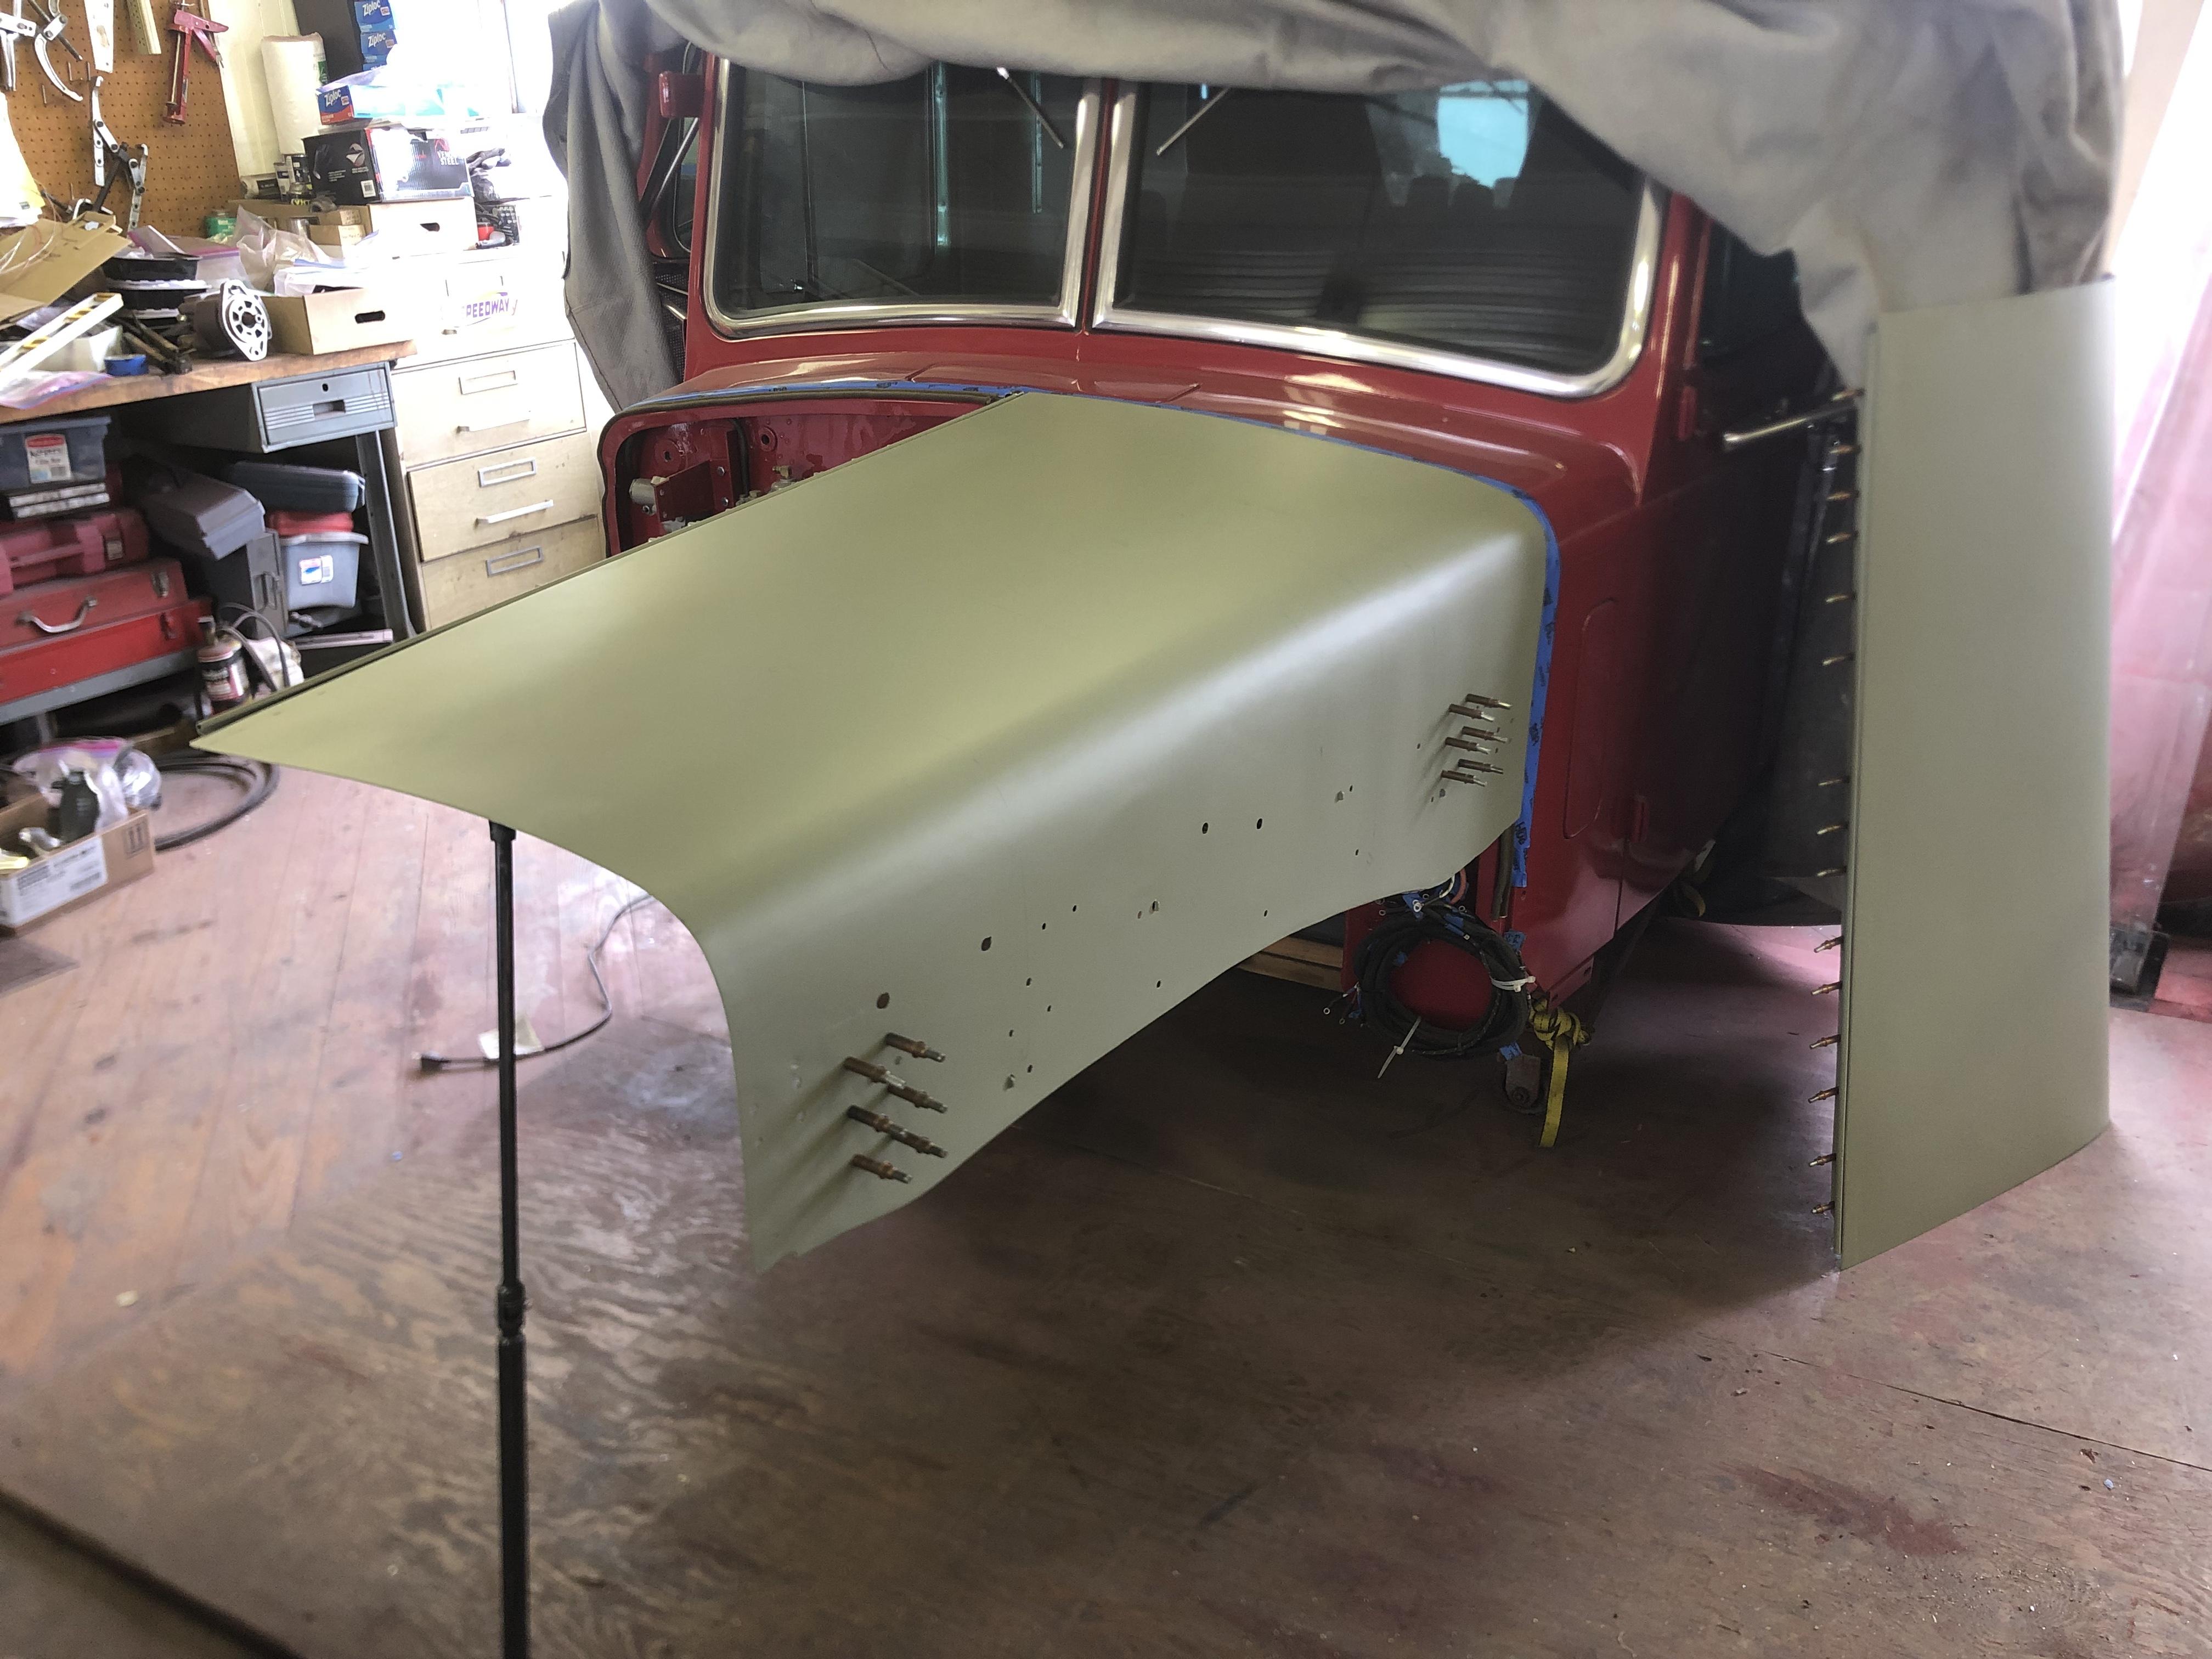
Drove about 70+ rivets back into the hood halves at my friend's shop today. It may not pass an airworthiness inspection, but I haven't forgotten how to drive rivets from my schooling 40 years ago. Interesting coincidence, the plane I was flying when I found the truck was in the shop for it's annual inspection and was right next to where I was working.
-
Coca Cola LJ Mack colors
mattb73lt replied to 1961H67's topic in Antique and Classic Mack Trucks General Discussion
That looks great. I think you’ll be fine grafting those fenders together into one. I still can’t believe you used the entire cab back I sent you!! It look really good. -
That was neat! Cool video.
-
H Model Restoration
mattb73lt replied to h67st's topic in Antique and Classic Mack Trucks General Discussion
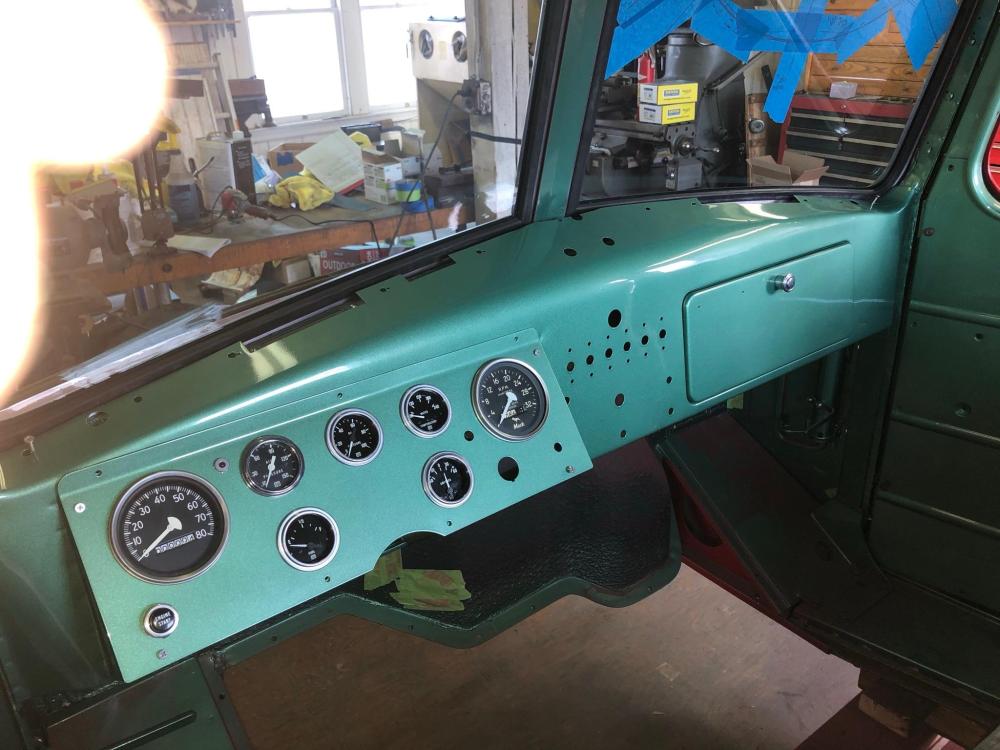
And your fuel gauge is moved down to that panel, too. The instrument panel is a lot thinner and longer. Just picking out some differences between the two. -
H Model Restoration
mattb73lt replied to h67st's topic in Antique and Classic Mack Trucks General Discussion
Interesting what Mack did to the dash for two different models they made out of the original design.
-
Oil bath air cleaner modification
mattb73lt replied to Robo987's topic in Antique and Classic Mack Trucks General Discussion
I’m running gear oil in my oil bath filtered 237. That’s what was recommended when I swapped in the 237. Haven’t had any issues with it sucking oil with the heavier weight oil. -
I think someone must of had them plated at some point. That really makes them standout for sure. I’ve seen people do that with other items, to dress things up. Mostly you see the brushed gold Mack used.
-
B-73 Restoration
mattb73lt replied to mattb73lt's topic in Antique and Classic Mack Trucks General Discussion
I just checked it, but can’t find a tag on it. It came with the engine. It appears to be a common Delco 42MT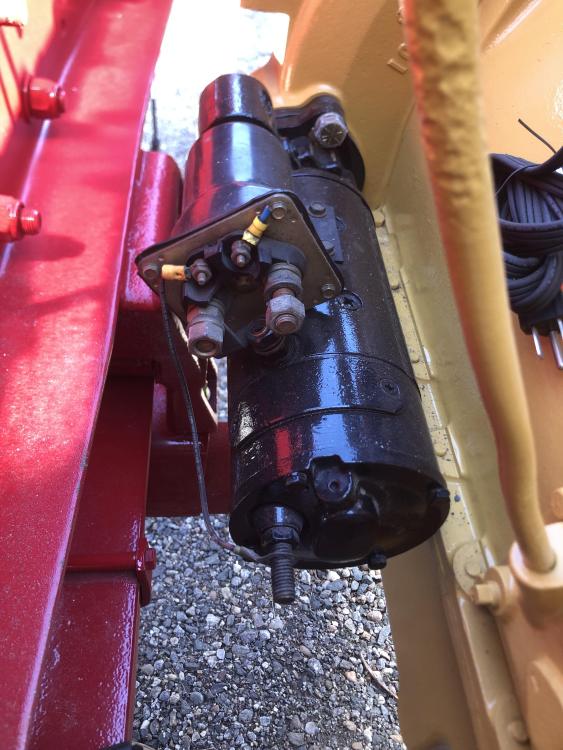
-
B-73 Restoration
mattb73lt replied to mattb73lt's topic in Antique and Classic Mack Trucks General Discussion
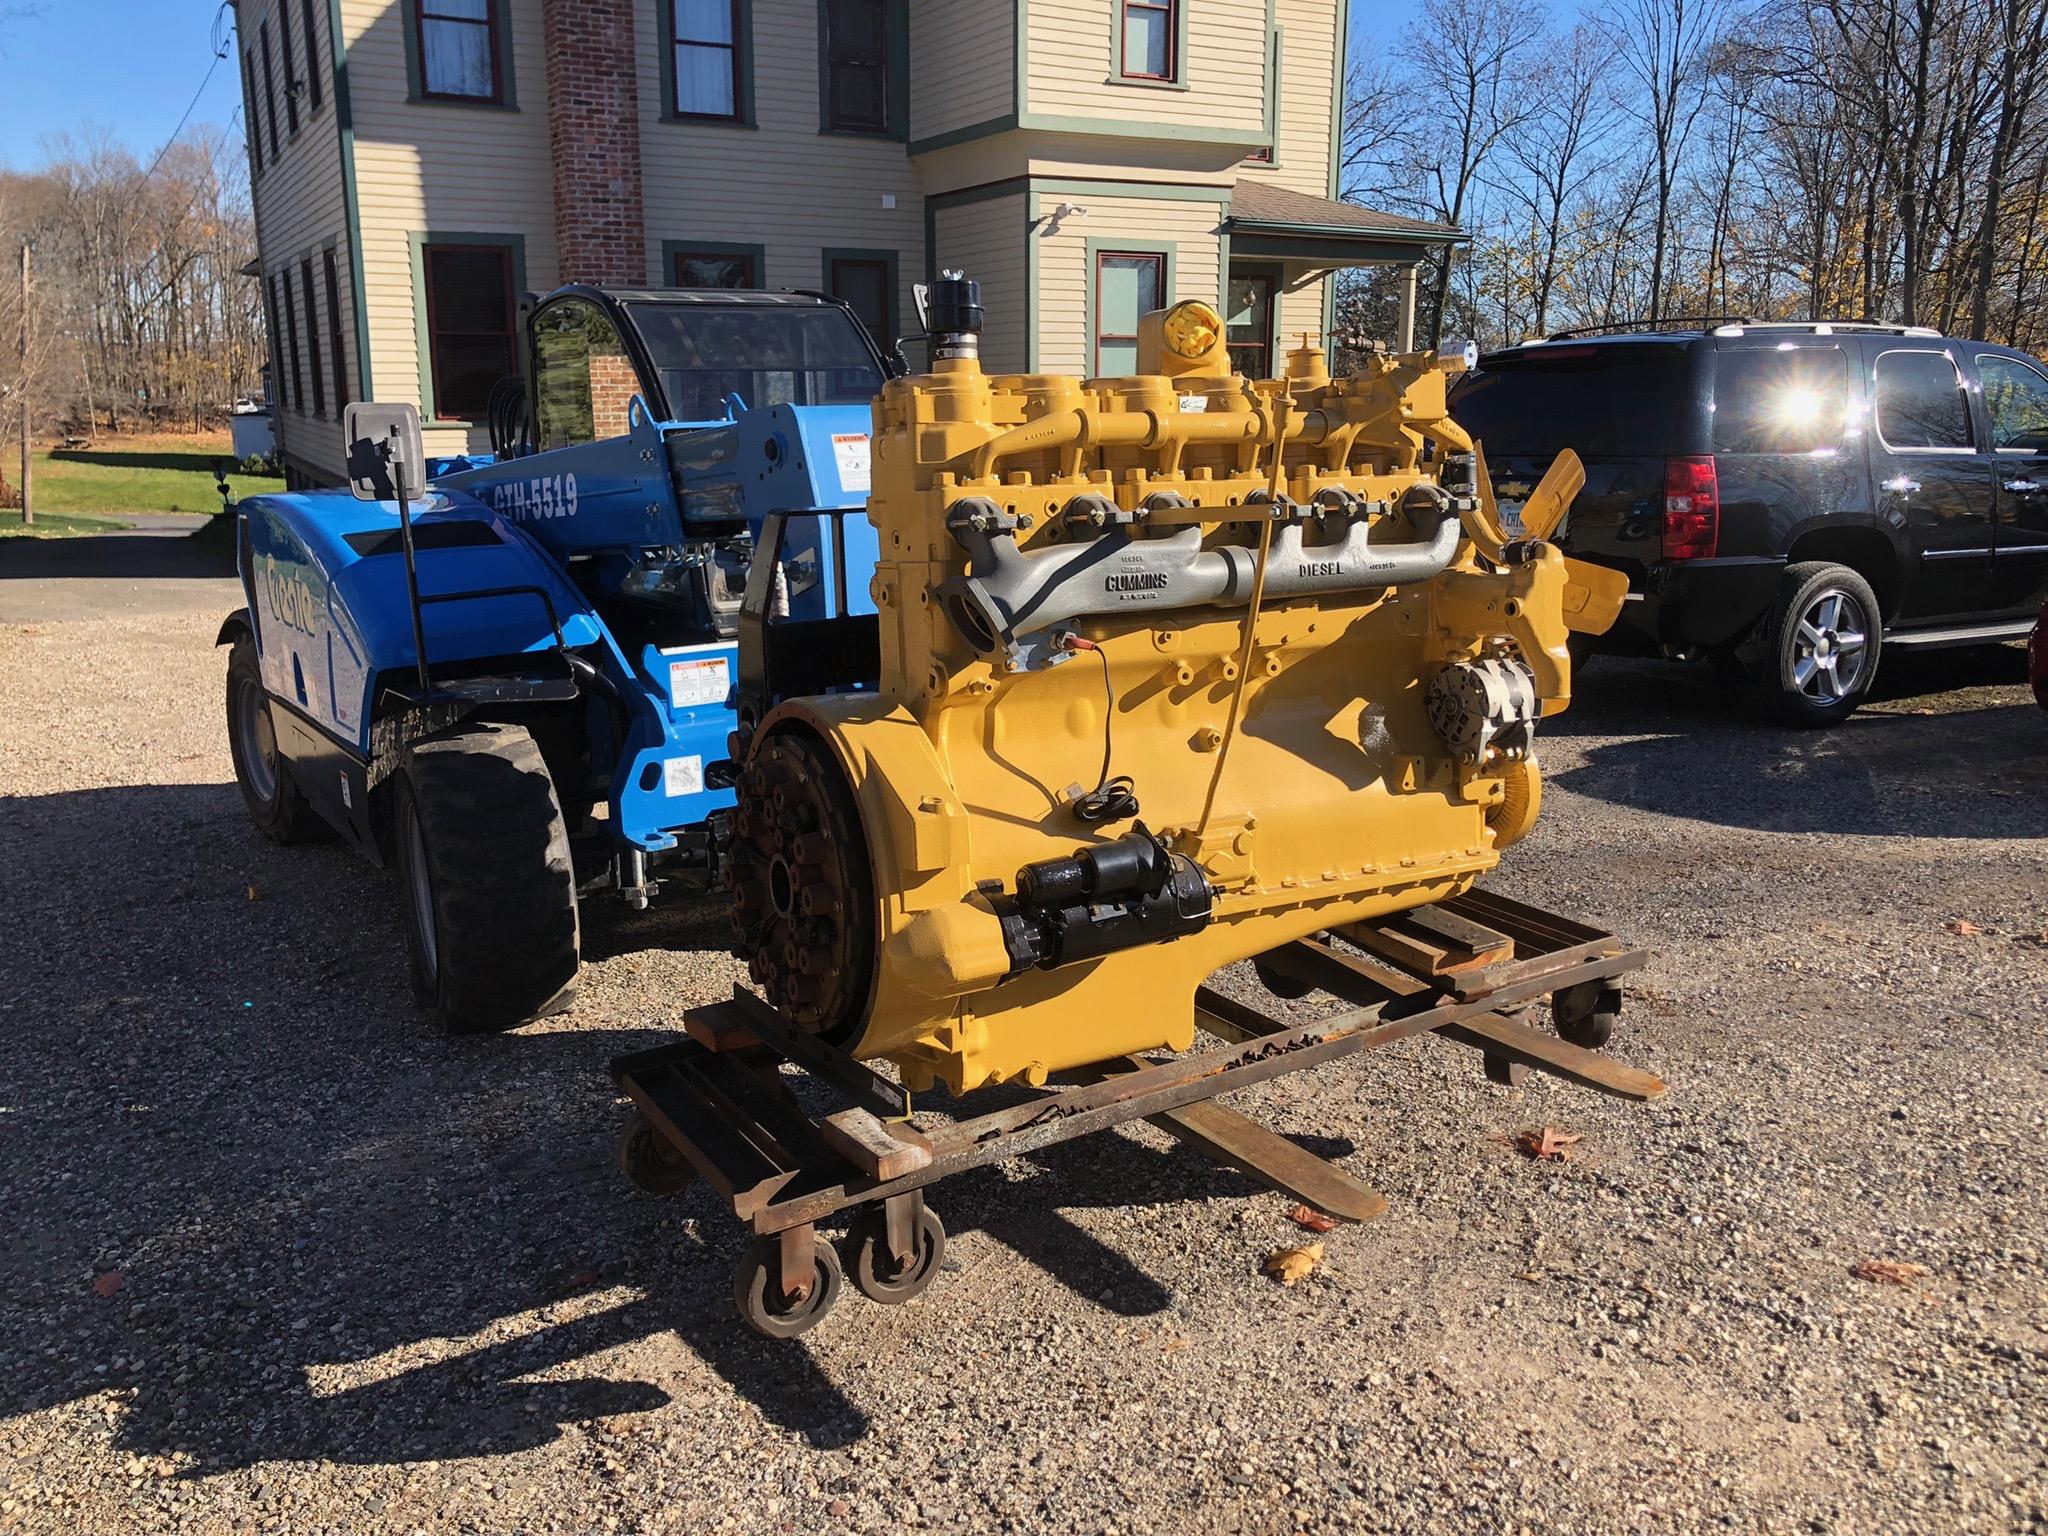
The color always brings up discussion. There are at least four colors Cummins used, an early grey, "Cummins Old Gold", Cummins gold and the later beige. When I bought this engine it was rust and grease covered. As I was cleaning it I uncovered several areas with paint remaining. It had been rebuilt at least once in it's life and repainted. From what remained I found that Eastwood had a color, "Equipment Yellow" that was a really good match from what was on it, plus it was formulated as a two part epoxy, high temperature enamel of aircraft grade. When I've taken pictures of it the digital phone camera can tint it differently. From a bright yellow inside the shop to a darker yellow with a little orange tint outside. But, I think it is a pretty good match for the "Old Gold" color, plus it's very durable. which was the main reason for using it.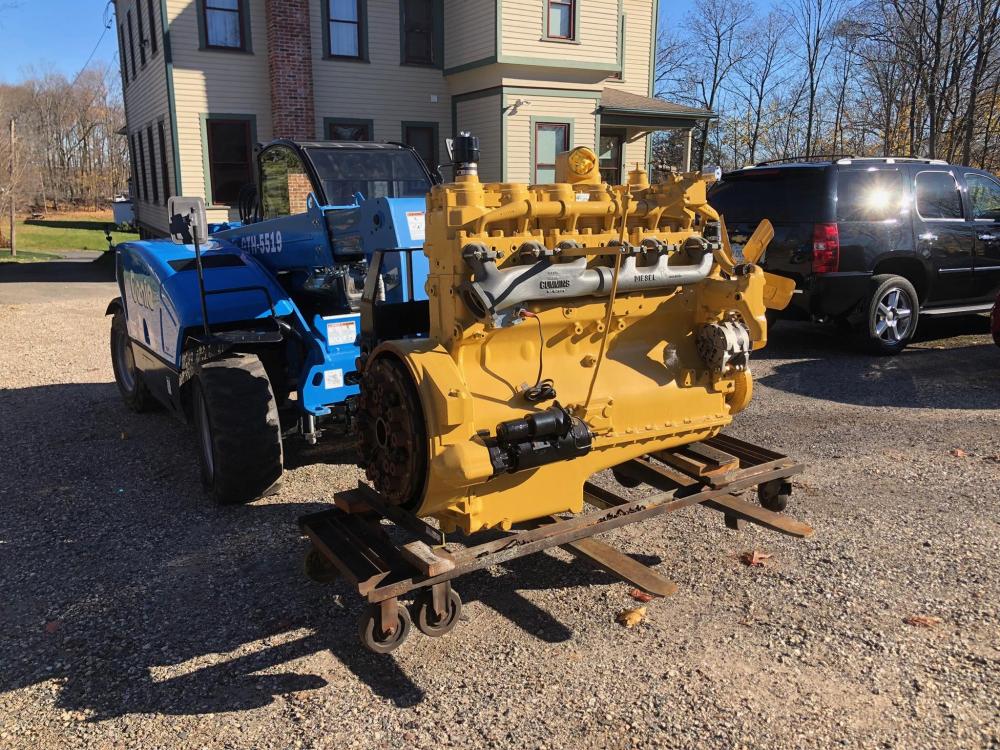
-
B-73 Restoration
mattb73lt replied to mattb73lt's topic in Antique and Classic Mack Trucks General Discussion
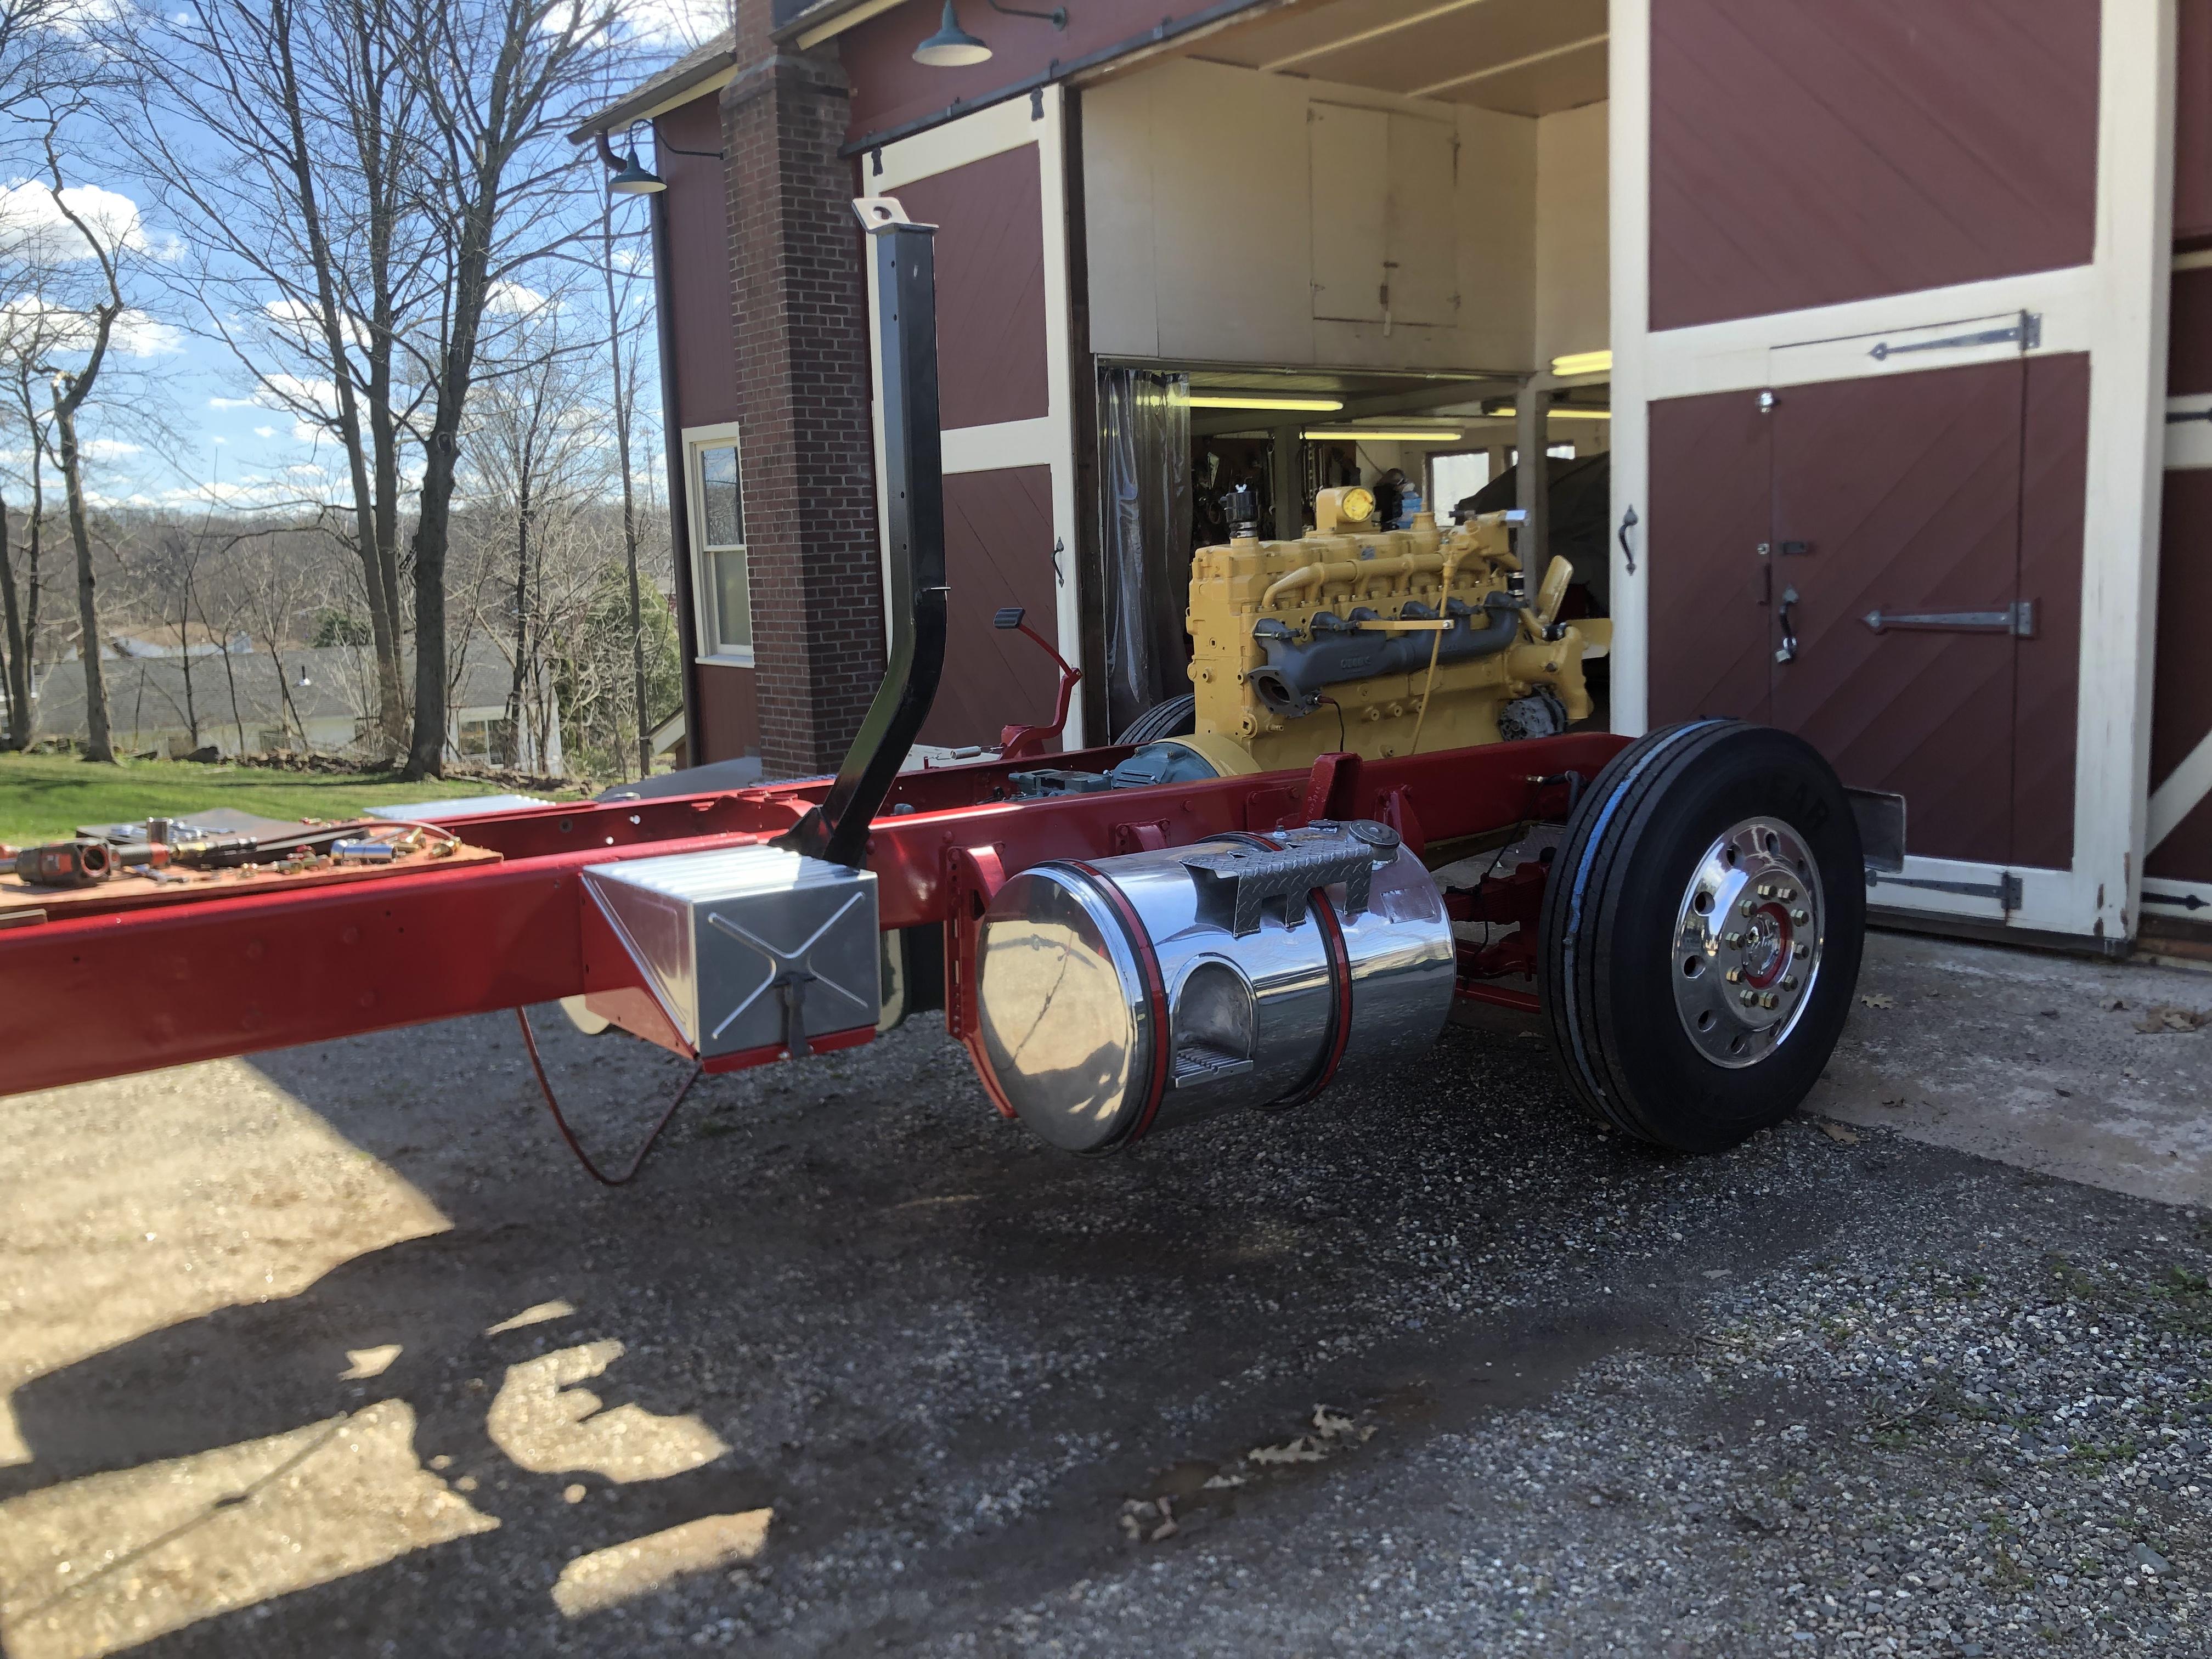
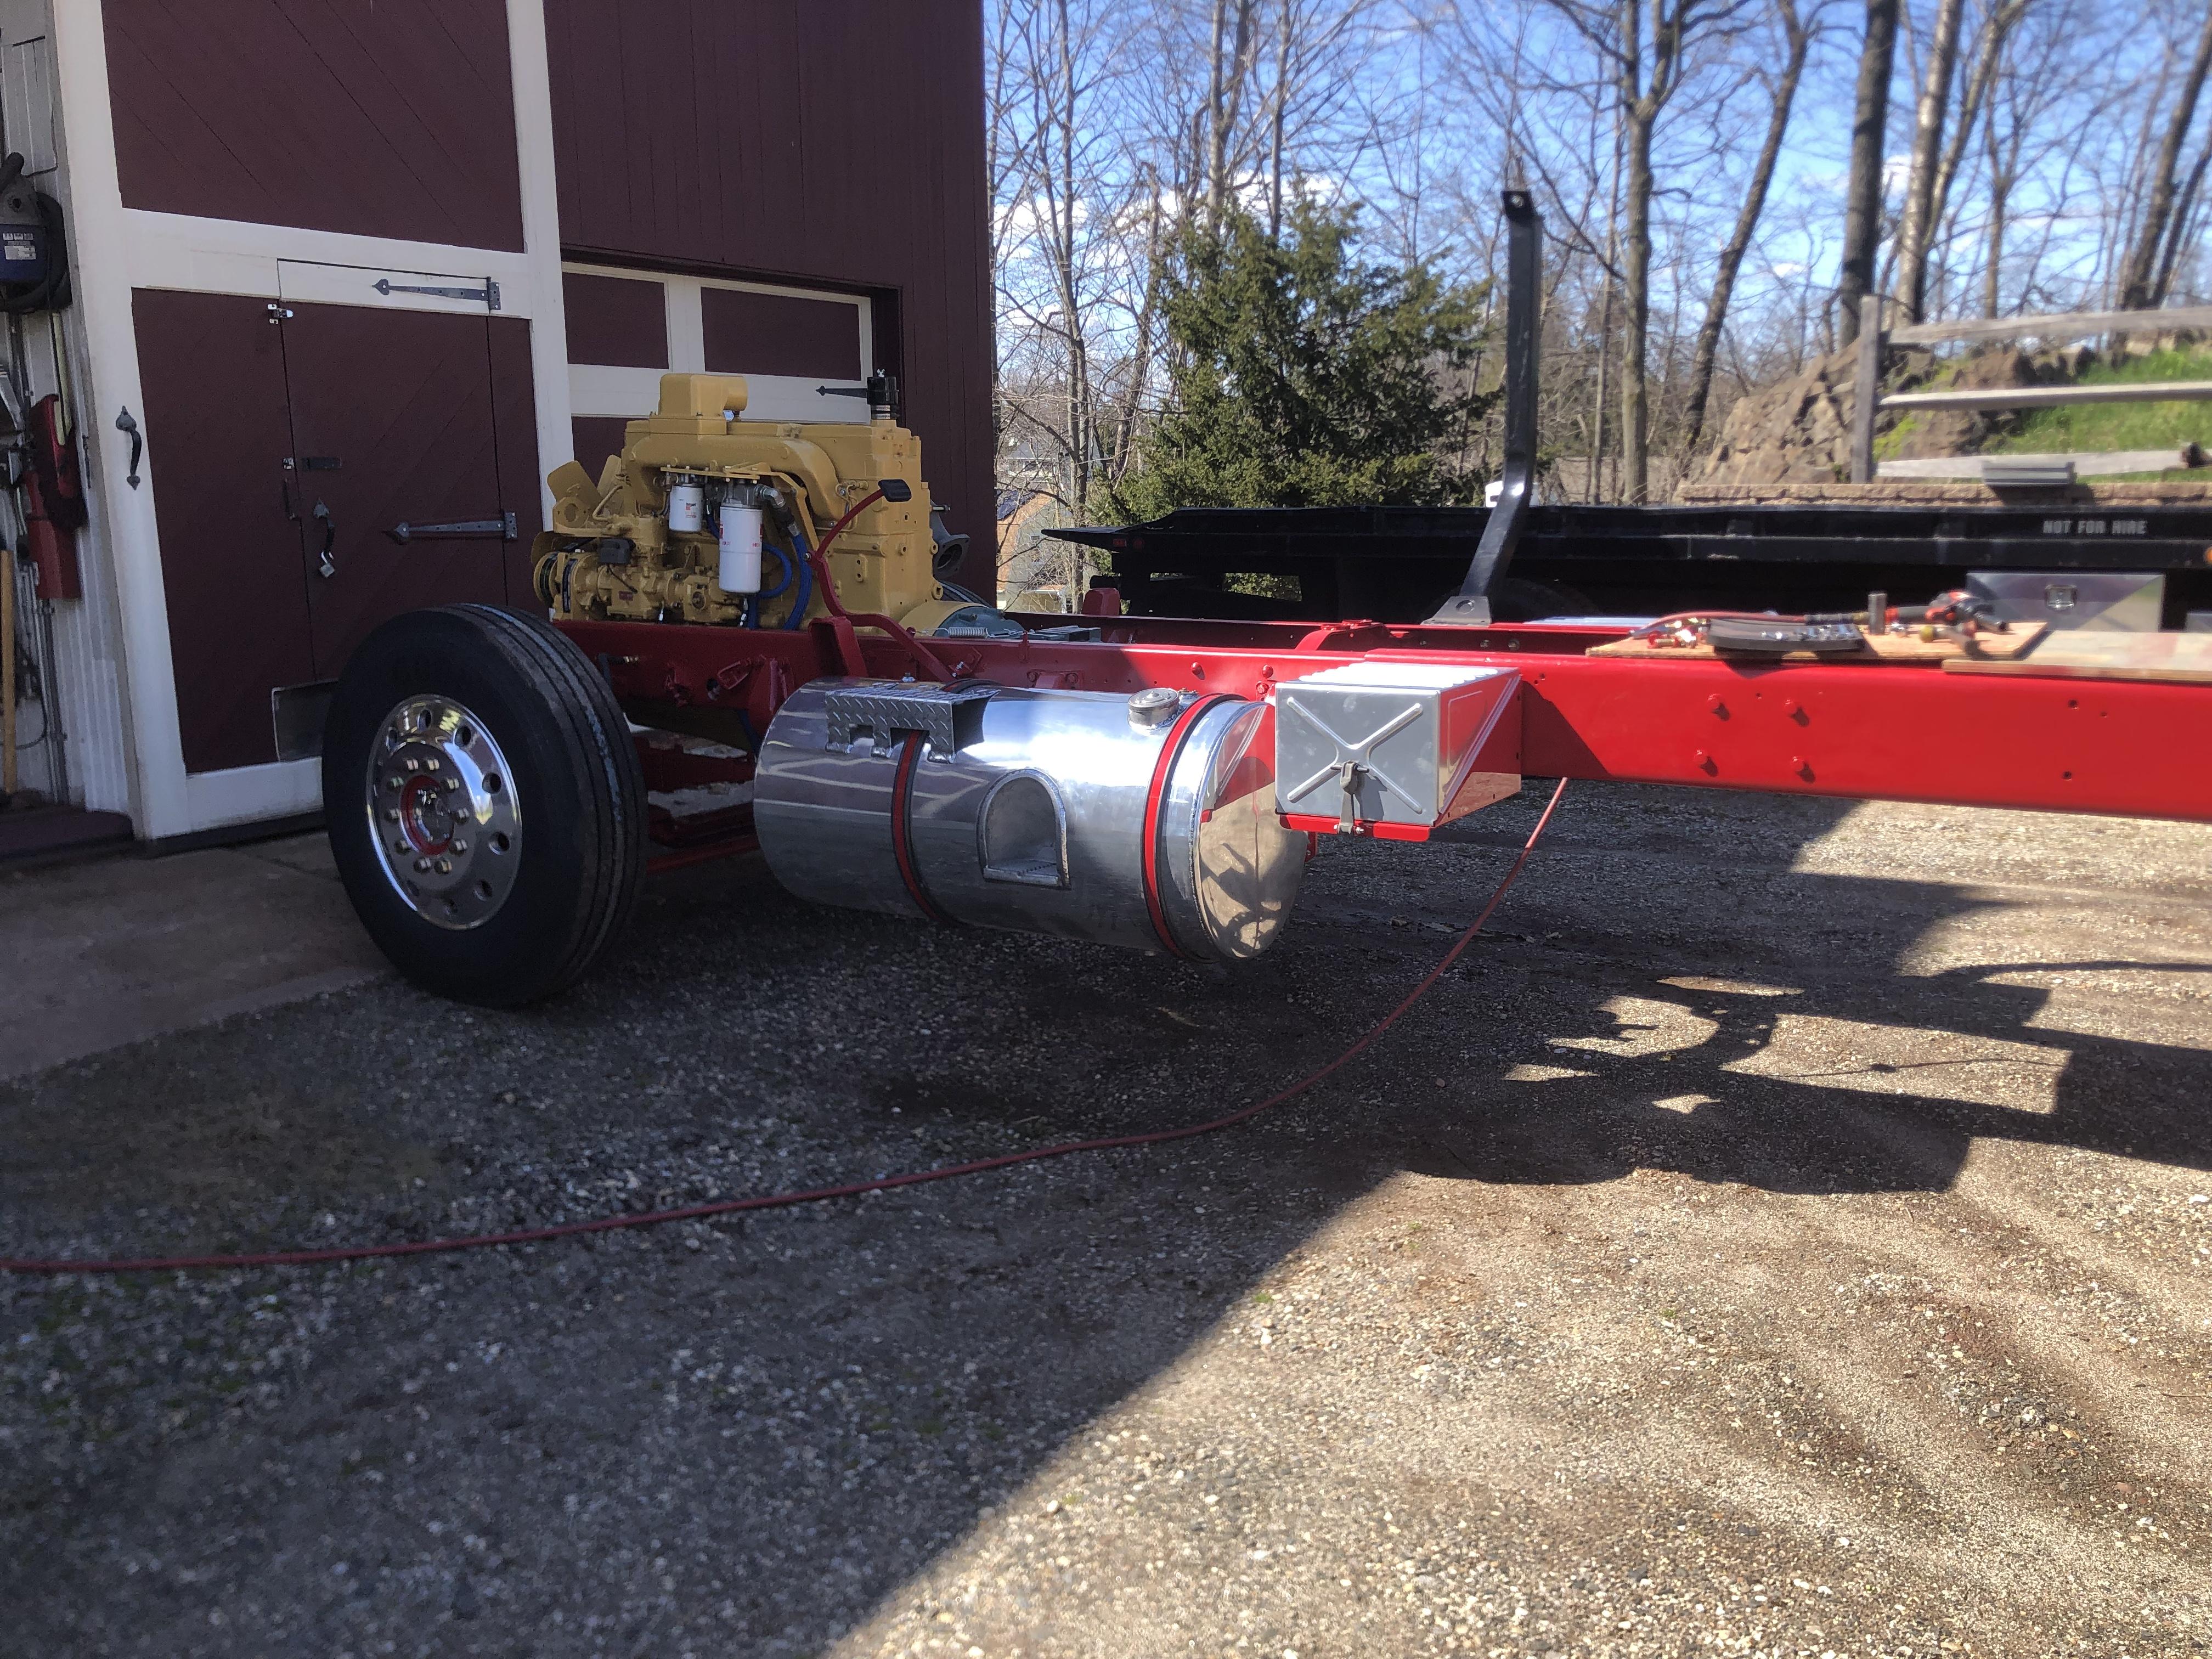
Going to run a 12V starter on the Cummins NH220. This has the L cab on it, so it’s completely different than a B-61 with the doghouse and firewall. -
B-73 Restoration
mattb73lt replied to mattb73lt's topic in Antique and Classic Mack Trucks General Discussion
I was going to do it with the doors open and run a stacked pair of 2X10”’s through the cab. Pad the wood with some high density foam and have two heavy eyelets at each end. Suspend that with a chain and use the same 5,000# lift with the jib boom to raise it into place. Praying like Hell the whole time that disaster doesn’t strike! -
B-73 Restoration
mattb73lt replied to mattb73lt's topic in Antique and Classic Mack Trucks General Discussion
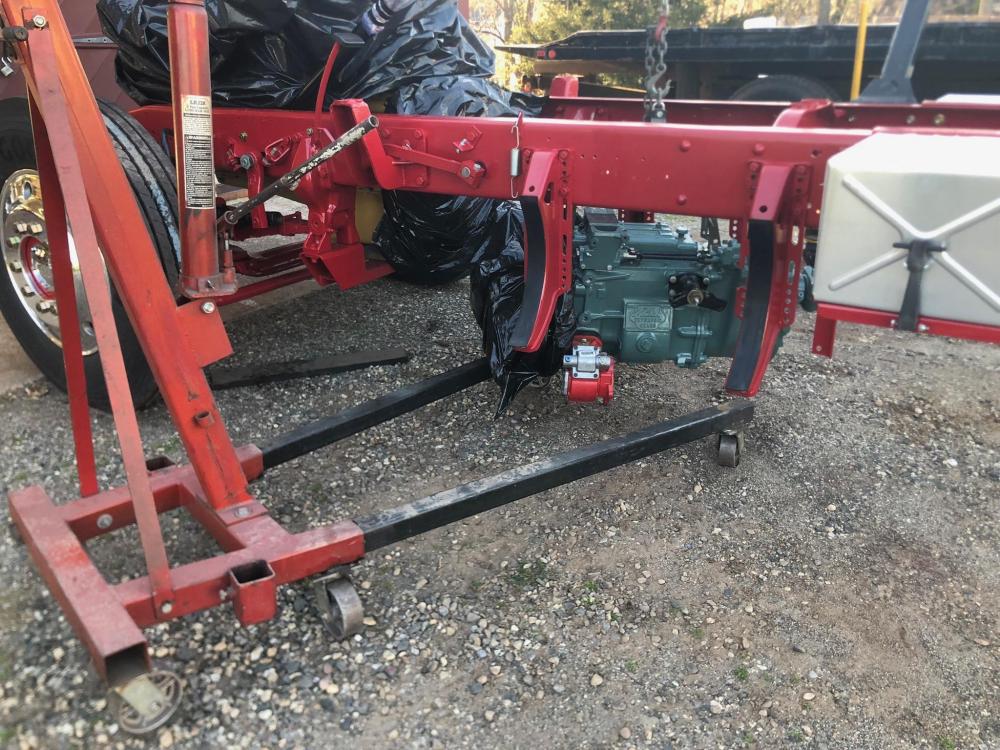
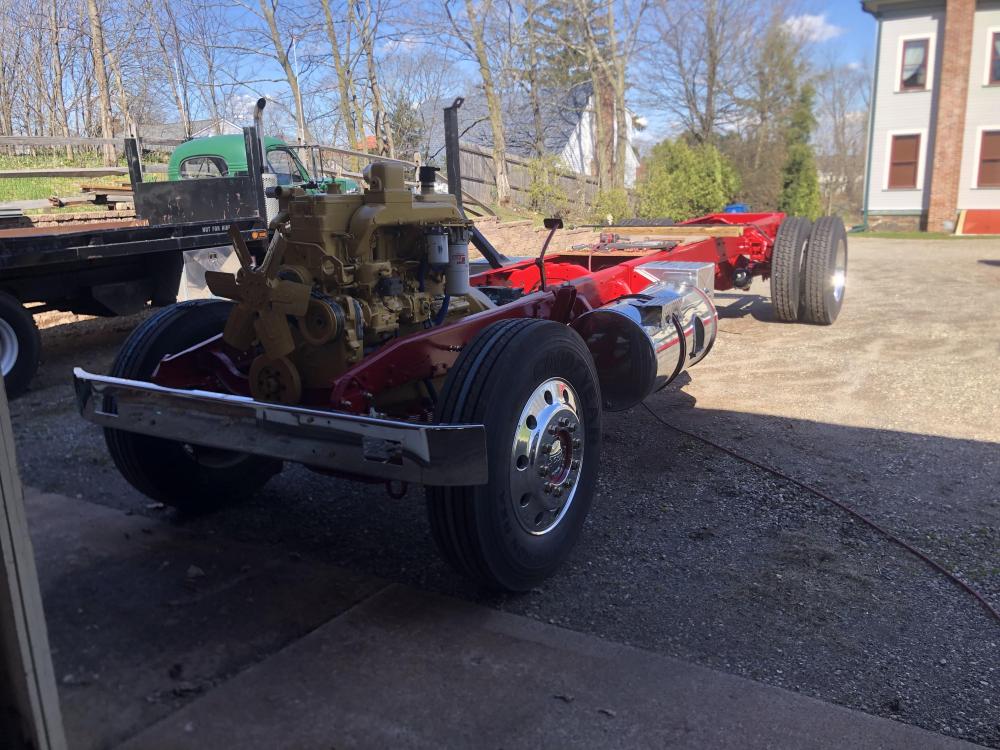
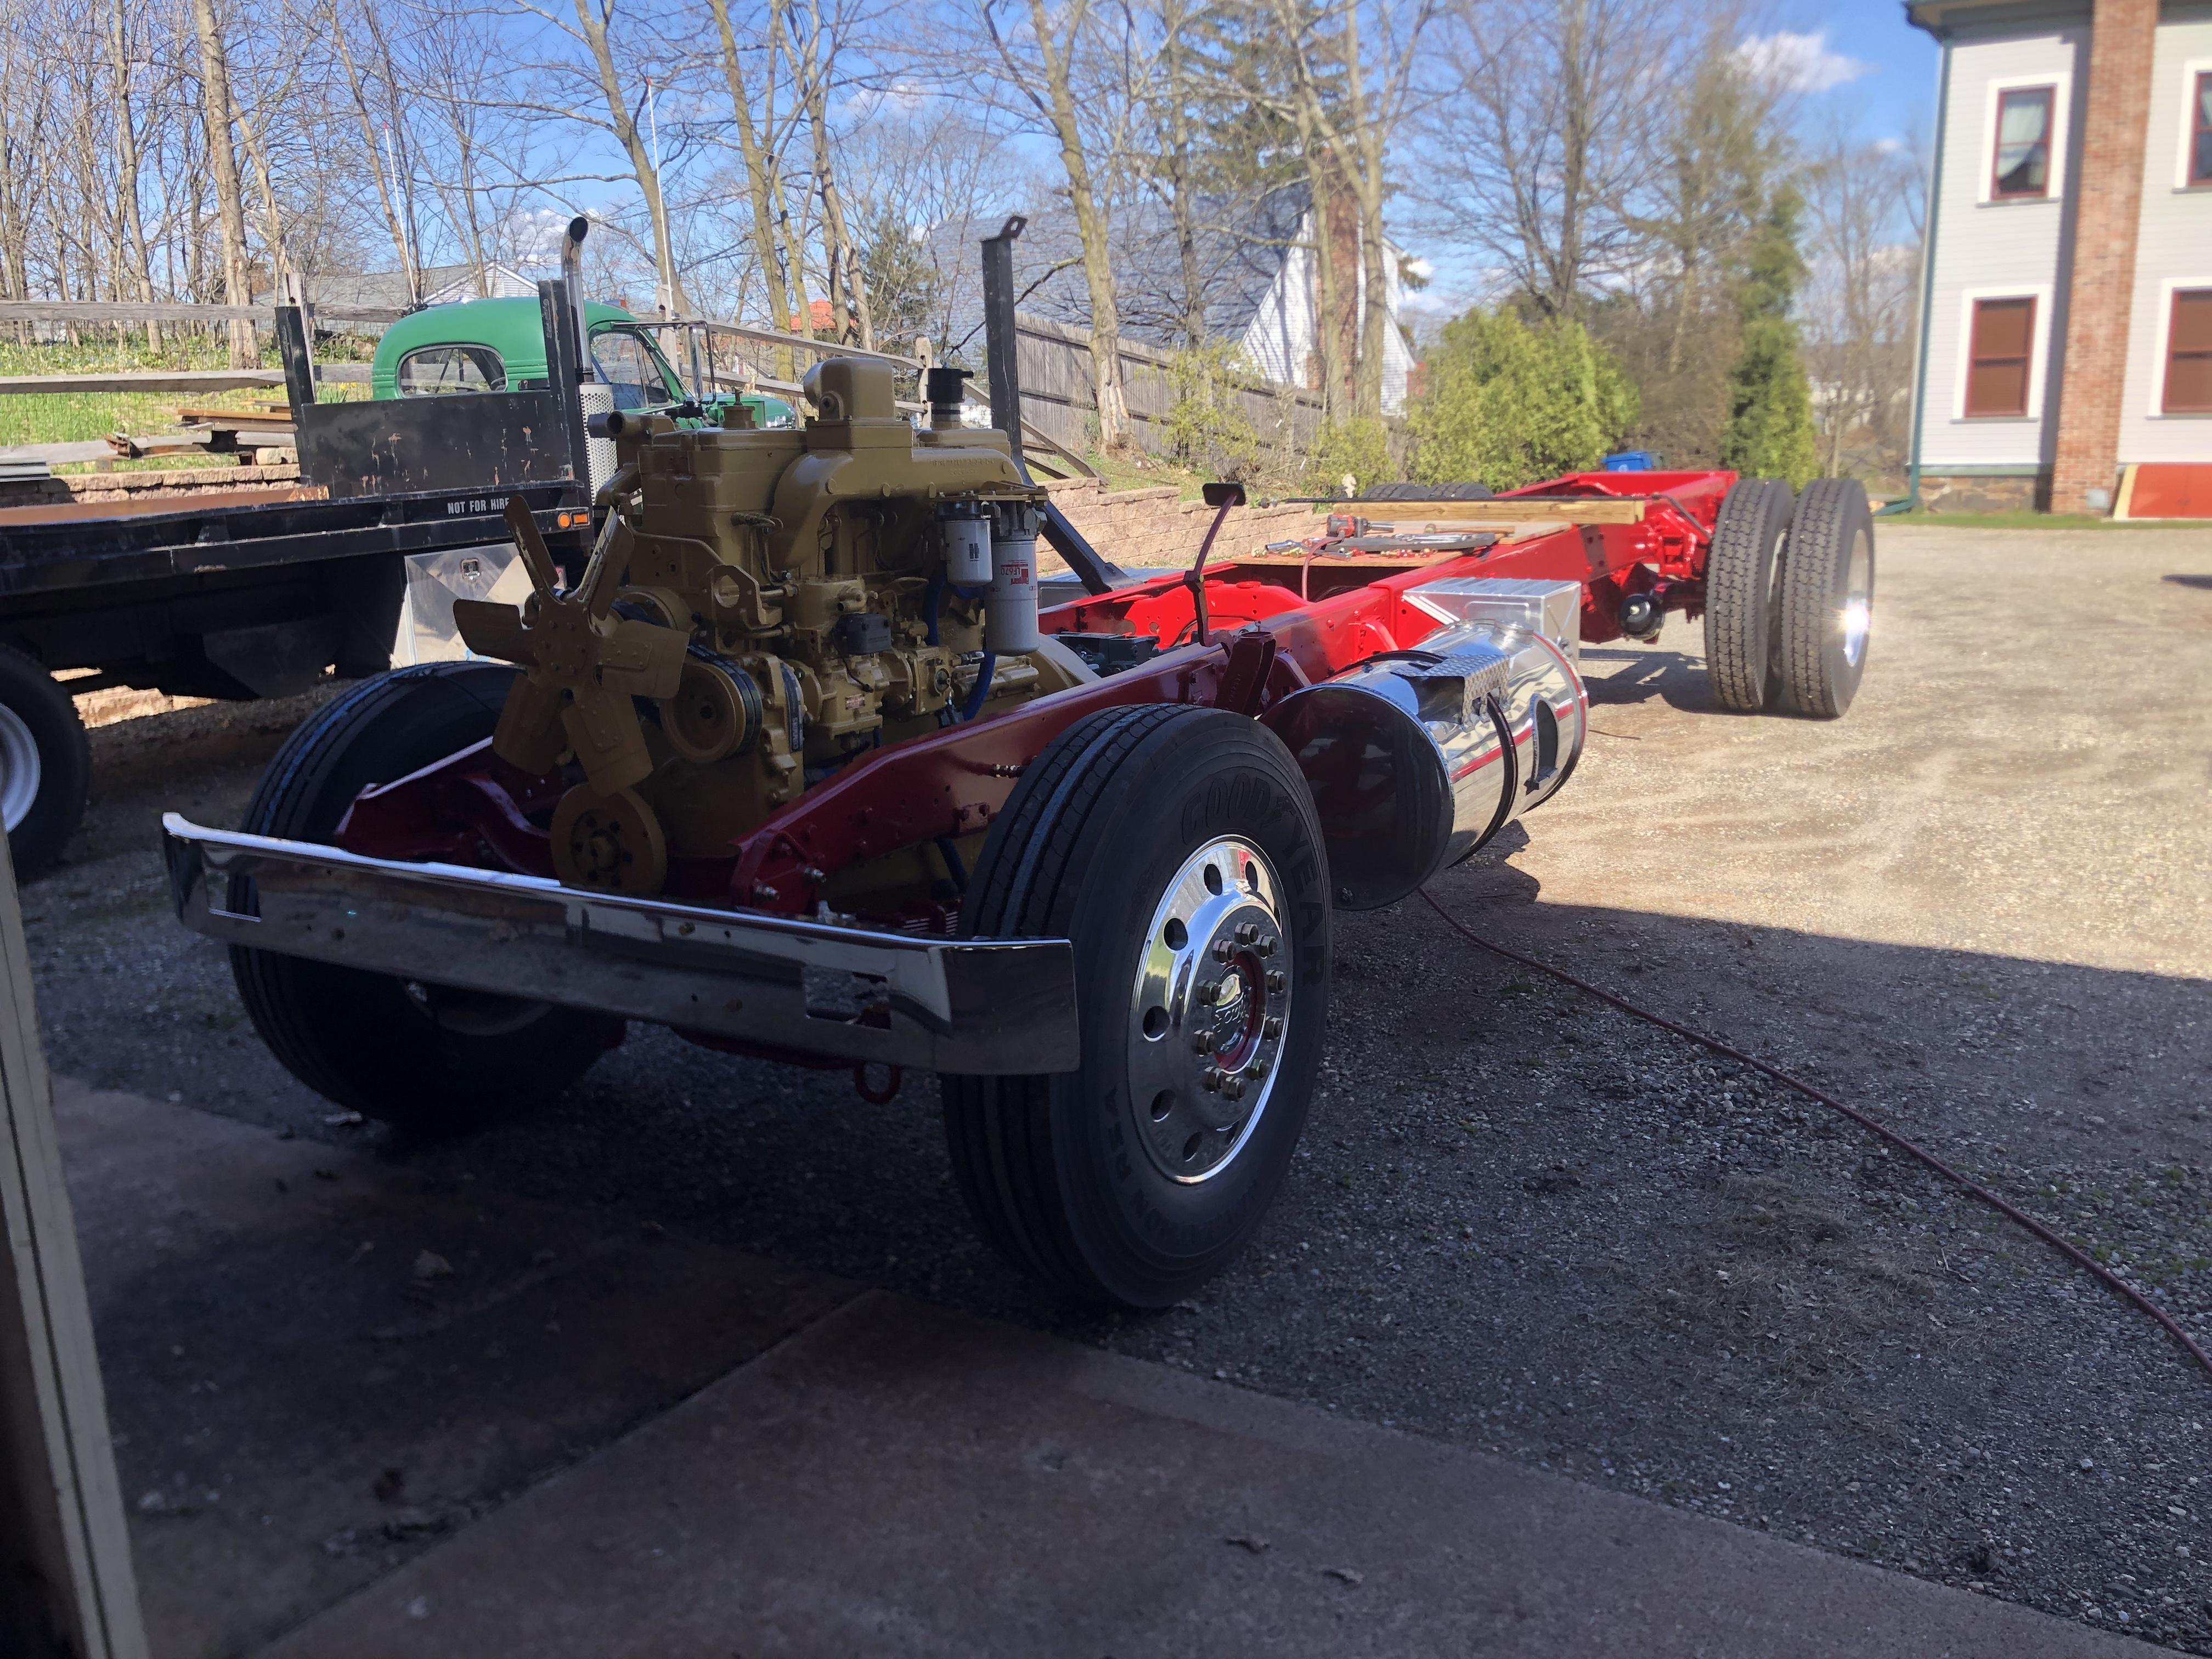
Another mock-up day. Getting the frame spacing set for all the items I need to mount. New battery boxes, stack support and put the tanks on for measurements and spacing. Still need a new hydraulic tank for the body and a pair of equipment boxes, but plenty of space as you move aft. I'm really loving the mix of paint, aluminum and stainless.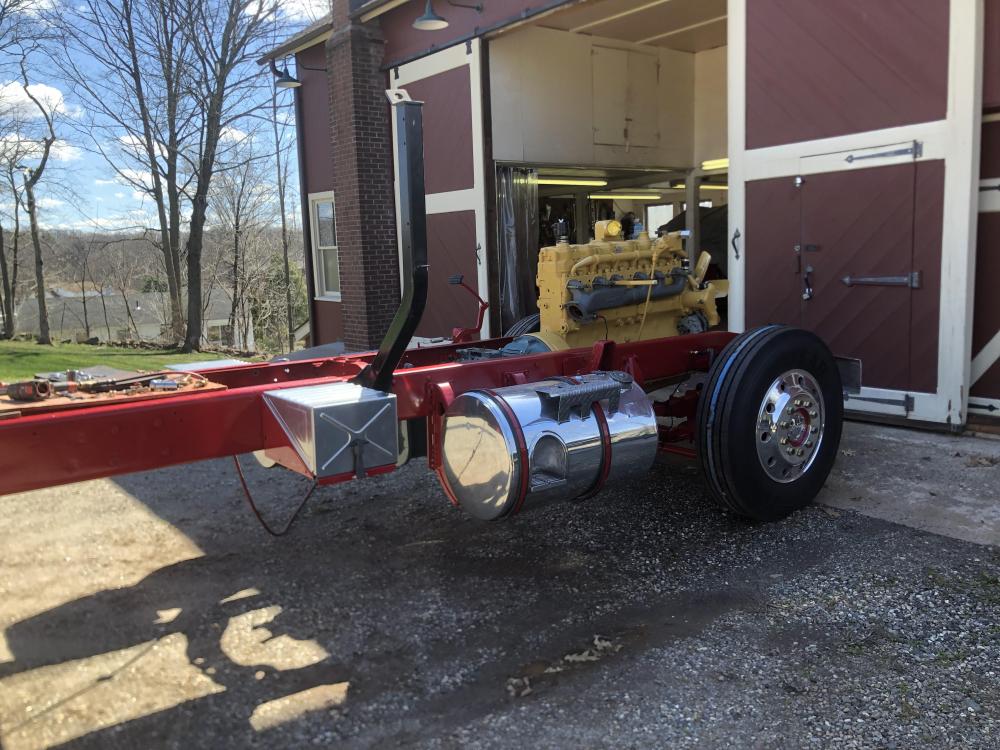

-
H Model Restoration
mattb73lt replied to h67st's topic in Antique and Classic Mack Trucks General Discussion
Nice detail work. Love the shifter boots! -
B-73 Restoration
mattb73lt replied to mattb73lt's topic in Antique and Classic Mack Trucks General Discussion
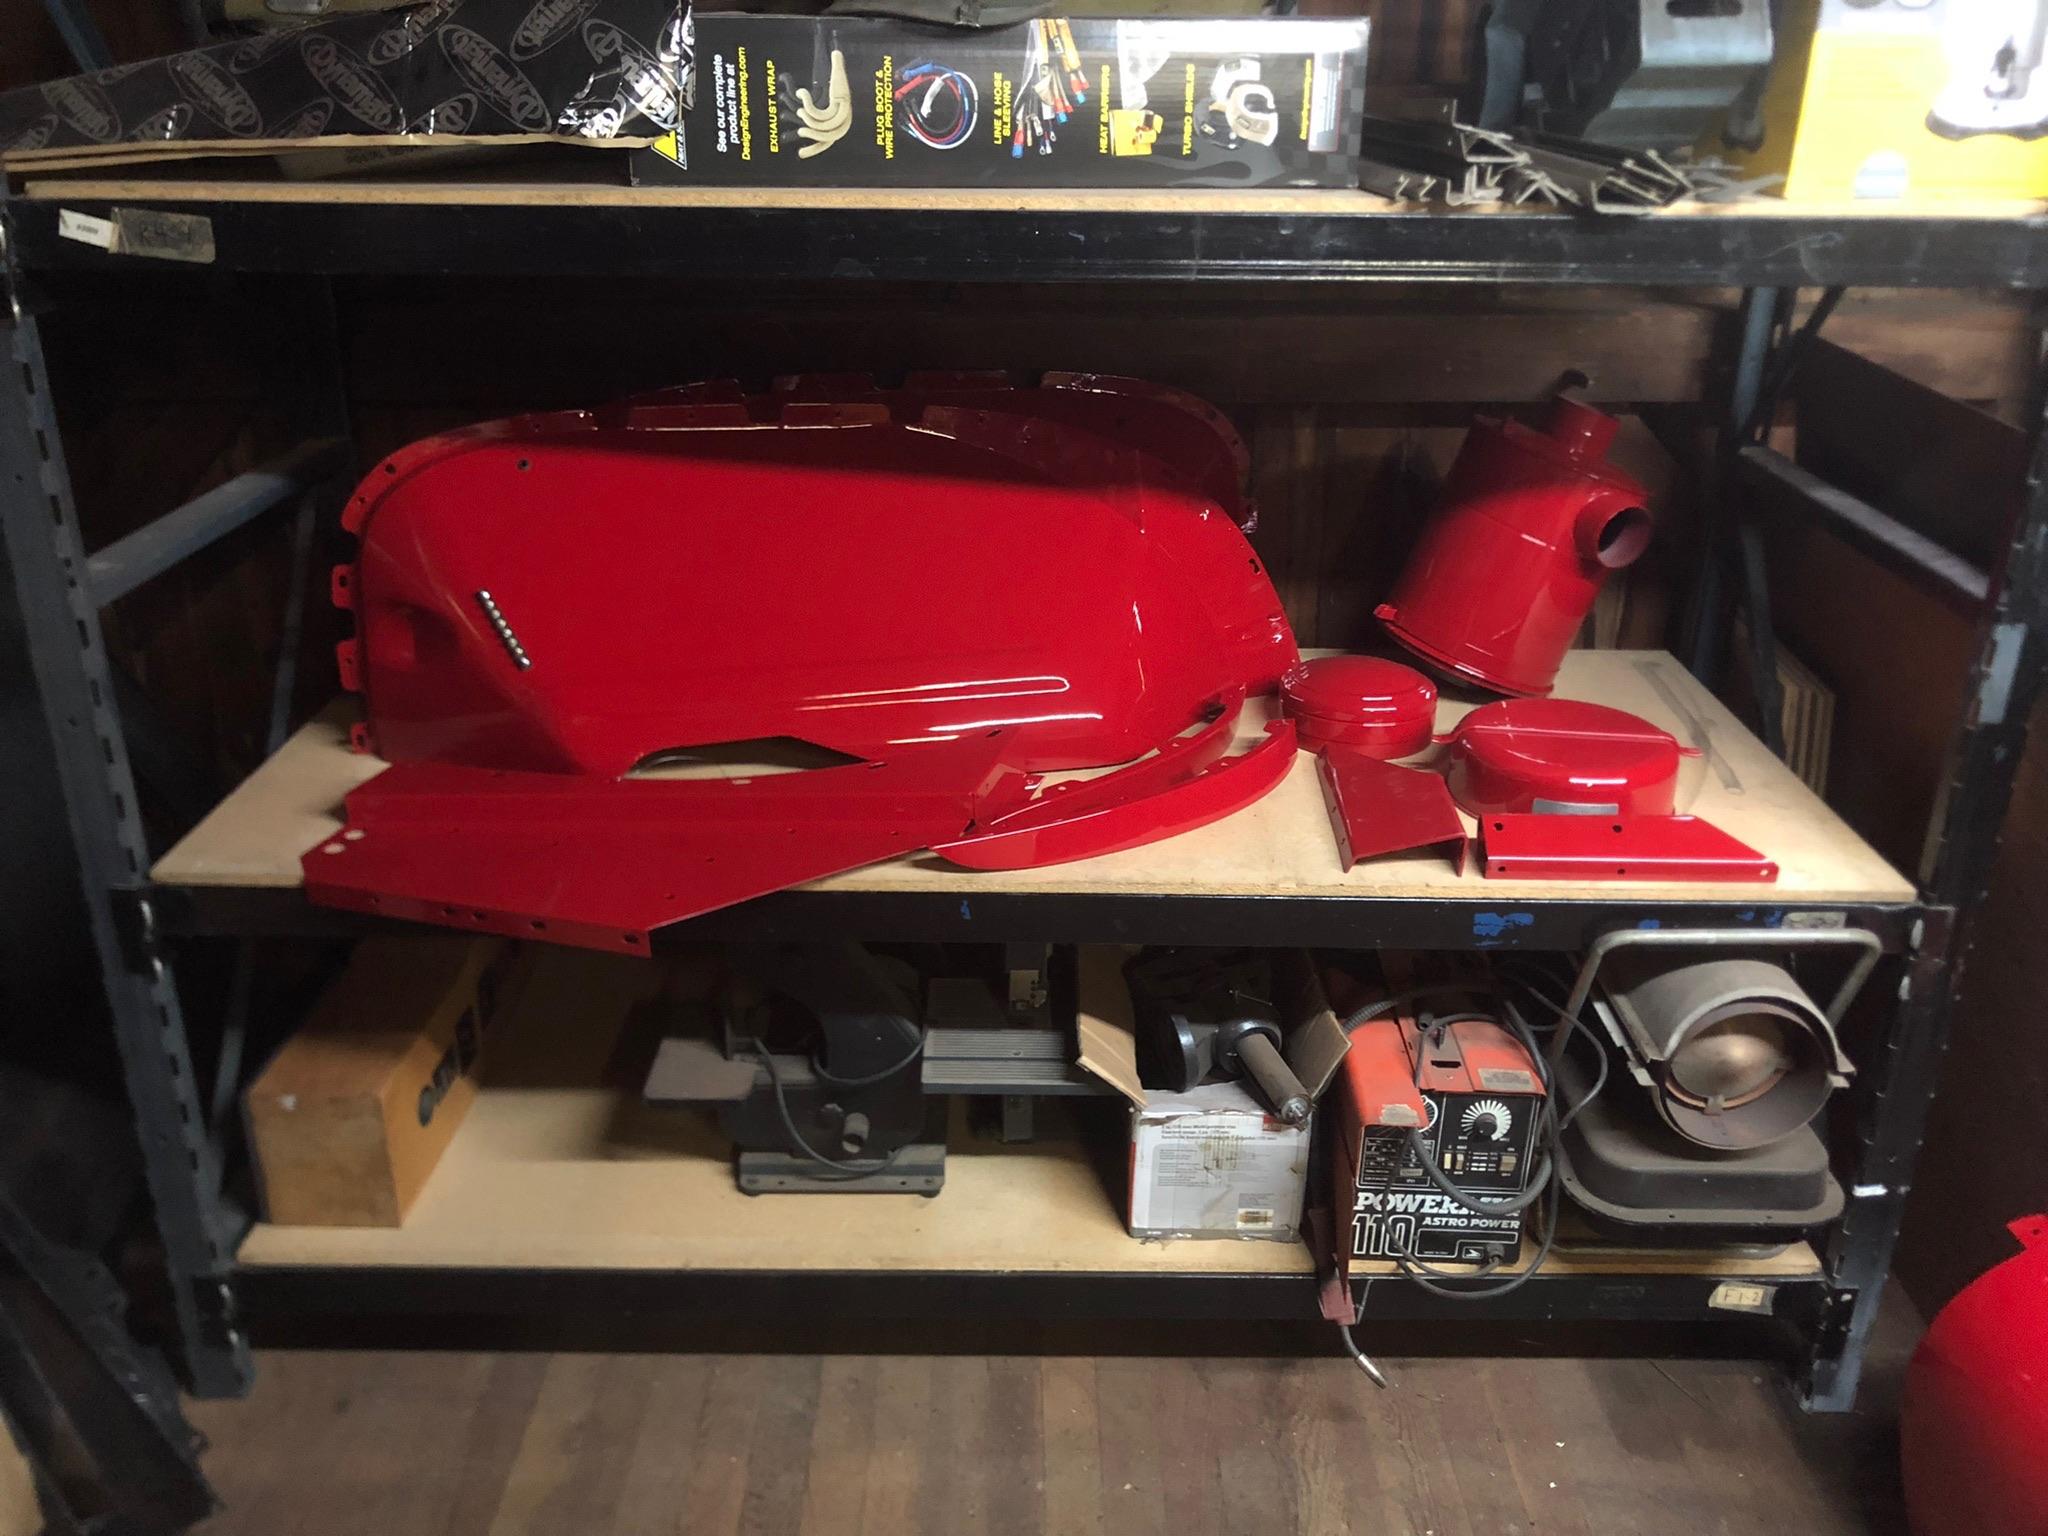
Yup, just a few more things to do and then back on the frame to finish up several items. Then it should start looking like a truck again. The shelves are full of parts ready to go!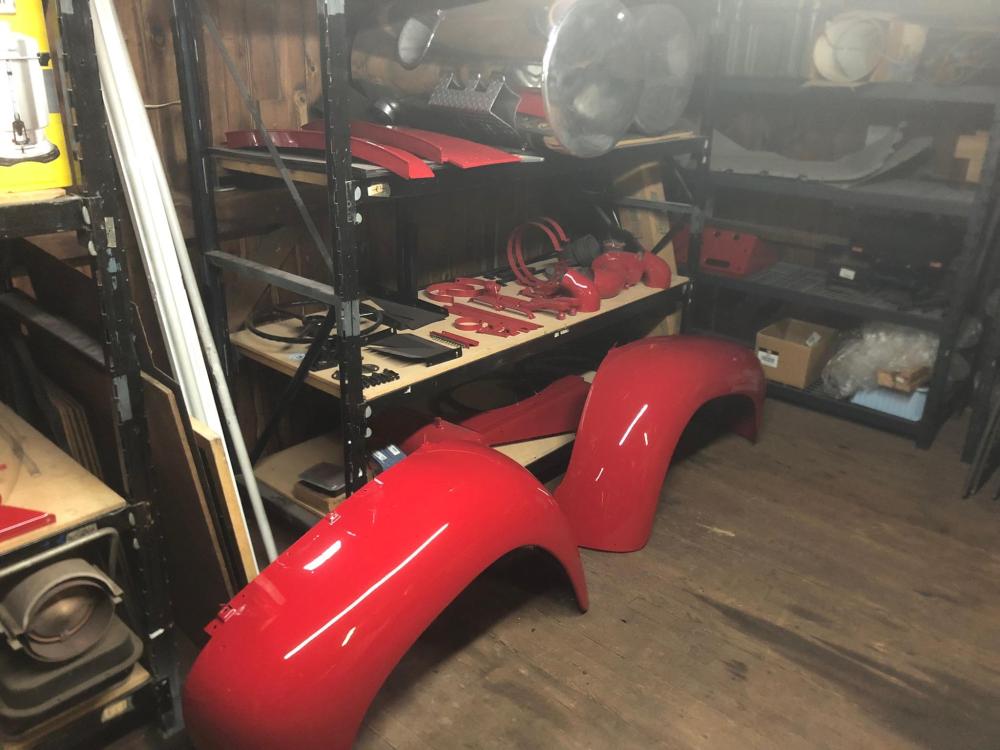

-
B-73 Restoration
mattb73lt replied to mattb73lt's topic in Antique and Classic Mack Trucks General Discussion
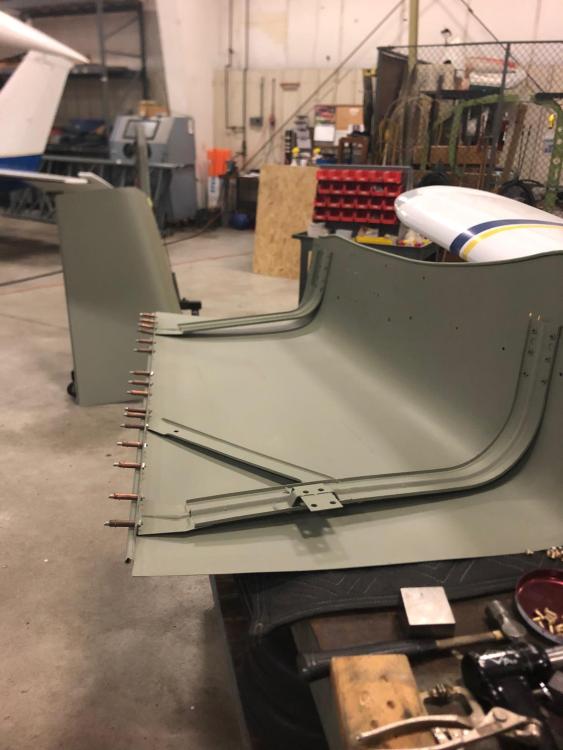
All primered out and fitted together. Heading off to a friends shop this week to rivet it back together and reawakening some dormant A&P skills I haven’t used in forever!
-
E3D173D7-8AC9-4F35-AD9E-AA377EF7B819.jpeg
mattb73lt commented on 1961H67's gallery image in BMT Member's Gallery - Click here to view our member's albums!
 Starting to look good!
 -
B-73 Restoration
mattb73lt replied to mattb73lt's topic in Antique and Classic Mack Trucks General Discussion
No, two different trucks. The one with the fender is 1961H67's, he's working on an LJ. We've been comparing notes and helping each other out. -
B-73 Restoration
mattb73lt replied to mattb73lt's topic in Antique and Classic Mack Trucks General Discussion
Excellent! They look straight, but yeah they’ll need some work. Splicing two together will be a challenge. It’s really starting to look good. I think your idea about the original paint scheme will certainly make it stand out for sure. Great to see it coming along. -
B-73 Restoration
mattb73lt replied to mattb73lt's topic in Antique and Classic Mack Trucks General Discussion
Mock up Monday. Tested out my new bumper to check the alignment of the brackets that were mangled when I got it. This truck came with a flush bumper with no grill guard, which I always liked with this style radiator. When I found it it had a bumper off a DM grafted to it. Those brackets were welded to these. Lots of heat and hammering to get them back in shape. This should make the front end look really good.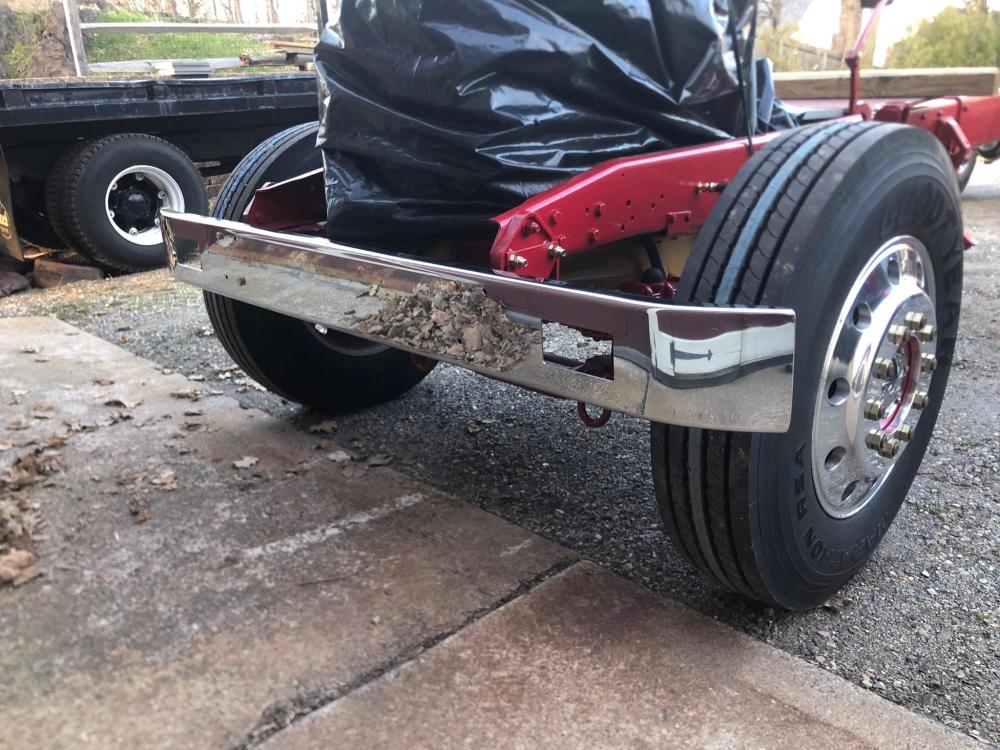
-
B-73 Restoration
mattb73lt replied to mattb73lt's topic in Antique and Classic Mack Trucks General Discussion
Thank you!


BMT Forum Logo
