


mattb73lt
-
Posts
1,432 -
Joined
-
Last visited
-
Days Won
146
Content Type
Profiles
Forums
Gallery
Events
Blogs
BMT Wiki
Collections
Store
Everything posted by mattb73lt
-

E3D173D7-8AC9-4F35-AD9E-AA377EF7B819.jpeg
mattb73lt commented on 1961H67's gallery image in BMT Member's Gallery - Click here to view our member's albums!
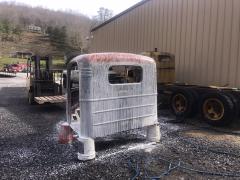 Starting to look good!
 -
B-73 Restoration
mattb73lt replied to mattb73lt's topic in Antique and Classic Mack Trucks General Discussion
No, two different trucks. The one with the fender is 1961H67's, he's working on an LJ. We've been comparing notes and helping each other out. -
B-73 Restoration
mattb73lt replied to mattb73lt's topic in Antique and Classic Mack Trucks General Discussion
Excellent! They look straight, but yeah they’ll need some work. Splicing two together will be a challenge. It’s really starting to look good. I think your idea about the original paint scheme will certainly make it stand out for sure. Great to see it coming along. -
B-73 Restoration
mattb73lt replied to mattb73lt's topic in Antique and Classic Mack Trucks General Discussion
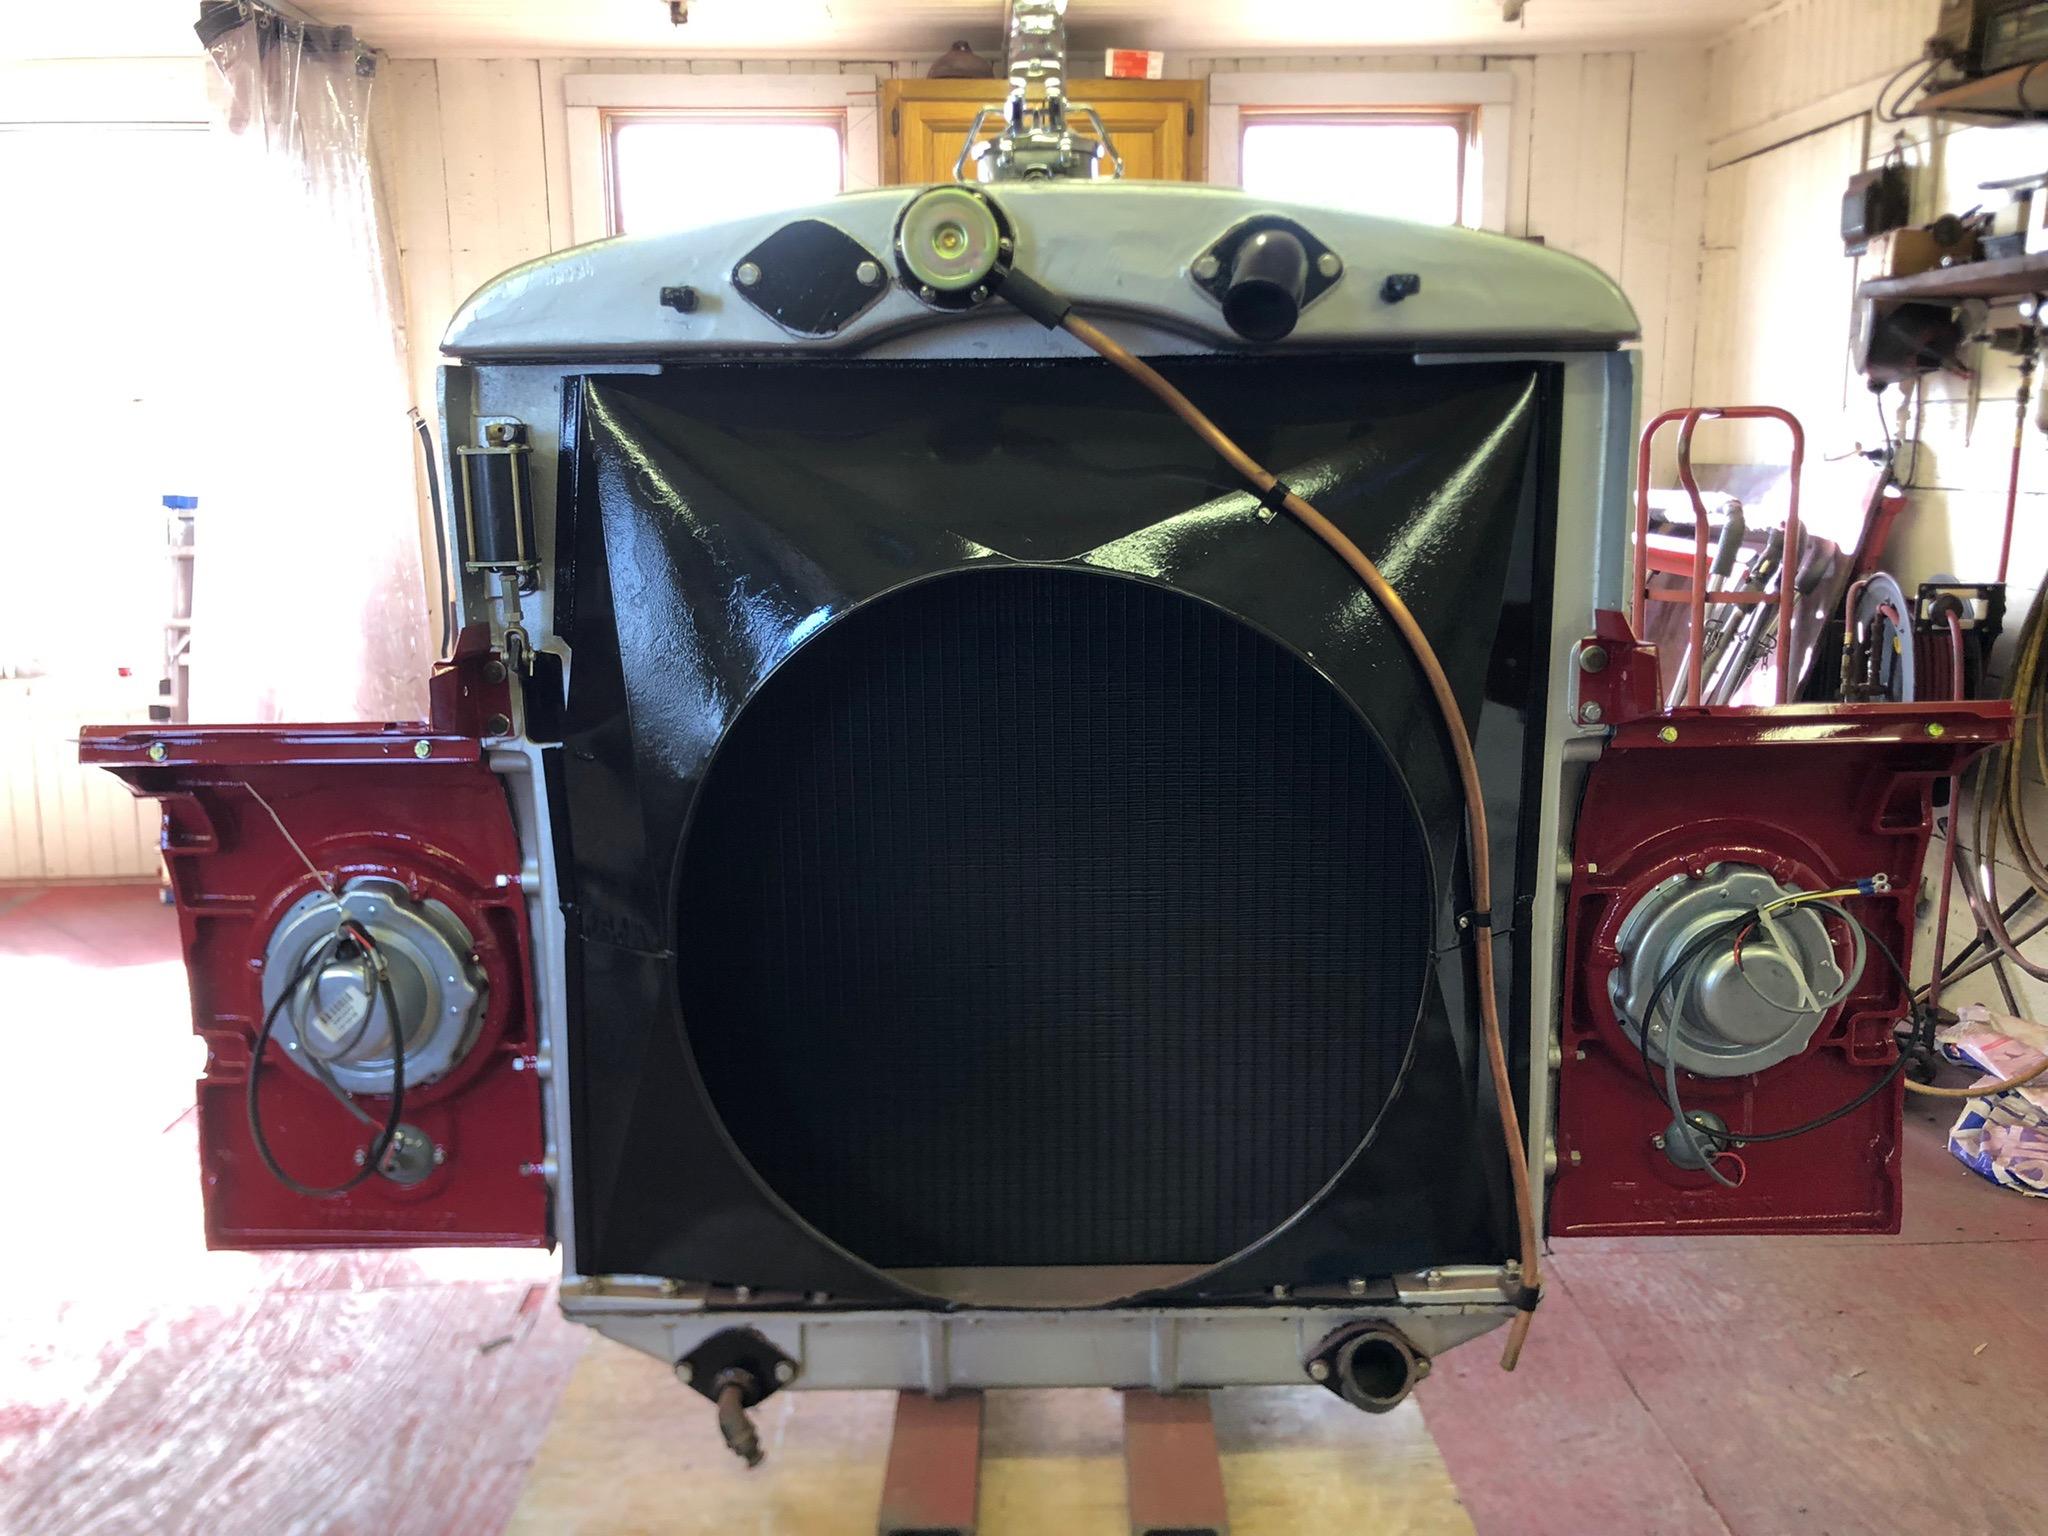
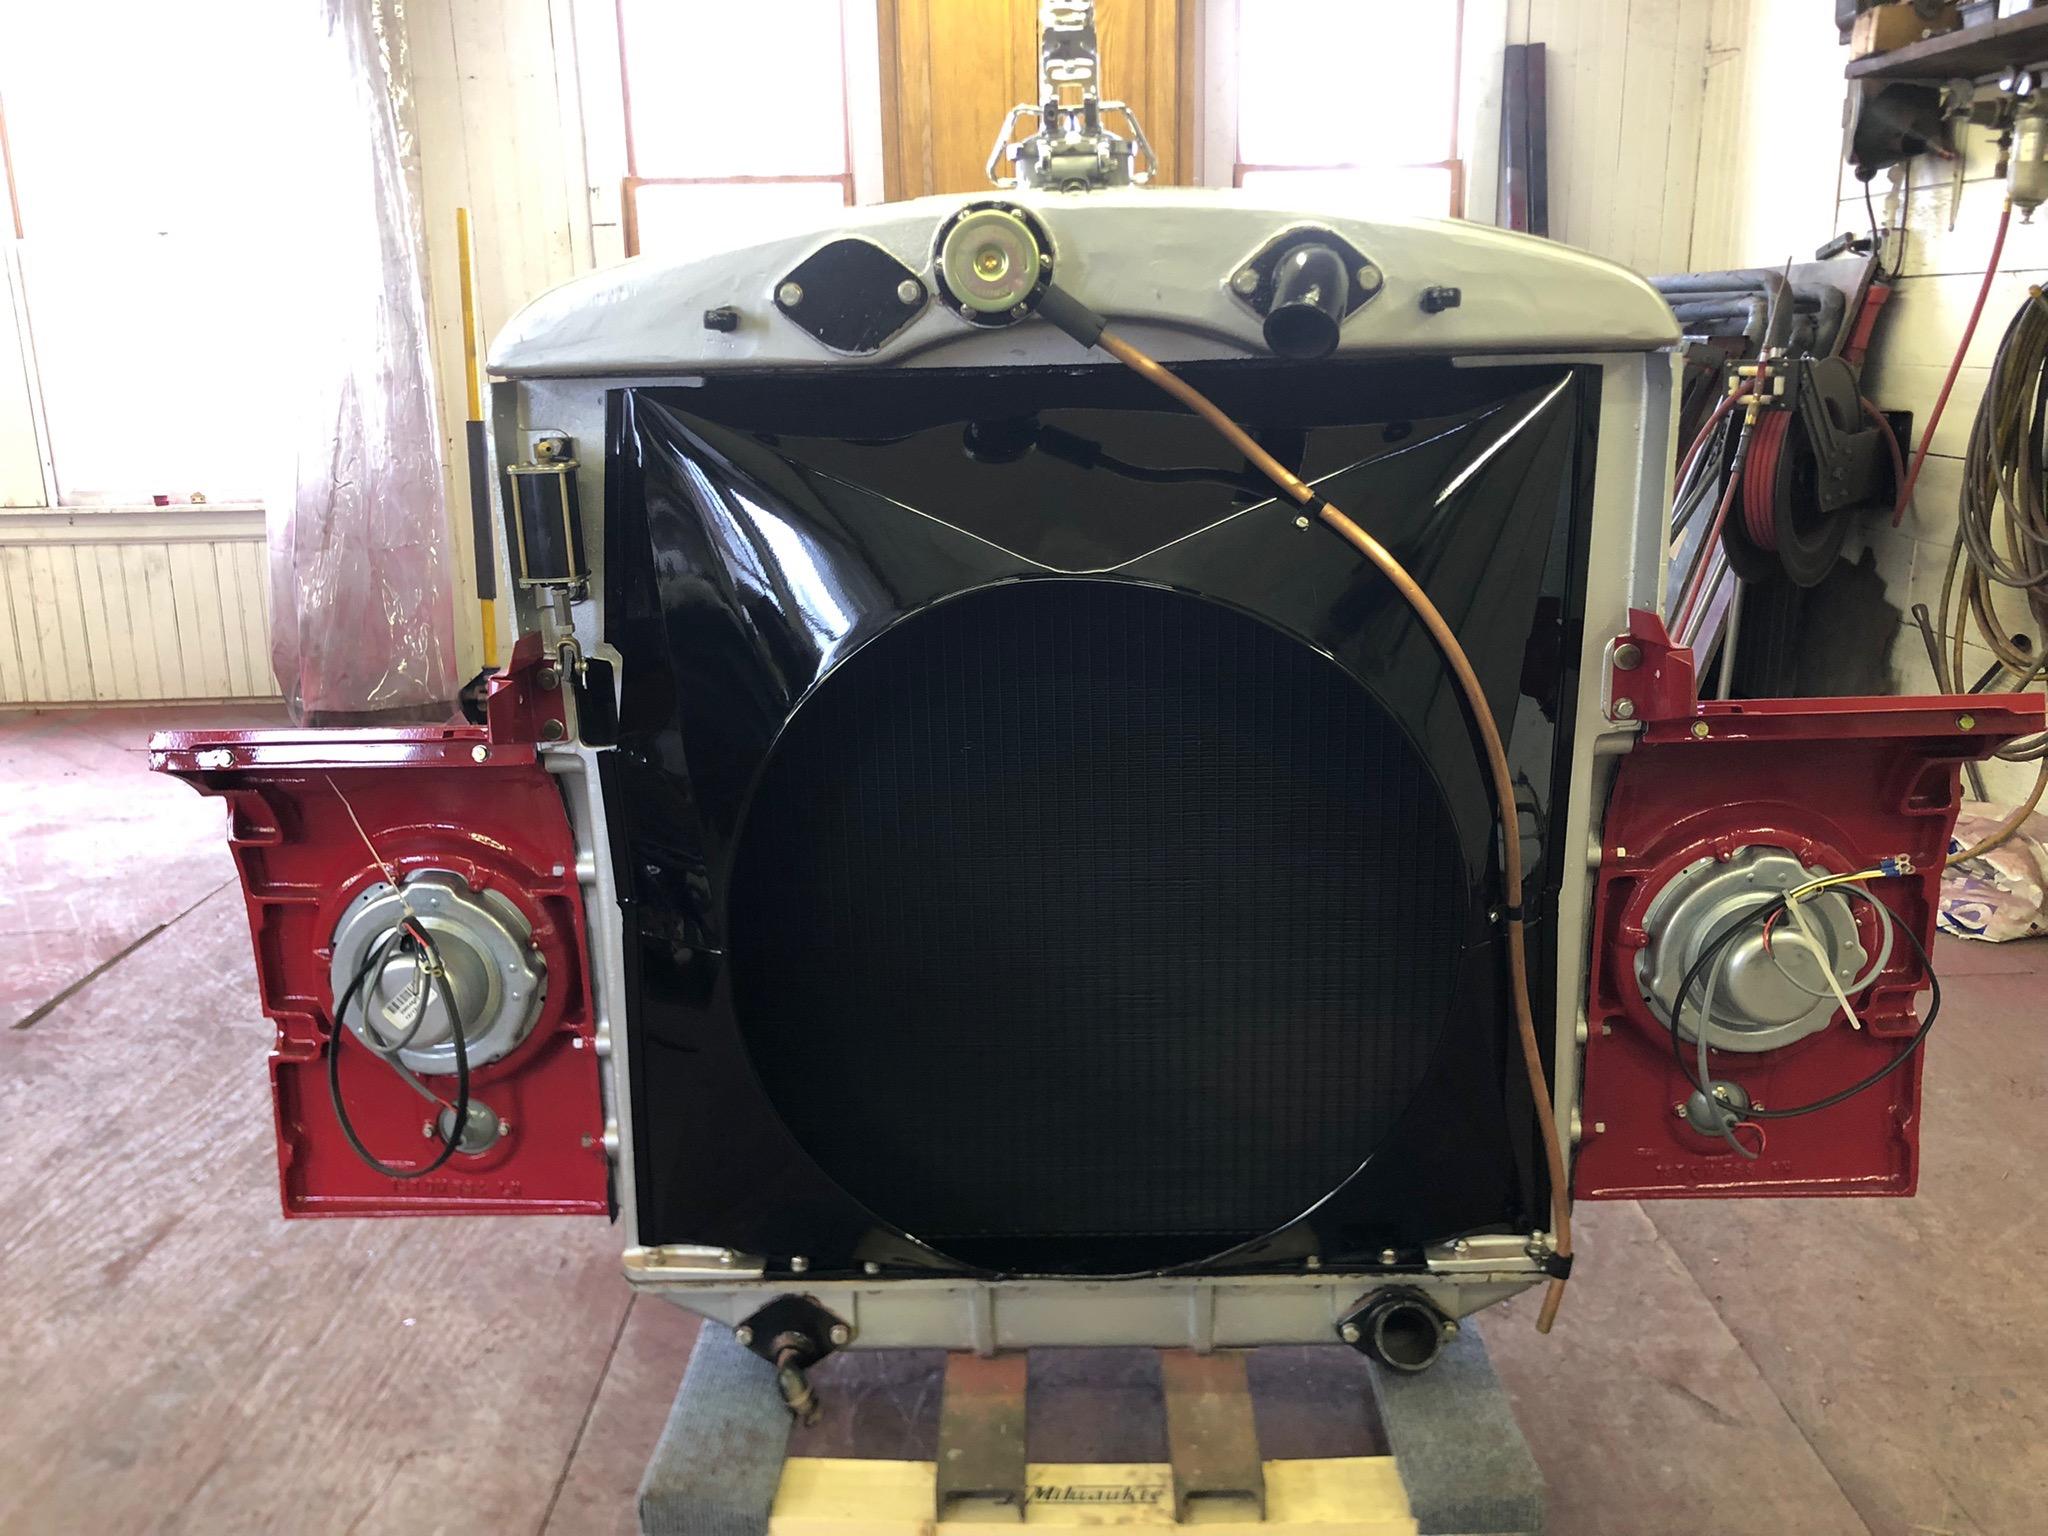
Mock up Monday. Tested out my new bumper to check the alignment of the brackets that were mangled when I got it. This truck came with a flush bumper with no grill guard, which I always liked with this style radiator. When I found it it had a bumper off a DM grafted to it. Those brackets were welded to these. Lots of heat and hammering to get them back in shape. This should make the front end look really good.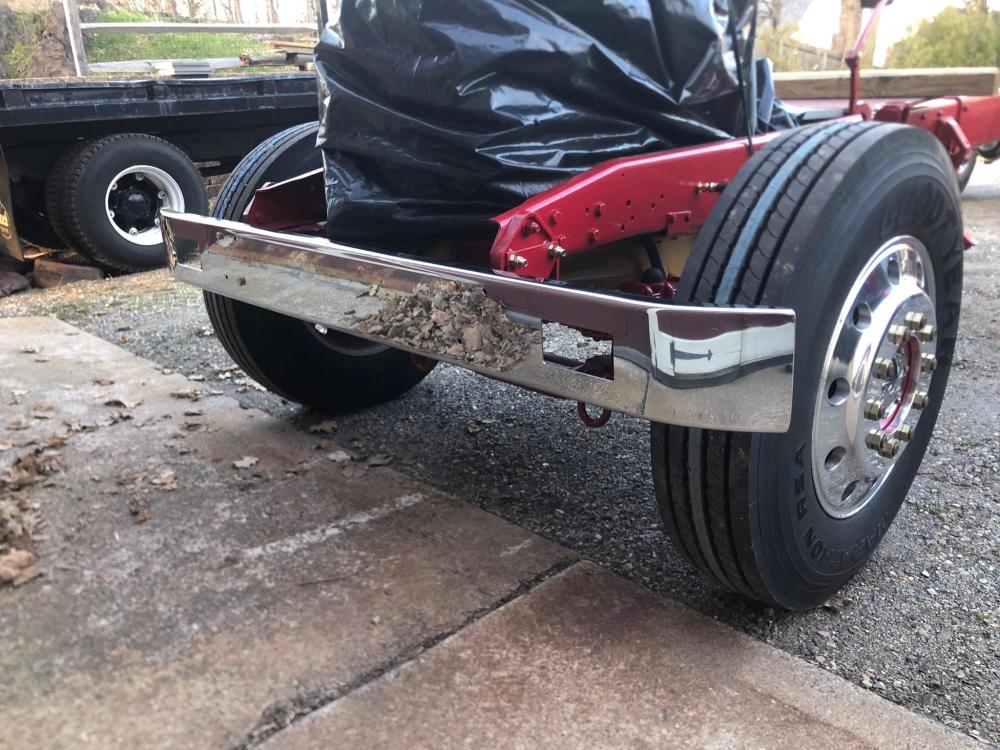
-
B-73 Restoration
mattb73lt replied to mattb73lt's topic in Antique and Classic Mack Trucks General Discussion
Thank you! -
B-73 Restoration
mattb73lt replied to mattb73lt's topic in Antique and Classic Mack Trucks General Discussion
1961H67 awesome pictures!! I’m so glad all those parts were so helpful. This little blog has been so helpful to me in keeping me focused and on track and I’m even happier that it has helped you in your efforts, along with others who maybe are just here to read through it. It has been quite the journey thus far!! -
B-73 Restoration
mattb73lt replied to mattb73lt's topic in Antique and Classic Mack Trucks General Discussion
No, I’m dying to see it together too and a little anxious about putting the cab on without dropping it! Also, not fully retired yet, but my new career gives me a lot of time to do things in the winter months and things will really pick up in May for the summer. So, I’m pushing to get as much done now. -
B-73 Restoration
mattb73lt replied to mattb73lt's topic in Antique and Classic Mack Trucks General Discussion
Thanks for the comments. I never thought this would be this nice, considering what I started with. I had a vision of what I wanted to make it into when I found it all those years ago, but never it being this nice or taking so long. In a way, I’m glad it did because my skills have improved and I have the means and time now to do it right. And that damn cab! It almost made me question starting it because it was so bad. But finding several things for it and a friend that gave me the fire truck cab for the roof made me think I could do it. Plus, chatting with everyone has been a blast. Never imagined chatting with people from Australia or Russia about it. So I thank everyone for adding to the conversation, it all helps on this long journey!! Matt -
B-73 Restoration
mattb73lt replied to mattb73lt's topic in Antique and Classic Mack Trucks General Discussion
Ok, I’ll run to the hardware store to see if I can find some rattle can paint to match, clarinet reeds and scotch tape and strap this whole thing back together to see if I can make it!,😂😂 -
B-73 Restoration
mattb73lt replied to mattb73lt's topic in Antique and Classic Mack Trucks General Discussion
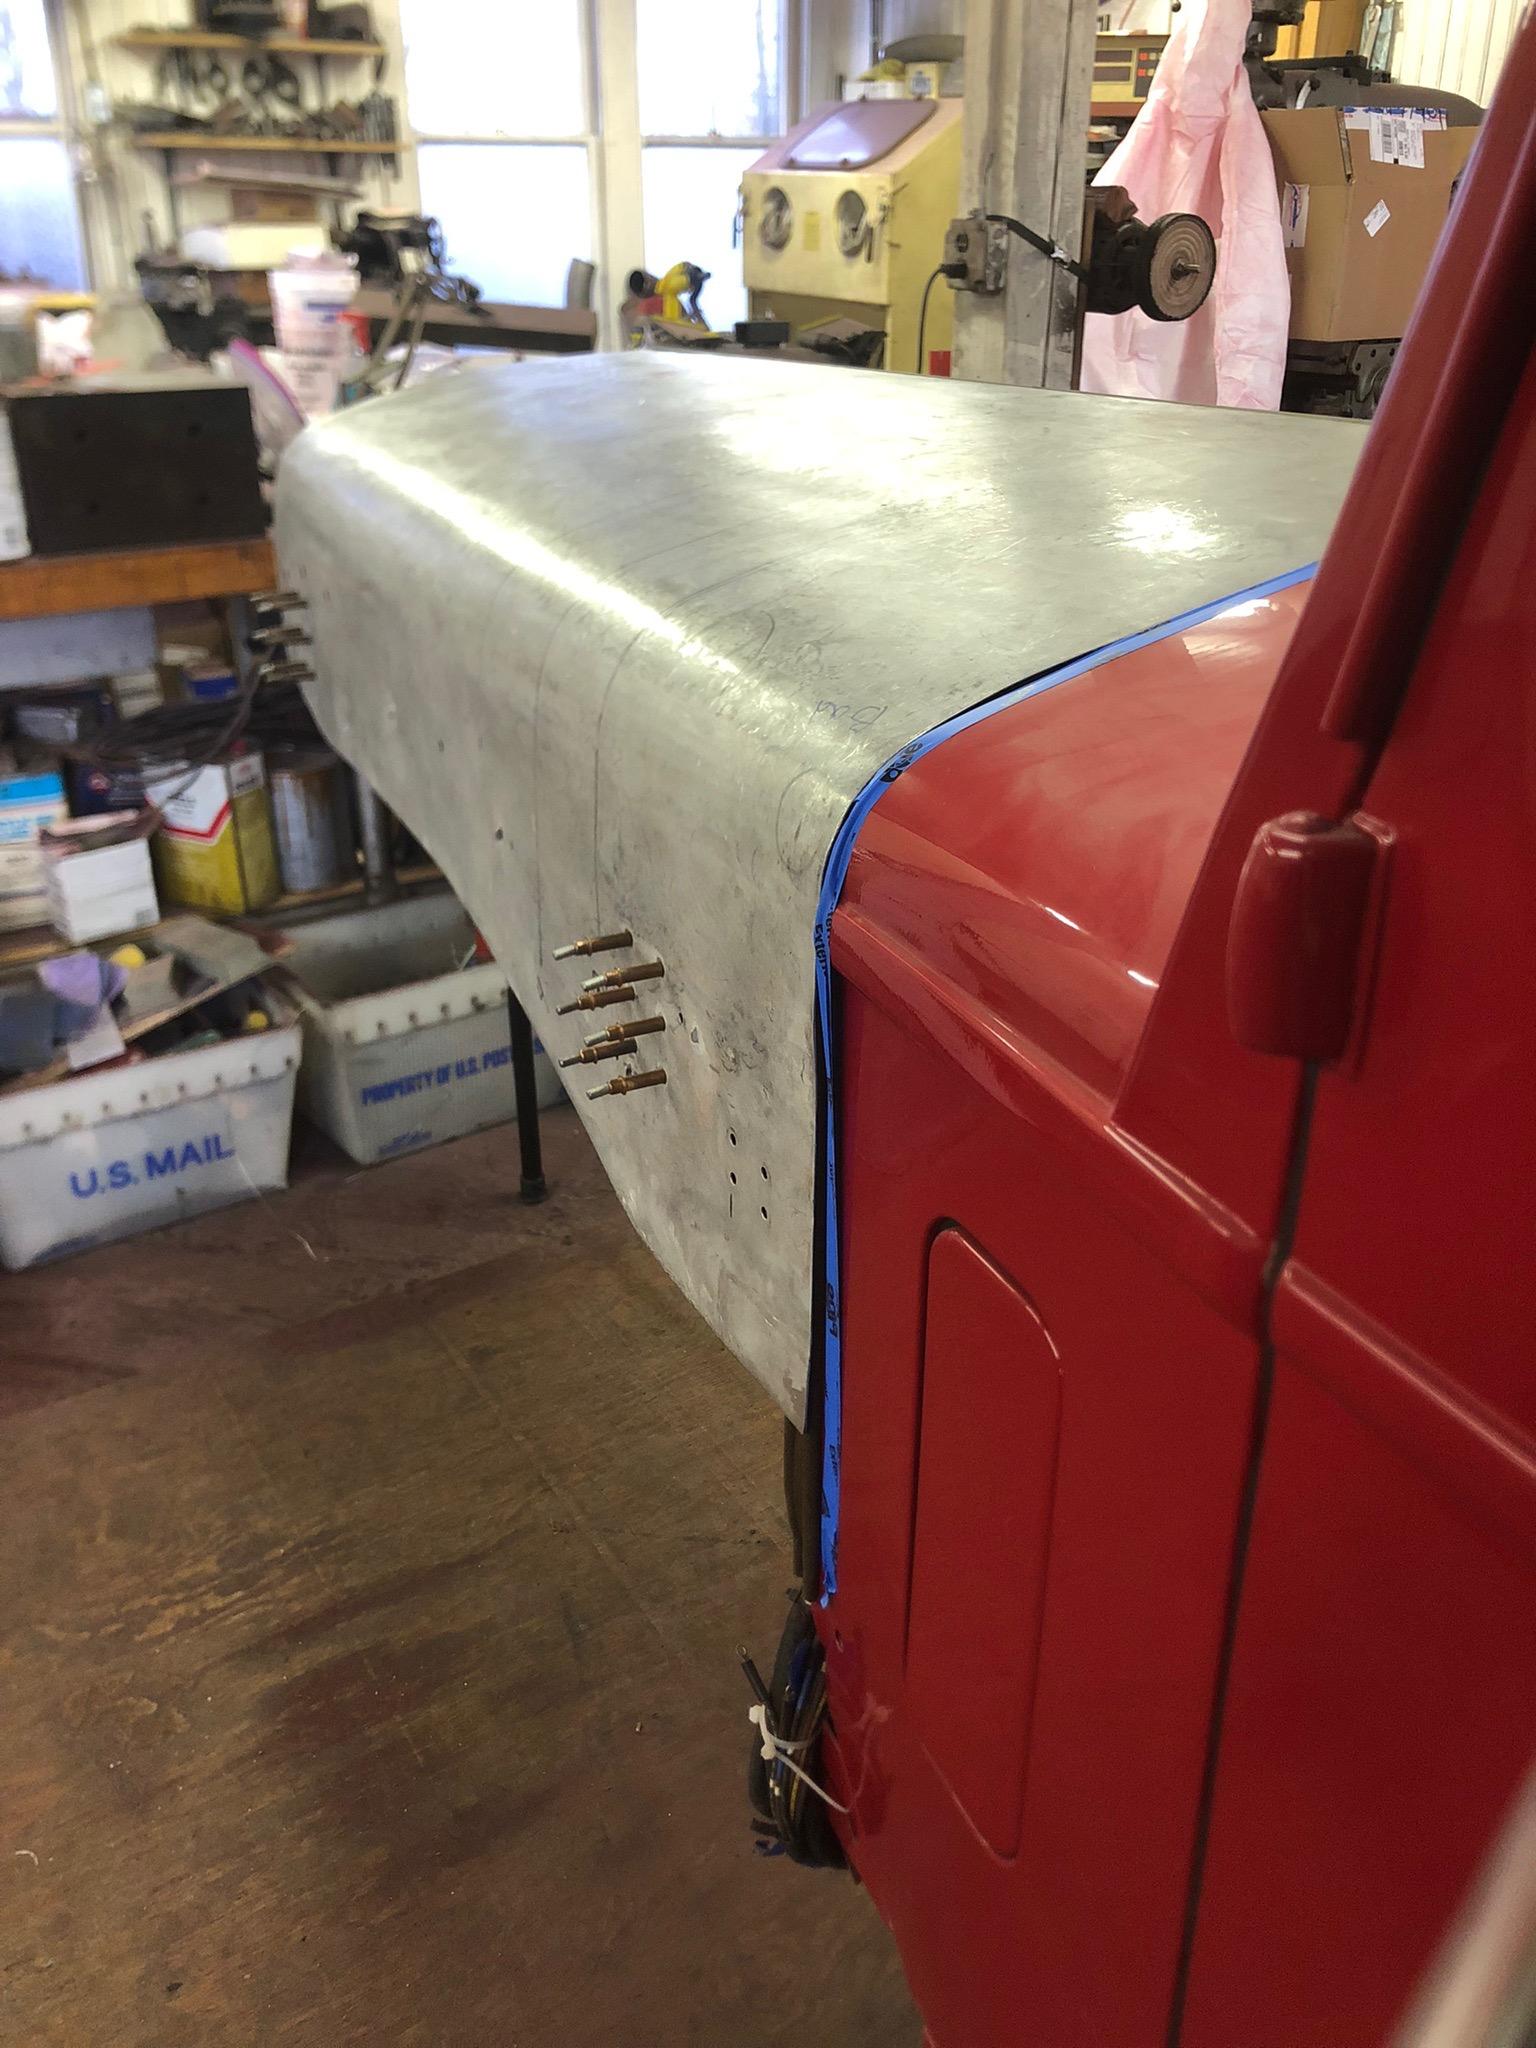
Using my aviation skills to repair the hood. Both halves had to be de-riveted to get at and eliminate several areas of corrosion and chafed areas. All that was patched on both skins. Then the braces that support the hood were all bent, broken and corroded. So I'm blending two sets into one to repair them. The original rivets were very soft so I'm going to replace them with harder AD aircraft rivets. Driver's side aligns pretty well after all that and pinned together temporarily with Cleco fasteners. A couple of days should have both halves ready for bodywork.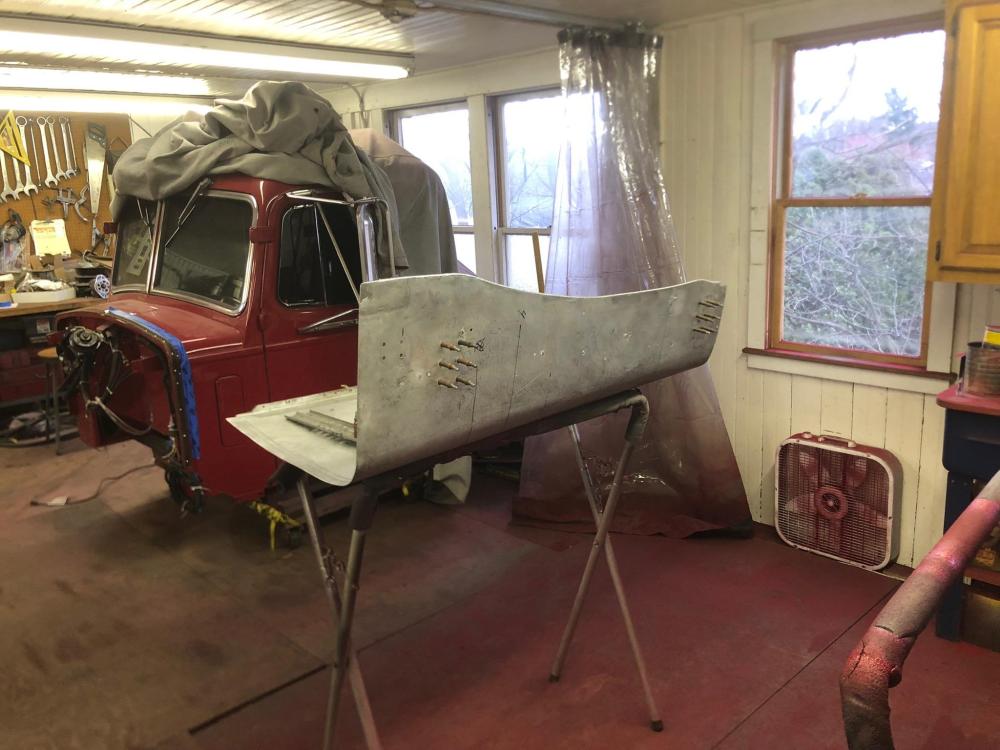

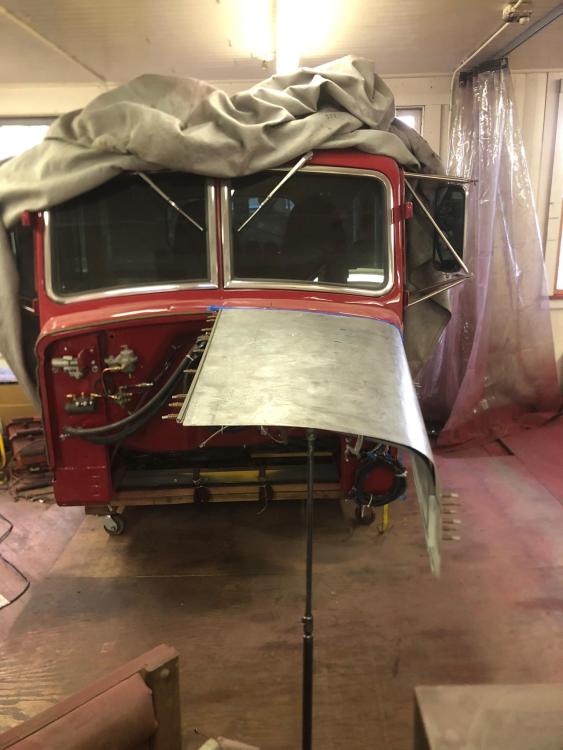
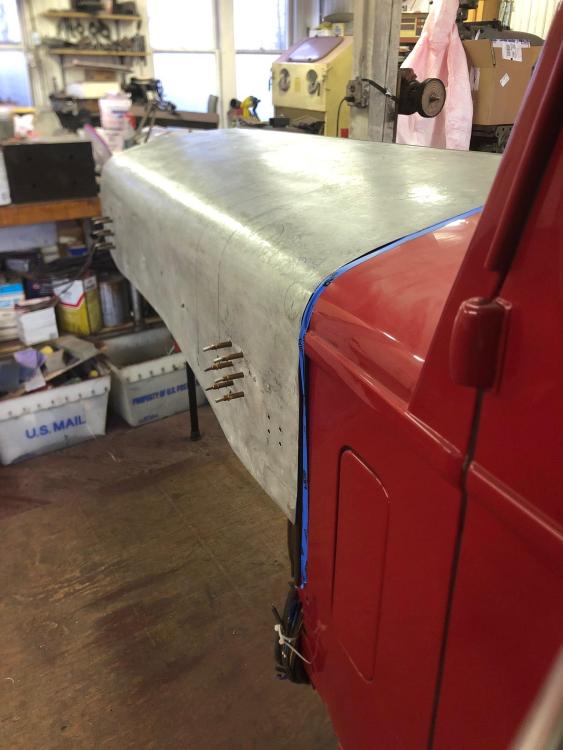
-
B-73 Restoration
mattb73lt replied to mattb73lt's topic in Antique and Classic Mack Trucks General Discussion
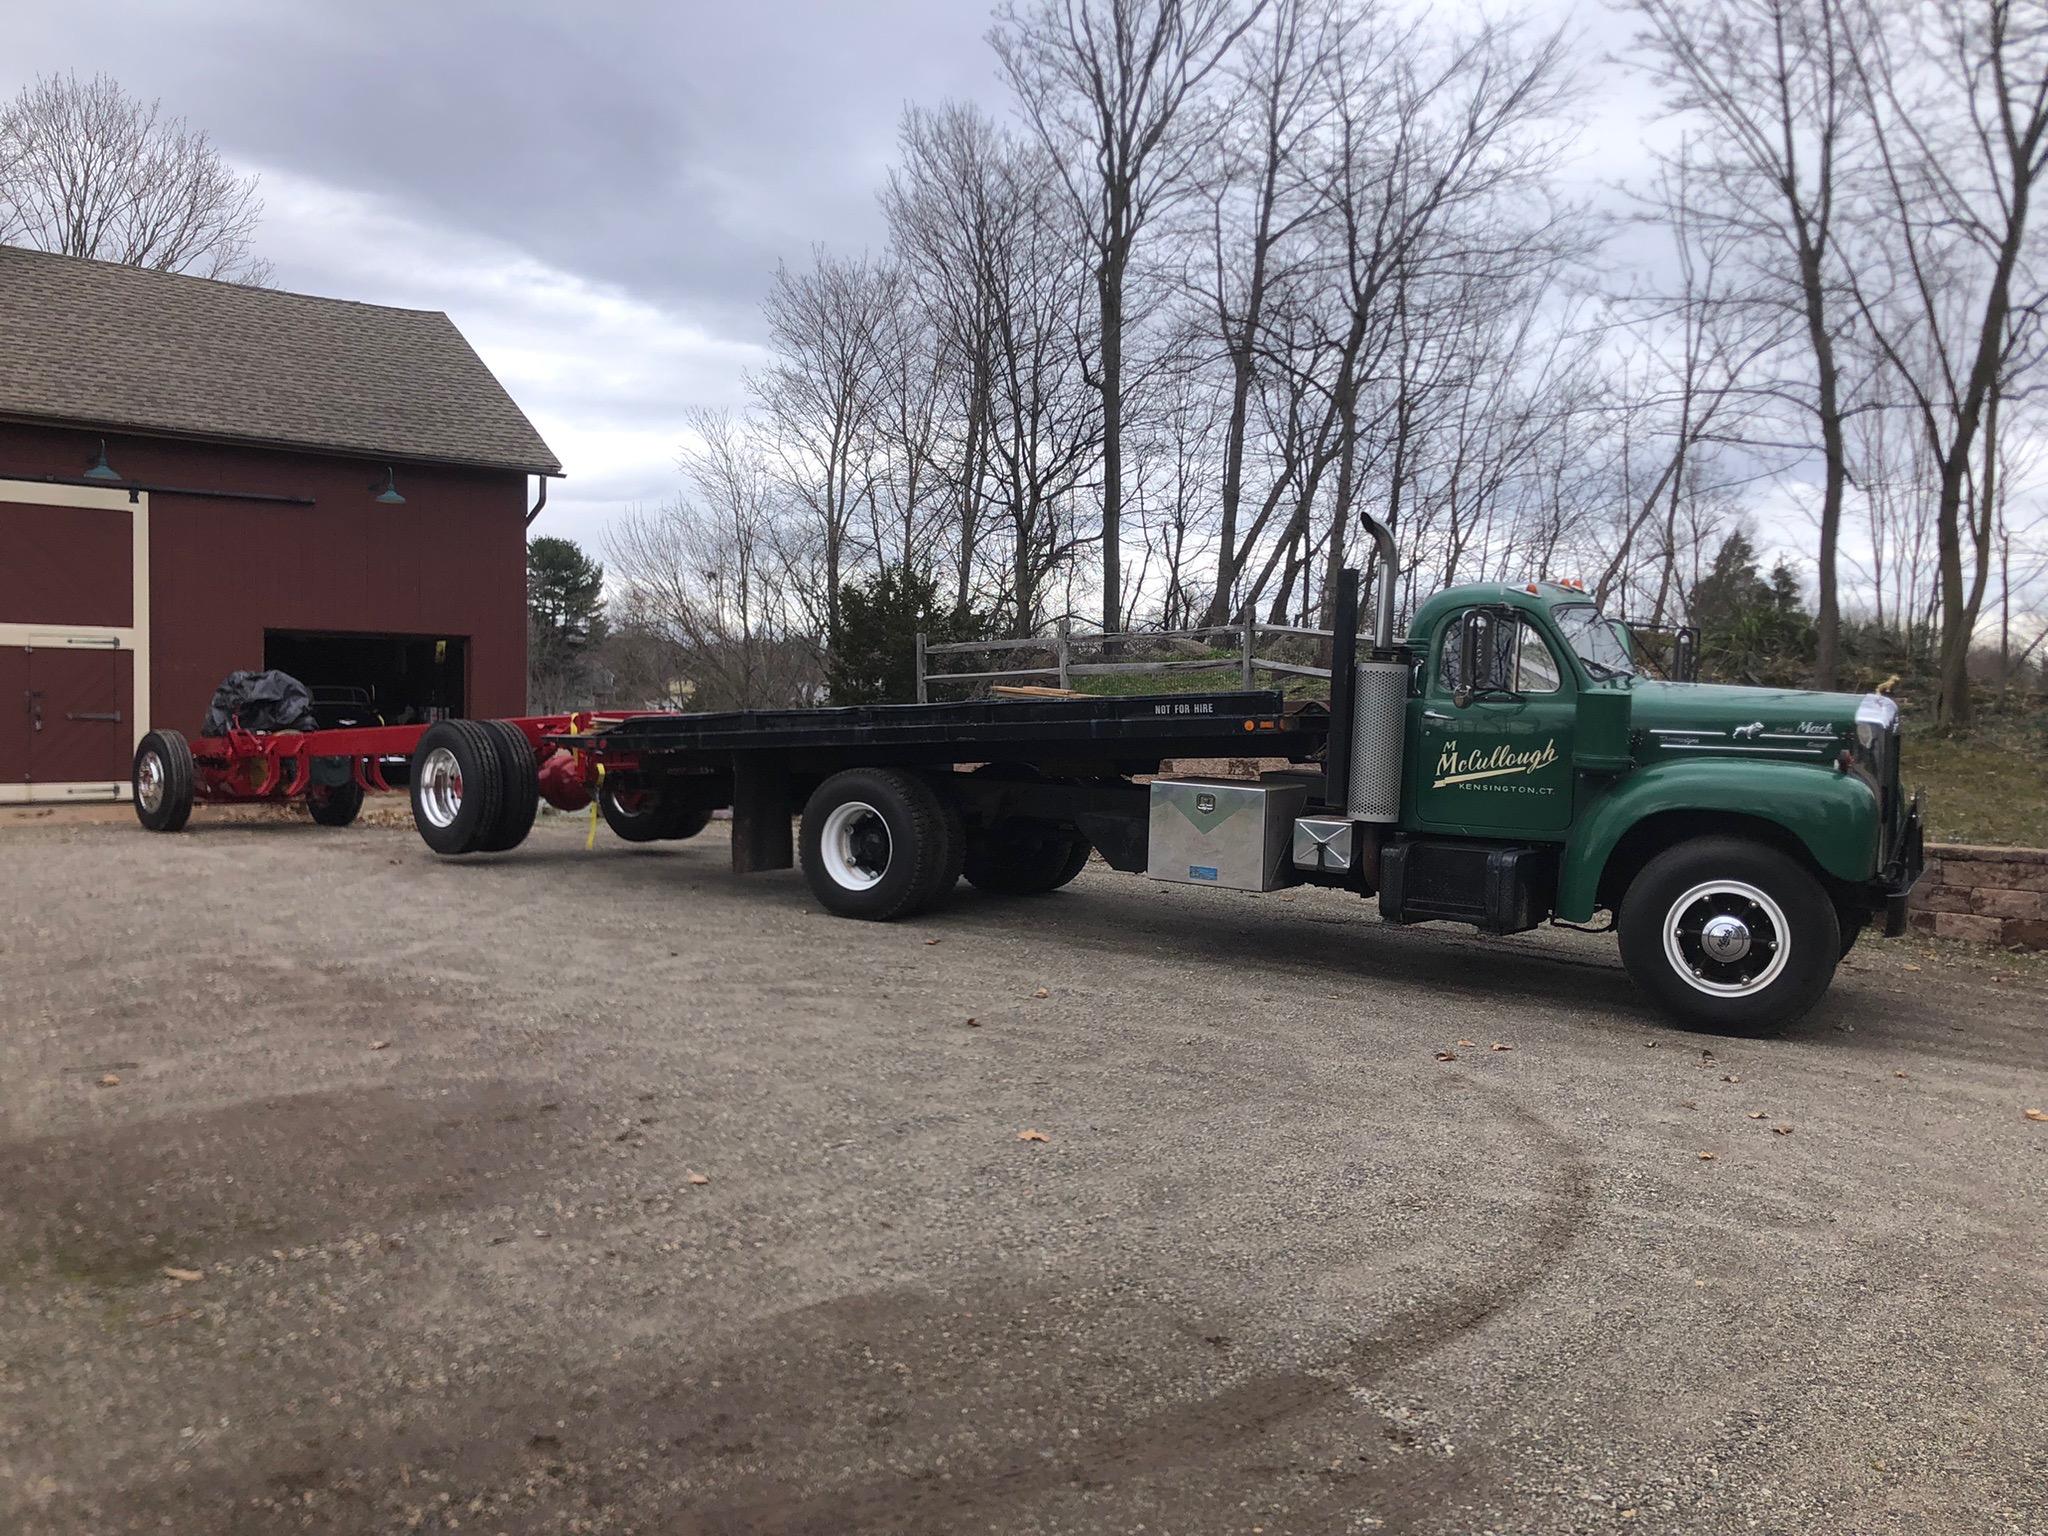
Back in front of the barn, today, so I can get stuff done and get this thing running!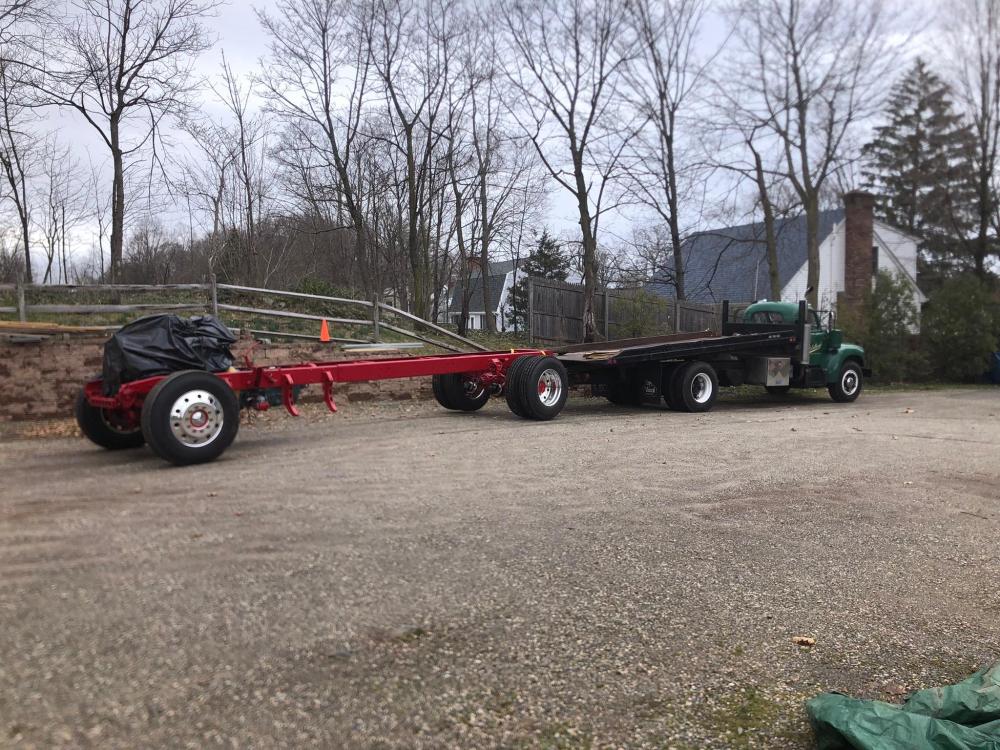

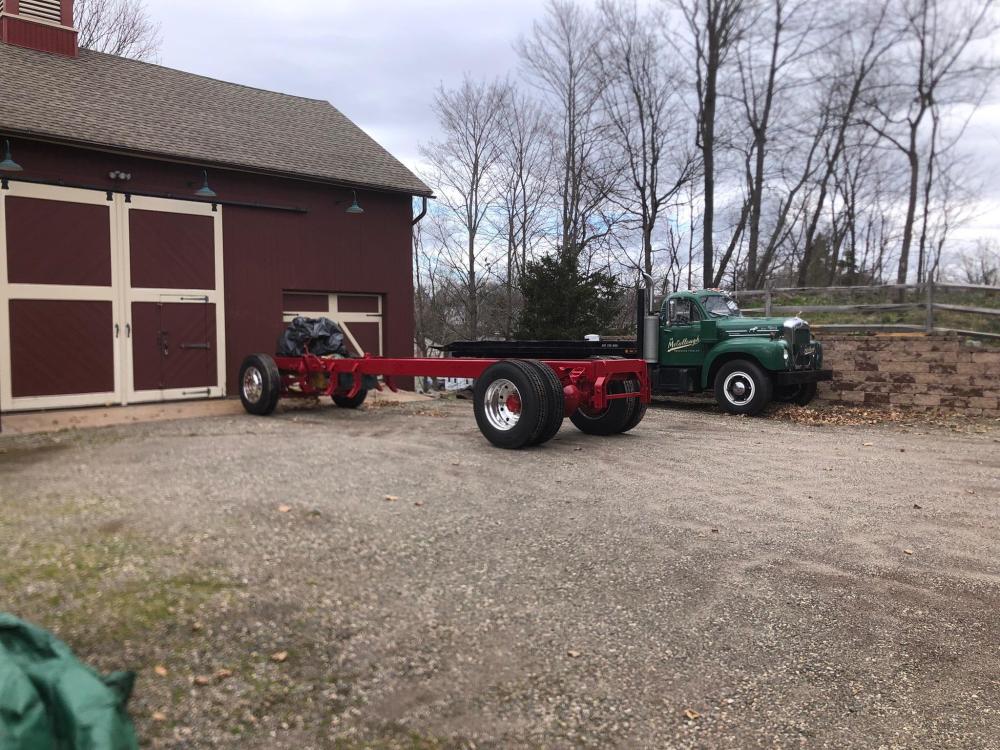
-
B-73 Restoration
mattb73lt replied to mattb73lt's topic in Antique and Classic Mack Trucks General Discussion
I think that’ll be a stretch, I’m hoping for running and moving by then. Lots of work to finish, but with just the hood to do, it’s mostly assembly work. -
B-73 Restoration
mattb73lt replied to mattb73lt's topic in Antique and Classic Mack Trucks General Discussion
Just the hood to go now!! There are some loose pieces and some touch up work to go, but the bulk of the painting is behind me. What a good feeling!!! And I brought some toys home from winter storage today, too!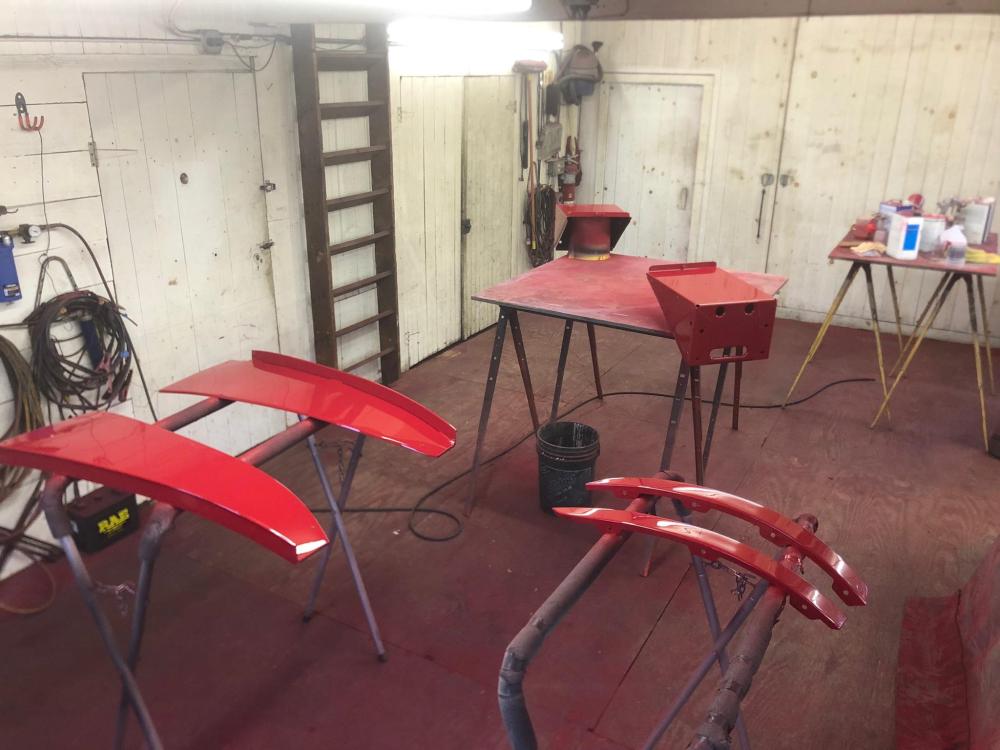

-
B-73 Restoration
mattb73lt replied to mattb73lt's topic in Antique and Classic Mack Trucks General Discussion
The second coat and sanding of the primer really helps to add to it. -
B-73 Restoration
mattb73lt replied to mattb73lt's topic in Antique and Classic Mack Trucks General Discussion
Yes, single stage. PPG Concept. Synthetic acrylic enamel. -
B-73 Restoration
mattb73lt replied to mattb73lt's topic in Antique and Classic Mack Trucks General Discussion
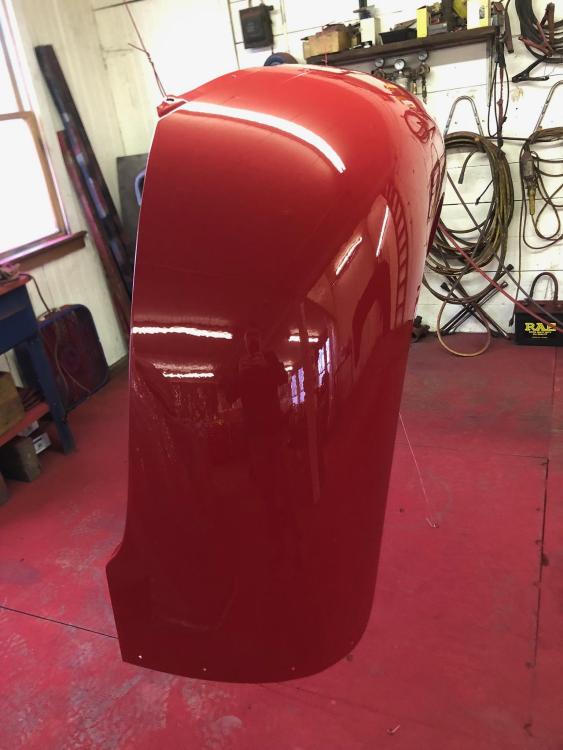
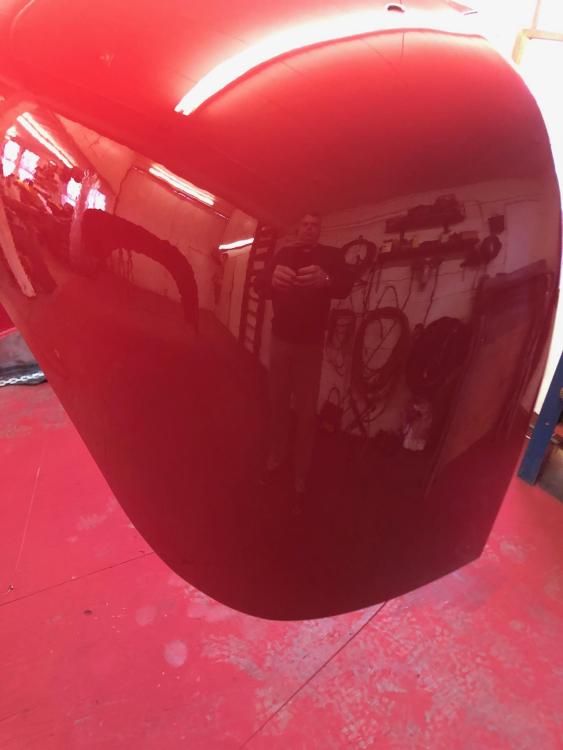
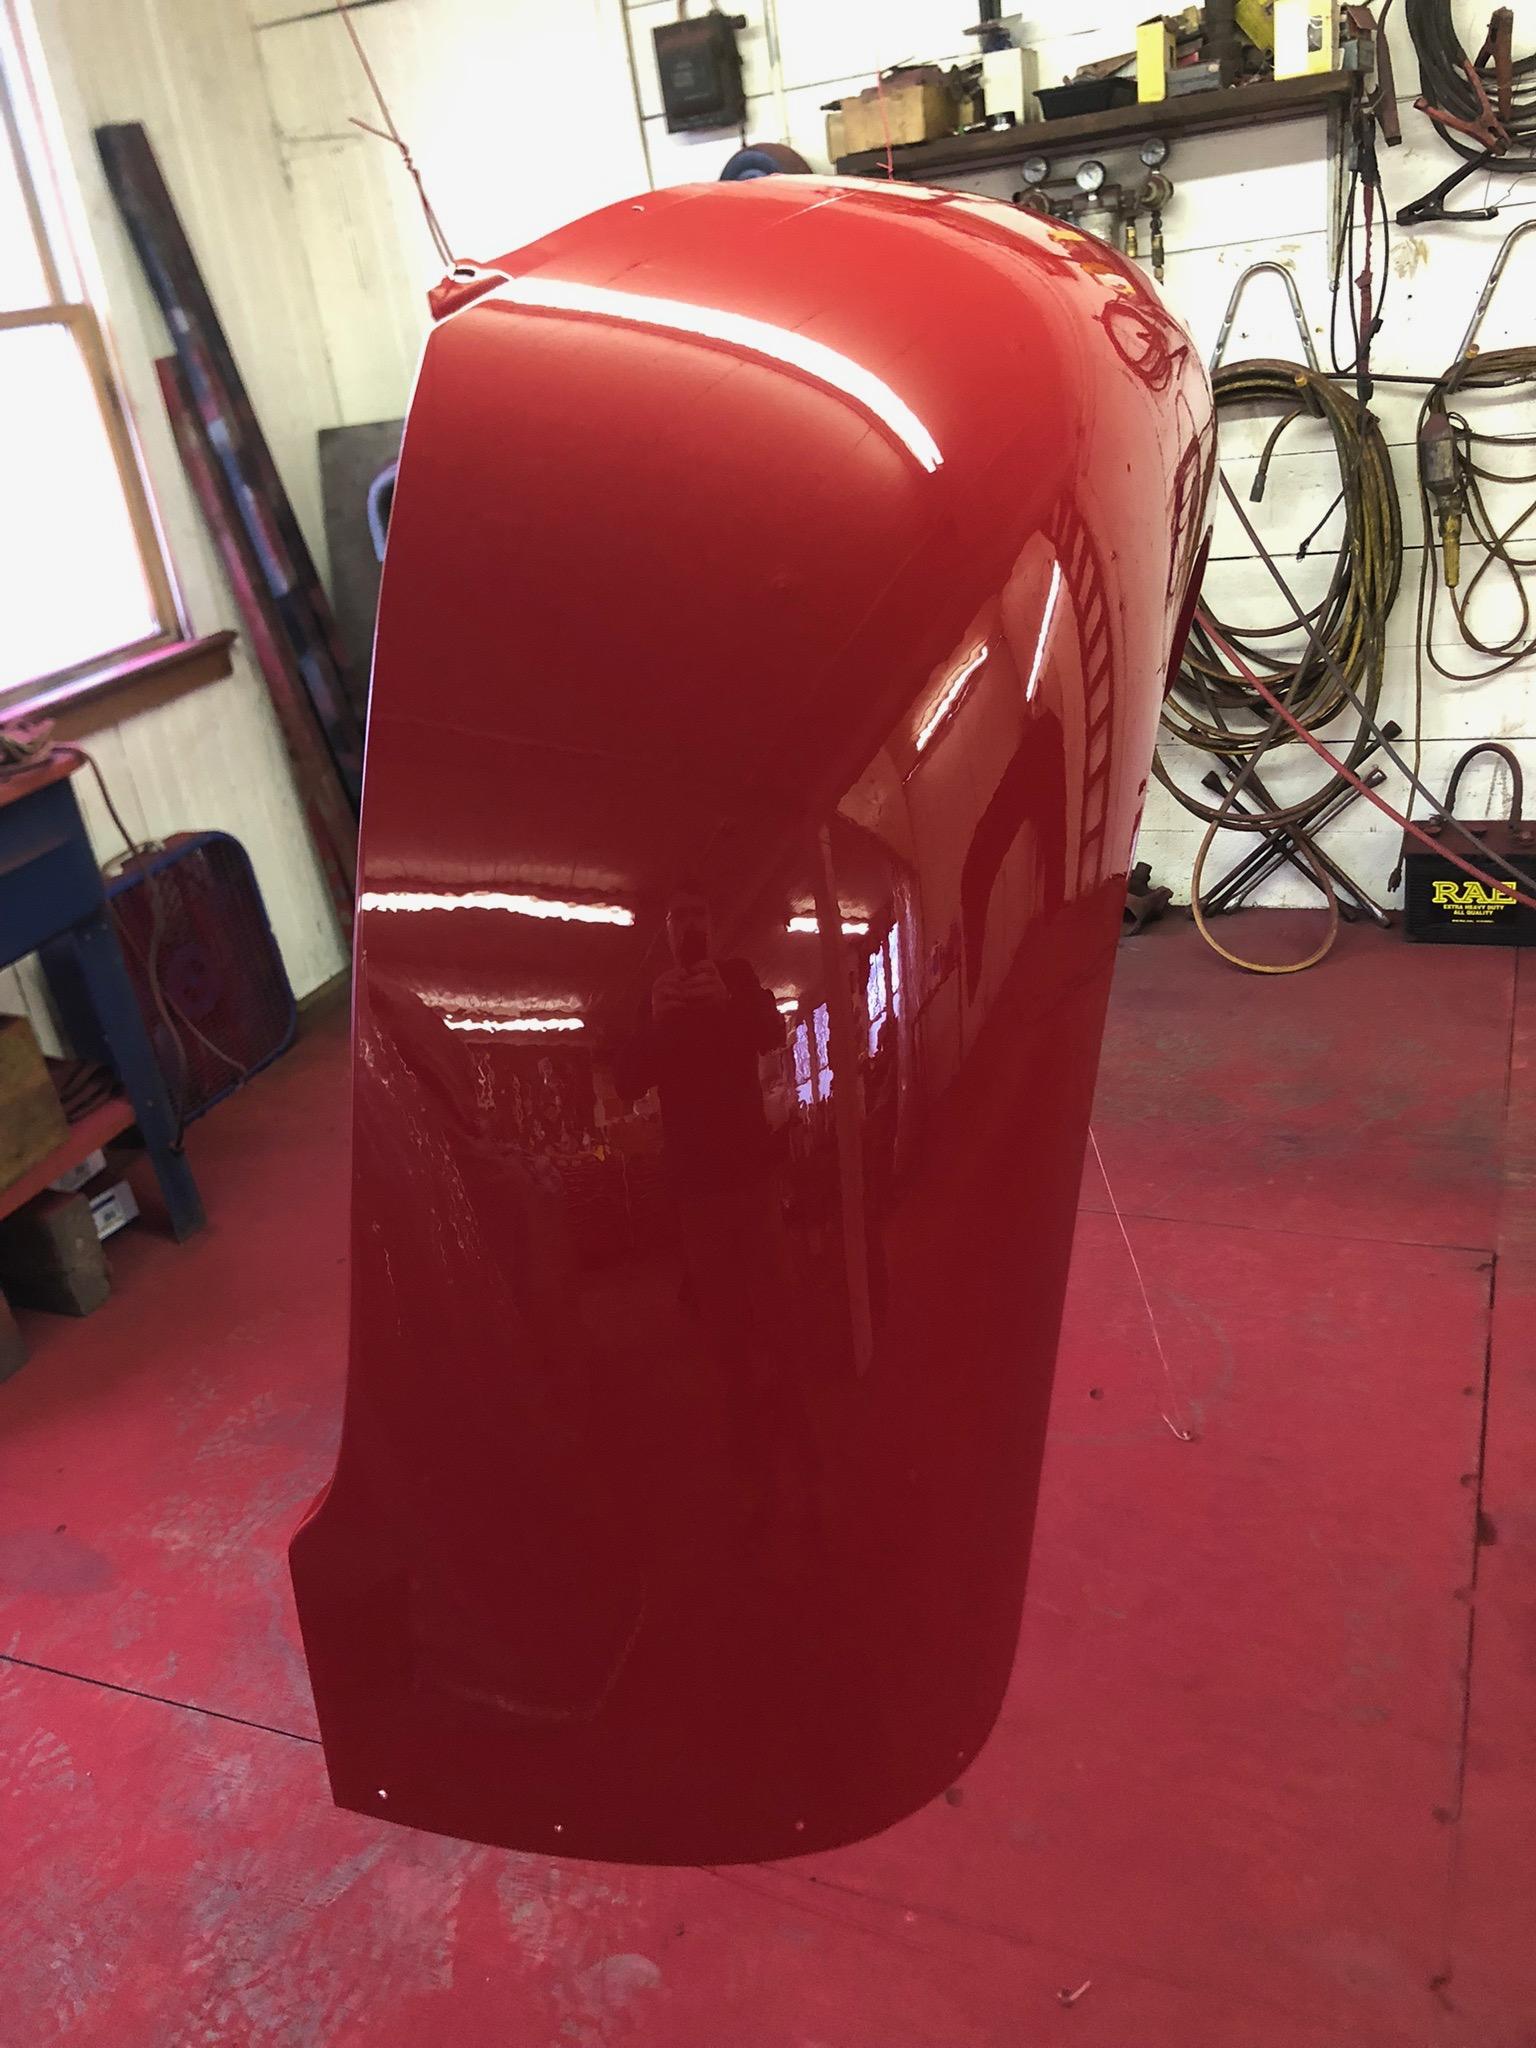
Damn!!!! I'm not an expert but I stayed in a Holiday Inn Express last night!! This paint is pure magic!! It makes me look like I have an idea what I'm doing. It took about three mixed quarts to cover all the surfaces and edges, close to what I thought it would. So, no left over unused paint. Look at the gloss and reflection of the last picture.
-
B-73 Restoration
mattb73lt replied to mattb73lt's topic in Antique and Classic Mack Trucks General Discussion
Yeah, we’re getting that weather tomorrow. Friday is supposed to be 62* and I have to work tomorrow so all is good. -
B-73 Restoration
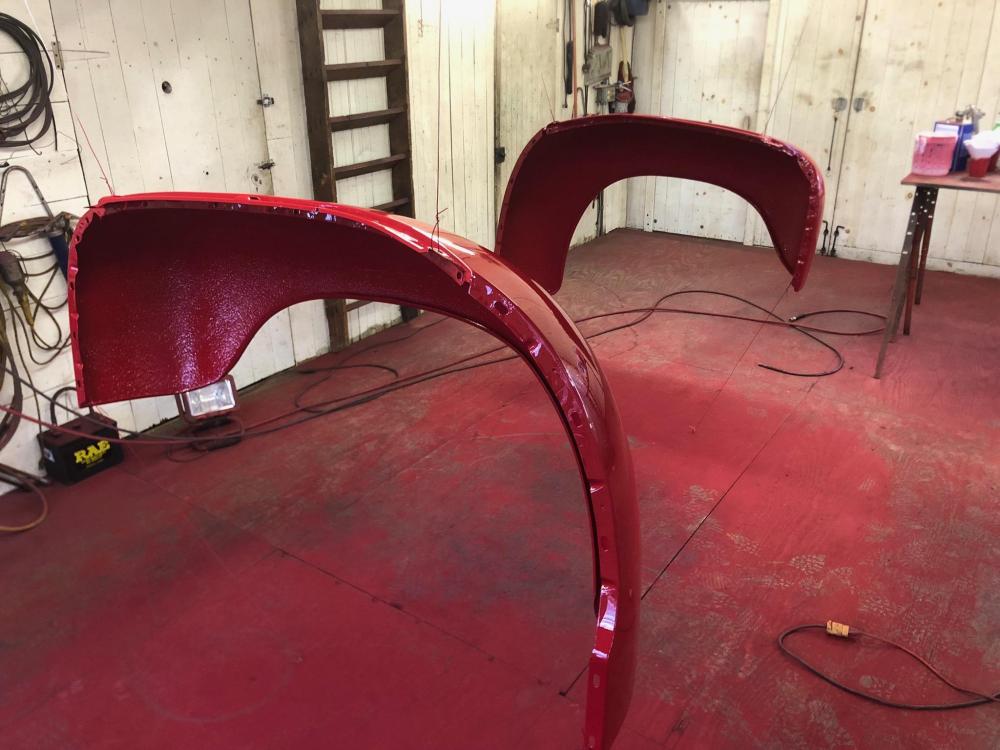
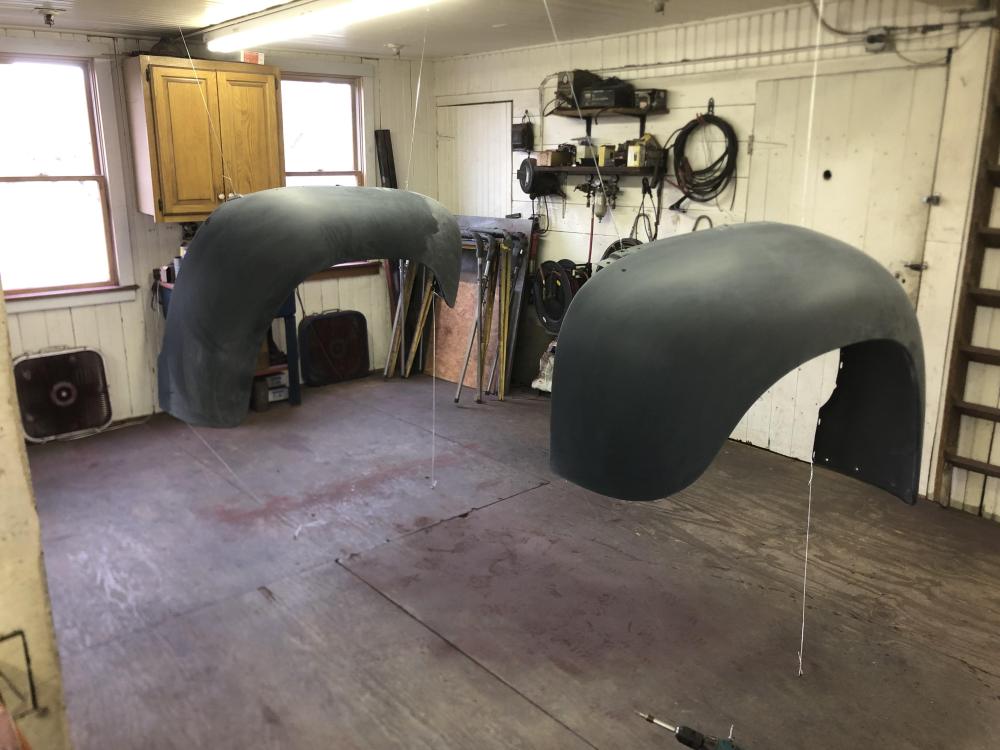
mattb73lt replied to mattb73lt's topic in Antique and Classic Mack Trucks General Discussion
Two days of prep sanding and the fenders are hung and ready. Friday should be the day to throw down some color. Just the catwalks and hood to go. The hood will need a bit of time to fix and re-assemble. Progress!!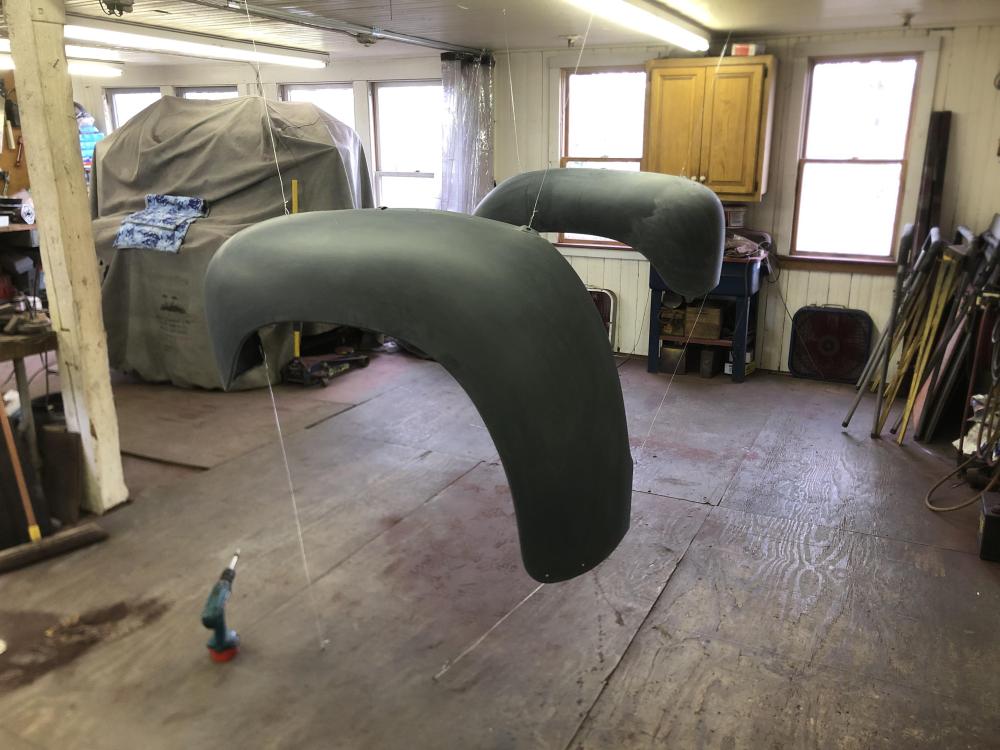
-
B-73 Restoration
mattb73lt replied to mattb73lt's topic in Antique and Classic Mack Trucks General Discussion
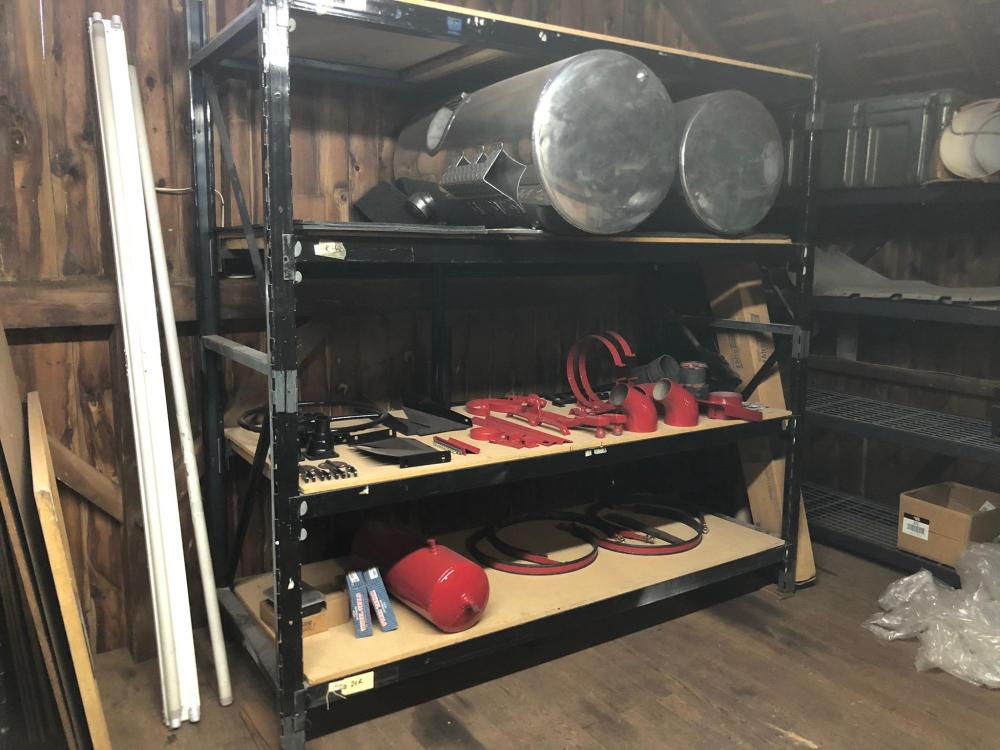
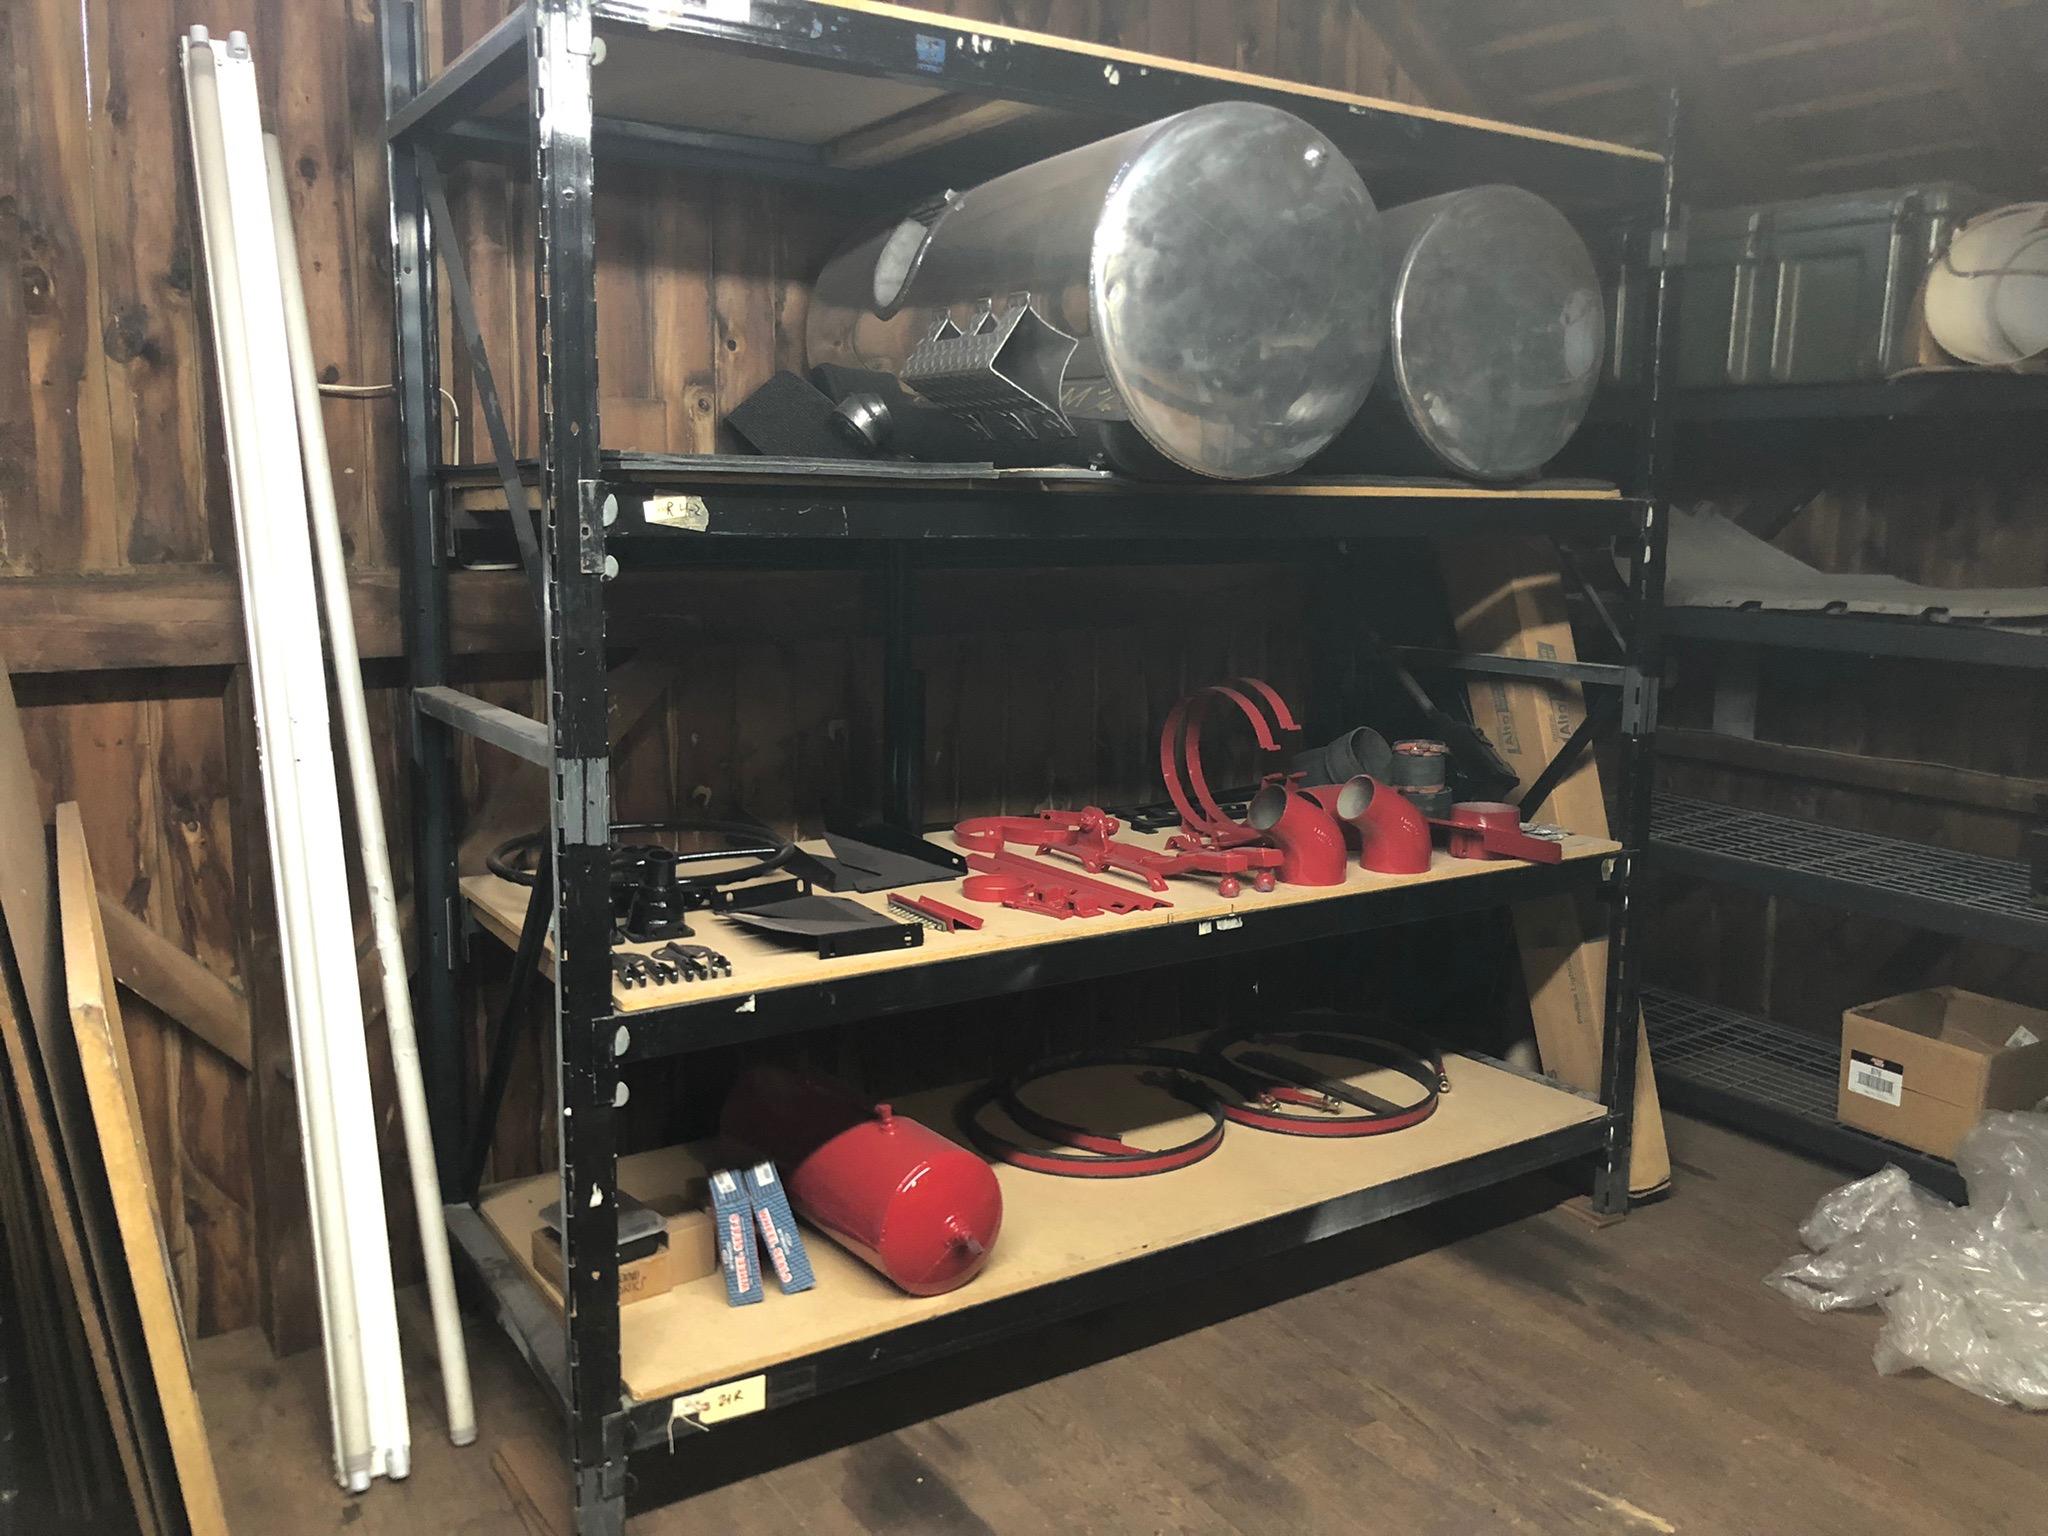
The shelves are filling up, again. Just the fenders and hood, plus a few minor parts, to go. I'm going to be really pissed if I get Nuked before I finish this truck!!!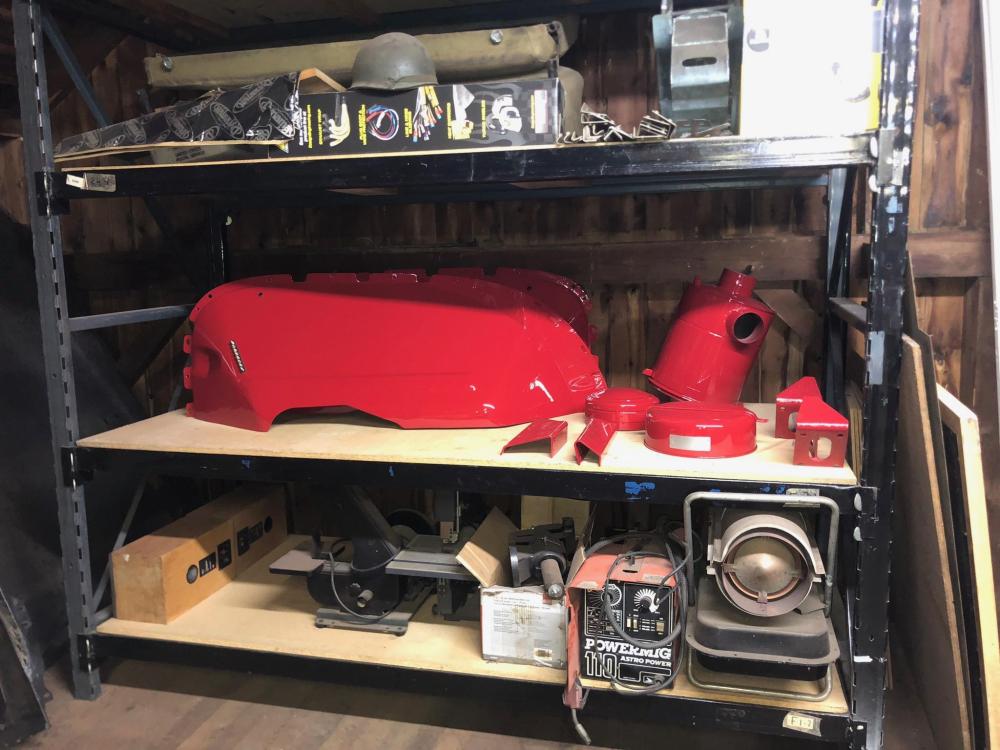

-
B-73 Restoration
mattb73lt replied to mattb73lt's topic in Antique and Classic Mack Trucks General Discussion
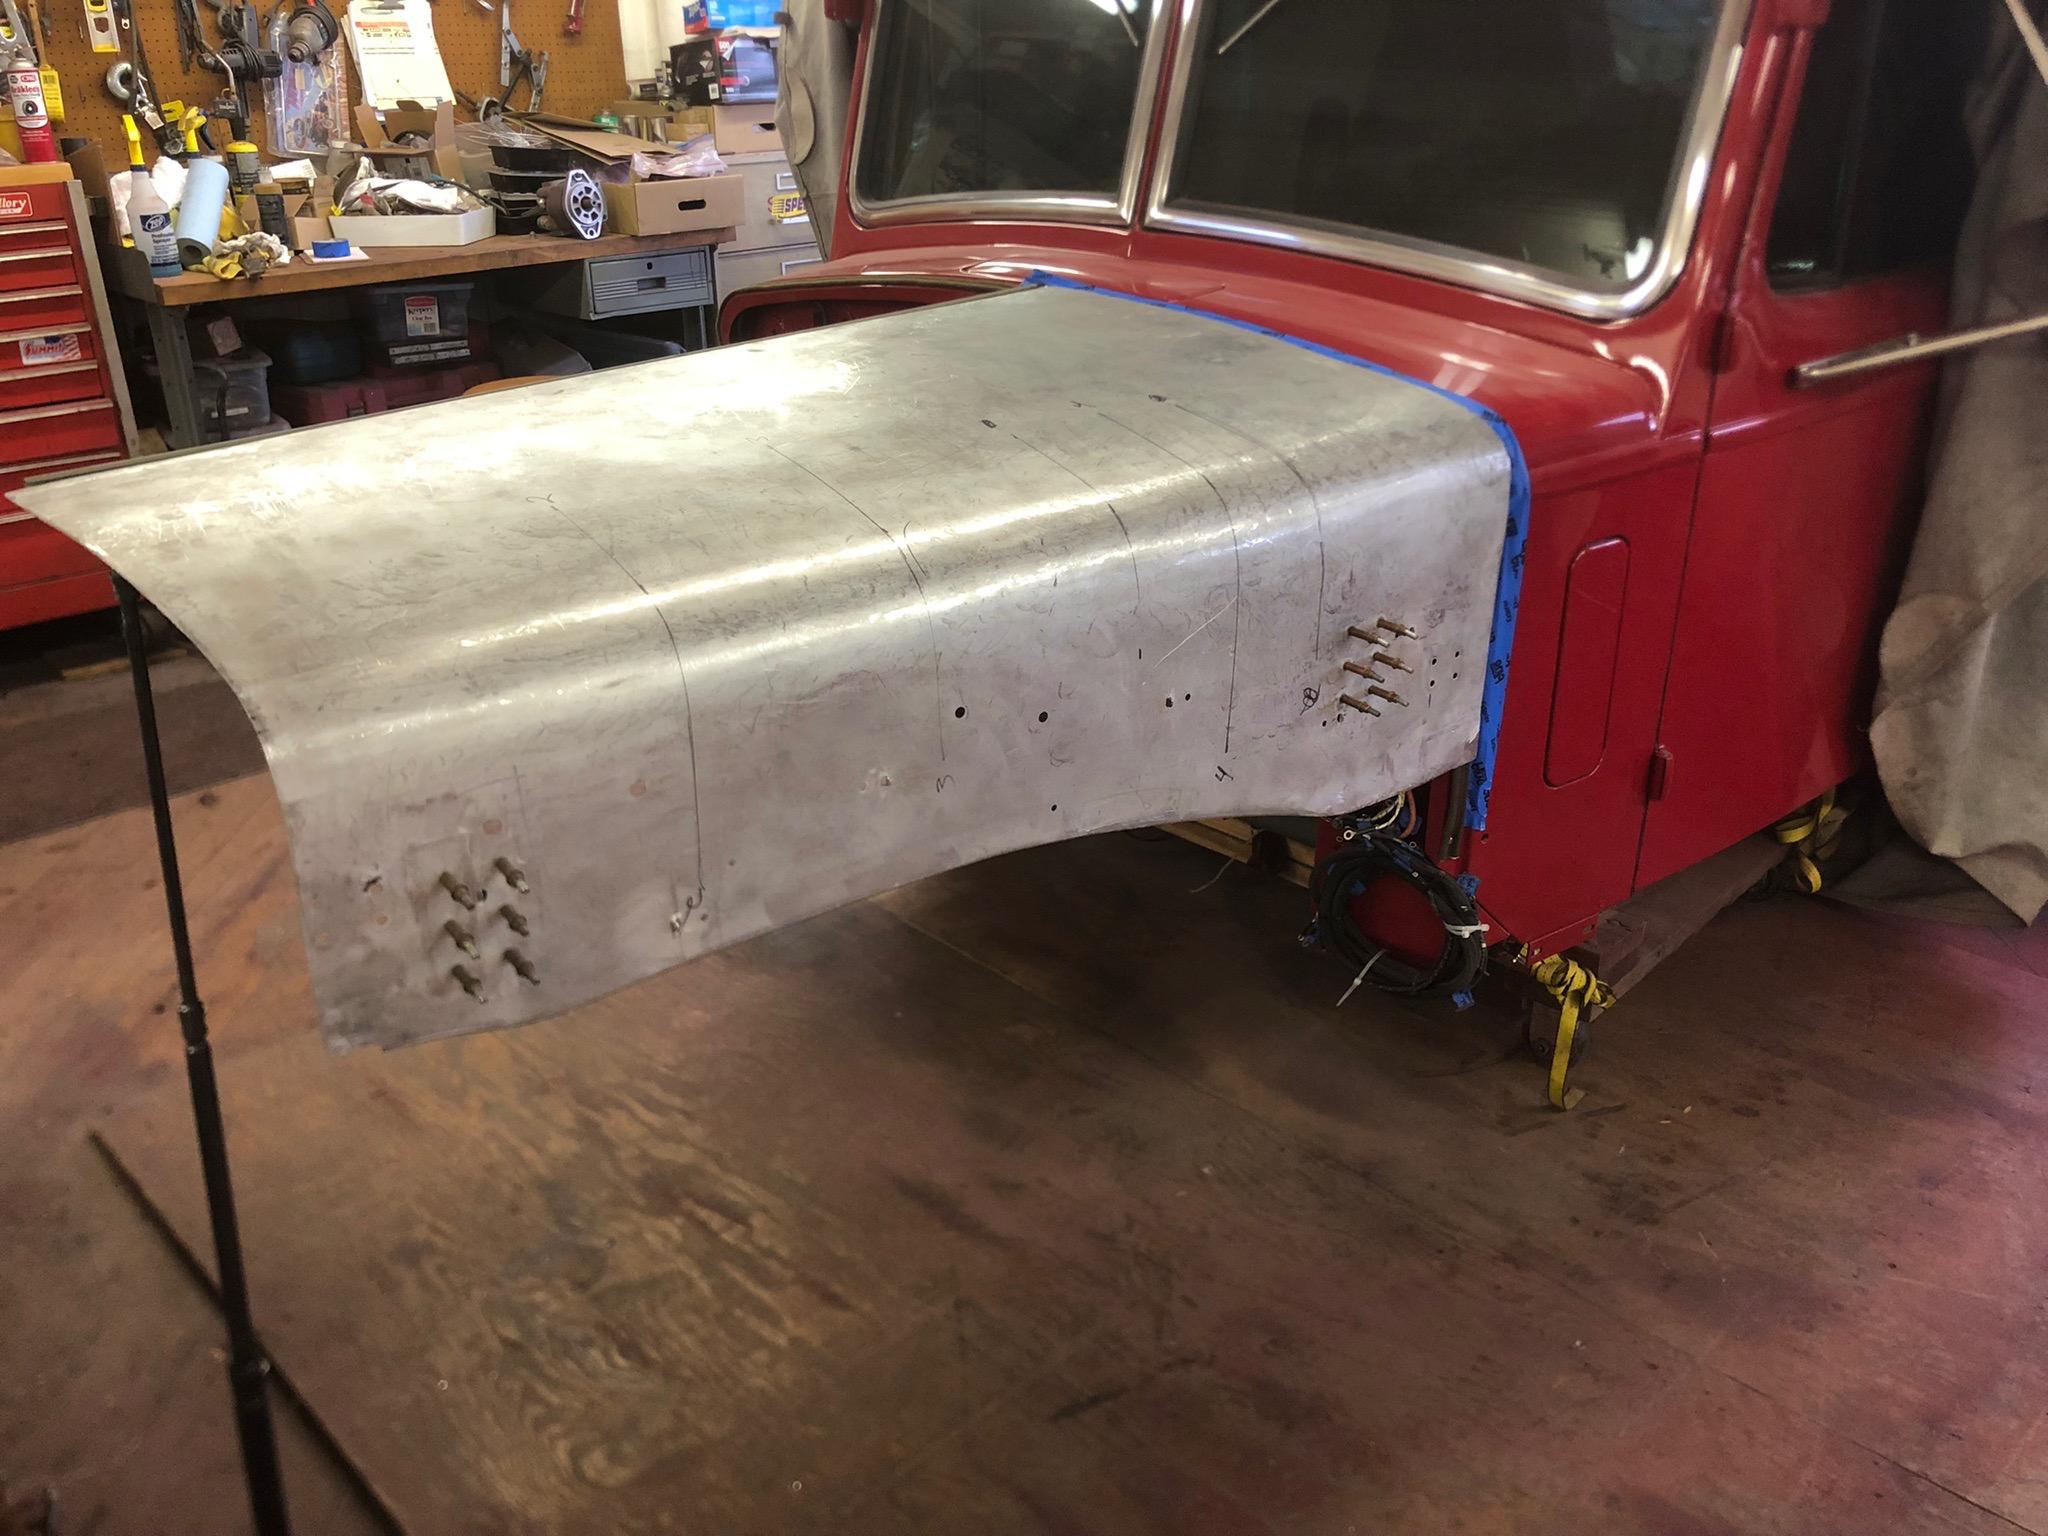
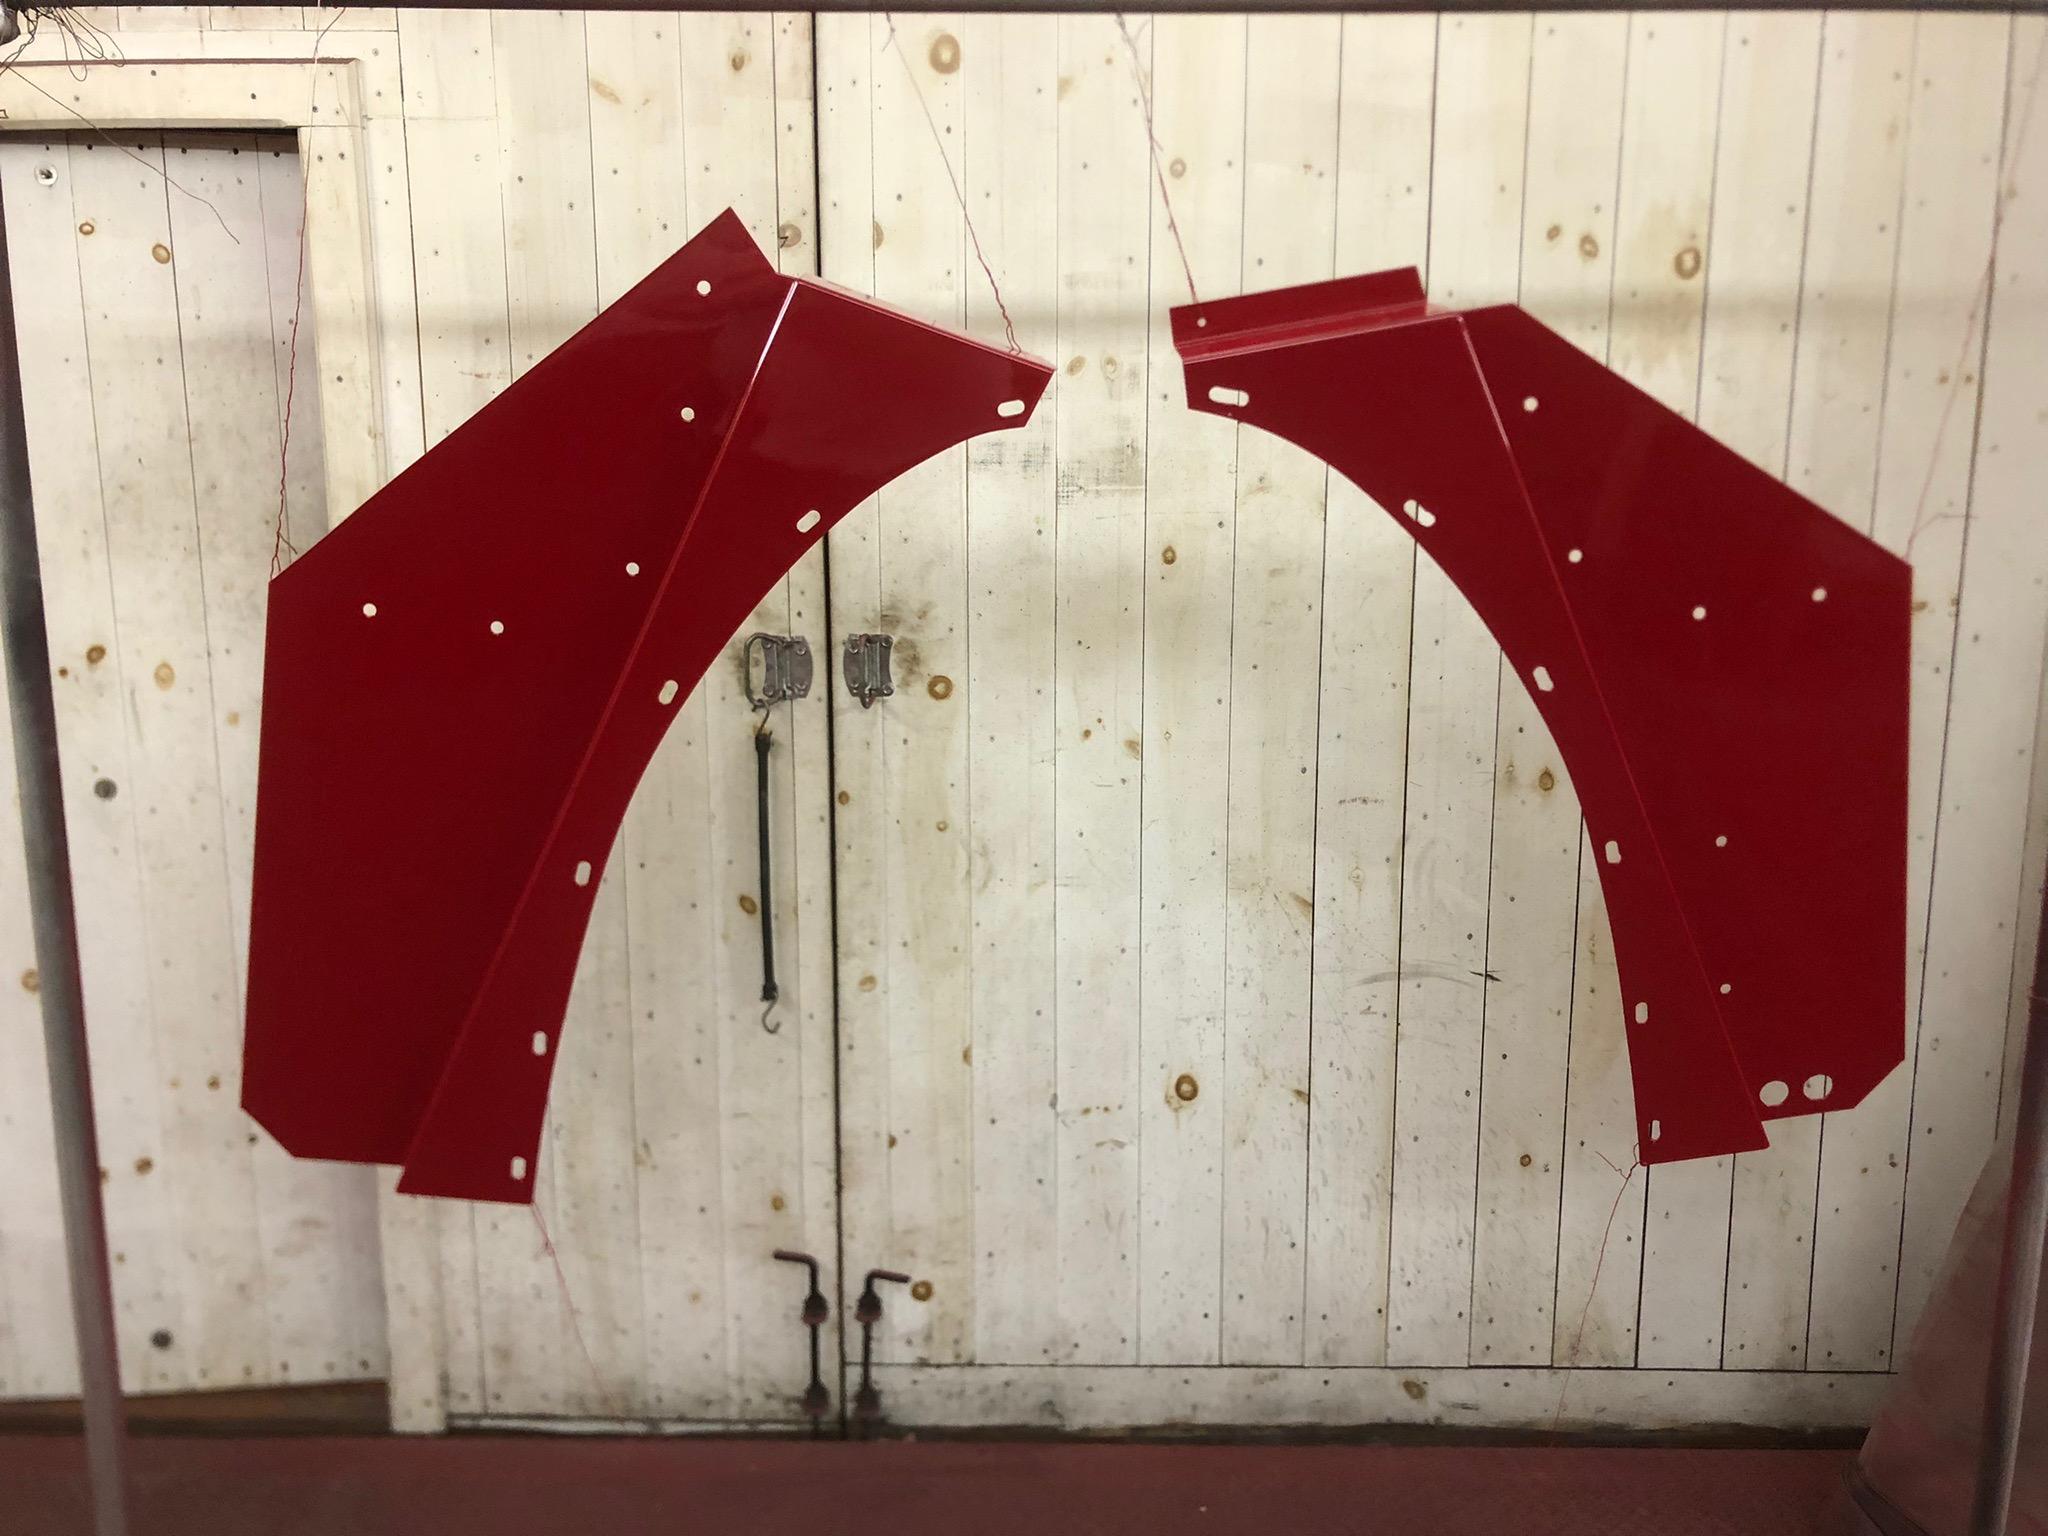
L parts pretty scarce, as you're aware, especially cab parts. Fenders are a whole separate issue, as there's several variations. Splicing a few together might not be too bad to make a good pair. -
B-73 Restoration
mattb73lt replied to mattb73lt's topic in Antique and Classic Mack Trucks General Discussion
I had a good mentor show me a few tricks on doing bodywork that I've built on since. Patience is key to having it come out to where you want it. Sometimes you have to redo your work, as in the radiator shroud. This truck has been my biggest and most challenging project I've ever done. I just want it a certain way, but want to be able to use it and enjoy it without it being a barn/hangar/trailer queen. -
new old macks
mattb73lt replied to Mean Green's topic in Antique and Classic Mack Trucks General Discussion
It would be cool to build a 0 mile truck out of that RD!! I could think of several versions of what I'd like to build. -
B-73 Restoration
mattb73lt replied to mattb73lt's topic in Antique and Classic Mack Trucks General Discussion
Ok, that'll do. Don't know what I was thinking when I painted it the first time, but it's better now

-
B-73 Restoration
mattb73lt replied to mattb73lt's topic in Antique and Classic Mack Trucks General Discussion
No, they're just Home Depot specials I've had forever. The other ones are Eastwood padded workhorses for bodywork which are great for this stuff. And you're right about collecting up stuff for a decent shop! -
B-73 Restoration
mattb73lt replied to mattb73lt's topic in Antique and Classic Mack Trucks General Discussion
Jackstands? I see two different types of sawhorses if I'm looking at the same photo? No, I was never at an auction in Oxford.


BMT Forum Logo
