

Vladislav
-
Posts
8,043 -
Joined
-
Last visited
-
Days Won
79
Content Type
Profiles
Forums
Gallery
Events
Blogs
BMT Wiki
Collections
Store
Everything posted by Vladislav
-

Out for a stroll in the RS700L
Vladislav replied to Lmackattack's topic in Antique and Classic Mack Trucks General Discussion
Many thanks. My choice would be the RS if I ever do but the Pete definitely has attractive and not very common appearance. -
I surprizingly saw none of both of those when I was in Istambul in 2011. Moreover, all in all I cruised no less than 2500 km over the Turkey roads both mains and locals and saw only one Mack truck I even couldn't figure out which model it was. The truck went in the opposit direction on a 6 lane highway behind the concrete divider. It looked like a DM or maybe a R-model but difficult to determine when we passed each other on a speed of 200+ km/h in total.
-
Out for a stroll in the RS700L
Vladislav replied to Lmackattack's topic in Antique and Classic Mack Trucks General Discussion
Excellent! Any side pics of the Pete where the color scheme is better seen? -
Magnums and Freedoms 2020
Vladislav replied to phildirt's topic in Antique and Classic Mack Trucks General Discussion
Is this what you was talking about? I surprized seeing a non-air suspended cab on a RW. The truck had 36" Able Body.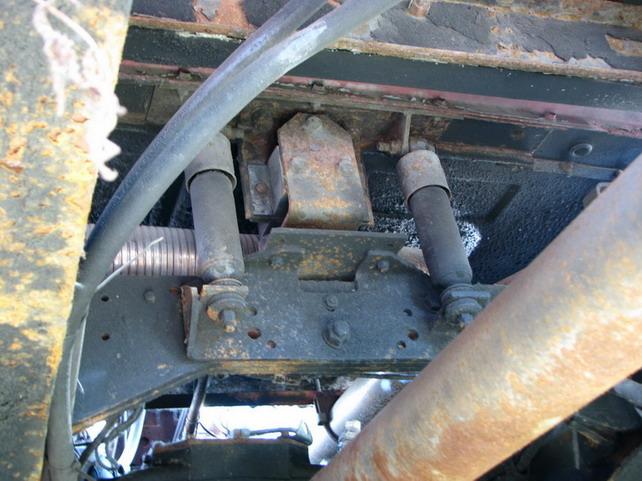
-
The most amazing fact is the reason of that matter is the mother-nature. A driver is a kind of a male animal. So he just marks his territory. No doubt he doesn't understand that himself.
-
1964 C615
Vladislav replied to Prowrench's topic in Antique and Classic Mack Trucks General Discussion
C-model in Keystone Truck and Tractor Museum I took a picture of in 2018.
-
1964 C615
Vladislav replied to Prowrench's topic in Antique and Classic Mack Trucks General Discussion
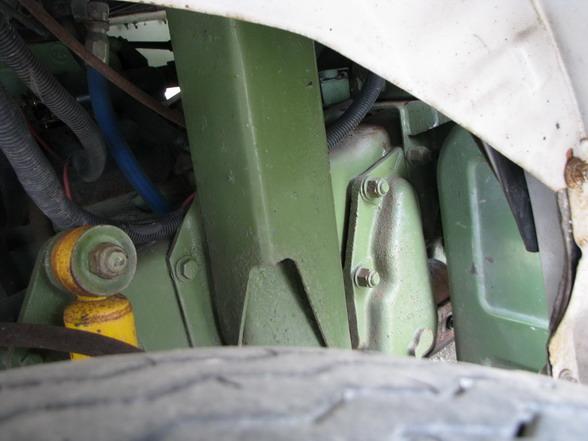
Not almost what you meant. That collar and pin setup was used on DM's including DM800 you are building. The style with rubber pads I mentioned was what was used on L-models including LT's. I have that setup in my 1945 military Mack. The front axle assembly used there was off a L-model I belive. The picture of the light green frame (not khaky) is a C-model front spring rear bracket. As you can see its body is similar to a R-model part by the shape but accomodates the spring end in rubber pads clamped with a cover. Difficult to see on the below the chassis picture but you can if zoom in.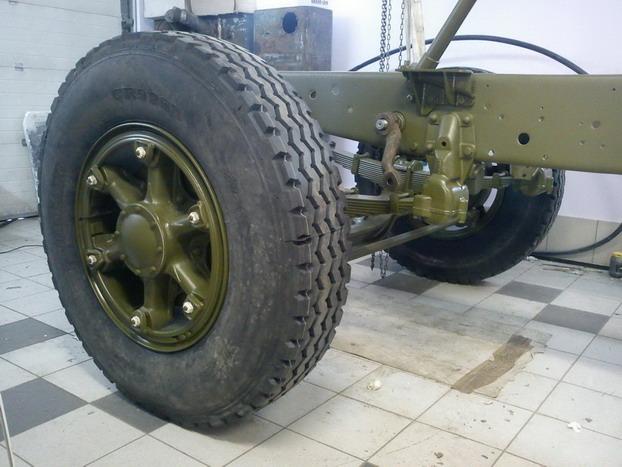

-
1964 C615
Vladislav replied to Prowrench's topic in Antique and Classic Mack Trucks General Discussion
Both look nice on my mind. Just different of style. -
Gift idea
Vladislav replied to Hobert62's topic in Antique and Classic Mack Trucks General Discussion
Wonder how the prints are heat and wear resistant. I had luck buying a tea cup in the America on Wheels museum with their print on. And to my unpleasant surprize the picture got suffered from boiled water put in making tea.. For correct judgement i should point out I still use the cup everyday and the print still on, Just got small bubbles all over so I expect it chipping off soon. -
I read of Iceland got the same result when tested 1.3% of the population a couple of weeks back. They had 200 positive tested people with 100 non-symptomes. Now seems the fact continues standing the test of time.
-
i don't remember the exact figure but that was far.
-
Magnums and Freedoms 2020
Vladislav replied to phildirt's topic in Antique and Classic Mack Trucks General Discussion
The up-close is rally nice! Thanks. -
1964 C615
Vladislav replied to Prowrench's topic in Antique and Classic Mack Trucks General Discussion
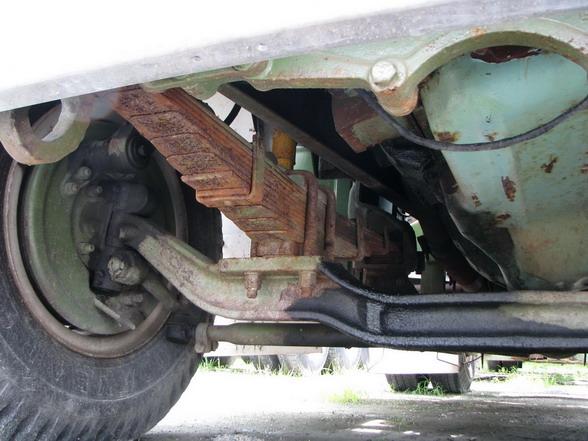
Many thanks for the reference. Looks like you are right (and i didn't doubt much in that). The rails on the 3rd pic too look like the ones a R-model utilized. But with different spring hanger brackets. Of what i also noted a C-model had front spring rear brackets with rubber pads for the leaf ends to attach. This F-model brochure represents something looking similar as much as I can determine from the drawing. My R's have rear ends of springs hanged on shakles and I belive the most R's had them of that style. Not sure of early series trucks though. Ok, now I will pay more attention to F-model chassis when up close to an early truck. Just didn't know they differ. -
Magnums and Freedoms 2020
Vladislav replied to phildirt's topic in Antique and Classic Mack Trucks General Discussion
Great looking line up! Thanks for sharing. Never knew about this part of Tony Champion's collection. The only question is the Freedoms don't have the statue pring on their sides by some reason. -
Looks like a very good quality color photos for 1961. And sure nice scenaries with that old machine. Thanks for digging them out
-
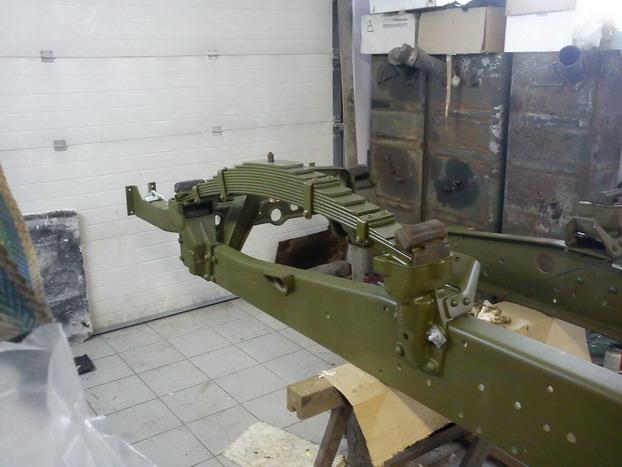
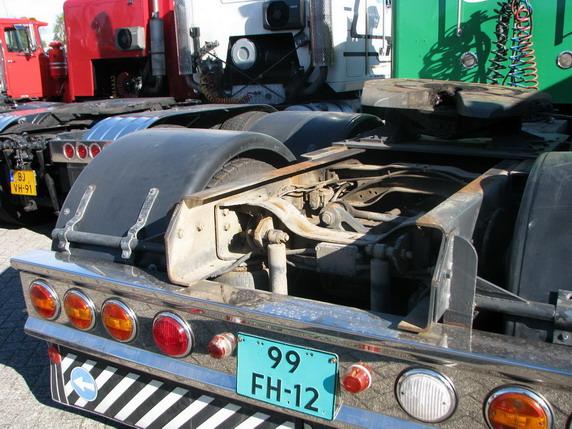
3/8 thick single rail chassis of a RW700 belonged to our Dutch member.
-
Some Superliner Pics.
Vladislav replied to jackb61sx's topic in Antique and Classic Mack Trucks General Discussion
It was an act of modifying and as the memory serves it was shared on here in the past. -
1964 C615
Vladislav replied to Prowrench's topic in Antique and Classic Mack Trucks General Discussion
Wow! That's one almost new fact to me. Have never seen a F-model with that shape of the rails. Any pics? -
Thanks for sharing. Very interesting. Also enjoyed reading the story by the link.
-
Fred Weber B Model
Vladislav replied to autocardc's topic in Antique and Classic Mack Trucks General Discussion
Nice old picture. And cool to see the truck is still in the perfect shape. What are the fuel tanks? An aftermarket convertion? Is the LH one for hydraulic supply? -
Best B-day wishes Tom! Smooth travels and keep well and healthy. Hope Zina pleases you and both you have a nice time.
-
RW cab light mounts
Vladislav replied to smalls111184's topic in Electrical, Electronics and Lighting
My trouble was they got spinning after I broke screws in them (which were SS in common steel inserts). So drilling or other remove anyway. -
Currently we have about 6000 cases in the country with nearly of 4000 of them in the capital. About 50 people died. Starting from nearly 15th of March news were announced to keep distancing and 2 week quarantine for those who was coming home from China, Italy, Iran, Germany, France etc. Many people started working from homes about the same time. Starting from the end of March a non-working week was announces with staying home quarantine starting from Monday. To the moment a week is gone and it's prolonged up to the end of April. All the borders were closed the same time and international flights cancelled. The quarantine is not really strictly so far. It's declared that everybody must stay home being only allowed to go for food to a nearest store, to apotek of to walk a pet for no longer than 100 meters from home. On practice all that is limitations of the constitution rights so people try doing their business too. What turns out difficult since all shops and other commercial and social facilities are closed excepting grocery stores, apteks and gas stations. The most citizens prefer staying home just for reasons of safety. That's why not really huge figures so far. But too possibly they will get change in the nearest future.
-
No, don't mention it. In fact I would be easily satisfied with a Superliner hood
-
1964 C615
Vladislav replied to Prowrench's topic in Antique and Classic Mack Trucks General Discussion
What really surprized me in a C-model it was built on a pair of R-model frame rails. And if we take to account C was introduced earlier it means Mack designed that frame for C and further kept in production up to 2004 year. Co0ngrats on the great purchase! Too like to specifications.


BMT Forum Logo
