


mattb73lt
-
Posts
1,421 -
Joined
-
Last visited
-
Days Won
146
Content Type
Profiles
Forums
Gallery
Events
Blogs
BMT Wiki
Collections
Store
Everything posted by mattb73lt
-

B-73 Restoration
mattb73lt replied to mattb73lt's topic in Antique and Classic Mack Trucks General Discussion
Well, I have a bunch to do and I need to finish the B73 when I get it back in the spring. First, clean up my shop, it looks like it exploded when I was trying to finish the bed. Second, I still have to finish the ‘41 cruiser for the State Police Museum. Then, my cousin called me about doing some work on his M38A1 jeep. Not sure about the Jeep, usually I frown on working on relatives vehicles. I’ve had several people ask me about doing projects for them, but that can turn into a can of worms. If I was closer to you, it might be possible. -
B-73 Restoration
mattb73lt replied to mattb73lt's topic in Antique and Classic Mack Trucks General Discussion
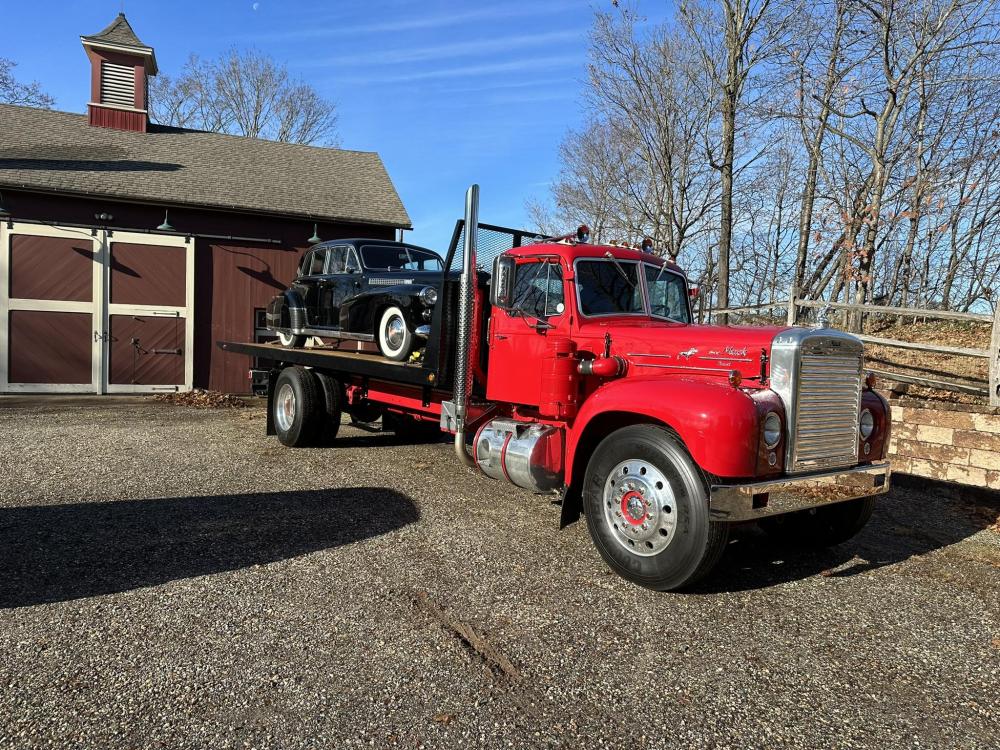
First load on it's back. Put them both in storage for the winter this morning. Also, the first time since '98 the B73 hasn't been hiding somewhere in my yard. Rode really nice with the Caddy on it and pulled some pretty big hills better than I thought it would. Lots of looks and thumbs up going down the highway.
-
Oil Filter Relocation
mattb73lt replied to nam vet's topic in Antique and Classic Mack Trucks General Discussion
You can easily do a single spin on. I did this to my NH220 in my B73 from a canister filter to a spin on filter.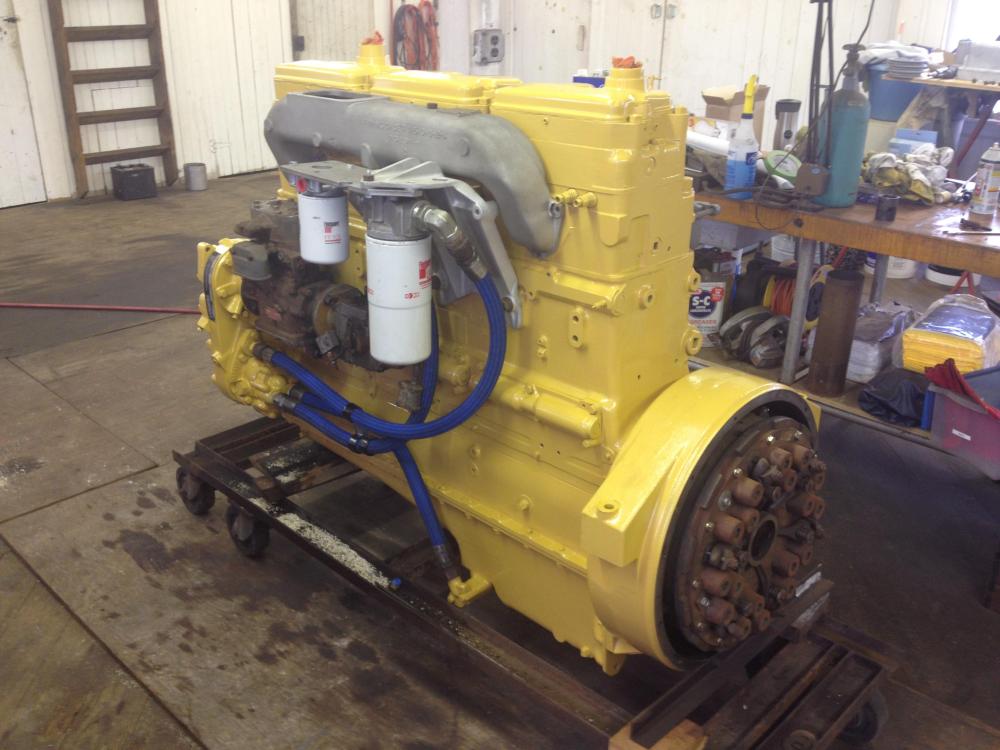
-
Coca Cola LJ Mack colors
mattb73lt replied to 1961H67's topic in Antique and Classic Mack Trucks General Discussion
The B Model's are easy, same as 2 1/2 and 5 ton military trucks and plentiful. The L clutch pad is a different shape, being taller in the center. Early 60's-70's Ford and International trucks trucks are kind of similar, but I think they maybe too small. Steele Rubber Products has a large selection, but nothing specific for the L I saw. A temporary solution would be to find one that's too large and trim it to cover the pedal, then glue it to the pedal. Also, just keep asking around, one may surface that's usable. -
Coca Cola LJ Mack colors
mattb73lt replied to 1961H67's topic in Antique and Classic Mack Trucks General Discussion
That’s a really nice touch. Great work! -
B-73 Restoration
mattb73lt replied to mattb73lt's topic in Antique and Classic Mack Trucks General Discussion
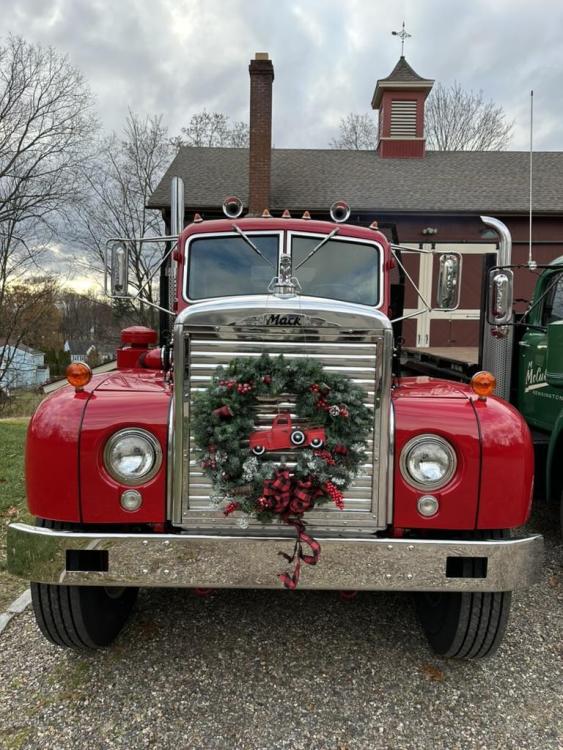
I just stuck it there for the photo. It’s my wife’s and she had it on the back porch. I stole it while she was at work and hung it there. It would interfere with the shutters anyway. -
B-73 Restoration
mattb73lt replied to mattb73lt's topic in Antique and Classic Mack Trucks General Discussion
Decorating the yard this year was easy with Christmas colored trucks!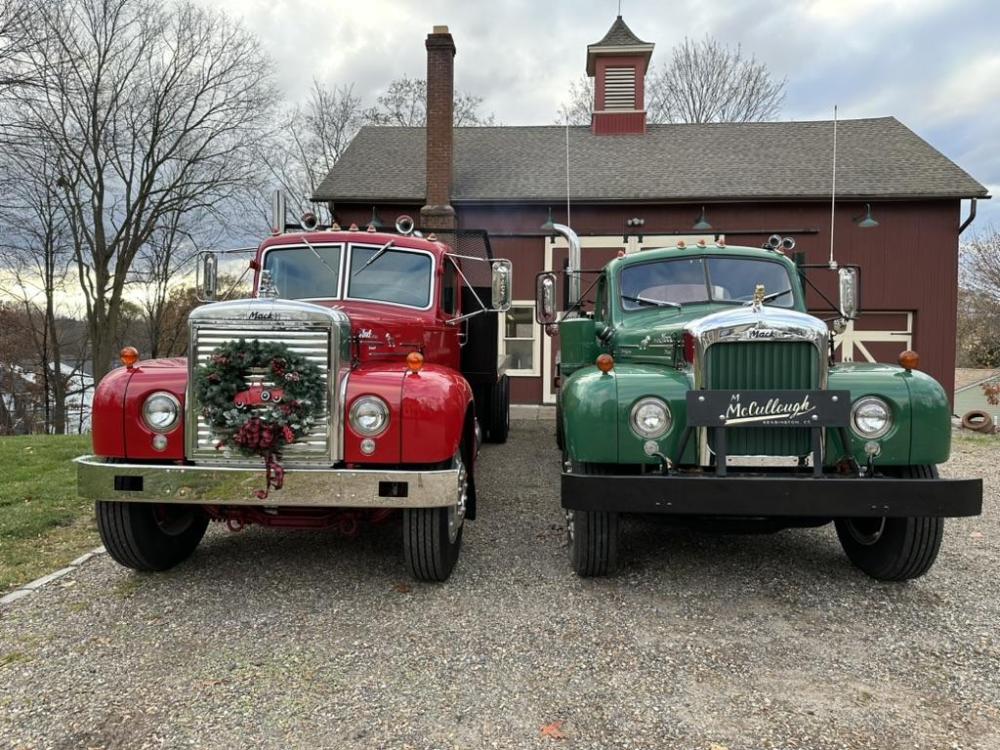
-
Oil Filter Relocation
mattb73lt replied to nam vet's topic in Antique and Classic Mack Trucks General Discussion
I’d have to look, I think those might be hard lines. I may be thinking of my original installation on the 673 where I added an oil cooler to it. -
Nice work!! That'll look great when painted and assembled!!
-
Oil Filter Relocation
mattb73lt replied to nam vet's topic in Antique and Classic Mack Trucks General Discussion
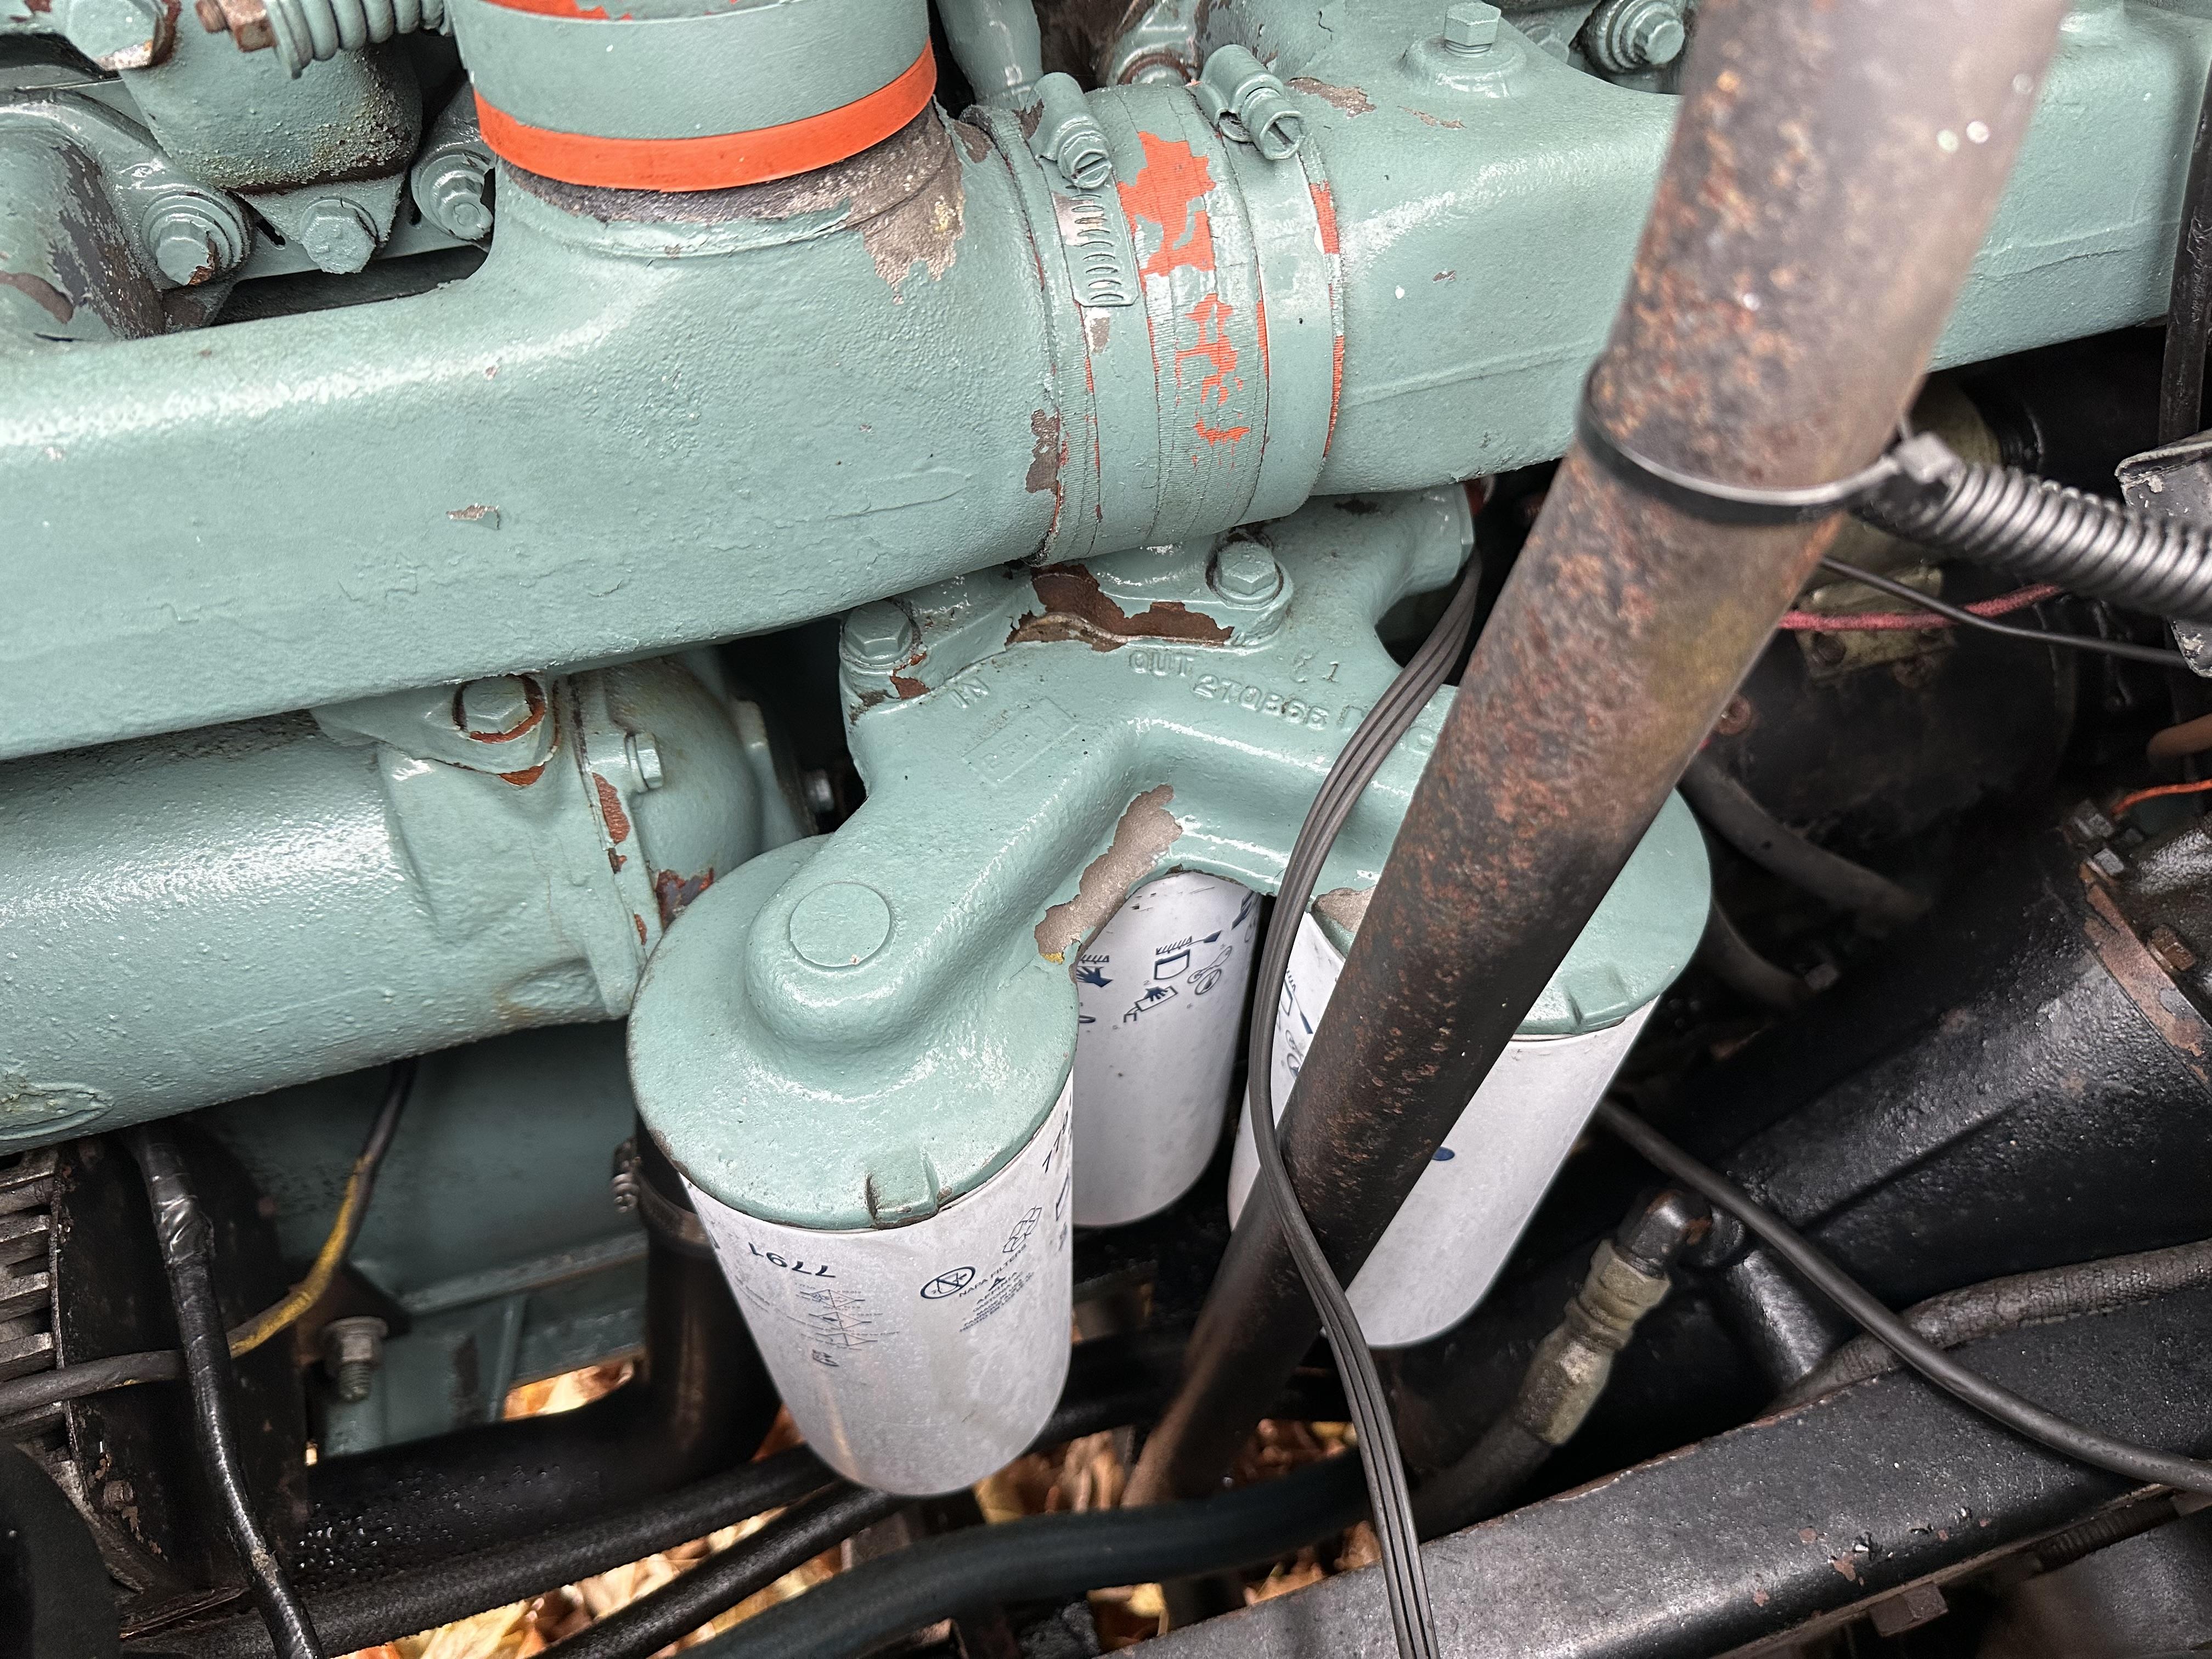
If you have an oil cooler, it'll sit just below the left side of your intake manifold and to the left of the oil filter pad. It'll be round, about 3-4" in diameter. It should have two large flex lines running into it and back to the filter pad. If you look at my photo of the spin-ons you'll see it. -
Oil Filter Relocation
mattb73lt replied to nam vet's topic in Antique and Classic Mack Trucks General Discussion
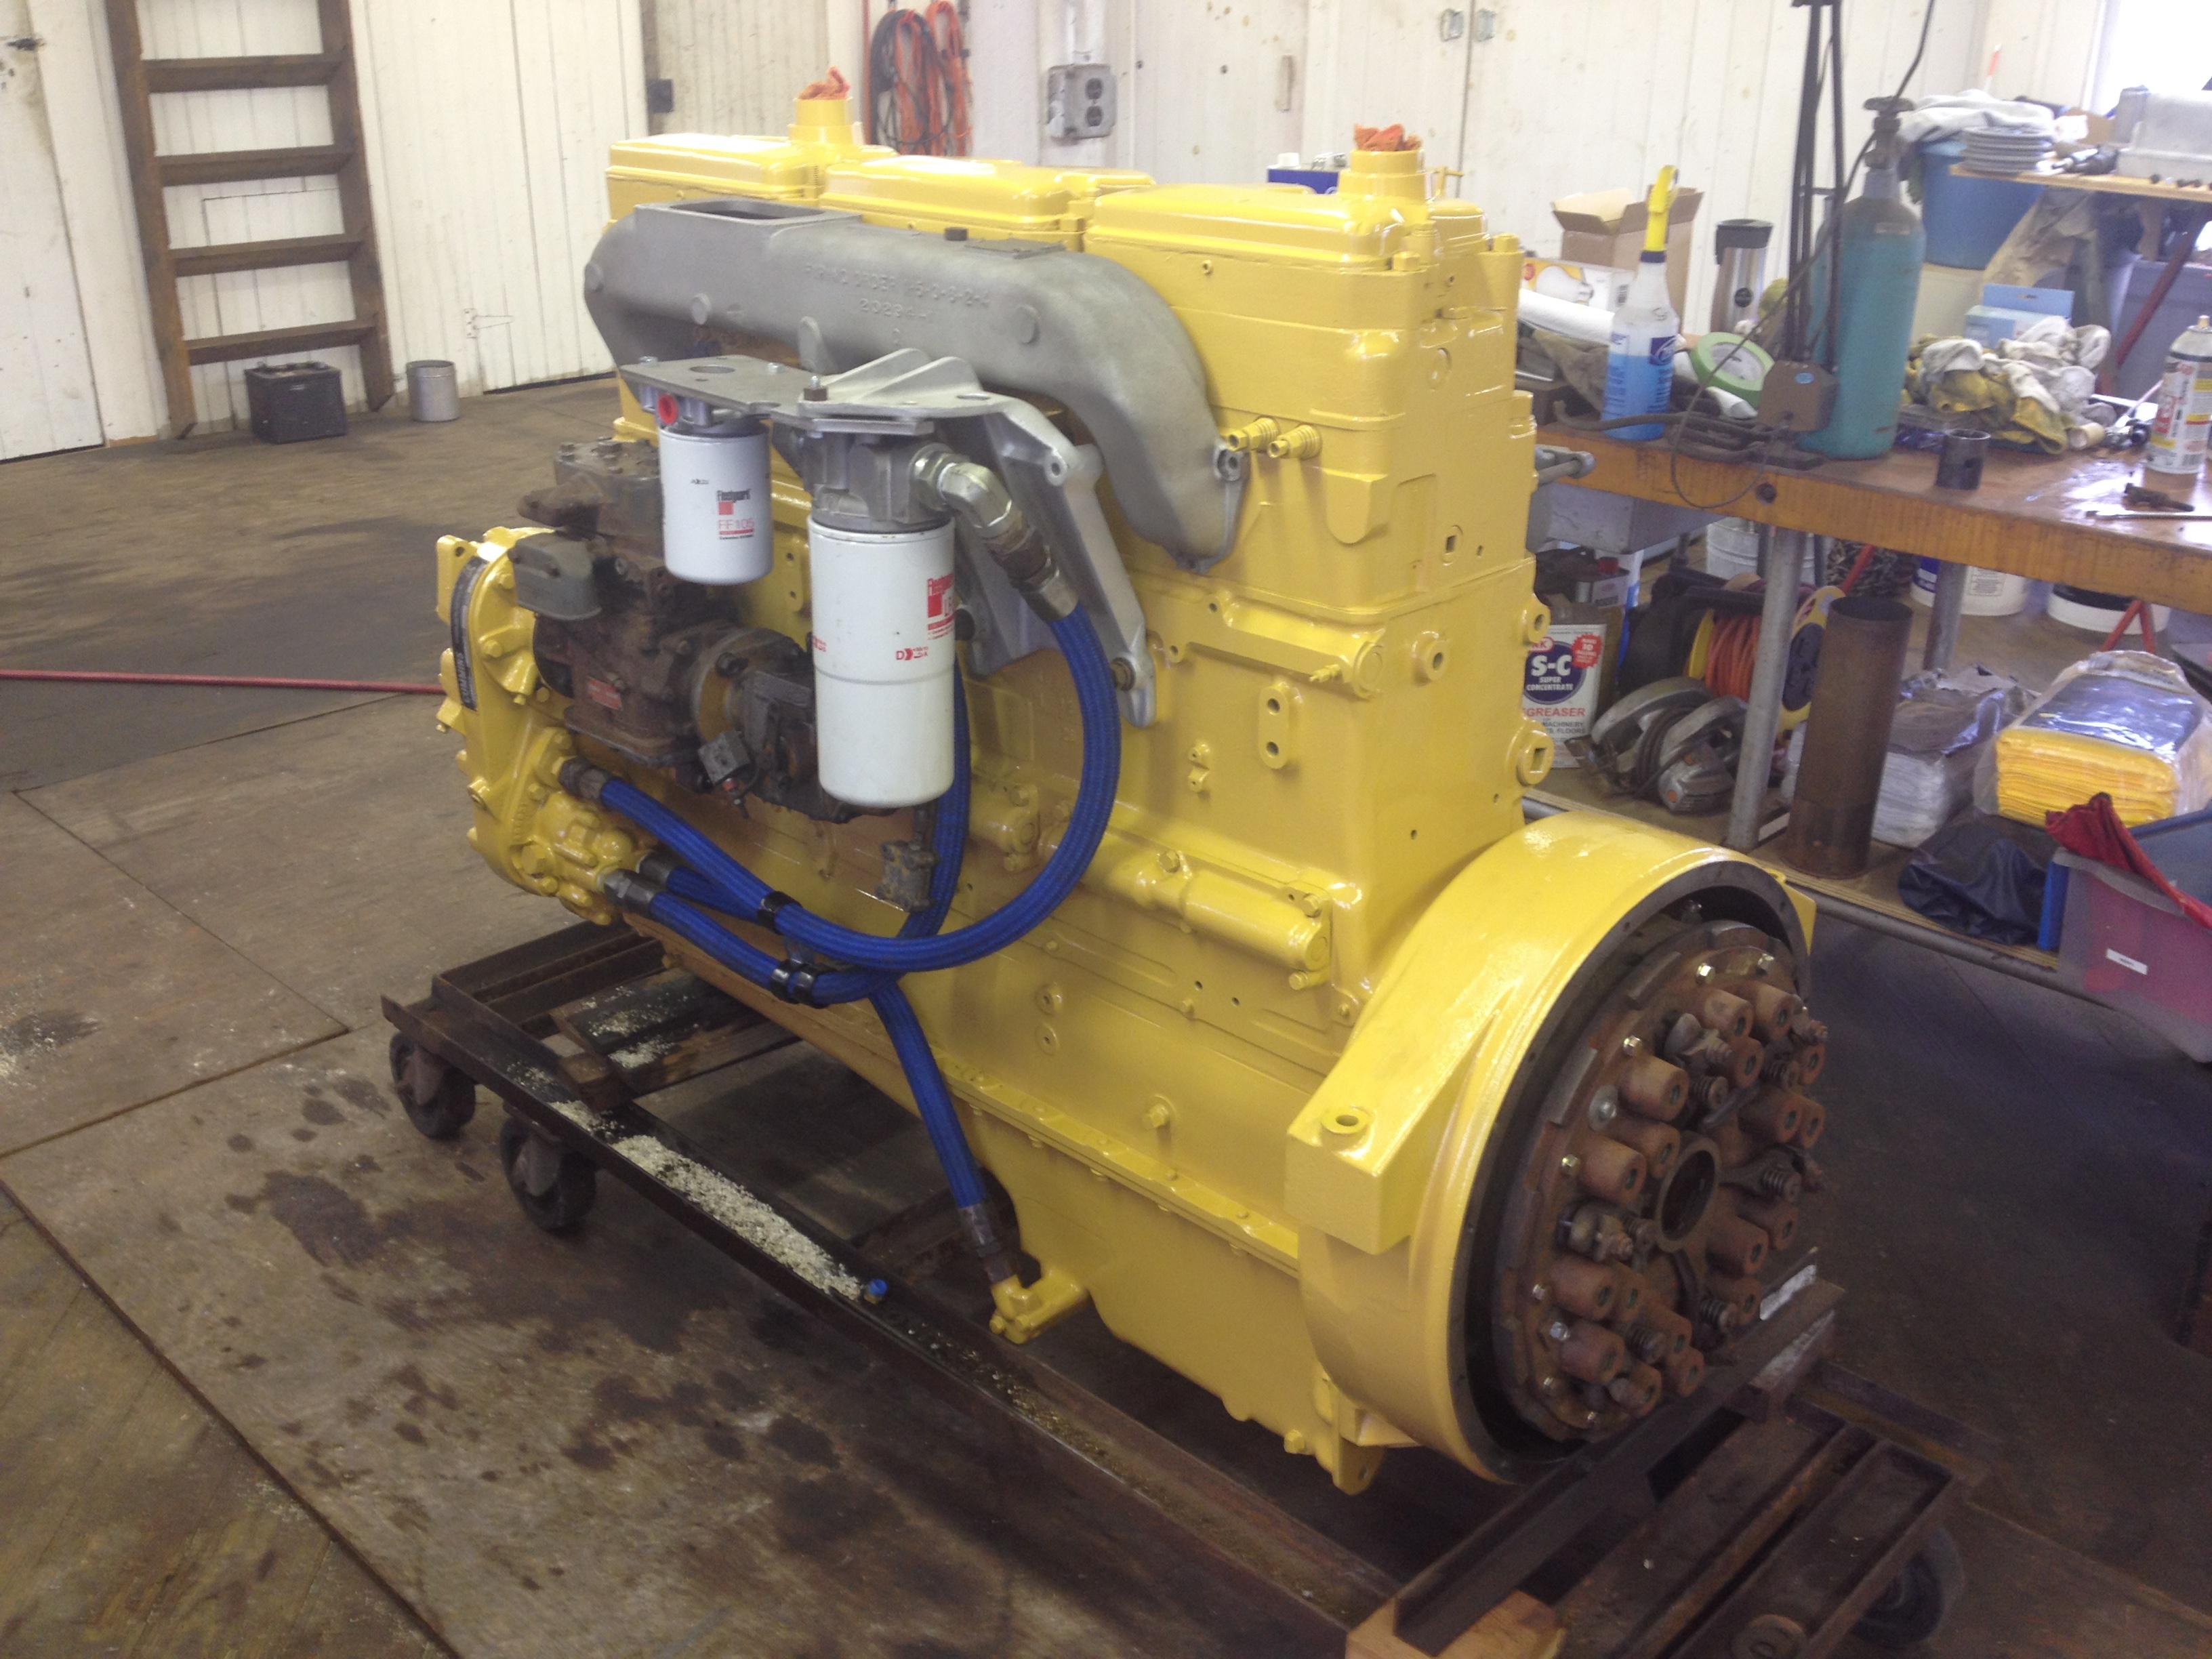
237's are transplants. I did some research into converting my END-673 to spin-ons, but had to replace it before that with the 237. It was pretty straight forward with the filter housing bolting directly to the oil filter pad. Port alignment was not an issue and there are several gaskets available to line it up. I was looking to do it because the filter elements were getting harder to find. Another plus is that there are no external oil lines to route or worry about. Filters can also be had that are shorter in length to get you around clearance issues. -
Oil Filter Relocation
mattb73lt replied to nam vet's topic in Antique and Classic Mack Trucks General Discussion
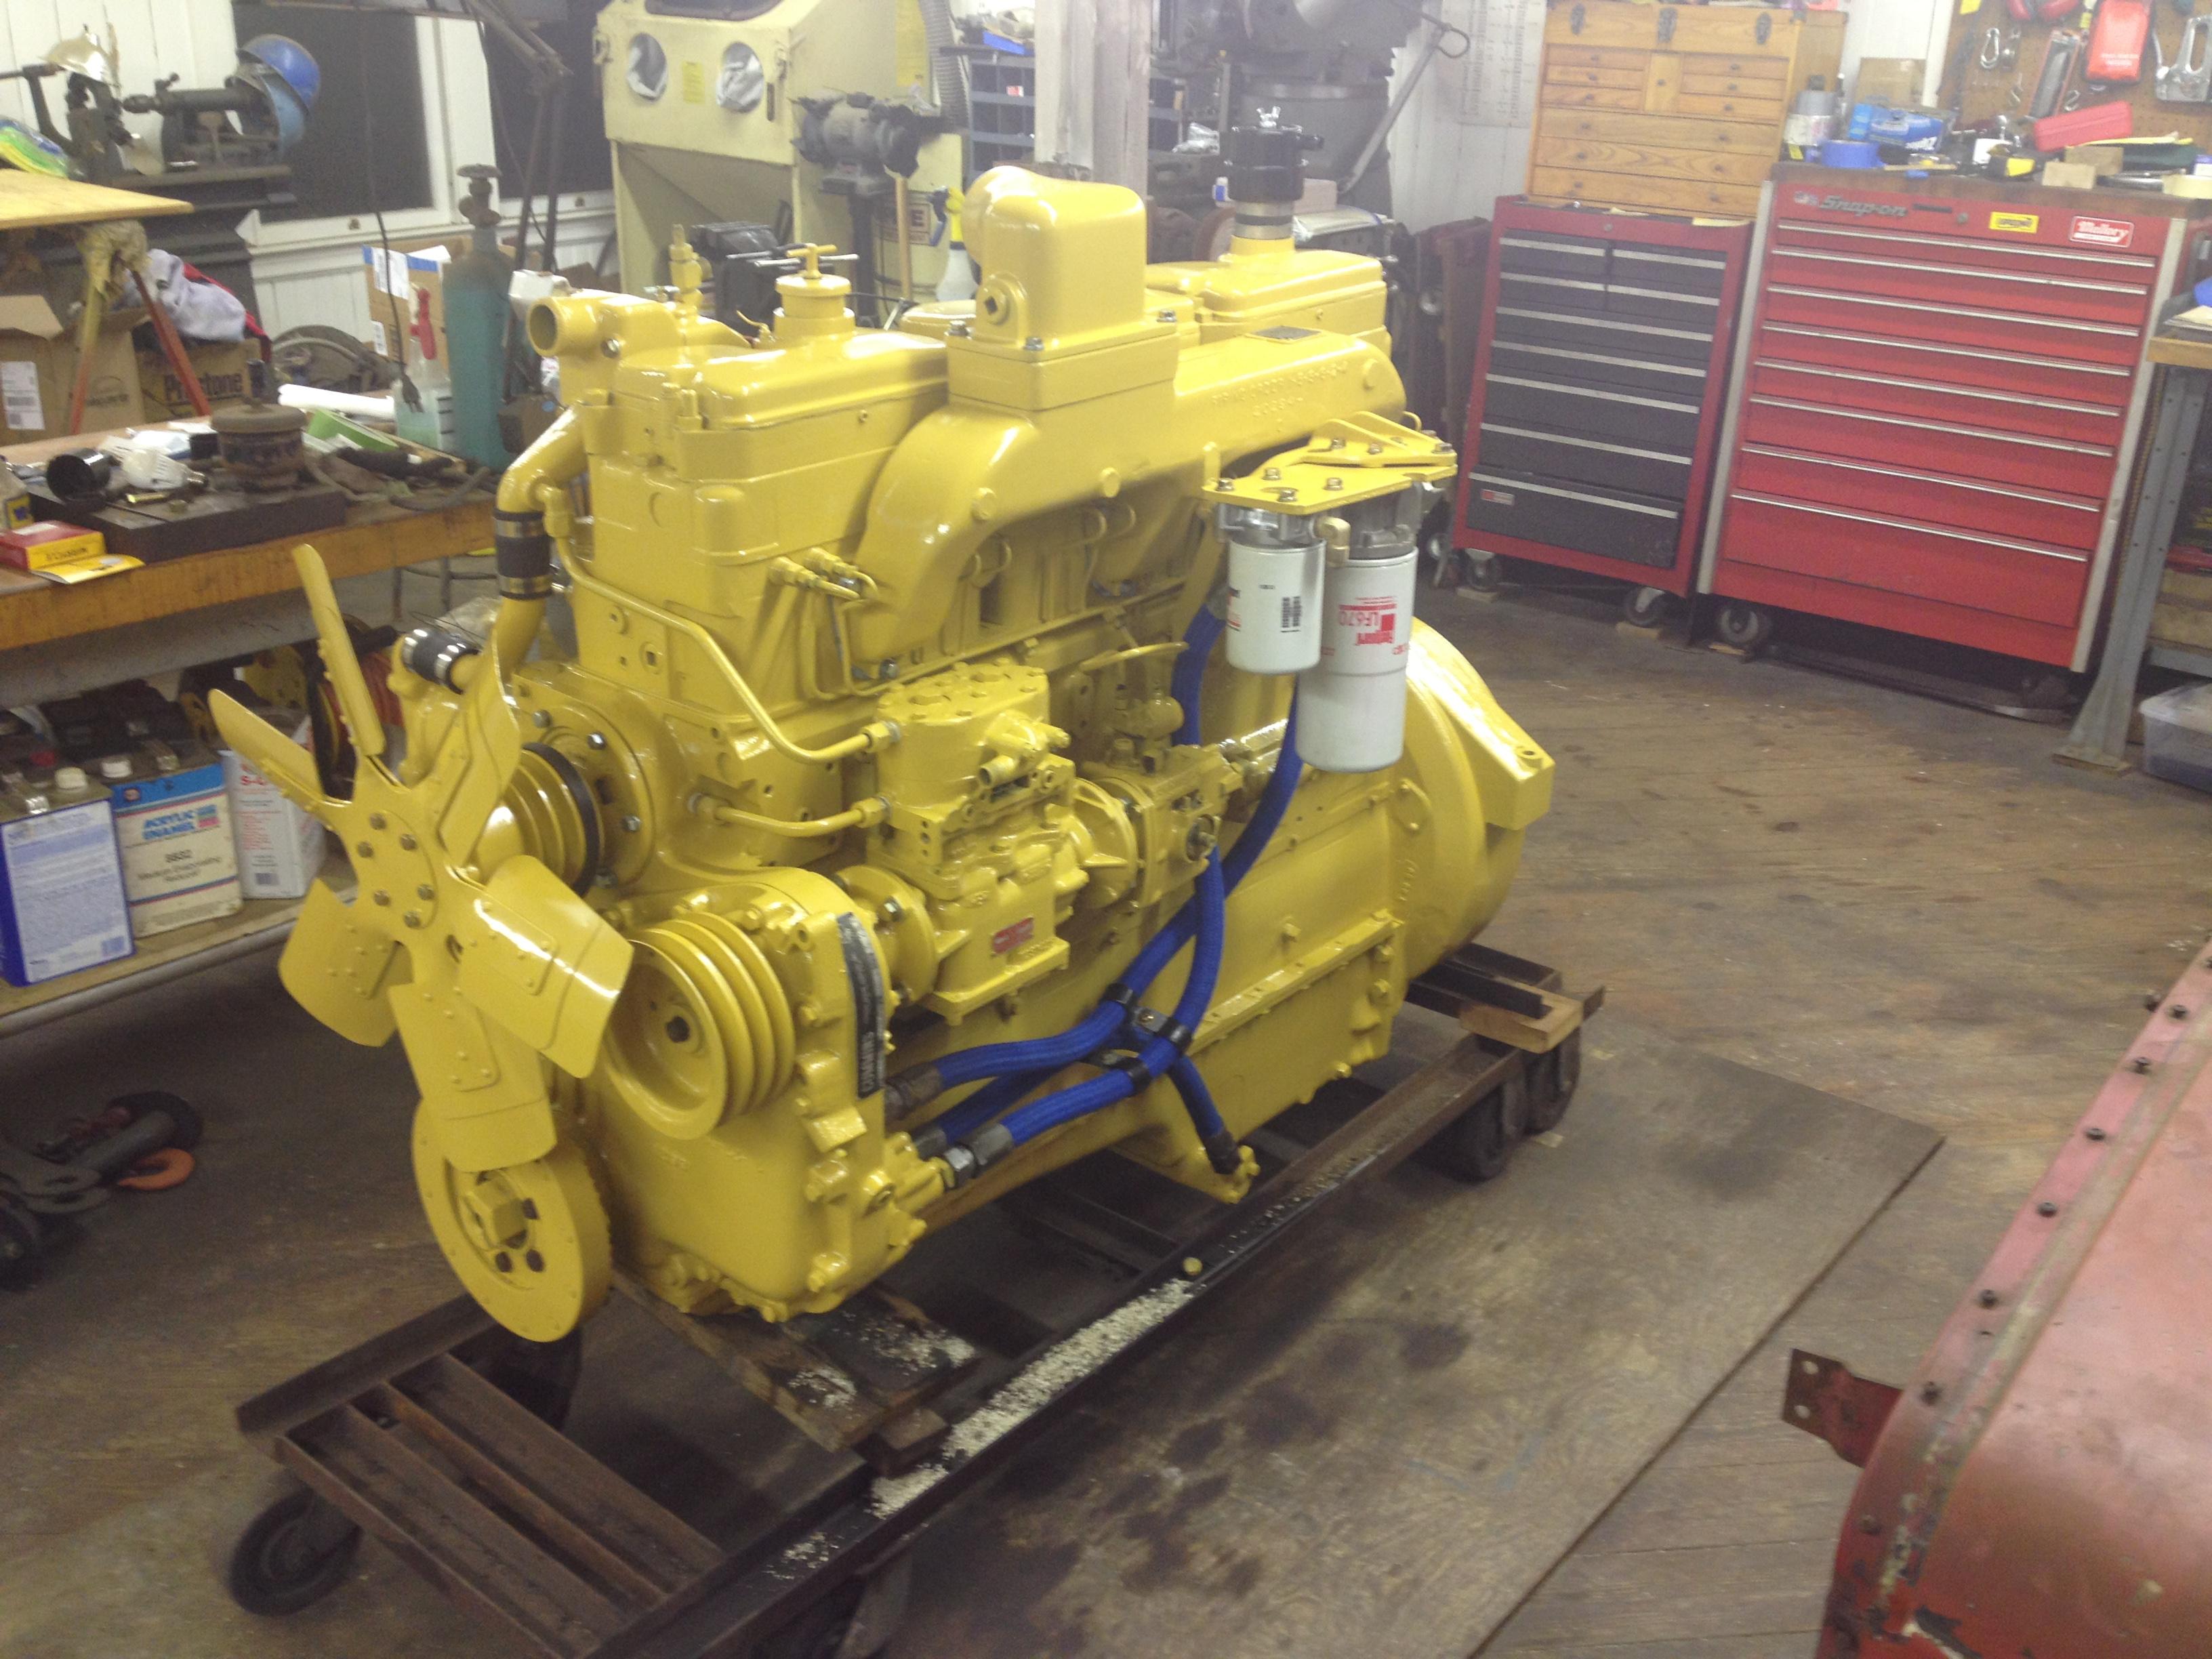
My concern with that last photo would be flow volume through it to supply the block/turbo. Additionally, getting replacement filters for that unit. It might be worth it to scrounge around and find a triple filter arrangement off an ENDT-675 with the spin-on filters. It would make servicing the engine a lot easier. This is the arrangement on my 675(237) that’s in my B42.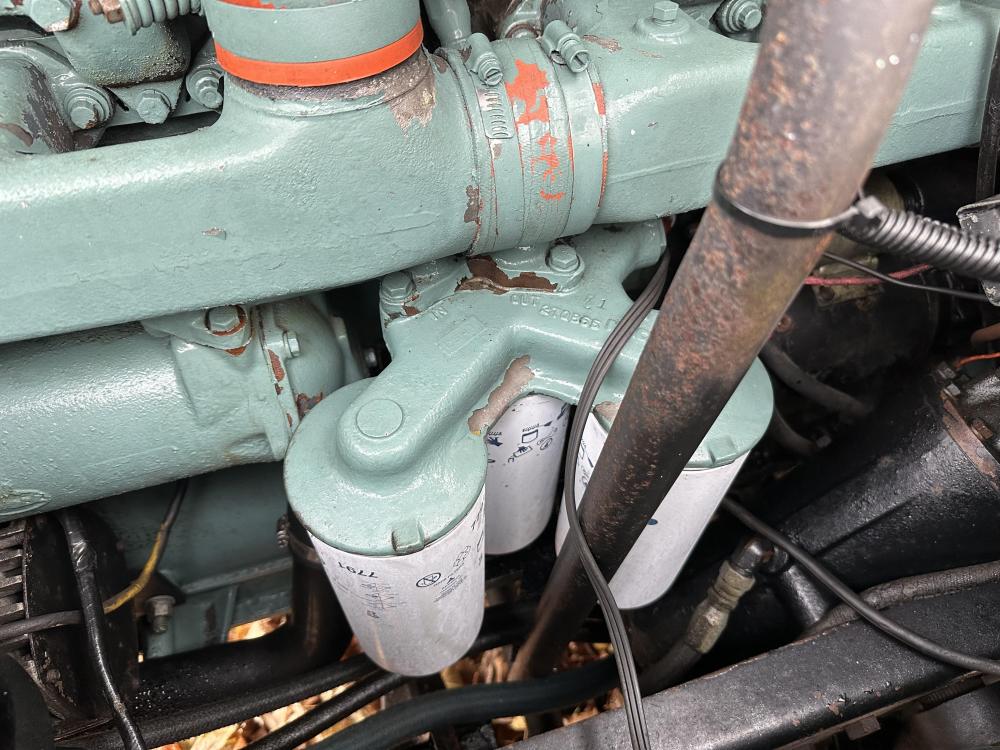
-
Coca Cola LJ Mack colors
mattb73lt replied to 1961H67's topic in Antique and Classic Mack Trucks General Discussion
Interesting valve for the front brakes. I've seen those before, but didn't realize they had settings. I thought it was like the front axle limiting valve you mentioned, just ON/OFF. My B73 had the limiting valve and a trolley valve on the column. I removed all of that and the trailer connections to simplify my system as none of that is needed now that it's a straight truck. -
B model voltage
mattb73lt replied to Licensed to kill's topic in Antique and Classic Mack Trucks General Discussion
I have a friend that has an early production B42 that is very original and is 6V Pos ground. It is possible the early gas powered trucks with small displacement gas engines were that way, too. But my ‘63 B42 was 12V Pos ground when I got it. Most big manufacturers switched to 12 volts around the mid-50’s. -
B-73 Restoration
mattb73lt replied to mattb73lt's topic in Antique and Classic Mack Trucks General Discussion
This story is far from over and it's been a wild transformation. Now to finish it up and start enjoying the fruits of all my labors!!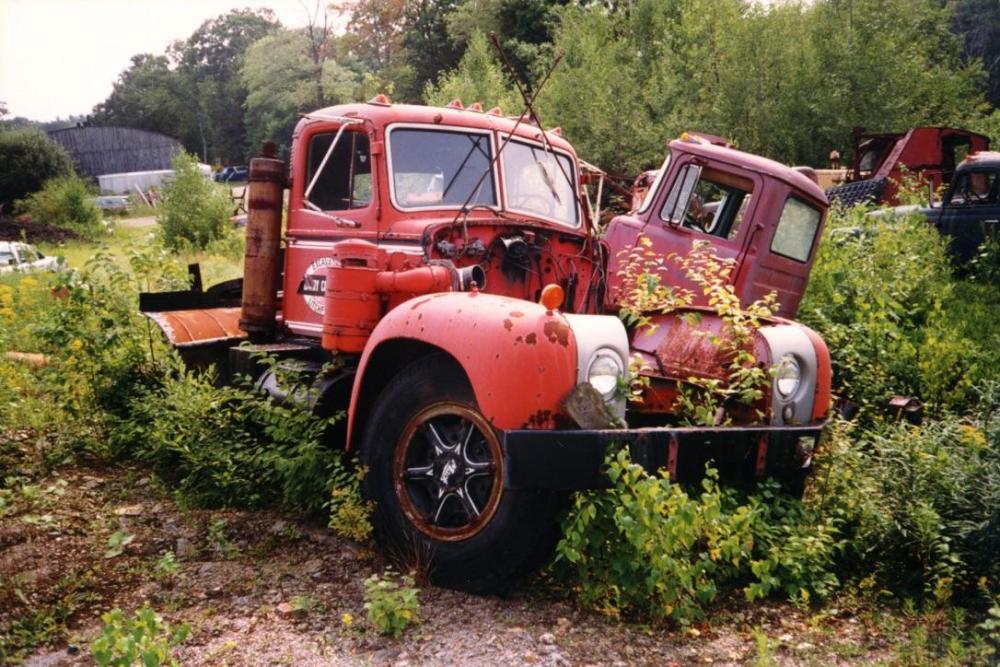

-
B-73 Restoration
mattb73lt replied to mattb73lt's topic in Antique and Classic Mack Trucks General Discussion
And same to you. Welcome Home!! -
B-73 Restoration
mattb73lt replied to mattb73lt's topic in Antique and Classic Mack Trucks General Discussion
No, I don't plan on letting that happen. Still some stuff to finish, but the future goal is to get out there with it and drive it. Plus, using it to haul my cars to antique car tours for which the other truck was built and this was to be it's follow on. -
H628
mattb73lt replied to doubleclutchinweasel's topic in Antique and Classic Mack Trucks General Discussion
It is a shame. But these trucks had a hard life and most were used up and discarded when they could no longer be economically repaired. It would be nice if some of the more “exotic” factory builds had survived. Looking at that list, there’s a lot of low volume numbers showing specific builds for a customer. -
Great comeback. That truck has had quite the life! Awesome to see it back at work, again. Good job!!
-
Finally some DM progress
mattb73lt replied to mowerman's topic in Antique and Classic Mack Trucks General Discussion
I sourced mine from a local hydraulic shop. I like to use the take-apart Aeroquip style fittings, because I can make my own lines. The crimped ones are fine, but you can’t reuse the fittings. I would find a shop and once you determine the size hose you have, order it and have them ship it to you. I’ve had to do that when I was constrained for time. I built all my oil lines for the NH220 when I converted it to spin-on filters.
-
B-73 Restoration
mattb73lt replied to mattb73lt's topic in Antique and Classic Mack Trucks General Discussion
Mechohaulic, here’s the axle set upon that Granite Tri-axle. It’s set up to carry some serious weight because it was spec’d out by a rigging company. For some reason they declined delivery so my friend grabbed it. Way too heavy for my needs, too many tires, too(ie; $$$$!)
-
B-73 Restoration
mattb73lt replied to mattb73lt's topic in Antique and Classic Mack Trucks General Discussion
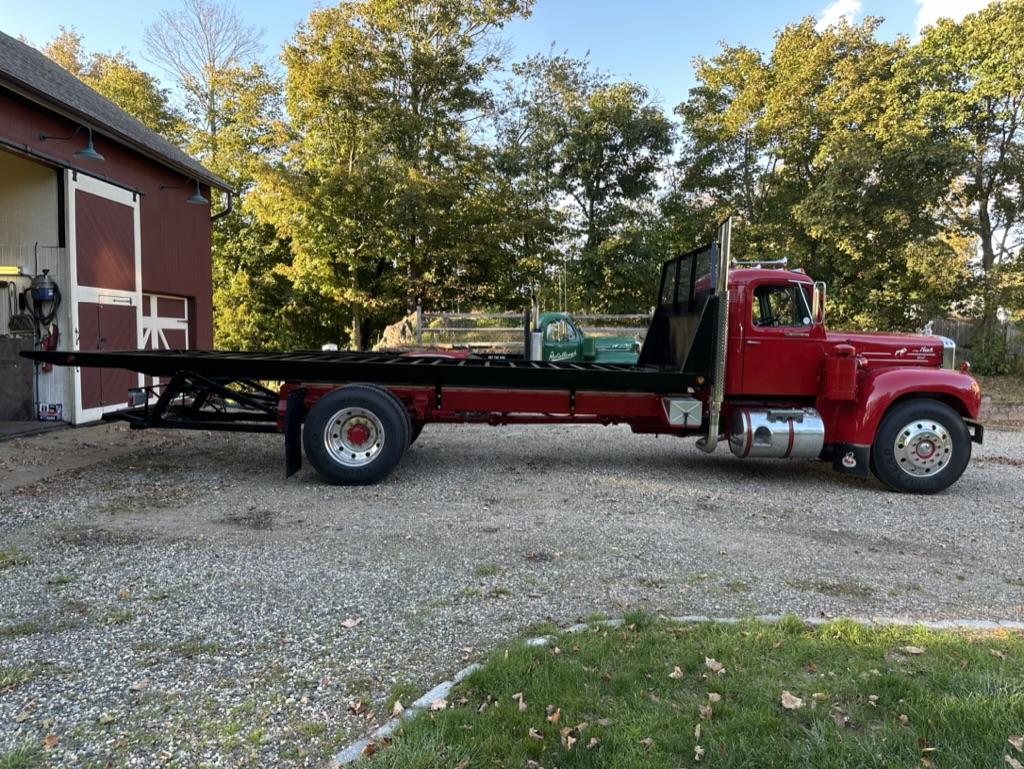
Mehohaulic, the balance of the truck is pretty good. The deck has 13' forward and 11' aft. If you look at the landing gear, there's not much room to move the axle back maybe another foot. But that's about it.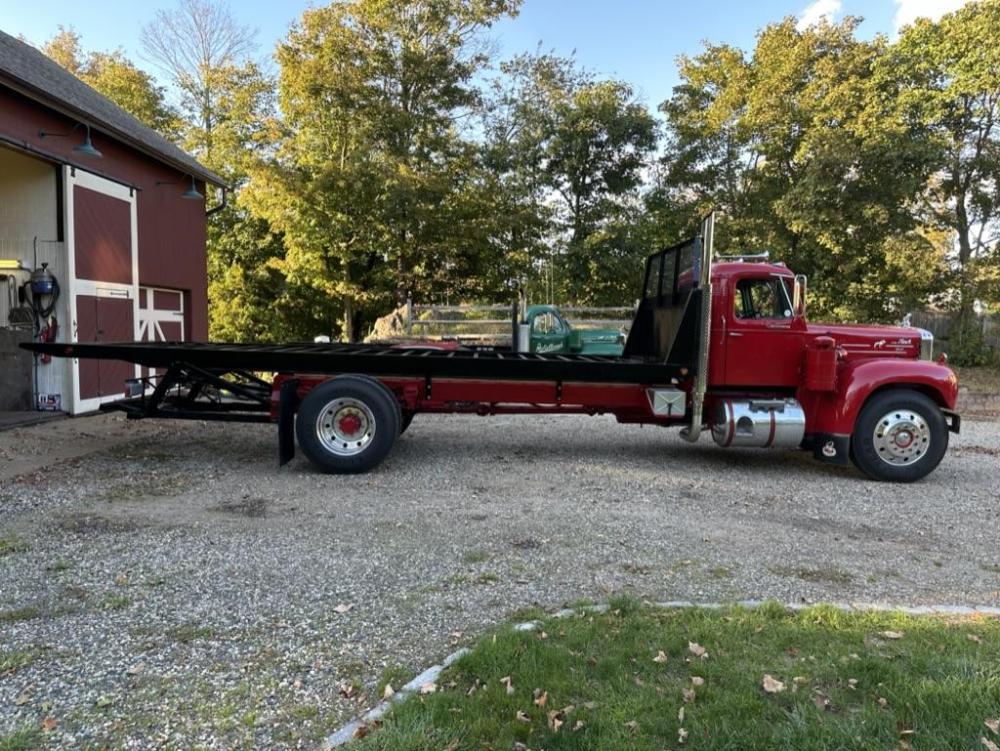
-
B-73 Restoration
mattb73lt replied to mattb73lt's topic in Antique and Classic Mack Trucks General Discussion
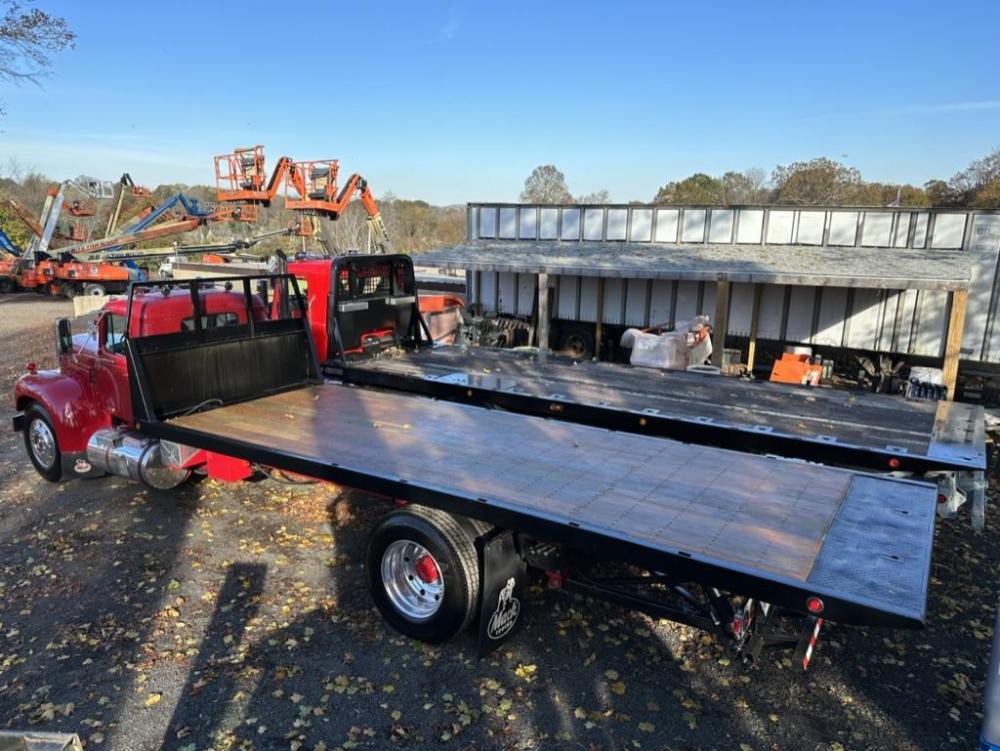
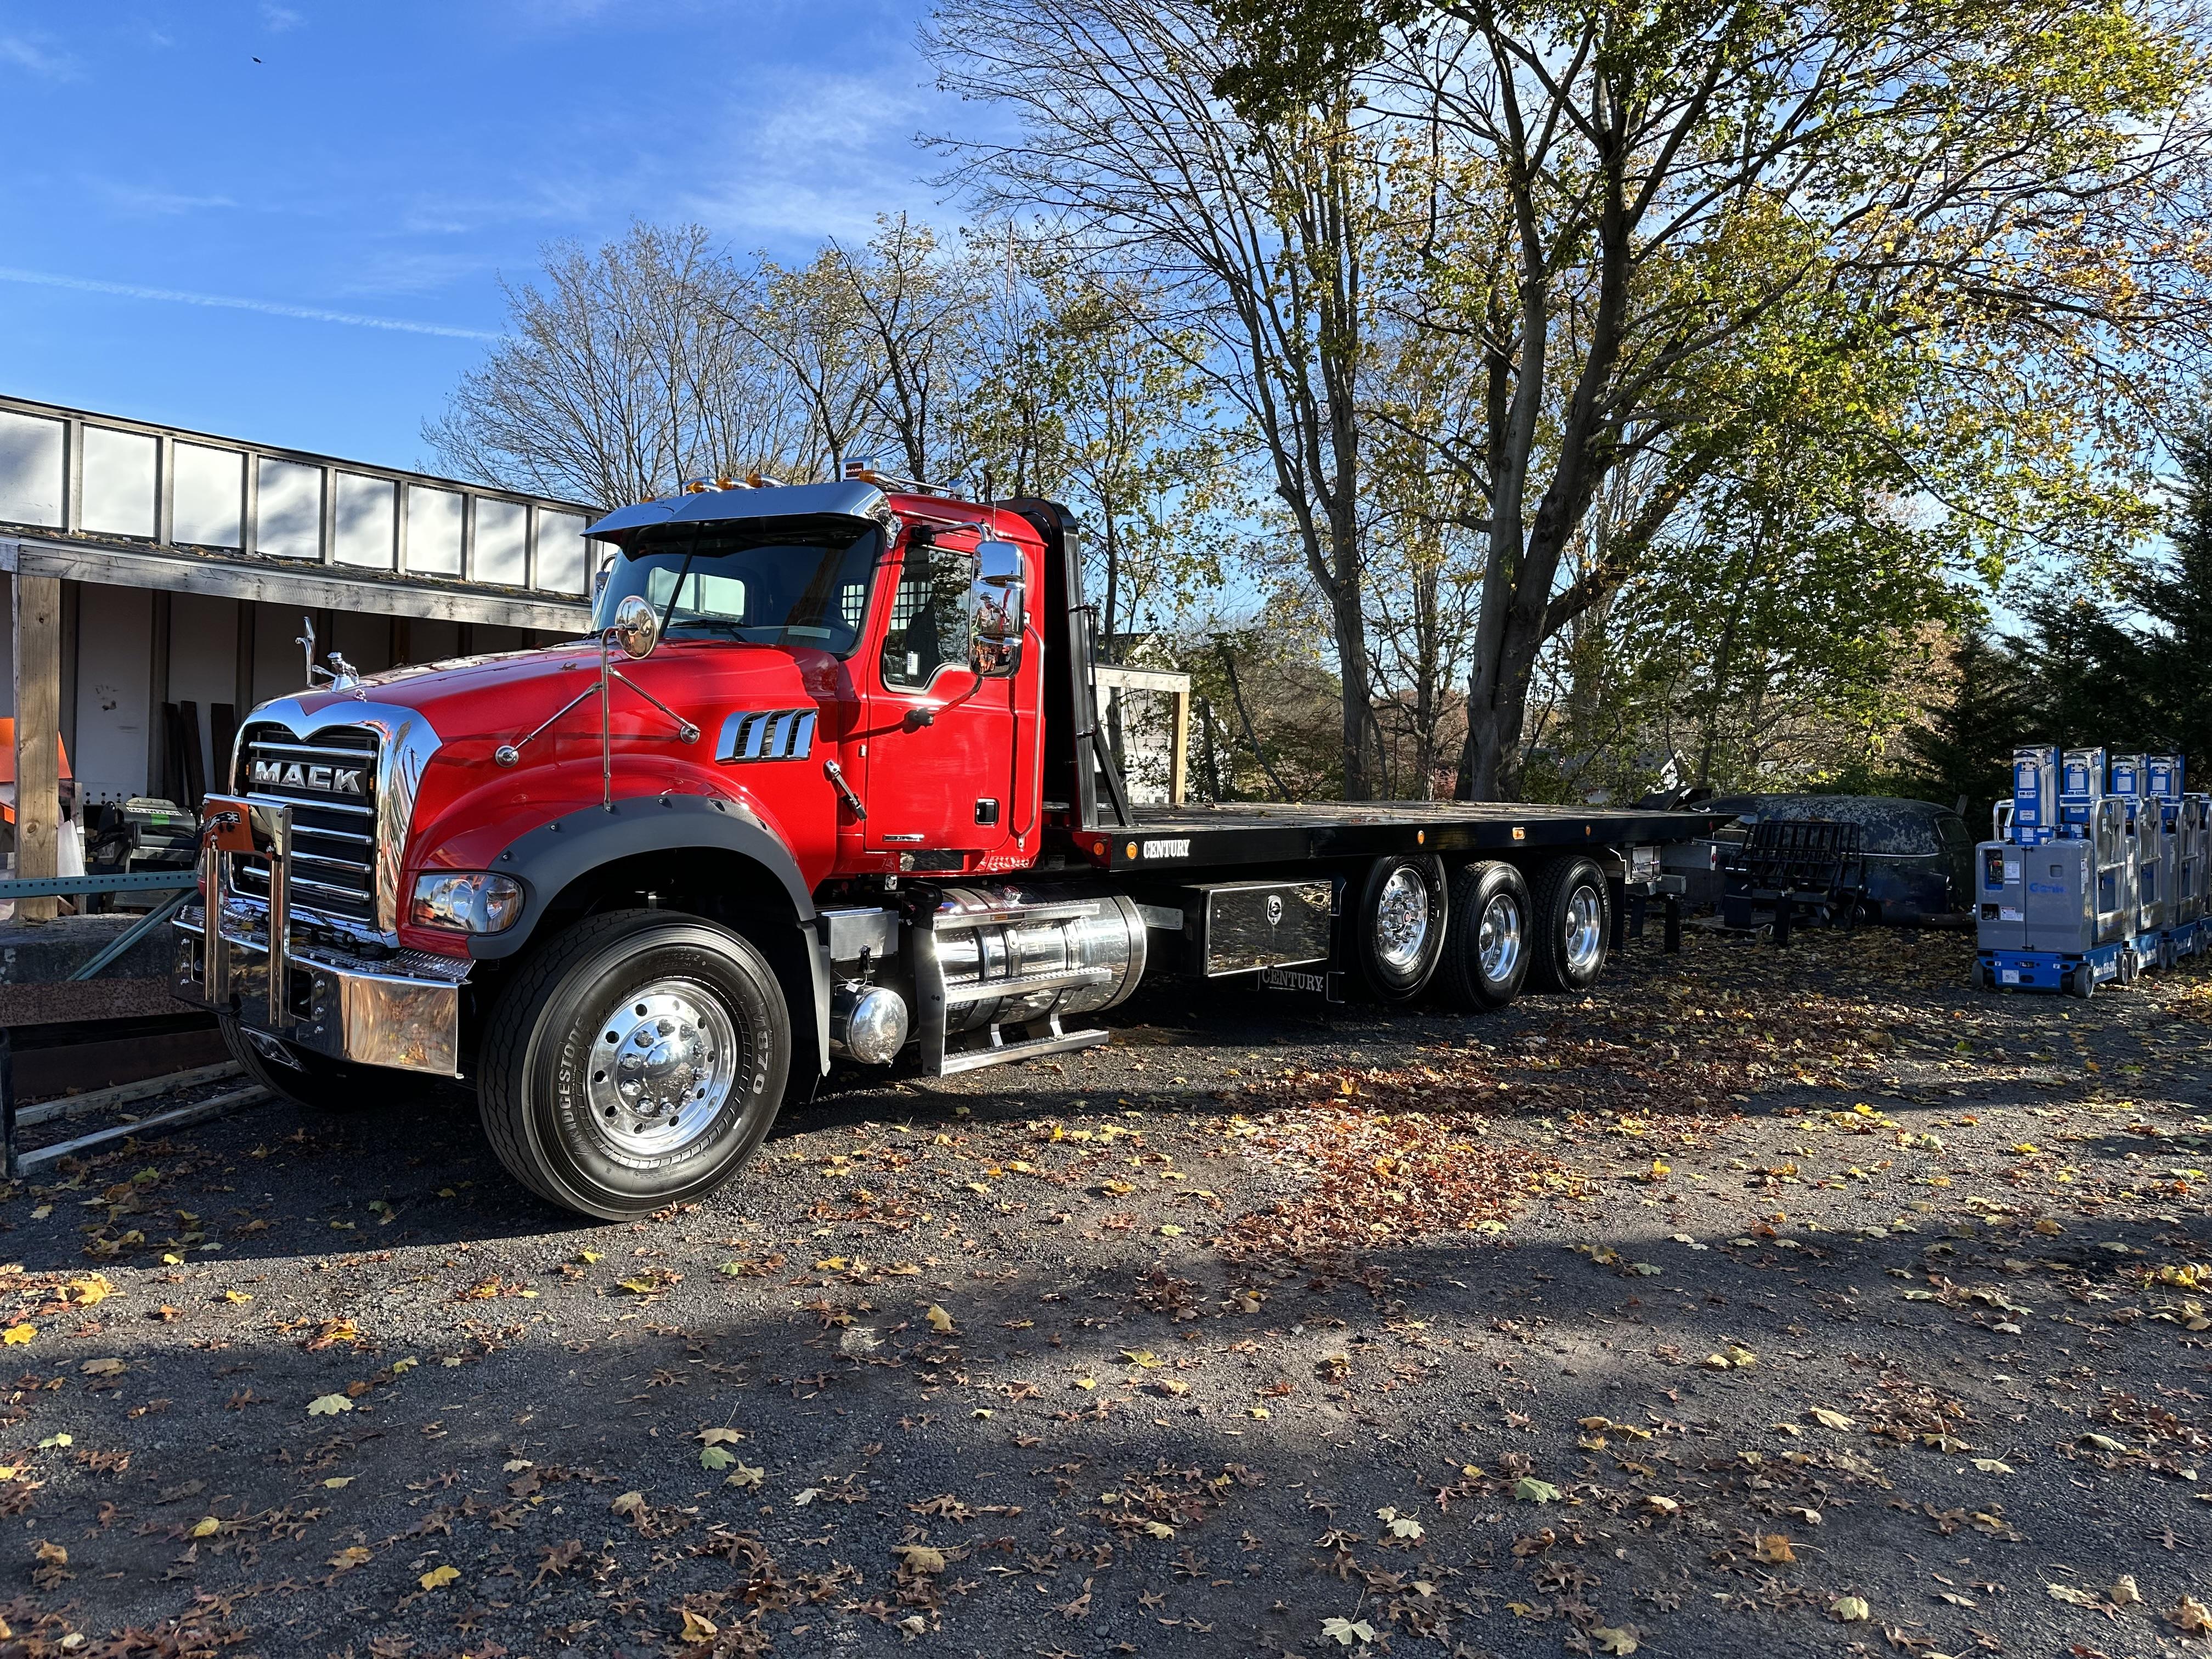
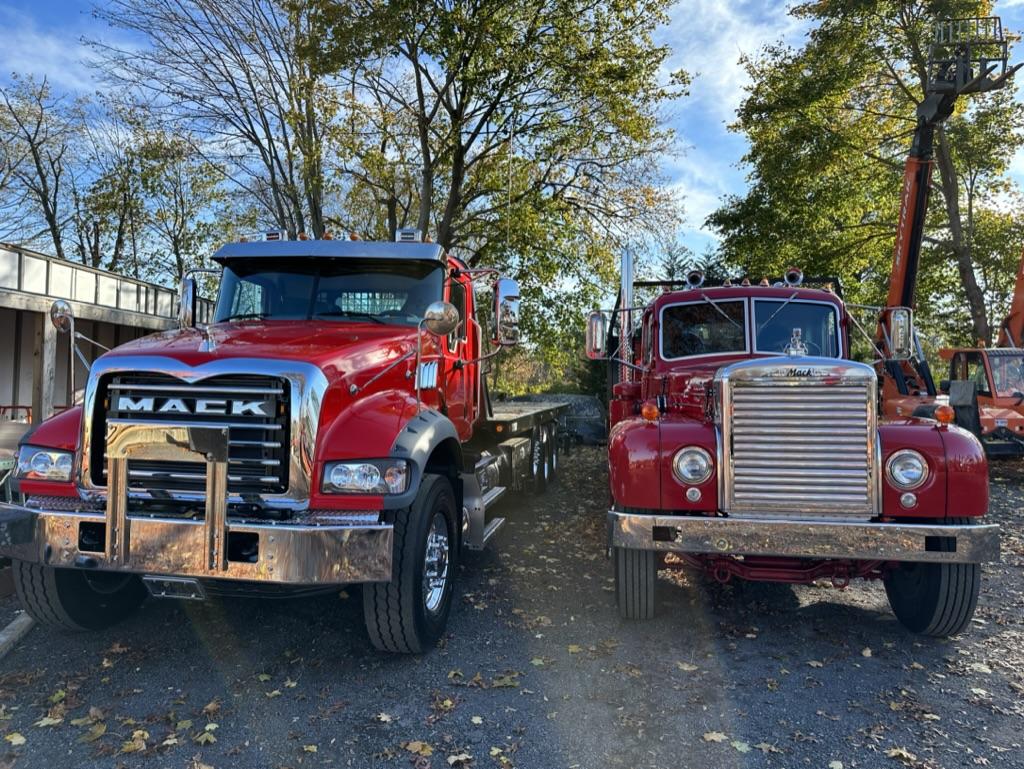
I was over at my friend's yard today, the one that very graciously sent me several lifts to assembly my truck. He just took delivery of a 2024 Mack Granite Tri-axle Roll Back with a Century body. I couldn't help but park mine next to it to compare. Not even registered yet, with all the stickers still on it!. I almost passed out when he said it was over $300,000, DAMN!!!!! 64 years between the two.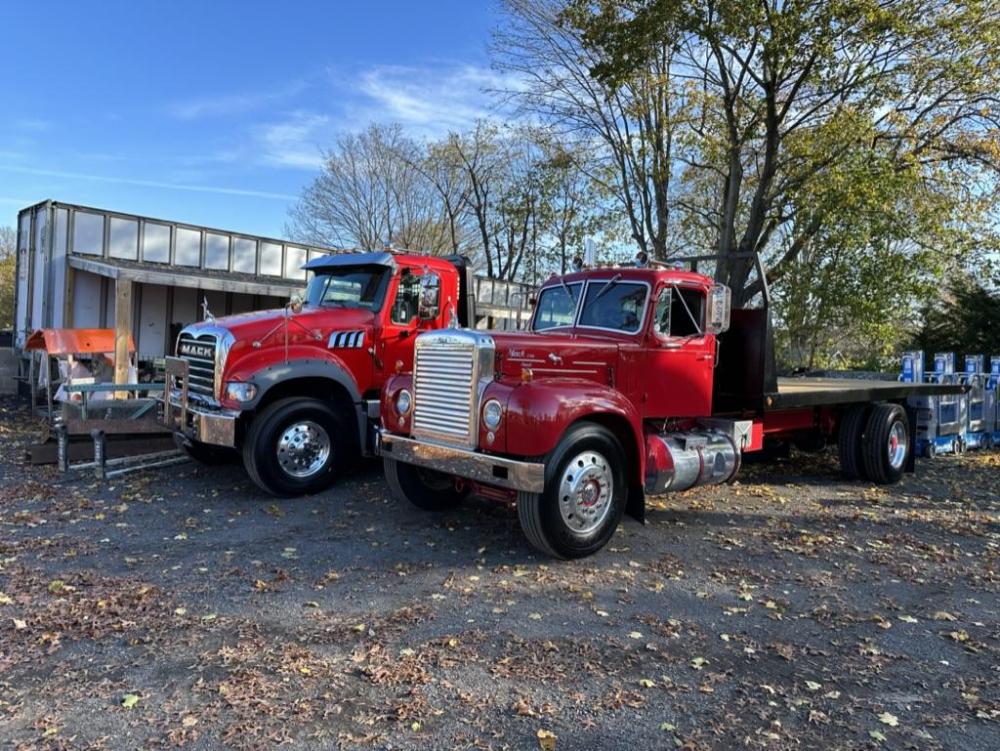

-
B-73 Restoration
mattb73lt replied to mattb73lt's topic in Antique and Classic Mack Trucks General Discussion
I don't know him, but I'll ask. If he's there I'll pass that along. -
B-73 Restoration
mattb73lt replied to mattb73lt's topic in Antique and Classic Mack Trucks General Discussion
Yup that works!! I wonder what's going on with me posting pictures and videos. Pics won't post when i submit my post, but if I go back in and post them after they go in. It has been since I got a newer phone, though.


BMT Forum Logo
