


mattb73lt
-
Posts
1,424 -
Joined
-
Last visited
-
Days Won
146
Content Type
Profiles
Forums
Gallery
Events
Blogs
BMT Wiki
Collections
Store
Everything posted by mattb73lt
-

More Frame Questions
mattb73lt replied to nam vet's topic in Antique and Classic Mack Trucks General Discussion
BTW, I’m not trying to hijack nam vet’s thread, just trying to give him some visuals to help with the issue. TY. -
More Frame Questions
mattb73lt replied to nam vet's topic in Antique and Classic Mack Trucks General Discussion
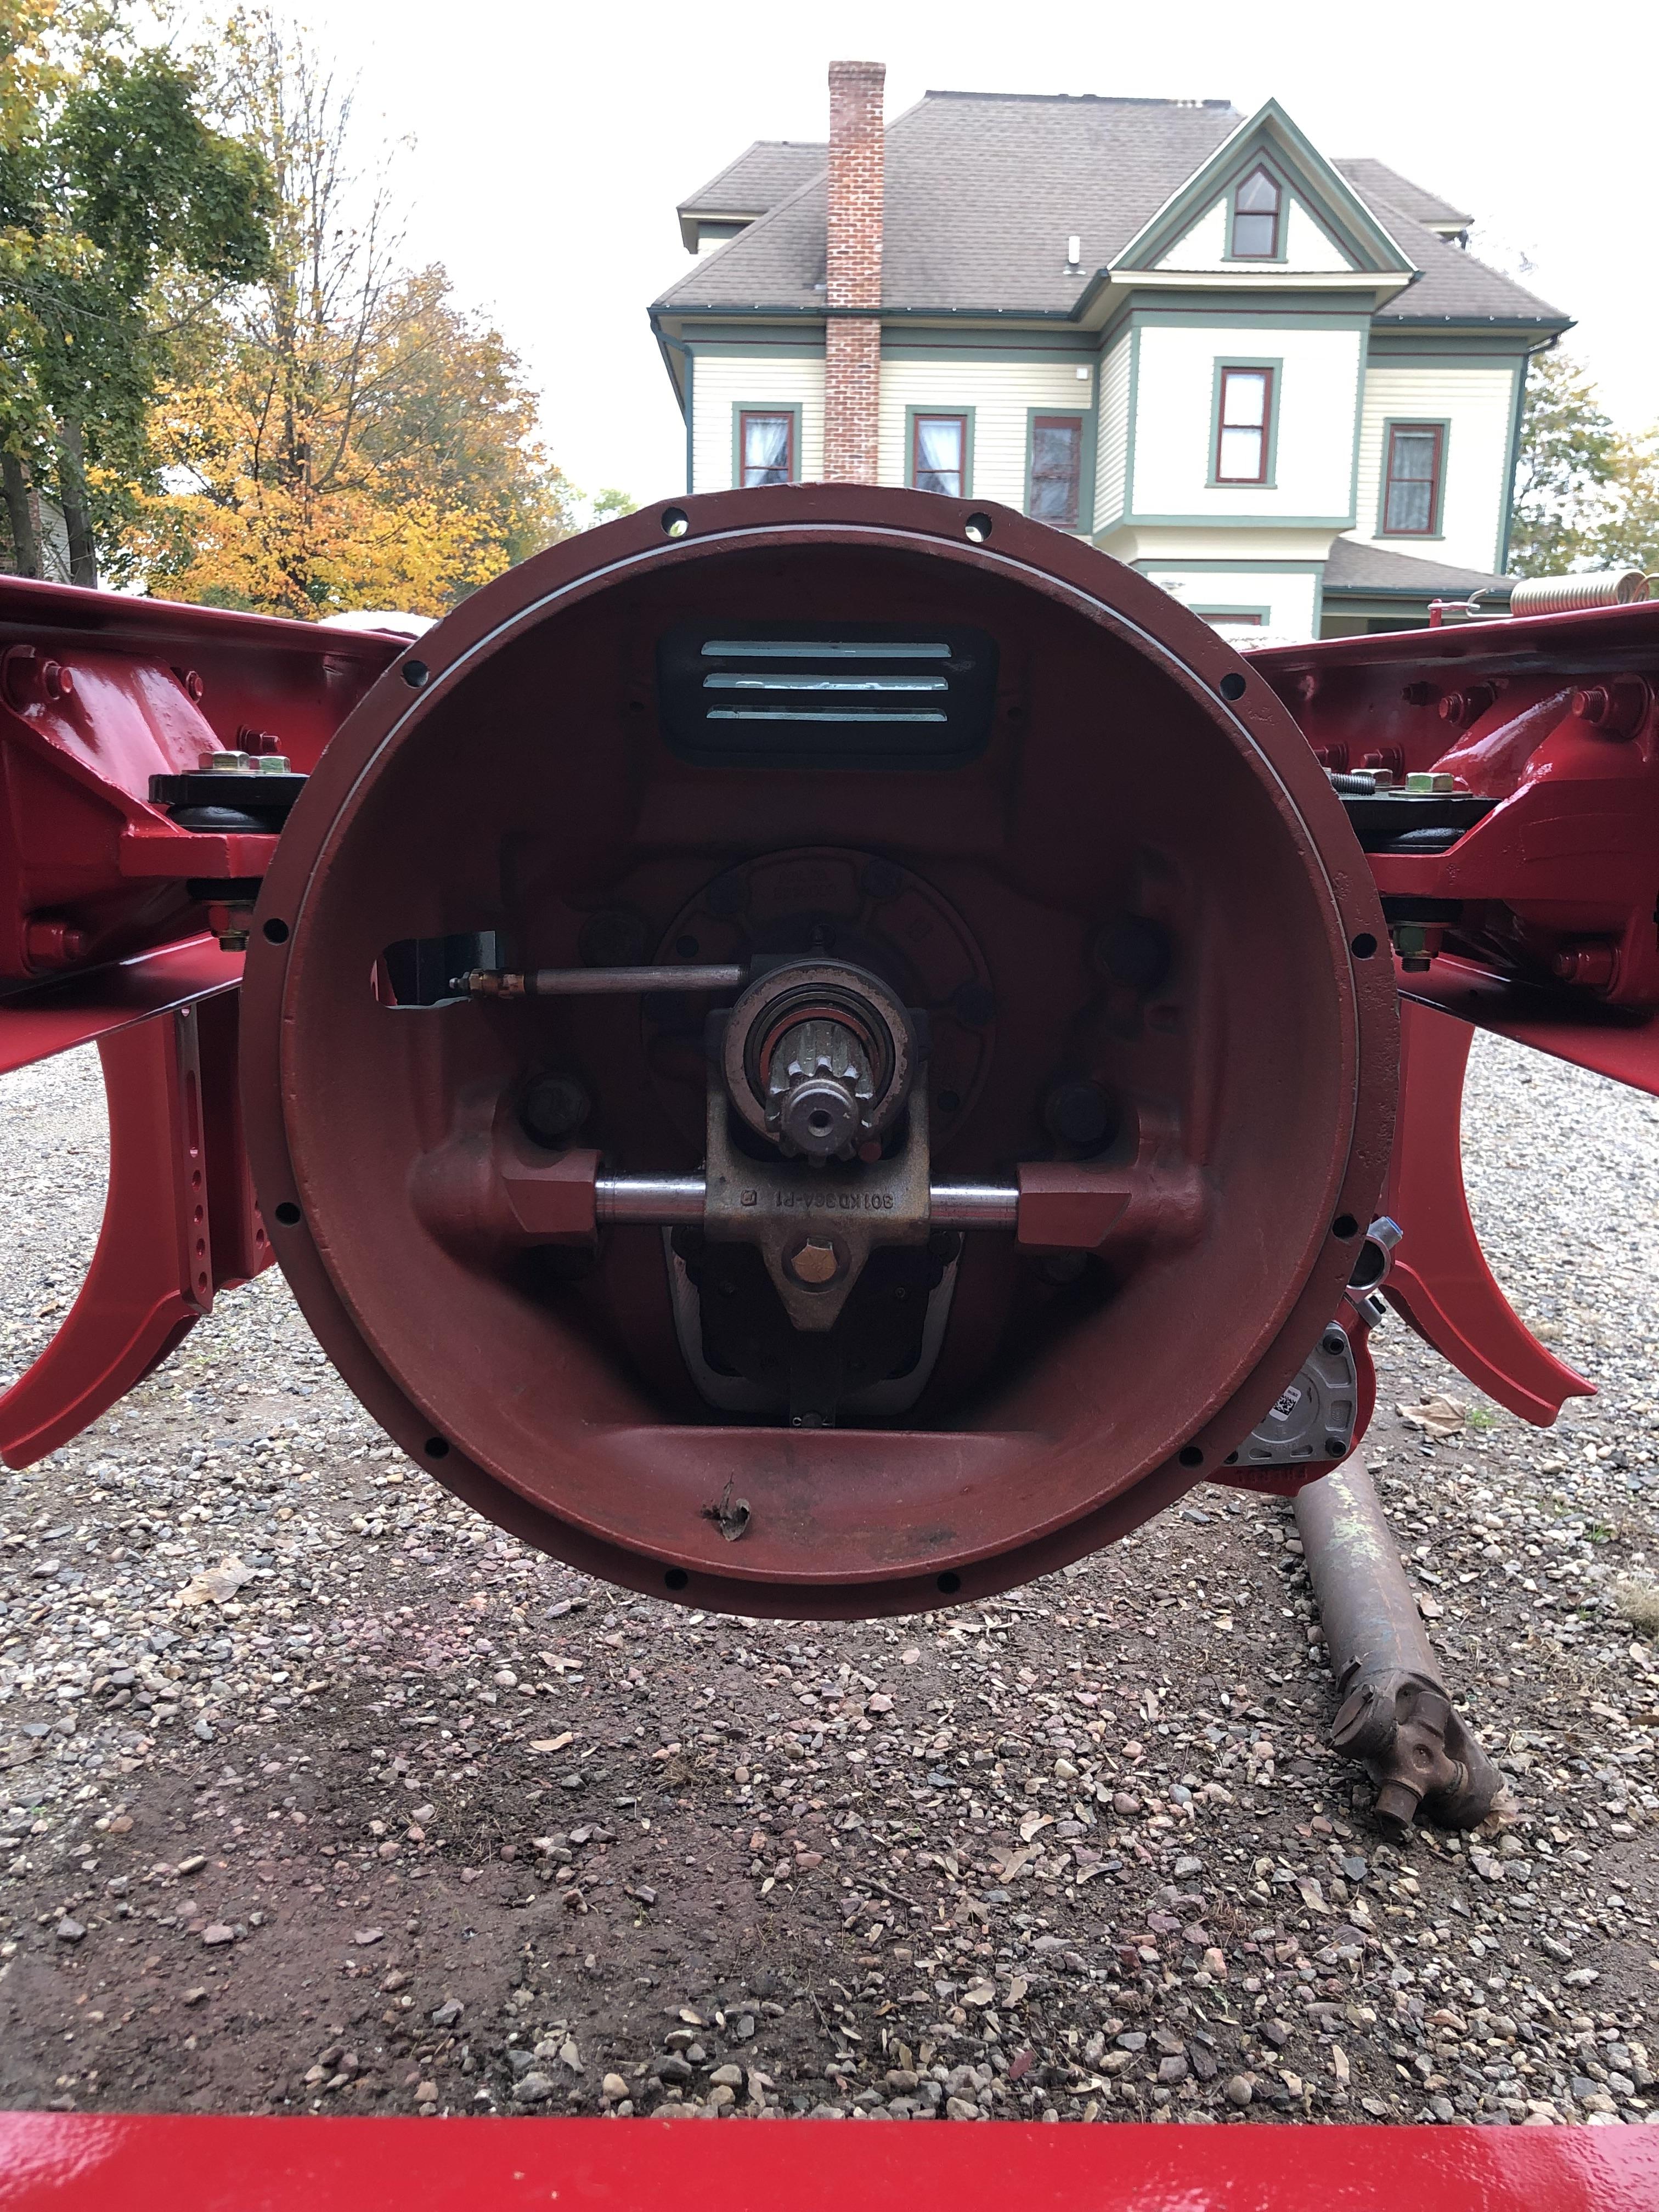
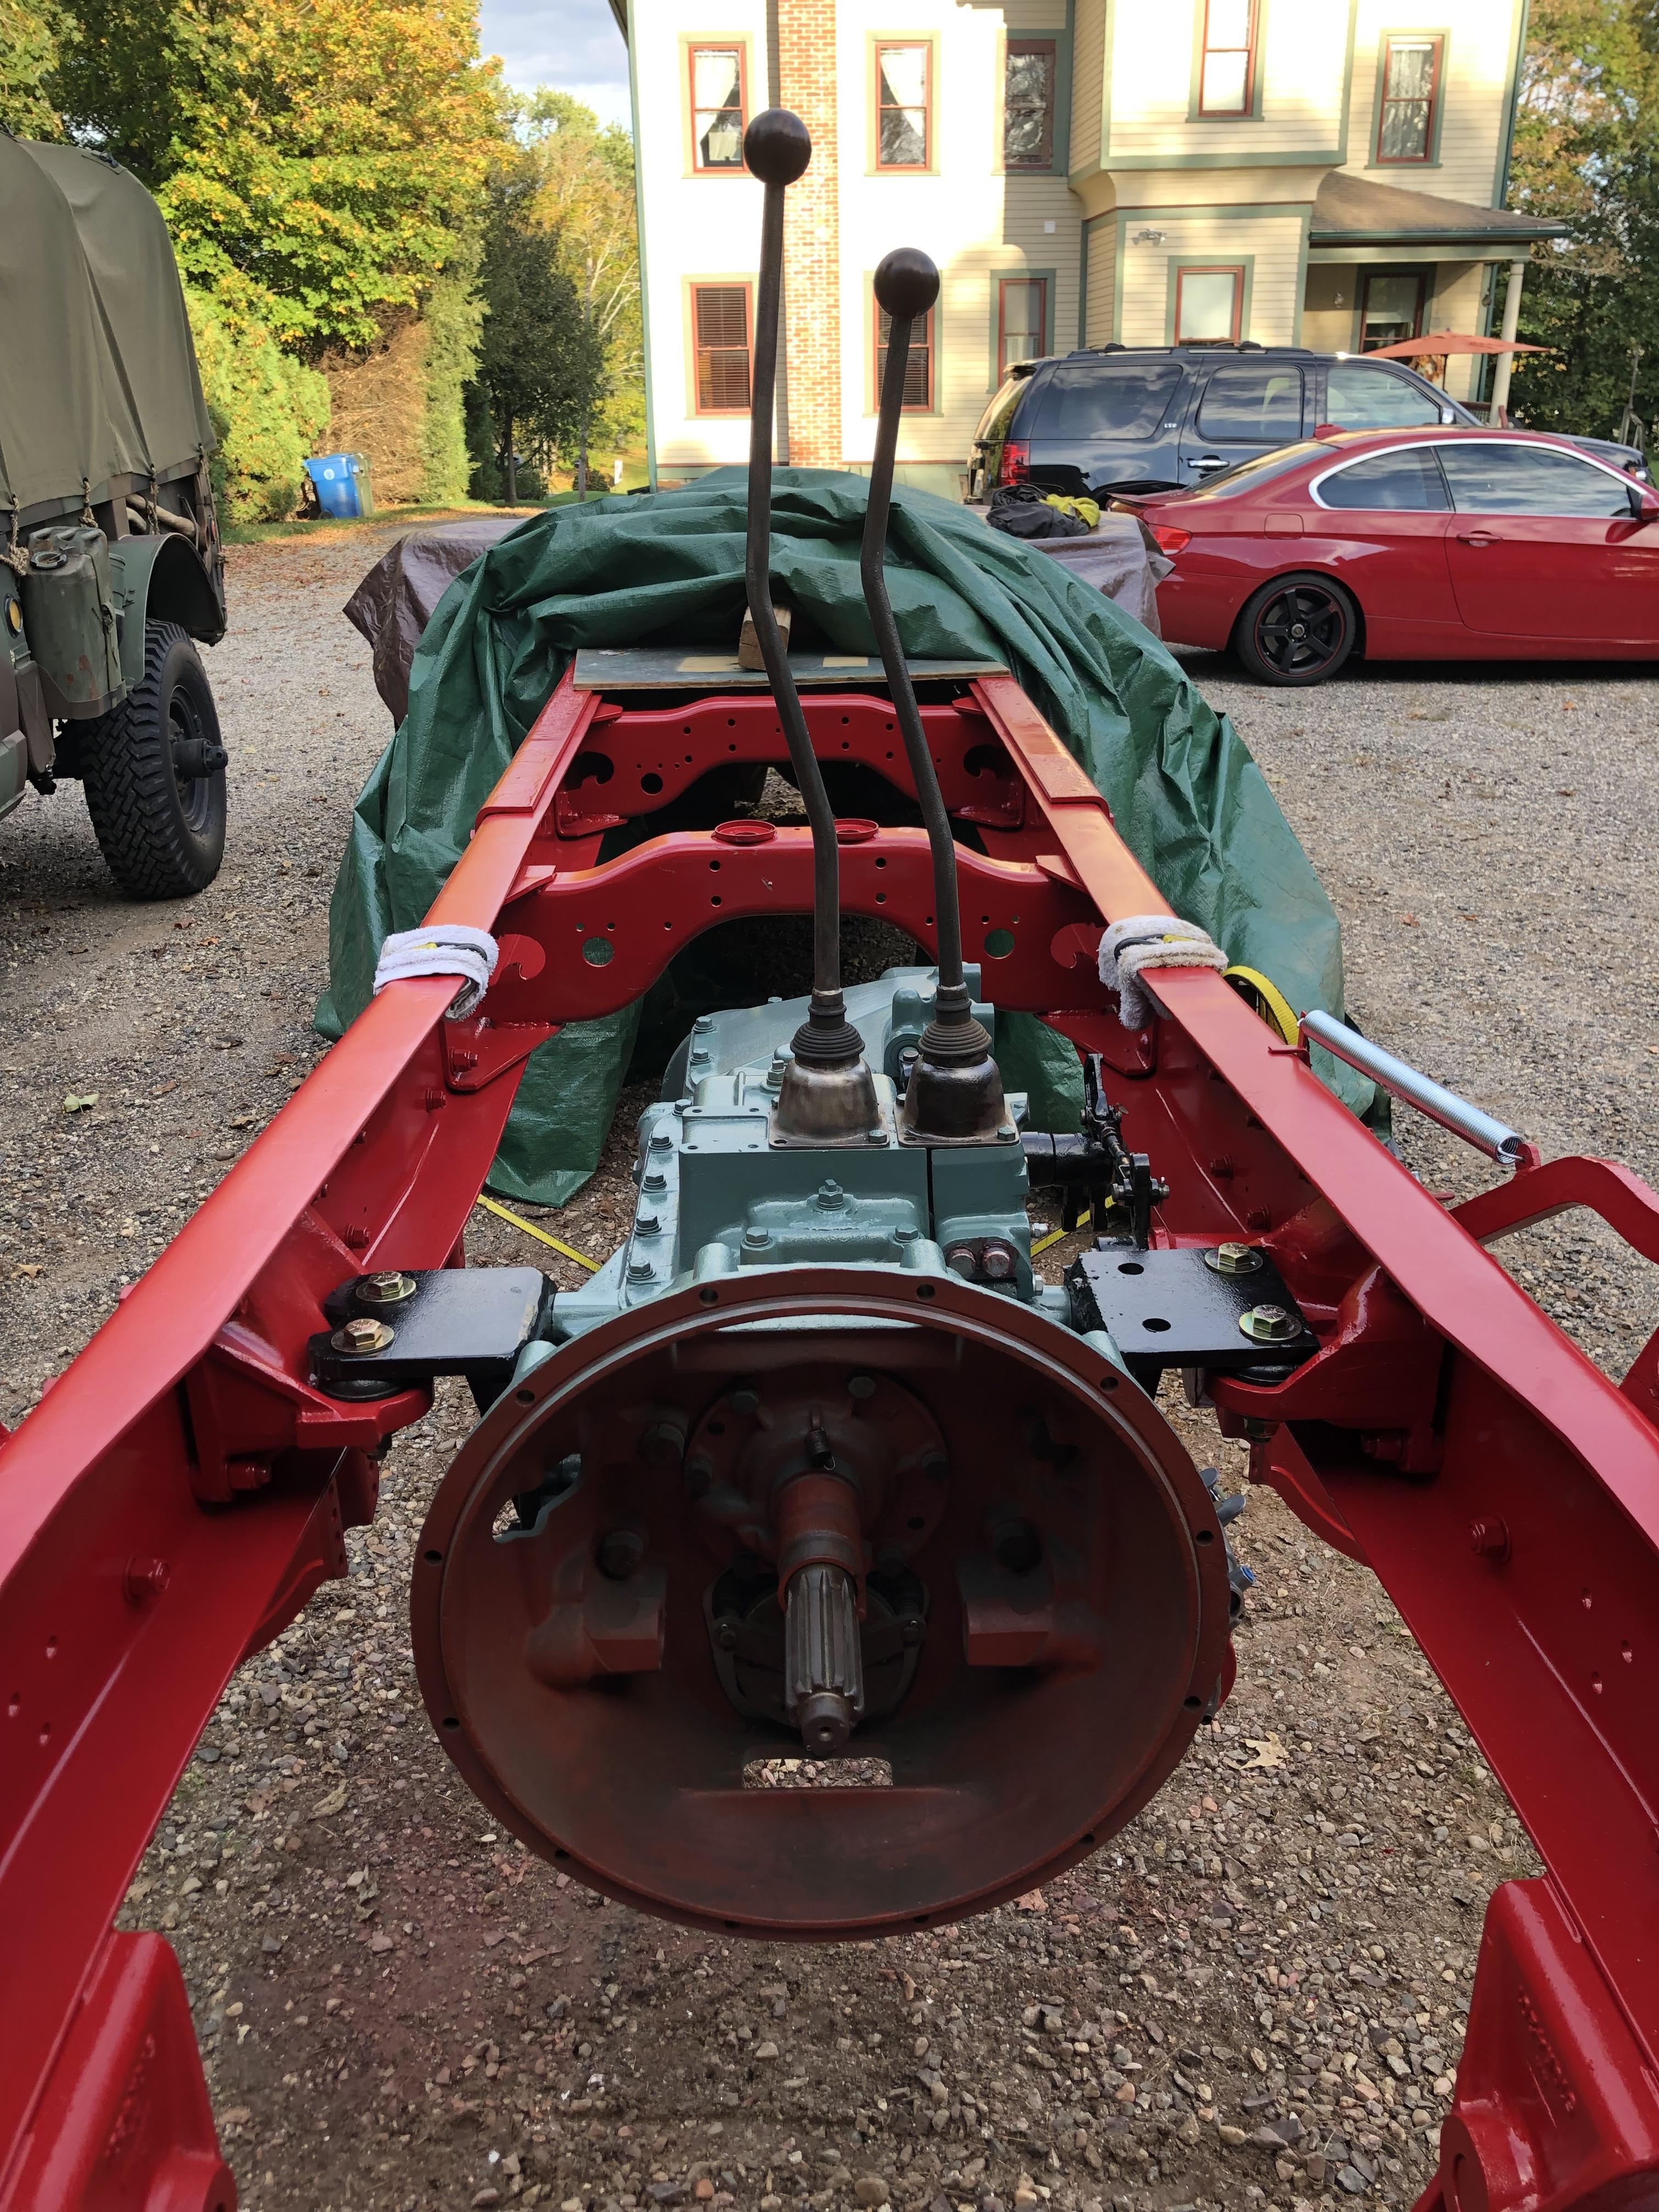
Push type. I hadn’t put the cross shaft and fork in yet when I took that.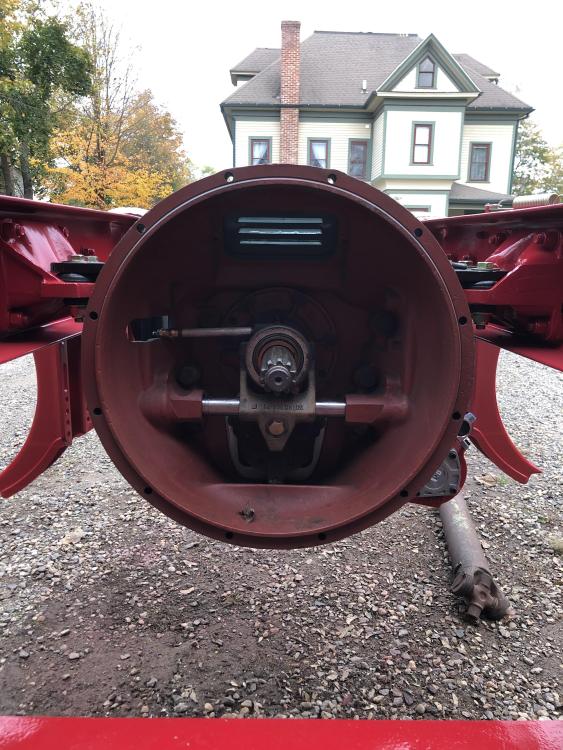
-
More Frame Questions
mattb73lt replied to nam vet's topic in Antique and Classic Mack Trucks General Discussion
No worries, post away. That transmission and frame was a dirty mess when I found it. 350K + miles and left in a field. It wasn’t a magic wand that made it look like that.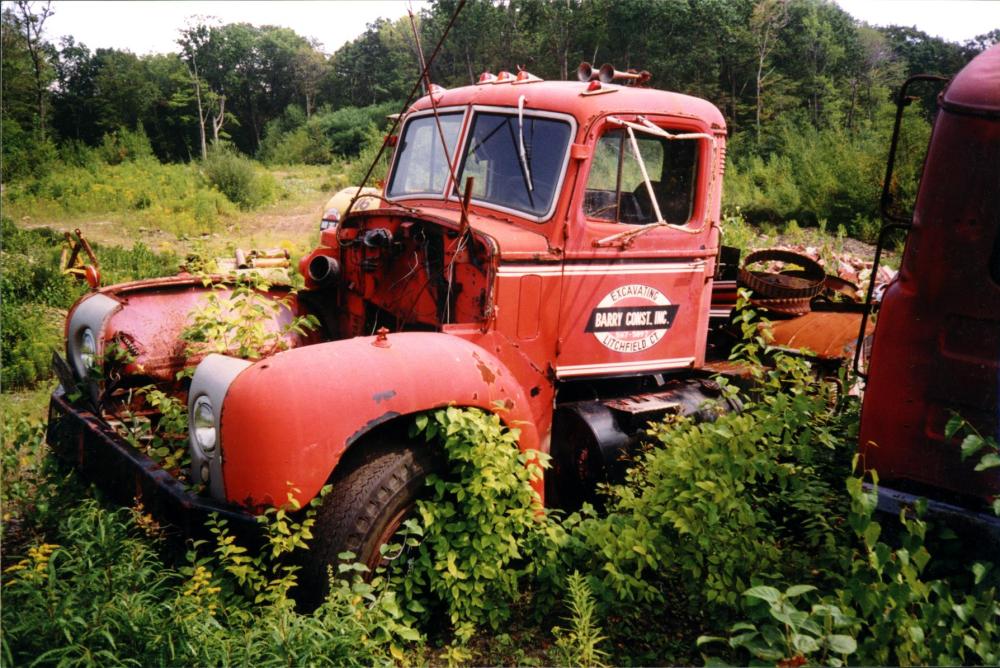
-
More Frame Questions
mattb73lt replied to nam vet's topic in Antique and Classic Mack Trucks General Discussion
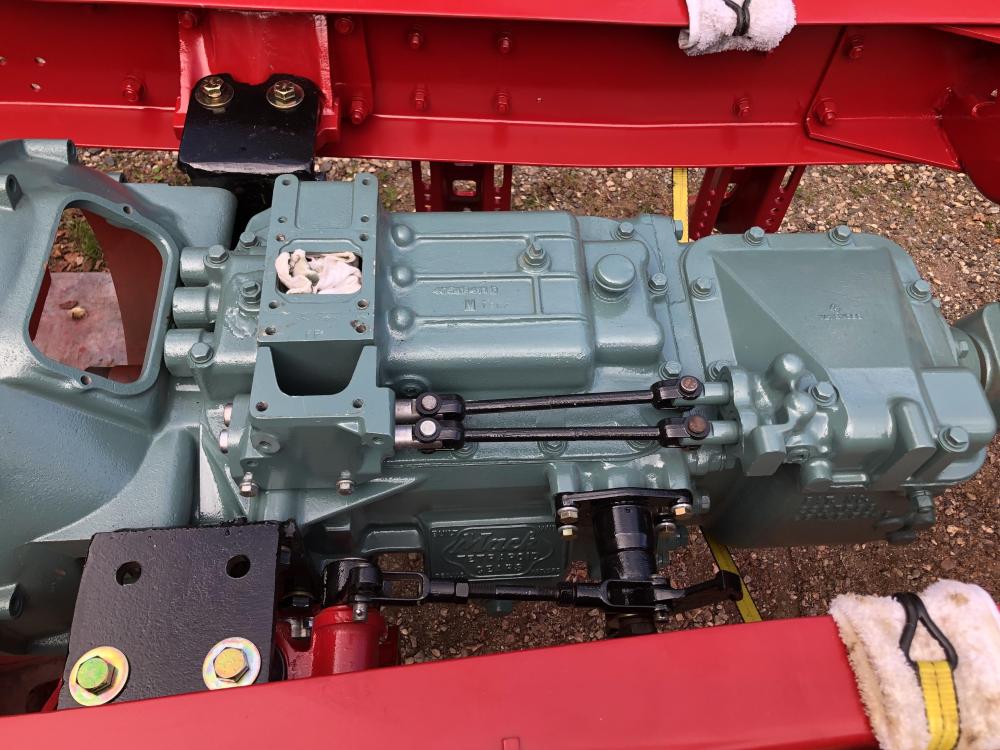
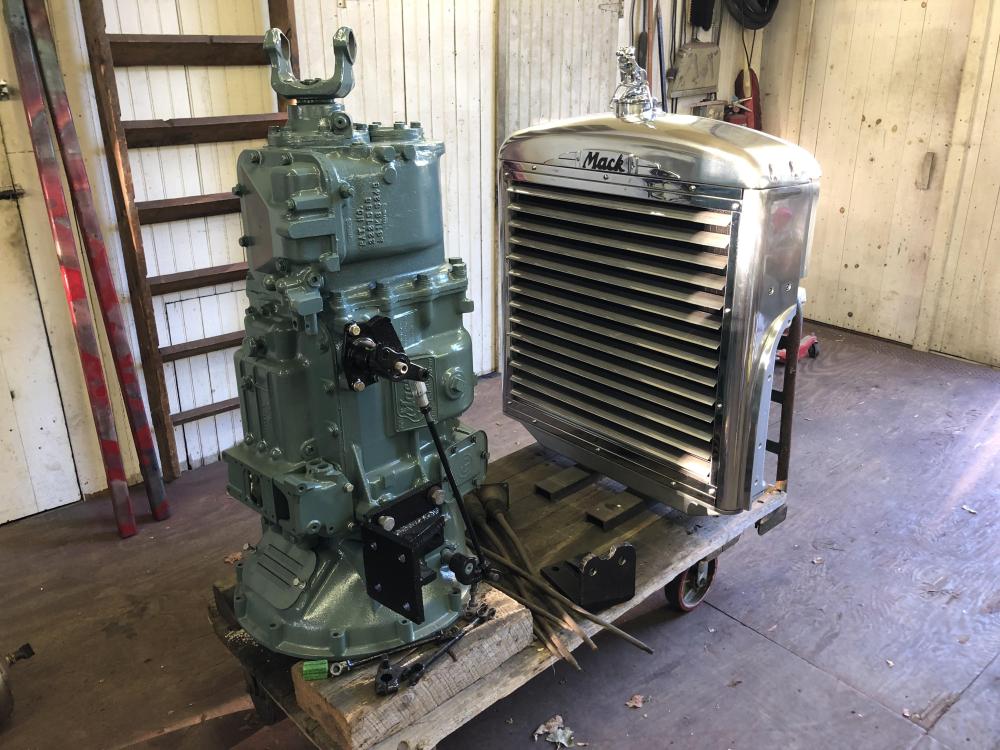
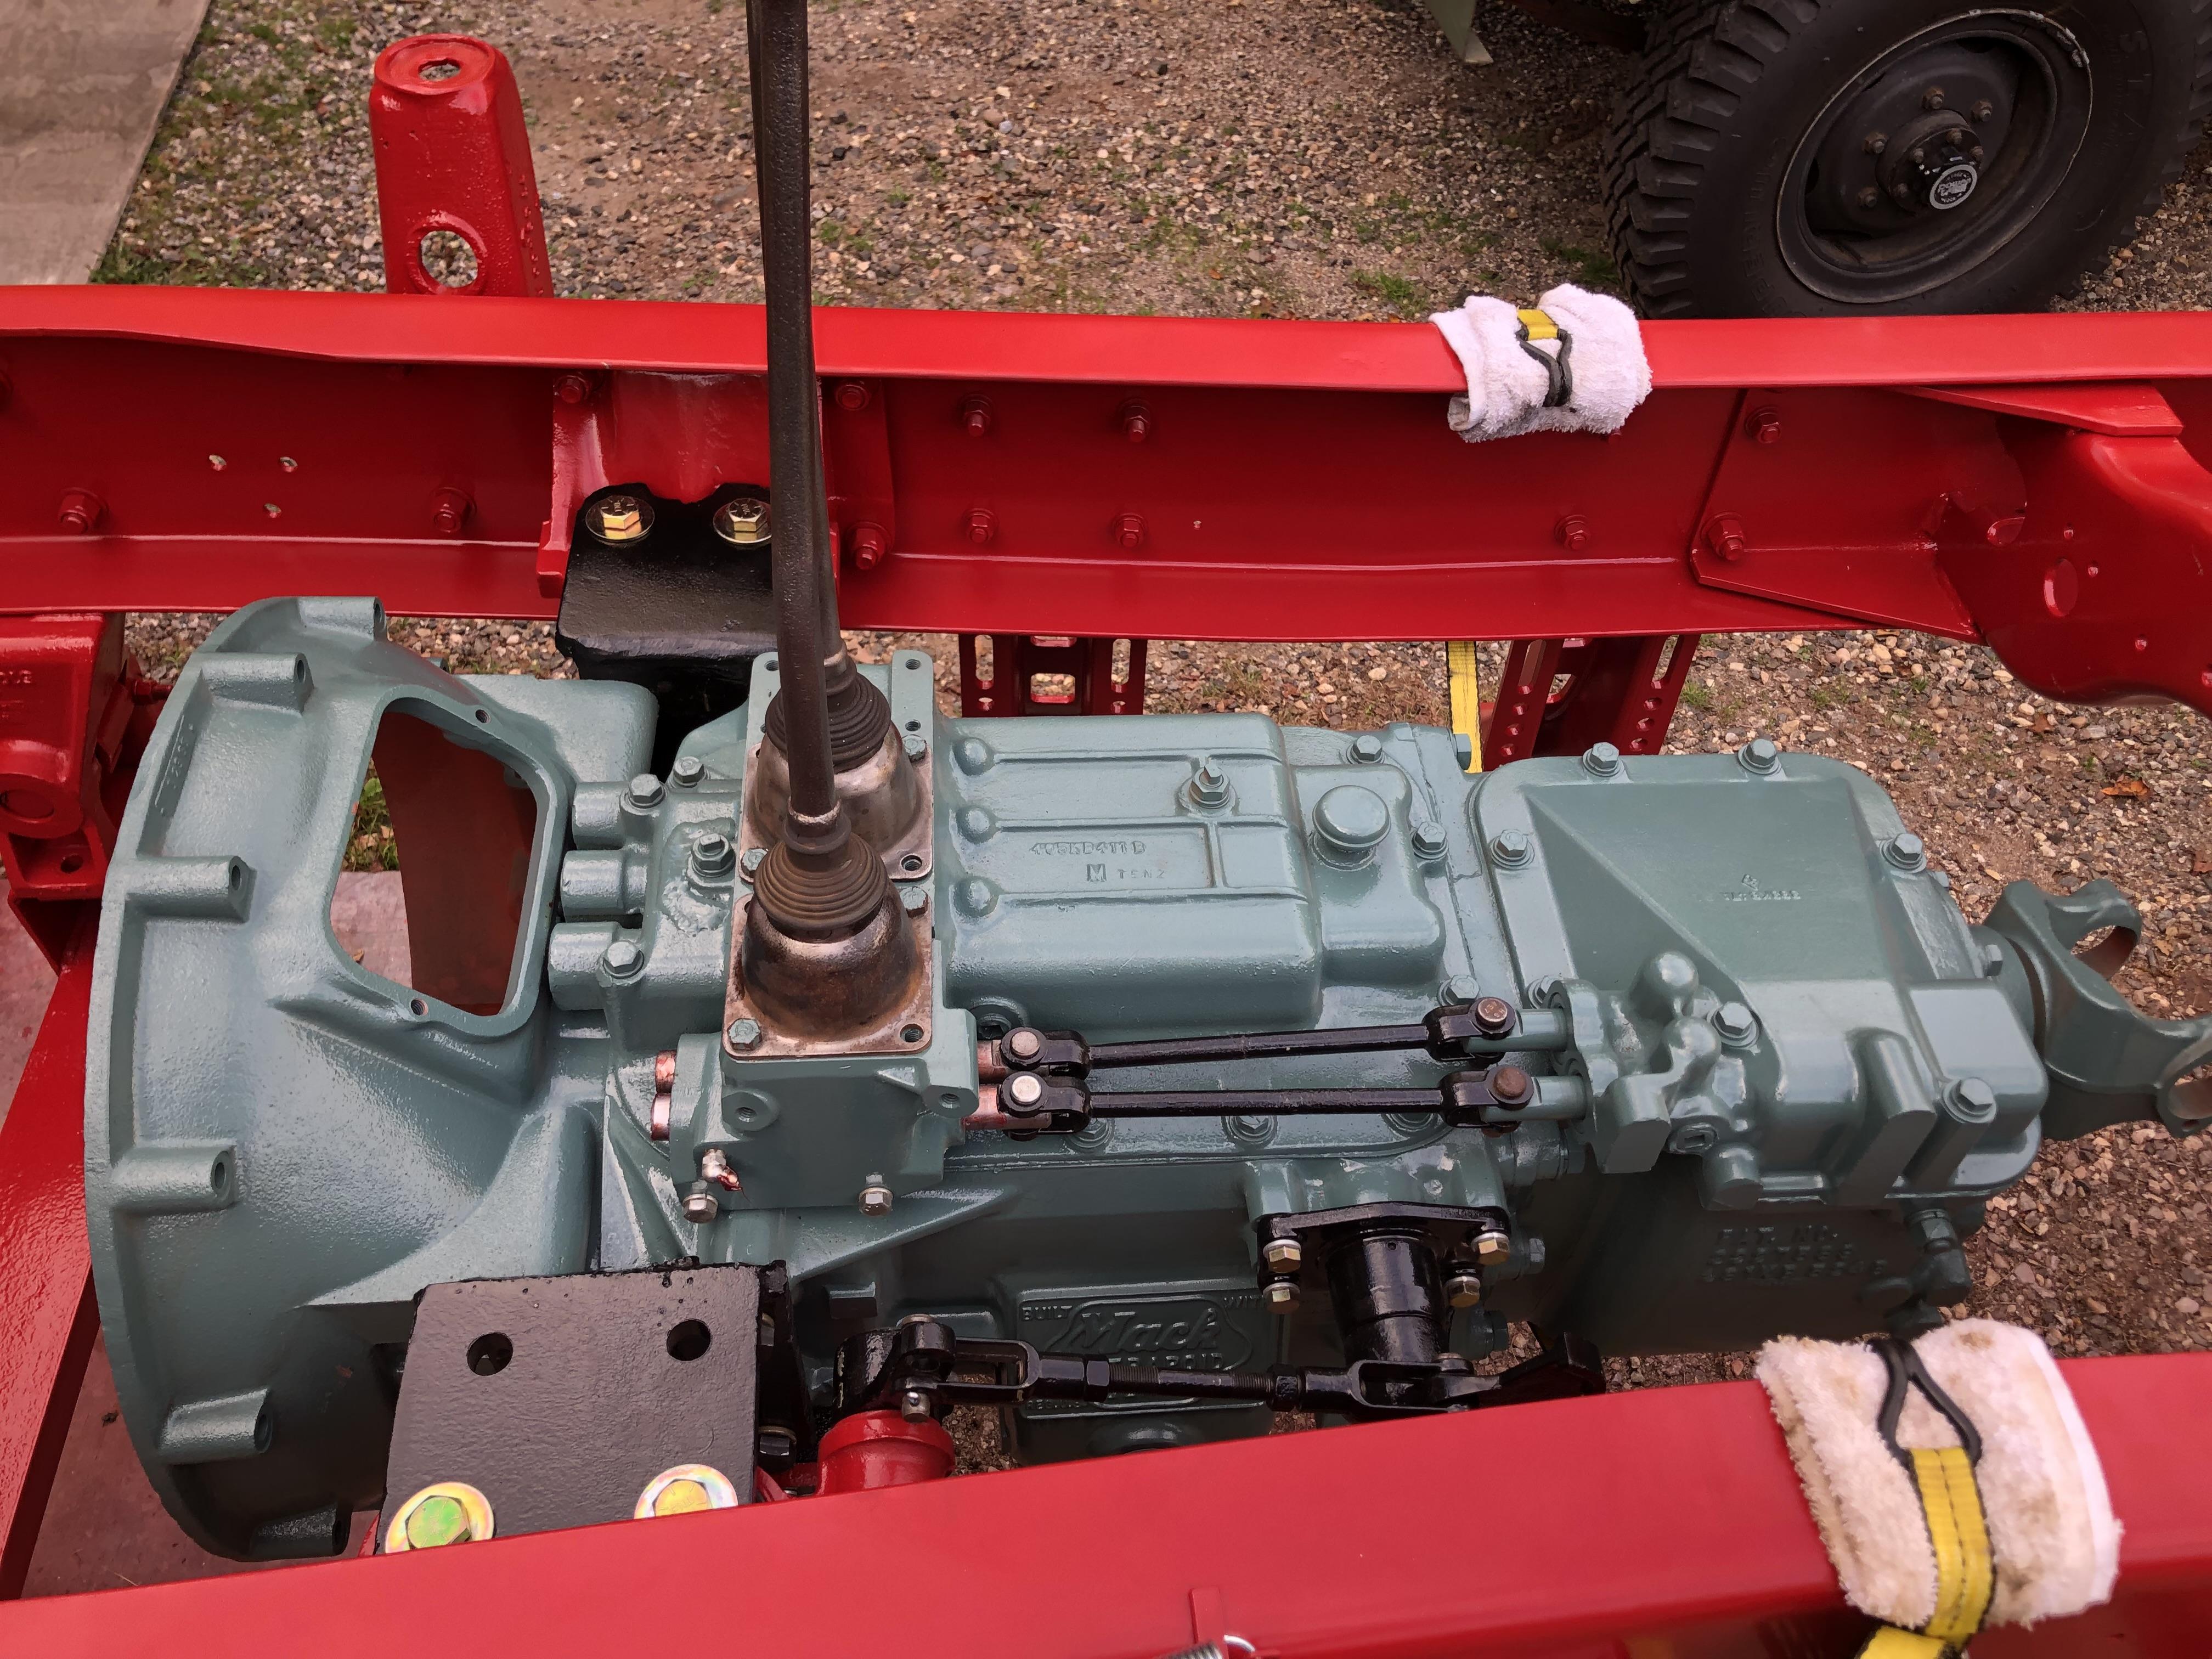
Triplex. TRTL-720 to be exact. Double overdrive, double disc clutch and a clutch brake. -
More Frame Questions
mattb73lt replied to nam vet's topic in Antique and Classic Mack Trucks General Discussion
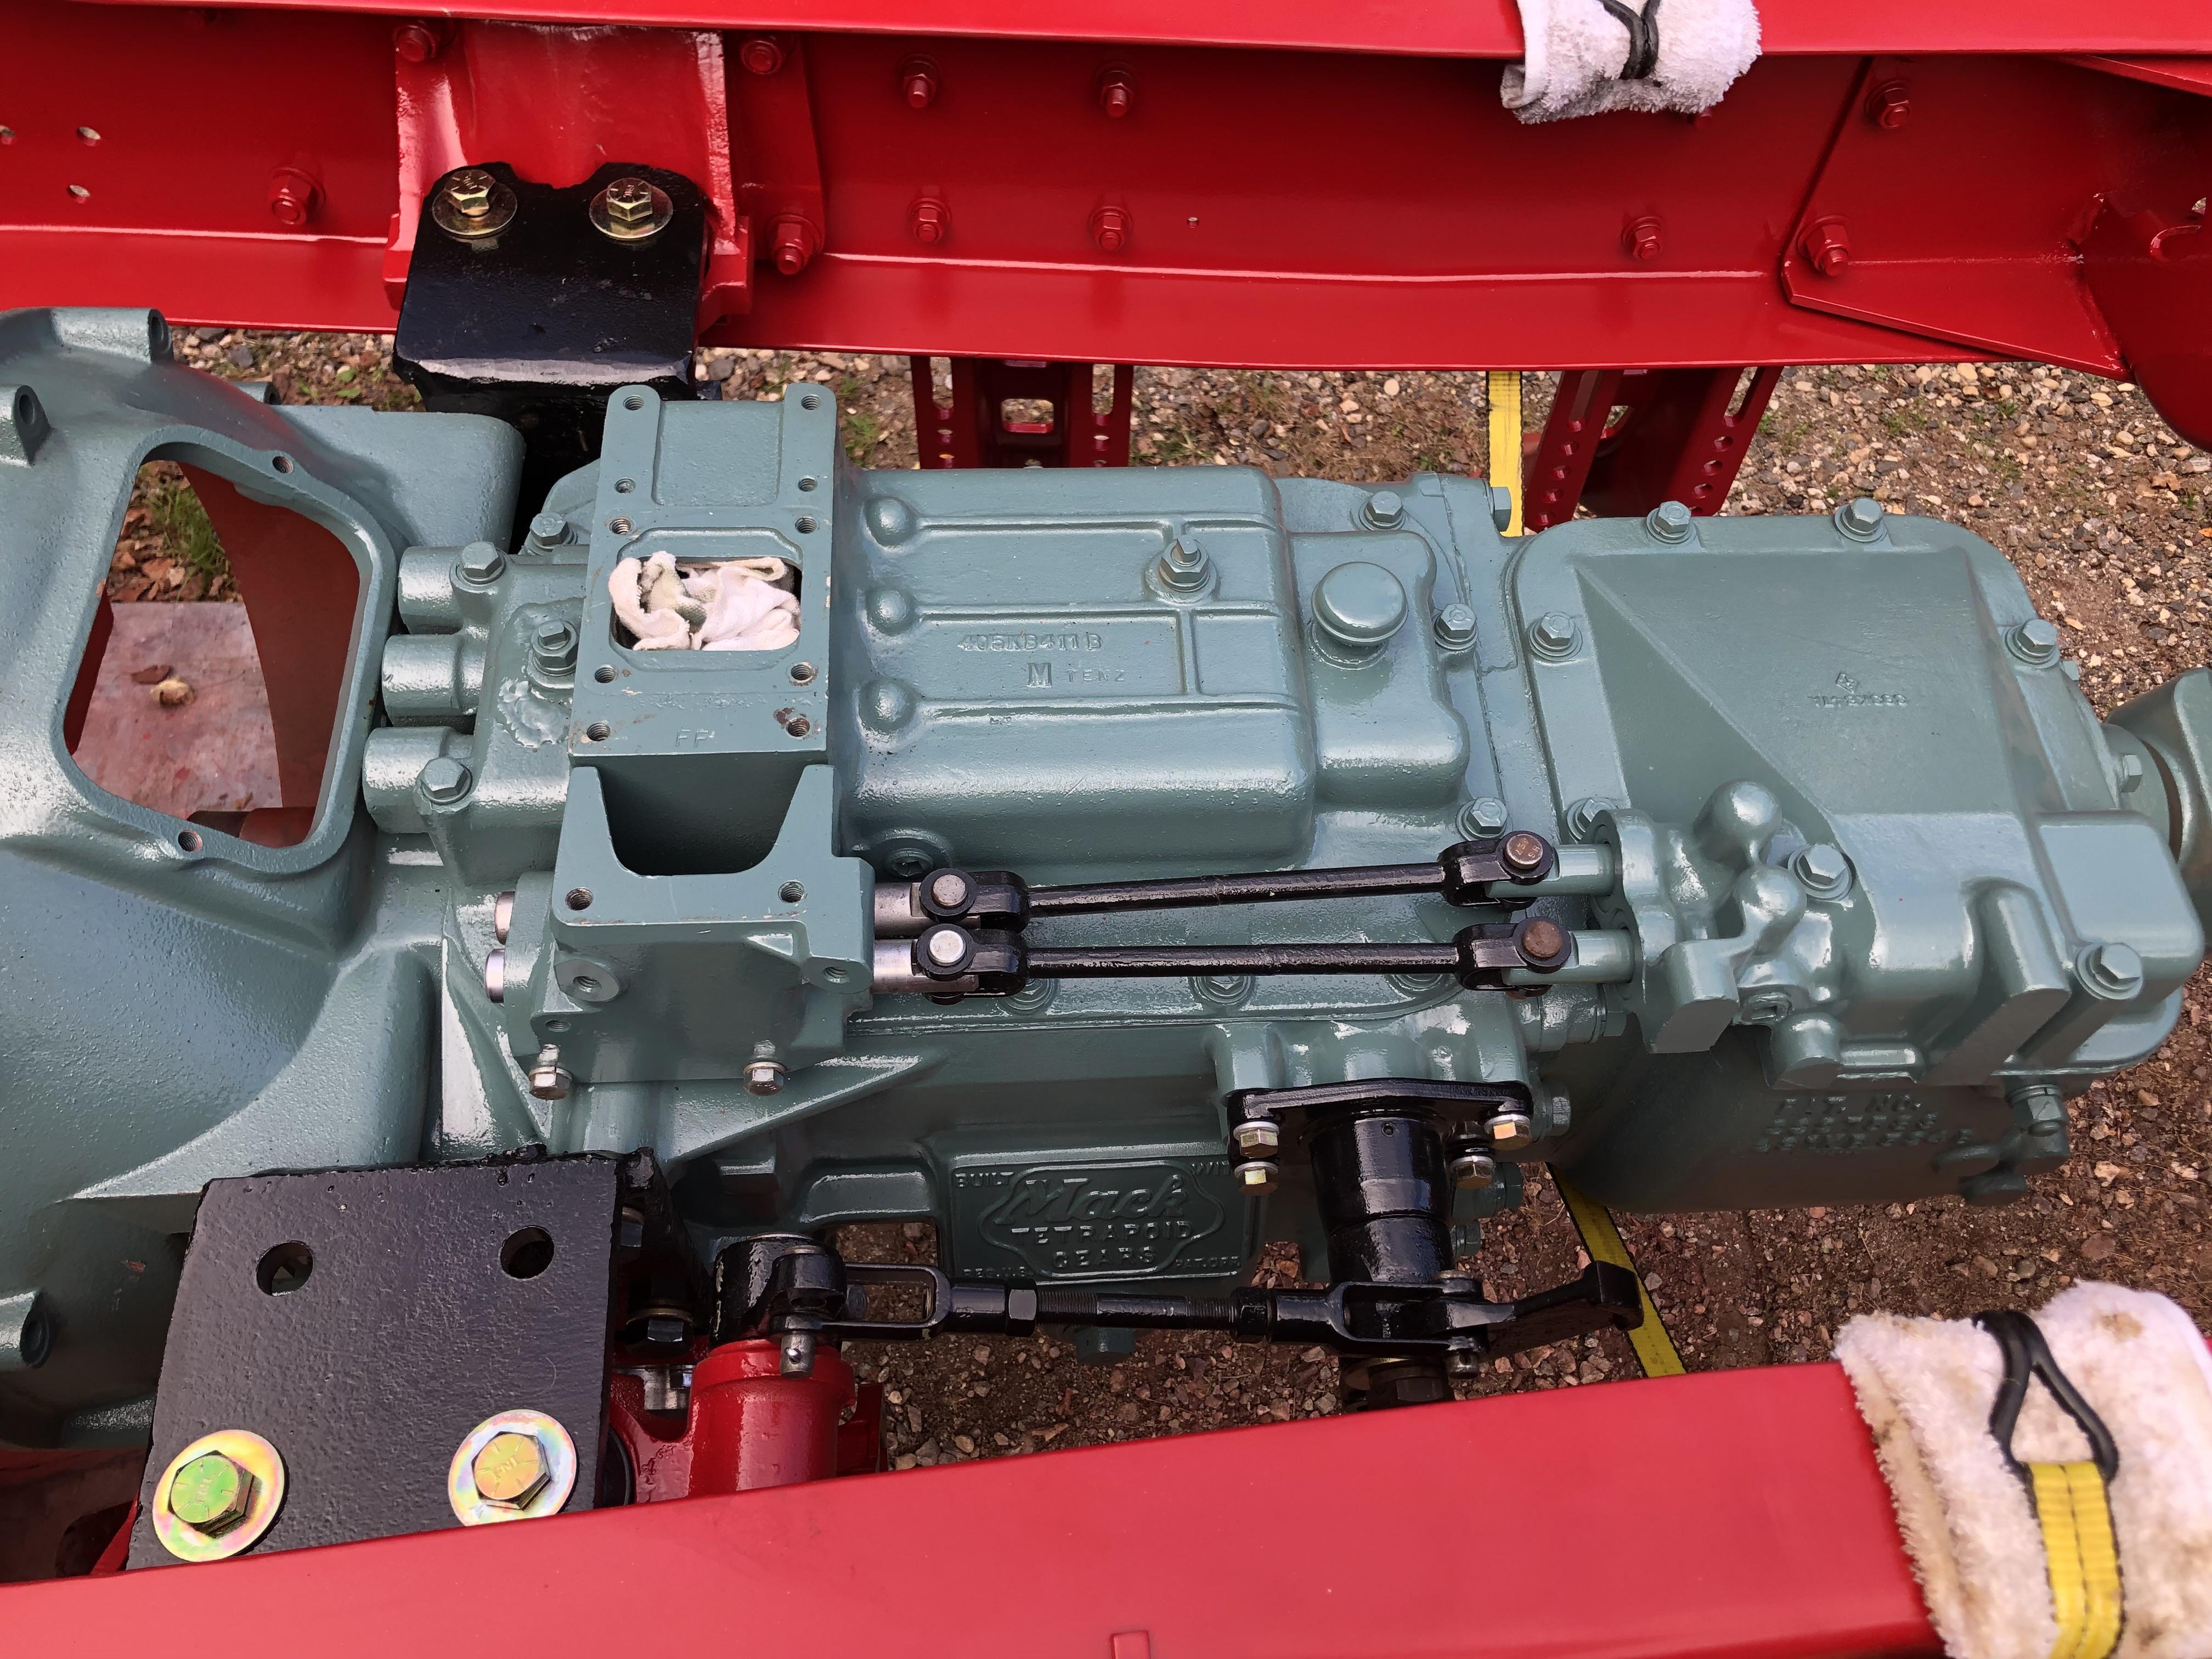
There are variations to what Mack did. Most frame and transmission mounts were cast. Gas and diesel mounts are different as we discussed. Just for general info, there is a difference in single and double clutch arrangements, too. Double disc clutch’s require a 1” deeper bell housing on the transmission side, moving the transmission back 1”. Mack used an offset welded mount made out of 1/2” plate. They’re roughly made and not cast. My B73 has these. If you look at these pictures you can see the off set. Most mounts bolt directly to the frames and transmissions.

-
More Frame Questions
mattb73lt replied to nam vet's topic in Antique and Classic Mack Trucks General Discussion
I've seen cast spacers and washer stacks underneath transmission and motor mounts on trucks I've parted out. If the alignment is good the bolts should go right through the mounts and bolt up, you shouldn't have to force them and they shouldn't have any preload on them. Pictures of what you're dealing with would be really helpful to help us see what's going on to help you? -
B-73 Restoration
mattb73lt replied to mattb73lt's topic in Antique and Classic Mack Trucks General Discussion
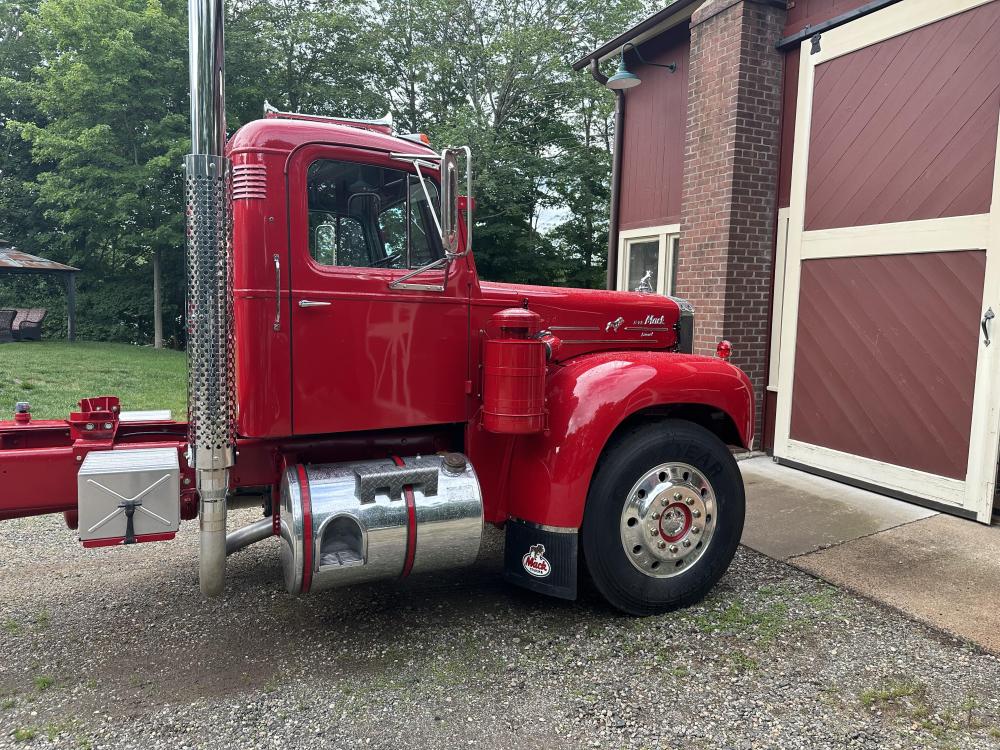
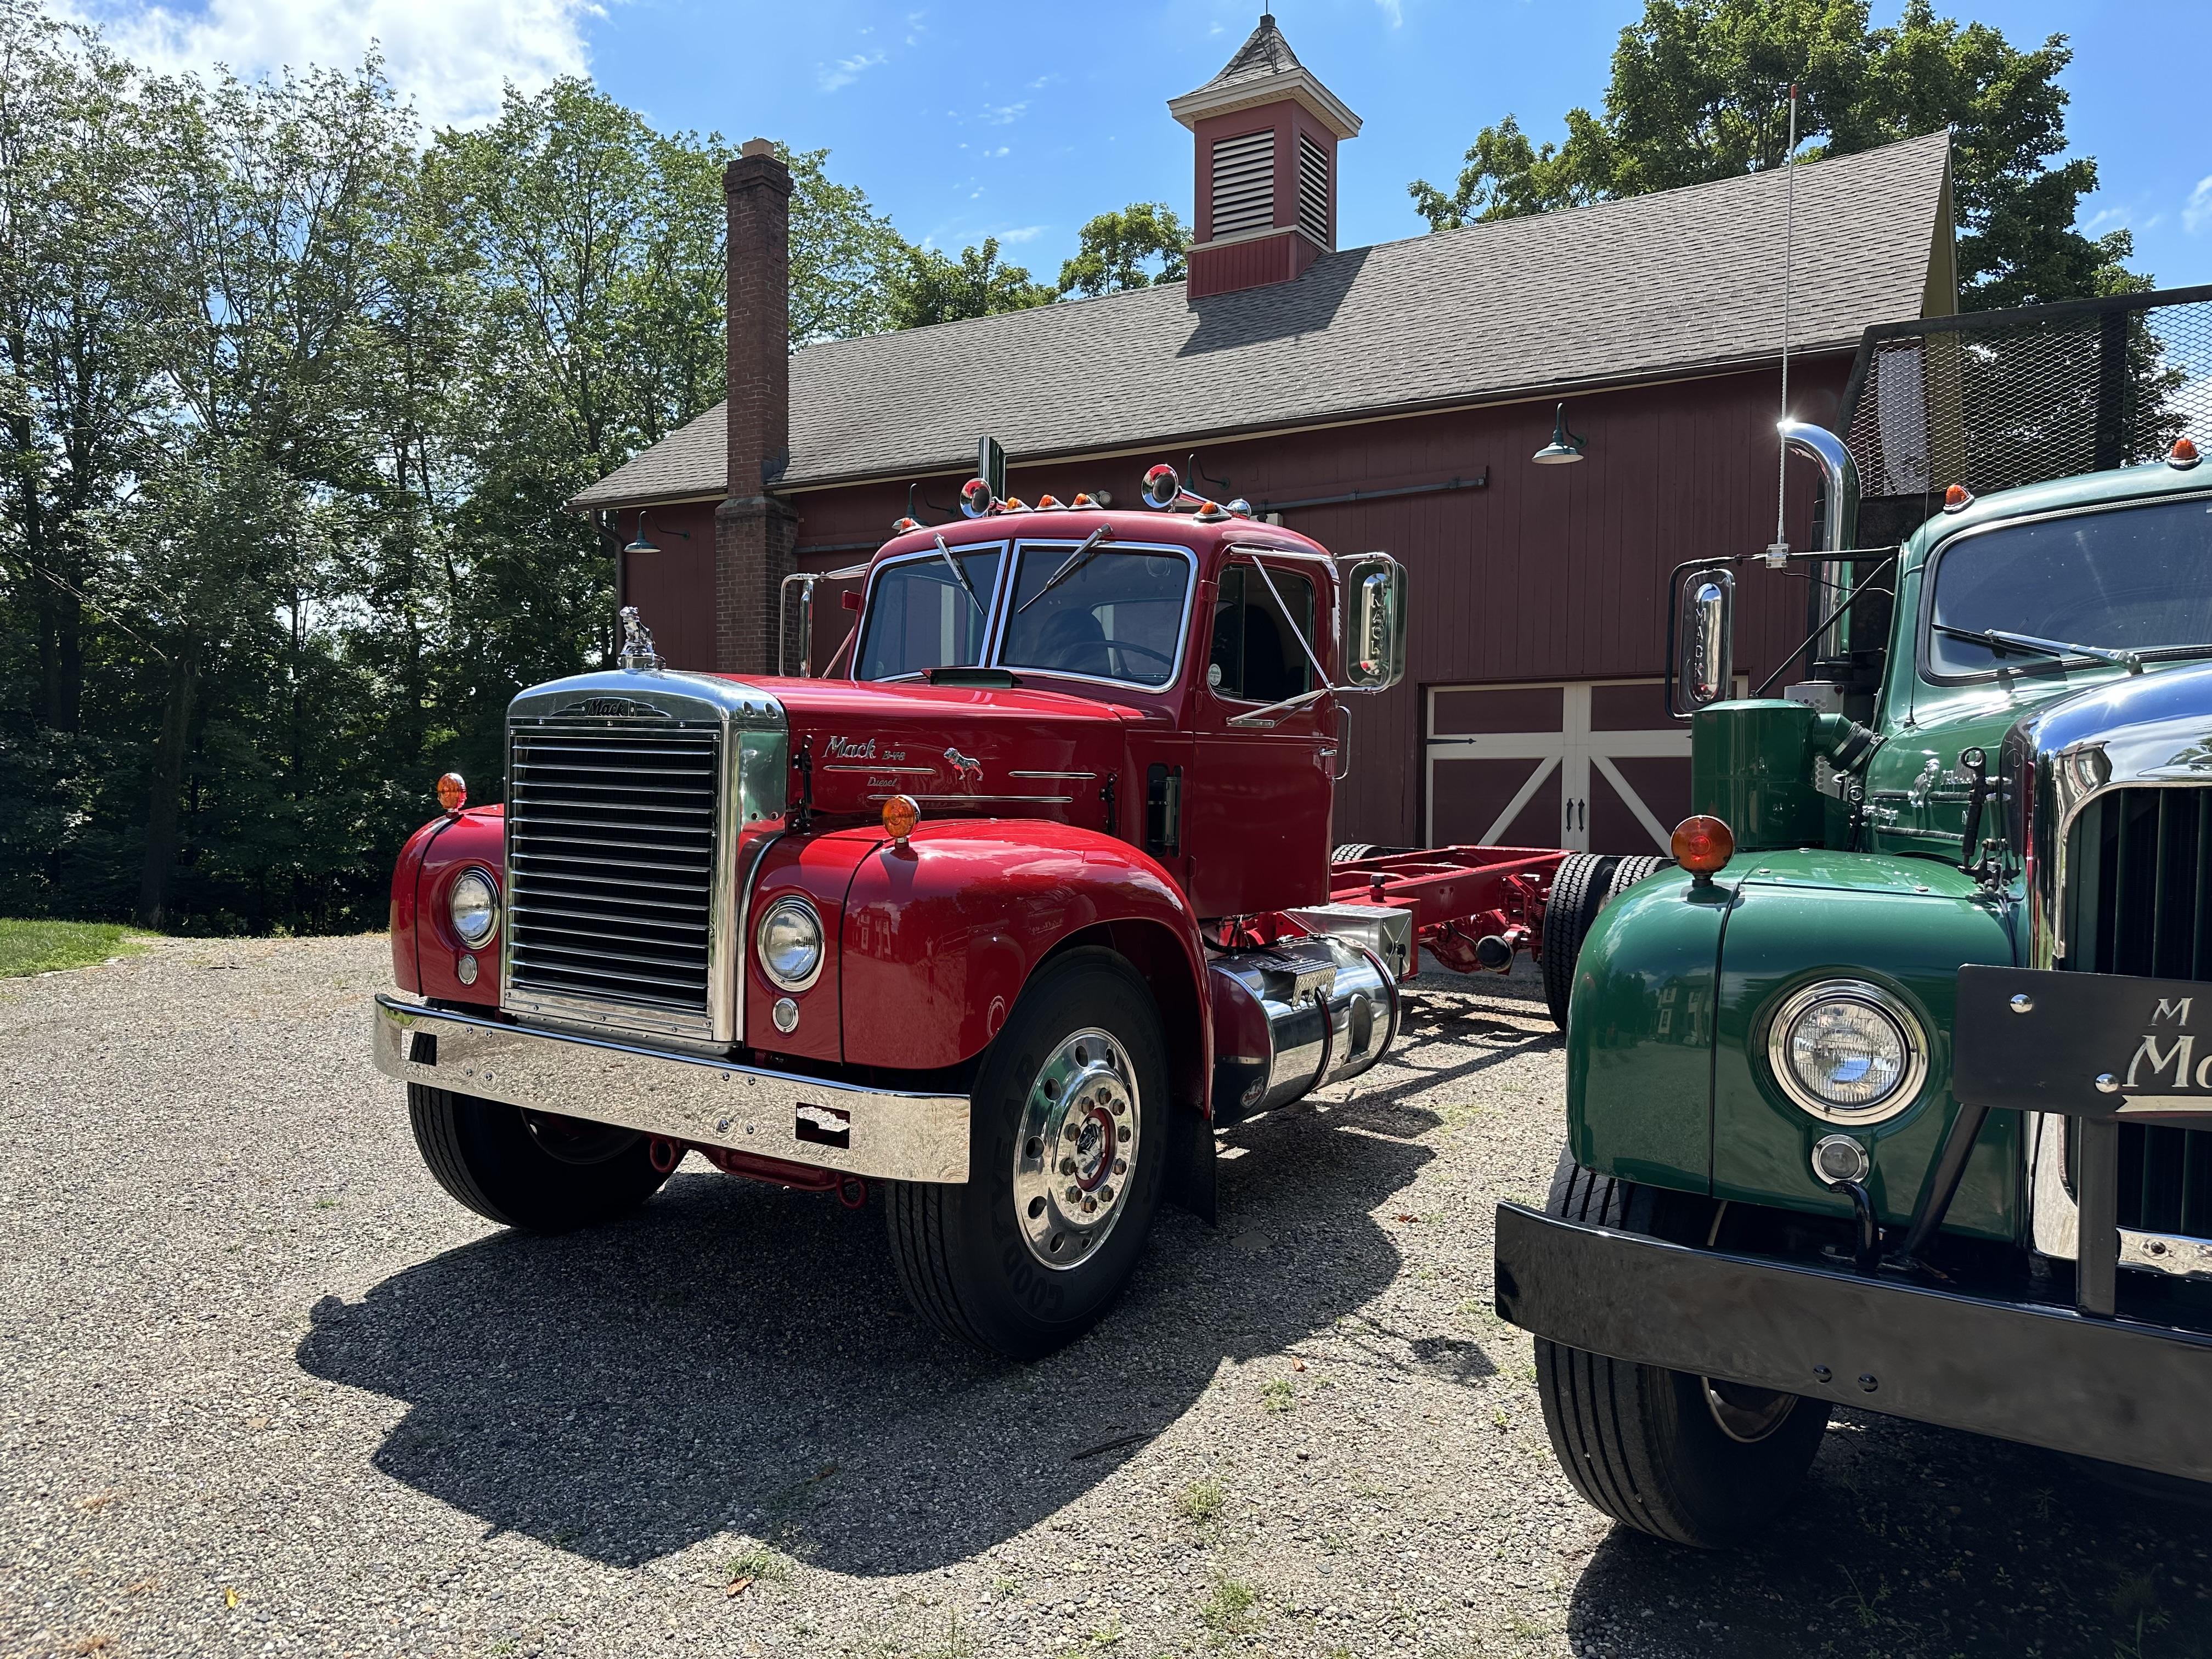
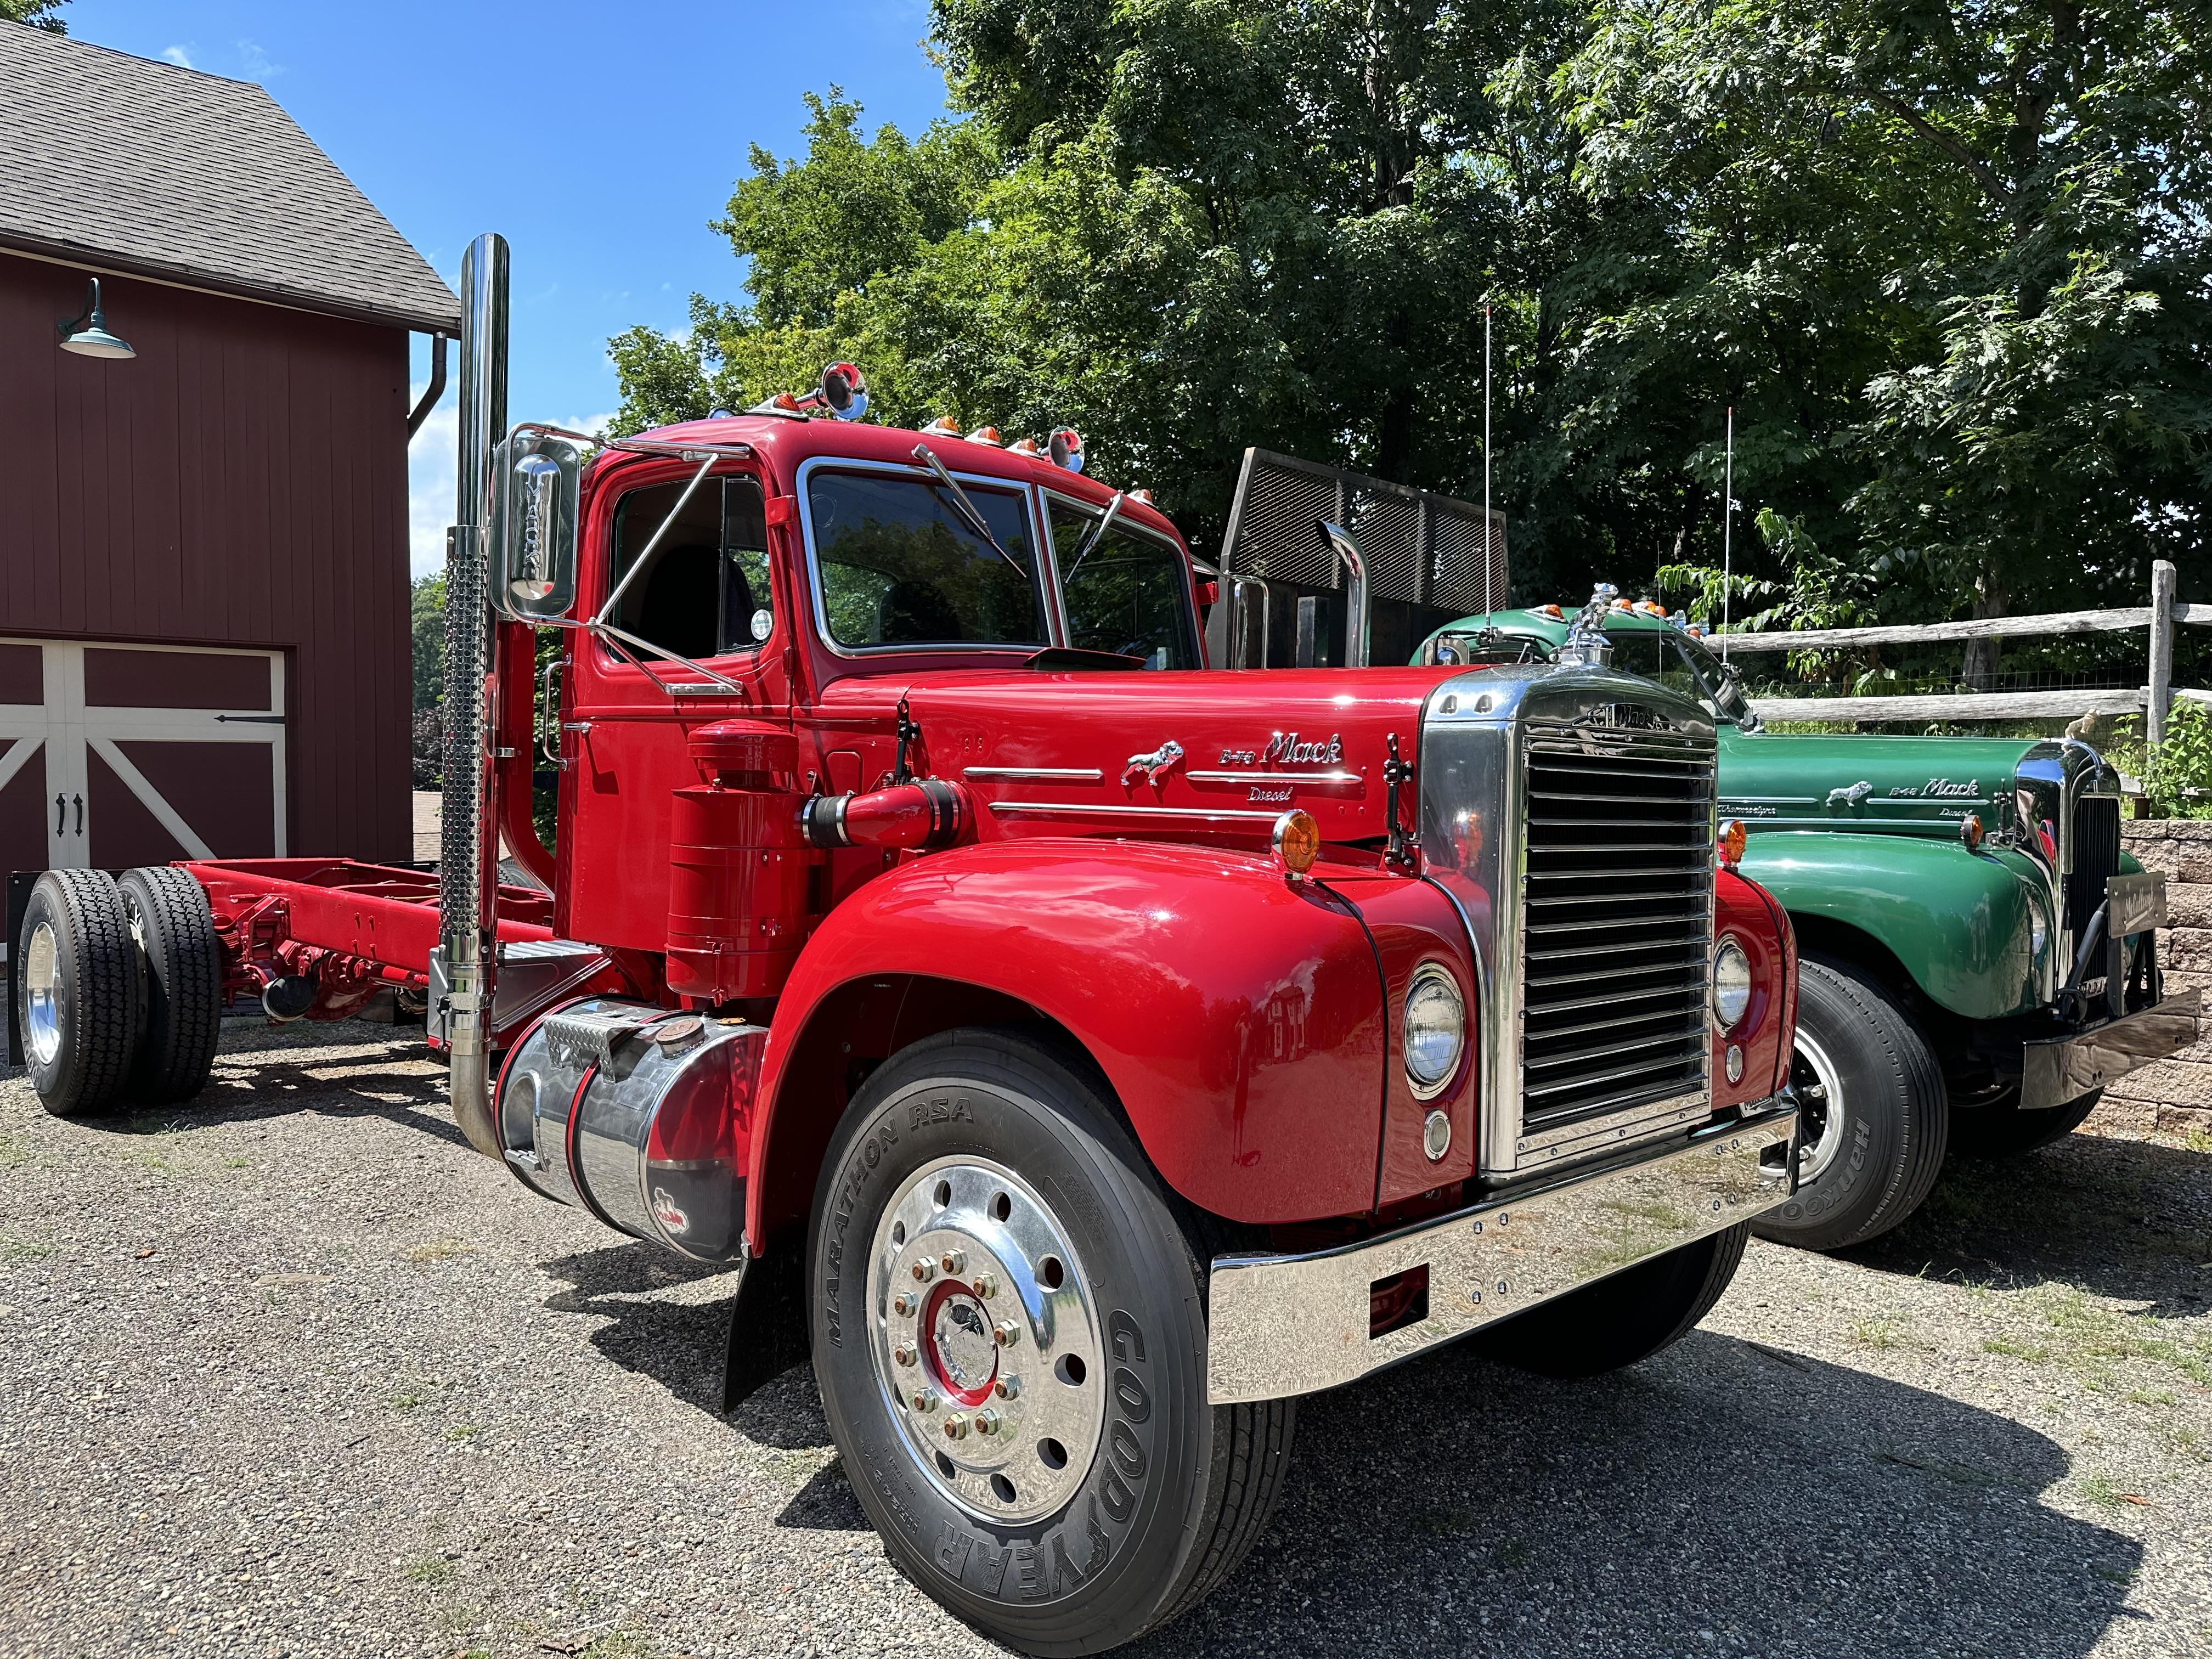
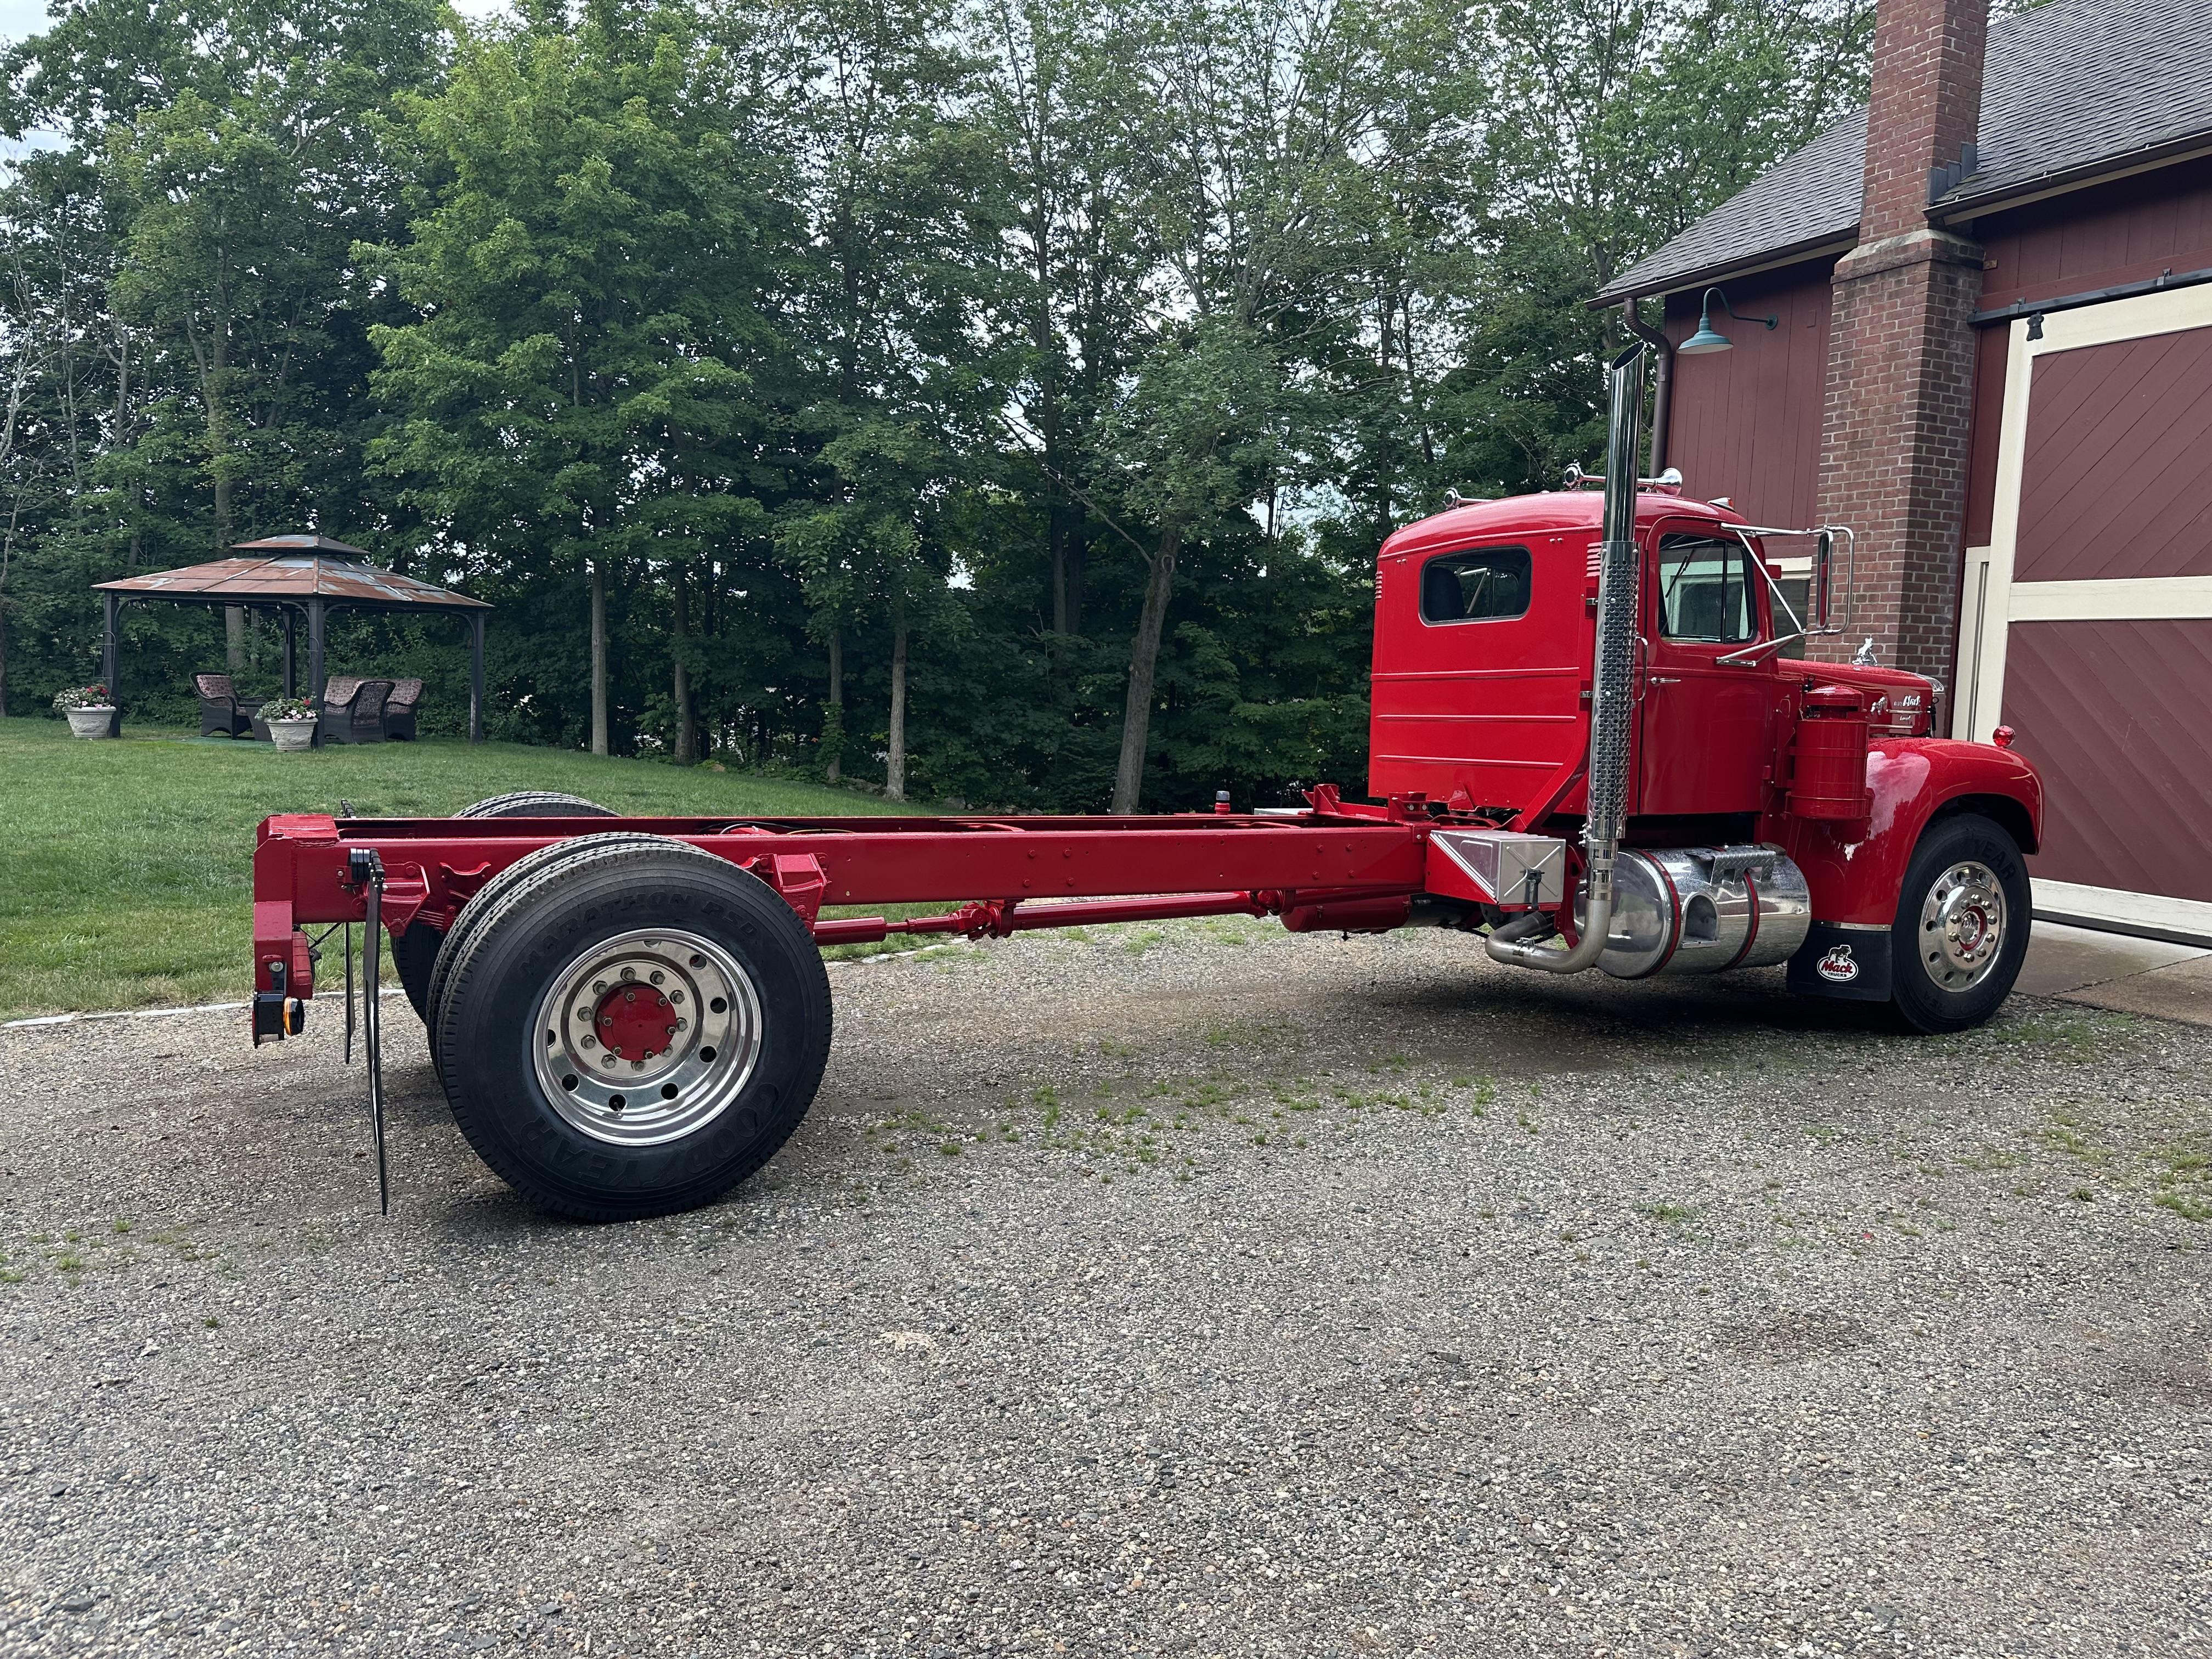
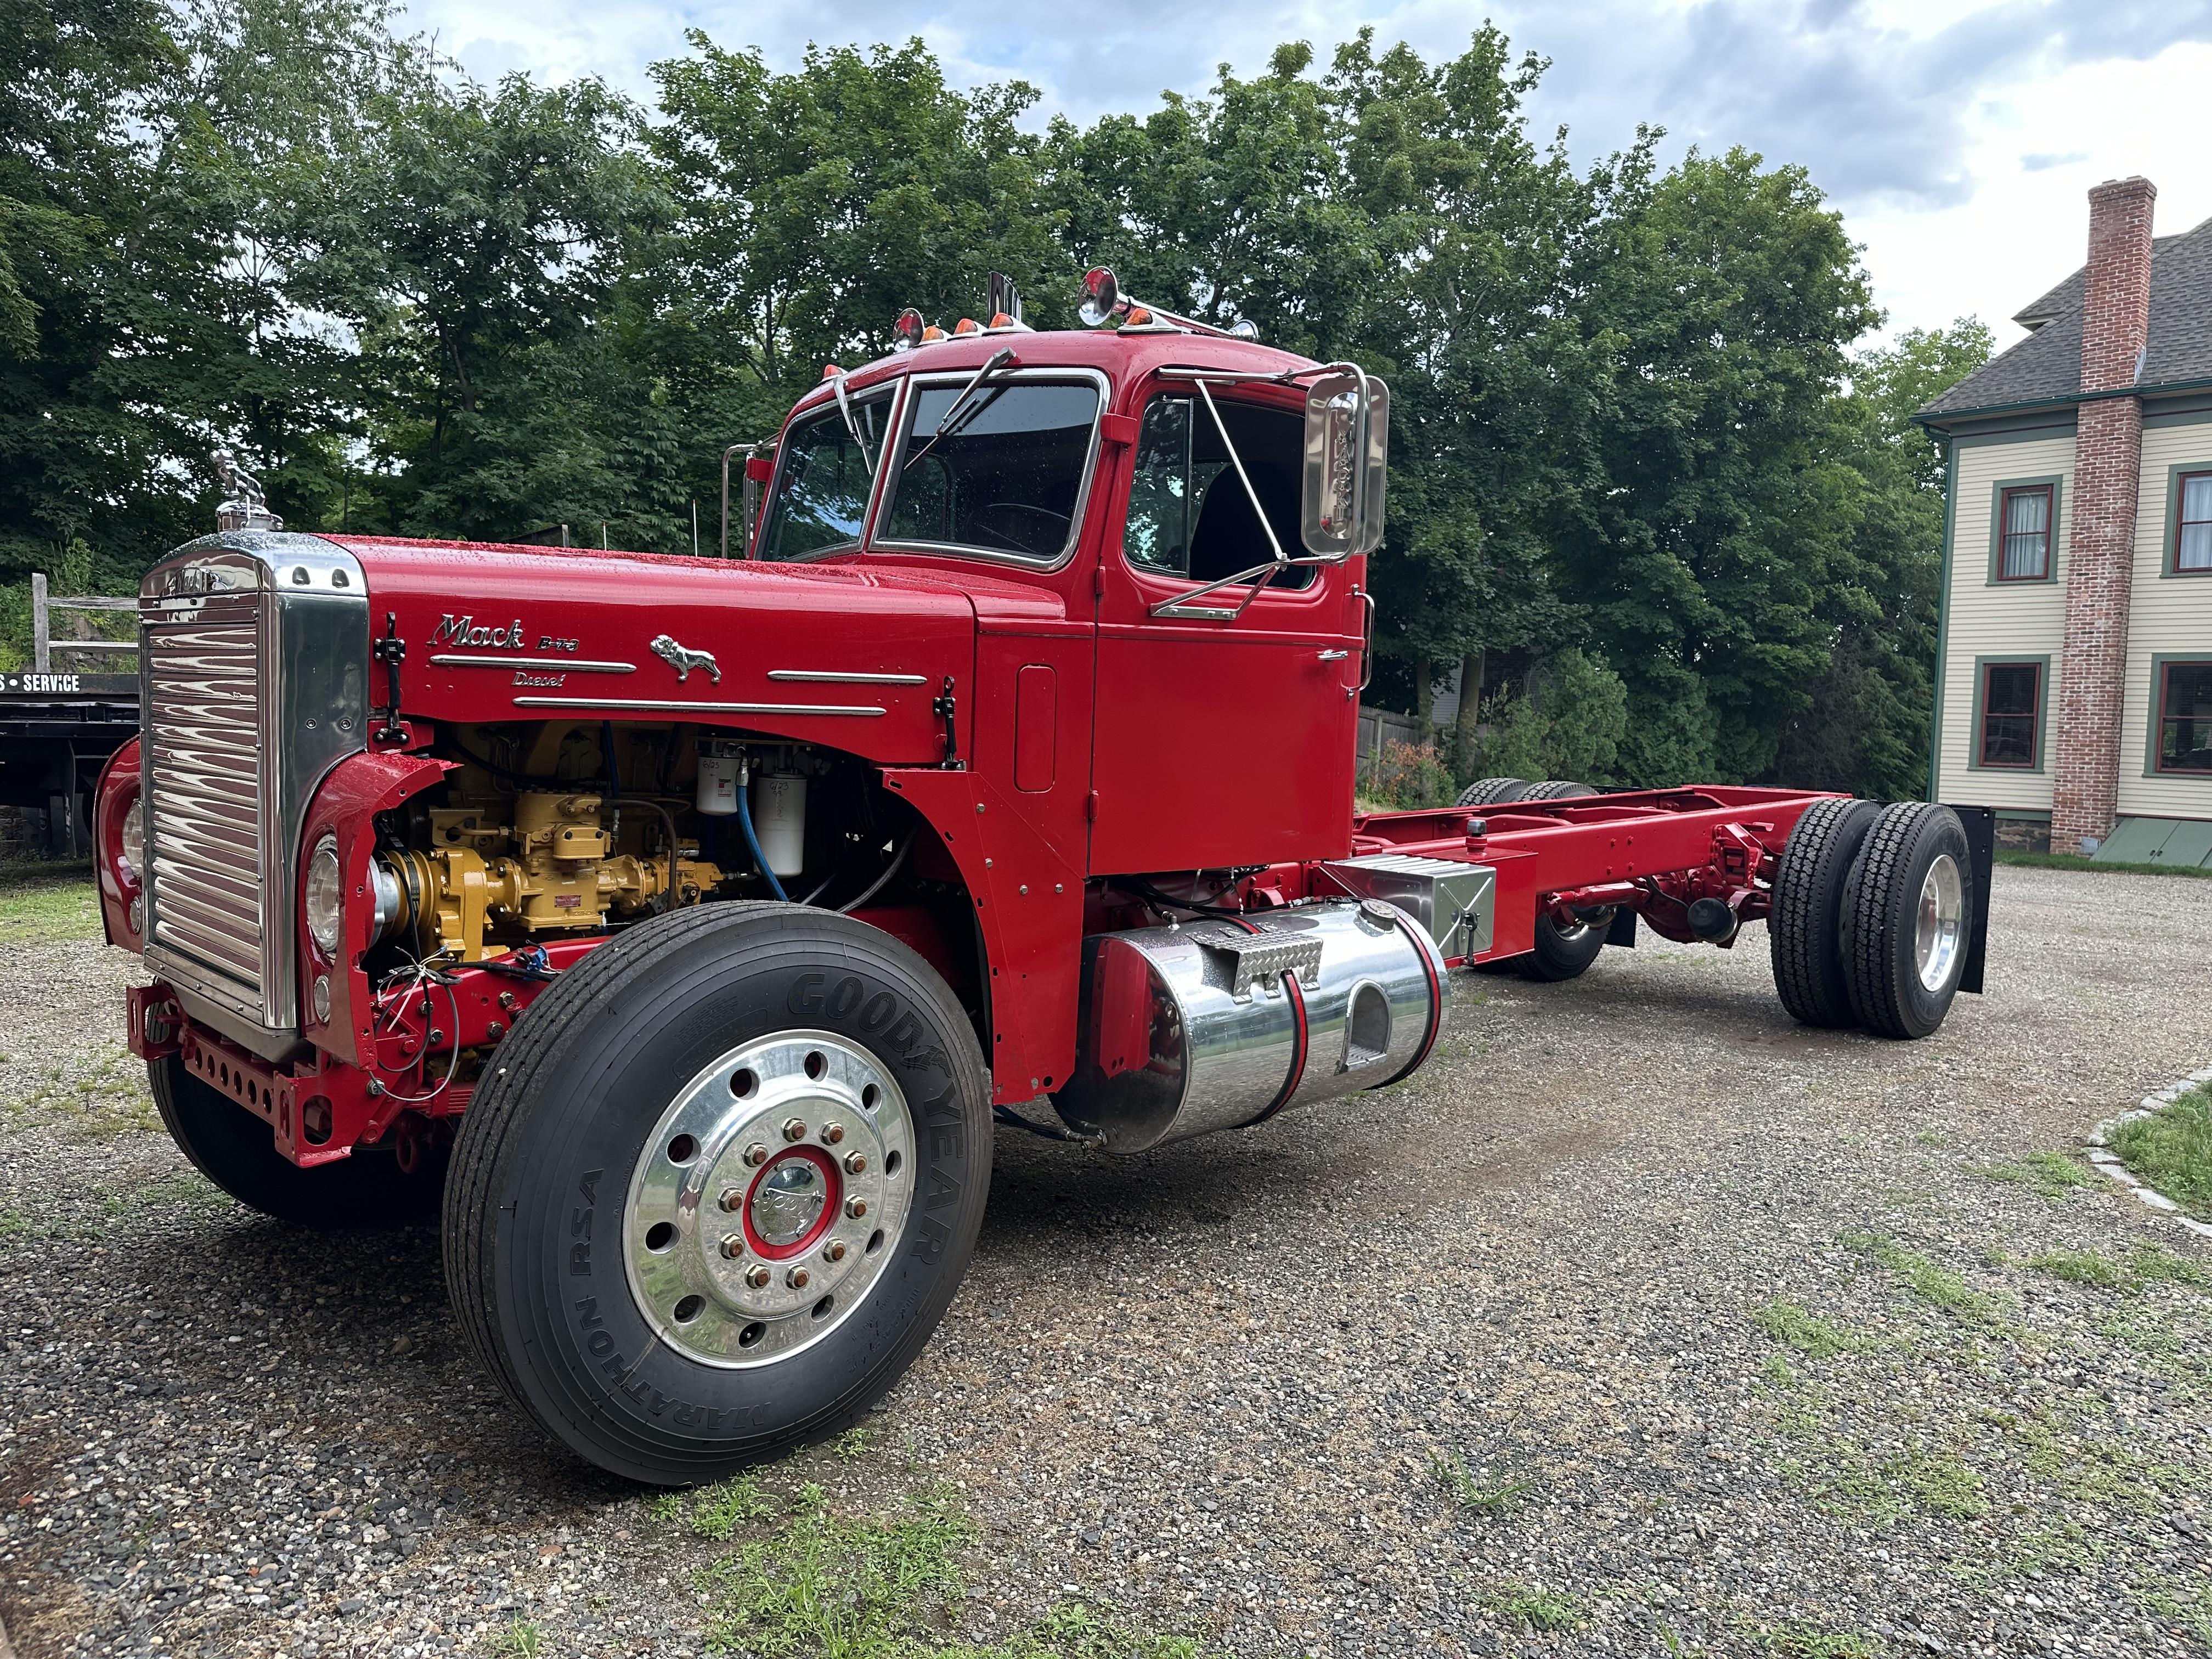
The sheet metal is all together. I need to make a few adjustments and fill a few bolt holes, but it's looking good. Very happy it’s back together!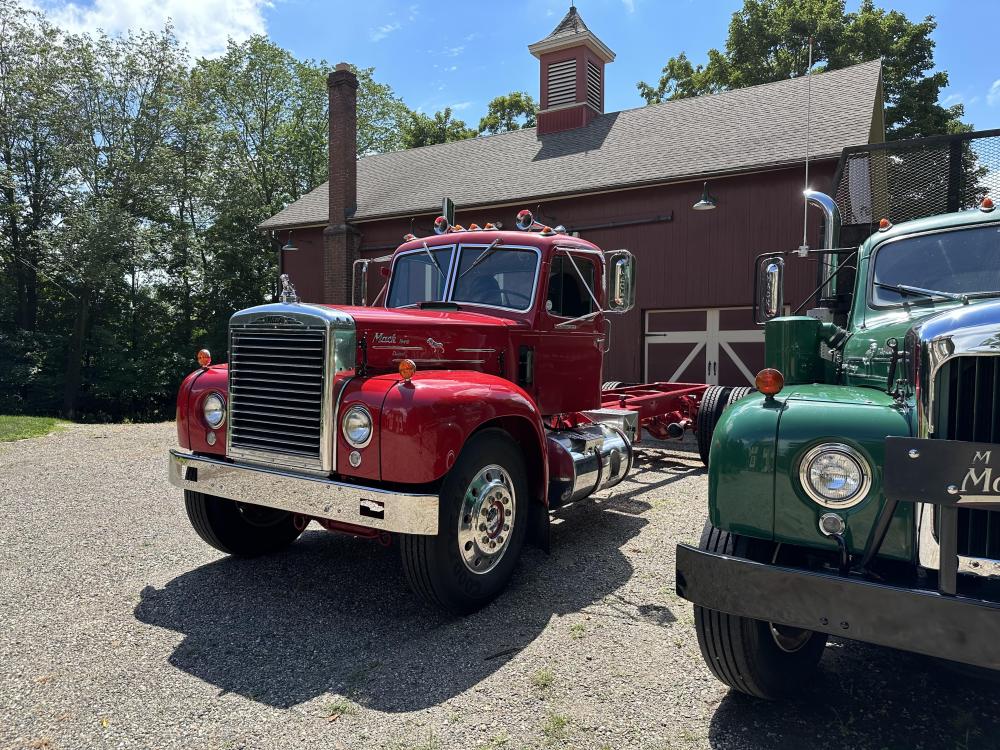
-
B-73 Restoration
mattb73lt replied to mattb73lt's topic in Antique and Classic Mack Trucks General Discussion
It sucks. The rear has no give and bounces pretty good over bigger bumps on the highway. Local roads are easier as the speeds are a lot less. I think the gearing is spot on. With the 4.62 rear, double over Triplex and 24.5 rubber it just floats at about 1650 RPM at 70 MPH. That's barely half throttle. If I come on a hill/grade, it's a quick downshift to 4th Hi-split and you're over it. I love the sound of the exhaust, but down the road I'm probably going to put a muffler on it. -
B-73 Restoration
mattb73lt replied to mattb73lt's topic in Antique and Classic Mack Trucks General Discussion
No, i think it was just messing with me!! Hasn't done it since. I put another 50+ miles on it today, so I'm up to 210 miles total and 110 on the new motor. Admittedly, I'm still a little gun shy about running it after the first time it blew up. I'm alert to every smell, noise and vibration, but so far all is OK. I'll make a video soon of a road test. -
motor position
mattb73lt replied to nam vet's topic in Antique and Classic Mack Trucks General Discussion
The basic engine is the same. The bell housing is the difference. The tilt shouldn't effect anything as it was designed to be that way. As long as there's no interference with the firewall or other areas, I can't see any issues. To get it vertical, the best way to do that would be to swap the engine bell housing. The B67 series had the fire wall cut out and a removable "doghouse" inside the cab for access to the rear of the engine, as the cab was moved forward on the frame and the front sheet metal was shortened. As for the color, earlier engines were a blue-grey tint, similar to a Detroit Diesel. I believe the Maxidyne was the engine that started the gold paint, from 237 HP and up. -
B-73 Restoration
mattb73lt replied to mattb73lt's topic in Antique and Classic Mack Trucks General Discussion
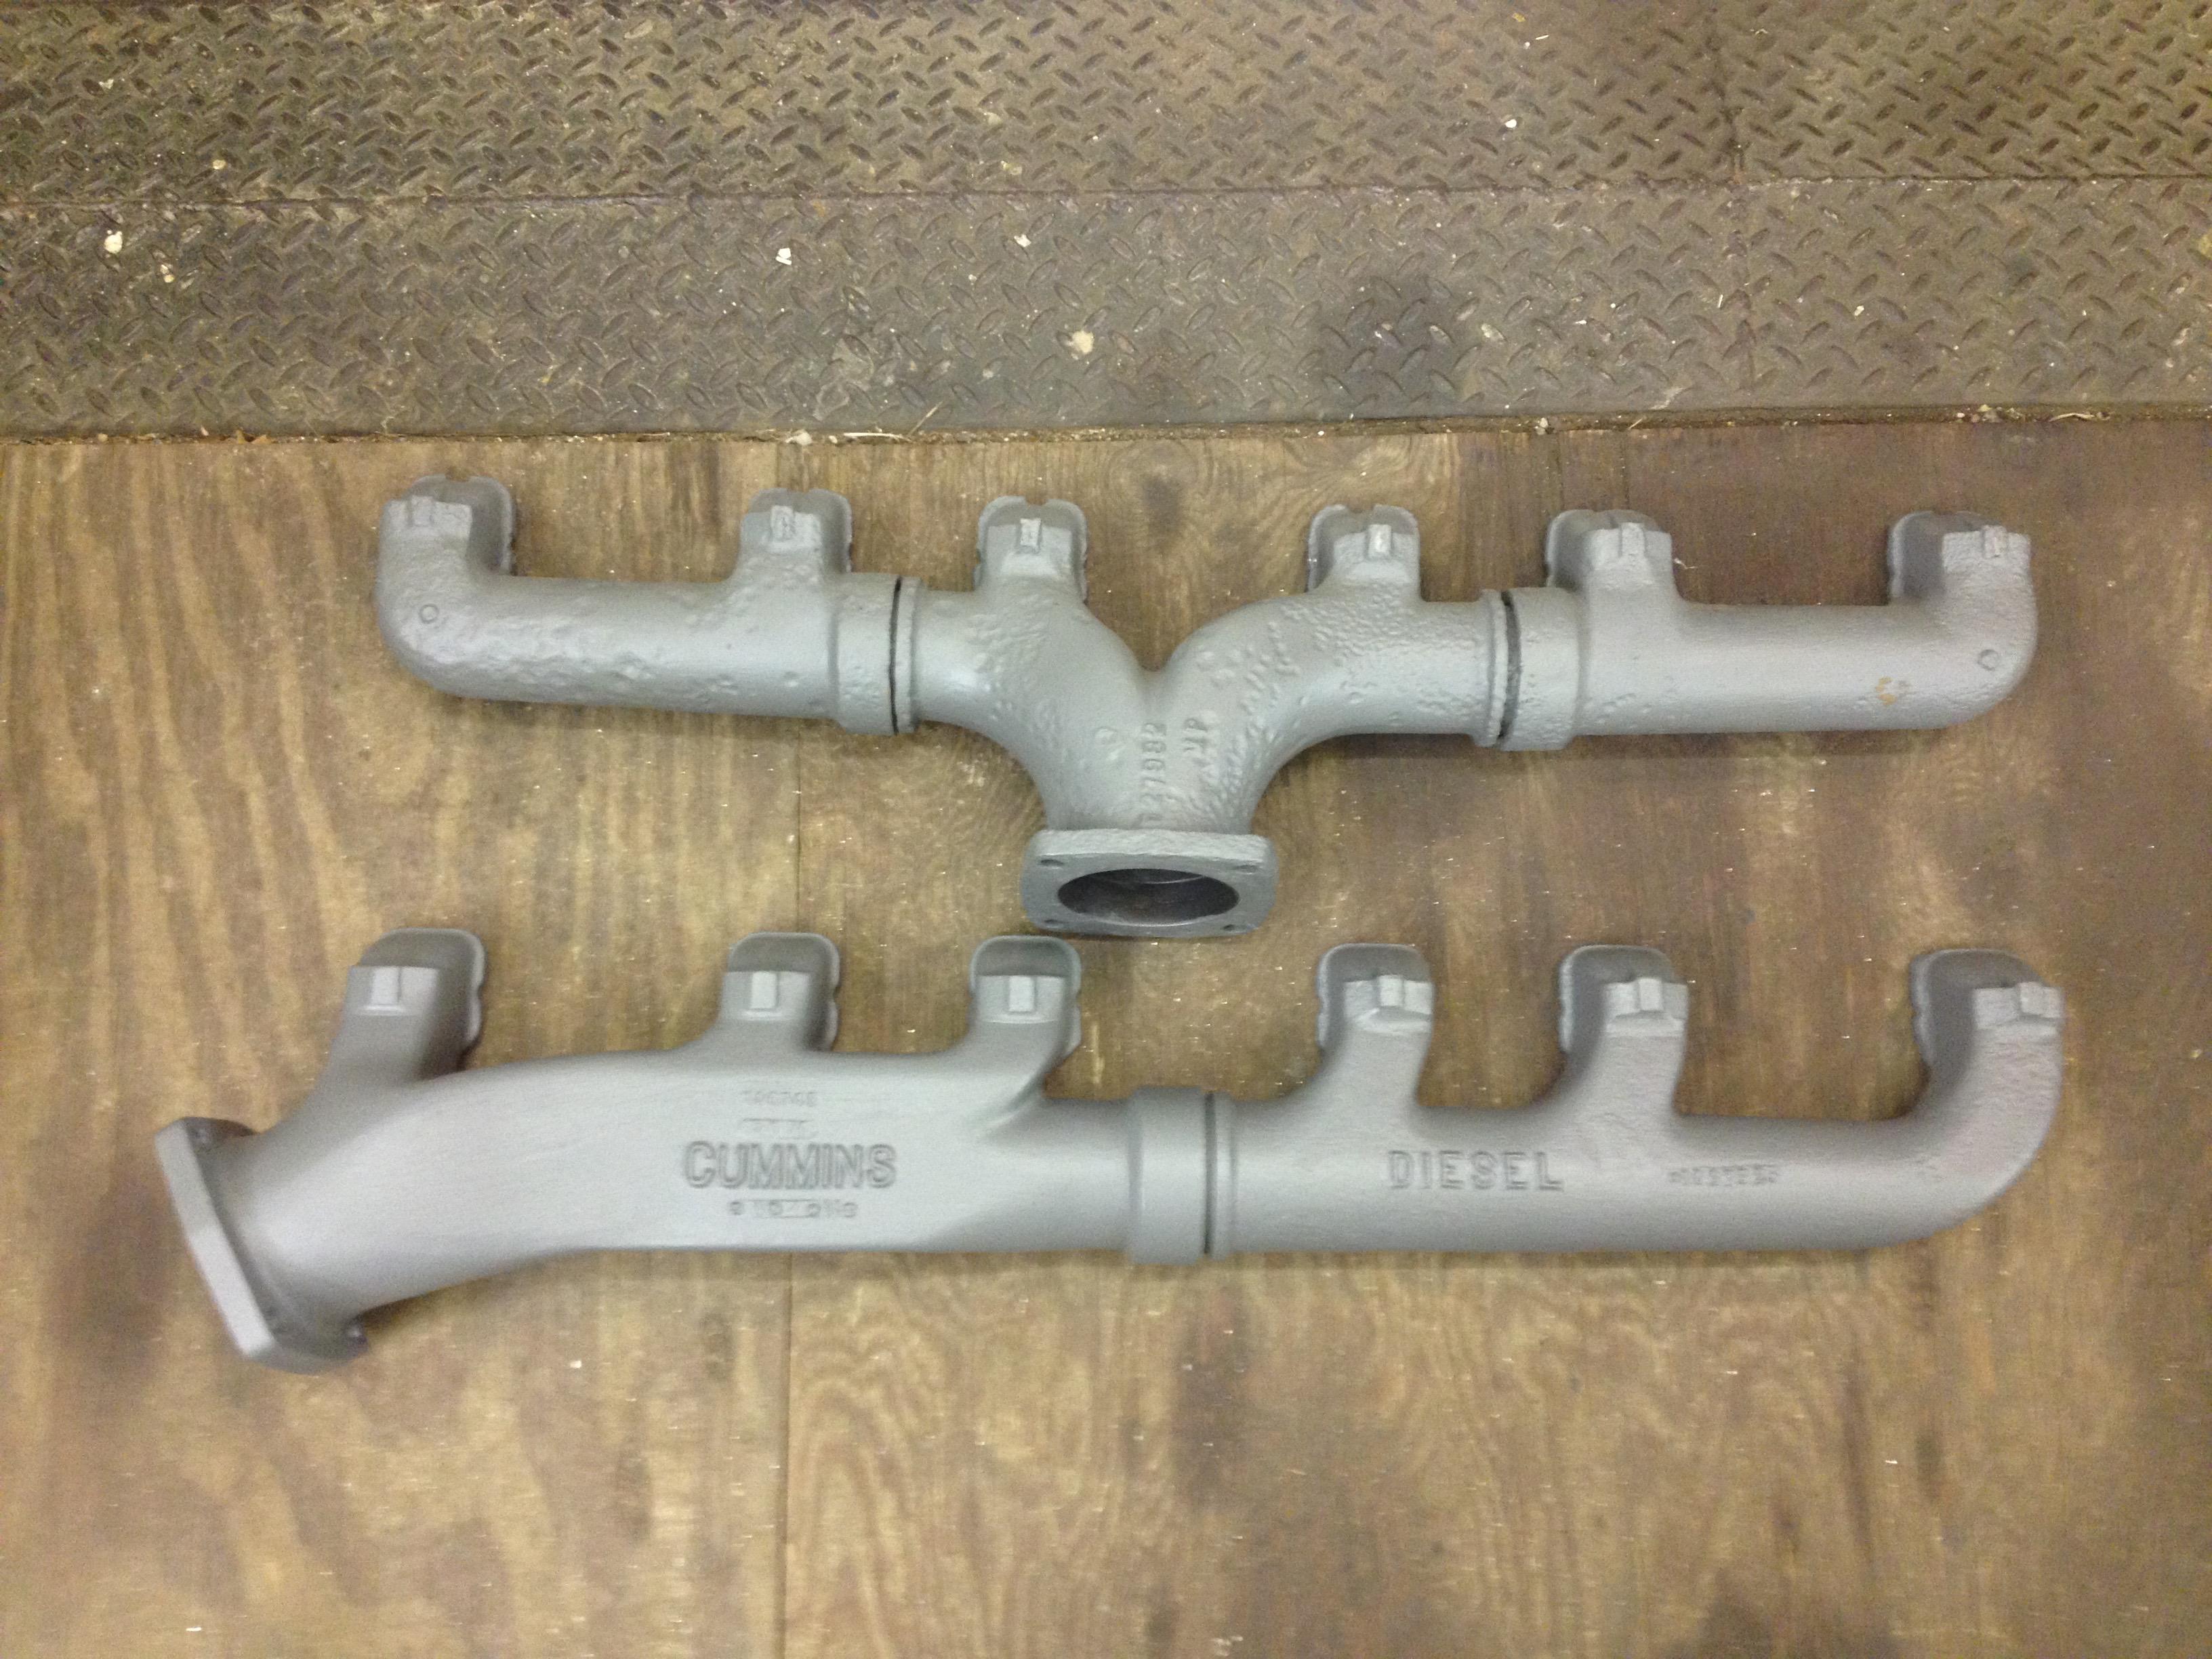
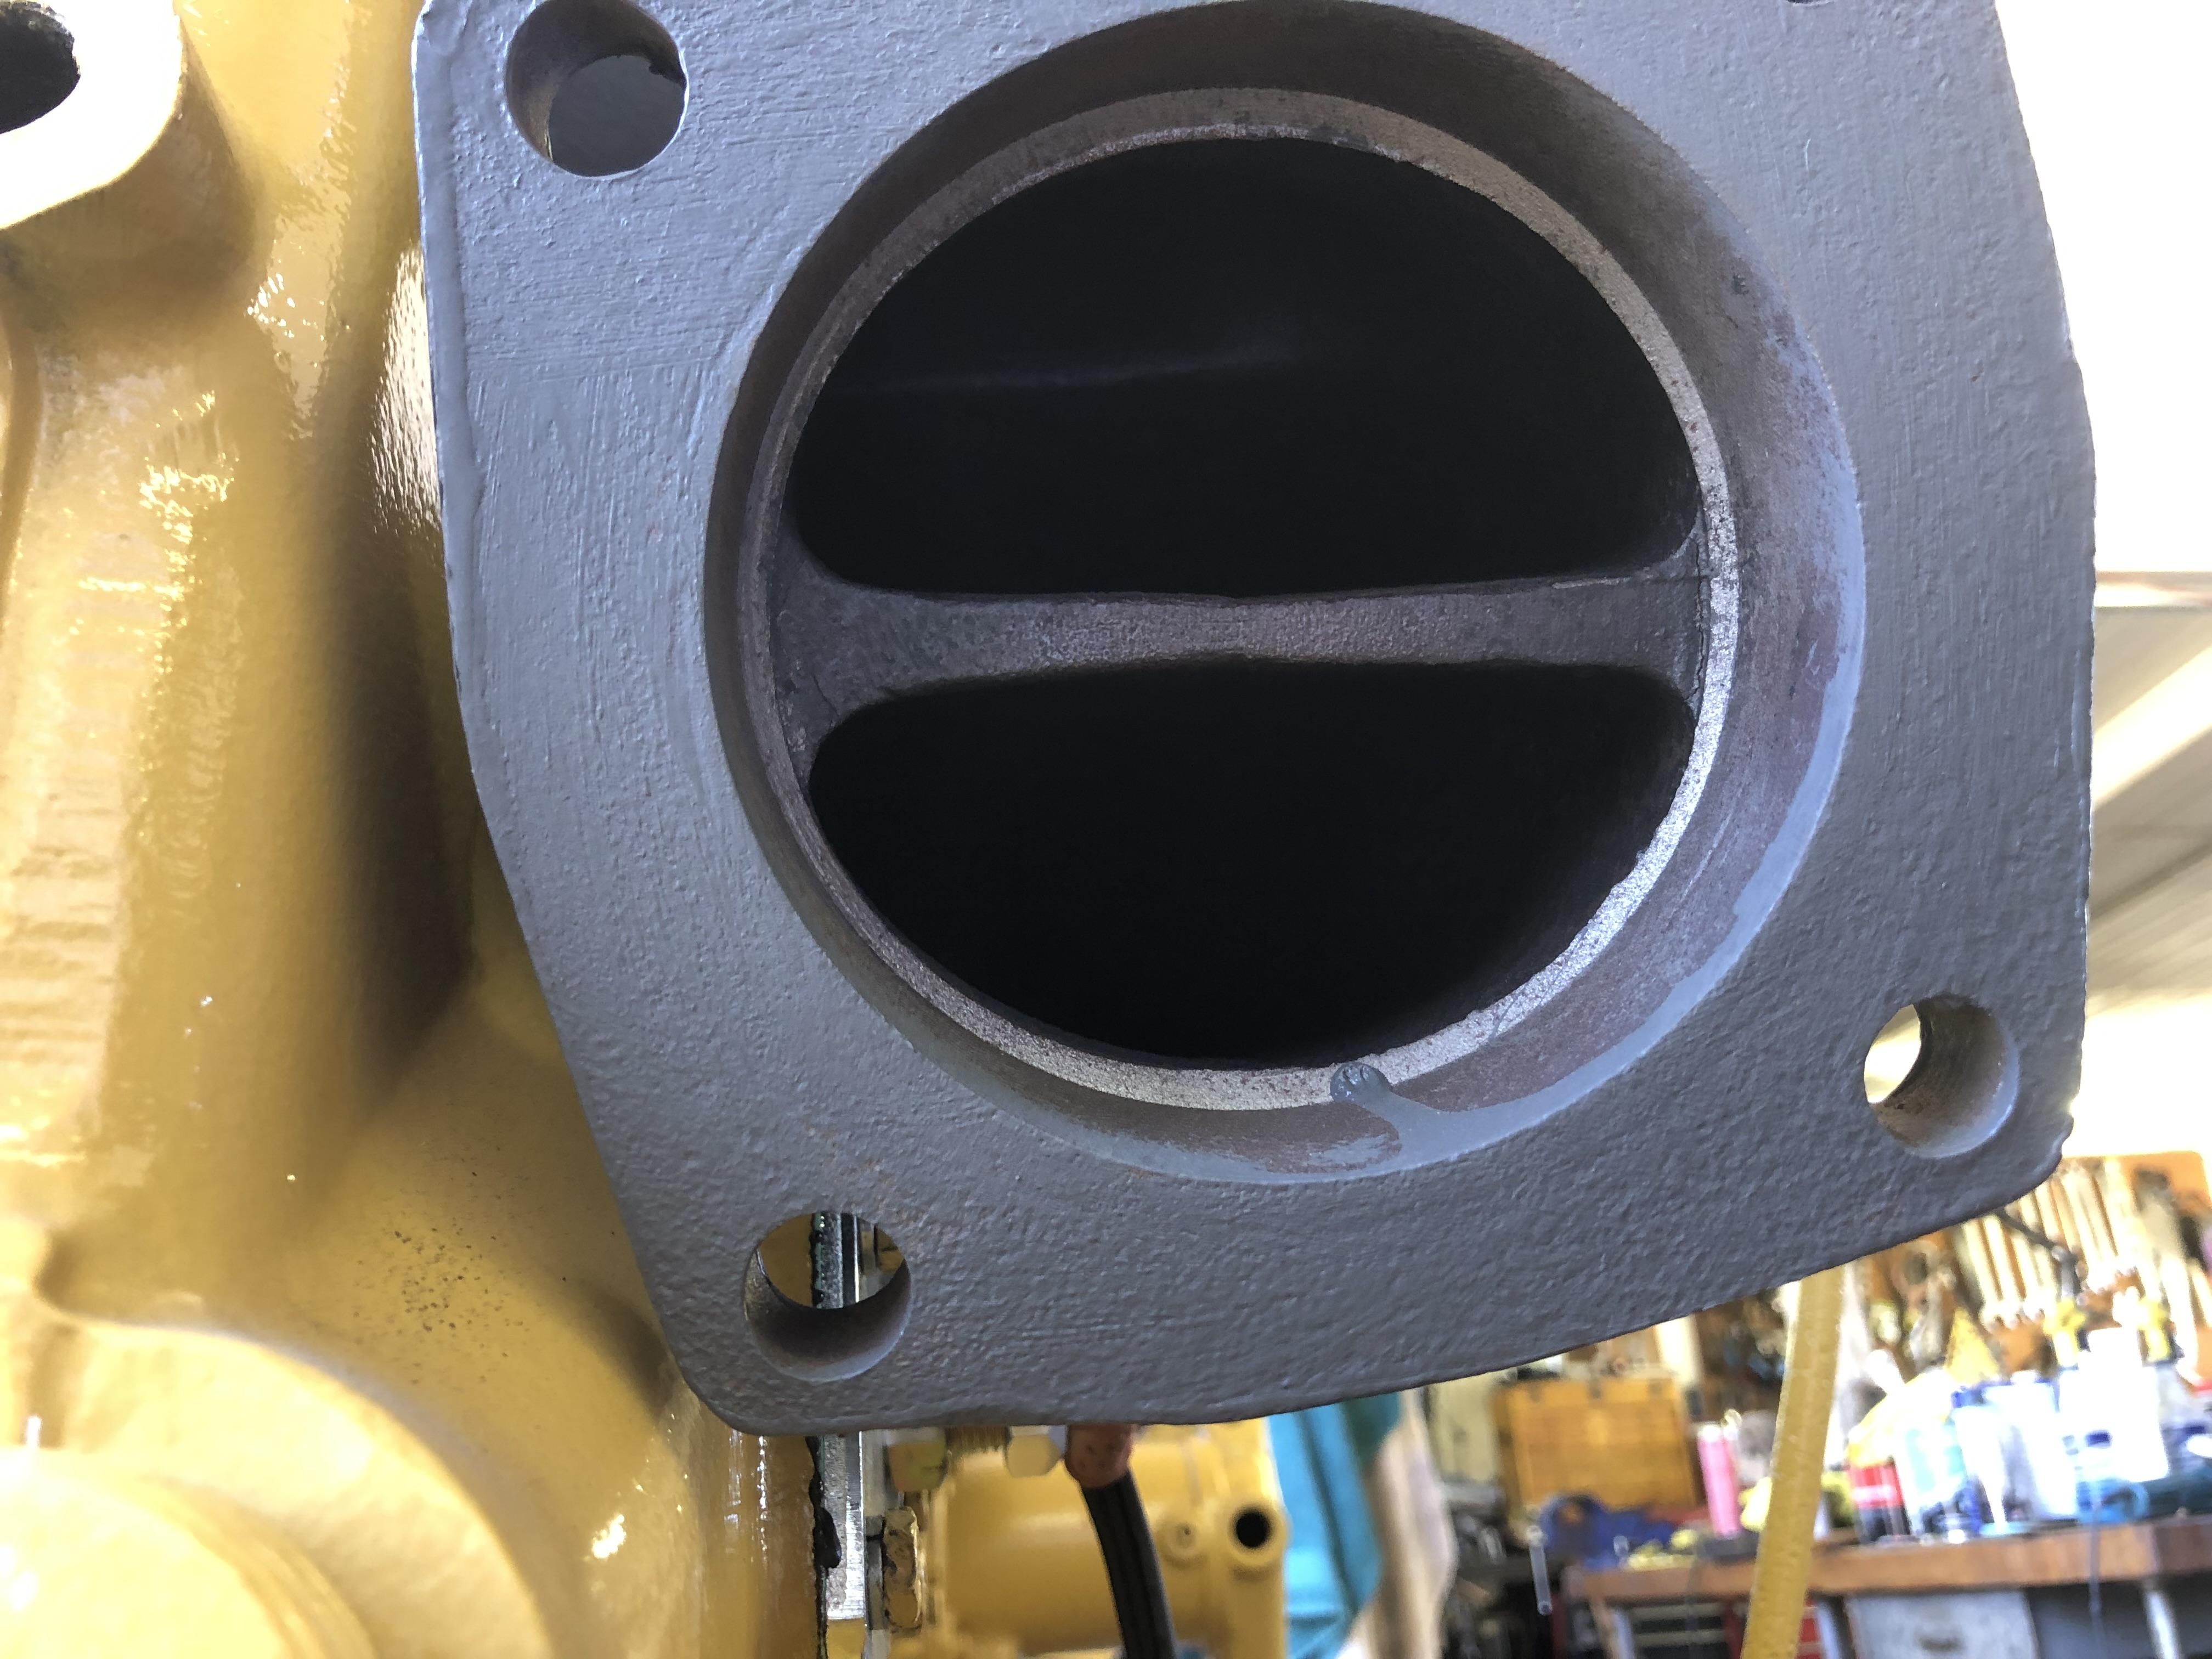
The back drop dumps out the rear, versus a center dump. Additionally, it has an internal baffle that prevents the gasses from mixing until they leave the manifold, giving it a particular and distinct bark. A split manifold is actually two separate manifolds.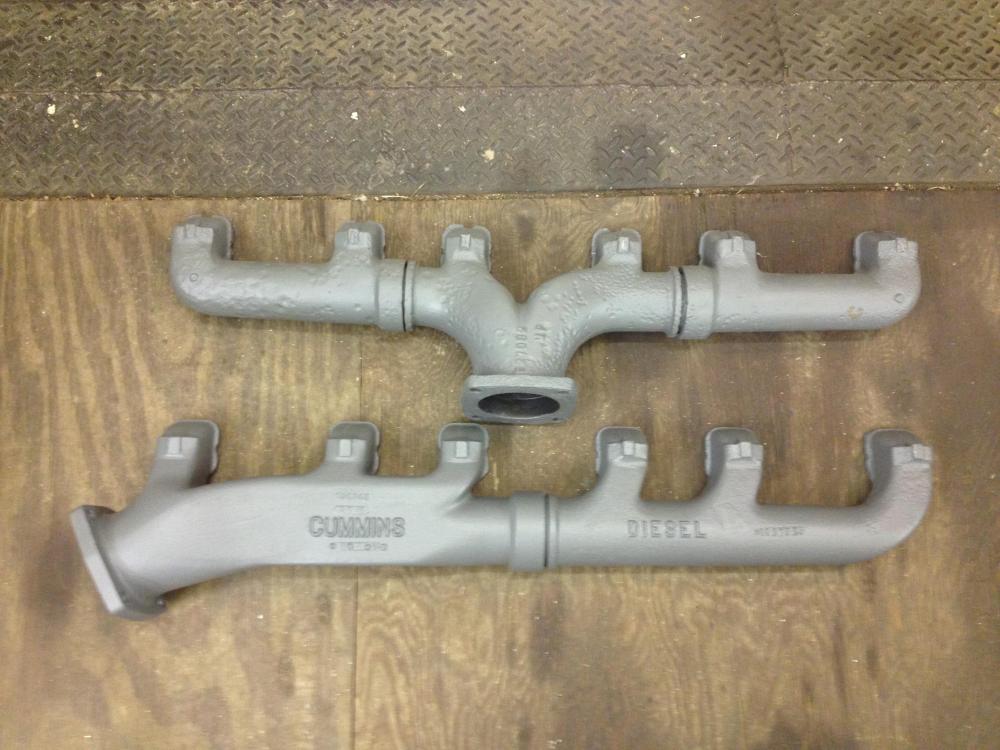

-
B-73 Restoration
mattb73lt replied to mattb73lt's topic in Antique and Classic Mack Trucks General Discussion
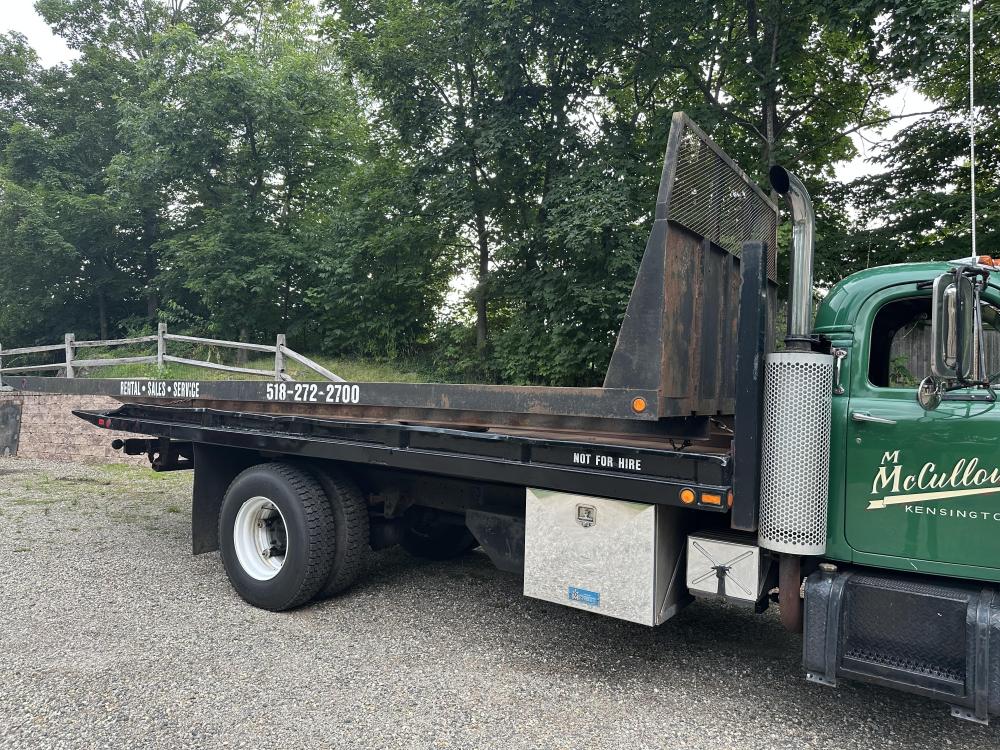
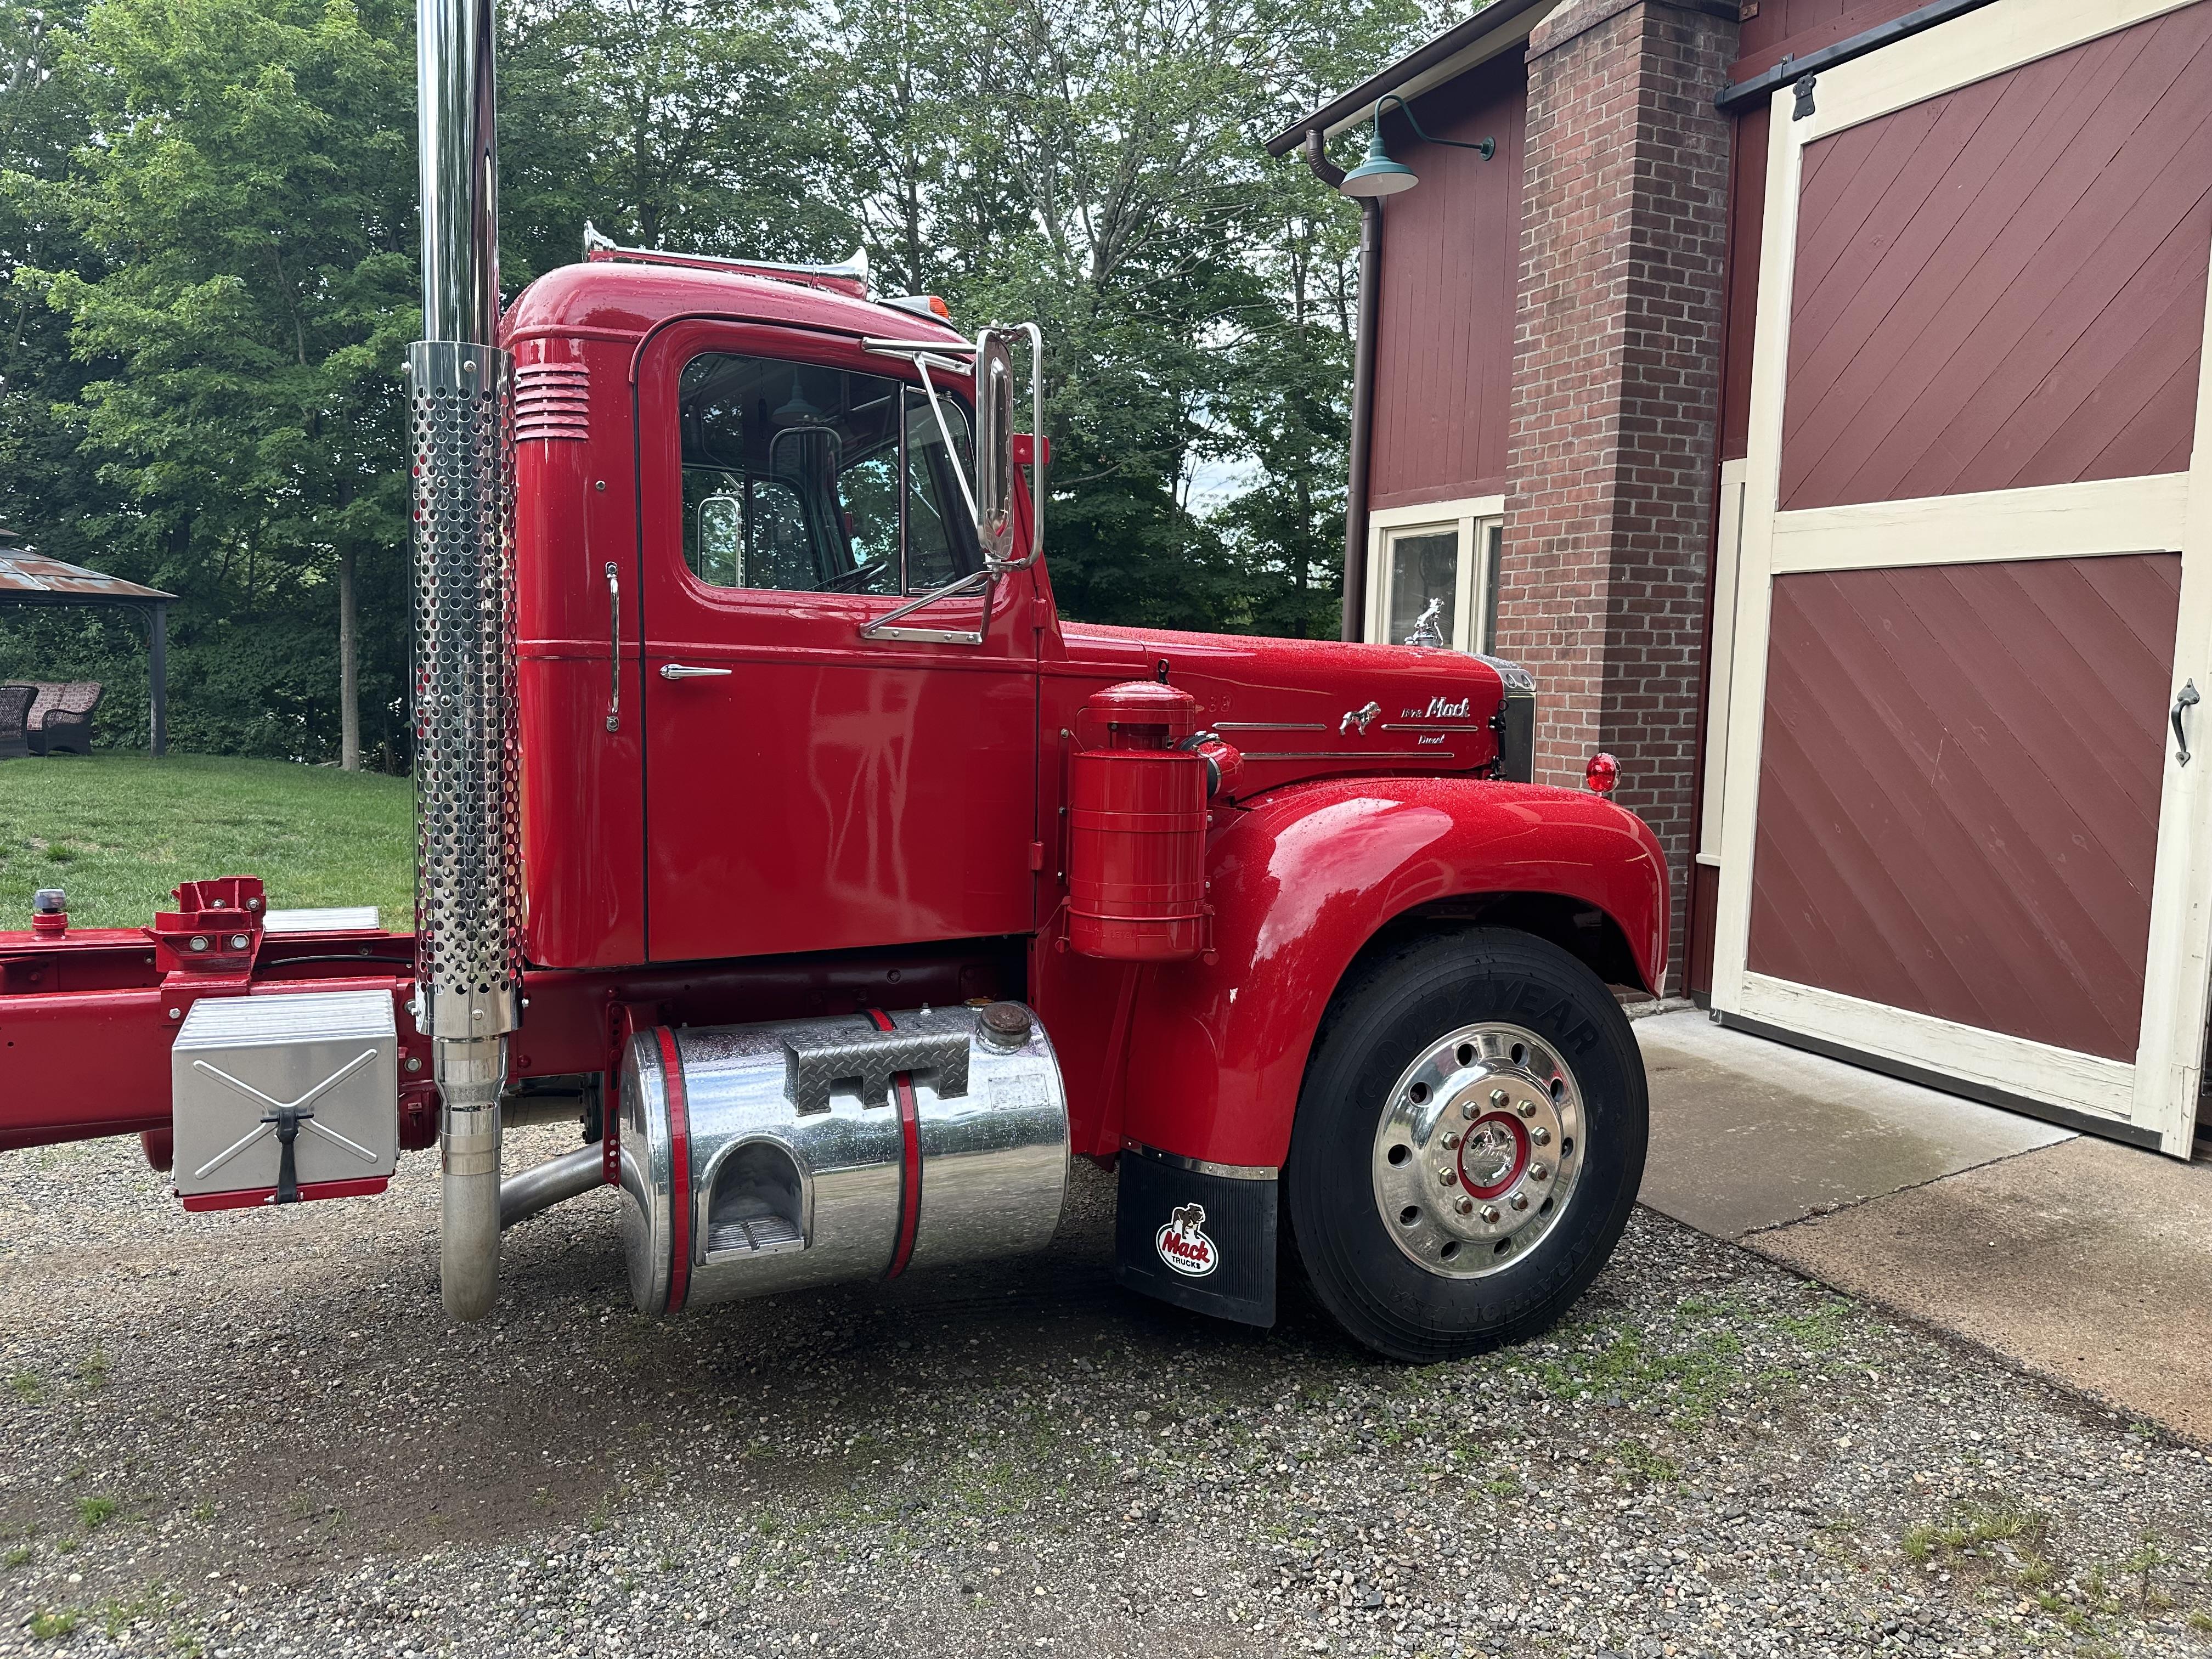
As for pin striping I do have a plan. Thick gold or maybe Cummins Old Gold for a main stripe and on the inside of that a thin Mack or Emerald green stripe. I'll probably put my name on the door, kinda like the other truck. -
B-73 Restoration
mattb73lt replied to mattb73lt's topic in Antique and Classic Mack Trucks General Discussion
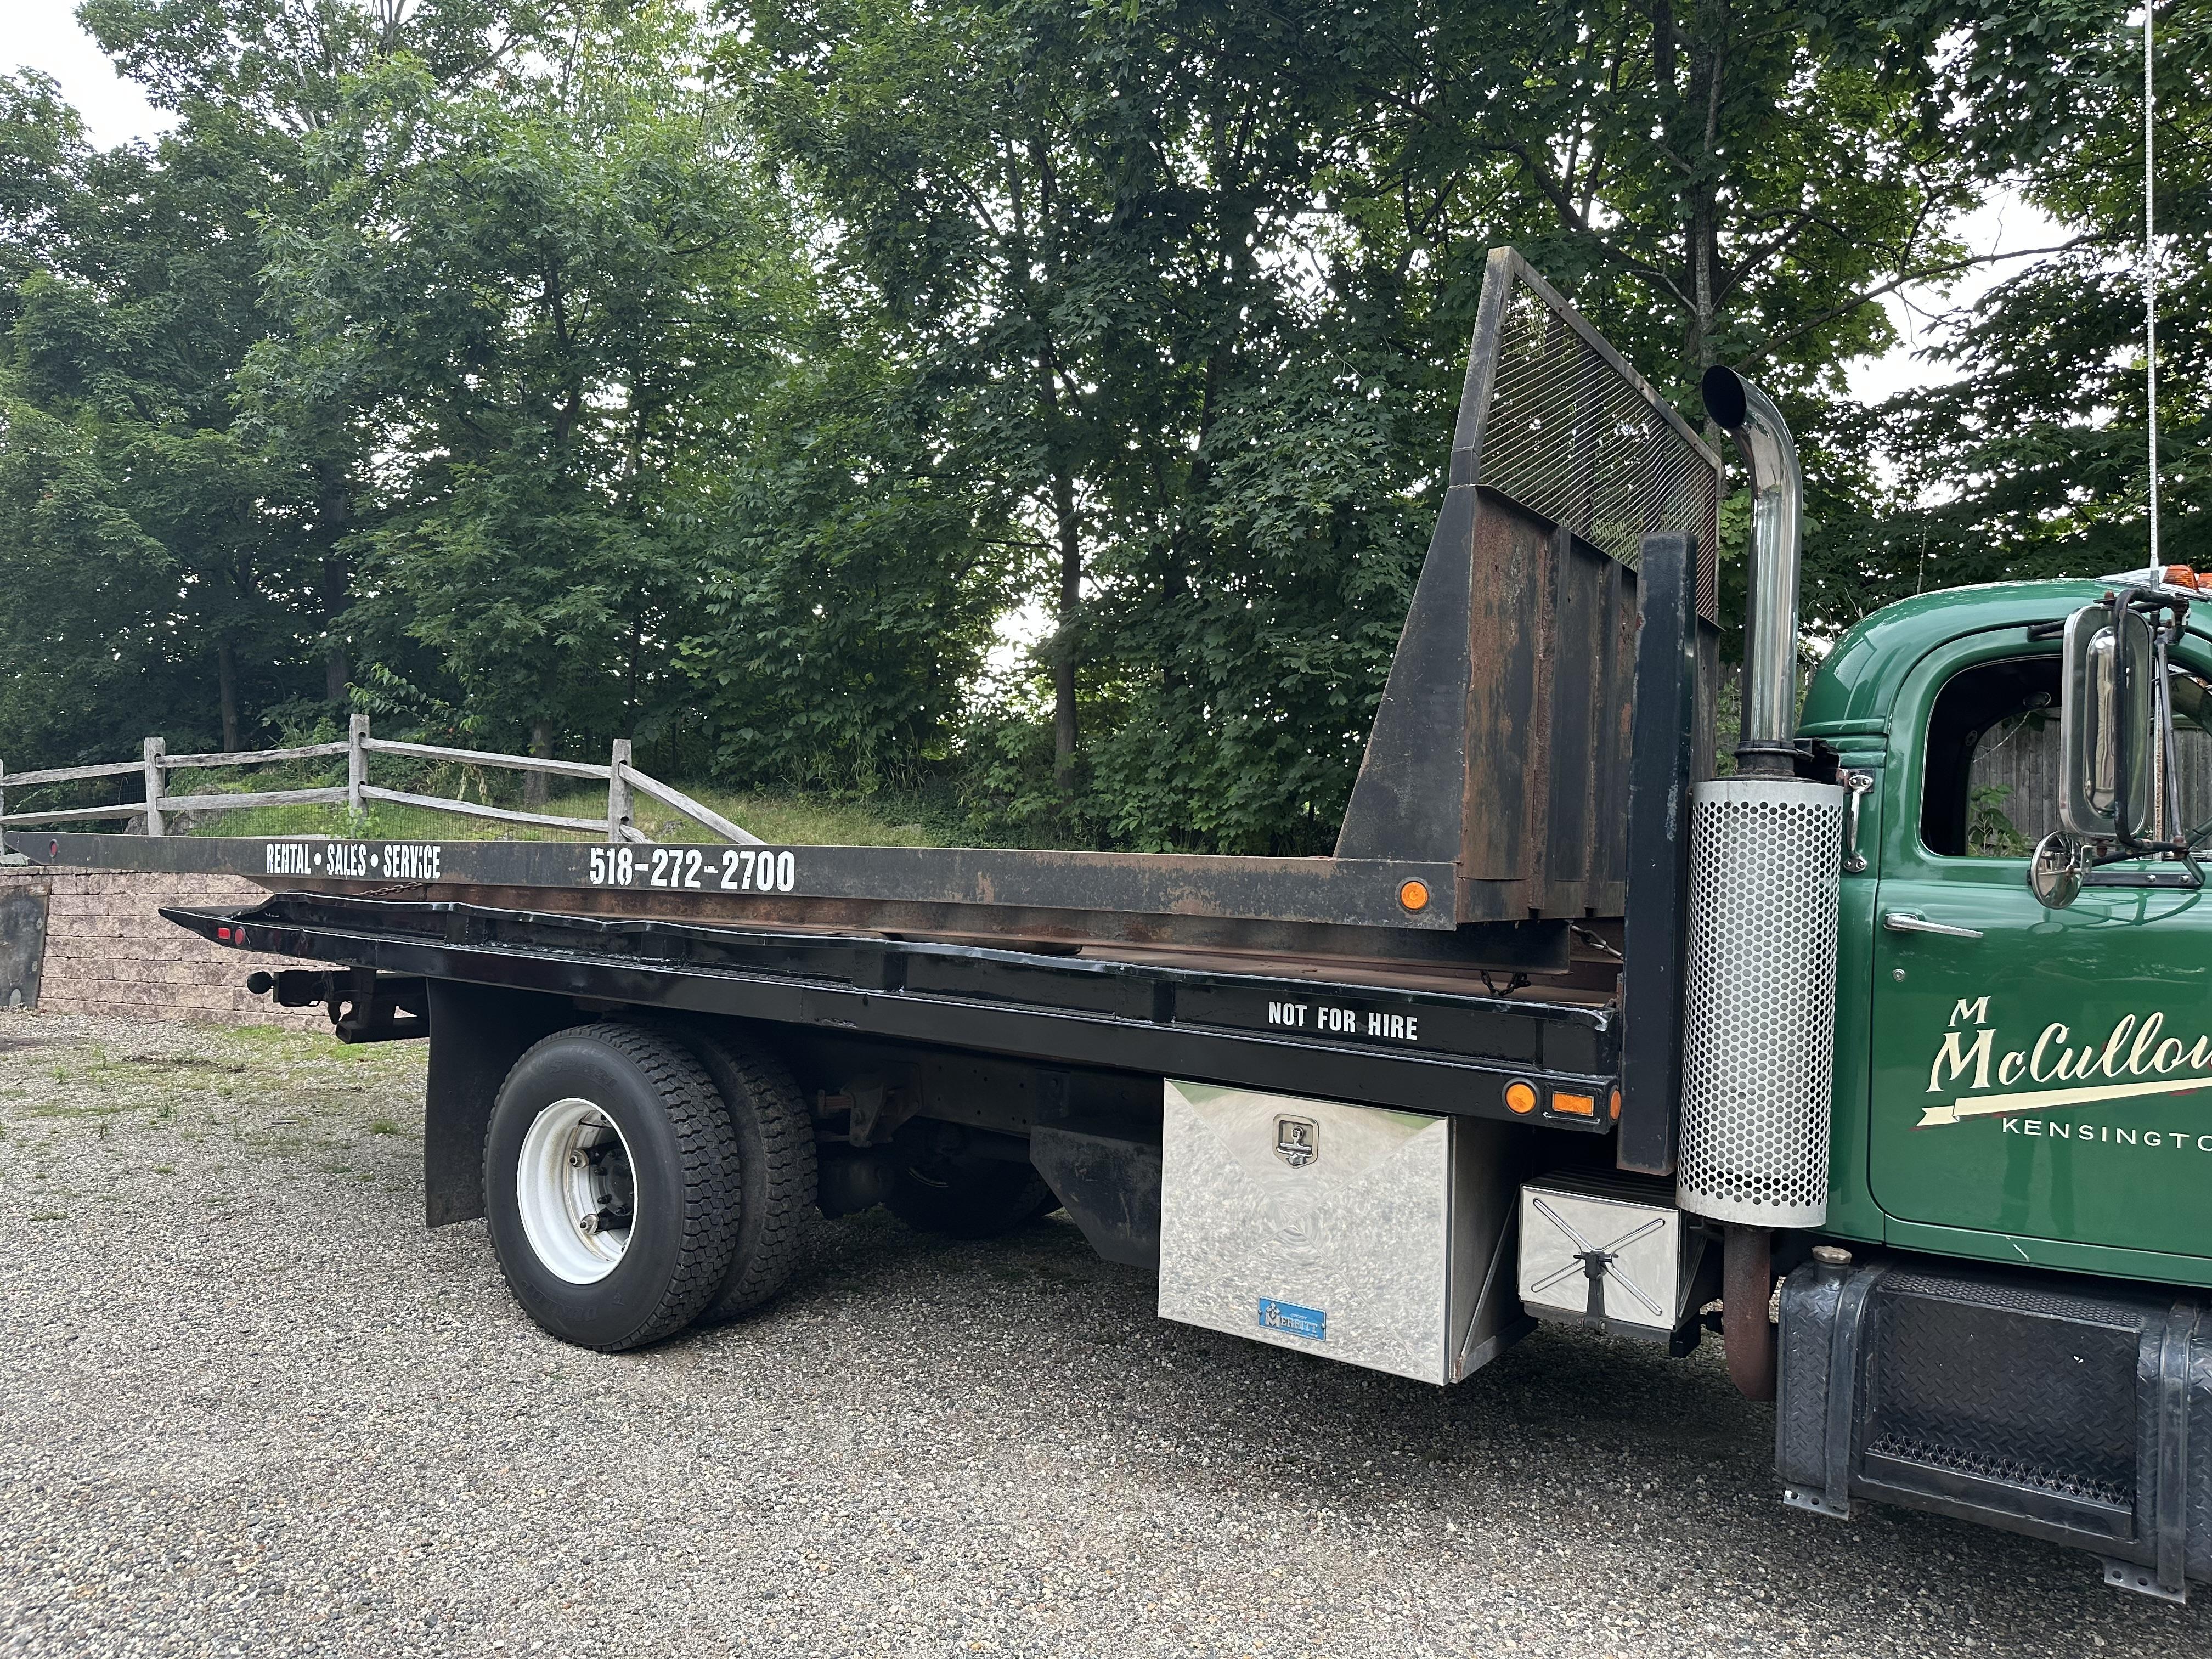
Yes, rear flaps. The deck has a head board on it. You can see it peaking up over the back of the green truck. it's about 67" high. -
B-73 Restoration
mattb73lt replied to mattb73lt's topic in Antique and Classic Mack Trucks General Discussion
Test runs!!! Headed out about midday after the rain stopped. First one I went 25 miles, circling the house on local roads. I stopped often to check driveline temps, leaks and if anything was coming loose. Went back to the house to shut it down and check everything. Lost a little antifreeze though the cap, but it was topped up a little too high. Went out again, this time trying some highway(bravely). Was on another short circuit when I saw I had about 90 psi air pressure and slowly dropping. Was making a beeline for the house and got down to a little less that 70 psi and was crapping myself, then it started to build again. Went up to 120 and cut off normally. Got it back to the house and bled it down and the compressor cut in at 90 and cycled back to 120. Did that several times and it operates as usual. I think it was just trying to get me to leave skid marks in my drawers!! It runs great, though!! 60+ psi oil pressure running hot and 25 at a hot idle. Traffic was getting heavy, so I’ll go out another day for more miles.
-
motor position
mattb73lt replied to nam vet's topic in Antique and Classic Mack Trucks General Discussion
So your saying it's leaning to the passenger side? A short nose B67 had the engine tilted to the passenger side by, I think, 14 degrees. This was done to provide clearance for the driver's feet, steering box, etc. If you have a standard cab the engine should be vertical. The frame should be pre-drilled or gas or diesel engine mounts and as you stated, they are different. I've done this swap to a B42 and have a 237 in mine. If the previous owner did the swap it could be possible they used a B67 engine. To tilt the engine Mack drilled the bolt pattern offset on the engine bell housing to get the tilt needed for that application. Pictures of what you have would be helpful to determine what's going on and to more clearly see your issue? -
H Model Restoration
mattb73lt replied to h67st's topic in Antique and Classic Mack Trucks General Discussion
That is really coming out nicely!! It looks factory new. Everything is clean, crisp and sharp. It takes so much effort to make that happen. Beautiful job!! -
B-73 Restoration
mattb73lt replied to mattb73lt's topic in Antique and Classic Mack Trucks General Discussion
I will agree there are supply chain issues, these nitwit's gave it no effort. It was a 20 minute search and a few phone calls. The parts for this pump are readily available, it's a common Vickers pump, albeit old. I had to ship it to Michigan, but they were able to readily ID it and confirmed they had the parts for it. As for the hydraulic cylinders, they took the long one apart that pushes the bed in and out and looked at it. That was about it. When I asked over the months were we were with, they were waiting for answers from a supplier. When they had questions of me for what they were, I always answered promptly. Then they were telling me it would probably cost in excess of $4K to rebuild all three. The other shop was saying about $2K and would be done in a few weeks. The local shop has done work for me before, but since covid, their abilities have dropped way off. I'm not sure how they'll stay in business continuing this way. -
B-73 Restoration
mattb73lt replied to mattb73lt's topic in Antique and Classic Mack Trucks General Discussion
Slowly going back together, again. Waiting on my power steering pump to come back from being overhauled. Had to get it back from a local hydraulic shop after they did nothing but complain about supply line issues for six months. Did a 20 minute internet search and found a place that would do it quickly. I should have it back maybe this week or early next week. I’ll leave the left fender off until it’s back in. Just makes it easier. Now that I can move the truck again, I was able to pull the bed up from beside the barn, today. Took the winch out of it and a few other items to get it ready to move to my friends’s shop so he can do some repairs to it. Strapped it to the deck of the B42 to move it when he’s ready. I hauled the three hydraulic cylinders for the bed to Danbury last week to be overhauled, so they should be back in a few weeks. The pace to finish is finally picking up!!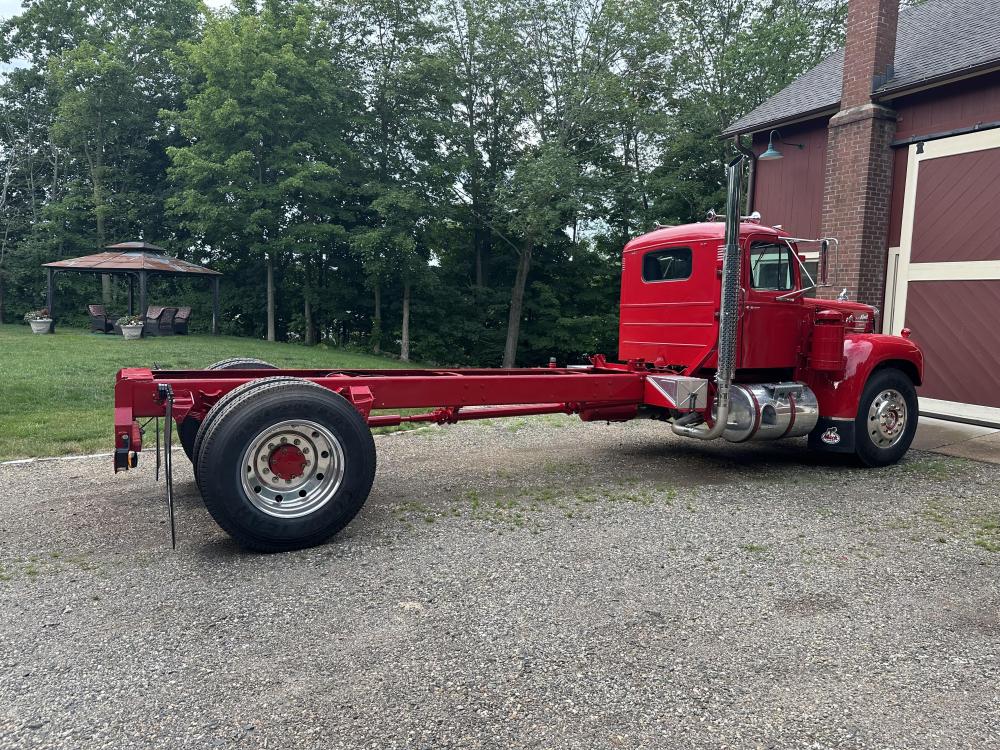

-
H Model Restoration
mattb73lt replied to h67st's topic in Antique and Classic Mack Trucks General Discussion
Looks great! Do you have a trailer you're going to pull with it or just bobtail? -
B-73 Restoration
mattb73lt replied to mattb73lt's topic in Antique and Classic Mack Trucks General Discussion
For some reason the shorter video I have won't load. It's a walk around of it idling and just ticking away. So happy it just purrs. It was a lot of time lost, but now I can say I've touched every part of this truck. -
B-73 Restoration
mattb73lt replied to mattb73lt's topic in Antique and Classic Mack Trucks General Discussion
Let’s try this one. IMG_8934.mov -
B-73 Restoration
mattb73lt replied to mattb73lt's topic in Antique and Classic Mack Trucks General Discussion
I'll try again later.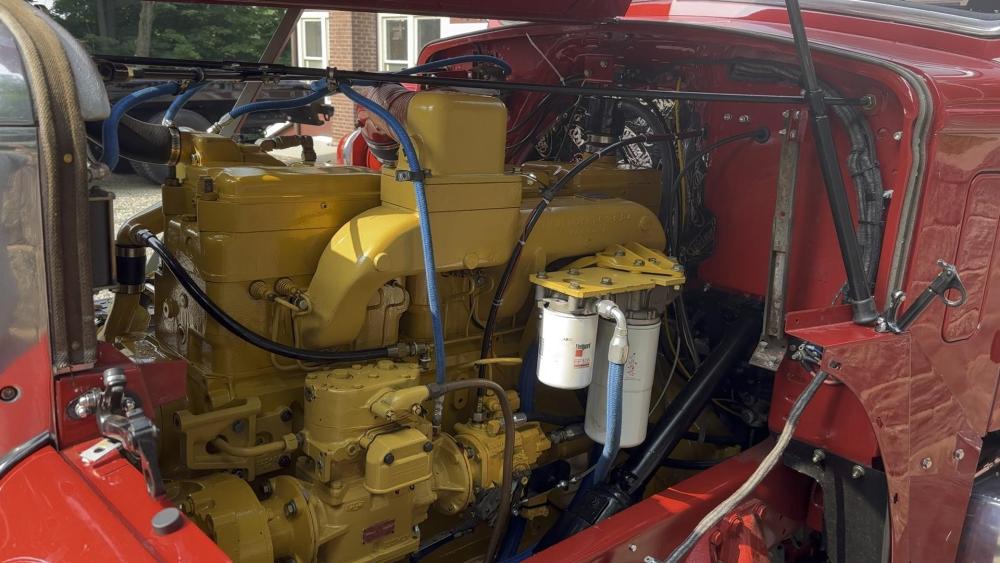
-
B-73 Restoration
mattb73lt replied to mattb73lt's topic in Antique and Classic Mack Trucks General Discussion
It’s ALIVE!!!! It fired off so gently and idles smoothly. Accelerates really well and has that Cummins bark! Now I can move it, since it hasn’t budged since October!! I have short video, but it’s too big. I’ll make another shorter one shortly. -
B-73 Restoration
mattb73lt replied to mattb73lt's topic in Antique and Classic Mack Trucks General Discussion
Not sure. I was setting my sights on Brooklyn, but now I think I’ll be ready for Lancaster, MA in August. The only problem is that now is the same weekend as my employer’s DreamRide weekend for the Special Olympics. That’s also a long way to go with no weight on the back, as the ride sucks without any. -
B-73 Restoration
mattb73lt replied to mattb73lt's topic in Antique and Classic Mack Trucks General Discussion
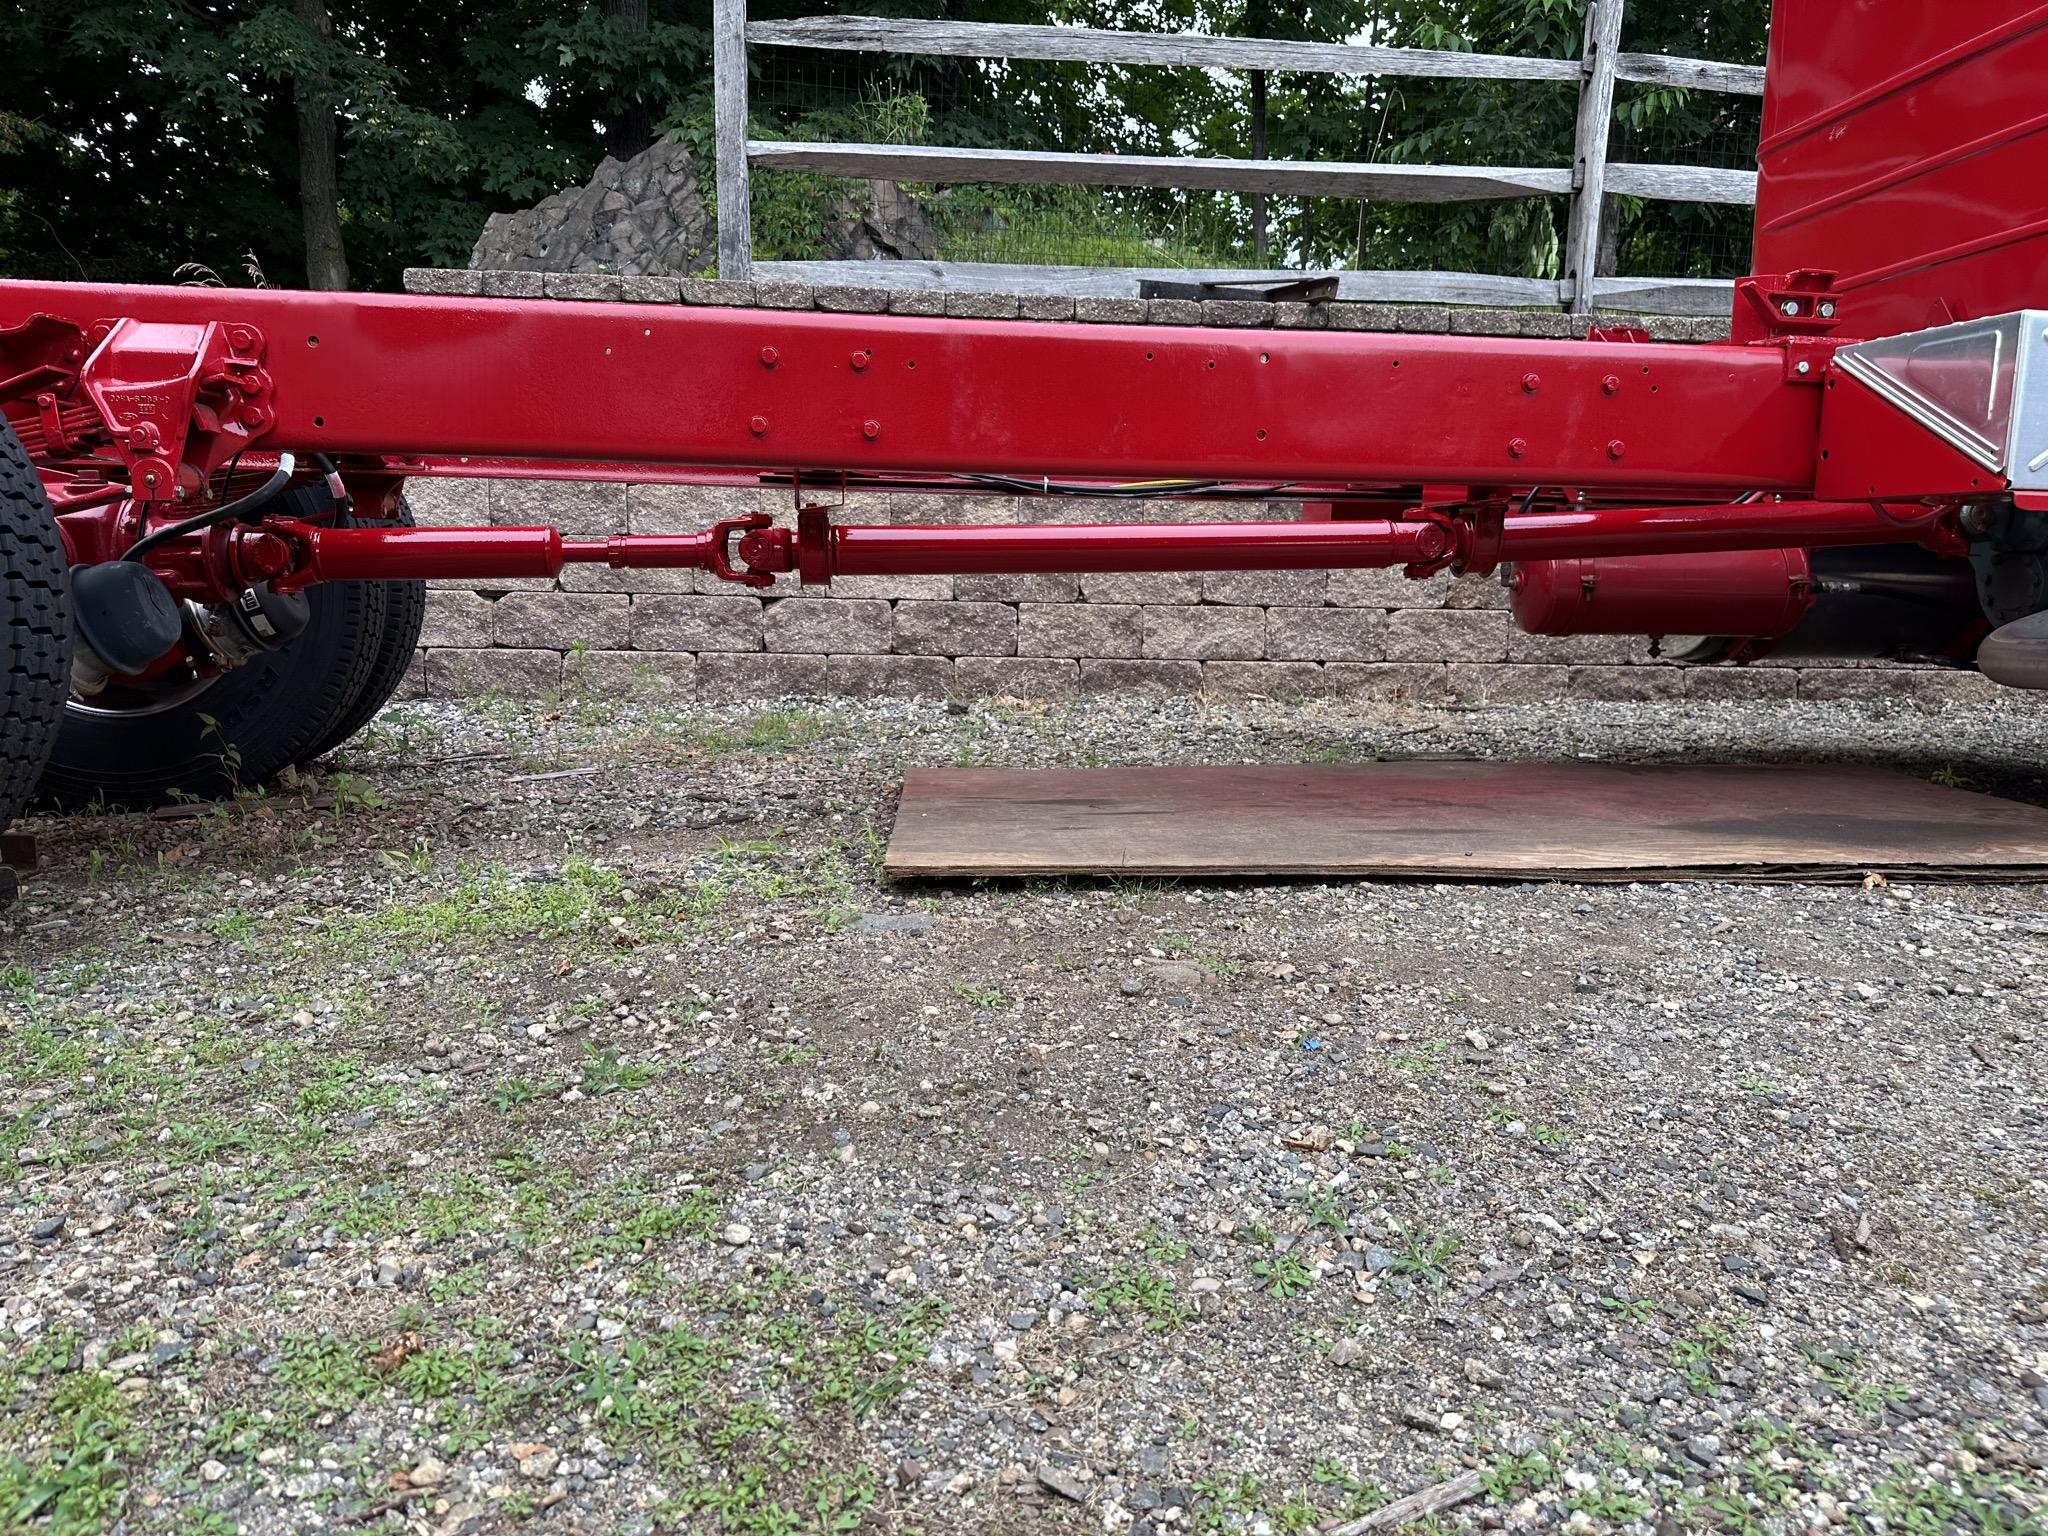
The squawk list is a lot shorter, now. Lots of little stuff knocked out. The driveshaft came out nice. The UPS driver who frequents my house was busting my chops about it, saying the truck looks great except for the driveshaft! I got the throttle and clutch switches for the Jake mounted and adjusted. I’ll probably rough in the wiring for them and finish some more stuff under the dash.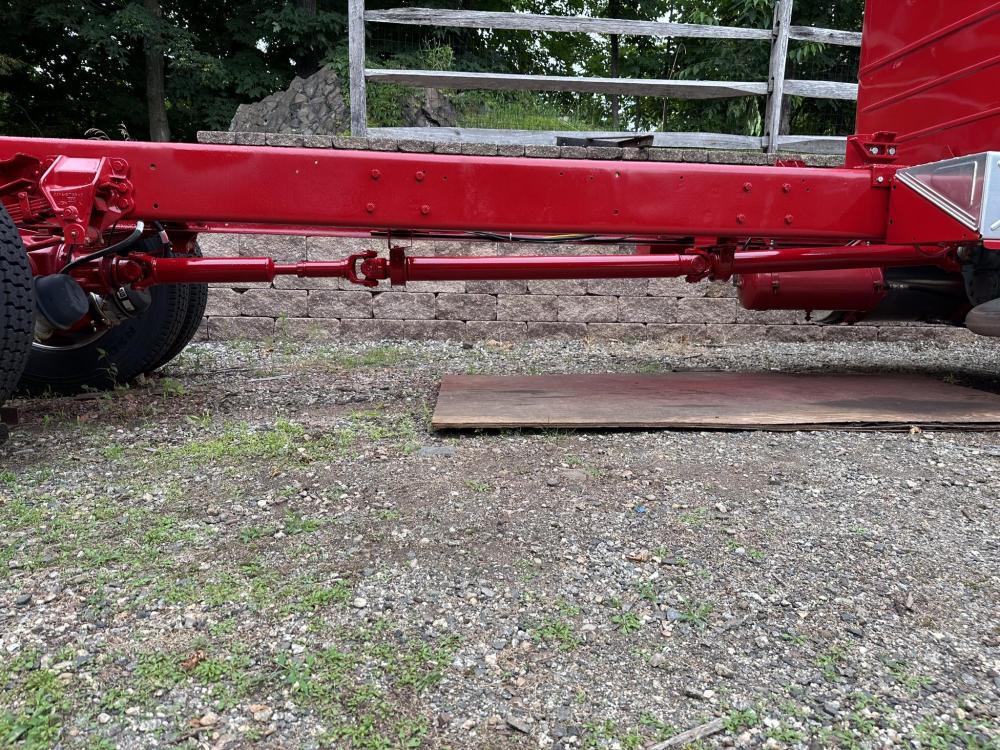


BMT Forum Logo
