


mattb73lt
-
Posts
1,421 -
Joined
-
Last visited
-
Days Won
146
Content Type
Profiles
Forums
Gallery
Events
Blogs
BMT Wiki
Collections
Store
Everything posted by mattb73lt
-

B-73 Restoration
mattb73lt replied to mattb73lt's topic in Antique and Classic Mack Trucks General Discussion
The LED’s are so small now. I can easily hide them at the top of the rack in the screened area, front and back. I might mount some additional rear stops and turns on the back side. Nothing crazy and sort of unobtrusive. -
B-73 Restoration
mattb73lt replied to mattb73lt's topic in Antique and Classic Mack Trucks General Discussion
Thanks. But it'll be a while before I get tired of driving this one, then we'd have to duke it out before I give it up(LOL)!! -
B-73 Restoration
mattb73lt replied to mattb73lt's topic in Antique and Classic Mack Trucks General Discussion
I'm going to add some work lights to it for the deck and some underneath the body for backing up. I'll probably add some LED warning lights at some point, too. The winch mounts into the deck, up front below the head board, like most roll backs. -
B-73 Restoration
mattb73lt replied to mattb73lt's topic in Antique and Classic Mack Trucks General Discussion
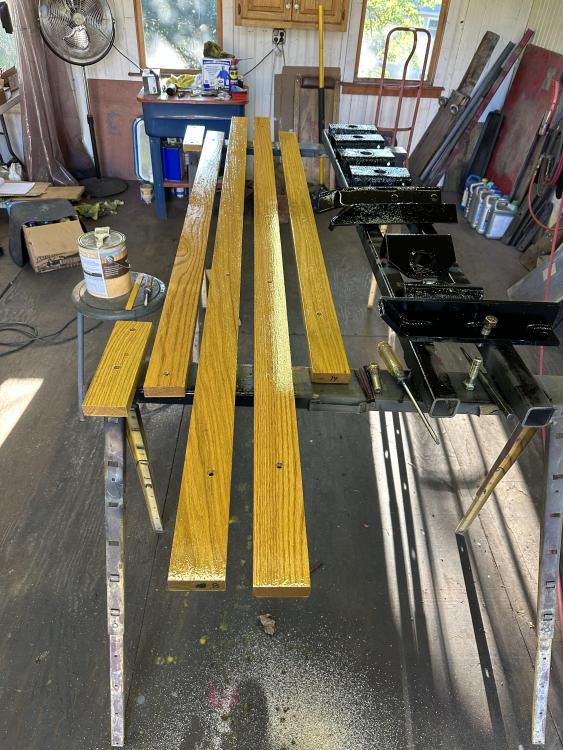
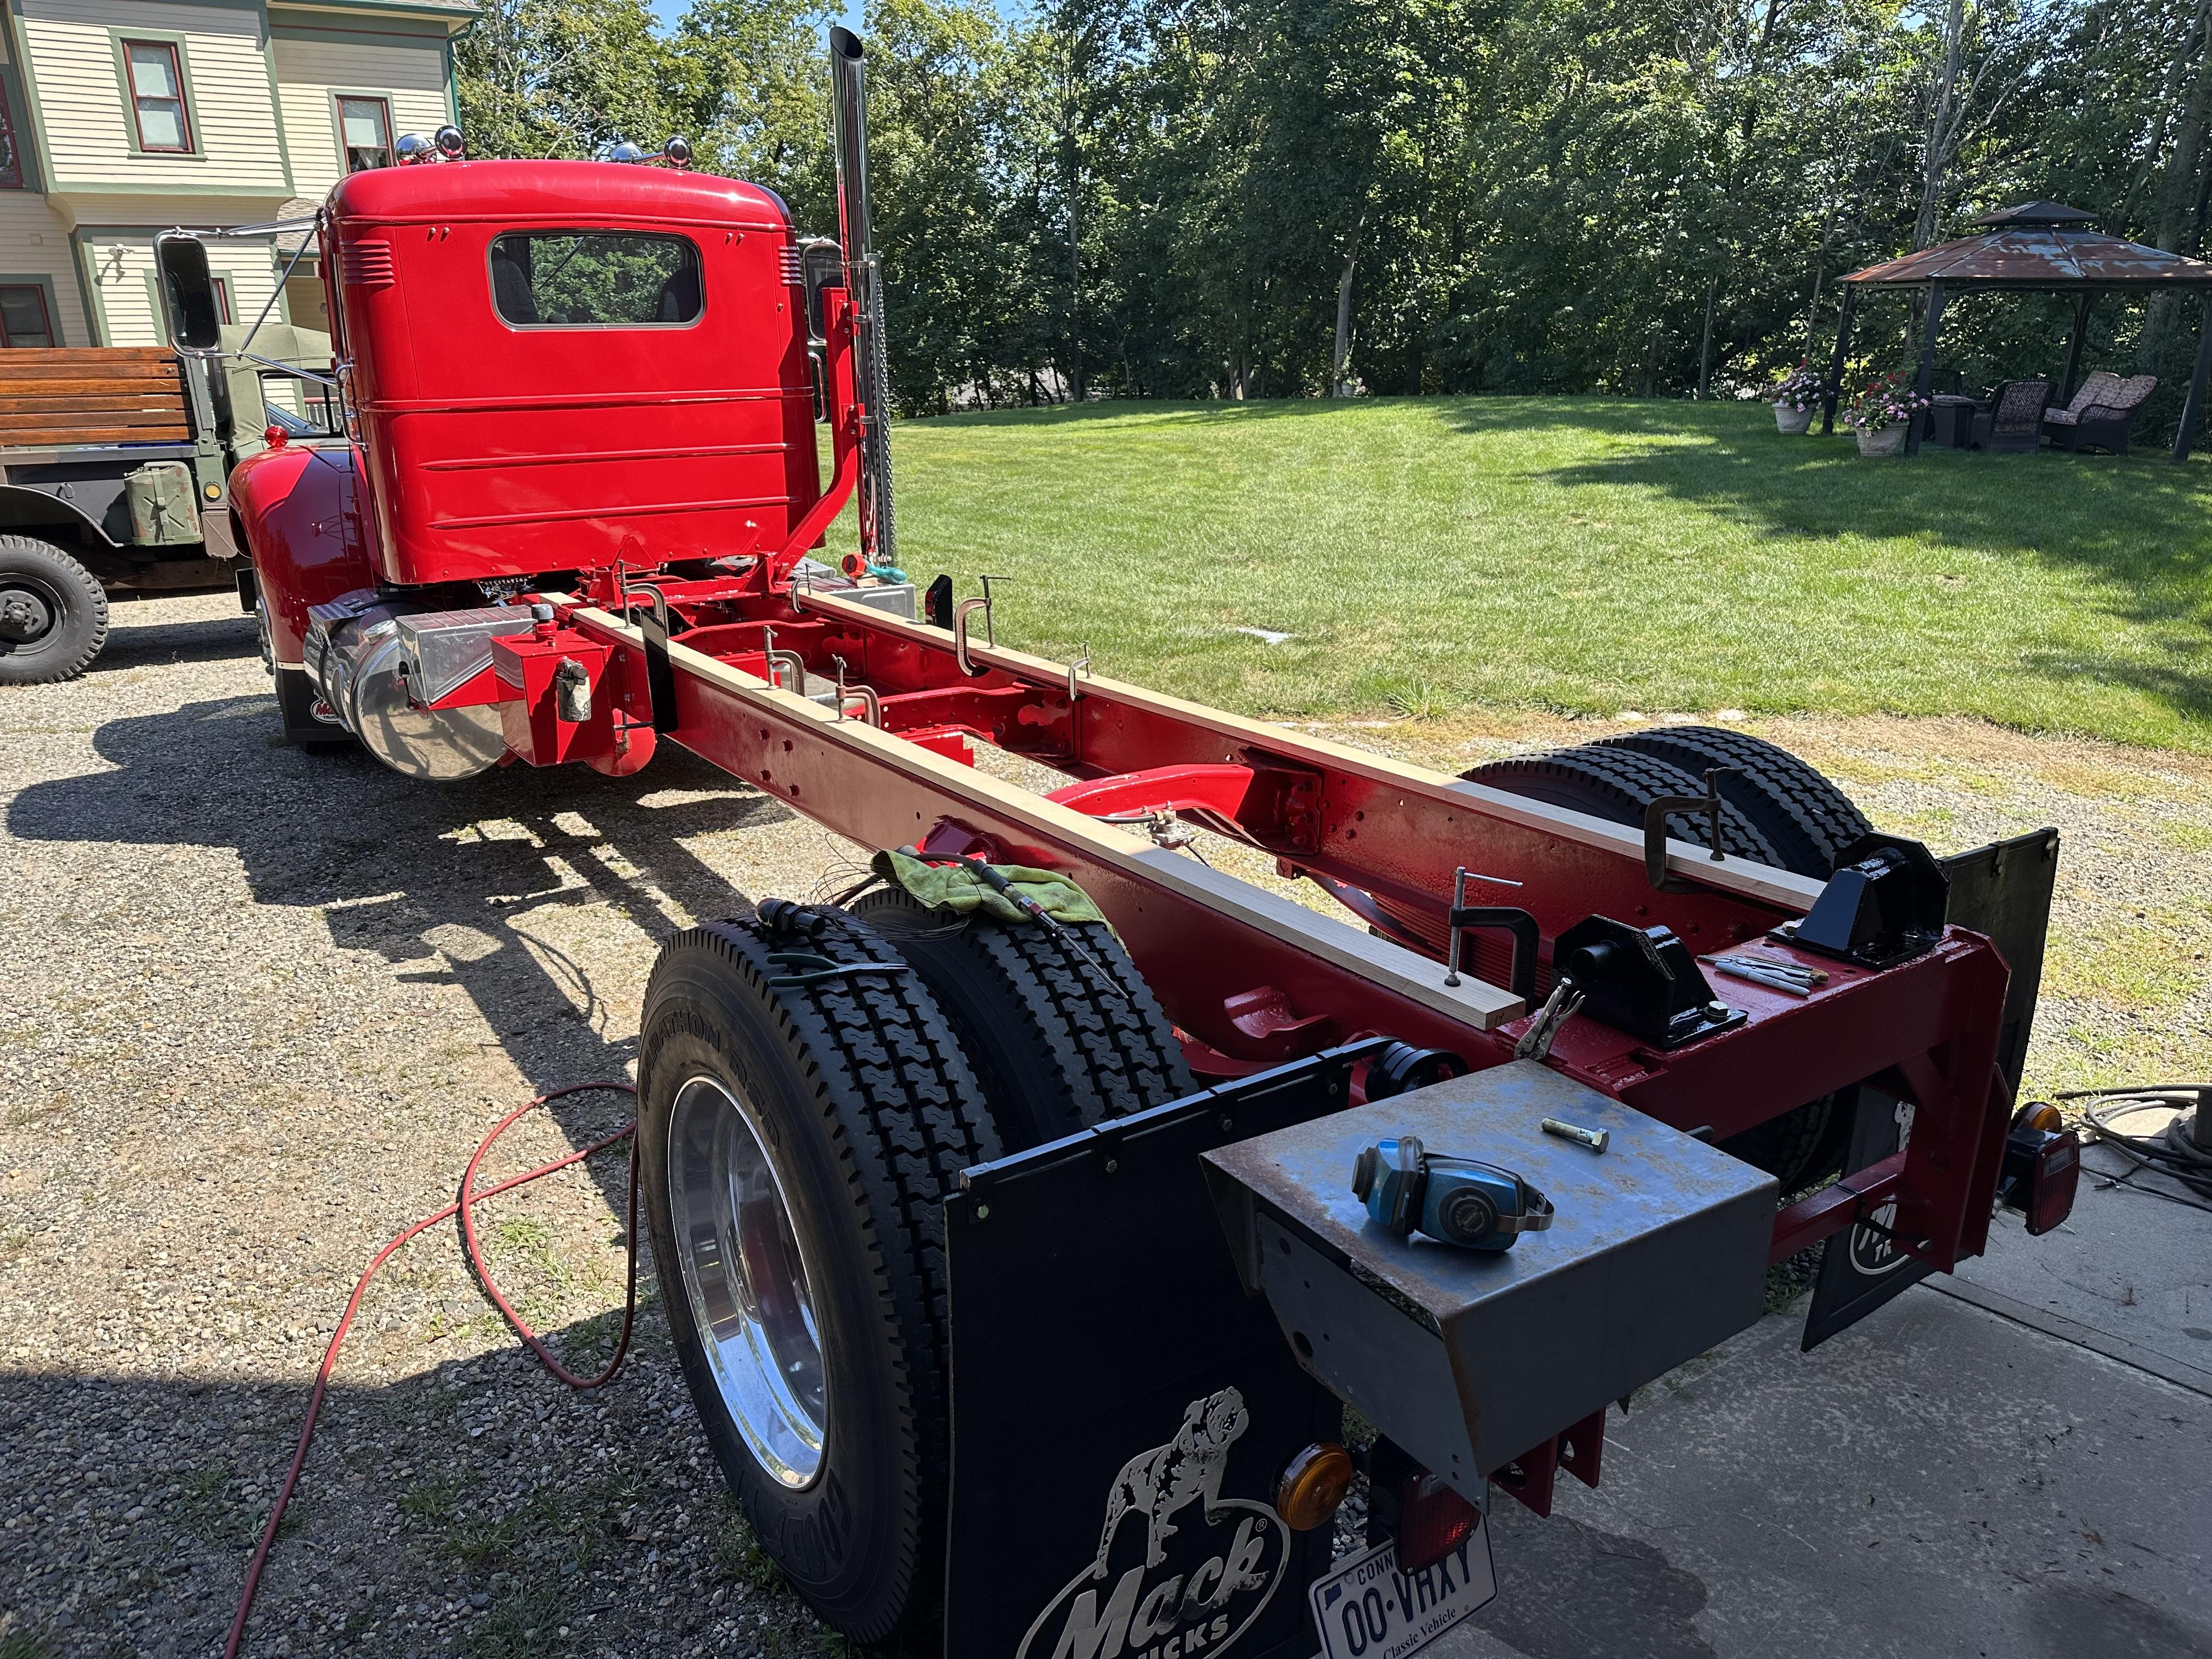
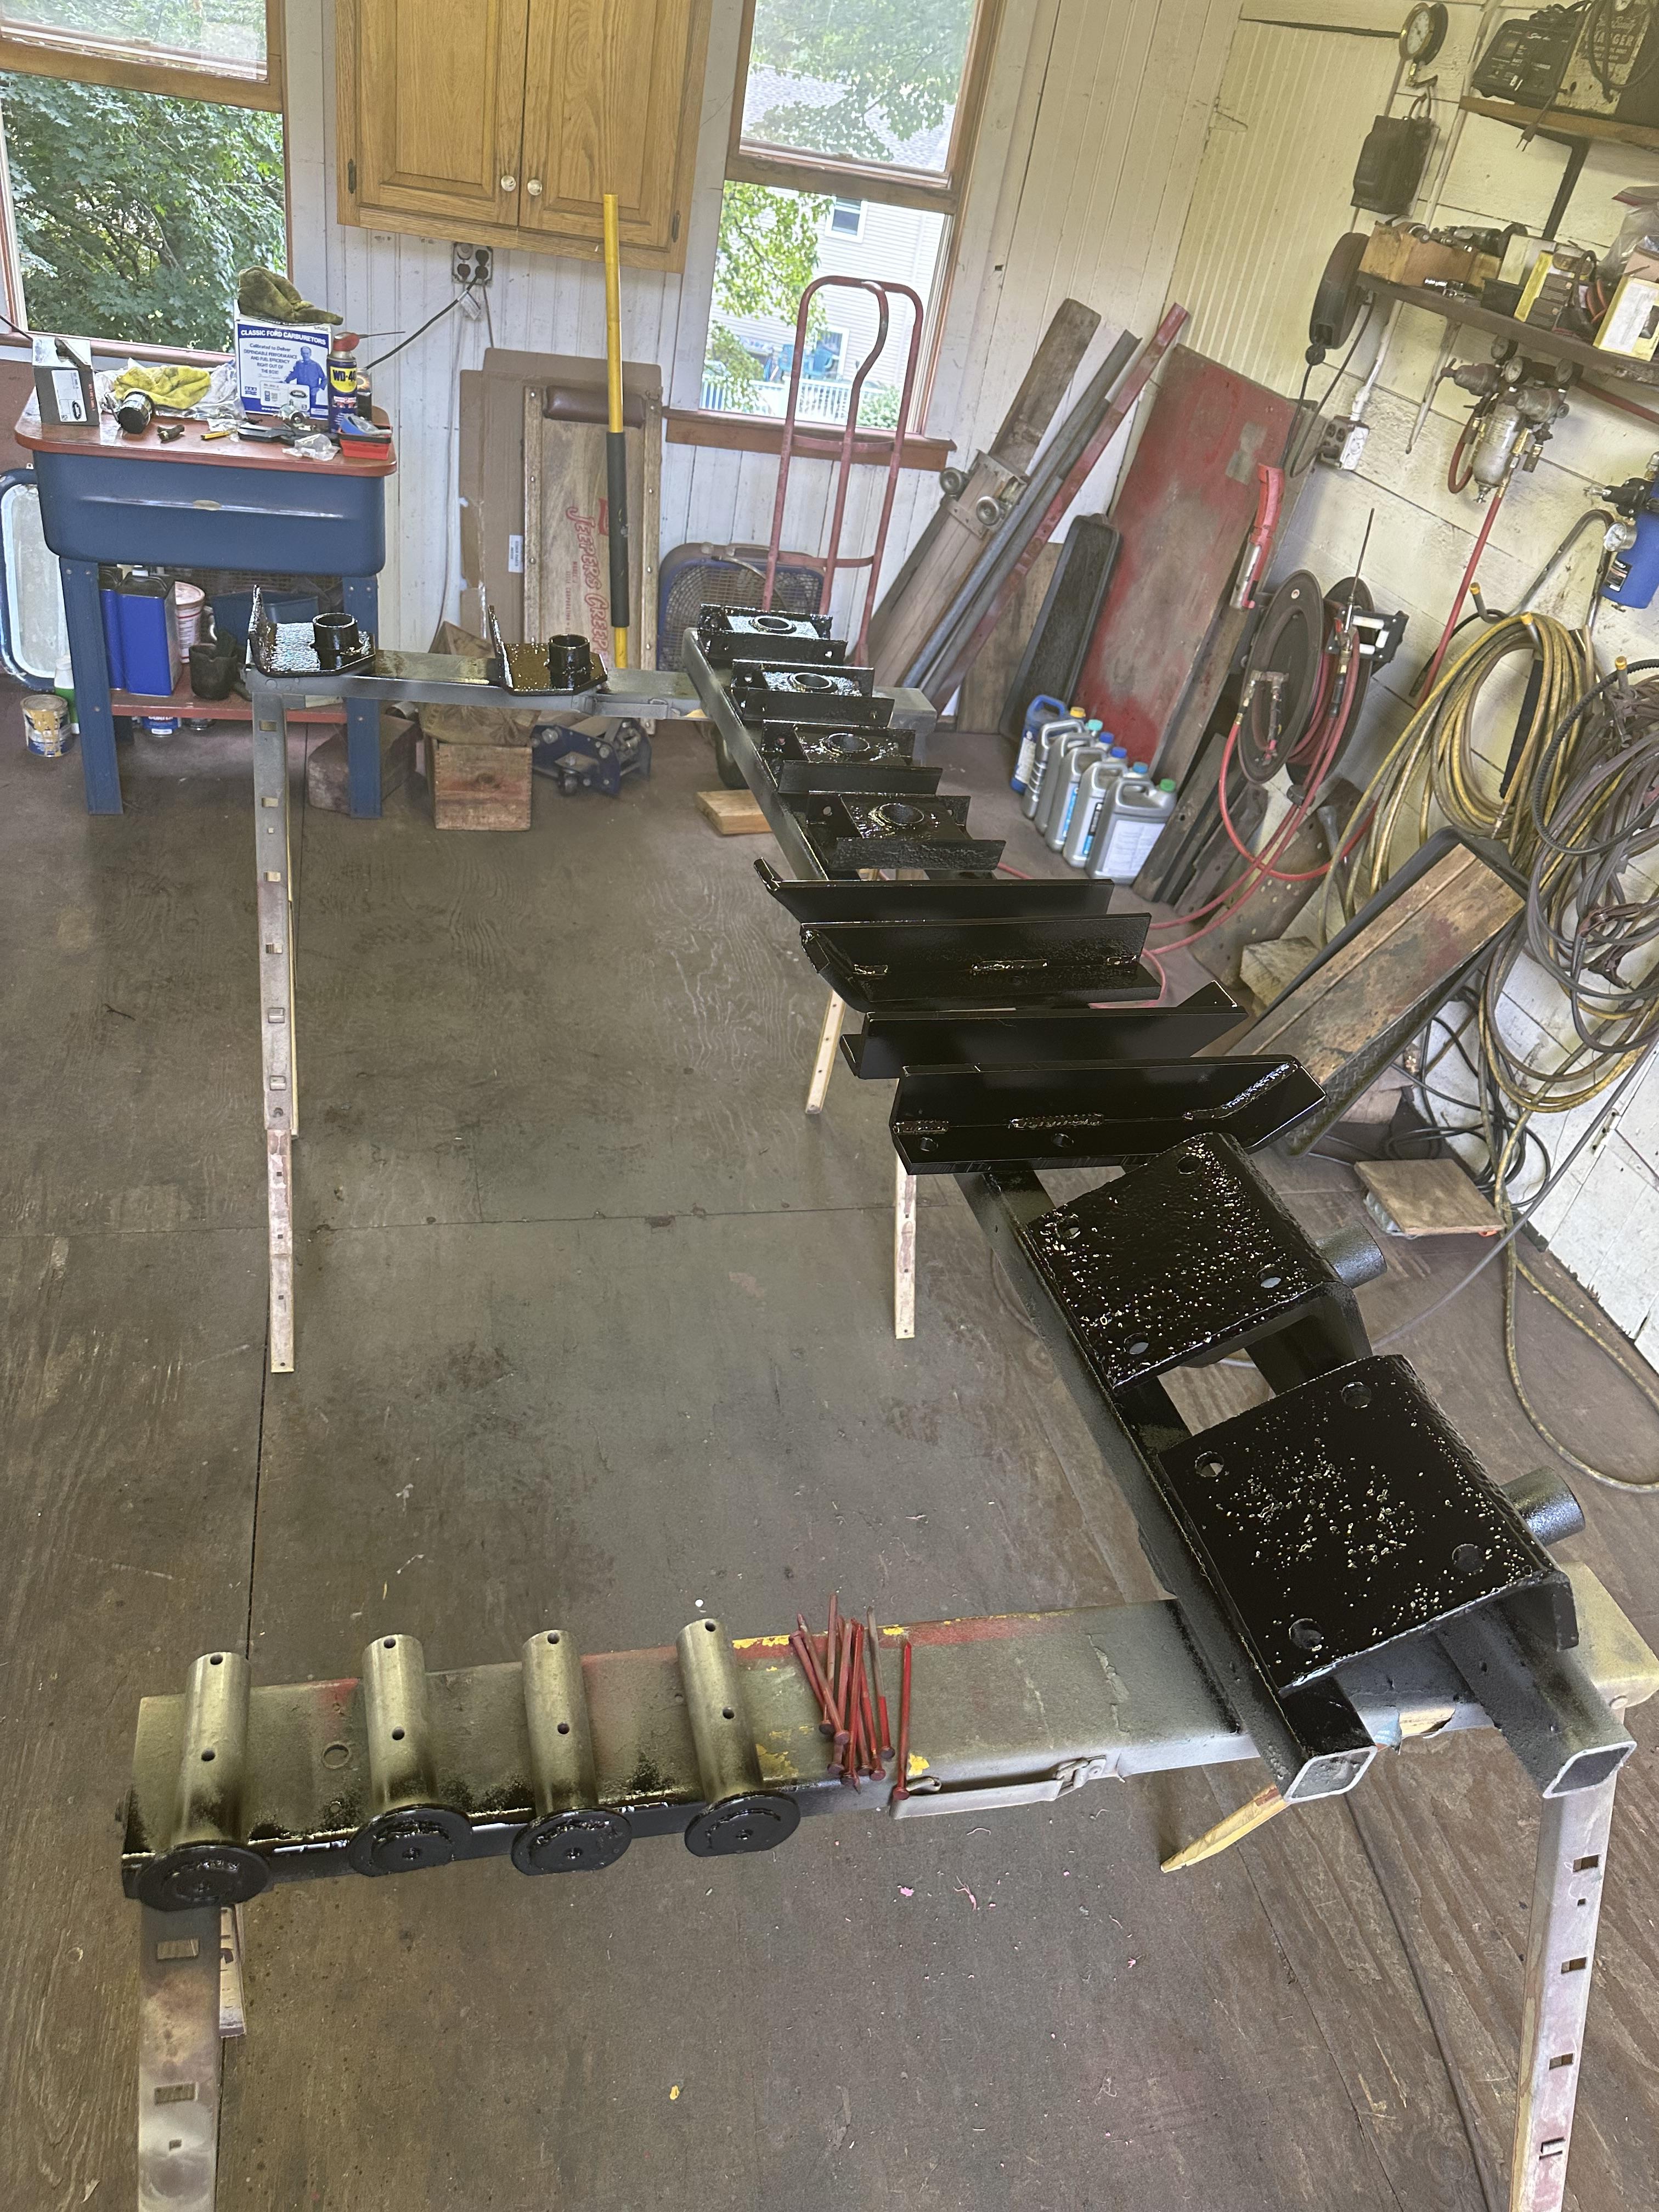
Utilizing my amateur woodworking skills today. Ripped down the oak for the frame rail strips. Drilled and countersunk all the holes for mounting and now treating the wood with preservative. I’ll give them a few coats before I mount them. Ordered up some parts from Jerr-Dan for the sliding pads and some hydraulic line protector for the winch lines. Mocked up a NOS control box I found to replace the crusty one where the valve body mounts. Ordered more hardware to attach all the bed bed mounts and guides. All the new hydraulic lines should be back next week. And…. Busy day getting a lot of things ready for the bed. Thinking I might make Gerhart’s this year(maybe)!!


-
B-73 Restoration
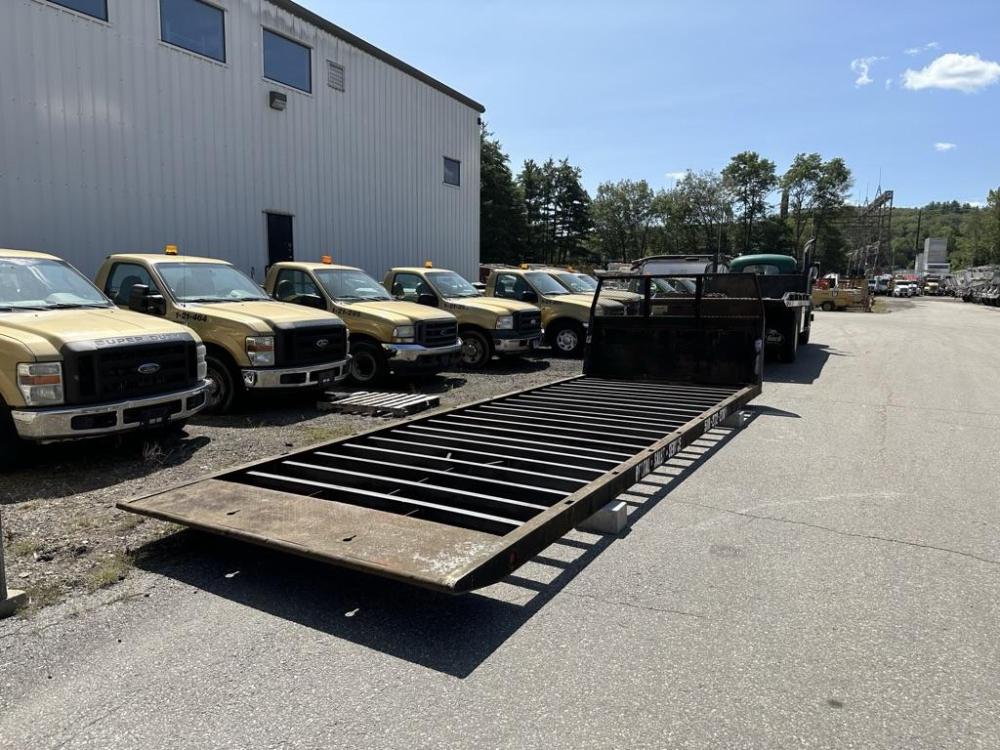
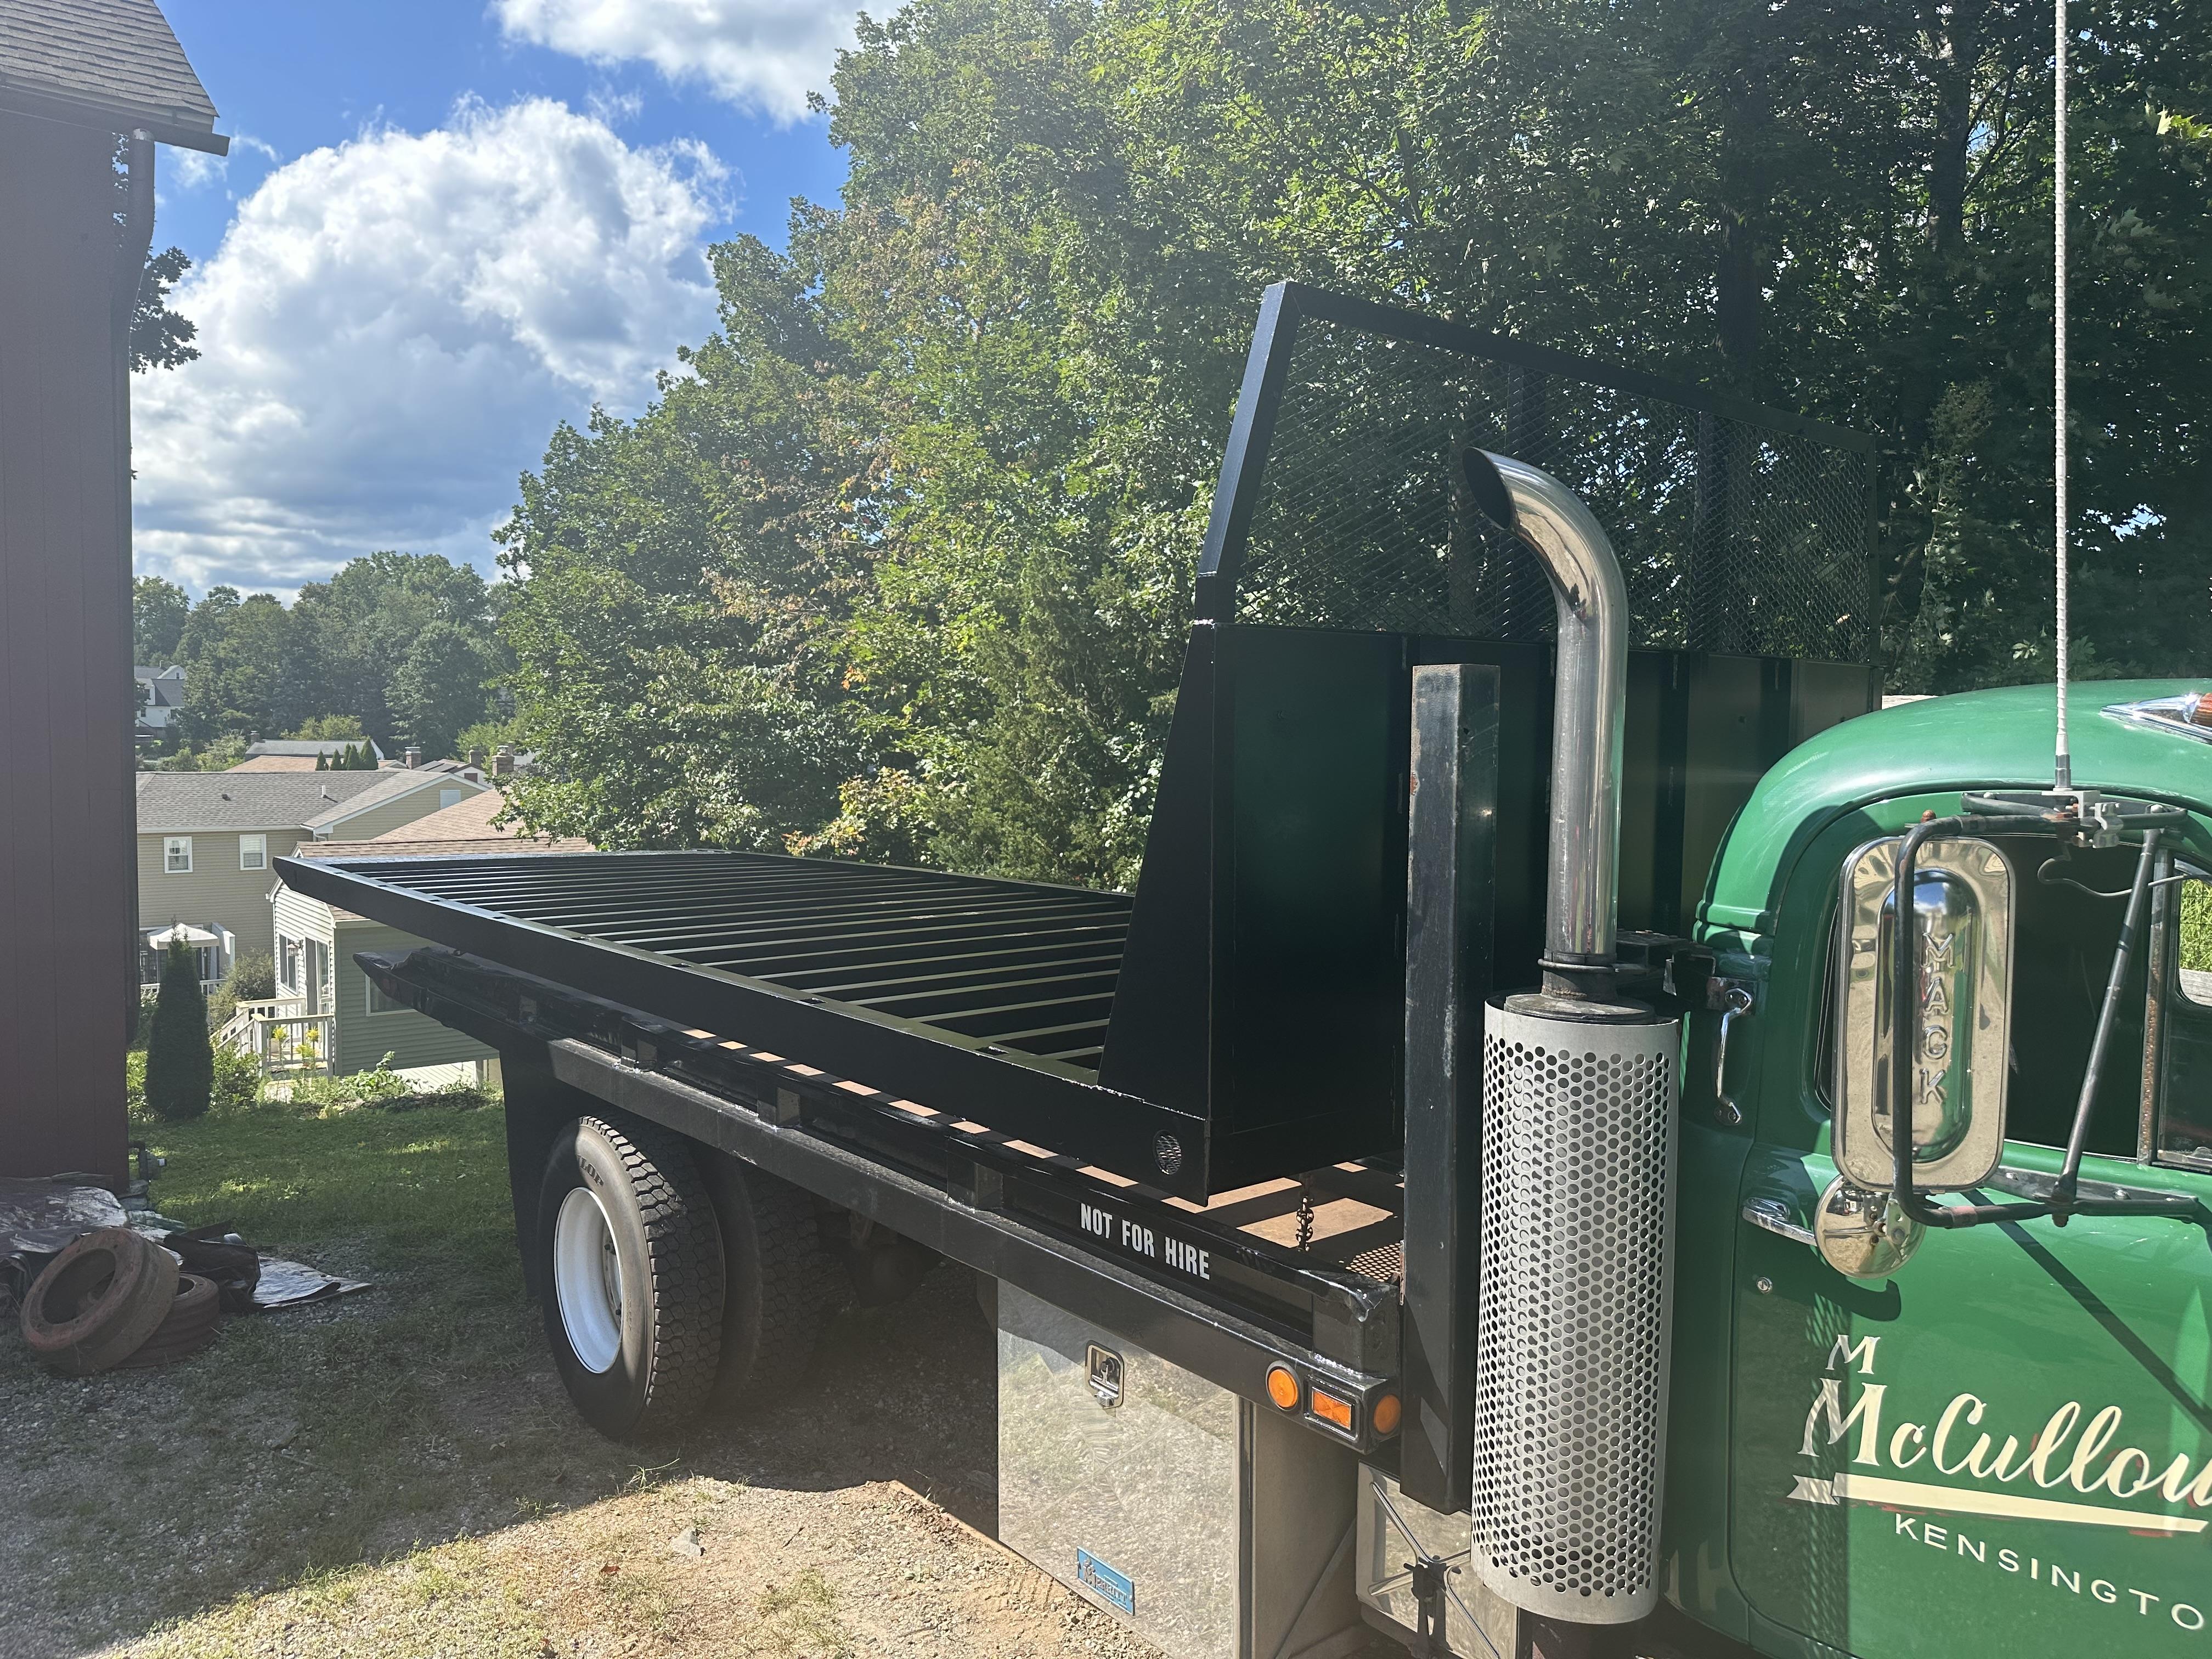
mattb73lt replied to mattb73lt's topic in Antique and Classic Mack Trucks General Discussion
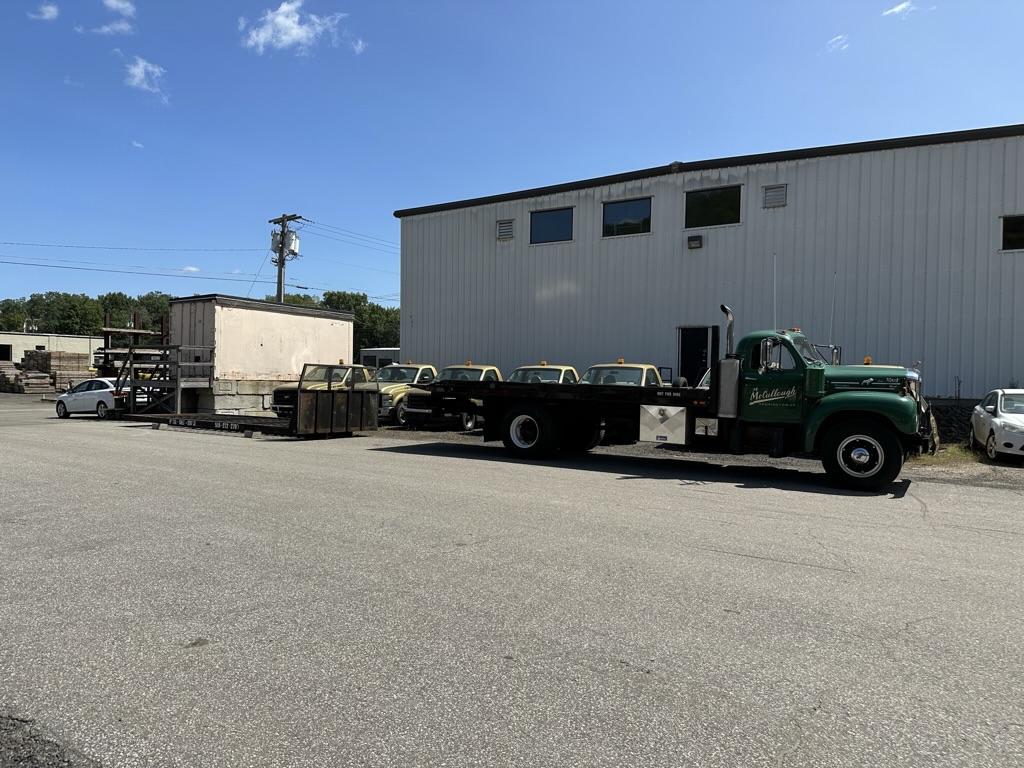
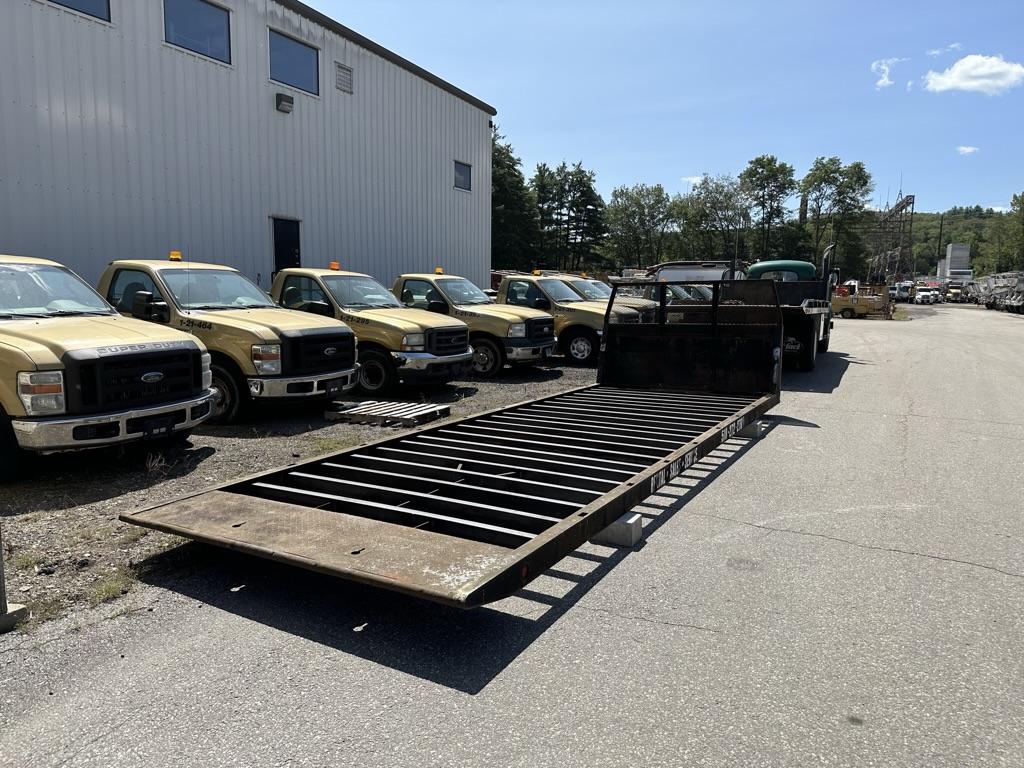
Well, that was fast. Thought deck would be done towards the end of next week from what I was told when I set this up. Got a call this morning that it was done and ready for pickup. Jumped through my ass and got the B42 up to Torrington by 11:00, loaded and headed back to the house by 12:00. Glad I shopped this out. I don’t think I could’ve done it cheaper by myself, plus the mess of sandblasting. They guy I dealt with said it took 6 gallons of paint to cover it. It’s done now I’ve got to hustle it up and get it mounted. Painted all the mounts and guides for the frame, today. I have the oak for the frame top, where the bed slides and rests on. All my hydraulic hoses should be headed out to be fabricated tomorrow or Friday. Lots to do and source, but it’s coming together pretty quick at the moment.

-
Coca Cola LJ Mack colors
mattb73lt replied to 1961H67's topic in Antique and Classic Mack Trucks General Discussion
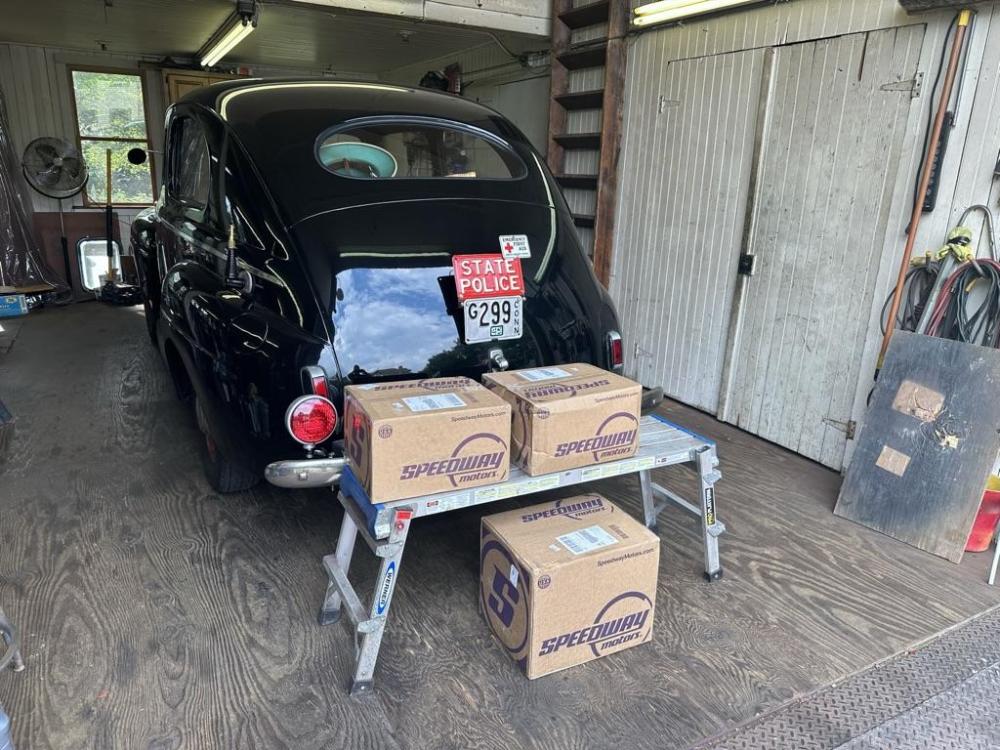
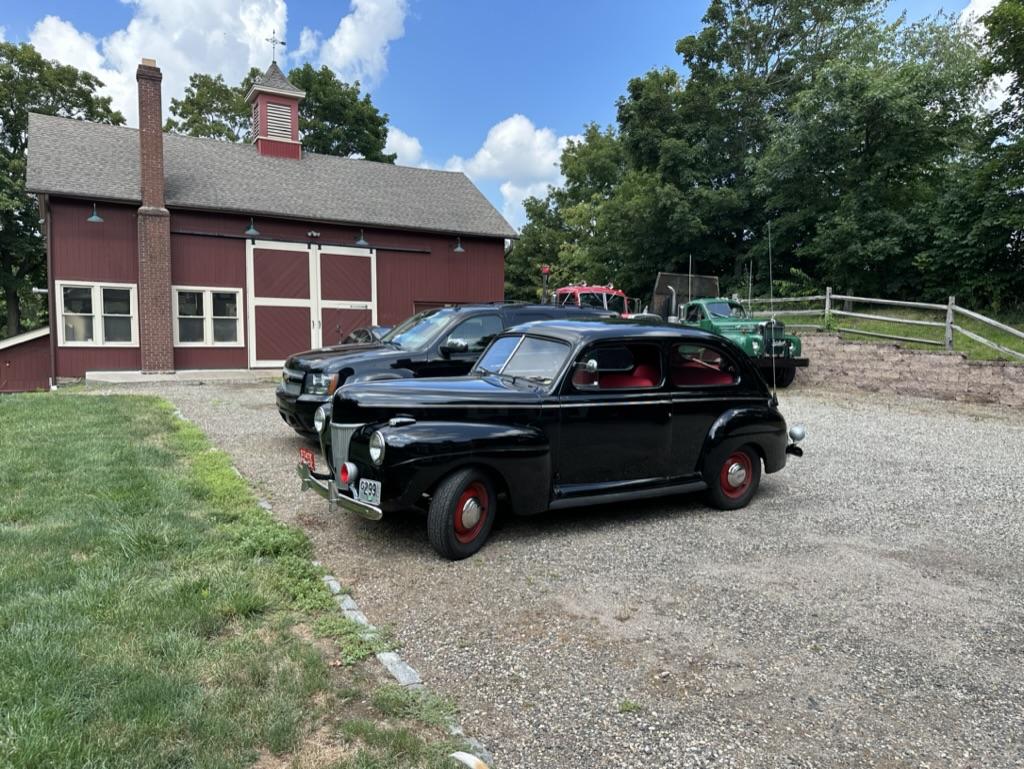
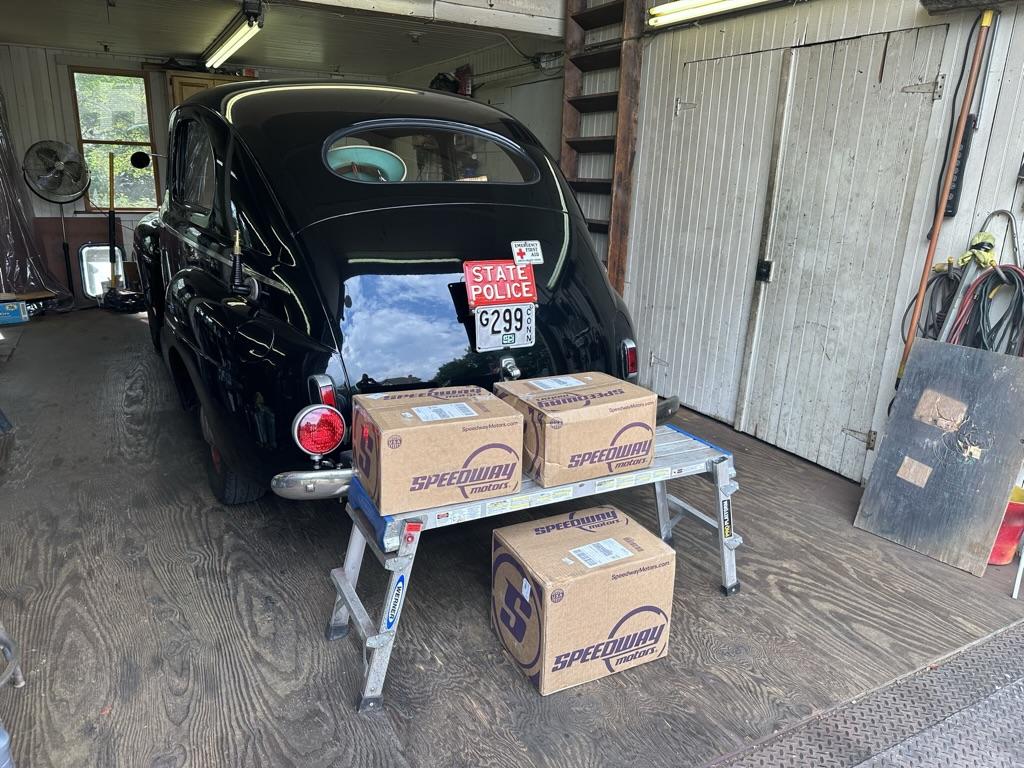
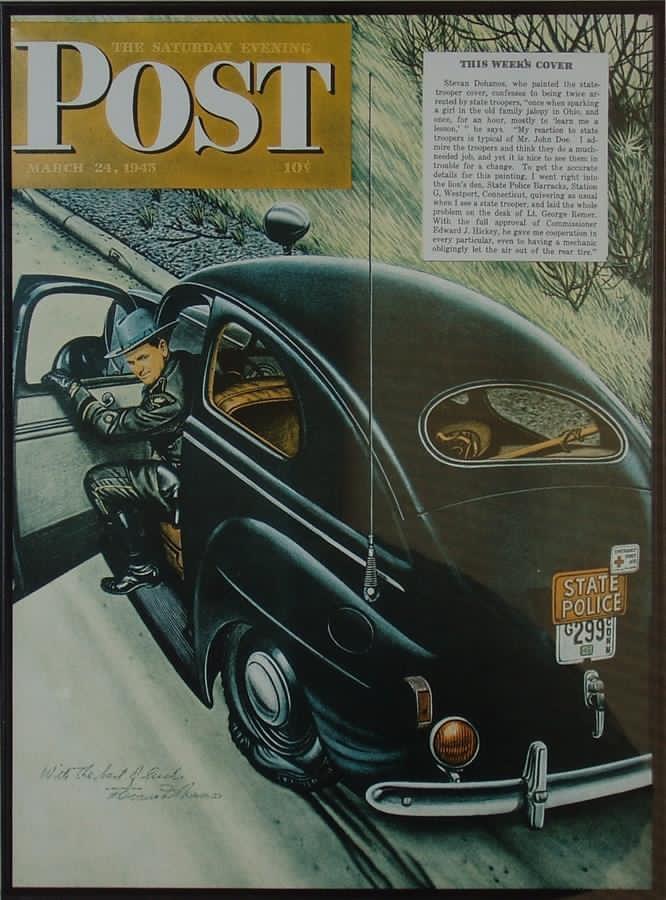
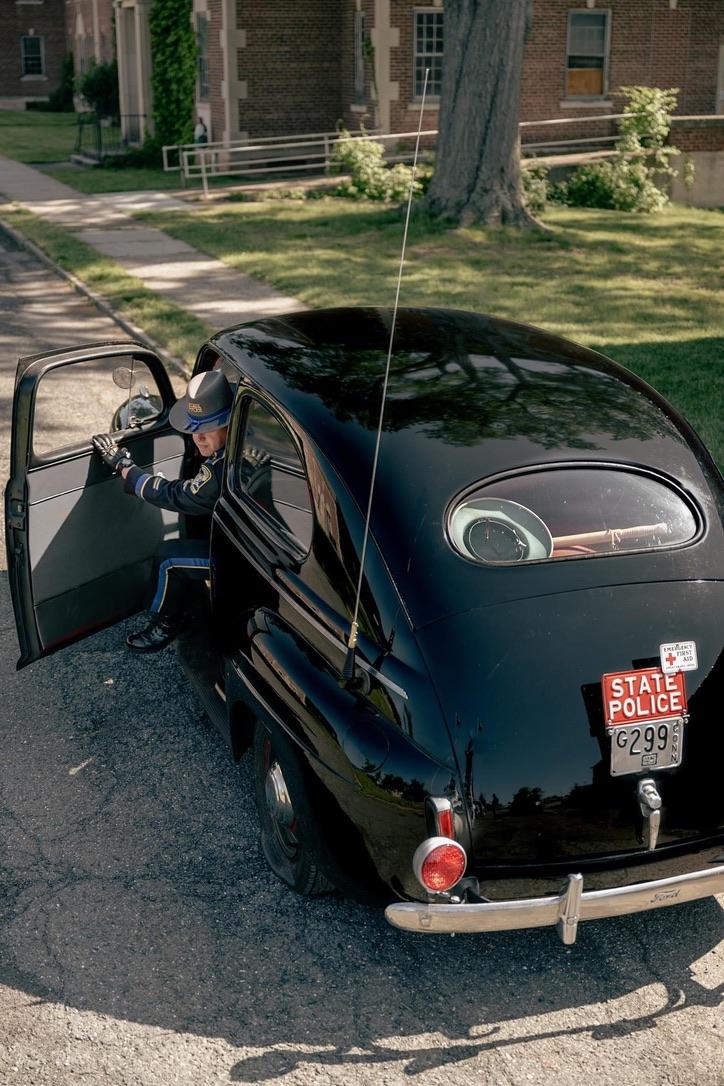
This is the Saturday Evening Post cover from 1943 that this car replicates and a recent photo the department did as a tribute.


-
B-73 Restoration
mattb73lt replied to mattb73lt's topic in Antique and Classic Mack Trucks General Discussion
Again Dean, my condolences. Very tough to lose a friend of that long. Sounds like he was very talented and that's an amazing truck he built. Enjoy those close to you and what you have. -
B-73 Restoration
mattb73lt replied to mattb73lt's topic in Antique and Classic Mack Trucks General Discussion
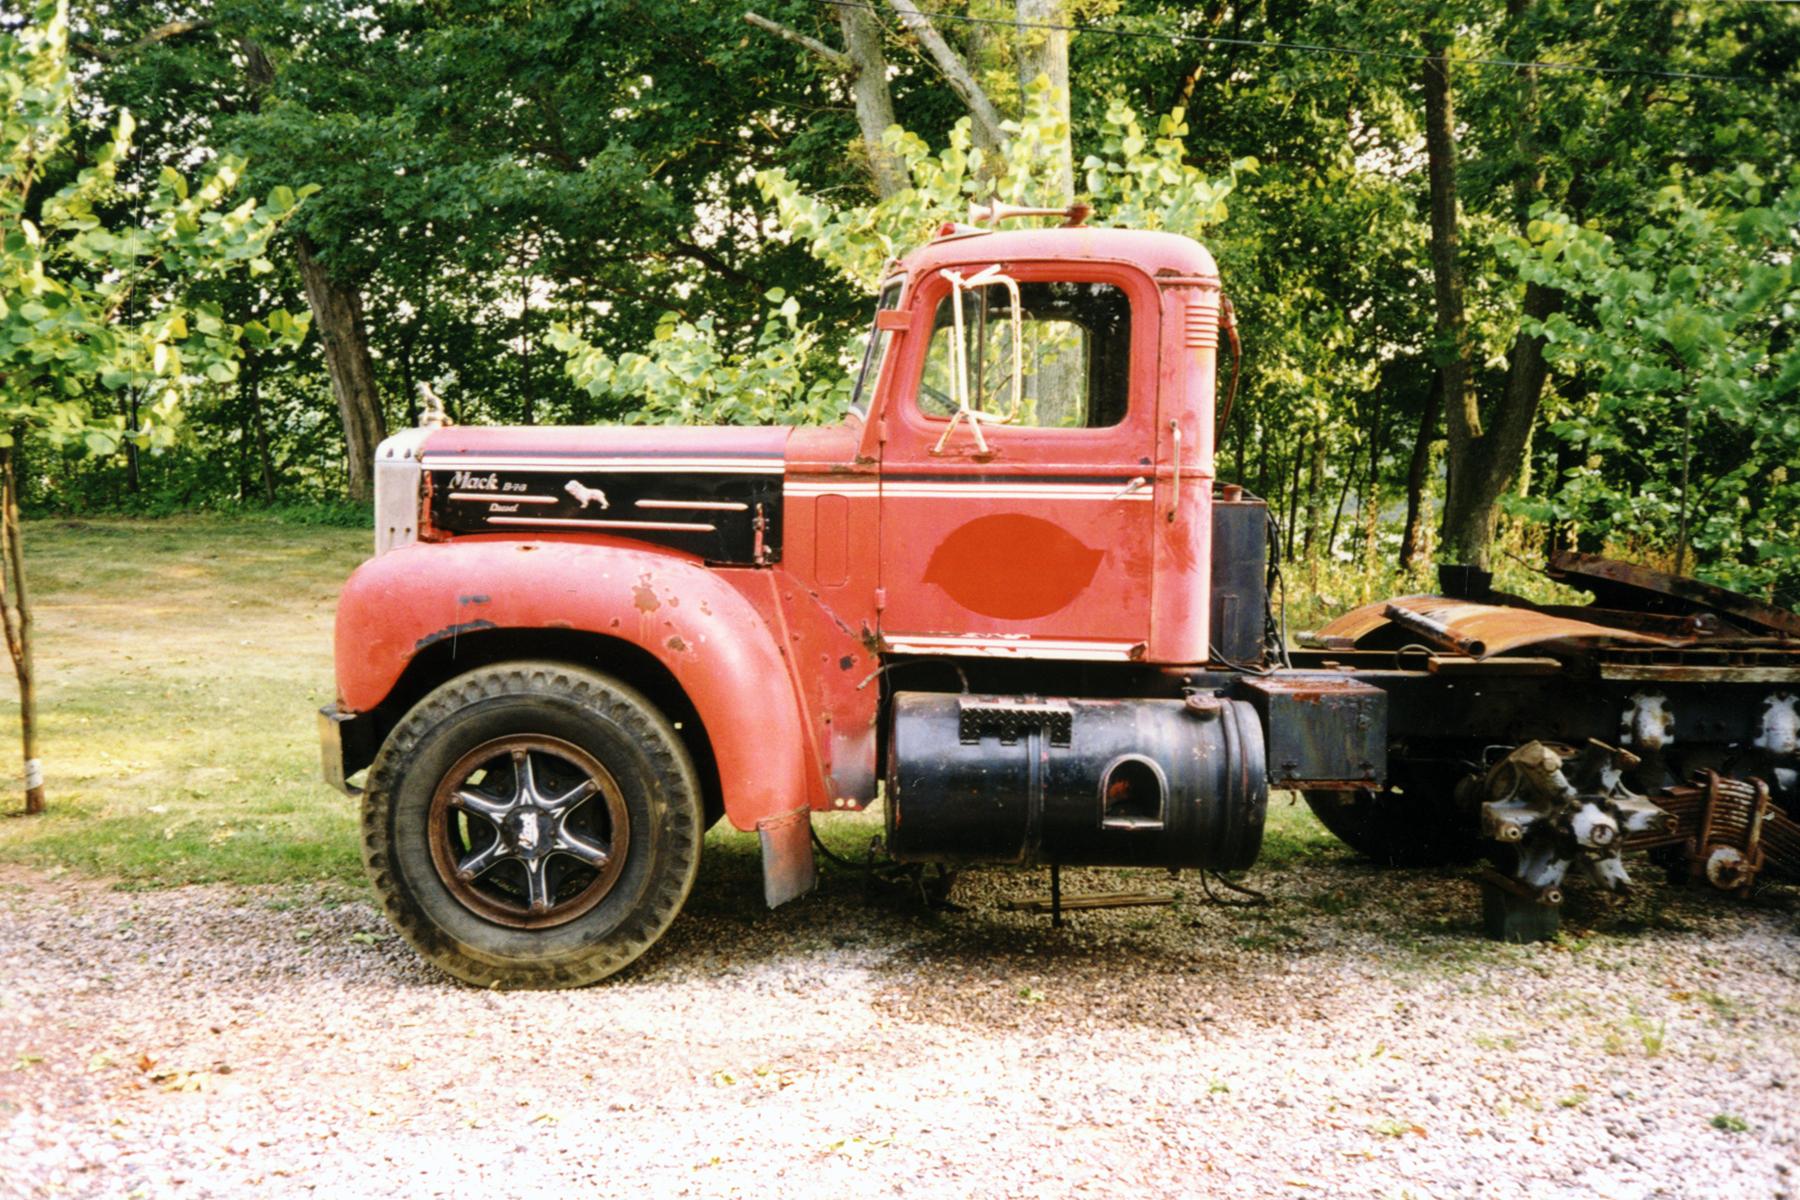
It is real close, it was a very short wheelbase. I have some pictures of the back, but I’ve never digitized them.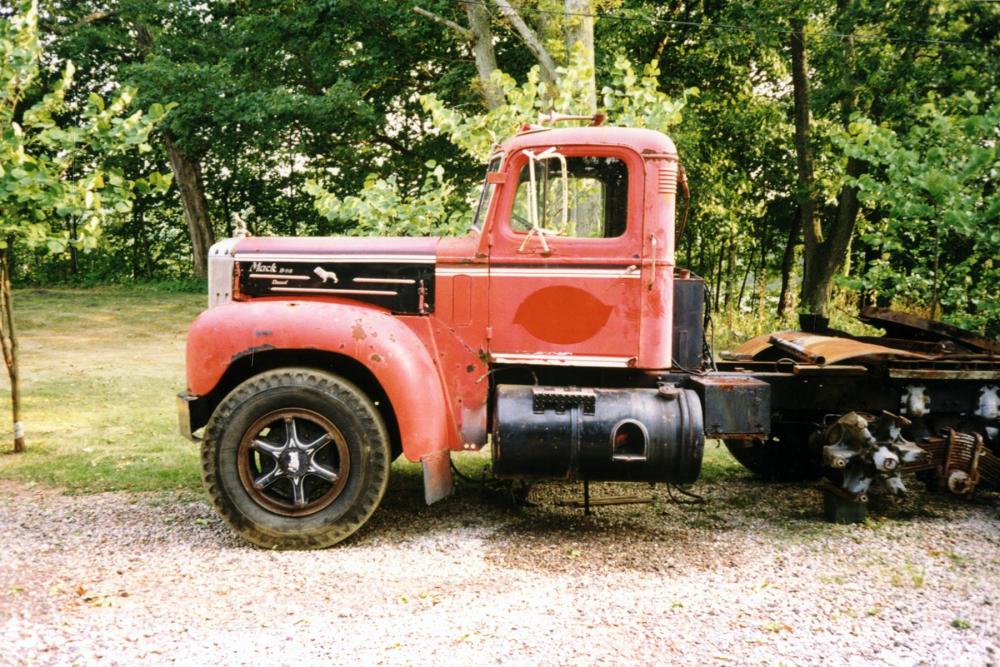
-
B-73 Restoration
mattb73lt replied to mattb73lt's topic in Antique and Classic Mack Trucks General Discussion
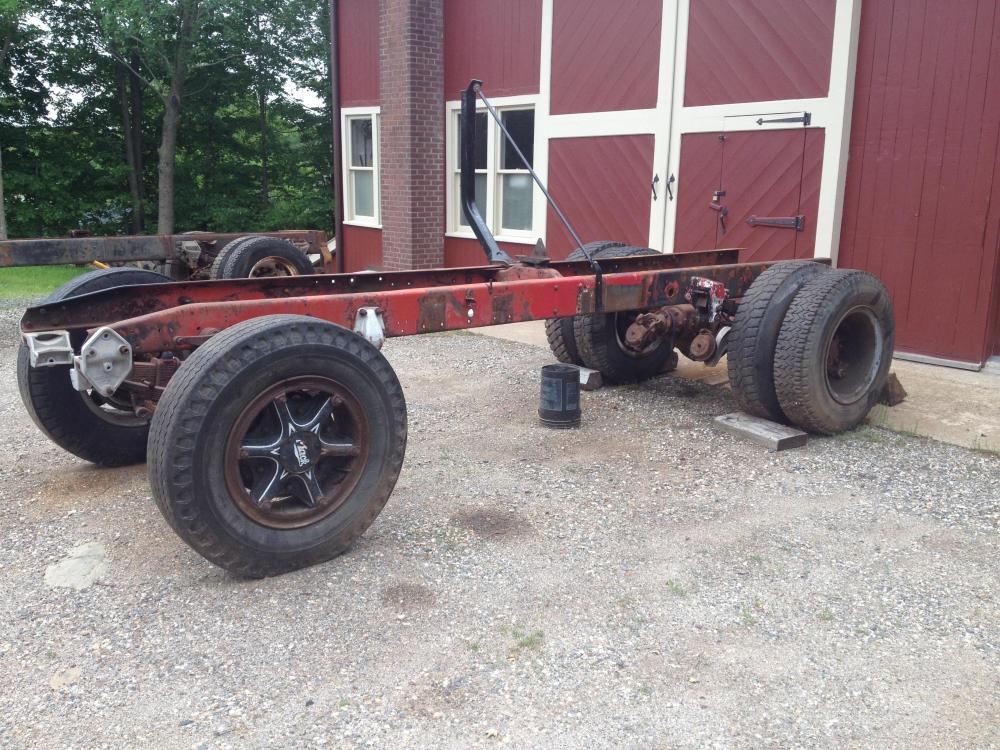
It had the shortest factory wheel base, fixed fifth wheel. The person I bought it from put a tandem setup in it and added 8” to the frame for the air tank. -
B-73 Restoration
mattb73lt replied to mattb73lt's topic in Antique and Classic Mack Trucks General Discussion
So pissed I missed this show, it's one of my favorites. One of the few where it's almost equal distance for my brother and I to meet up, like Brooklyn. I wish it moved back to the Fall, it's a lot easier for me to attend. This weekend is flat out for work, every year. -
R model battery box lid
mattb73lt replied to hicrop10's topic in Antique and Classic Mack Trucks General Discussion
Steel or aluminum? Are they not still available from Mack. I bought two aluminum ones complete from Mack around 2005. But that was a while ago. And the was definitely Doug Fetterly. I have his number if you can't find it? -
B-73 Restoration
mattb73lt replied to mattb73lt's topic in Antique and Classic Mack Trucks General Discussion
No, I have to work Saturday and Sunday, now. Big weekend at work. -
B-73 Restoration
mattb73lt replied to mattb73lt's topic in Antique and Classic Mack Trucks General Discussion
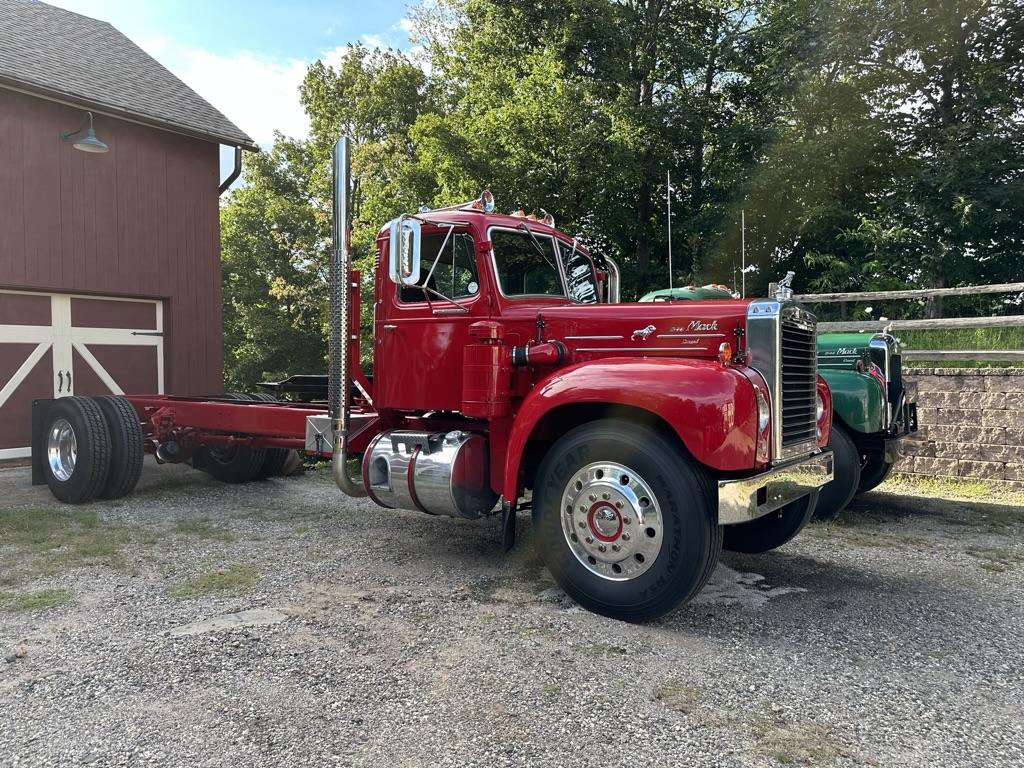
Picked up the deck this morning and dropped it at O&G in Torrington for blasting and paint. The manager actually set me up with another party they do business with and had a much better price for the work. Should have it back in about a week or so. Then went to Atlantic Trailer and ordered the wood, 17-16'X7" boards should cover the deck. 860 fasteners, six drill bits/counter sinks/drive bits, also ordered to install it. I'll head back over in the morning to pick everything up with the B42. It had a big work out today running stuff around. Interesting how different the two trucks are. The B42, smooth, quiet, easy shifting. The B73, harsh, loud and rough. A lot of the roughness will go away with the body mounted, the harshness will go away as things wear in. And while I love the loud bark of the Cummins and Jake, it'll get a decent muffler in the future. Another day of gathering things up and logistics.
-
"Bad" driver and the B Model
mattb73lt replied to D2Denny's topic in Antique and Classic Mack Trucks General Discussion
There’s a lot of those “safety “ films from that era. Always surprised me how long those films were in circulation, decades for a lot of them. That one brings back a lot of memories of patrolling the highways investigating and cleaning up those scenes. A lot of tragic things happen out there. Everyone I worked with had a very morbid sense of humor from dealing with it. Most of it never made me flinch, it was what it was and that was my job. There are many scenes though I’ll never forget. Trying to hold someone together until more help arrives. Doing CPR on someone I pulled from a wreck in a snow storm, while the family yells at me to save their husband/father. The roads are a dangerous uncaring place. -
B-73 Restoration
mattb73lt replied to mattb73lt's topic in Antique and Classic Mack Trucks General Discussion
Thank you for that, it's much appreciated!! -
B-73 Restoration
mattb73lt replied to mattb73lt's topic in Antique and Classic Mack Trucks General Discussion
I'm hoping it'll turn a few heads. It's the largest and most comprehensive restoration I've ever done. -
B-73 Restoration
mattb73lt replied to mattb73lt's topic in Antique and Classic Mack Trucks General Discussion
It's a 24' Jerr Dan roll back with a 10K winch. The deck is a wood inlay. I'm going to use Apitong, a red Brazilian hard wood, for the decking. It's used a lot for trailer flooring. I'm ordering it through Atlantic Trailer over in Cheshire. -
B-73 Restoration
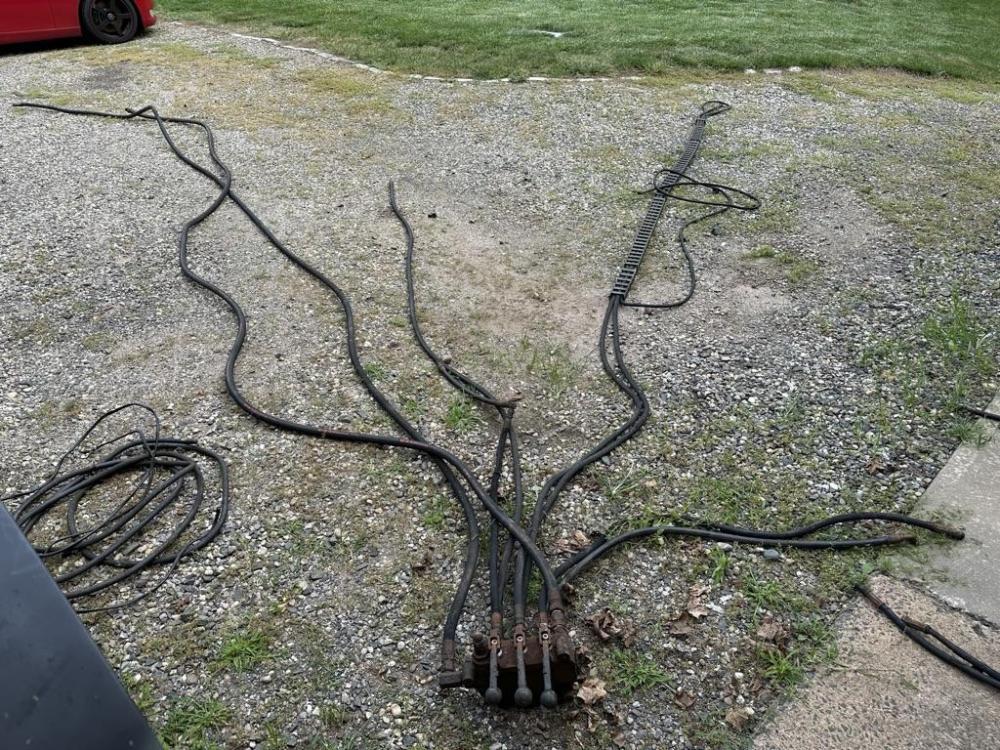
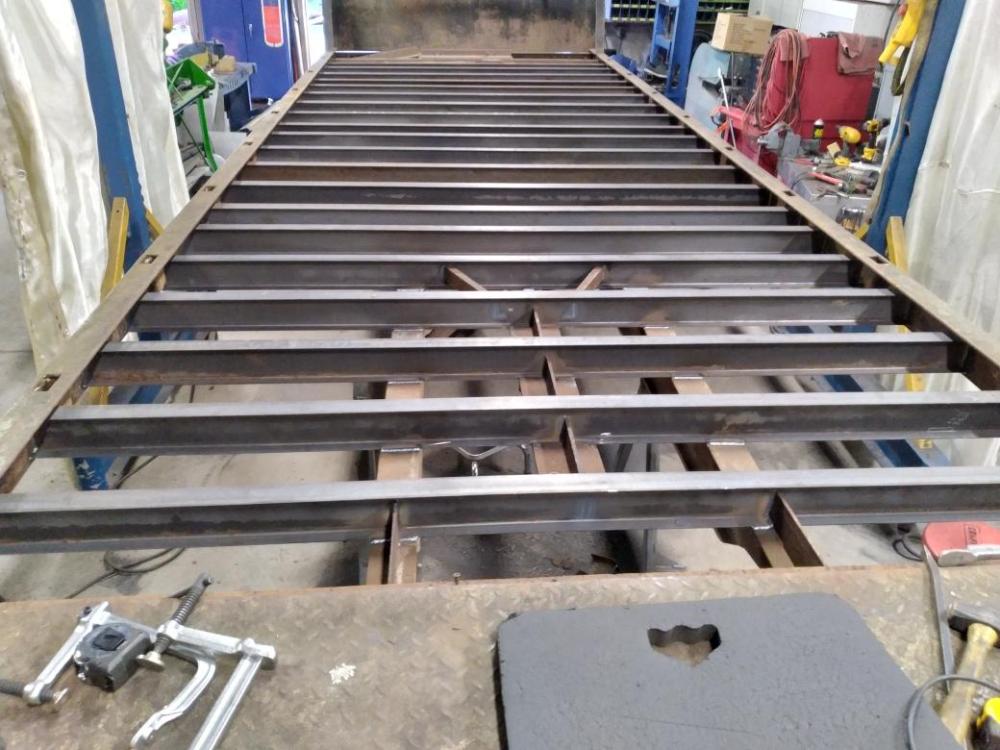
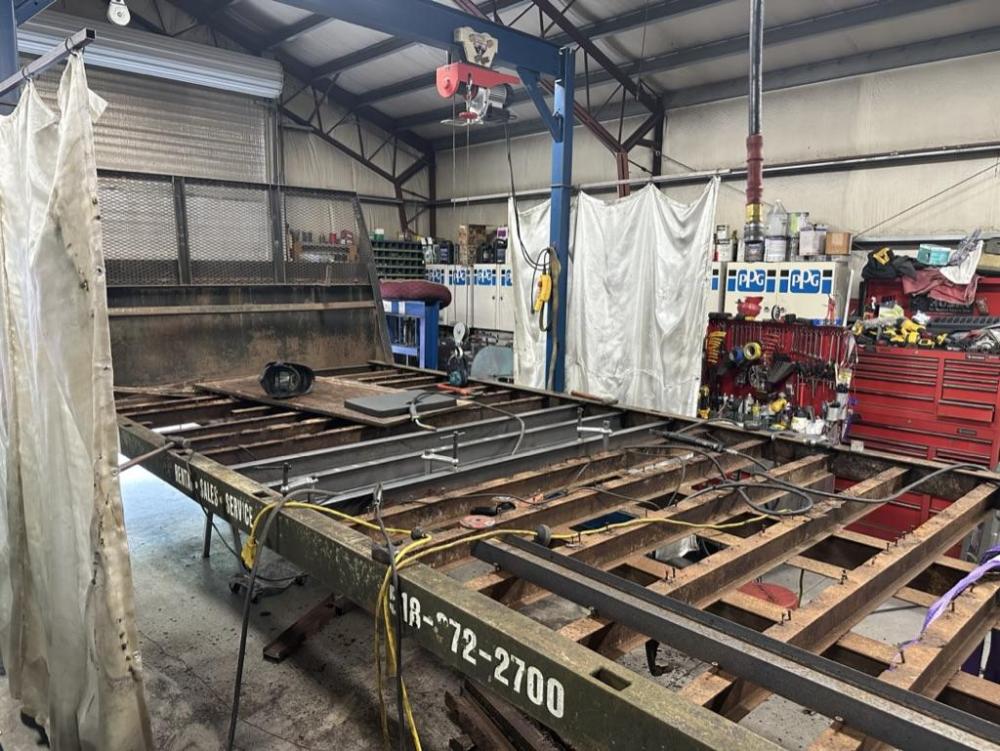
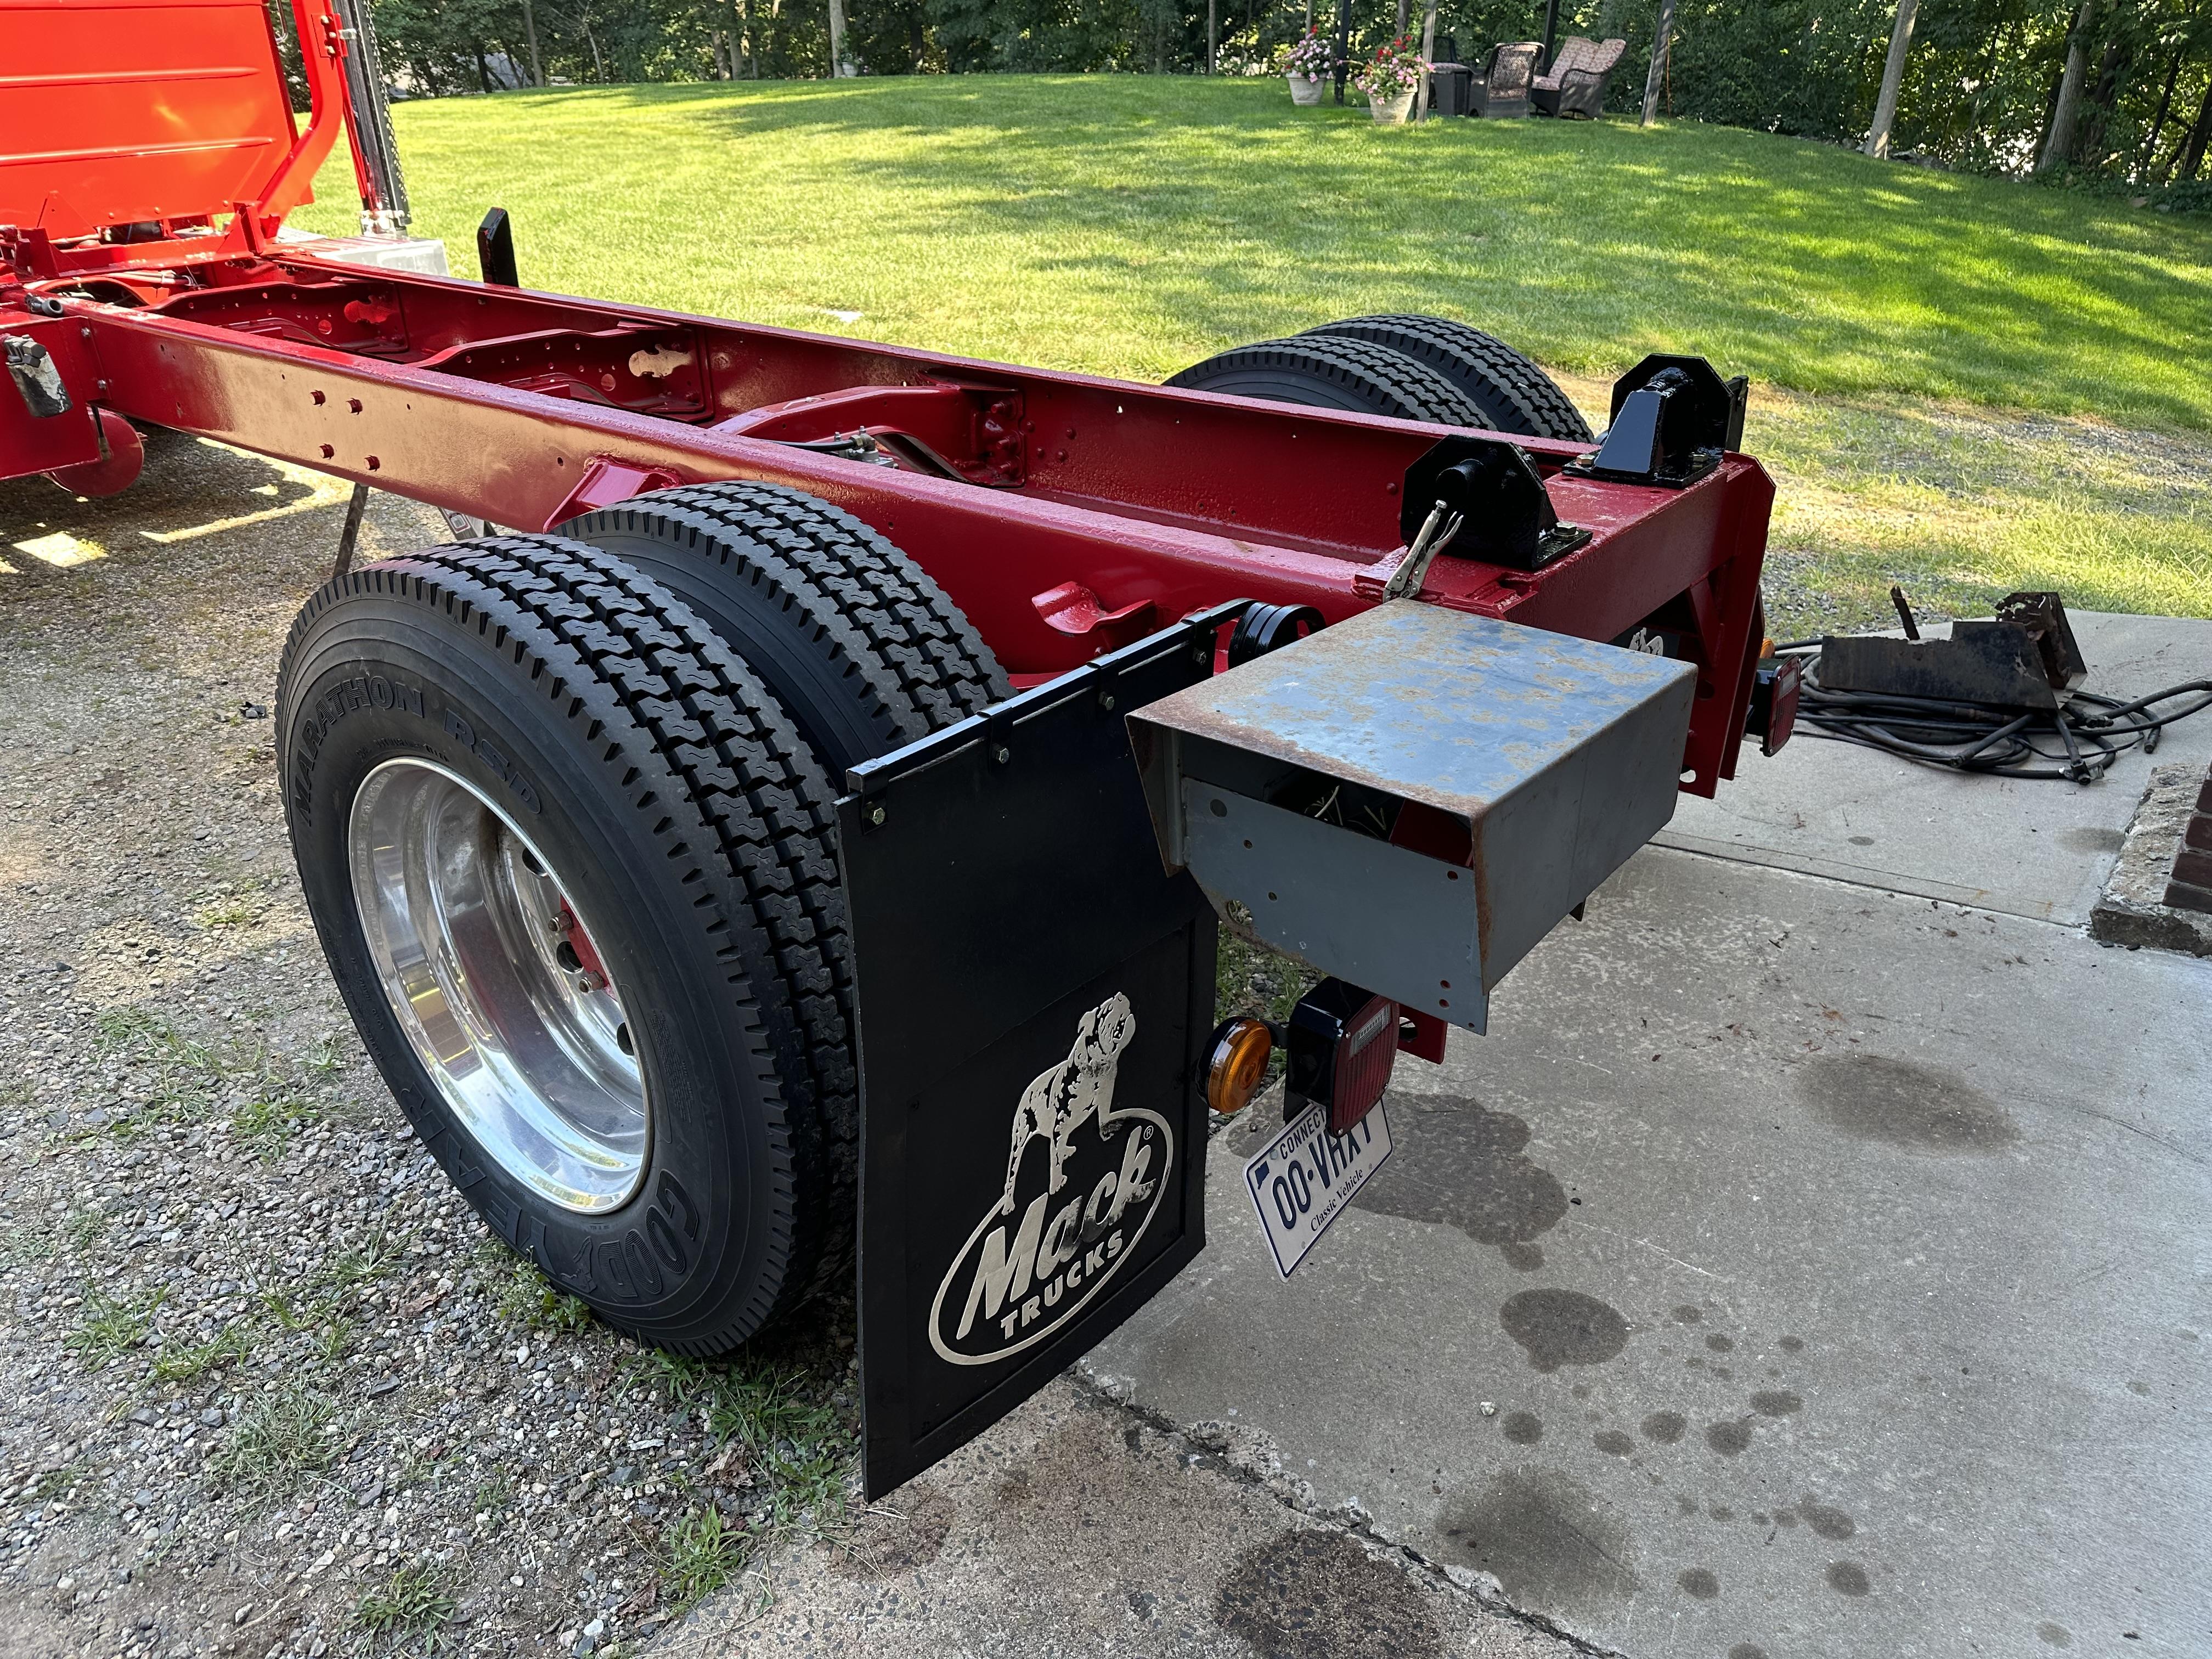
mattb73lt replied to mattb73lt's topic in Antique and Classic Mack Trucks General Discussion
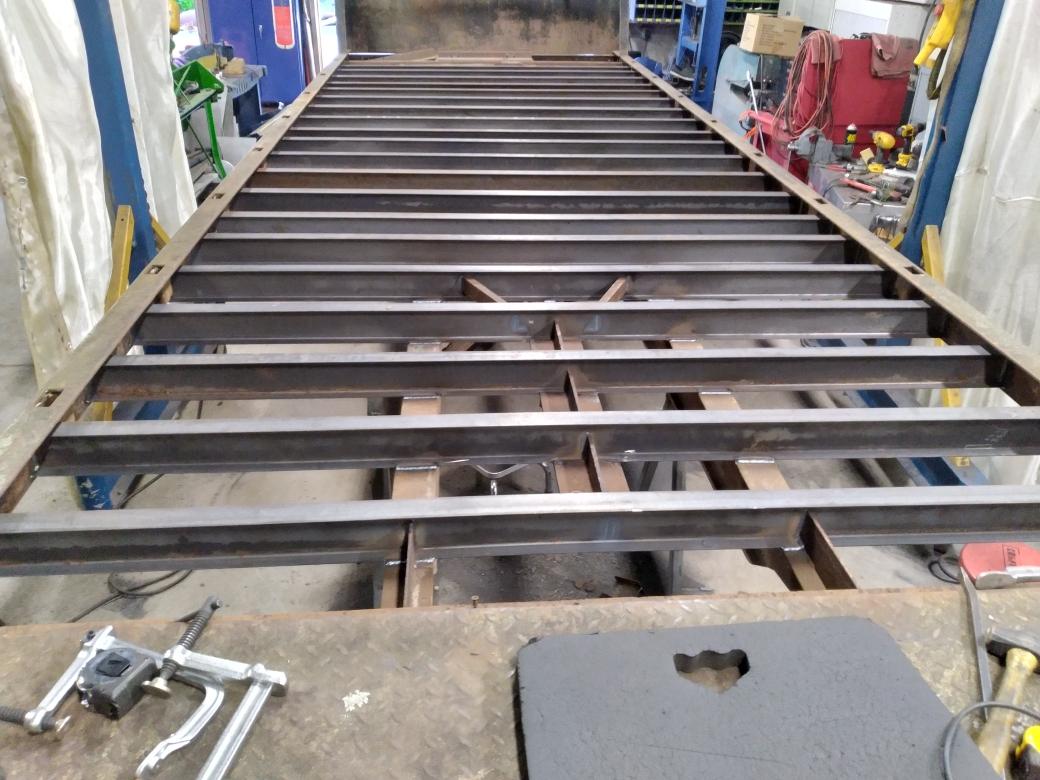
All kinds of stuff getting done. Friday, the B73 hit 500 engine miles and got it's first oil change. No issues since getting it running and it remains very dry on the top and bottom. The oil was still pretty clean and I still have to cut open the old filter just to see what's in there. All 20 new crossmembers have been installed and the head board work should be next. I dragged the hydraulic system out and was able to separate all the lines from the valve body. It'll need all new lines and a valve body as none of it is serviceable. A few lines need to be lengthened for the new installation. All the pistons are ready for installation as are the lifting frames, everything needs paint before assembly. I need to source some wood strips for the top of the frame rails that the body slides on. I'm hoping to get the bed back this week for it's trip to be blasted and painted, that won't be cheap. I'm also going to order the deck wood this week, too.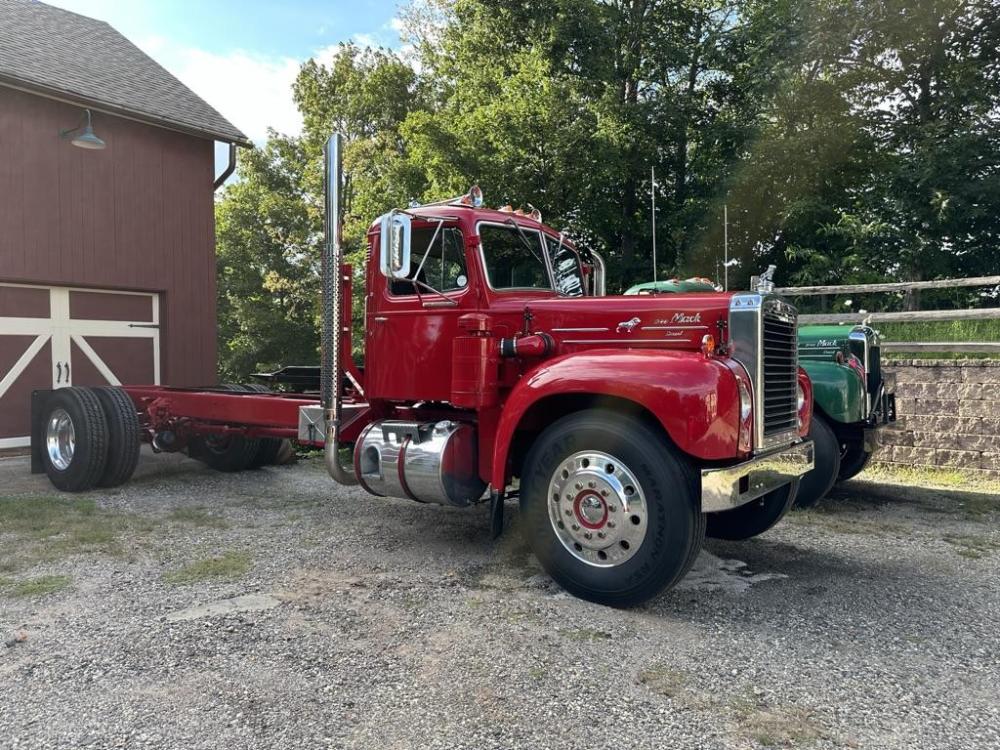
-
Classic truck insurance questions
mattb73lt replied to Robo987's topic in Antique and Classic Mack Trucks General Discussion
I have Hagerty on all my antiques. -
Painted The Mack Today
mattb73lt replied to Derrico's topic in Antique and Classic Mack Trucks General Discussion
Looks great!! -
B-73 Restoration
mattb73lt replied to mattb73lt's topic in Antique and Classic Mack Trucks General Discussion
I’m going to leave it pretty much as it is and repair what’s there. I few changes. I’d like to find some polished aluminum chain lockers to mount on the head board and with the new wood deck it should look awesome. -
B-73 Restoration
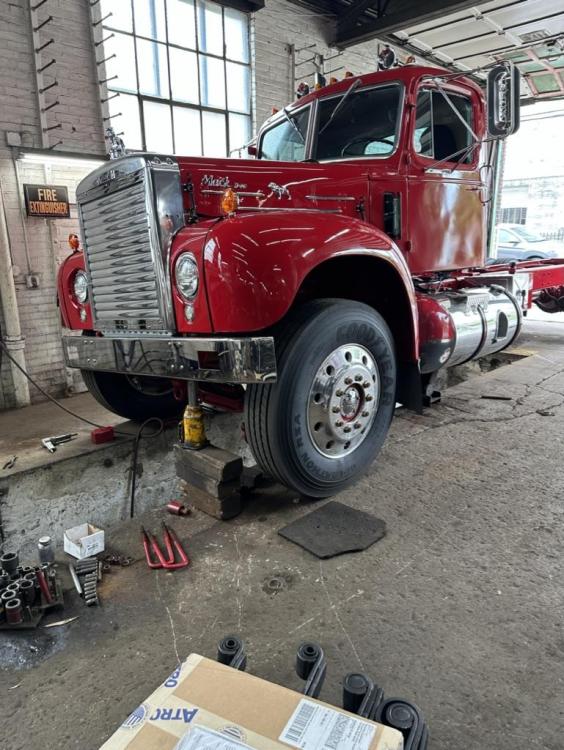
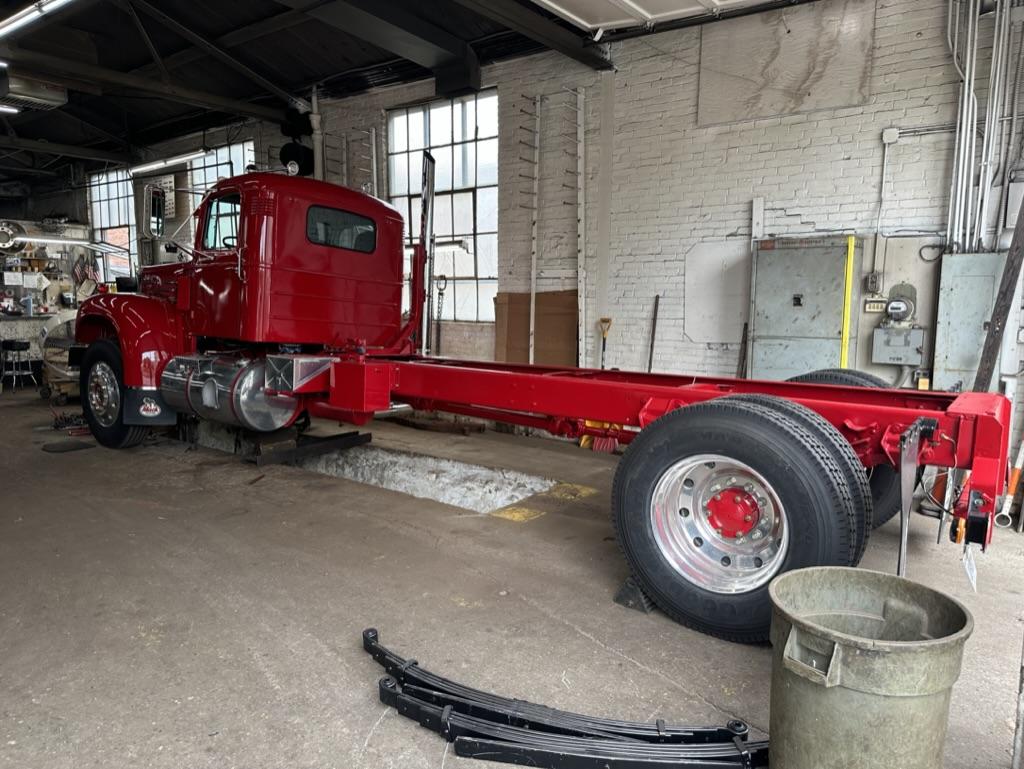
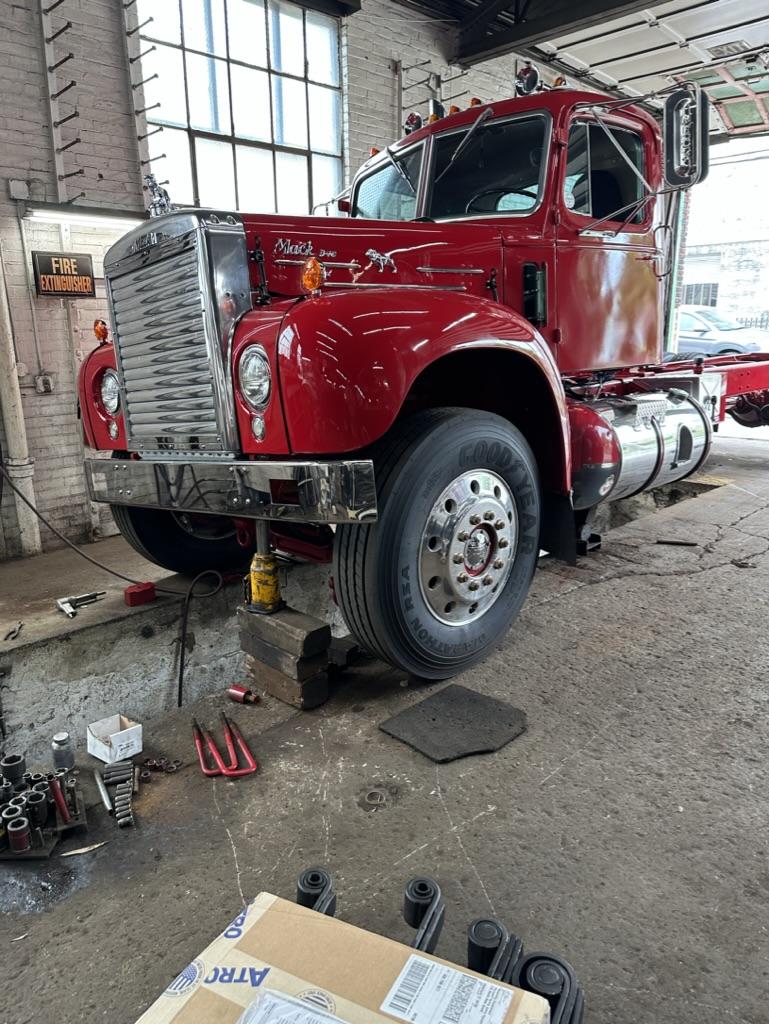
mattb73lt replied to mattb73lt's topic in Antique and Classic Mack Trucks General Discussion
It is the very place! Been in business over one hundred years. They still do great work. I was in and out of there in about three hours. The front end is now spot on level!
-
LT serial number.
mattb73lt replied to fjdrill's topic in Antique and Classic Mack Trucks General Discussion
I think they made about 2003 LTs of all configurations. That could be a little bit more than half way through the production run. The best bet, now that you have the serial number, would be to contact the Mack Museum and request the build records for the truck. That could answer a lot of your questions and help you with the history of the truck. -
B-73 Restoration
mattb73lt replied to mattb73lt's topic in Antique and Classic Mack Trucks General Discussion
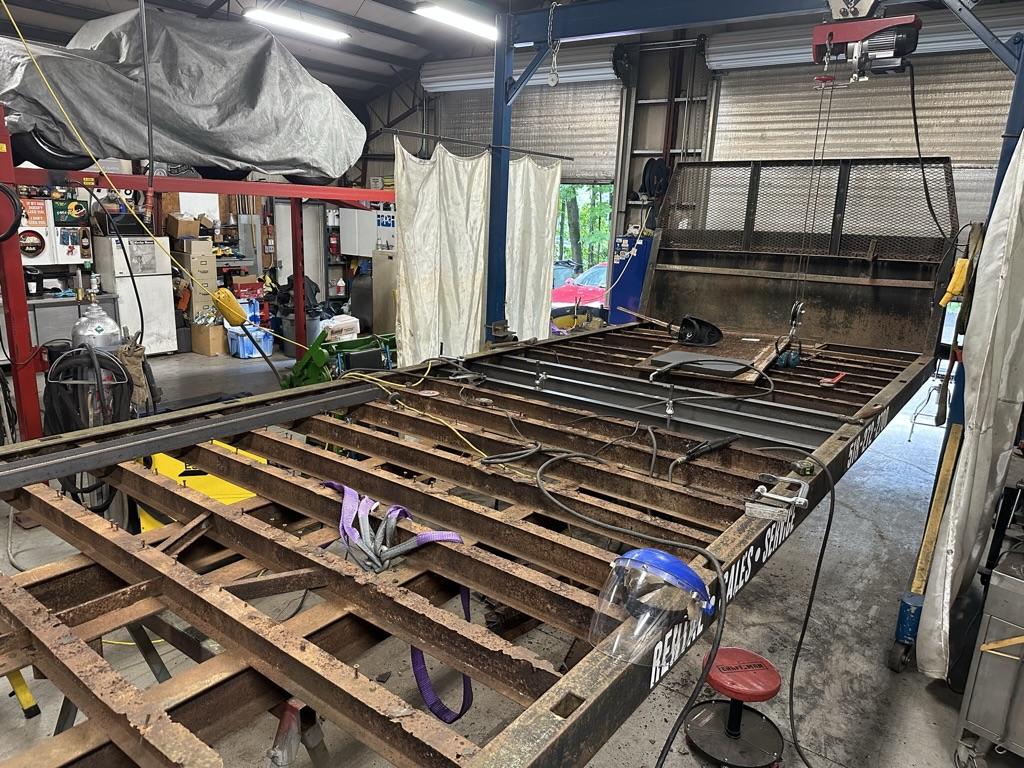
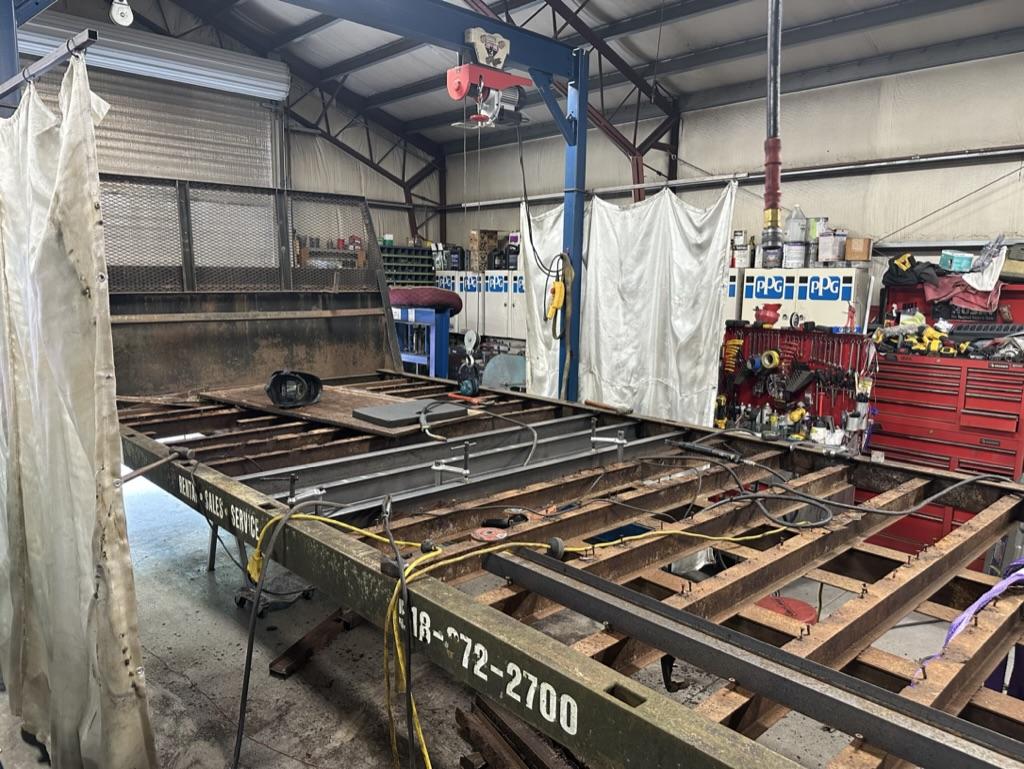
The deck is being worked on. I farmed this part out to a friend who has been a big help in fabricated a lot of parts and patch panels for me. His work and welding is amazing. He's replacing all 20 cross members I bought and doing some patches on some soft areas. When he's done, I'll pick it up with the B42 and take it up to O&G in Torrington to have them sandblast, prime and paint it for me. Going to go with black for the bed, it'll be easier to repaint if needed. while I've done about 95% of this truck myself, somethings are more efficient sending out. Having a flat shop floor is necessary to have the bed come out straight and not build any twist into with the repair work. Truck is running great, another test trip should do it for the first oil change at 500 engine miles. It's so much fun driving it and finally seeing it in one piece!!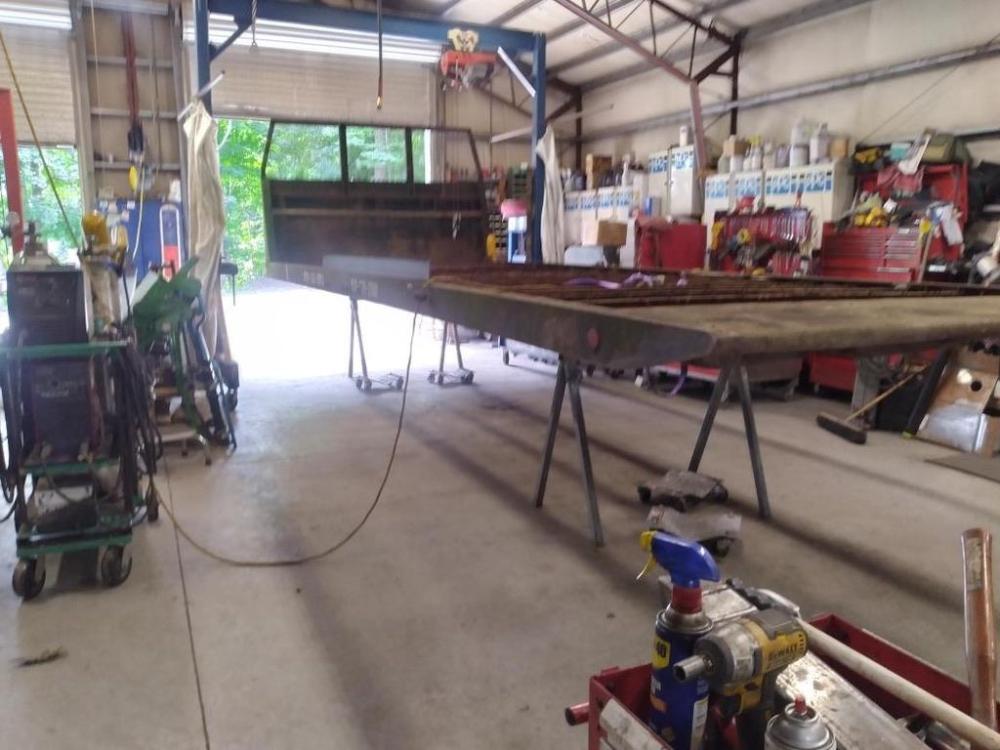

-
Mack B873sx restoration
mattb73lt replied to hicrop10's topic in Antique and Classic Mack Trucks General Discussion
Welcome back!! Glad to see you starting in on it again. Life does throw some hurdles at you and when it does, projects usually go by the wayside. I wish you all the best on your rekindled endeavor. You can get it done, even it it's just a piece at a time. The history and emotional attachment of your truck should help motivate you. It's going to be beautiful when you finish it!


BMT Forum Logo
