


doubleclutchinweasel
-
Posts
2,625 -
Joined
-
Last visited
-
Days Won
37
Content Type
Profiles
Forums
Gallery
Events
Blogs
BMT Wiki
Collections
Store
Everything posted by doubleclutchinweasel
-
My favorite Johnny Cash song is his version of Kris' "Sunday Morning Coming Down".
-
Harder to find a diesel mechanic these days than it is to find a college grad. Got plenty of those.
-
 I was walking home from little league baseball practice and saw a boy in the parking lot of my best friend’s dad’s gas station. Had been hit by a car. Blood everywhere. He was trying to get up. don’t know if he survived or who he was. I quit baseball that day. Still can’t get that image out of my mind.
 -
4-lane across Sweetwater! Used to have an uncle who lived right at the top of the hill.
-
4v vs 2v interchangeability
doubleclutchinweasel replied to Macktruckman's topic in Engine and Transmission
There used to be a saying that Macks built the roads for the Peterbilts to drive on. -
4v vs 2v interchangeability
doubleclutchinweasel replied to Macktruckman's topic in Engine and Transmission
I think you have a gem there. As long as you can keep it running, you're probably better off doing so. -
😄😄😄I didn't read that far down. LOL!!! 😄😄😄
-
"If you stole your outhouse from a construction site..."
-
B-73 Restoration
doubleclutchinweasel replied to mattb73lt's topic in Antique and Classic Mack Trucks General Discussion
You know, it is my considered opinion that this truck SUCKS! And the only way I can think of to make it "cool" is to...give it to me! Then it would be cool! I can't wait to see this thing finished. -
True. And a fig. 9-10 setup would have needle bearings on the top, not a bushing. That's what my '70 had.
-
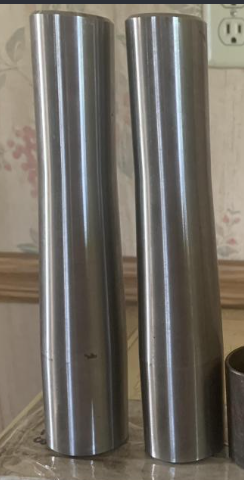
Here was a pic he posted. Definitely a tapered mid-section. But I don't know if the straight parts on the ends are correctly sized. Beside this is a pic I posted. The ends ARE straight where the bushings go. The taper is only for where it seats in the axle beam. Like you, I wish we could be there to help him sort this out.
-
That is a VERY informative post, Geoff.
-
I just wish there was some way to help the OP sort this out.
-
Straight part on small end even looks longer than I thought it would. I think you are right Mech. This eBay seller might be FOS.
-
I don't know, but these guys might be able to measure what they have and offer some insight into what you got... I keep finding references out there that suggest the 45 replaces the 32. But who knows for sure. The counter-holder-downers at the Mack dealerships certainly aren't much help anymore. https://instockmotorsports.com/mack-301sq32b-king-pin-kit-nos/ https://instockmotorsports.com/mack-301sq45a-king-pin-kit-nos/
-
Nice!
-
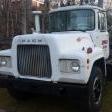
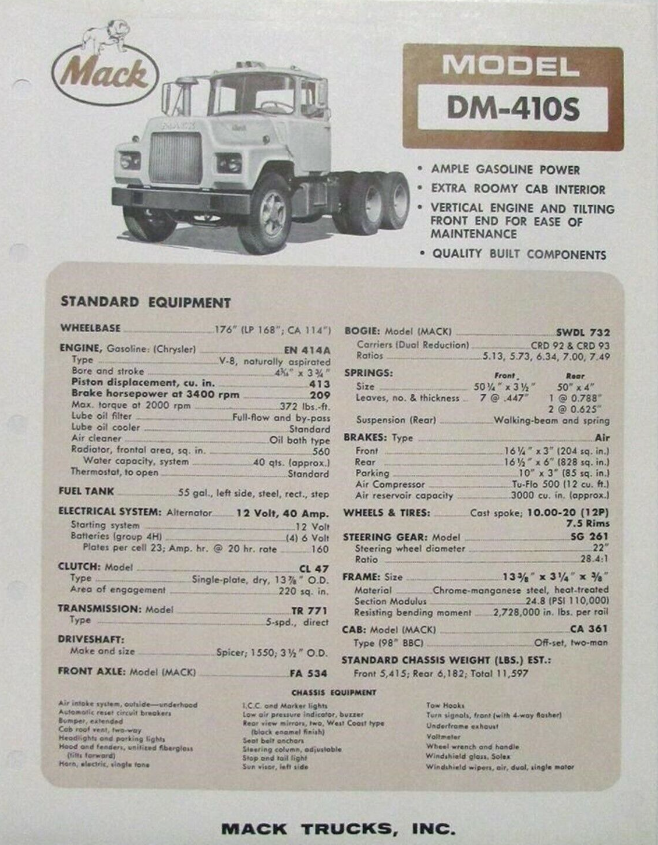
Yep! Here is a DM with a 413! I think this is a 1966 model.

-
Oh, and I think they only built 450 of these 413-equipped units (R410) between 1965 and 1970 (according to the Mack website). They also list 59 of the DM-410 made between 1966 and 1970. So, if the numbering system holds true, there are a handful of DMs out there with the Chrysler in them. All in all, these would be some rare pieces, and would make interesting collectibles.
-
My Mack fire apparatus photo album
doubleclutchinweasel replied to GA_Dave's topic in Fire Apparatus
This site has some of the better pictures of the then-and-now type. https://horsepowermemories.com/2017/06/16/smokey-and-the-bandit-filming-locations-a-40-year-now-and-then-look-back/ One of the hardest spots to find for me was the pond-hopping site. Theymoved the road! But, it's still there if you know what to look for (see map). This is where Bandit and Frog drove through the Chattahoochee River and Buford lost his door. Just north of Helen, Ga. Red line is where the road went before they straightened it. Oh crap! I went off-topic! Sorry!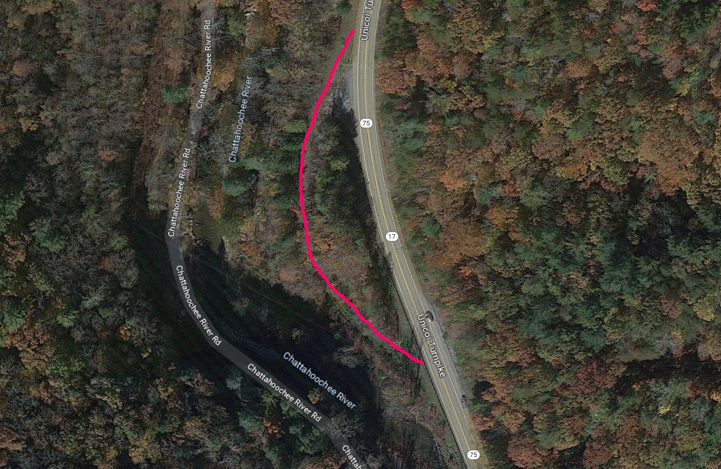
-
My Mack fire apparatus photo album
doubleclutchinweasel replied to GA_Dave's topic in Fire Apparatus
I think this is it today...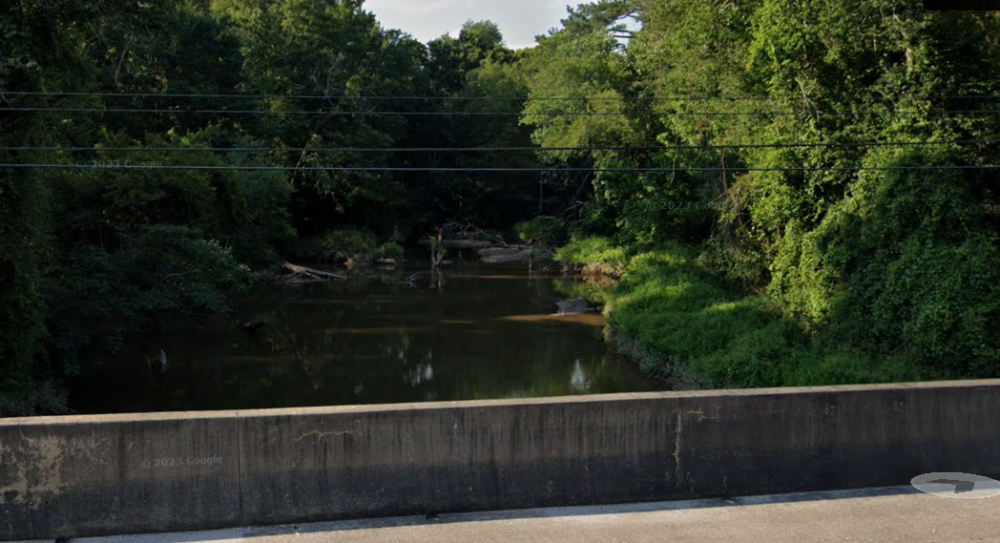
-
My Mack fire apparatus photo album
doubleclutchinweasel replied to GA_Dave's topic in Fire Apparatus
Yep. Not much evidence left of the bridge. And this was a few years ago. Even less there now.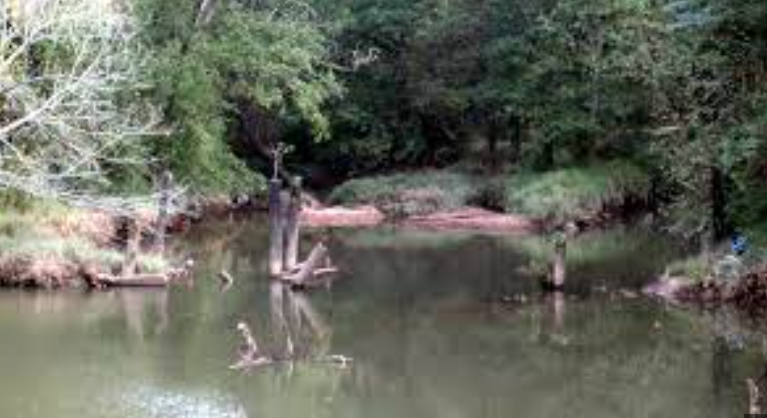
-
Oh. You were back in my home town! Where were you at over there?
-
A light duty Mack transmission (like a TR-77) was common behind the 413.
-
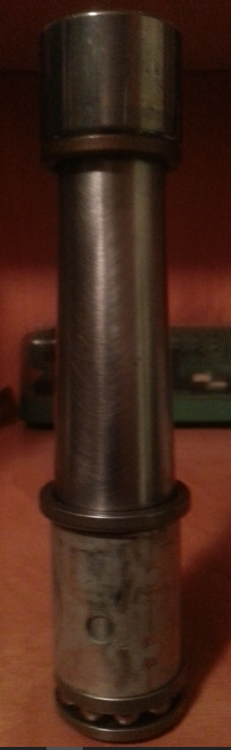
I definitely think someone has mismatched parts in that kit. I mean, these are NOT that uncommon. Bunches of them were done by the guys on here. And, I don't think it is a matter of a wrong kit number. The bushings do not appear to fit the pins! That screams mismatch to me. Refer to the picture I posted of the kit I had for mine. Everything stacked up fine on the bench. And, I bet that kit SHOULD have had the seals with it too. I don't know if what you got was a real Mack kit or something somebody cobbled together and put a Mack part number on. All I do know is that this is a pisser. Might want to see if the eBay seller will accept a return. There's a "correct" kit out there somewhere. If I was close to you, and had access to a machine shop, I could MAKE you a set of bushings to fit that pin and axle. And, no. This type of pin did not have a locking flat on them. That is common on straight pins. These are merely held in place by the locking effect of the taper. Easy out. Easy in. I just hate that the pieces you got do not match up. Again...a real pisser.
-
Here's a little more. Has a green one part-way down.


BMT Forum Logo
