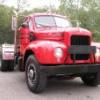
Mike Posted March 16, 2010 Share Posted March 16, 2010 Been wanting to take off the steering wheel. It still has the center horn button in place but has no room to get under it or beside it. So I get the idea and use one of my rubber dent pullers that fits perfect. I try and turn the two but with no luck. The horn button is flush or even with the side of the steering wheel making me wonder if a spring is under the button or not, cause the button does not go down or up. Any tips even DYNAMITE will be excepted....been dealing with this too long and getting nowhere with it. Have taken many wheels off cars and trucks even steering wheels without this much trouble. Thanks mike Quote Link to comment https://www.bigmacktrucks.com/topic/13059-b-model-steering-wheel/ Share on other sites More sharing options...
Freightrain Posted March 16, 2010 Share Posted March 16, 2010 Mine was loose and rattled so I took it off long ago. Pretty sure it just snaps on there as I was working on the extra steering column I have the other week. There is a sprung steel ring in a cup that I think is used to hold the button on. Might take some persuasion to get it to pop?I actually was able to pull the wheel off that extra column really easily. Once I got the nut off, using a steel slug I was able to hold the column between my legs(supporting it by the wheel) and smack the center and the wheel came right off. Huh, never worked that easy before. The wheel is really cracked up bad so I used an air motor to grind out all the cracked areas. I want to bring it to work and sand blast the exposed metal ring so I can start to epoxy it and hopefully paint it up nice and install it on my truck. We'll see. 1 Quote Larry 1959 B61 Liv'n Large...................... Charter member of the "MACK PACK" Link to comment https://www.bigmacktrucks.com/topic/13059-b-model-steering-wheel/#findComment-51355 Share on other sites More sharing options...
Rob Posted March 16, 2010 Share Posted March 16, 2010 Push down with your thumbs and rotate the complete horn button about 1/3 turn. Don't pry on it as it is made from bakelite and breaks easily. It has fingers that fit into grooves in the lower adapter. Rob Quote Plodding along with no job nor practical application for my existence, but still trying to fix what's broke. Link to comment https://www.bigmacktrucks.com/topic/13059-b-model-steering-wheel/#findComment-51357 Share on other sites More sharing options...
Mike Posted March 16, 2010 Author Share Posted March 16, 2010 Push down with your thumbs and rotate the complete horn button about 1/3 turn. Don't pry on it as it is made from bakelite and breaks easily. It has fingers that fit into grooves in the lower adapter. Rob Rob........I have honestly tried that the first stab at it many times and it will not budge up,down,left,right....no fish. I was also hoping I could get beside it and slightly under to move the tabs out of it's groove, but no luck. I bought early last year from e-bay a very nice wheel and it has the 3 tabs or grooves you speak of the horn button slips into with a spring holding the assembly up. So I figured my wheel has the same. My wheel is cracked badly and needs to be fixed most definitely or I would leave it be. But also I want to be able to take the cab off when I get to that point in time. mike Quote Link to comment https://www.bigmacktrucks.com/topic/13059-b-model-steering-wheel/#findComment-51360 Share on other sites More sharing options...
Rob Posted March 16, 2010 Share Posted March 16, 2010 Rob........I have honestly tried that the first stab at it many times and it will not budge up,down,left,right....no fish. I was also hoping I could get beside it and slightly under to move the tabs out of it's groove, but no luck. I bought early last year from e-bay a very nice wheel and it has the 3 tabs or grooves you speak of the horn button slips into with a spring holding the assembly up. So I figured my wheel has the same. My wheel is cracked badly and needs to be fixed most definitely or I would leave it be. But also I want to be able to take the cab off when I get to that point in time. mike Get a piece of inner tube and ensure it is clean and oil free. Cut it to the diameter of the horn button, place it on the button, then push down with the ball of your hand and turn. Sometimes they are stuck from being in the same place for so long. Unless it has been glued down, (I've seen that) it will come off of there.Rob Quote Plodding along with no job nor practical application for my existence, but still trying to fix what's broke. Link to comment https://www.bigmacktrucks.com/topic/13059-b-model-steering-wheel/#findComment-51361 Share on other sites More sharing options...
Mike Posted March 16, 2010 Author Share Posted March 16, 2010 Get a piece of inner tube and ensure it is clean and oil free. Cut it to the diameter of the horn button, place it on the button, then push down with the ball of your hand and turn. Sometimes they are stuck from being in the same place for so long. Unless it has been glued down, (I've seen that) it will come off of there.Rob I have 3 RUBBER Dent Pullers, the one I used fits perfectly but, it would not budge it either. Maybe it's the kind of rubber i'm using uh!...... or it may need a little lube. Come on experts what about it? Rob...do you prefer Goodyear or YokaHoma on the inner tube? Only kidding......I'm getting delirious about this simple but delicate task. I don't want to break or bend this horn button. mike Quote Link to comment https://www.bigmacktrucks.com/topic/13059-b-model-steering-wheel/#findComment-51362 Share on other sites More sharing options...
Rob Posted March 16, 2010 Share Posted March 16, 2010 I have 3 RUBBER Dent Pullers, the one I used fits perfectly but, it would not budge it either. Maybe it's the kind of rubber i'm using uh!...... or it may need a little lube. Come on experts what about it? Rob...do you prefer Goodyear or YokaHoma on the inner tube? Only kidding......I'm getting delirious about this simple but delicate task. I don't want to break or bend this horn button. mikeThat is the only way you will get it off of there if it is the original style. It can take quite a bit of downward, and twisting force to get them loose at times. The rubber slots the fingers slide into tend to soften and glue themselves together. Brute force can be resorted to also. As a last ditch resort, pour the center of the steering wheel full of denatured alcohol as it will soften the rubber bond but will send you howling for help if you have any cuts.As a final solution; Sears sells a BFH that will take is off of there.Rob Quote Plodding along with no job nor practical application for my existence, but still trying to fix what's broke. Link to comment https://www.bigmacktrucks.com/topic/13059-b-model-steering-wheel/#findComment-51366 Share on other sites More sharing options...
Mike Posted March 16, 2010 Author Share Posted March 16, 2010 That is the only way you will get it off of there if it is the original style. It can take quite a bit of downward, and twisting force to get them loose at times. The rubber slots the fingers slide into tend to soften and glue themselves together. Brute force can be resorted to also. As a last ditch resort, pour the center of the steering wheel full of denatured alcohol as it will soften the rubber bond but will send you howling for help if you have any cuts.As a final solution; Sears sells a BFH that will take is off of there.Rob Hey......SEARS sold me a BBPFH many moons ago and a BSFH also. I know that once the dogears are broken off the horn button it won't fit anything anylonger. The sun and time has done a number on the wheel. I get cut just being in the vicinity so I get the kerosene for parts washer and cut washer out. mike Quote Link to comment https://www.bigmacktrucks.com/topic/13059-b-model-steering-wheel/#findComment-51367 Share on other sites More sharing options...
HK Trucking Posted March 16, 2010 Share Posted March 16, 2010 Somebody in the past probably put some silicone gasket maker (blue shit) on the mating parts where the horn button twists onto the wheel, to keep the horn button from vibrating or coming loose.I'm sure it served it's purpose, but now you're paying the price! Quote "If You Can't Shift It Smoothly, You Shouldn't Be Driving It" Link to comment https://www.bigmacktrucks.com/topic/13059-b-model-steering-wheel/#findComment-51371 Share on other sites More sharing options...
Freightrain Posted March 17, 2010 Share Posted March 17, 2010 That is why mine still rattled........no one had fixed it permanently? Quote Larry 1959 B61 Liv'n Large...................... Charter member of the "MACK PACK" Link to comment https://www.bigmacktrucks.com/topic/13059-b-model-steering-wheel/#findComment-51404 Share on other sites More sharing options...
Mike Posted March 17, 2010 Author Share Posted March 17, 2010 Thanks for the replys guys......I can put up with the rattleling for a while like my turn signal assembly......extreme noise, so I startup the B then put a piece of paper towel wedged into it. Harley Davidson must have helped engineer some of the Macks. LOL.....I remember when I bought a used 58 Panhead chopper back in 1972. Nuts and washers would fall off during a ride. I worked on it before a ride and after a ride and sometimes during a ride. The Softail Springer I have now has lost a couple of chrome trinkits but not enough to be alarmed. I came home from a ride once and found the rear brake resevoir lid almost off. It helps to put a coat of Red Thread loc on every bolt and screw. mike Quote Link to comment https://www.bigmacktrucks.com/topic/13059-b-model-steering-wheel/#findComment-51406 Share on other sites More sharing options...
Freightrain Posted March 18, 2010 Share Posted March 18, 2010 LOL! old neighbor stops by on his homebuilt chopper and usually has to ask for a wrench or two to tighten stuff back down. Lots of Red locktite, but still not enough. Hardtail springer with s/s motor. Quote Larry 1959 B61 Liv'n Large...................... Charter member of the "MACK PACK" Link to comment https://www.bigmacktrucks.com/topic/13059-b-model-steering-wheel/#findComment-51482 Share on other sites More sharing options...
Speed Posted April 2, 2010 Share Posted April 2, 2010 LOL-I finally have my '79 Shovel just about rattle-proofed. The only things I can't seem to resolve are the "mustache bar" turn signal mount on the back and the front fender bolts,which I suspect are just a little too long and aren't getting completely tight. On my last Shovel I went through the whole bike and changed everything possible over to Ny-Lock nuts and Allen head bolts,and used blue Loctite on everything. Never had anything fall off after that,except the rear fender,which vibration cracked until,getting home from work one afternoon I found the last 12 inches of fender,turn signals and taillight dangling from their wiring. For the horn button issue,what worked for me was smashing the first couple of inches of the tube on a can of PB Blaster flat so it'd fit down the sides of the button,and spraying the hell out of the "under-button" area,getting the button and the palm of my hand really clean,pushing down as hard as I could on the horn button,turning counter-clockwise,and sort of rocking the button,also in a counter-wise rotation. It took a little time,but I finally saw it start creeping around,and it went easier as I turned it. (I was surprised it held so well,since the screws that held the retainer plate in were all stripped.) Hope other parts of your project go smoother than the horn button. Speed Quote "Remember-ANY Gun Control is Unconstitutional!"<!--sizeo:3--><span style="font-size:12pt;line-height:100%"><!--/sizeo--><i><b>MACK-E Model Registry # 36</b></i><!--sizec--></span><!--/sizec--><a href="http://www.nvabatetravel.com/"target="_blank">http://www.nvabatetravel.com/</a> Link to comment https://www.bigmacktrucks.com/topic/13059-b-model-steering-wheel/#findComment-52404 Share on other sites More sharing options...
other dog Posted April 2, 2010 Share Posted April 2, 2010 LOL-I finally have my '79 Shovel just about rattle-proofed. The only things I can't seem to resolve are the "mustache bar" turn signal mount on the back and the front fender bolts,which I suspect are just a little too long and aren't getting completely tight. On my last Shovel I went through the whole bike and changed everything possible over to Ny-Lock nuts and Allen head bolts,and used blue Loctite on everything. Never had anything fall off after that,except the rear fender,which vibration cracked until,getting home from work one afternoon I found the last 12 inches of fender,turn signals and taillight dangling from their wiring. For the horn button issue,what worked for me was smashing the first couple of inches of the tube on a can of PB Blaster flat so it'd fit down the sides of the button,and spraying the hell out of the "under-button" area,getting the button and the palm of my hand really clean,pushing down as hard as I could on the horn button,turning counter-clockwise,and sort of rocking the button,also in a counter-wise rotation. It took a little time,but I finally saw it start creeping around,and it went easier as I turned it. (I was surprised it held so well,since the screws that held the retainer plate in were all stripped.) Hope other parts of your project go smoother than the horn button. Speed Hi Speed...no pun intended. Quote Producer of poorly photo-chopped pictures since 1999. Link to comment https://www.bigmacktrucks.com/topic/13059-b-model-steering-wheel/#findComment-52406 Share on other sites More sharing options...


Recommended Posts
Join the conversation
You can post now and register later. If you have an account, sign in now to post with your account.