


mattb73lt
-
Posts
1,373 -
Joined
-
Last visited
-
Days Won
144
Content Type
Profiles
Forums
Gallery
Events
Blogs
BMT Wiki
Collections
Store
Everything posted by mattb73lt
-

B-73 Restoration
mattb73lt replied to mattb73lt's topic in Antique and Classic Mack Trucks General Discussion
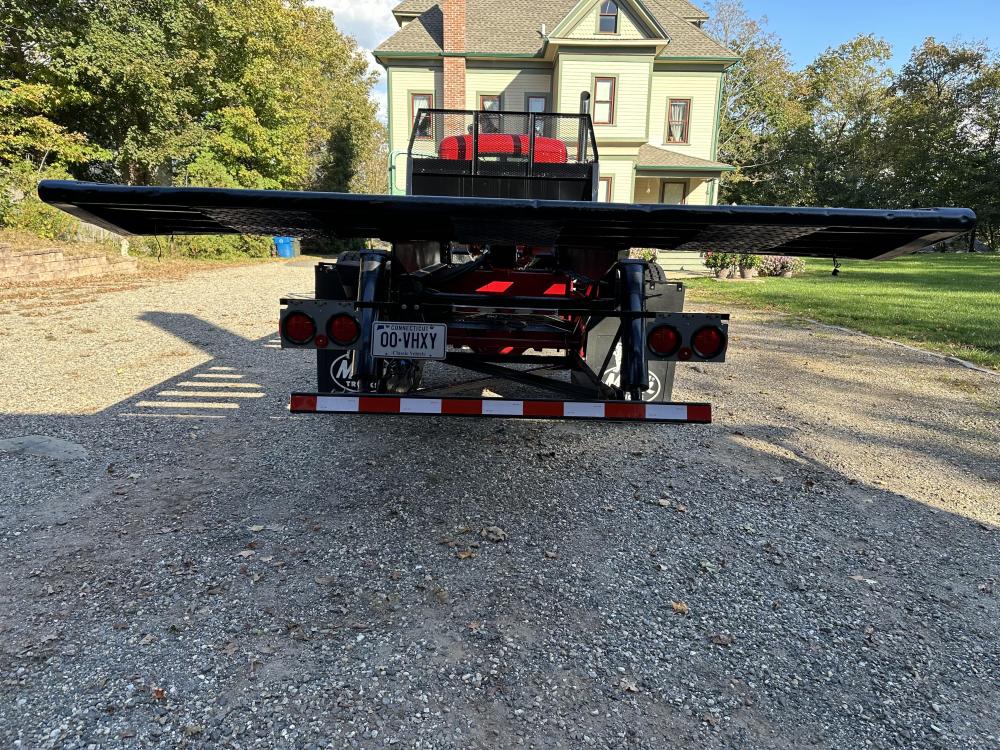
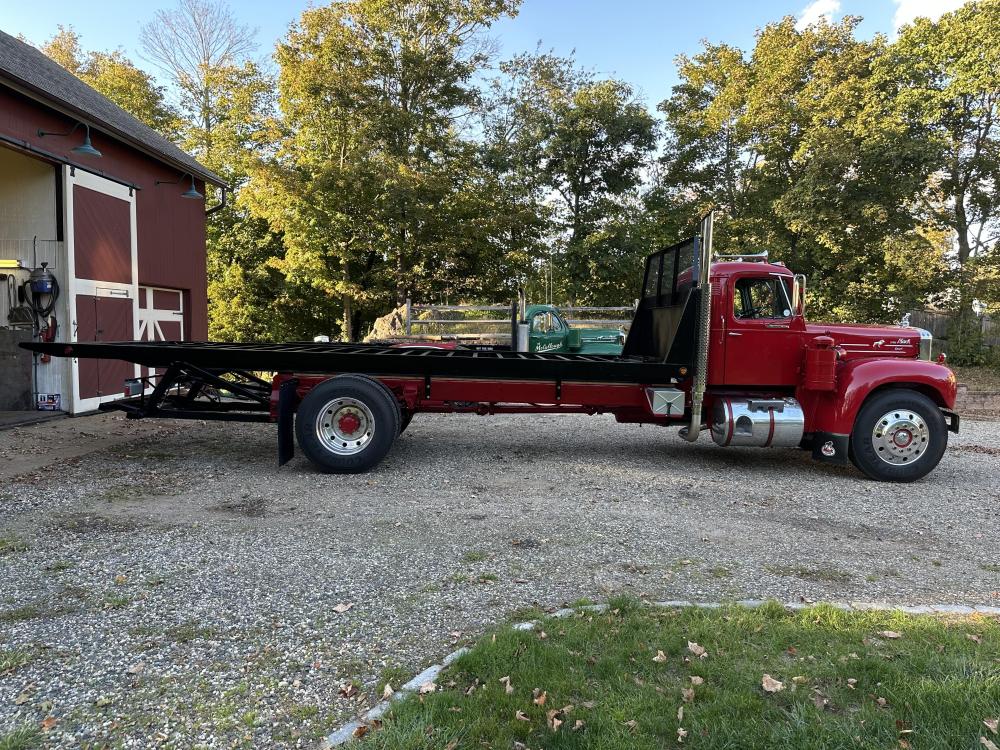
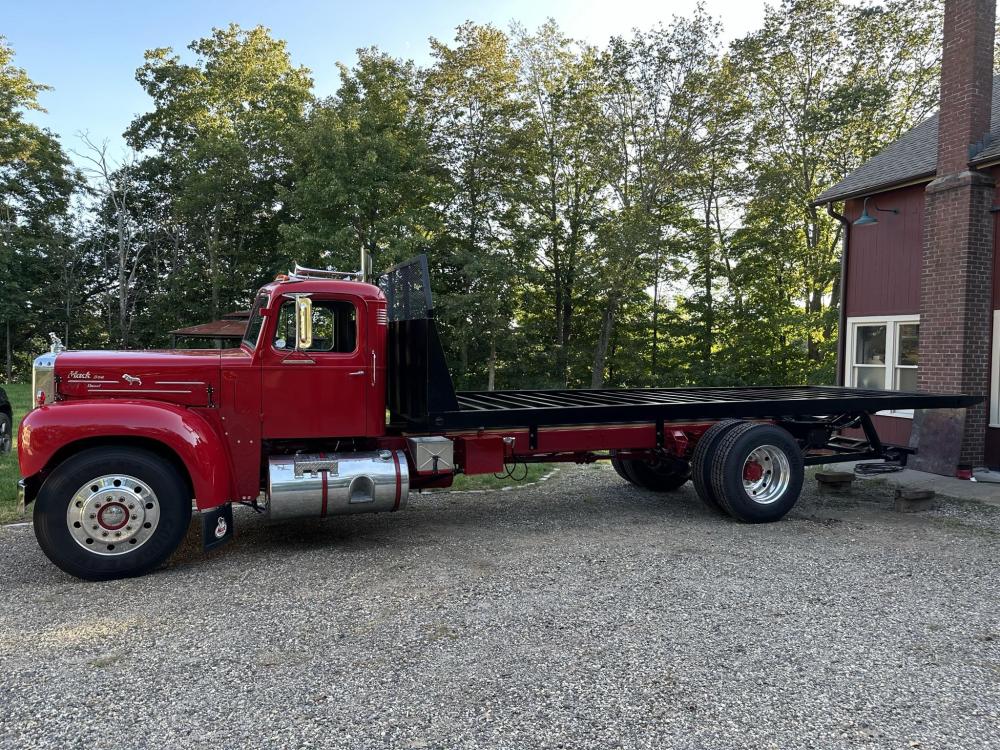
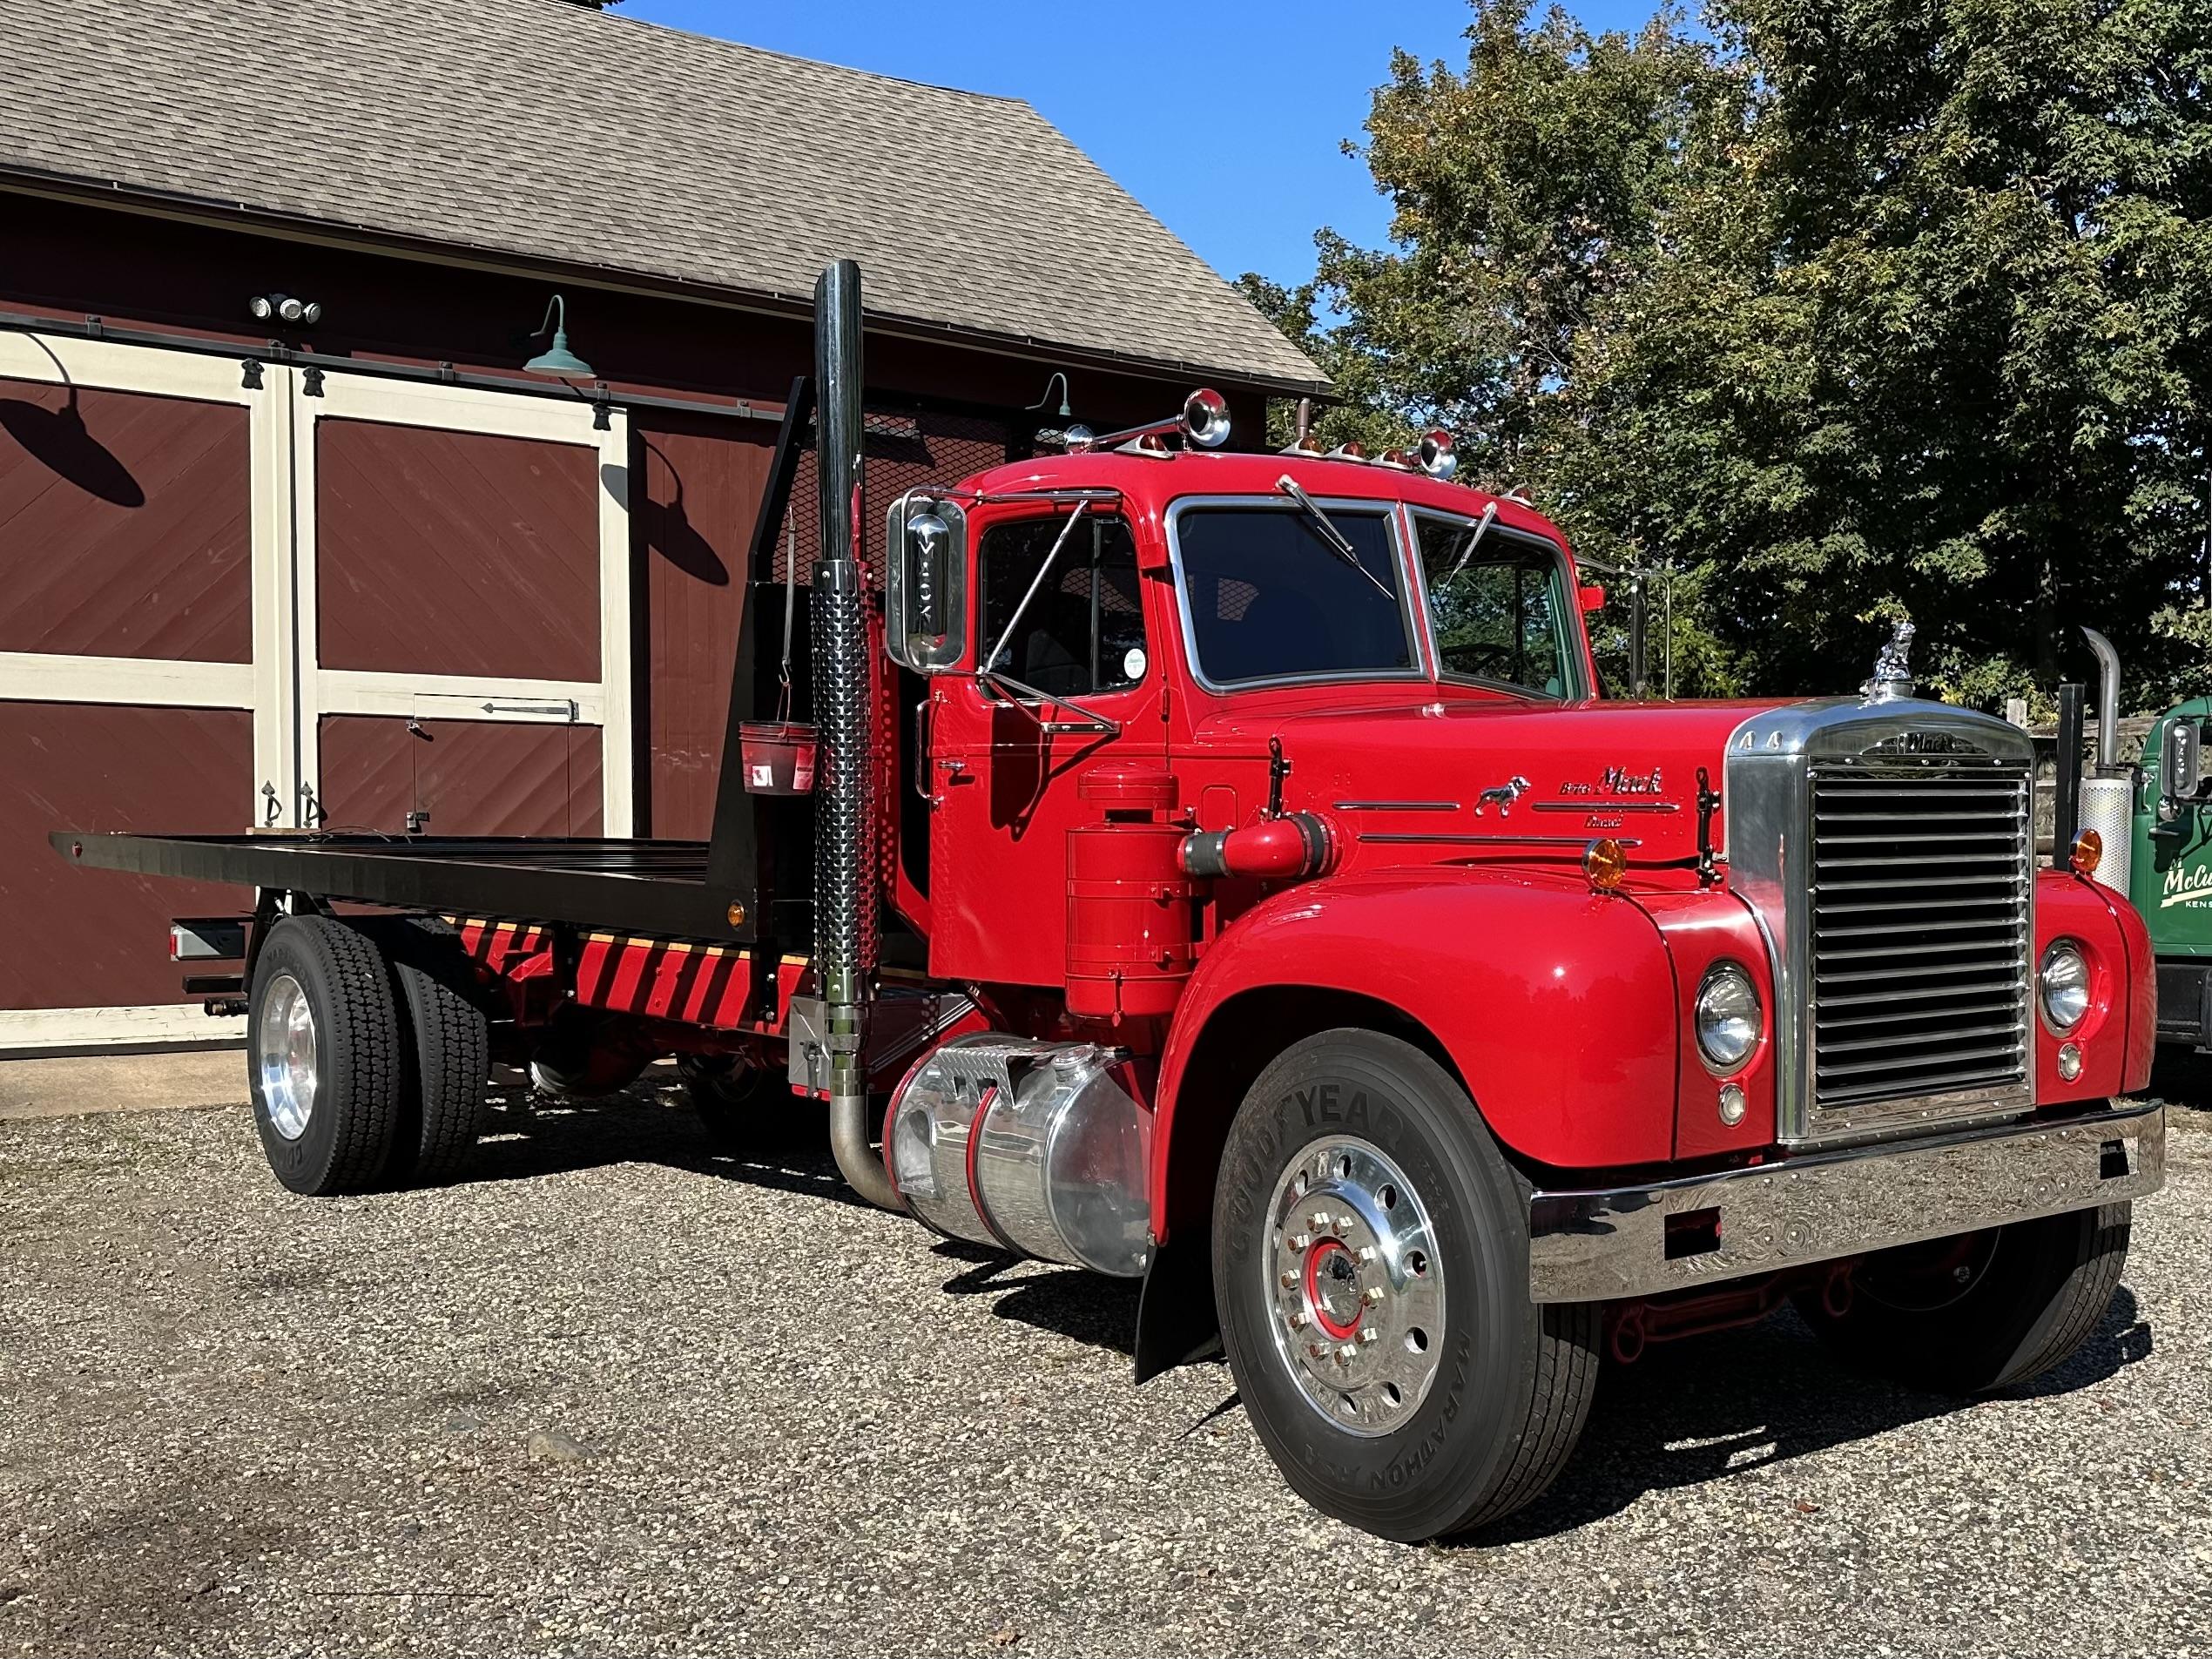
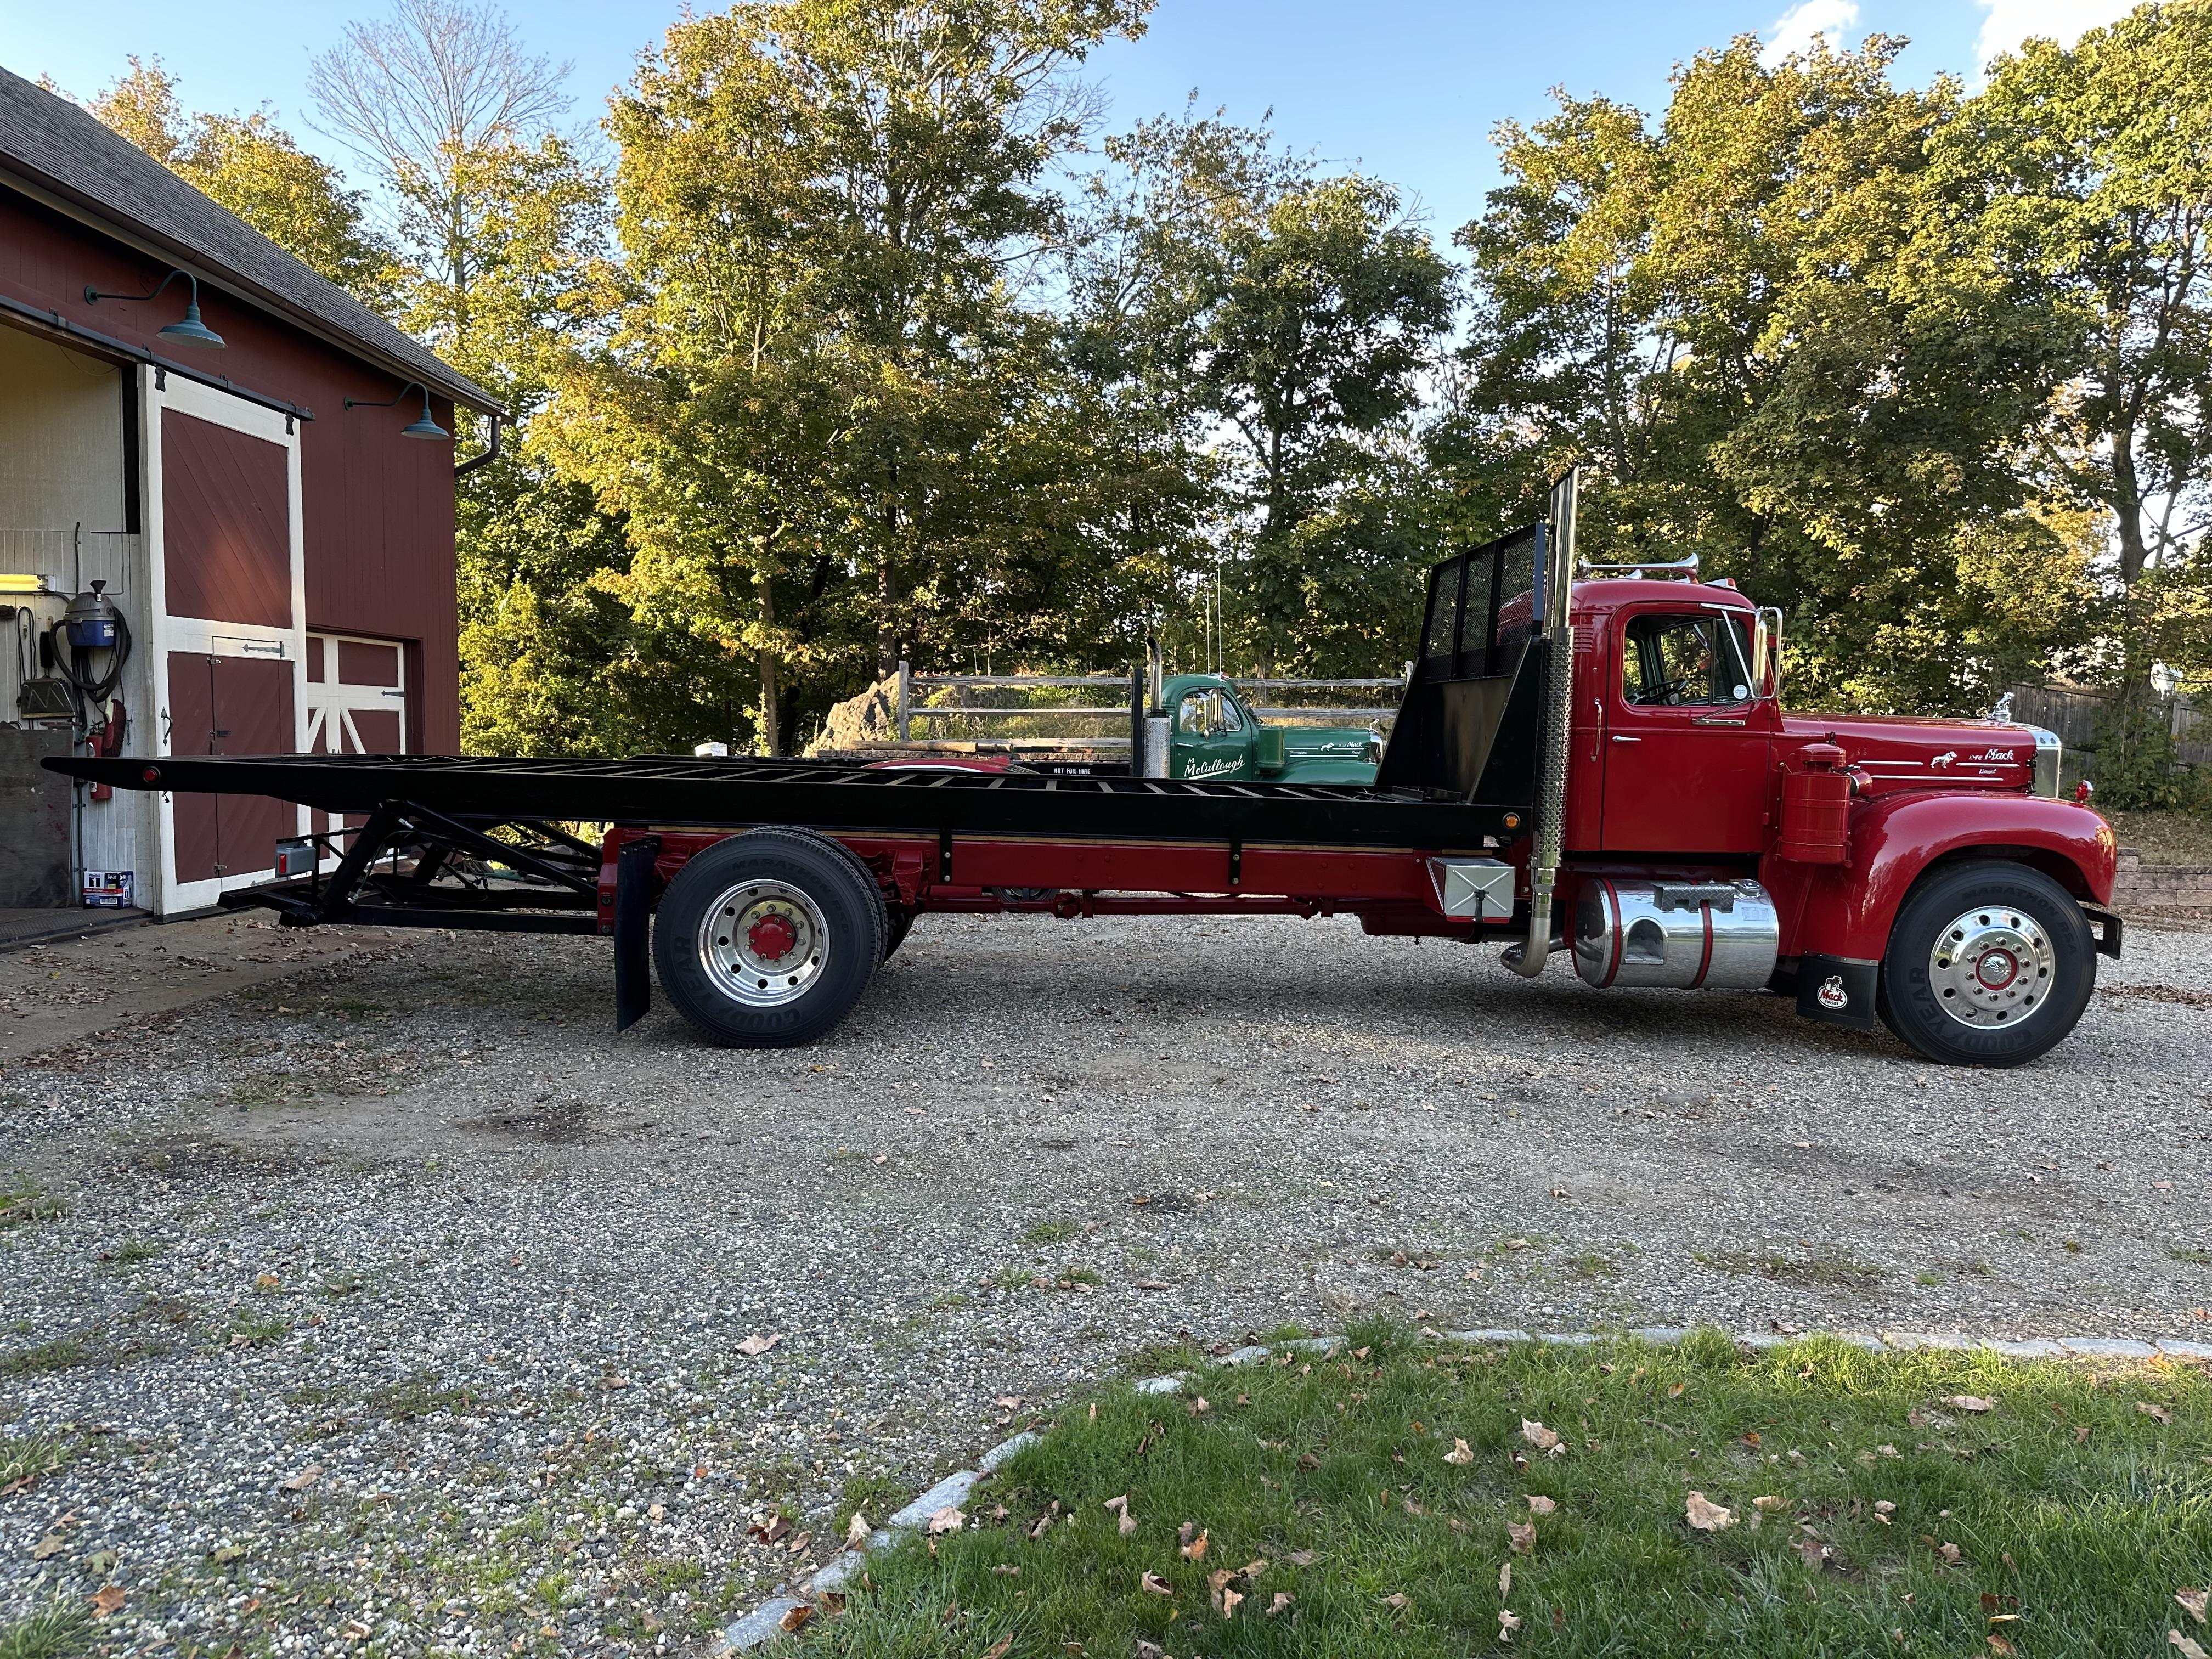
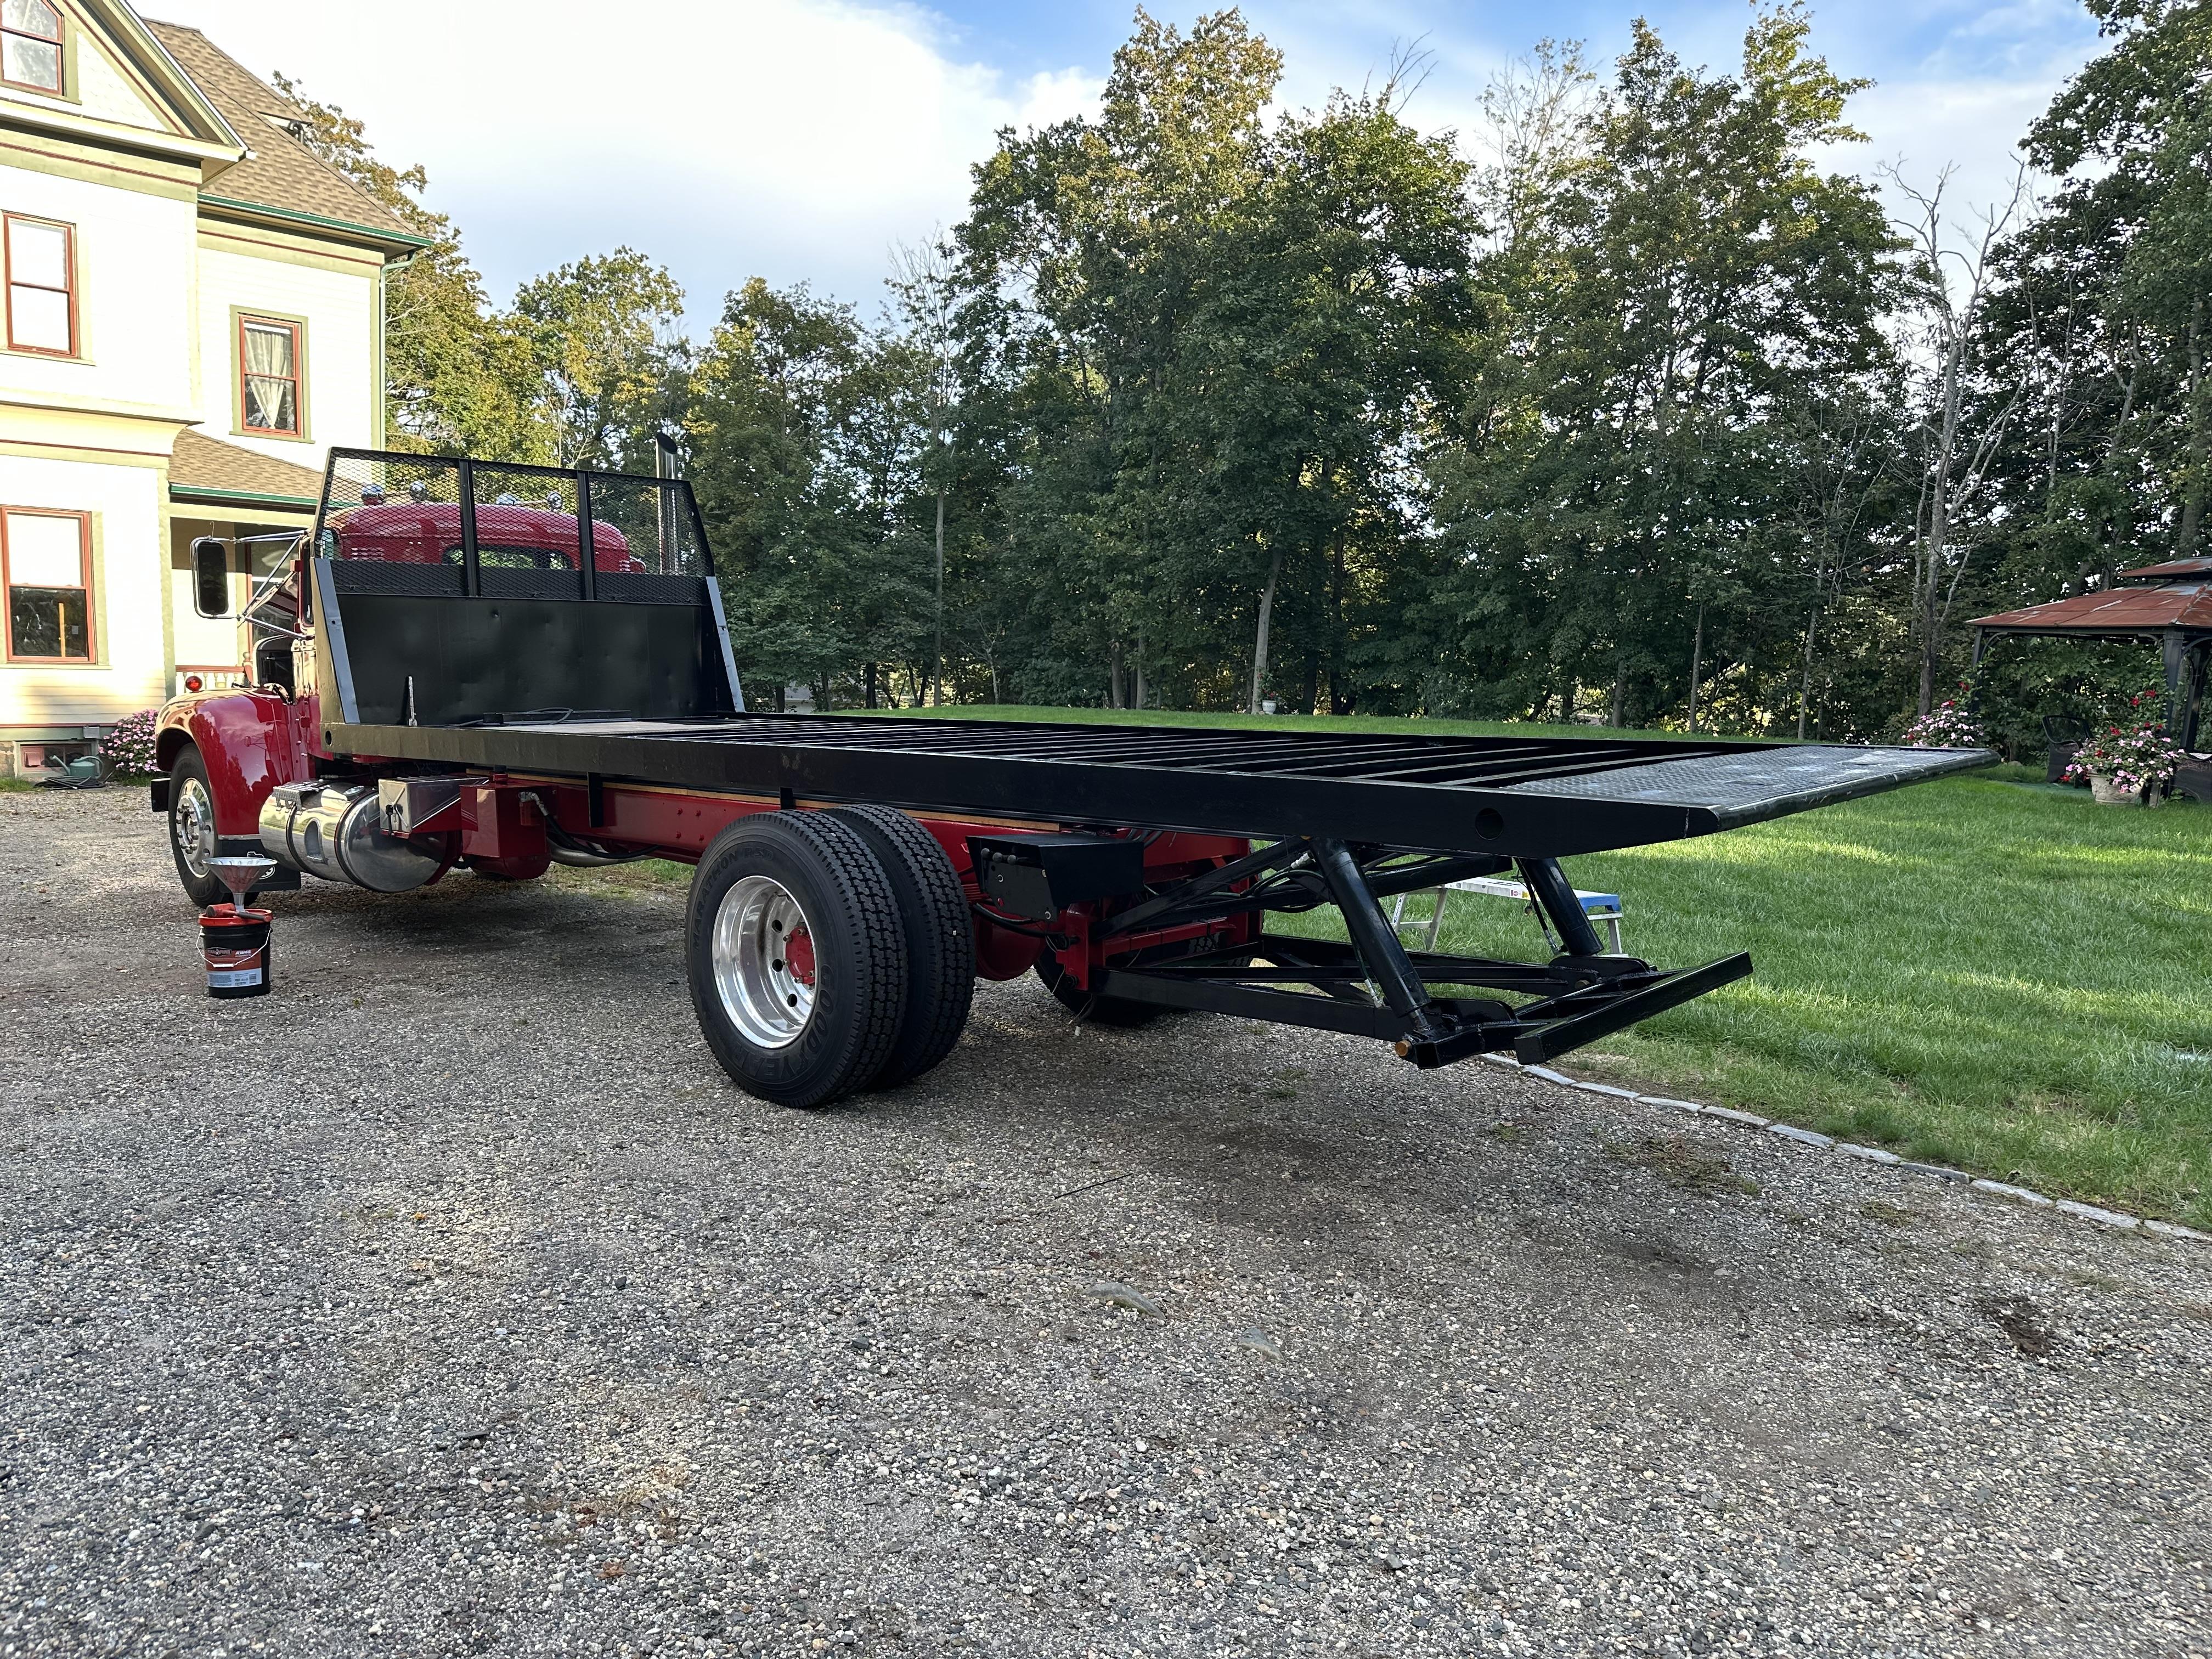
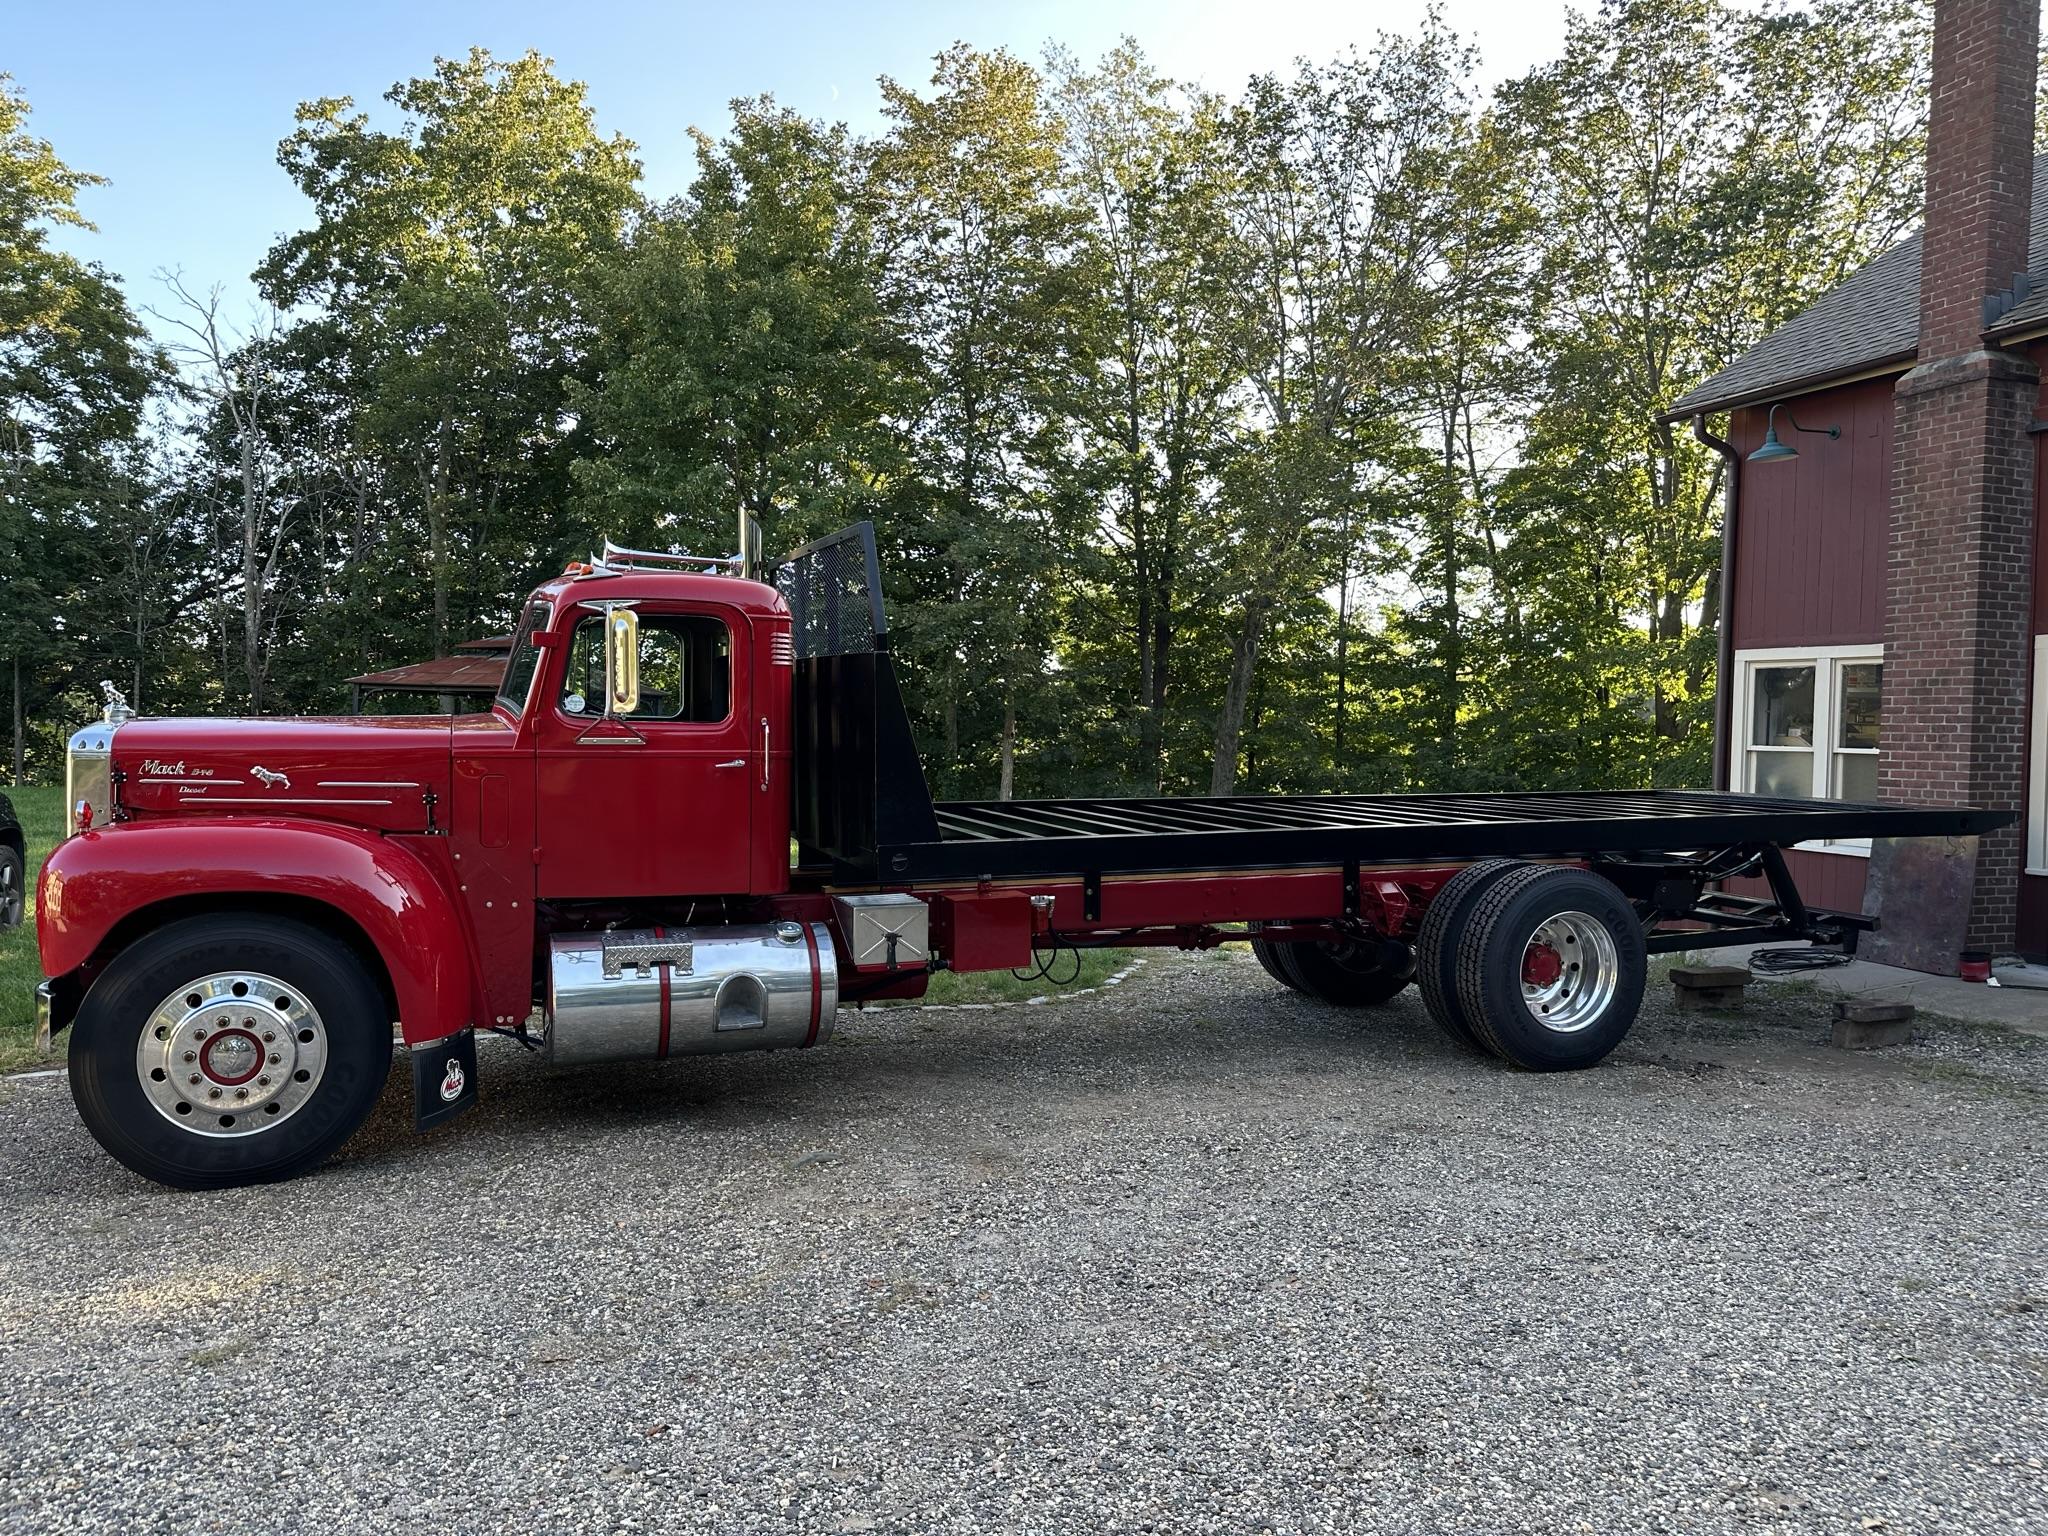
Tail lights are done. I just need to finish the deck lights and add a light for the plate. Took it out for a test drive for the first time since adding the deck on. Completely different ride with the extra weight. Smooth, no hopping around over bumps. Just a few more things to do and I should be onto the deck wood next week, the last big thing to do to it and some small stuff to finish. I added a side shot to the post, quite the long truck, now!!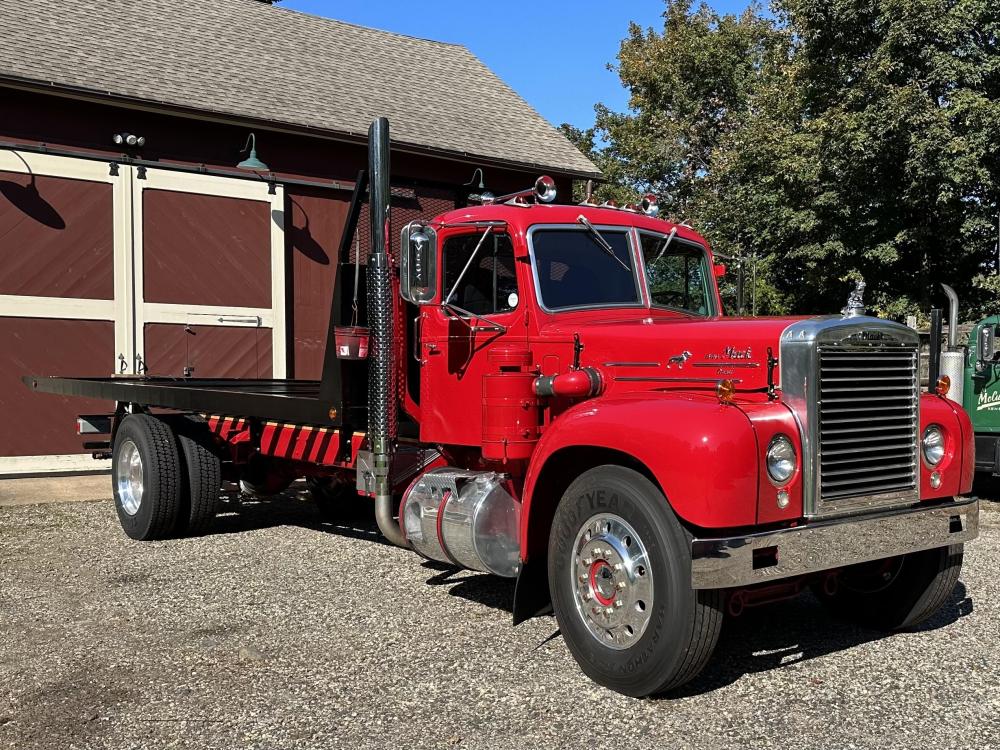
-
Finally some DM progress
mattb73lt replied to mowerman's topic in Antique and Classic Mack Trucks General Discussion
I would wait also, until you’re ready to put it on the road and for the same reason. I bought some “yard rollers” for my project. They were round and held air. Then bought what I needed as I got closer to the road. -
B-73 Restoration
mattb73lt replied to mattb73lt's topic in Antique and Classic Mack Trucks General Discussion
I put the pictures in sequence on the previous page to show it. -
B-73 Restoration
mattb73lt replied to mattb73lt's topic in Antique and Classic Mack Trucks General Discussion
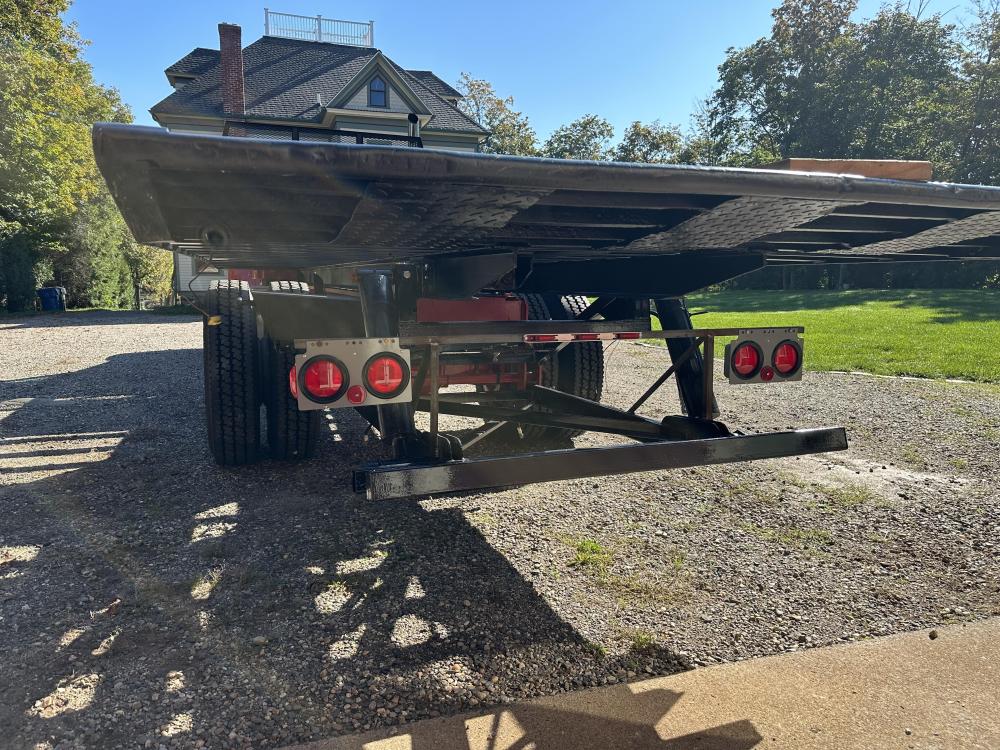
No, you got it right. Lower the gear, bring the body back and then lower the bed by raising the gear. The gear controls the rate and angle of the bed. Once the load is on the deck, start retracting the bed. Lower the gear which raises the bed, before you pass the center of gravity or the bed will raise itself without control. -
B-73 Restoration
mattb73lt replied to mattb73lt's topic in Antique and Classic Mack Trucks General Discussion
Mechohaulic, That's not a lever, it's a chain binder from when I had it strapped to the bed of the other truck. There are two screen chain pockets on either side of the winch area for storage. Future plans have two polished aluminum storage boxes on either side of the frame. I'm looking for two vertical chain storage lockers to mount on both sides of the head board. Probably pin striping and door lettering to dress it up a little and finish it. It does look good, though!
-
B-73 Restoration
mattb73lt replied to mattb73lt's topic in Antique and Classic Mack Trucks General Discussion
Works been kinda busy. So, not a lot of time to spare. I did fabricate the tail light bracket and have them roughed in. Paint and wiring next then the bed decking next.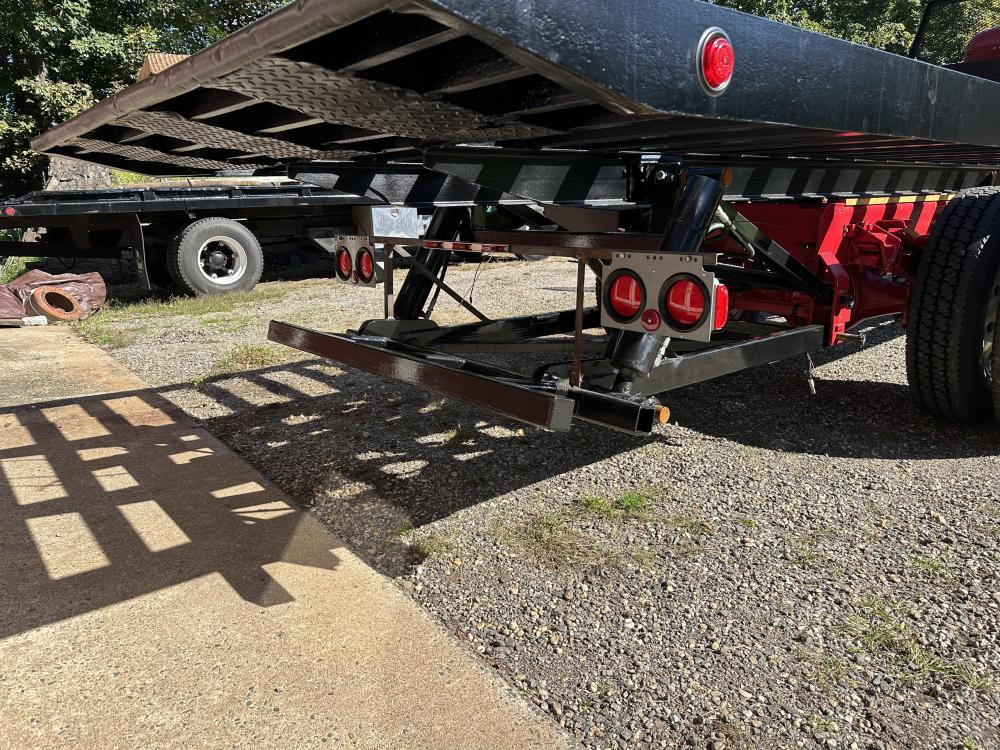
-
LTL Trunnion cracked
mattb73lt replied to Macman's topic in Antique and Classic Mack Trucks General Discussion
It is sad that a lot of the skills and knowledge to manufacture parts like that are disappearing. When I see a raw casting like that, my mind immediately goes to how I need to set it up to machine it into a useful part. That comes from my technical education in high school taking a Machine, Tool & Die course. At the state technical school I went to we had a huge machine shop and a large class. The classes behind us were smaller each year. The overall school population declined through the years and the state closed it for several years. When it reopened a few years ago one of the shops that was cut was the machine shop. One of the largest spaces in the school is now occupied by a Nursing course. I went there nearly 40 years ago and still call upon what I learned there all the time. The younger generation doesn't seem to have much interest in learning hands on skills anymore. It gets harder every year to find places to do work like what you've shown. -
B-73 Restoration
mattb73lt replied to mattb73lt's topic in Antique and Classic Mack Trucks General Discussion
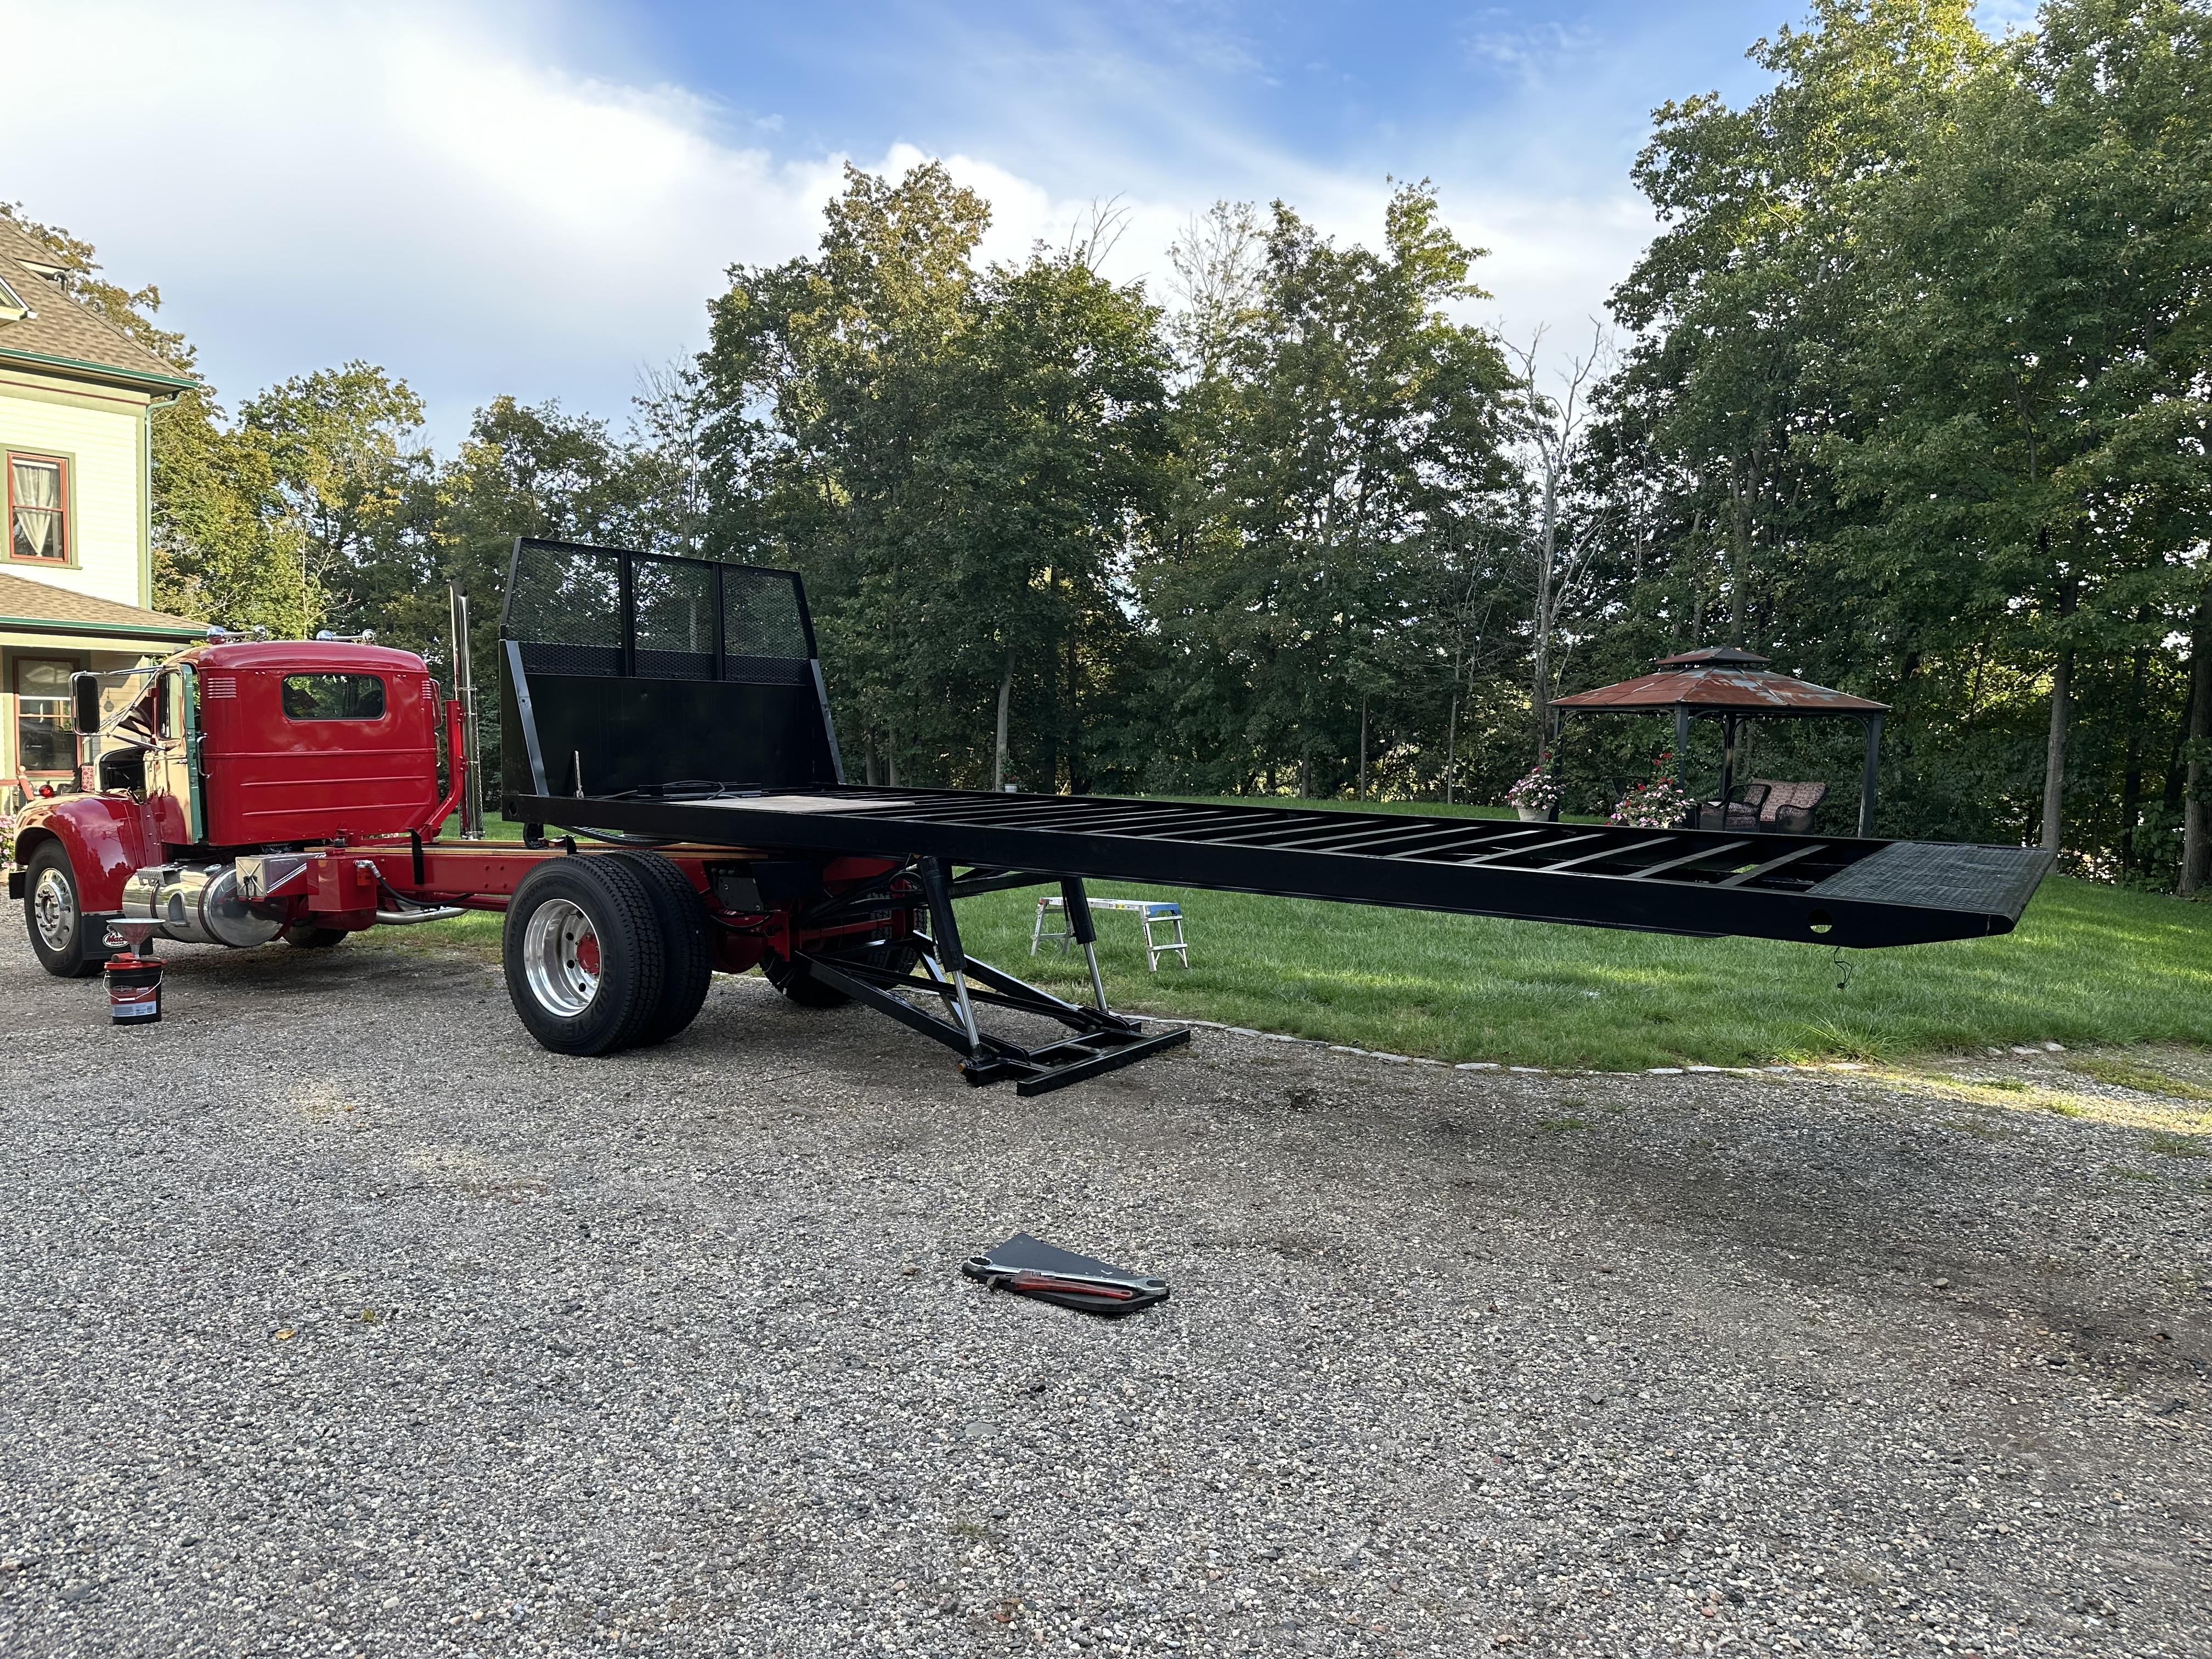
No, it’ll gravity dump if you don’t put the leg down and then run the body out. It operates a little different than the Chevron deck on the other truck. That one is power up and down. -
B-73 Restoration
mattb73lt replied to mattb73lt's topic in Antique and Classic Mack Trucks General Discussion
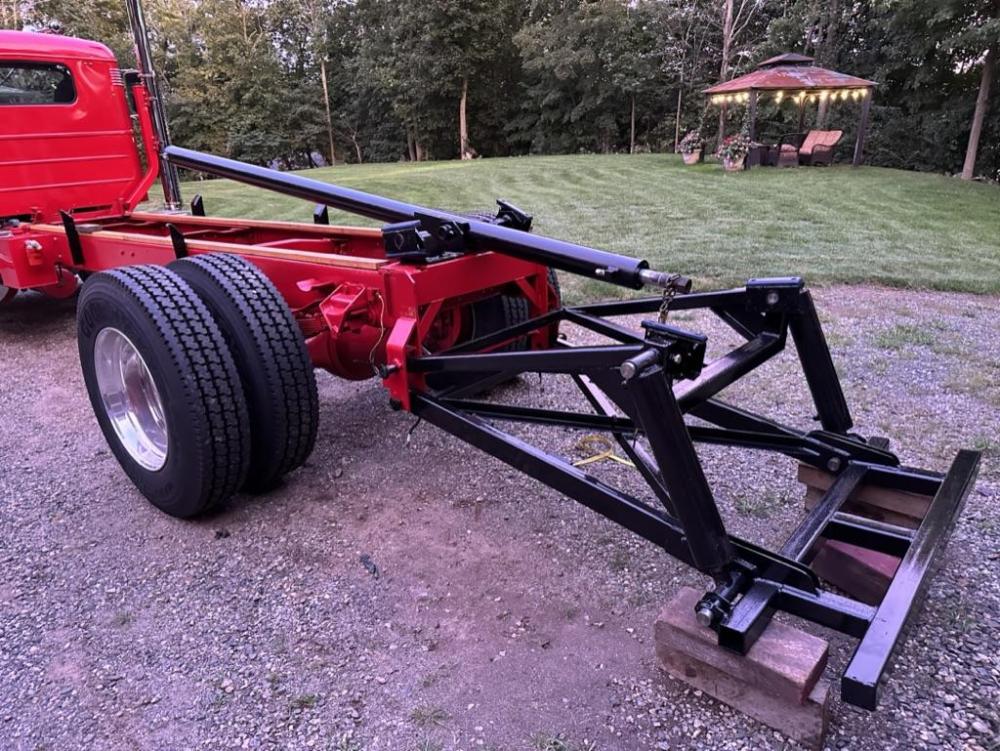
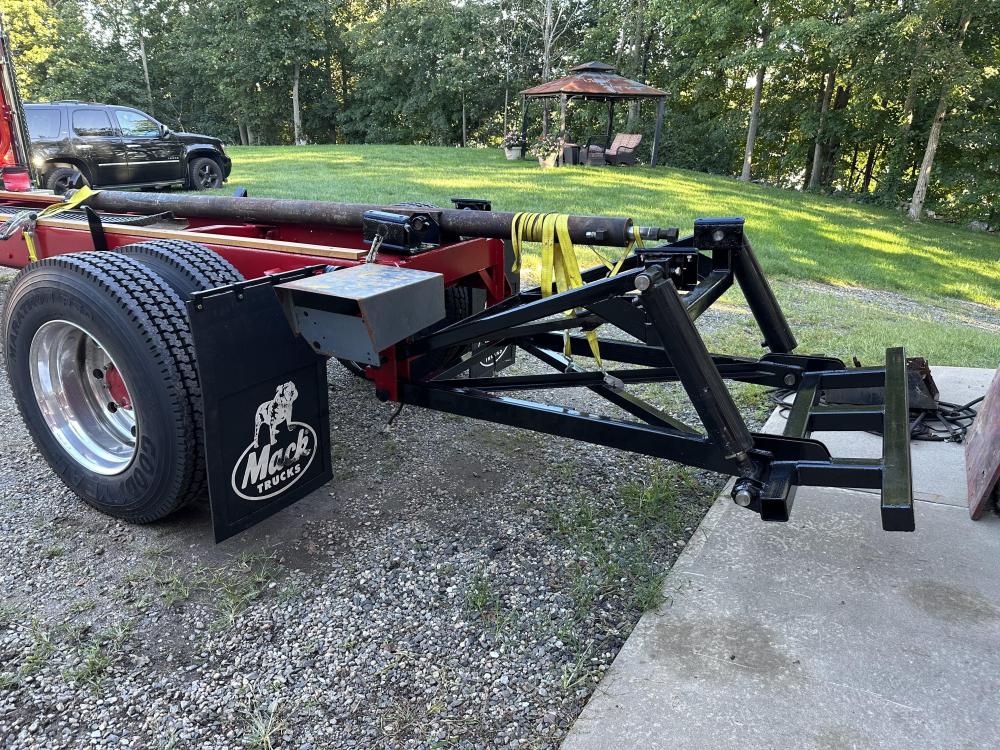
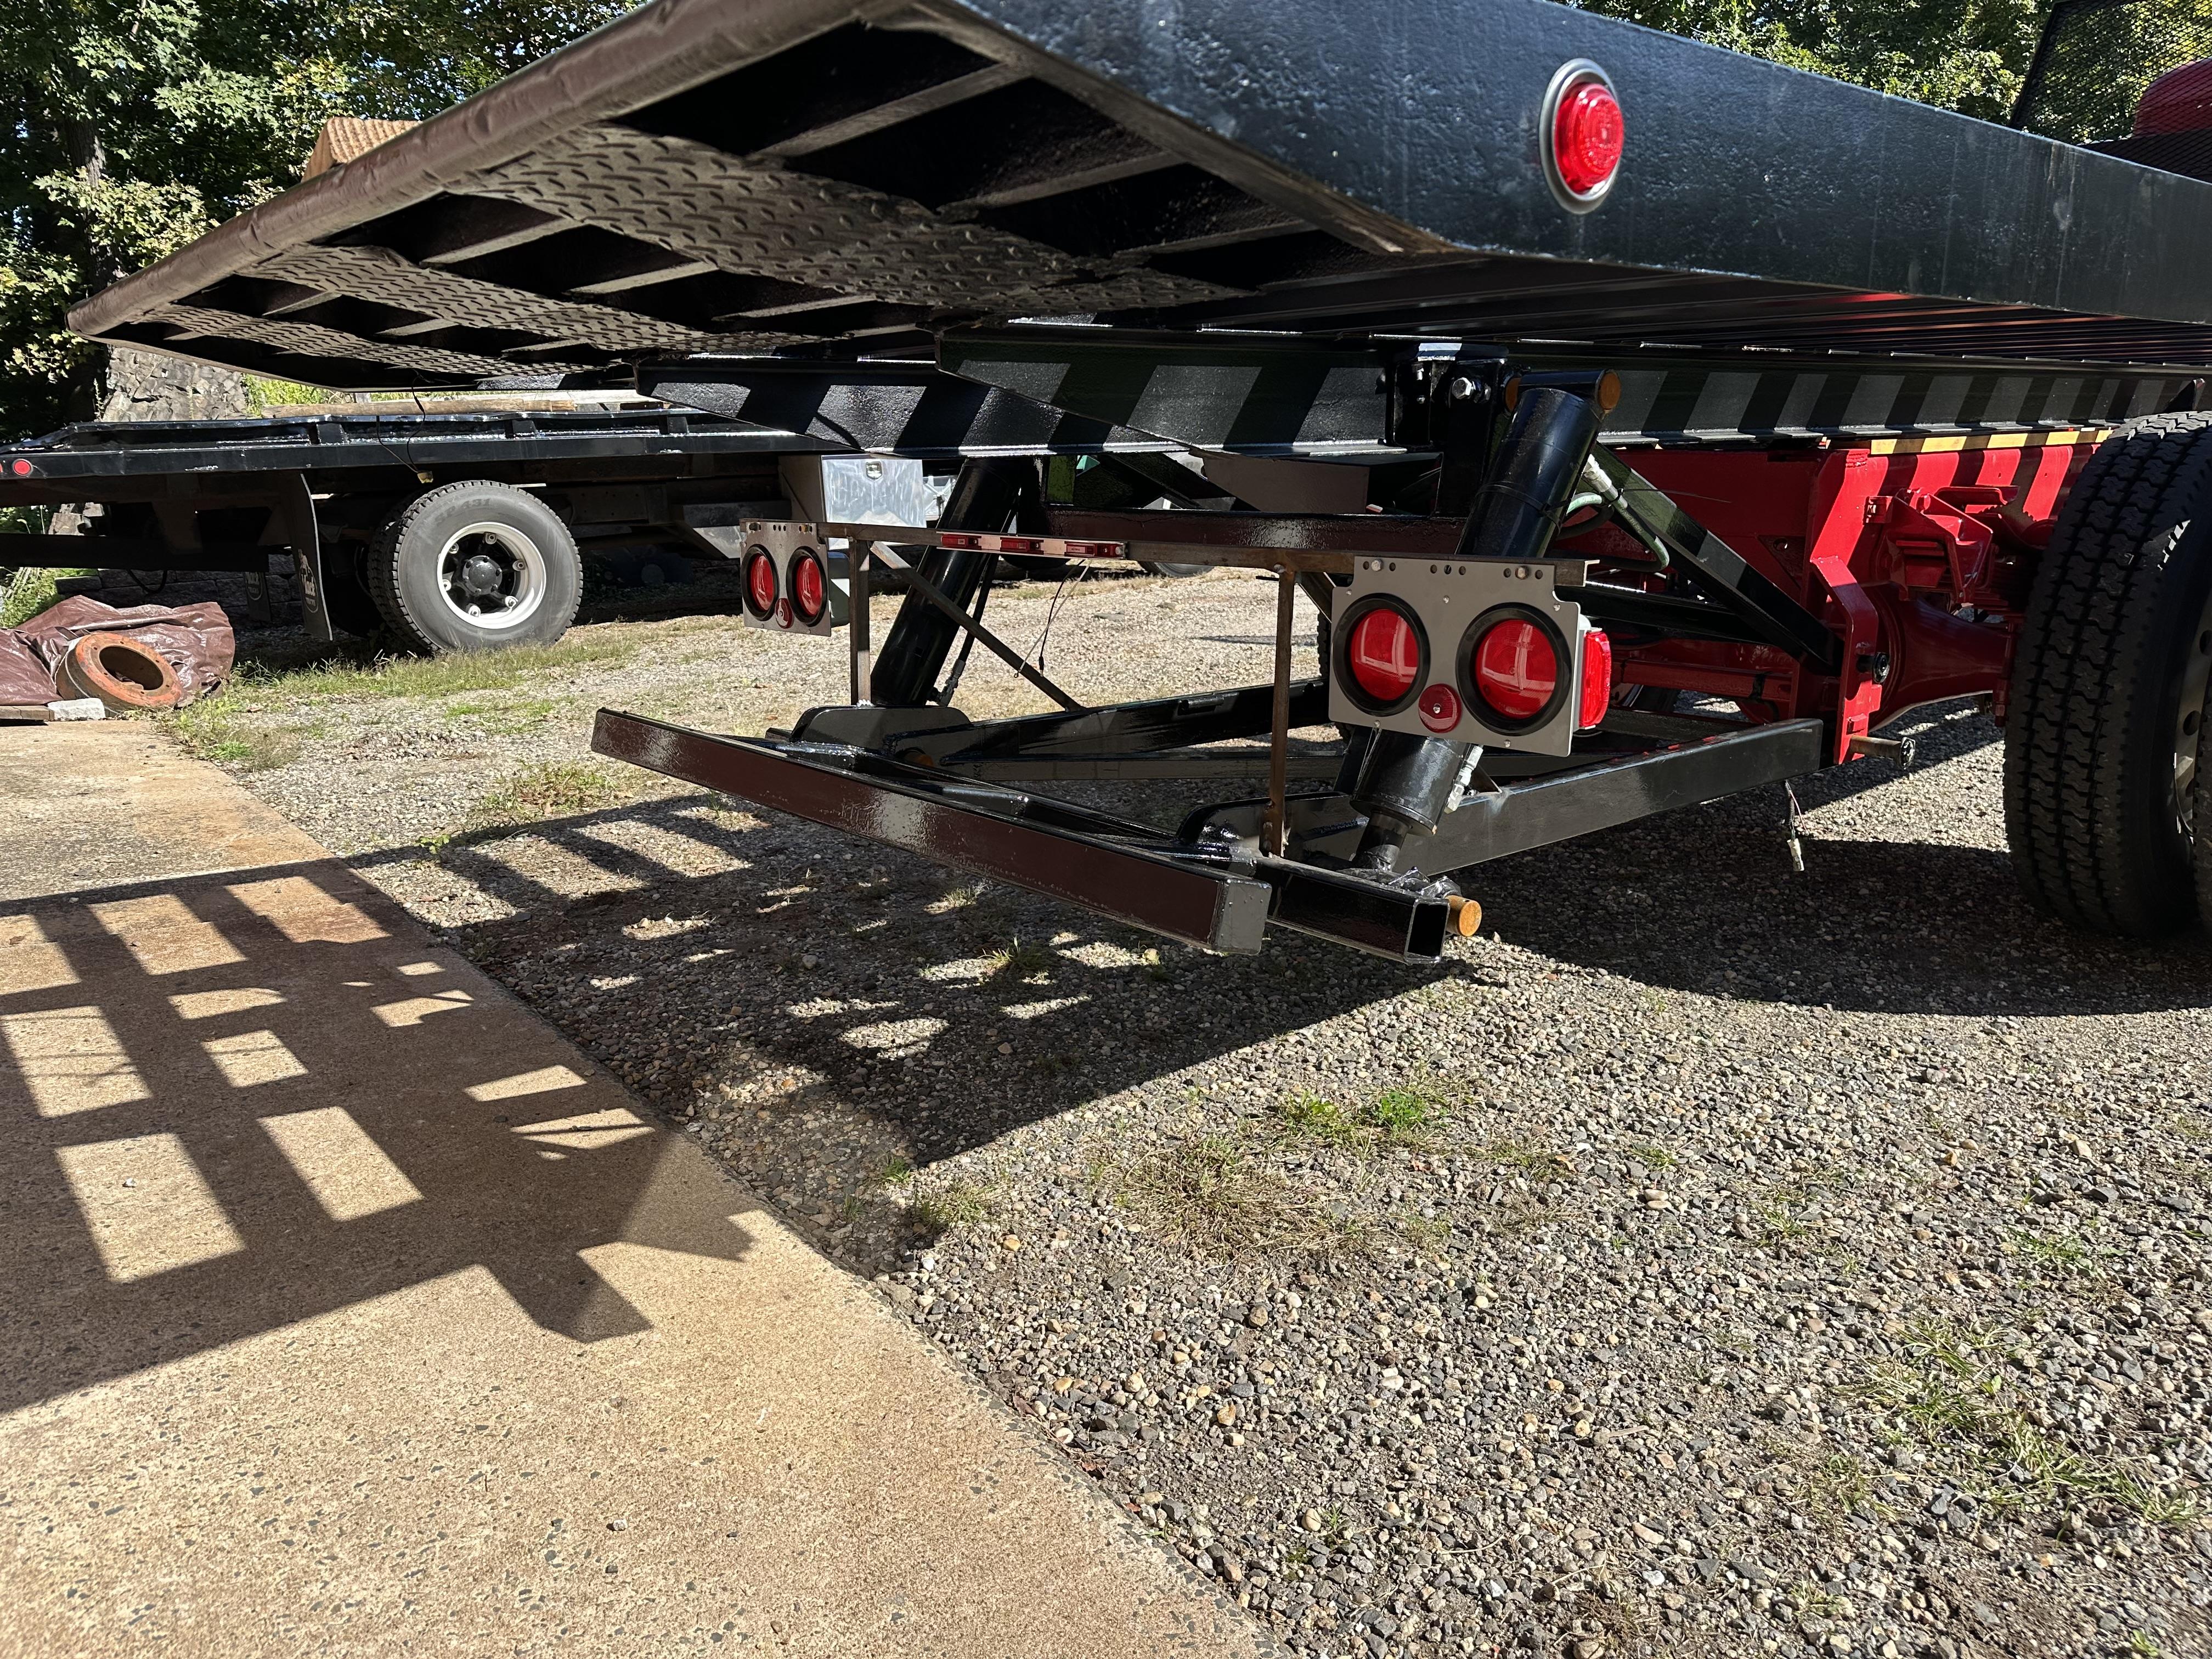
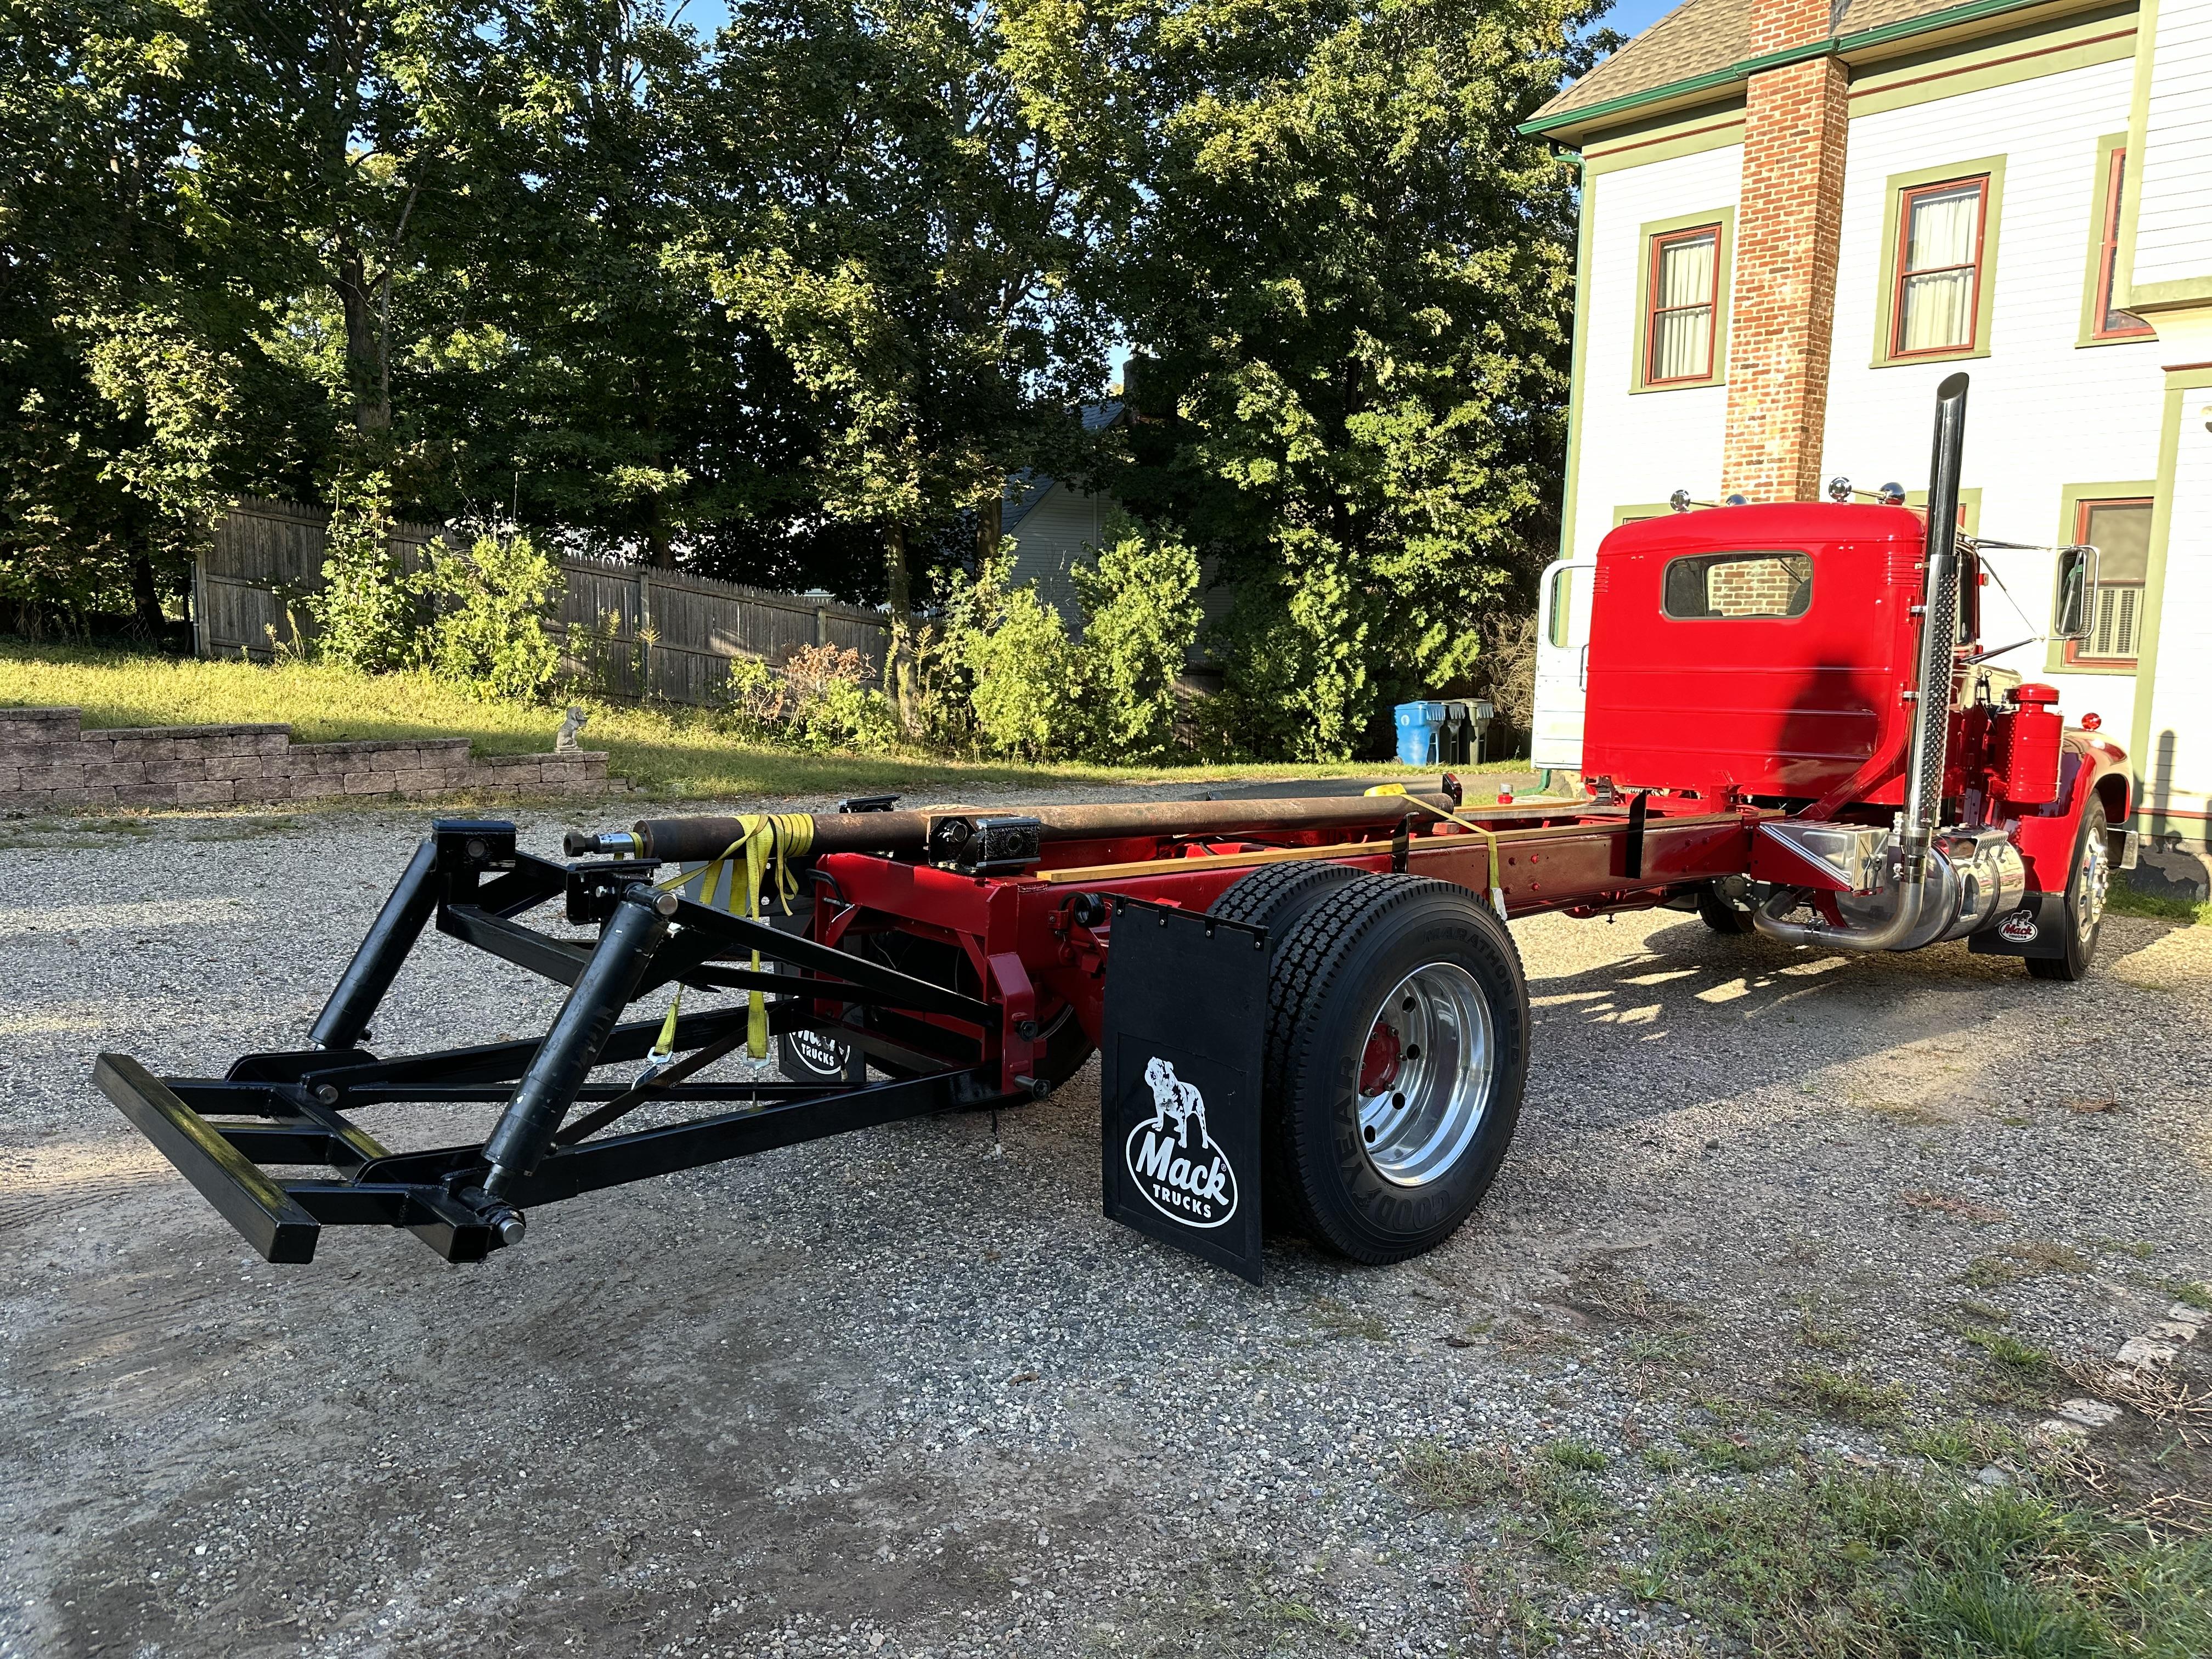
This should help. The long piston pivots with the deck.
-
B-73 Restoration
mattb73lt replied to mattb73lt's topic in Antique and Classic Mack Trucks General Discussion
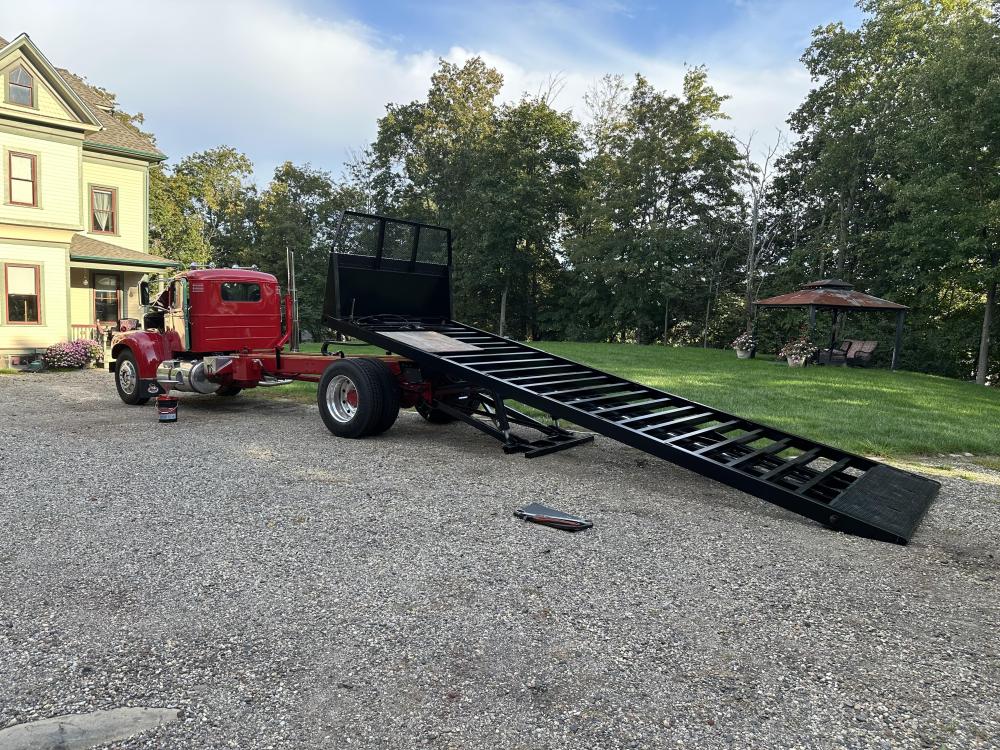
It works. I still need to get another pail of hydraulic oil to fill it completely. No leaks, except for one fitting I missed when putting all the lines in. Body and tail lights next, then adding on the wood deck. Getting close to having this all wrapped up. you can see from the pictures how the body operates.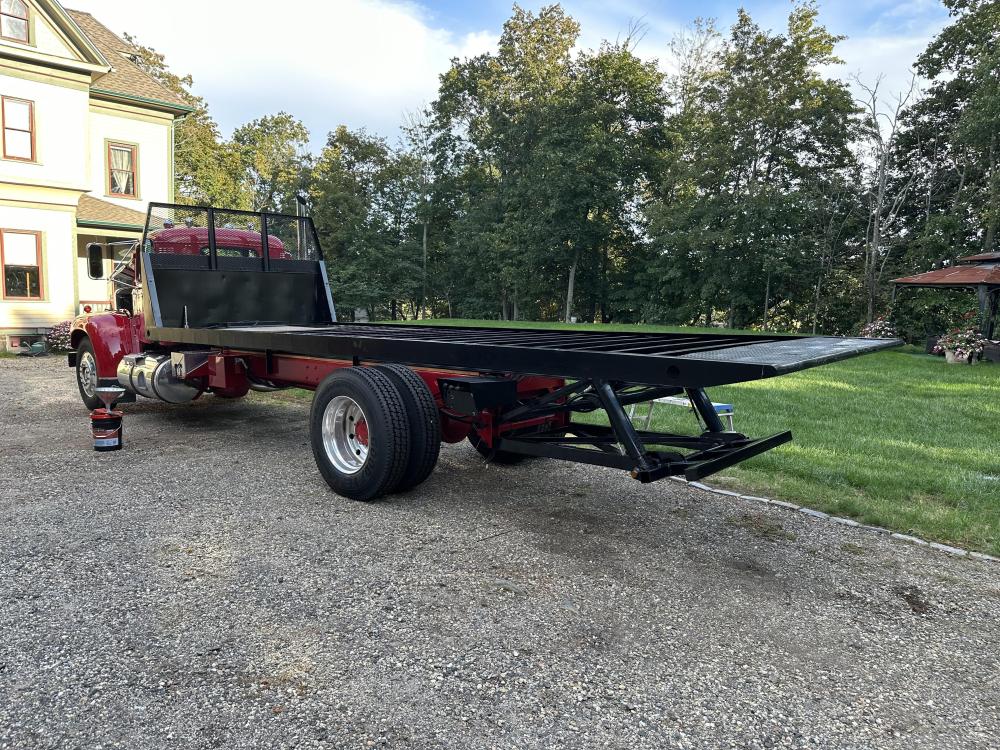

-
B-73 Restoration
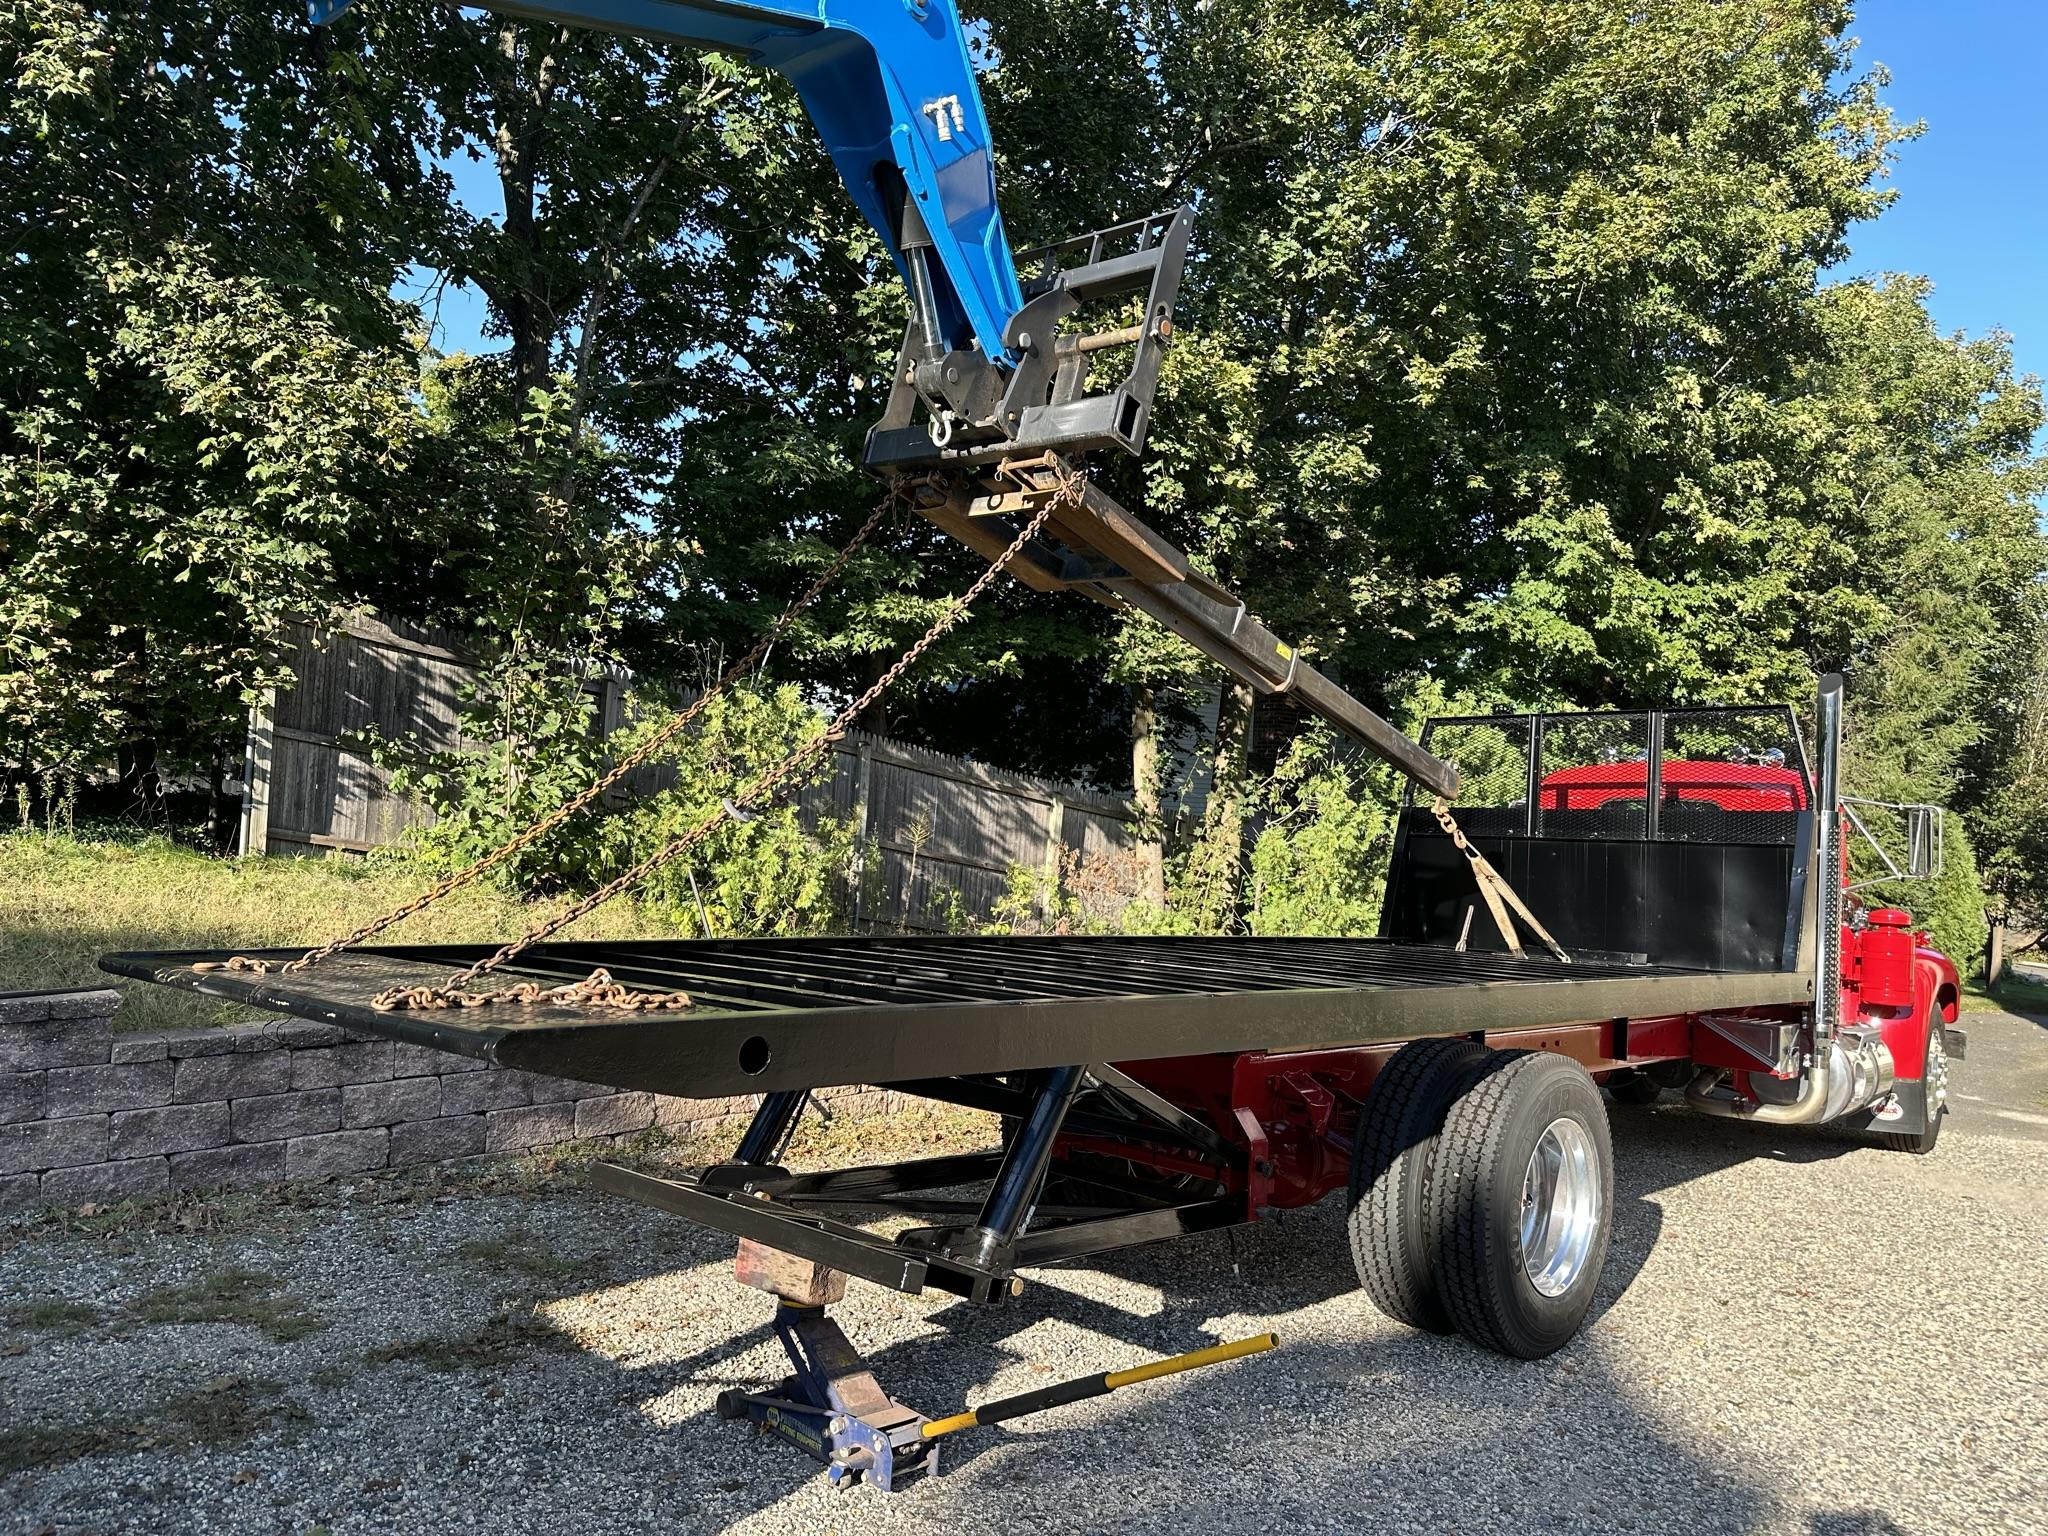
mattb73lt replied to mattb73lt's topic in Antique and Classic Mack Trucks General Discussion
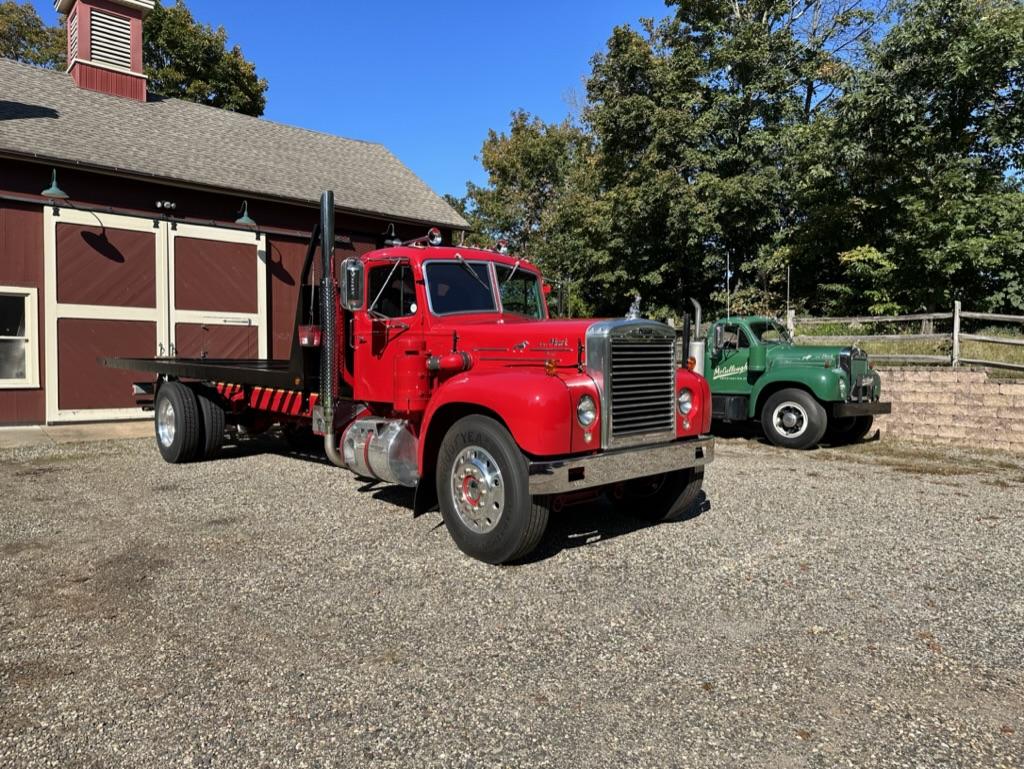
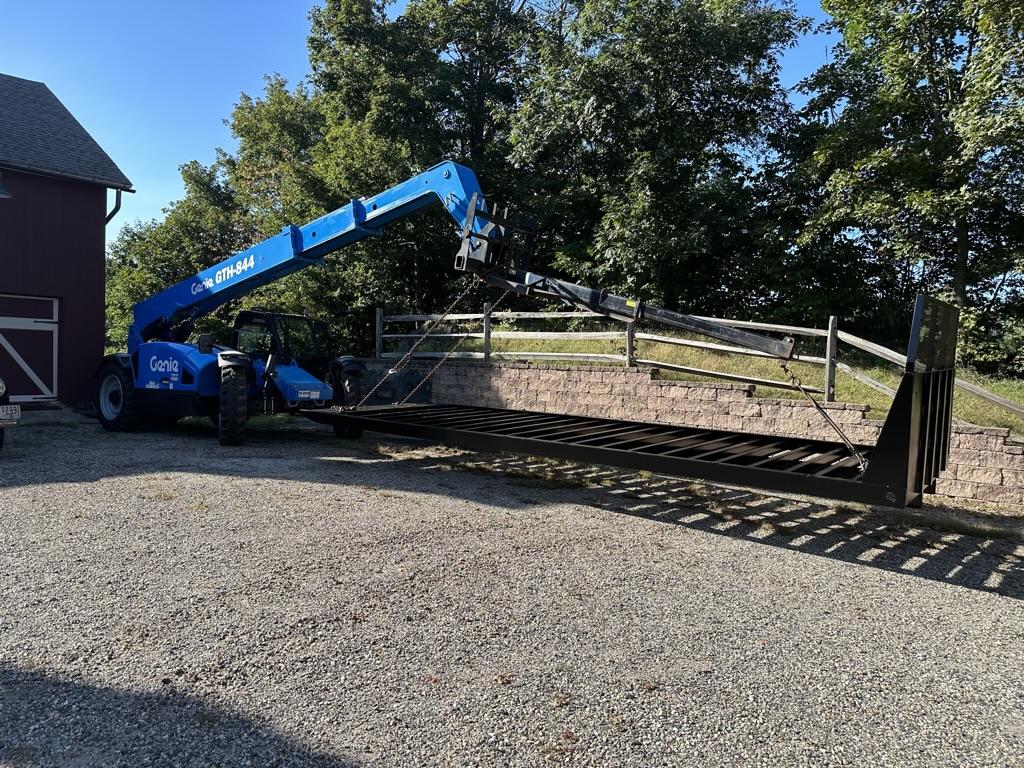
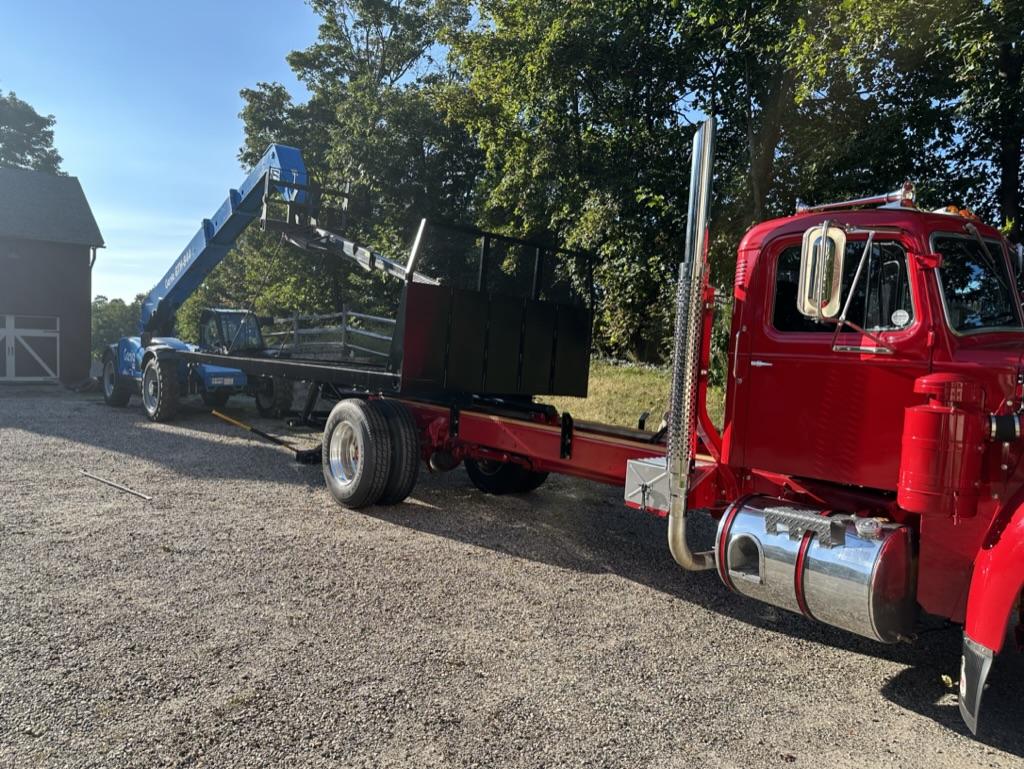
Here it is!! A marathon day running around for a few odds and ends to finish before sliding the body on. Quite the day. Seeing it together and how long the complete truck is, amazes me. Thought about this project and piecing it together it seems like forever. My friend's 8K# lift made light work of it. With all it's features, you can twist, crab, tilt and move it any way you need to to get things lined up. Took a bit to do as I was solo because it showed up way earlier than I asked for. Still lots to hook up and get done, never mind putting the deck on. Hydraulics are about 85% done and I have some more electrical stuff to do. But, DAMN, it's in one piece!!!!!


-
1960 Mack B61T Restoration
mattb73lt replied to eightup's topic in Antique and Classic Mack Trucks General Discussion
That actually looks pretty solid. The back of the cab is a rust prone area and it looks good. How is the rest rust wise? That looks like it'll clean up nicely and make you a good hauler. There'll be a few big expenses(tires/rims!) but it shouldn't be too bad for the rest. Depending on the level of restoration, it would be about as much as doing a car if it's mostly cosmetic. -
B-73 Restoration
mattb73lt replied to mattb73lt's topic in Antique and Classic Mack Trucks General Discussion
Mechohaulic, it’ll definitely gravity dump if you don’t put the landing gear leg down and run the body back. The sliders are set up with the two frame mounted ones on the inside and the two lift ones on the outside of the two main I-beams that run under the body. -
LTL Trunnion cracked
mattb73lt replied to Macman's topic in Antique and Classic Mack Trucks General Discussion
I'm sure the quality of that new casting is way above the original. when I had my frame completely apart all of my aluminum castings were of pretty poor quality, never mind the years of use and corrosion damage. A lot of them needed repair and re-machining. -
B-73 Restoration
mattb73lt replied to mattb73lt's topic in Antique and Classic Mack Trucks General Discussion
Painted everything black with POR-15. A lot of this stuff was pretty crusty and had to be rebuilt, mostly the lifting frames and the bed cross members. Everything is heavily coated, but it's unlikely this truck will see Snow and salt again. I got some smaller stuff hooked up today and painted to piston that slides the body. It seemed to be the best was to do it, because it's so long. Next week should see the hydraulic lines go in and some more equipment mounted. I'm thinking later next week I may slide the body back on. I may do it with the other truck by reversing the body on the bed and rolling it onto the new truck. Or, I may call my friend and borrow another lift. That may be the easiest way to do it.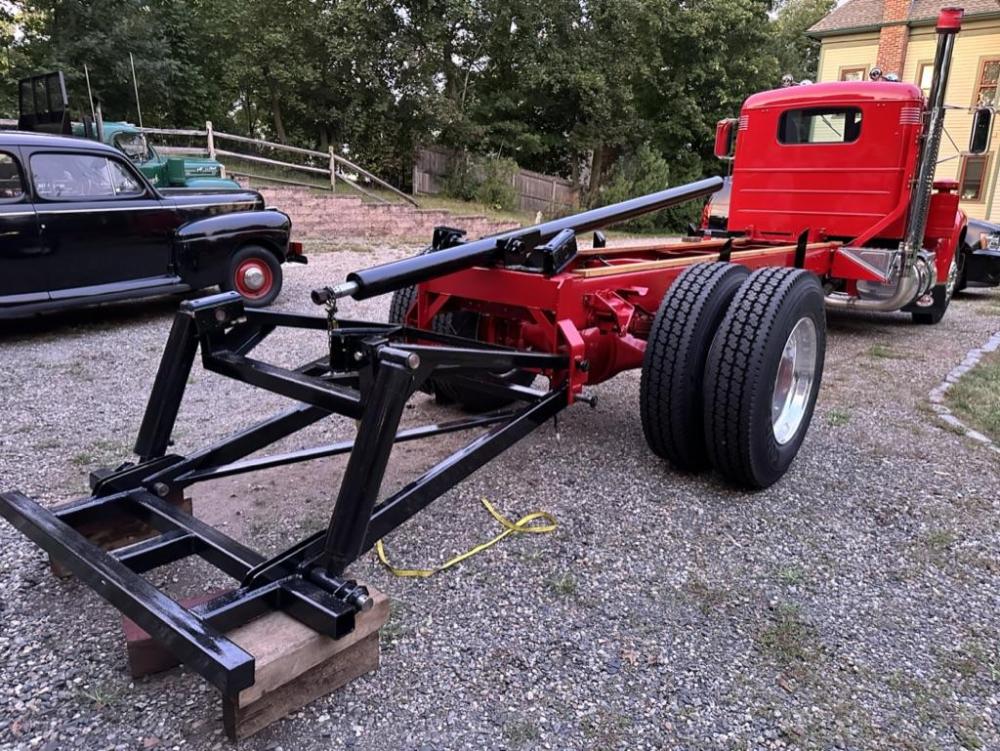
-
B-73 Restoration
mattb73lt replied to mattb73lt's topic in Antique and Classic Mack Trucks General Discussion
I hope you feel better. This one operates differently than the one on the B42. That one is a Chevron body that has fixed pistons to the frame. You can unlock the body, raise it and drive around to reposition to hook a load up. This one you put the landing gear down, then run the body out and then raise and lower it with the landing gear. That's really the main difference. Other than that they operate the same. The body is repainted black and will remain so. One, it's a lot cheaper to repair or repaint it black vs red. -
B-73 Restoration
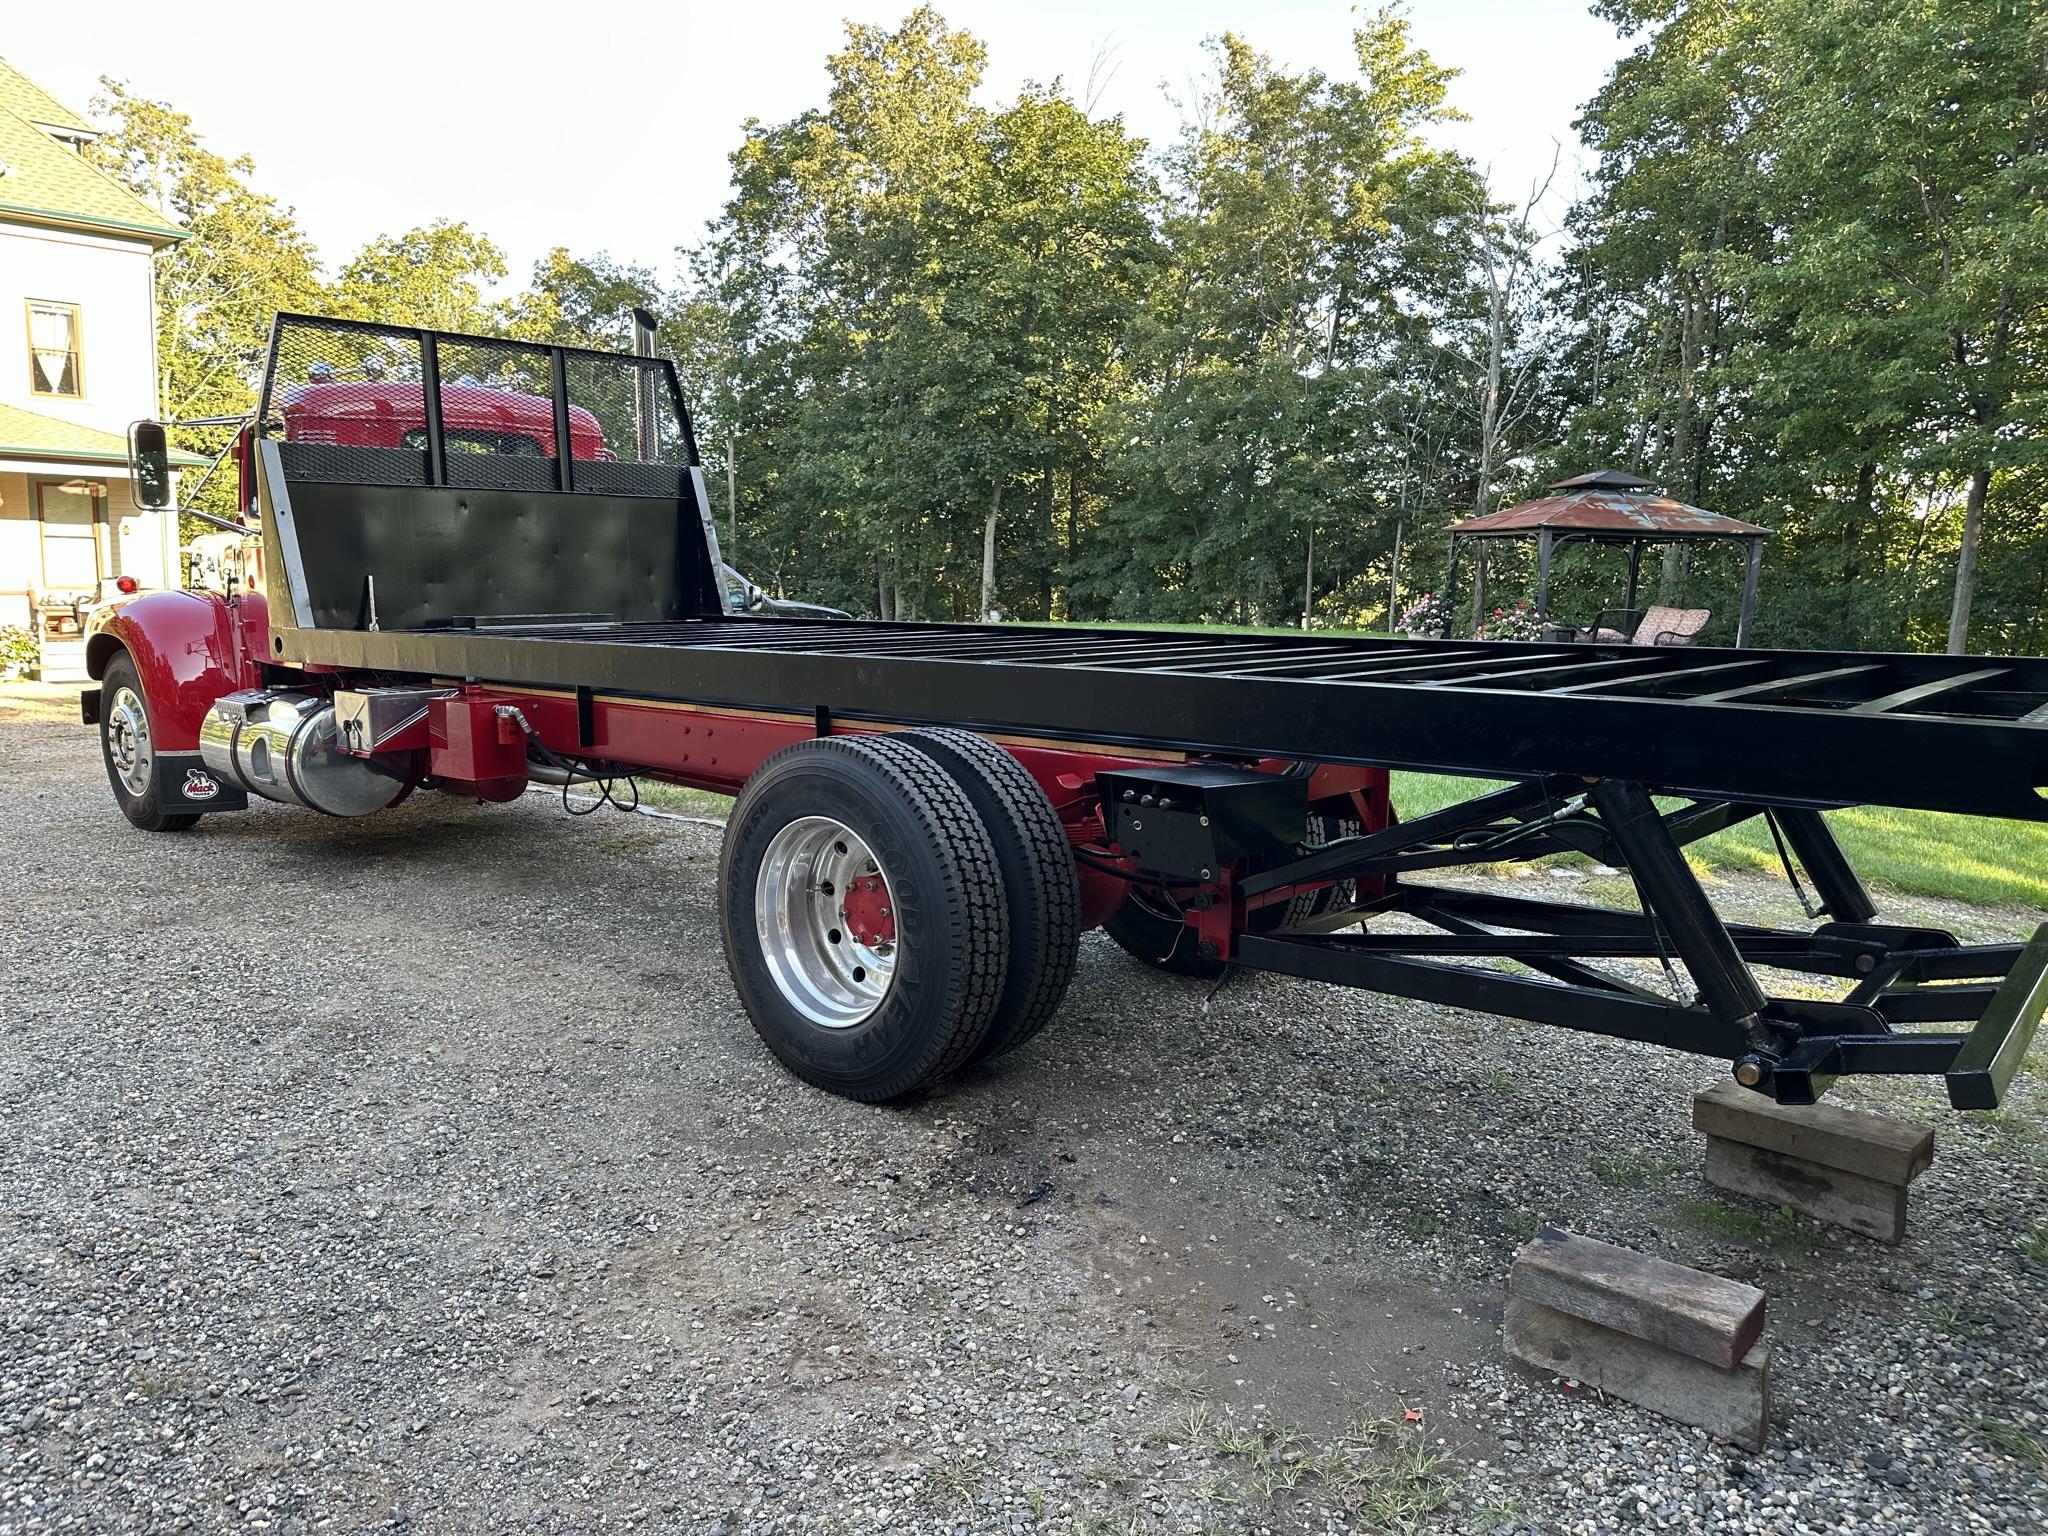
mattb73lt replied to mattb73lt's topic in Antique and Classic Mack Trucks General Discussion
The truck grew 6+ feet in length, today. Added both upper and lower lifting frames and all three hydraulic pistons. Lots to hook up and connect. But, edging closer to adding the deck onto it, pretty soon.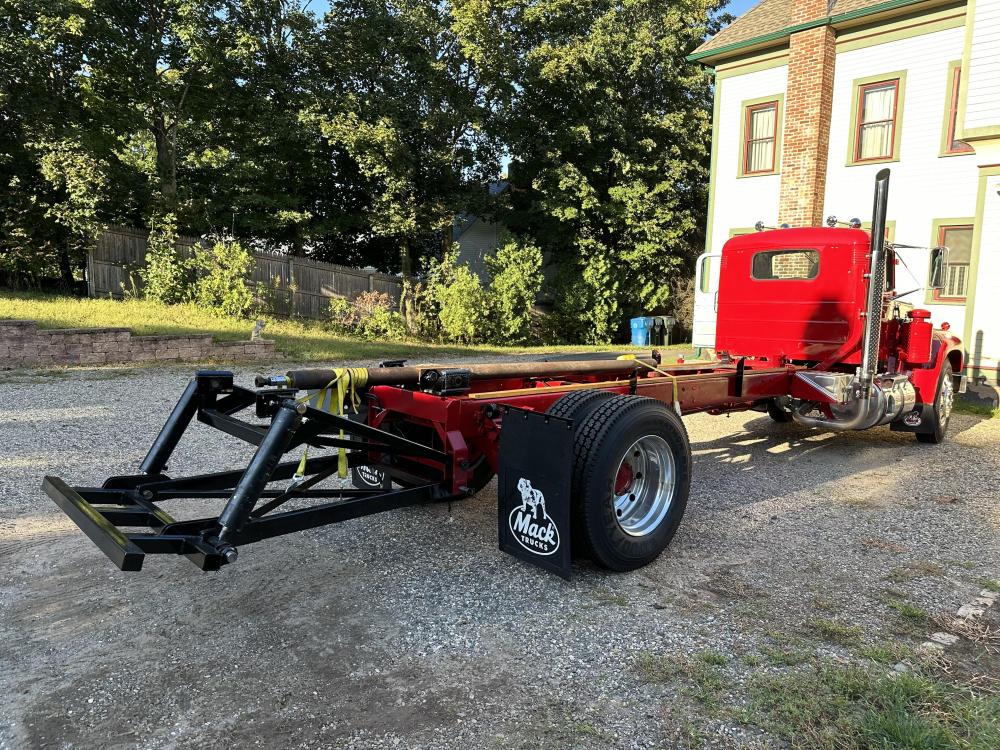
-
B-73 Restoration
mattb73lt replied to mattb73lt's topic in Antique and Classic Mack Trucks General Discussion
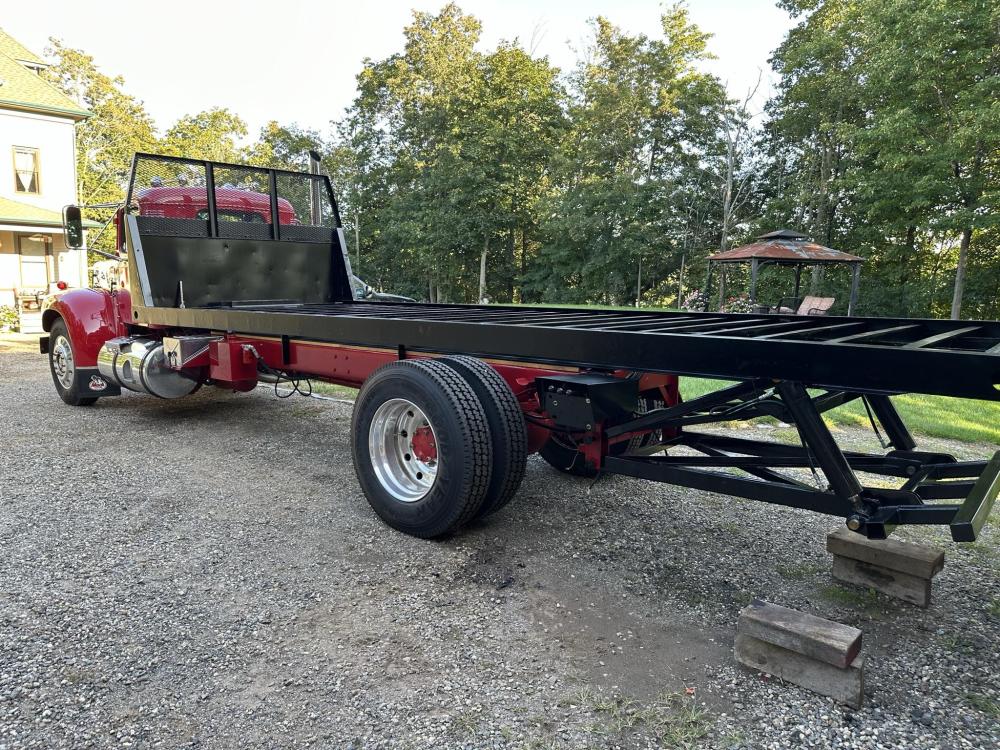
There's actually a few extra inches between the cab and the head board, for the stack and more importantly a condenser for air conditioning (in the future). -
B-73 Restoration
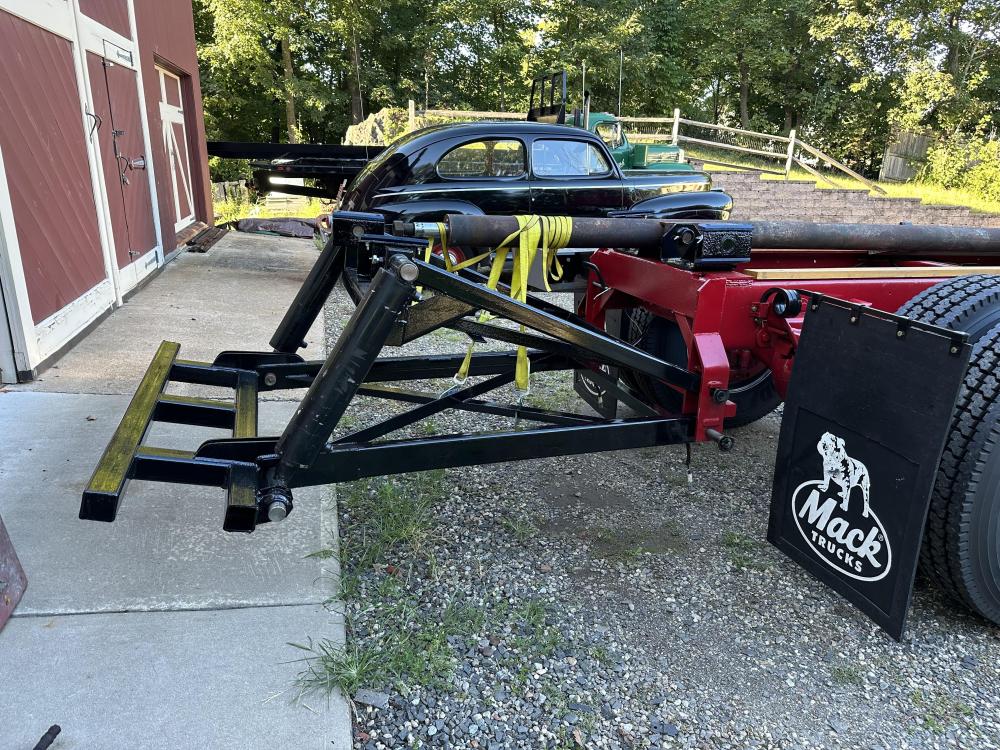
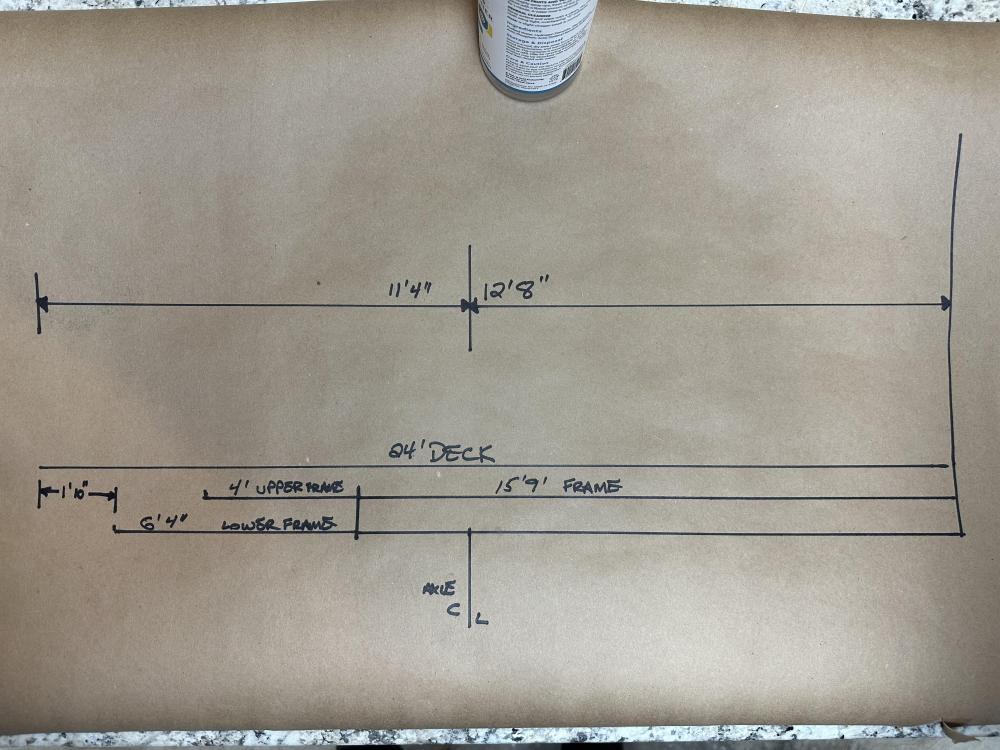
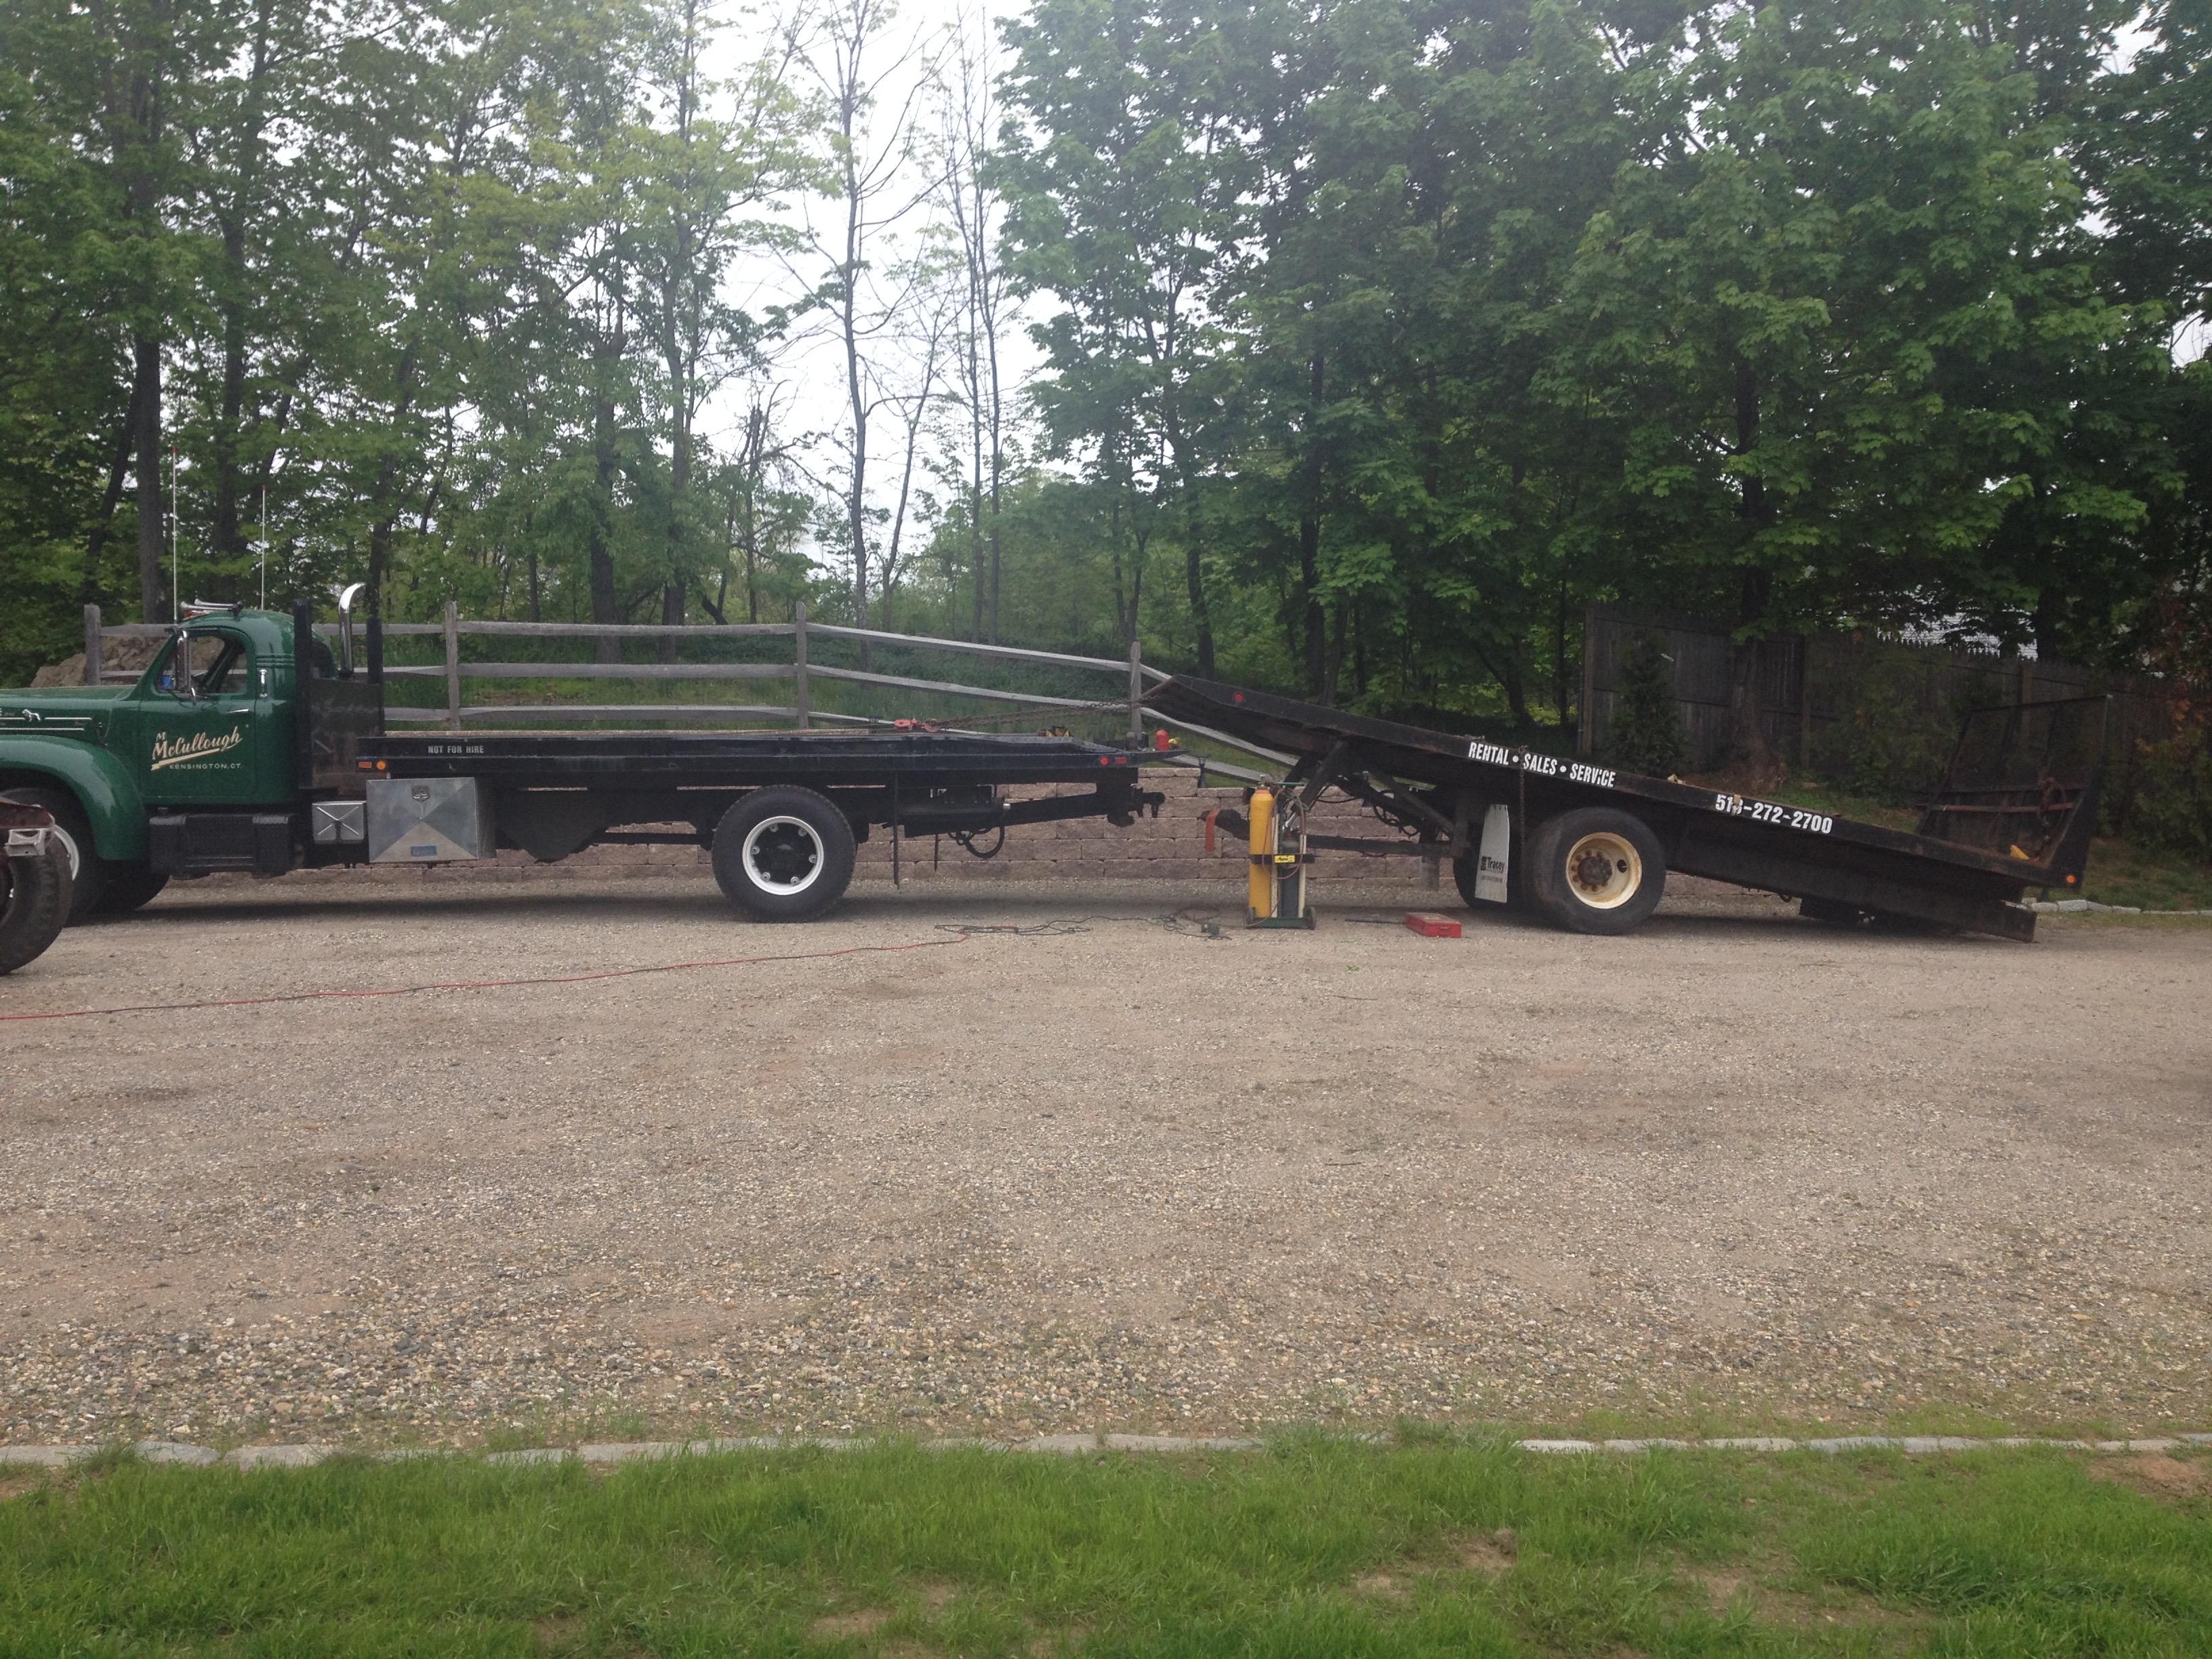
mattb73lt replied to mattb73lt's topic in Antique and Classic Mack Trucks General Discussion
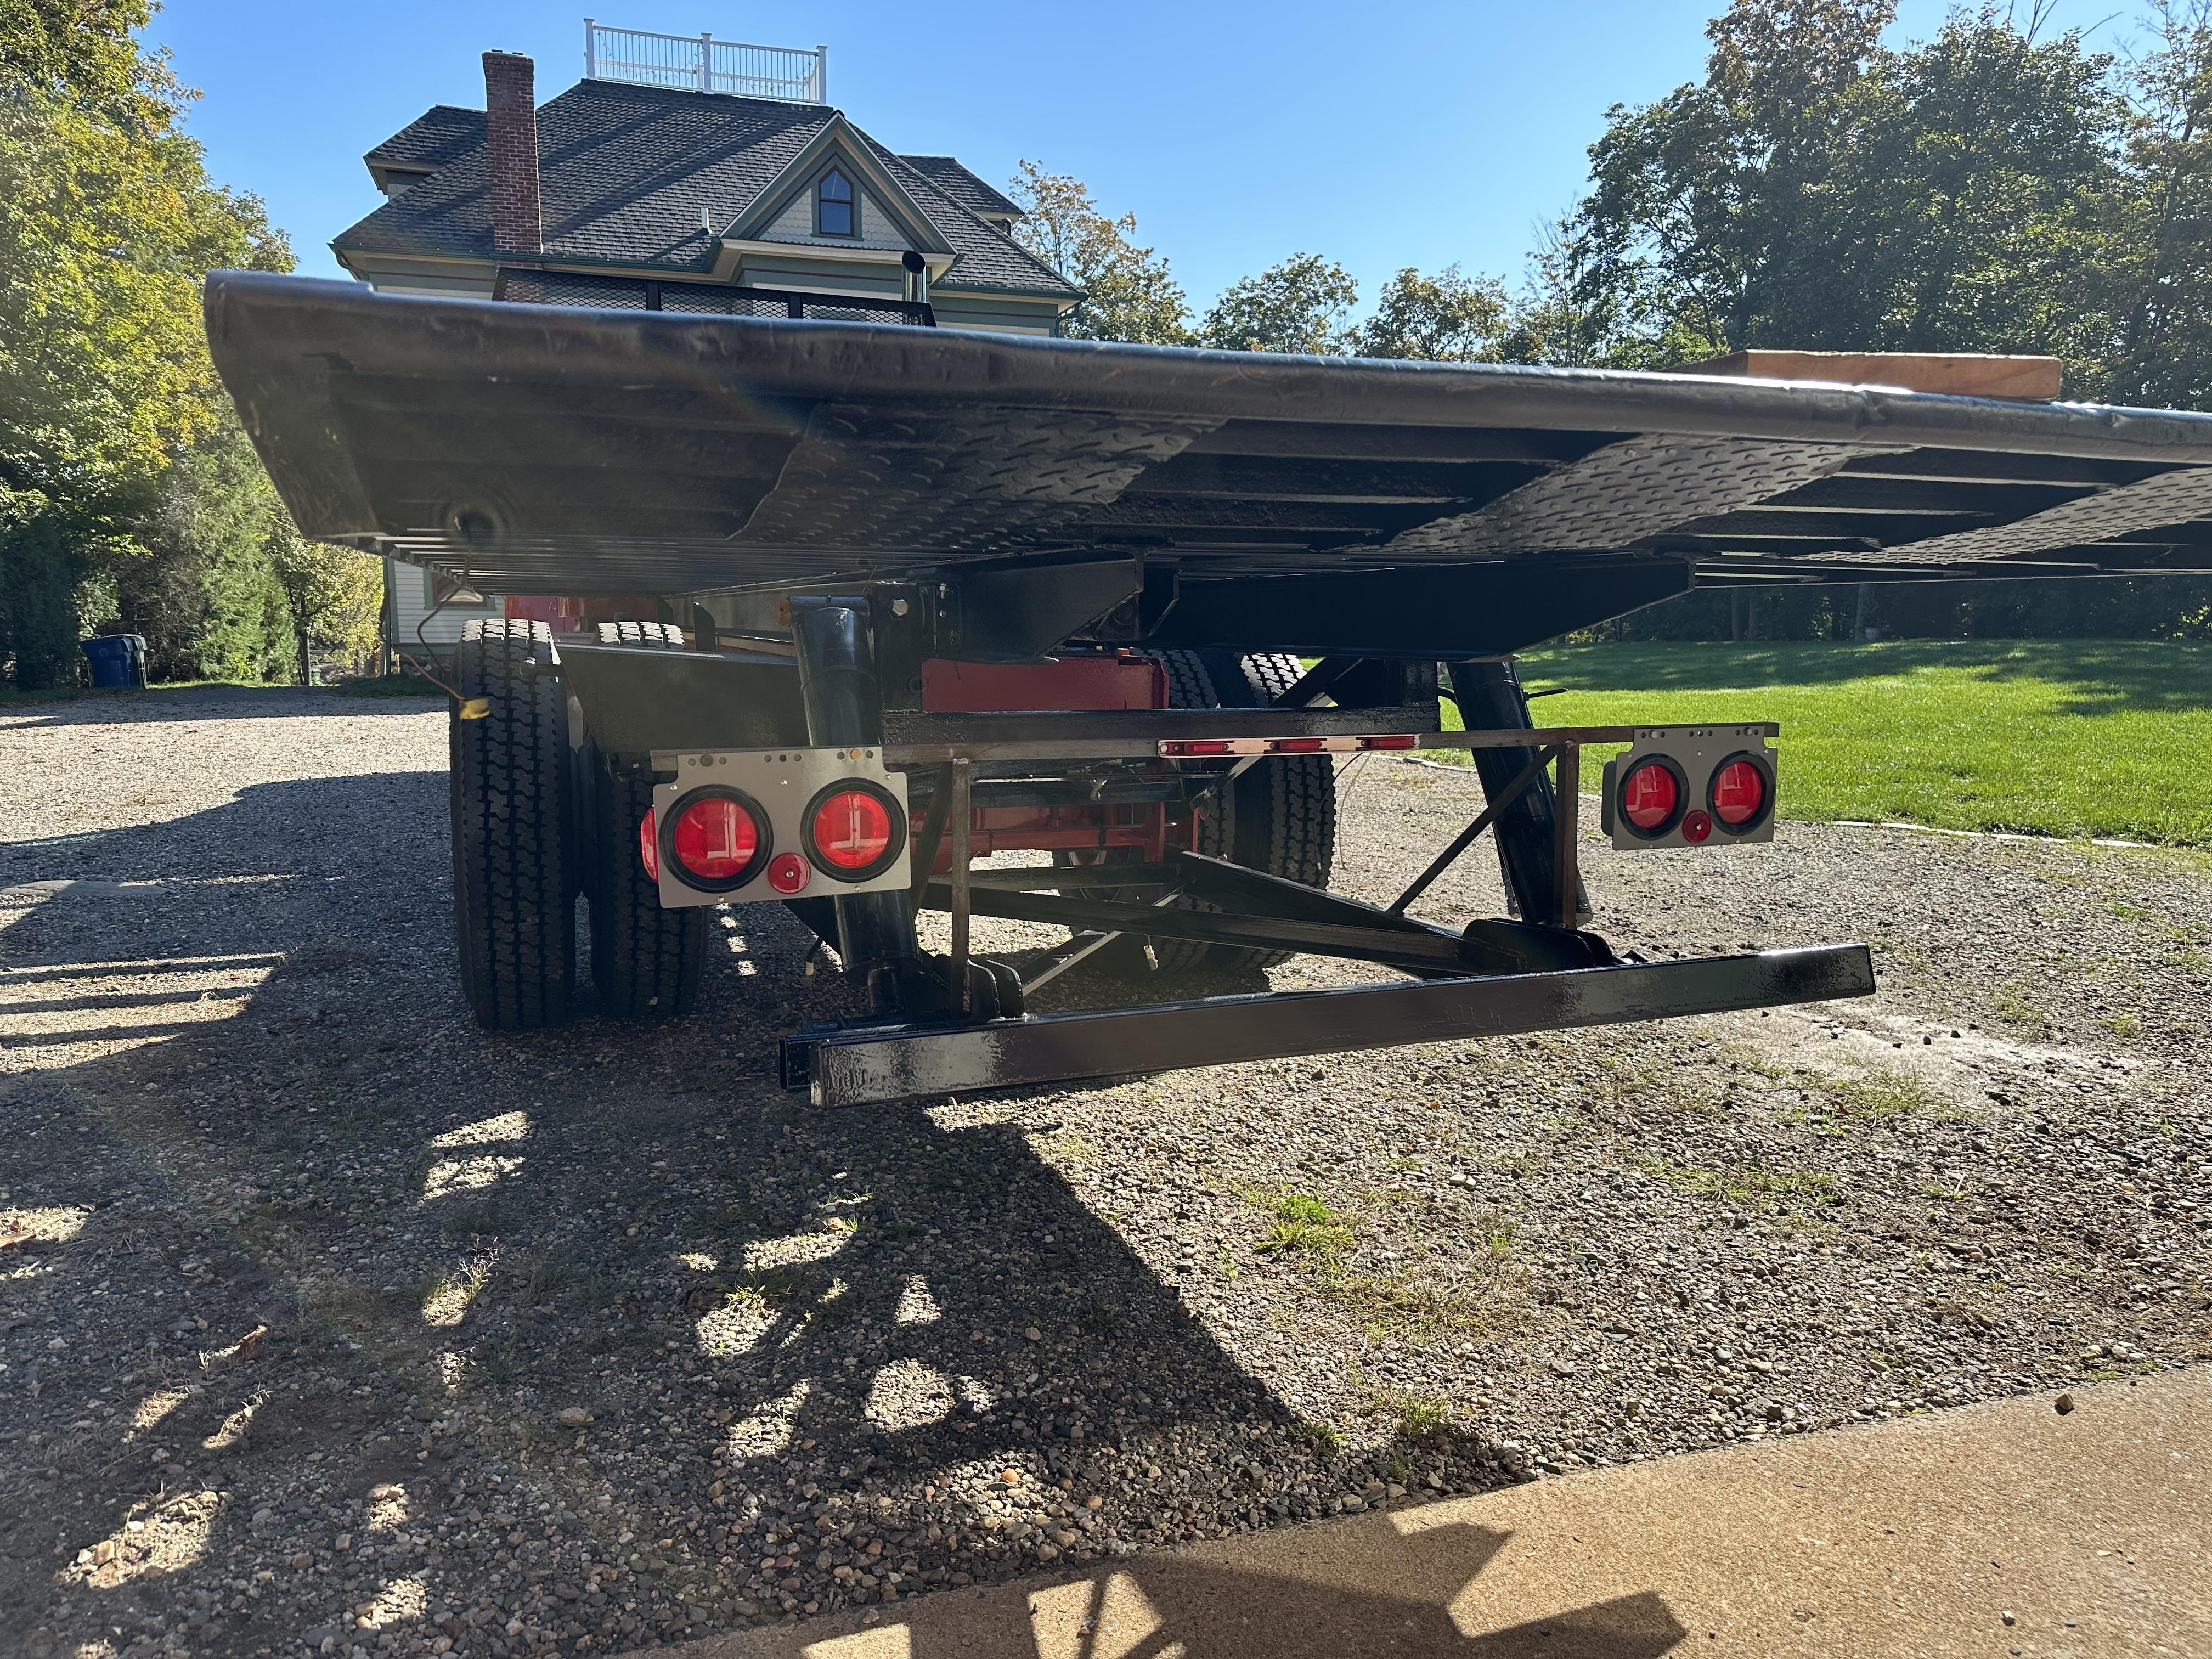
Damn, now you’re making me second guess what I did?? I had to go out and remeasure everything to double check and draw it up to be certain.Thanks by the way! So the axle does sit close to the center of the bed, 12’8” forward and 11’4” in the rear. What you’re probably not accounting for are the two under body frames that raise and lower the deck. In the upper photo, they’re blocked by the torch set. The lower frame extends out from the end of the truck frame about 6’4”. From there, there’s only 1’10” of over hang at the tail end. The lower frame presses on the ground to raise/lower the deck, stabilizes the deck at loading docks and is also a rear bumper (Mansfield bar).
-
That's a heavy spec Tractor!! I've seen Anthony equipment around, just can't place them at the moment. RT 22, somewhere in the New Haven-Branford area.
-
Looking good!!
-
Mack Museum
mattb73lt replied to mrsmackpaul's topic in Antique and Classic Mack Trucks General Discussion
I was going to suggest the same thing. It would stand to reason that if they were built here and shipped to Australia, that some sort of record would exist. If the were built in Australia, then they might be there, also. -
B-73 Restoration
mattb73lt replied to mattb73lt's topic in Antique and Classic Mack Trucks General Discussion
No worries, it’s all good. -
1941 Mack ED firetruck
mattb73lt replied to 41mack's topic in Antique and Classic Mack Trucks General Discussion
The fire truck forums here should be helpful. Joining SPAAMFA could also be a good resource for obtaining parts and fire equipment. Easiest solution would be to find a good running takeout to replace it. Rebuilding can get very expensive, depending on the work involved to bring it back. Be prepared for some significant payout of resources to get it back into an operational state. -
Finally some DM progress
mattb73lt replied to mowerman's topic in Antique and Classic Mack Trucks General Discussion
It’s always darkest before the dawn. Keep at it and once you start fixing things and laying on some primer to make it one color it’ll start looking like something! At least it runs moves and is mostly complete. You’ll turn the corner soon.


BMT Forum Logo
