

Willie dog
-
Posts
379 -
Joined
-
Last visited
-
Days Won
12
Content Type
Profiles
Forums
Gallery
Events
Blogs
BMT Wiki
Collections
Store
Everything posted by Willie dog
-
feeling dumb
Willie dog replied to Willie dog's topic in Antique and Classic Mack Trucks General Discussion
Good thought , but they were the only six split rims in the place at the time. -
feeling dumb
Willie dog replied to Willie dog's topic in Antique and Classic Mack Trucks General Discussion
That makes three of us! -
feeling dumb
Willie dog replied to Willie dog's topic in Antique and Classic Mack Trucks General Discussion
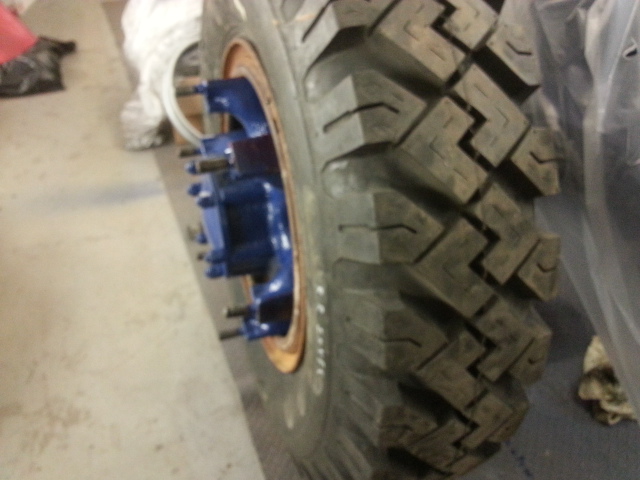
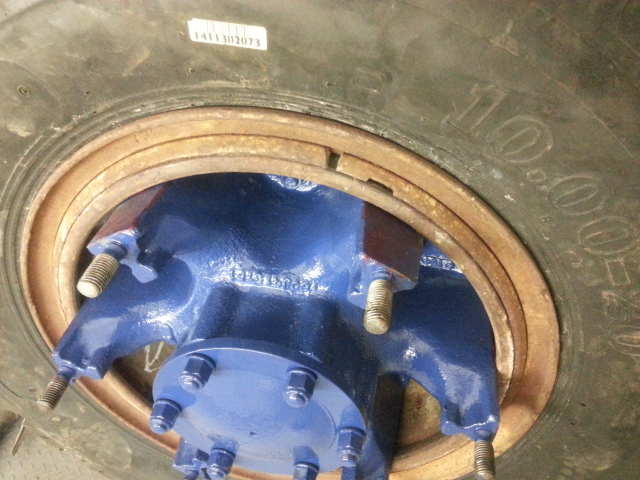
Oh yes. That is what alerted me the inner wheel wasn't on anywhere near enough. I set the spacer on the hub and the ring sat out PASSED THE LUG NUT STUDS. Oopps Something ain't right. -
feeling dumb
Willie dog replied to Willie dog's topic in Antique and Classic Mack Trucks General Discussion
After seeing how split rims are mounted I was afraid they would get scratched to heck. I did vlean and paint the inside of the rim where the rim liner goes. I have a good way to mask the tire from the rim for painting....I'll share the pics when I get to that point. -
feeling dumb
Willie dog replied to Willie dog's topic in Antique and Classic Mack Trucks General Discussion
It just seems strange that the rears go on just so far and stop dead. They aren't even touching the outside of the spokes, it seems to be the slight lip and the inner most rear of the hub that is causing the issue. The spokes on one hub have absolutely no paint on them, and the rim has very little paint and no rust that would seem to be stopping it. The pictures of the rear shows how far they go and it's as if something is keeping them from going any further. Nothing has changed except new tires. I'll get there eventually I think. -
feeling dumb
Willie dog replied to Willie dog's topic in Antique and Classic Mack Trucks General Discussion
They are Samson. I got them from Nebraska tire. 10x20 bias ply. -
feeling dumb
Willie dog replied to Willie dog's topic in Antique and Classic Mack Trucks General Discussion
Thanks to everyone for the information. I feel really stupid for not being able to reinstall a set of rear wheels. I'm learning a lot about old Macks. Cars and pick up trucks I am familiar with.....this is my first big truck....but not my last. -
feeling dumb
Willie dog replied to Willie dog's topic in Antique and Classic Mack Trucks General Discussion
I'm going to blast the wheels and try it again. I ground all the paint off of one hub where it contacts the rim. It still goes half way and no more. I'm a bit afraid to beat on the rim in fear of the lock ring flying out. They ccame off.....so they should go back on. -
feeling dumb
Willie dog replied to Willie dog's topic in Antique and Classic Mack Trucks General Discussion
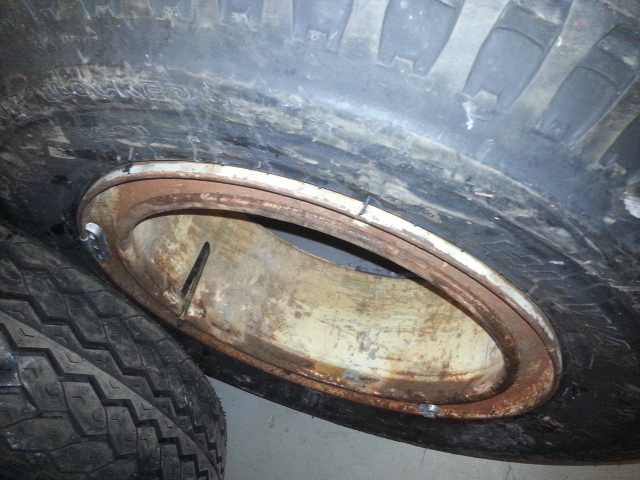
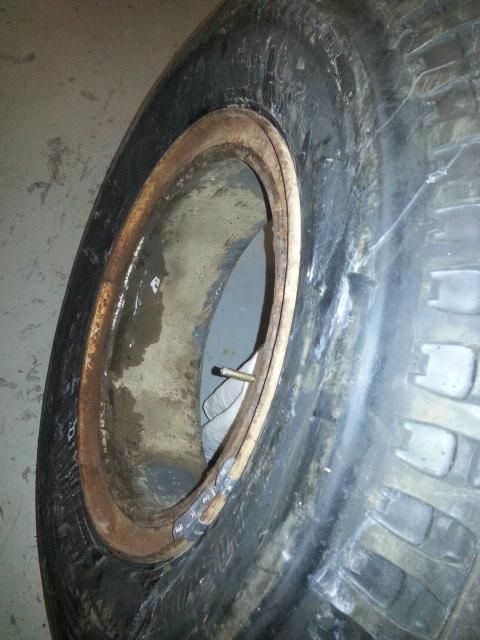
Actually the first two pictures are the front wheels. The pictures came out opposite of how I posted them. -
feeling dumb
Willie dog replied to Willie dog's topic in Antique and Classic Mack Trucks General Discussion
I tr tried every combination , reversing them , I even tried a definite front .....I know the rears came off the rear beccause I marked them. -
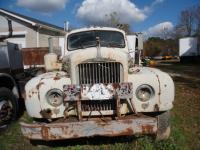
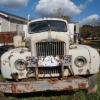
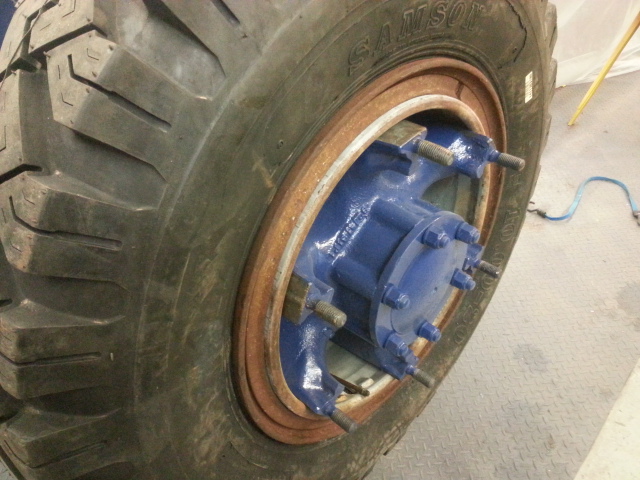
Some info please. I picked up the new tires after they were all mounted. Tried to put the rears on to test fit before painting. Well,the inner wheel will only go on less than half way and "boom". It stops dead and won't go on the hub farther. The outside of the spokes have no paint on them, and I even tried to grease them.....no help. Is there something I'm missing? I assume they should fit snug on the hub but, HOLY COW. I tried hitting the tire and rim with a rawhide mallet but still nothing. Also, is there a difference between the front and rear rims? If there is then I have to take two back and have them switched. Lastly, should the bead lock on the inner rear wheel should face out against the spacer that goes between the two wheels? The last two pictures are the front wheels. See the difference between the two outer edges? One ring looks like it stands out in relation to the tire sidewall.
-
http://classiccars-forsale.co.uk/classic_classifieds/1957-mack-b-65-thermo-dyne/ No connection. Just wanted to share.
-
NEXT STEP
Willie dog replied to Willie dog's topic in Antique and Classic Mack Trucks General Discussion
Yes. I'm gong to use it top and bottom of the cab floor and back wsll and maybe under the firewall pad. -
NEXT STEP
Willie dog replied to Willie dog's topic in Antique and Classic Mack Trucks General Discussion
Thanks to all of you for your interest. Thanks also to my VERY understanding wife. She only fusses a little bit (?) when I come in the house dusty , greasy, and pockets full of blasting grit. -
NEXT STEP
Willie dog replied to Willie dog's topic in Antique and Classic Mack Trucks General Discussion
Yes. Raptor makes a tintable bedliner. It's clear and you add the color of your choice. They also make a pre colored liner as well. -
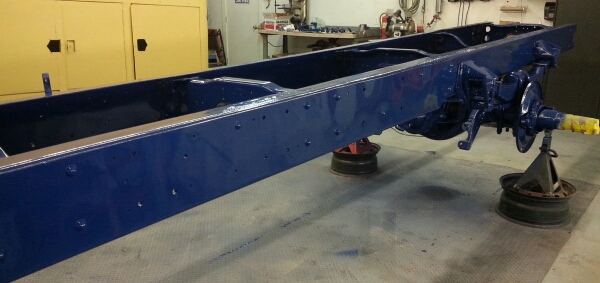
Finally got the chassis painted.
Willie dog replied to Coenut's topic in Antique and Classic Mack Trucks General Discussion
Very nice. I'm sure you're glad that part is over. On to assembly! -
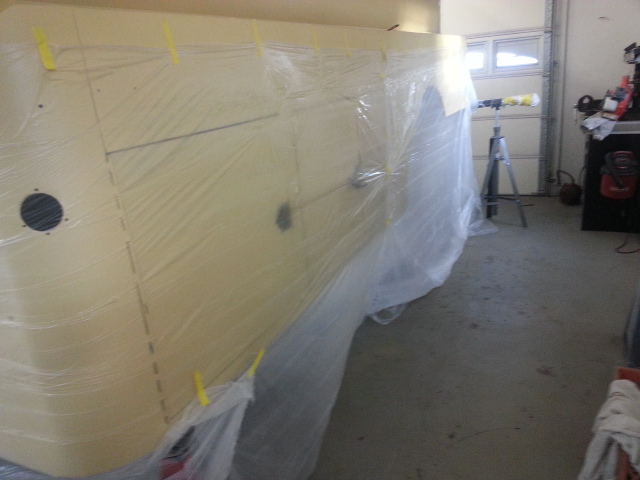
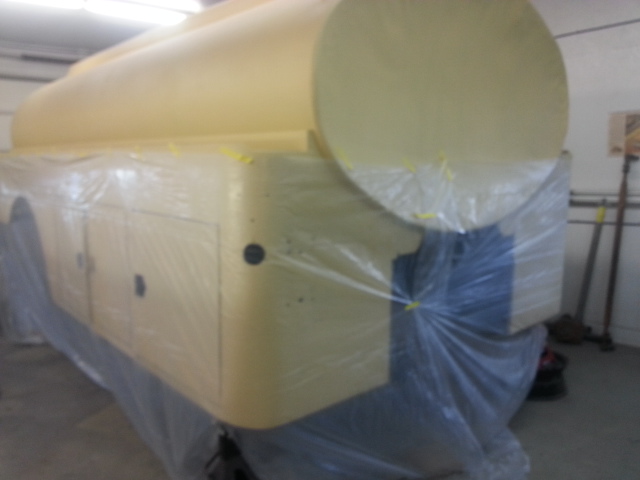
Getting ready to undercoat the tank body, wheel wells and everything underneath. Made an upside down tent to keep the splatter from going everywhere. It's all cleaned off , seam sealed and primed. I'm going to use Raptor bedliner. I've had good luck using it for undercoat on many other projects. It goes on nice and thick , has a nice black finish that's easy to touch up if necessary. I figured two kits should be enough. Then once the tires get here , it will be time to roll the almost completed frame back under the tank. I can't hang the front suspension until the frame is under the tank because I have to have the front of the frame almost touching the floor to get it to fit under the tank. I'm so excited!
- 10 replies
-
- 13
-

-
Frame paint
Willie dog replied to Willie dog's topic in Antique and Classic Mack Trucks General Discussion
Good question......I'm gonna try a Google search. Any bit of money I can save is a bonus. -
Frame paint
Willie dog replied to Willie dog's topic in Antique and Classic Mack Trucks General Discussion
All that is correct......just be sure to sand and re-prime any por-15 spots. I didn't use any clear. Just single stage acrylic enamel with a hardener. Oopps. Correction. I only used POR-15 down in the frame/fish plate seam. After blasting , all the rust everwhere else was gone so I didn't feel the need for it elsewhere. Good luck on your '41! Share some pics. -
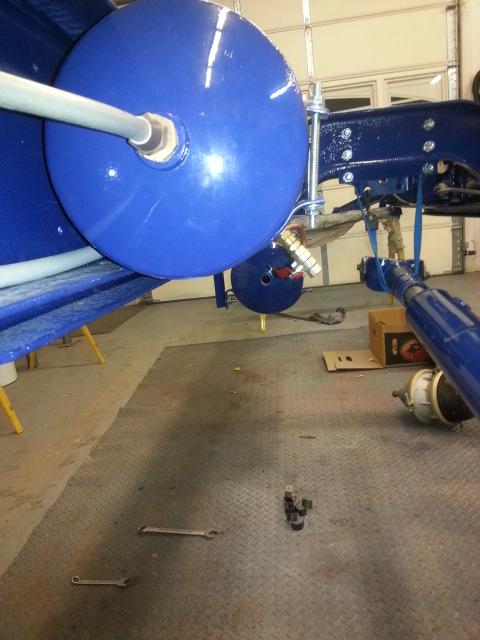
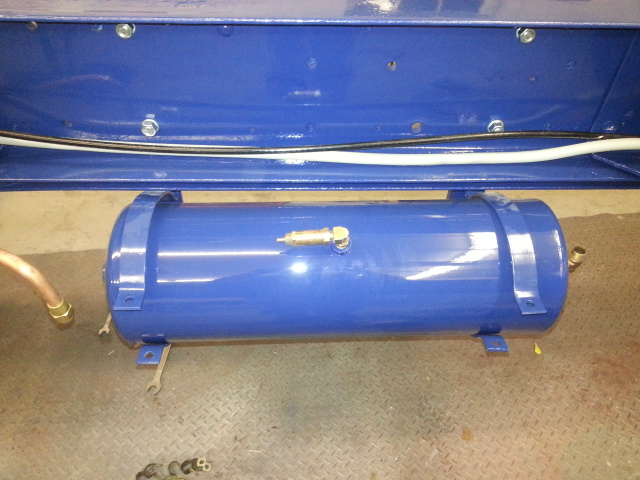
air tank question
Willie dog replied to Willie dog's topic in Antique and Classic Mack Trucks General Discussion
Thanks J. I layed awake in bed last night and thought , "You dummy. As long as the drains point down it doesn't matter where the top fittings end up." Thanks for confirming my brain fart! -
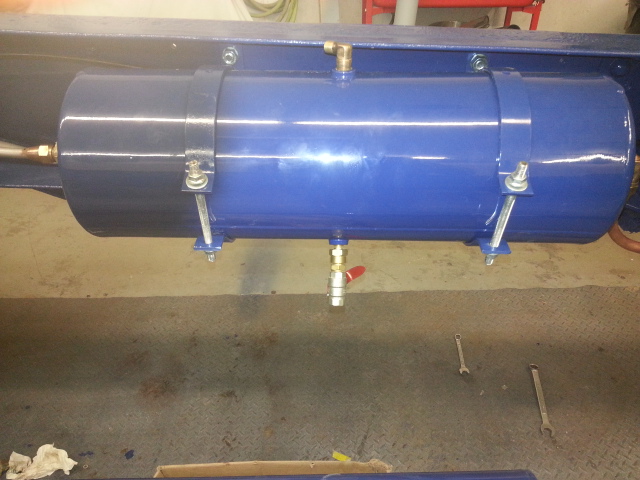
Gotta question about b 42 air brake tanks. I've installed them on the frame but something doesn't look quite right. I took plenty of pictures but of course the part I need to see isn't in the picture. I think the front tank is correctly aligned but it's the rear one I'm unsure of. As viewed from behind the tank, the drain valve looks to be ttilted way too far. I guess the simplest question would be does anyone have a few good pictures of the two air tanks placement ?
-
Frame paint
Willie dog replied to Willie dog's topic in Antique and Classic Mack Trucks General Discussion
How cool!! I think it's great to preserve a piece of history.......especially when it's your own!!! -
Frame paint
Willie dog replied to Willie dog's topic in Antique and Classic Mack Trucks General Discussion
I am going to do the blue and orange scheme with the Gulf logo on the tank sides. I still have the original pump and counter/ticket printer that was in it from new. I am going to make it LOOK as if it is ready to start pumping at any moment. Even though it will never pump a drop of oil ever again. -
Frame paint
Willie dog replied to Willie dog's topic in Antique and Classic Mack Trucks General Discussion
I sure will. New paint never cures fast enough when you have a pile of new and/or rebuilt parts waiting to go on. -
Frame paint
Willie dog replied to Willie dog's topic in Antique and Classic Mack Trucks General Discussion
I used Nason single stage with a hardener.
BMT Forum Logo
