


skip
-
Posts
219 -
Joined
-
Last visited
-
Days Won
3
Content Type
Profiles
Forums
Gallery
Events
Blogs
BMT Wiki
Collections
Store
Everything posted by skip
-
Yeah mate Im hearin ya, it was a big show, around 270 trucks i heard. It is hard to catch up sometimes but I should be kickiing around at a few shows yet with a bit of luck!! Thanks, regards, Skip
-
Thanks everyone for your comments, its nice to hear. It took a fair bit of doing but the next one will be easier and cheaper hopefully! Its the first one Ive done by myself so I learnt plenty and I will have a bit more of an idea on how to tackle the next one. For the Australian members that commented, yes I take it to a few shows, it went to Dubbo on the weeknd just past, and it will be going out to echuca in 3 weeks time for the ATHS show. Thanks again, Skip
-
As mentioned above, it doesnt engage the brakes, it allows air on the top of the diaphragm of the LQ2 so when you do apply the foot brake- and air fills the opposite side of the diaphragm, it wont travel as far, therefore limiting the amount of air going to the front brake boosters.
-
Did Mack make them? Neil Owen at Mack in Brisbane would know if you havent tried him already. How far are you getting into the motor? And are you doing the rest of the truck up? Skip
-
Gday mate. As mentioned above its basically like tuning a 2 valve, turn engine clockwise and line up your position marks on the harmonic balancer puller with the pointer marked 'valves' on the timing cover. 16 thou for intake and 24 for exhaust from memory. On the bridges between valves back of lock nut and adjusting screw, hold weight down on the bridge with your finger, or the rocker, and turn the screw down until it contacts the valve, and turn it an additional 60 degrees(one flat on the nut), then lock iit up. Do that before you set your valve clearance. 1-5-3-6-2-4 is the order. Its easy, good luck. The most difficult part of the job is fitting a spanner up between the front pulley and the radiator cowl! Skip
-
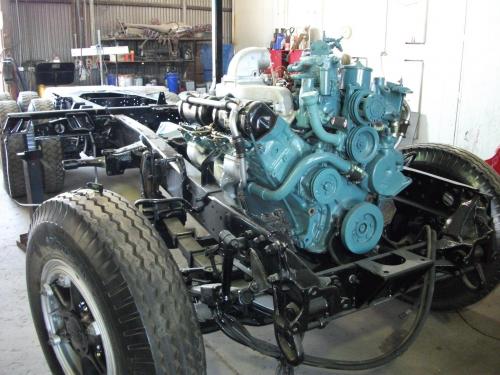
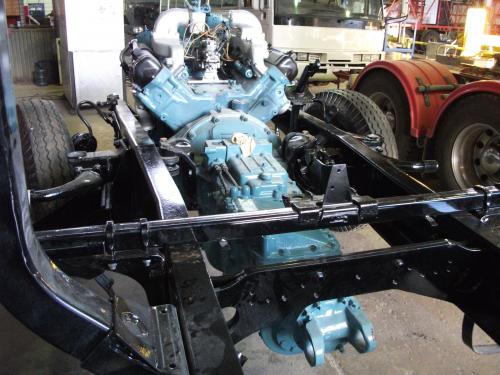
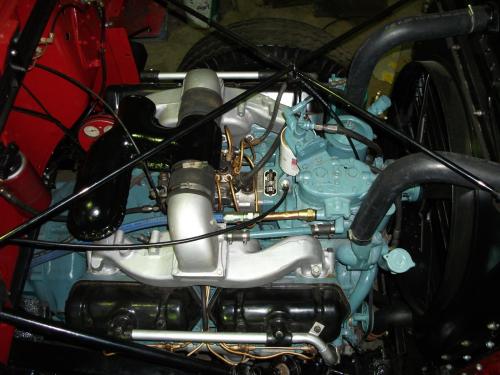
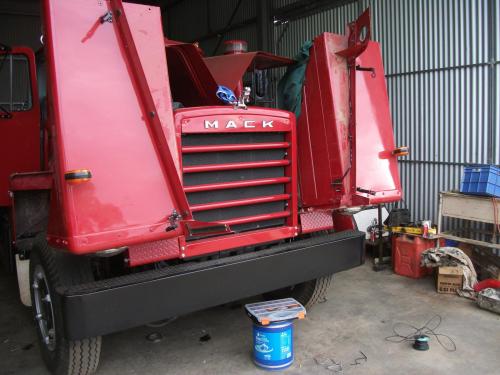
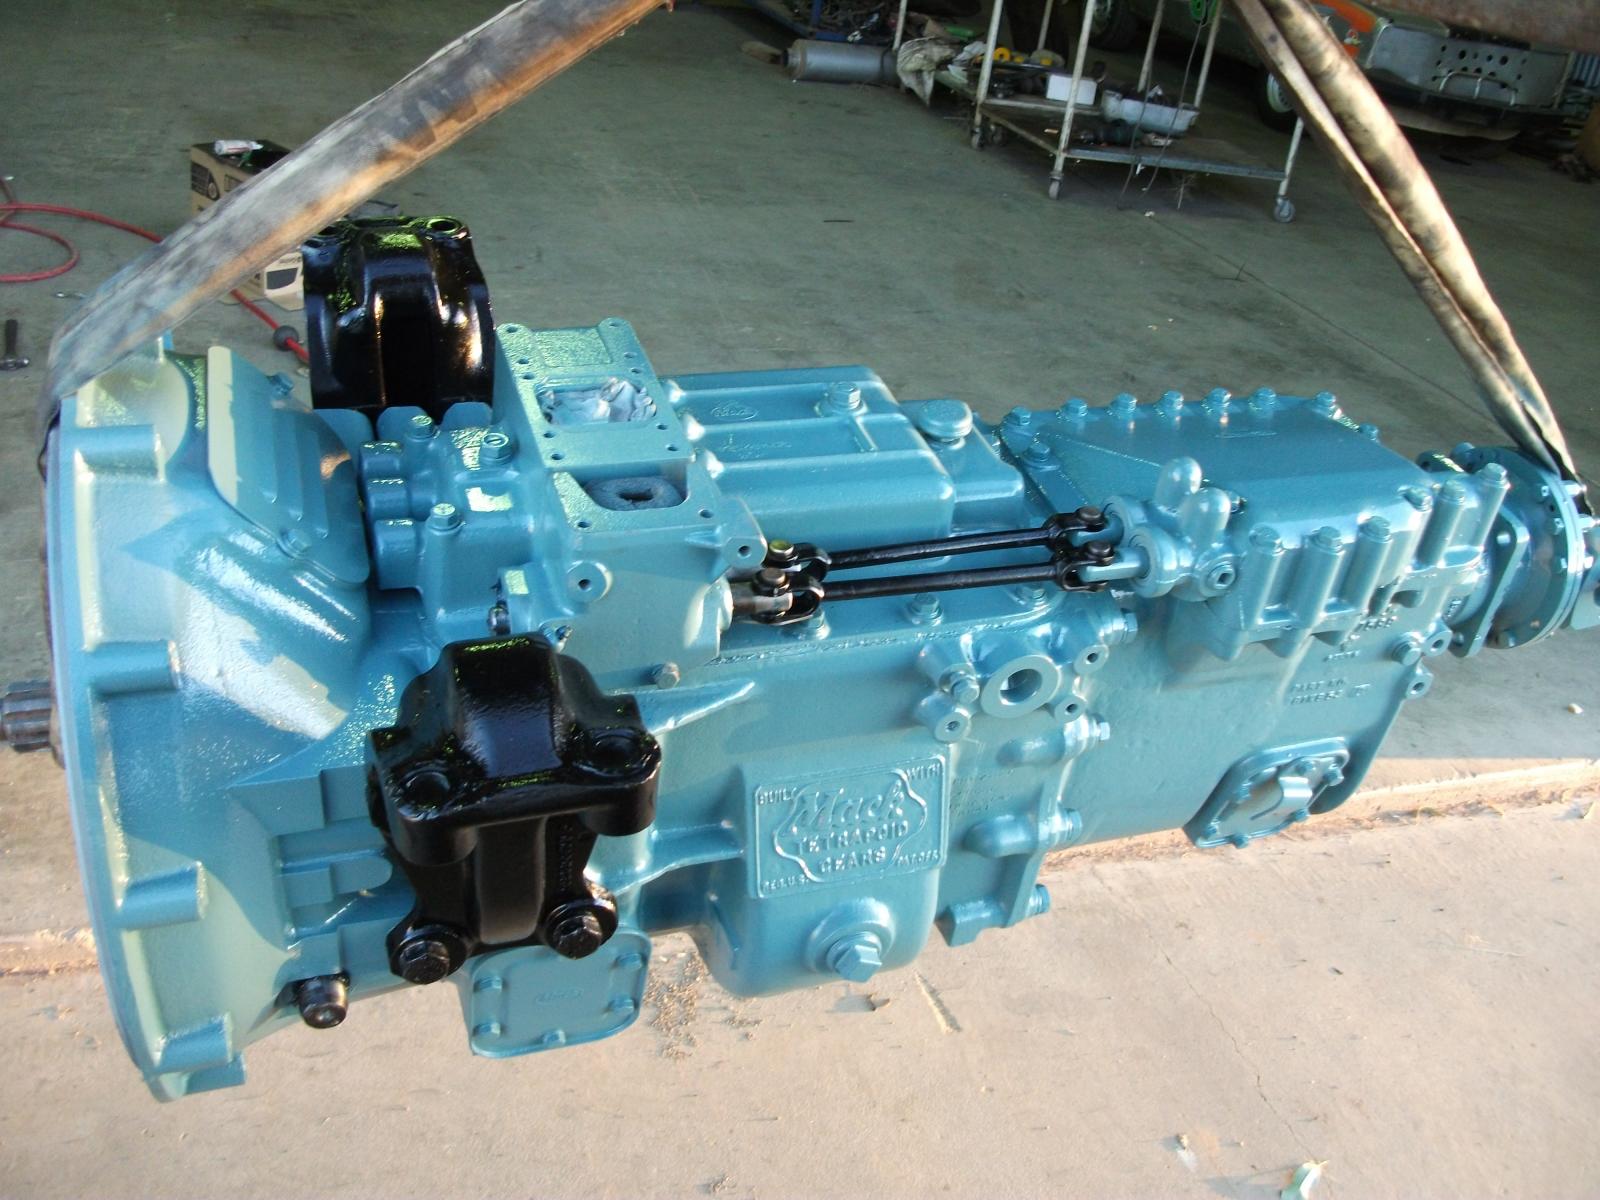
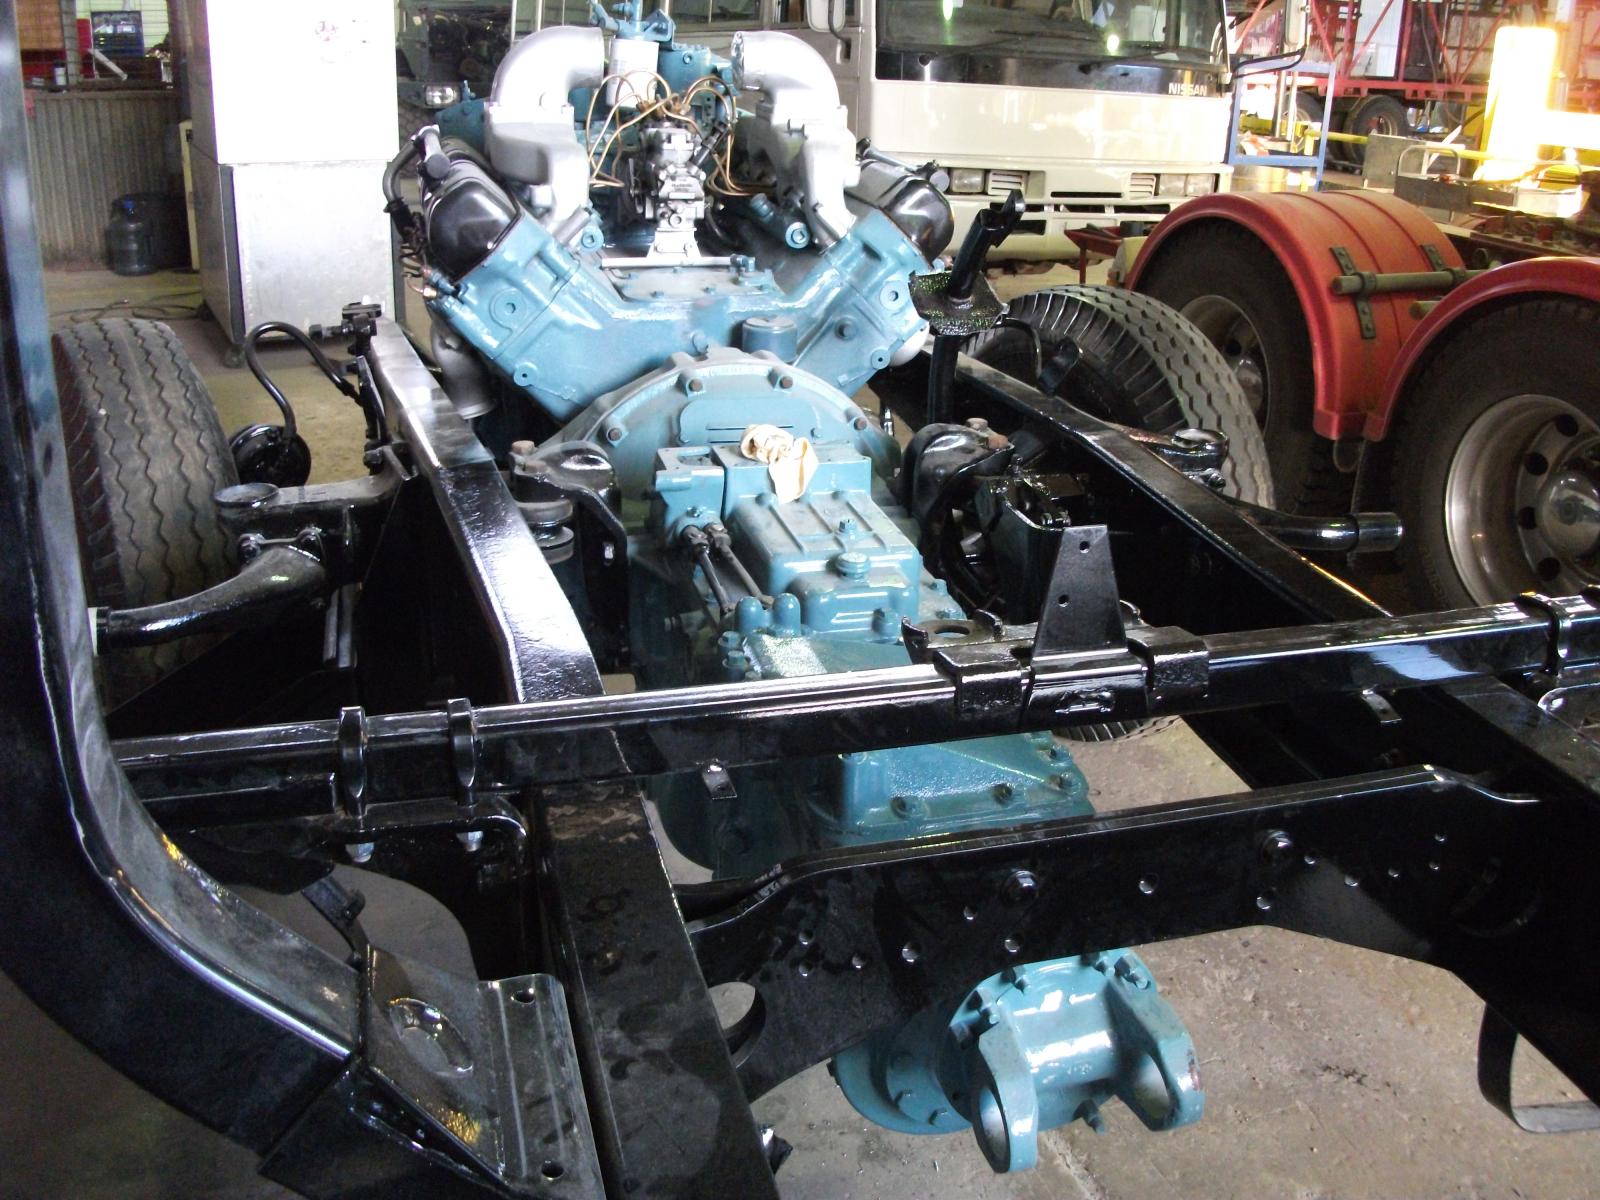
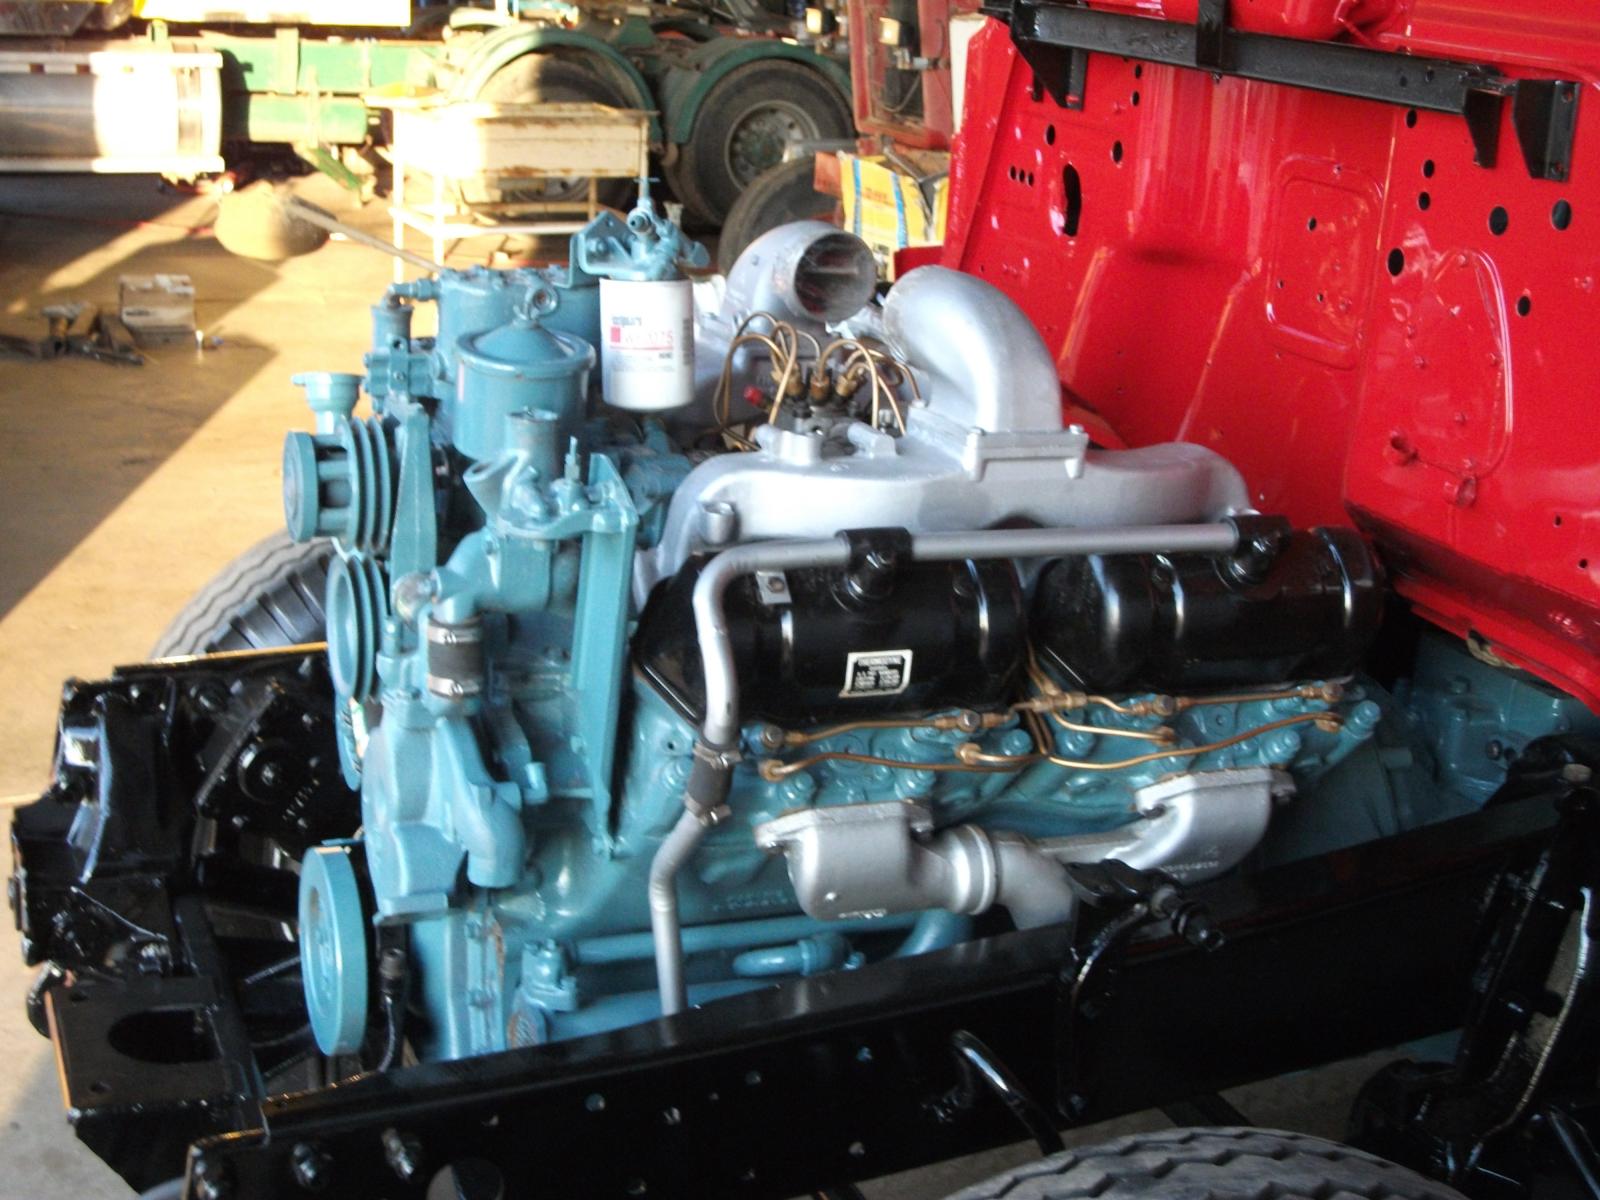
Hey guys, I didn't know how to attach more photos to the existing post so I just started another. Here's some photos of the engine and gearbox before and during the assembly. Skip . .


-
Right you are Maddog, I will post a couple after work today
-
Gday Jim. There was less than 25 RH drive units made. There were 25 R615RS' made but some had the plastic front, and I think that looking at every separate build sheet would be the only way to check that number for sure.
-
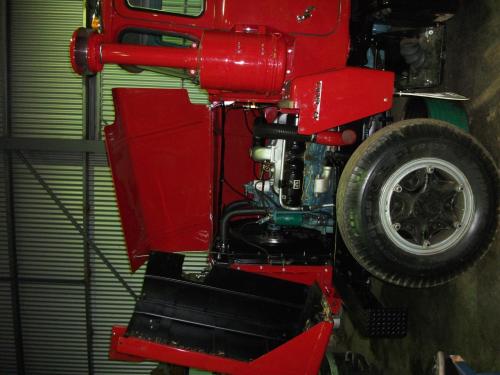
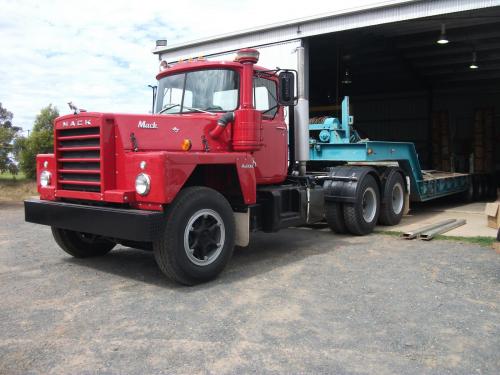
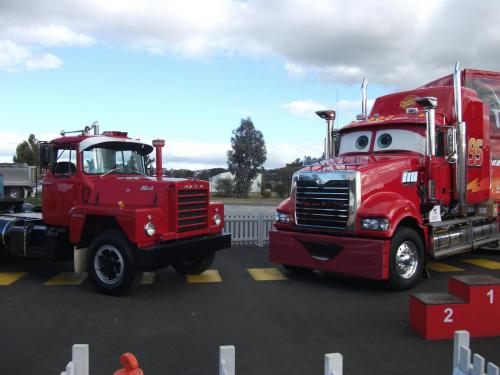
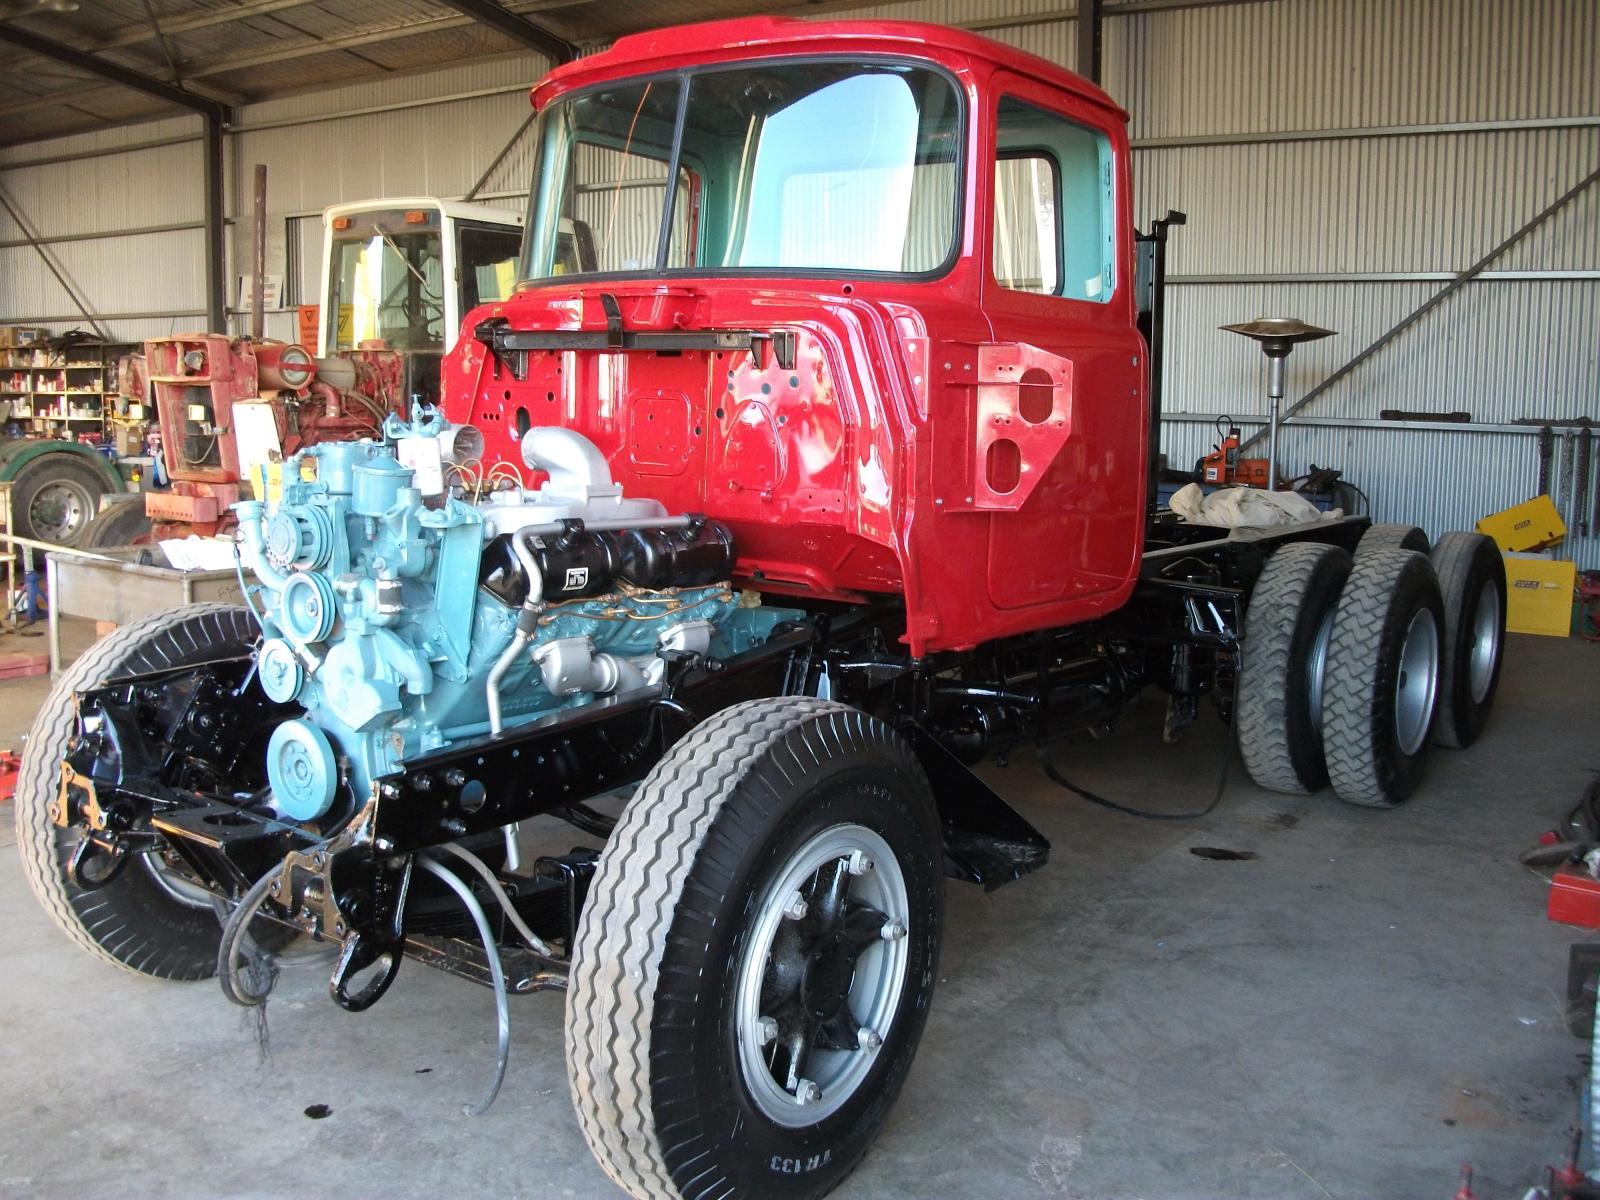
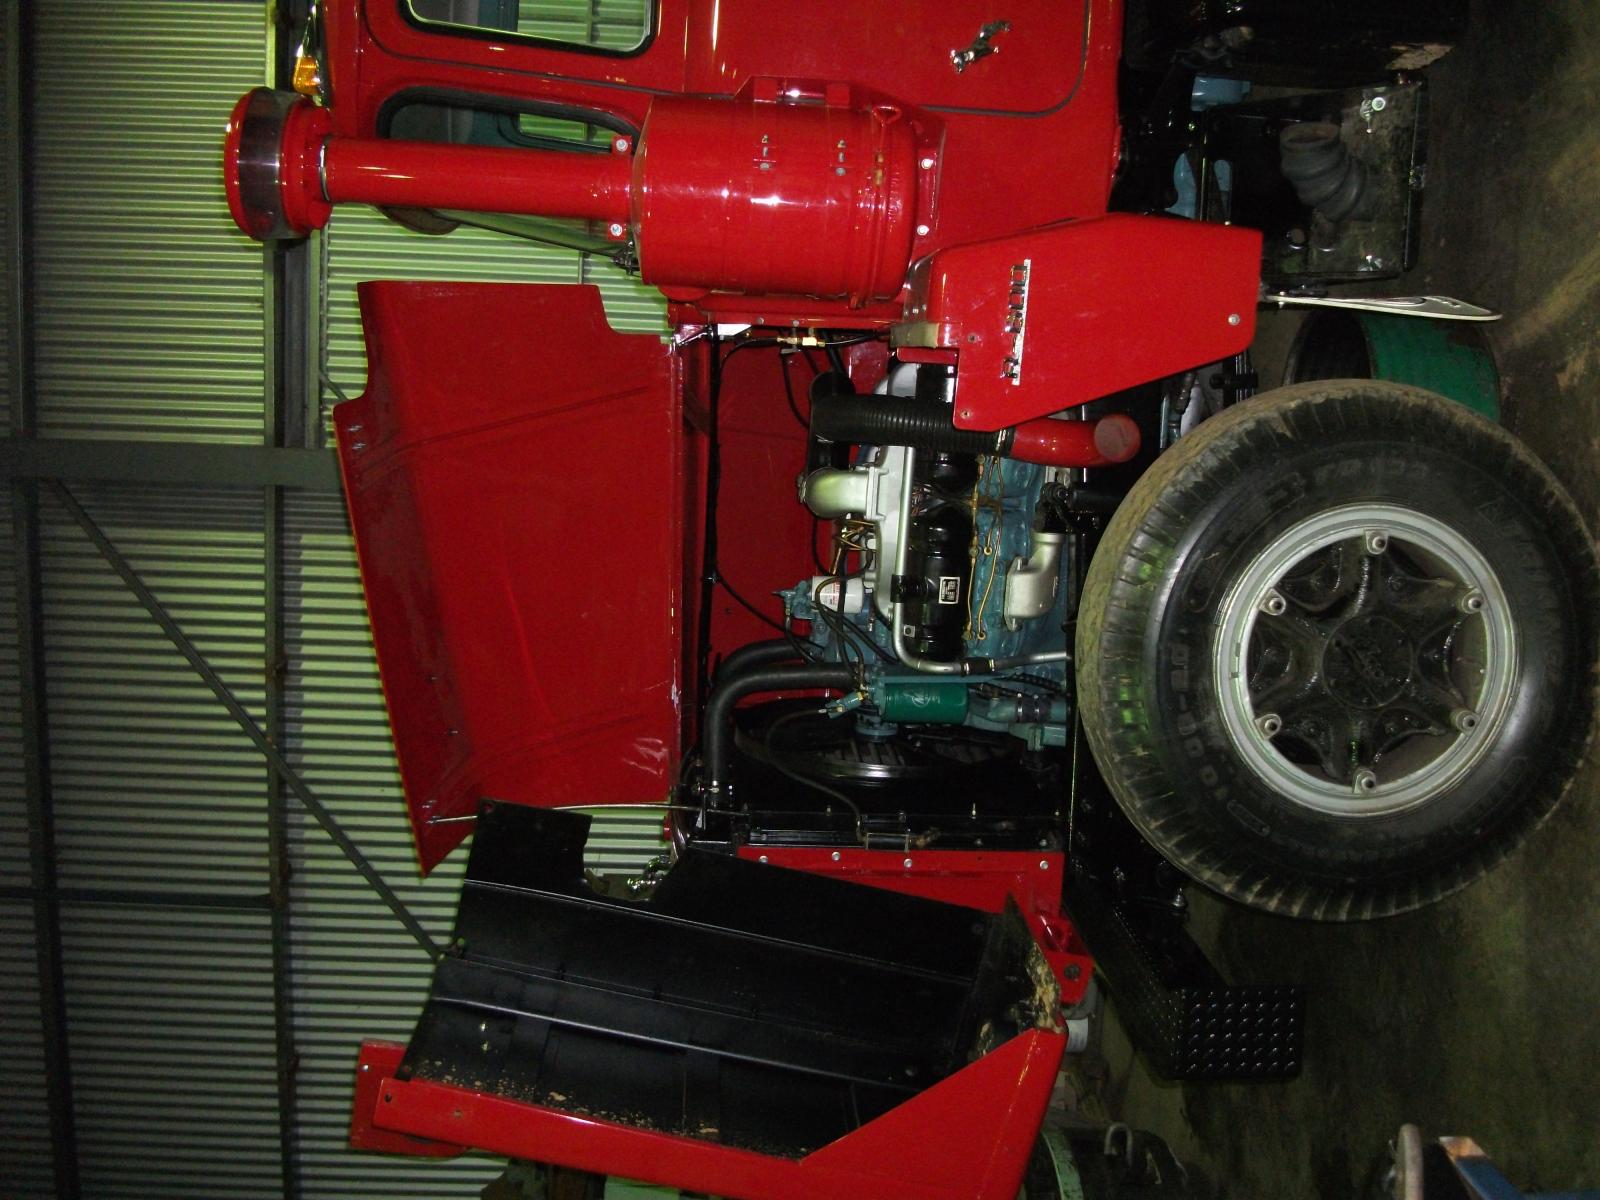
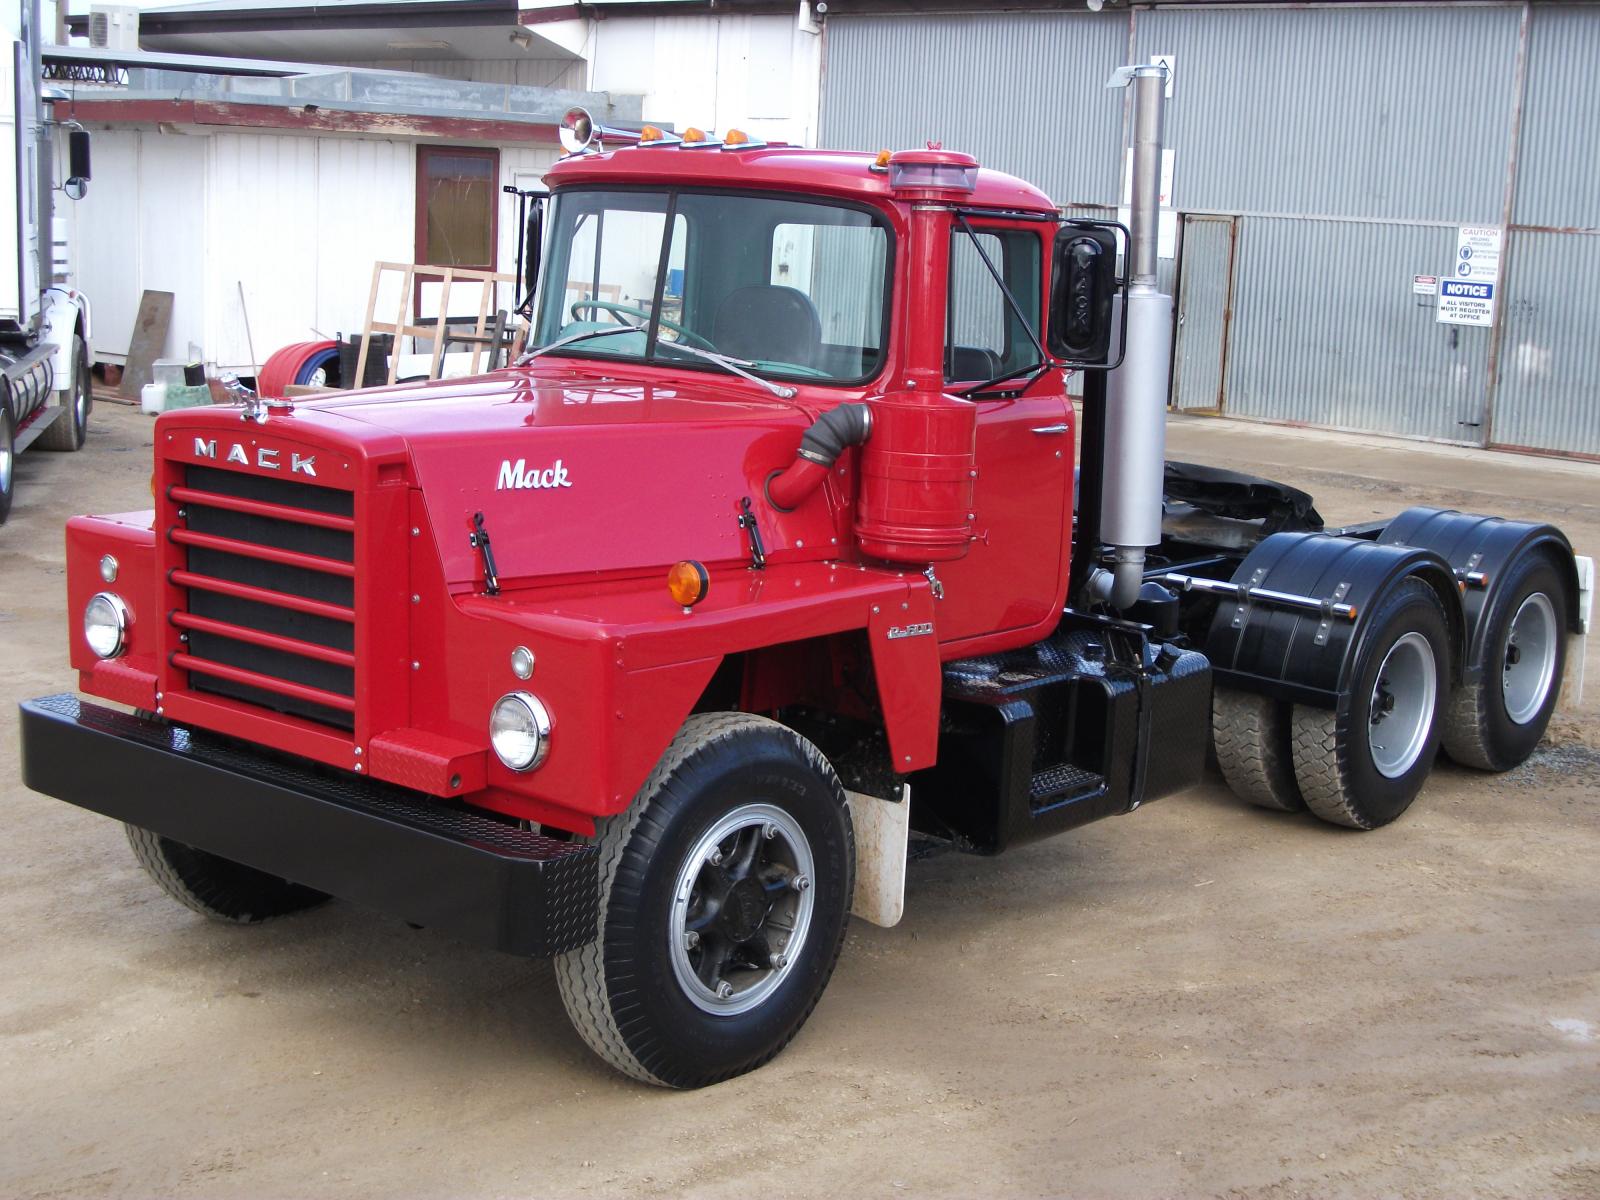
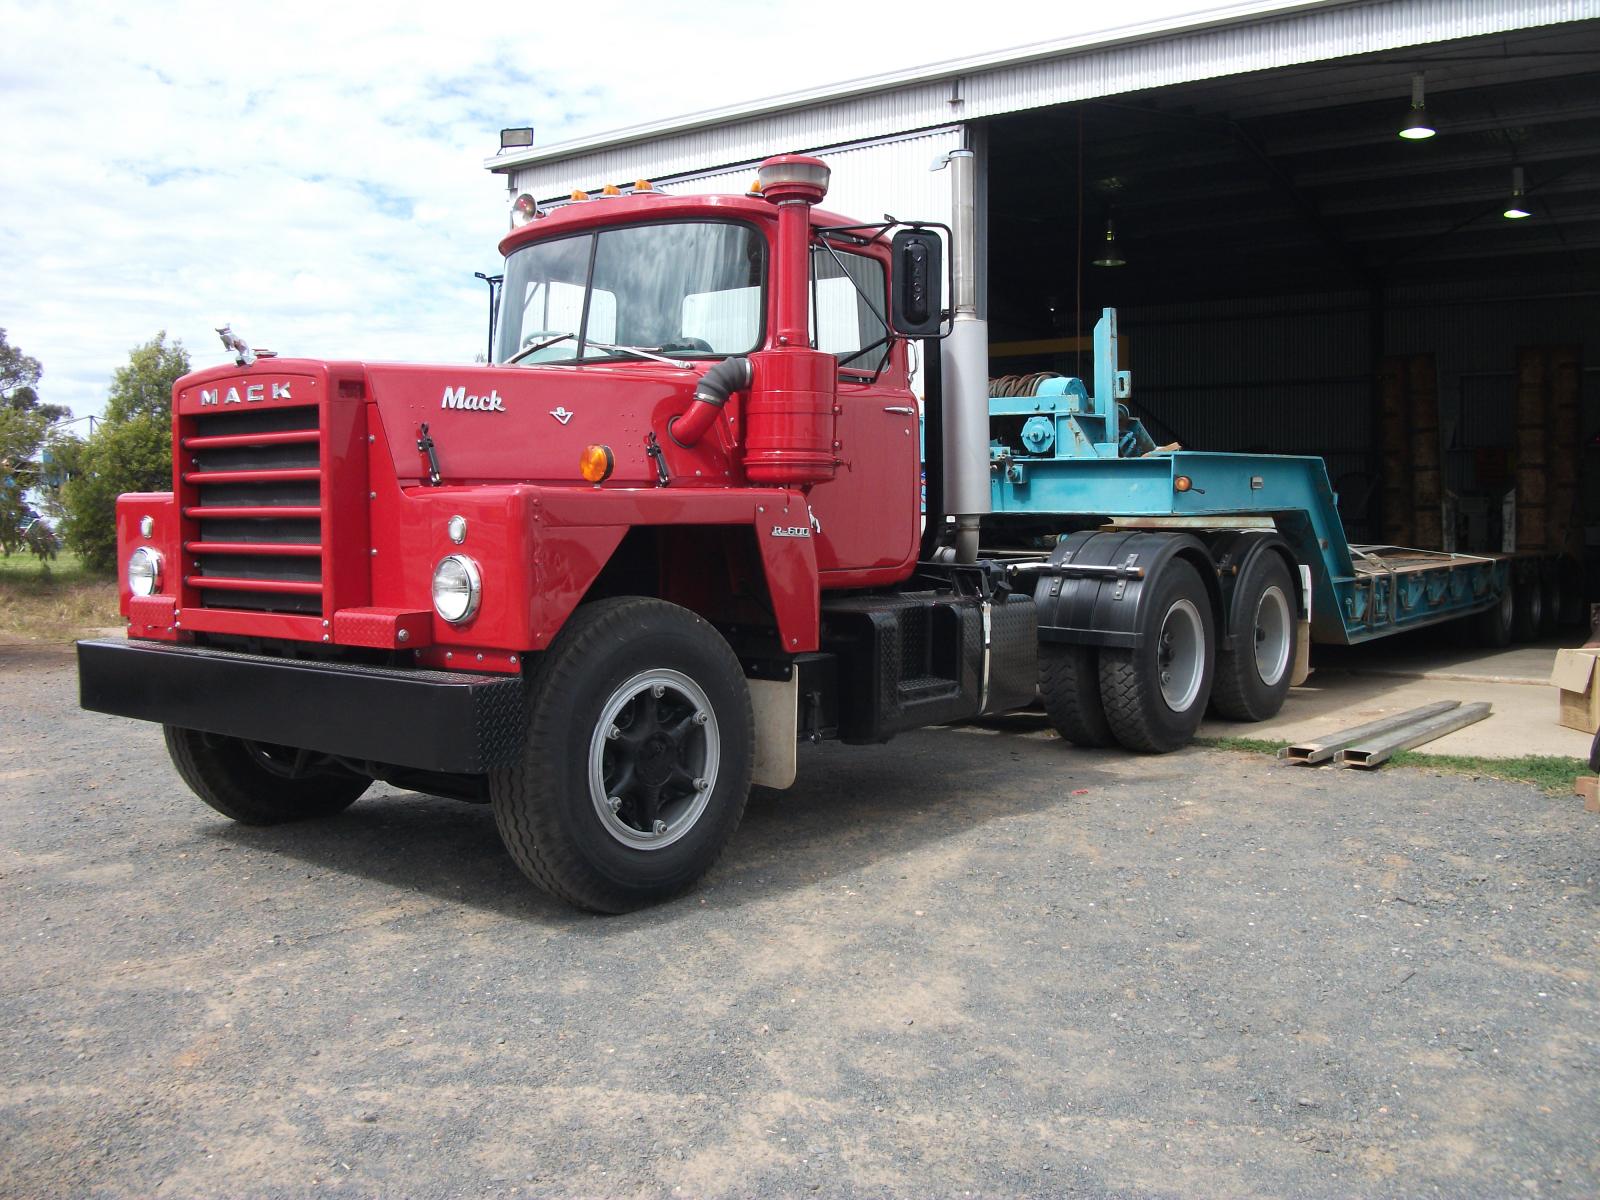
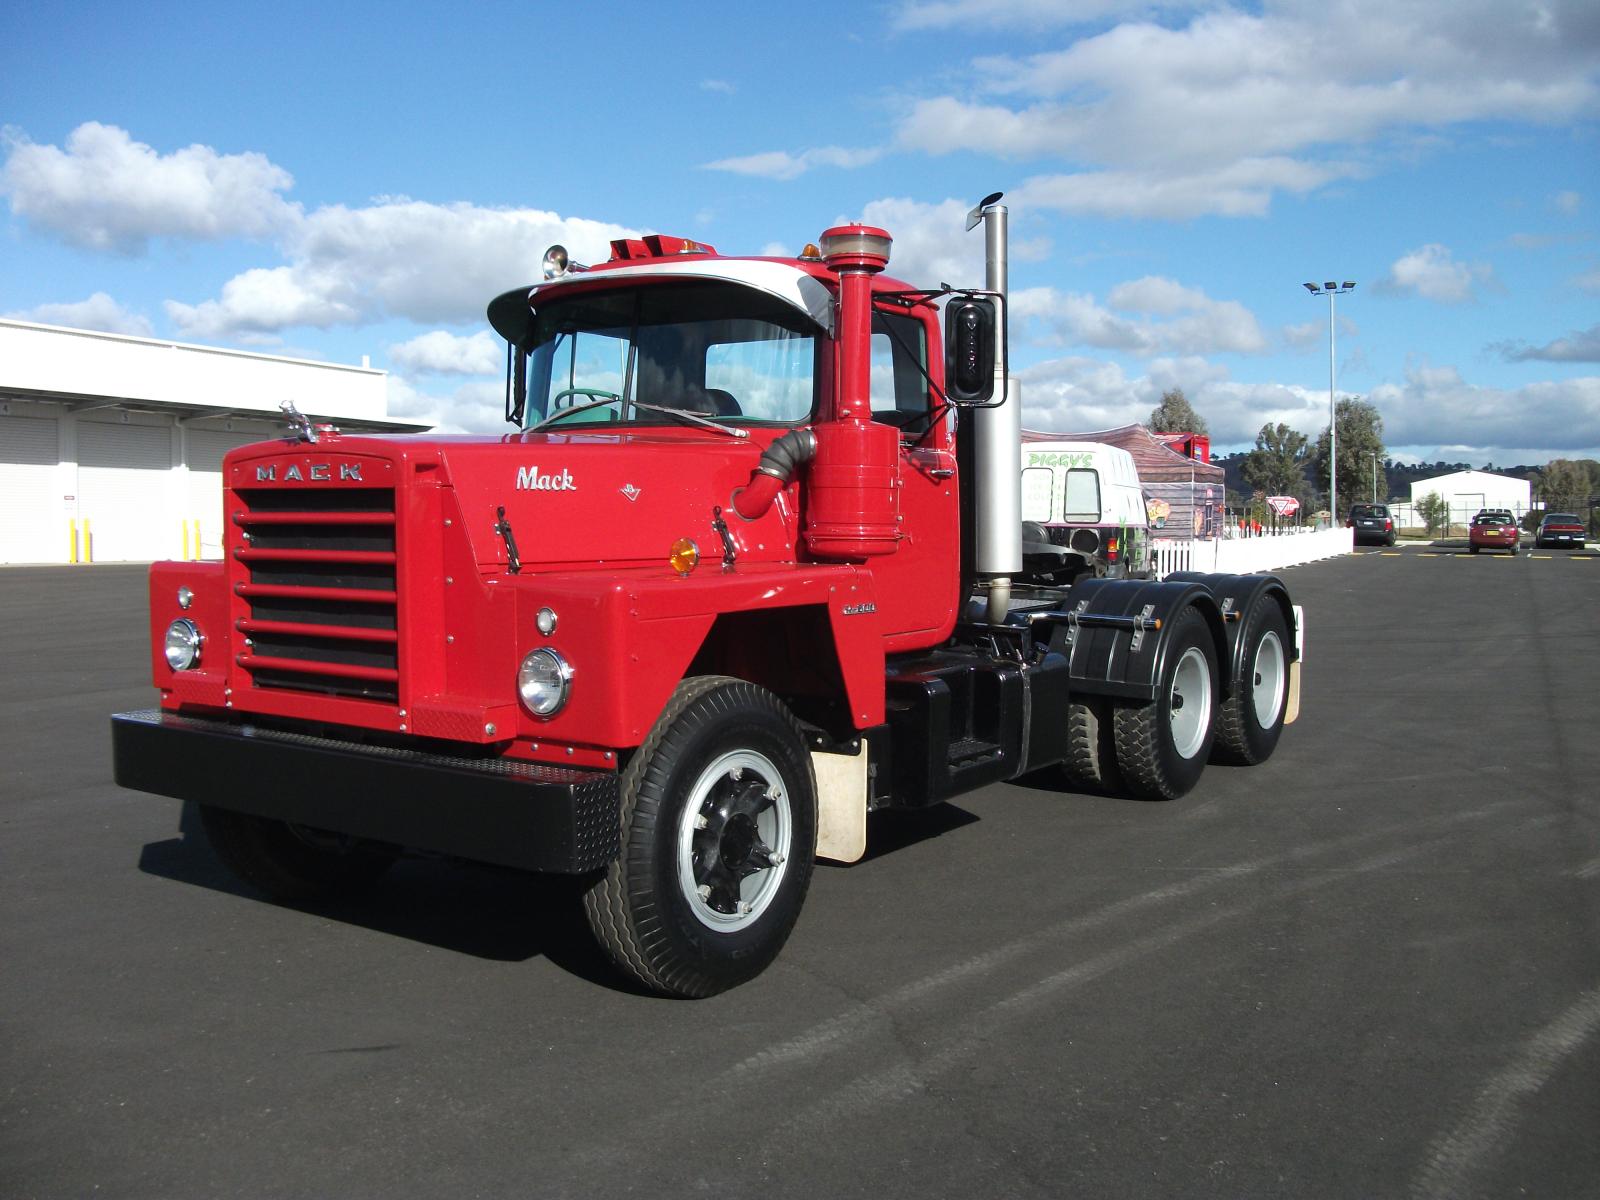
Gday everyone. I made a post ages ago that when I got my R615RS 'Flintstone' finished I would put up some photos. Well IIve been pretty slack and as most of you know a project is never really finished! Anyway the old truck is pretty well finished now so heres a couple of pictures. I have only recently added the sun visor and roof scoop. 2 of the photos were taken at the opening of a new Mack dealer near home, and Mack Australia have a Trident done up in the Disney 'Cars' colours. The 2 red trucks together was too good a photo opportunity to pass up. Regards, Skip

-
Ive put them in on a E6 2 valve without a tool. It came with a wear sleeve and I jus used a flat plate to hit the sleeve in and a small hammer and drift to tap the seal in. I just used Vernier calipers to set the depth of the seal evenly, and I temporarily installed the flywheel to push the wear sleeve on enouugh. I havent had any trouble with them. Obviously a proper installer is very handy and fool proof but I couldnt get my hands on one in tome. As long as you're careful with the hammer and drift you will have no worries
-
Just check the ride height valve under the back of the cab, it should only have 2 air lines going to it. One is the supply and the other is delivery to the air bags. If you are getting a good supply of air to the valve, then disconnect the height control rod on the valve and move the lever up and down manually and see if raises the cab or not. If this is the case then you have a crook valve. If you are not getting supply to the valve then, as mentioned earlier it will be a priority valve on the tank.
-
If you dont want to take out the delivery valve you can prime the fuel through the pump and wire the throttle to full fuel and turn the 1-1/4" nut at the front over a couple of times until you see fuel squirt out of No. 1 port. Then go back before the opening position and gently turn the nut at the front until you see fuel start to rise in the well of No. 1 port. Lock up the bolts at the front and that will be right. To do that you still position the engine on the timing mark you require. Im certainly not questioning the way listed above, as it is explained much better than this, but its just an alternative if you dont have the right tool.
-
Range syncro grinding when going for Hi to Low?
skip replied to mclow's topic in Engine and Transmission
Easy if you have the right tool. If not, you gotta weigh up the time it takes for you to fuck around half getting into it. Personally if I didnt have the tool straight away Id just pull the whole box out. Take a fuel tank off and roll the box out. They are pretty simple. Then just sit the box on its snout and pull the back section off piece by piece. The last one I did had an uppgraded synchro and I had to replace the mating gear on either side of the synchro which ran into a few dollars. Check the fork to make sure its not worn out, you can build it up and machine it to suit the sliding clutch if need be. Or buy it new. I used PAI parts in my last couple and I havent had any trouble, and it was cheaper than buying genuine parts. You have to think about a 9spd, they arent a great box at the best of times, but they are expensive to do up, and we are only talking about the rear section, if you had to re-race the whole box, replace the odd gear and sliding clutch you are nearly up for the cost of an 18spd. Here locally you would struggle to get $2000 for a good used 9spd, and to do the rear section up would nearly cost you double that with labour. Good luck, let us know how you go. Cheers, Skip -
I havent had to bore an E9 flywheel, but ive done a few old 855 Cummins'. Whats the highest rating clutch you can get with an 8/1/2" spigot? How much torque are you running? is it a 610hp? I would try to avoid it personally, but if you can do it too any other flywheel, why cant you do it to an E9?? Ill ring a bloke tomorrow who is dragging road trains with a 610 and I will post what I find out. Skip
-
88 MACK/RENAULT Mid Liner Cabover MS300 Clutch Problems
skip replied to Mike Strait's topic in Engine and Transmission
Gday mate. Sorry to hear you are working on a mid liner. They were called a G260 out here in Australia, they had a Volvo F7 cab. Am I on the right track? I had to replace a pressure plate and the slave cylinder and it was very difficult to bleed. The only way I could get any air out of it was to reverse bleed it, and to do that I had a little bit of fluid in the reservoir and i could see the bubbles coming out of it. I had a pressure bleeder clamped to the nipple on the slave, and pumped a small amount of fluid backwards through the system. It didnt work instantly, but after a couple of attempts it worked well. See how you go. Skip -
There isnt a lot of clearance between the bore and the outsiide wall of an 866. An E9 liner is only 1/8" bigger OD but I would be concerned wiith that area of the block. It might also be a bit of a drama to cut a bigger fire ring recess in the 866 head surface. Ive looked into the possibility of doing the same thing to an 865 Ive got. Ive got a set of pistons and liners for an E9 if you want that have done low kms, but if you are going to the trouble of all that machining then use new parts. The bottom of the block around the o-ring grooves will also need inserts made up, as the bigger liner will have a different sealing area. I admire what you are doing but it wont be cheap. I had similar work done to my 864 and it was a long way from affordable! But keep me posted and let me know how you go mate. Skip
-
Why would you do that to a superliner? They are the best looking truck ever made in my opinion, because of the original grille. I wouldnt bother bolting kenworth shit on there. Id rip it off and throw it to the shithouse! Sorry they're just my thoughts. Skip
-
Gday everyone, happy new year. Im wondering if the square cut block letter thermodyne badges are available anywhere. They go on the LHS front panel of the F model near the F700 badge on the F models. Im not sure if they were used on anything else. And also the R600 badges, are they still made or is anyone else making them? Any help is appreciated, Thanks. Cheers. Skip
-
Good work on finding that stuff mate. The critical part is making sure your main caps are tight in the block. If you have a good machine shop nearby then Im pretty sure they would be able to build up the tunnel and line bore it to suit new bearings. The caps should be tight in the block. When you undid the bolts did the cap fall out or did you have to wriggle it out? One other thing to take note of is your conrods. If you pull the engine right down and you have the conrods out, make sure you get them crack tested and properly closed and honed. I almost had a disaster with my END864 when it was going together. Id had new gudgeon bushes pressed into the rods and supposedly crack tested but on closer inspection, 2 of the rods had hairline cracks the whole way through where the cap bolts on, and on 2 of the little ends you could see daylight between the bush and eye of the conrod, so obviously it had had a little end failure at one point and it had damaged the eye. Lucky we found that before it went together. Theres lots of things to keep an eye out for. Id really like to see you keep the 866 in there but dragging a couple of trailers around is not exactly nursing it.If you're after power then an E9 is the way to go. If youre going to keep the 866 going then dont cut corners with it. It wont be cheap to do it right up but its the only way you will know that it will be a good thing. Also, there were 2 different types of oil pumps to my knowledge. The 865s and early 866s used a smaller pump, but it was updated to a higher capacity pump in later engines. I think they have the same mounting points and piping. Keep me updated on your progress mate. All the best for Christmas and the new year. Cheers, Skip
-
Dont bump up the horsepower any more, if youre already experiencing bottom end trouble then more horsepower is not the solution. Its already been mentioned bbut the oversized outer diameter shells are the answer, if you can get them. I know the E9 shells ones are still available but the 866 might be pushing the friendship. Good luck mate, I will se what Ican find out for ya. Skip
-
Thats a fantastic line up mate. The most superliners Ive seen in one line. We had a Mack show recently and they had maybe 16 or so at the show. not lined up though, plus a few V8 Valueliners a CLR and a couple of Titans. Was a good show. But once again mate, great work, thats the best lineup Ive seen. Cheers skip
-
Gday bullhusk. Just reading these posts, sounds like you have got yourself a rare beast. Is the seller willing to budge on his price? It would be good if you can get hold of it for a bit less. Skip
-
Spot on mate, it sounds like you know what they are worth and what you need to pay for it. Have you got photos of your other truck? Are they a rare truck in the USA? There certainly werent any V12 powered R700s here in Australia
-
Mate hes kidding himself. That chassis is rooted and really needs splitting apart to repair properly. The engine is in a million bits and if the crank and cam need to come out and be ground then thats going to run into big dollars. If the truck wwas a runner then it might be worth closer to 15 grand but as it is, with the work and money that has to be put into it just to get the truck running I reckon its worth around 2 or 3 grand. It might be a bit of a classic and a hard one to find but you could could throw 50 grand at it without breaking a sweat. So really you have to steal it. Like you said old mate, Its a long way overpriced.
-
Why are you replacing the head gaskets mate?


BMT Forum Logo
