


Rob
-
Posts
12,753 -
Joined
-
Last visited
-
Days Won
175
Content Type
Profiles
Forums
Gallery
Events
Blogs
BMT Wiki
Collections
Store
Everything posted by Rob
-
Yup. Probably a replacement front drive and the bolts didn't get properly addressed, worked loose through use, and departed the mount. Looks like an aggressive driving style was the final nail in the coffin for the parts. Truck probably needs greater attention than just the torque arm.
-
Seen a couple of 6-71 Detroit engines in a B-61 chassis several years ago. Never worked with them, just knew the owners and both were transplants. Also have seen a 6V-71 installed into a B-61 and it took little modification to be a slip fit.
-
All tanks I plan to use check good so onto fabricating mounting brackets. I ordered new brake hoses for the front axle in 3/8" size with 1/4" NPT fittings as original. Also have new type "12" brake chambers for the steer but replacement diaphragms too. This is the original size to the front brake axle. Type 30 were on the original drive axle and that is the same size as the replacement(s) but now have spring brakes so type 30/30 chambers. For the rear I'm stepping to 1/2" for all the hose connections that I don't reuse the original type "K" copper. The truck is longer now so some of the original copper line is short, but I don't mind adding additional where needed.
-
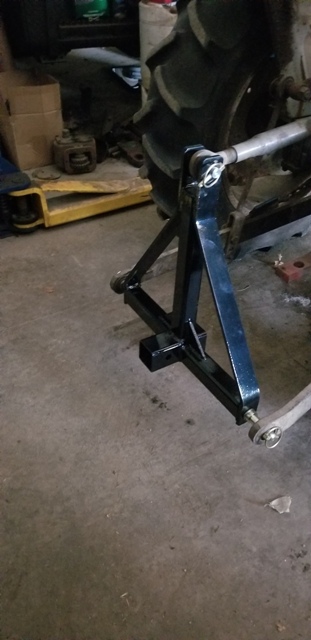
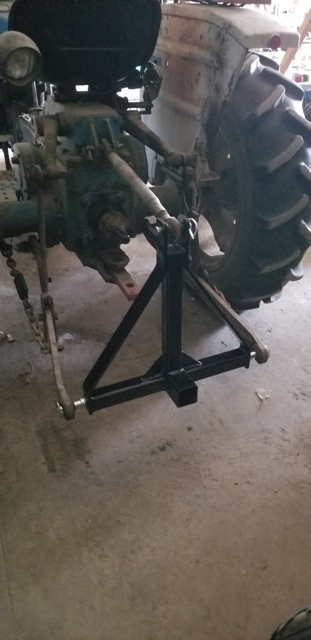
Hitch arrived today and I'm quite happy. Very heavy built and good welds. Maybe China built but it is "Titan" attachments out of Memphis, TN branded. Only thing I didn't like was no lock washers where the bottom pins thread into the weldment for retention. I installed grade 8 split lockwashers and blue Loctite on the threads so it's shouldn't vibrate loose.....
-
Never really had a problem in my B-61 but after I purchased the R model I had problems on short order with that vent window frame. I too always rode with my hand on the lower mirror brace in the B-61 but usually hold the steering wheel in the R as the right hand is always on the shifter, or also on the steering wheel. Power steering I suppose and never really thought about it.
-
Only problem I've ever had with the R model cab was catching my pinky finger on the left hand in the vent window frame twice over the years breaking the finger joint. That is one hurtin SOB too. The window frame is close to the steering wheel and manual steering exacerbated the issue. No complaints to the ride, room, visibility, or anything like that. The R model was built to be a working unit which it did admirably over the years. Only drove a single working R model that was on air ride and I didn't like it at all. 1986 model on Hendrickson, (I believe) in first a tractor, (dump trailer work) then conversion to end dump and the air ride just didn't feel "normal" to me in either application of the truck. Owner liked it however and readily paid the bill for conversion. Never drove any of the newer KW trucks except one finding the visibility lacking, (for me). Have rode in a couple and did not find them comfortable but this was back in the late 1990's so probably some changes over the years. One thing I didn't like about their cab was I couldn't get out of the seat and into the sleeper without my feet getting entangled in their shifter and dash arrangement. I don't know the series of truck, (something about "ant eater") but it had a small sleeper berth and I removed this and stretched it out installing a "day cab" kit for conversion to a fuel tanker. Seneca Tank did the balance of the conversion for the local oil distributor, and they too didn't like the cab layout. The truck was rotated through in just over a year.
-
Also need to acquire new tank mounting brackets. The originals much like the donor are simple angle steel and are bent/rusted up warranting replacement and the original type mountings will not work with my skirted winch bed. All tanks need to tuck into the frame or be inside of frame rails as the bed has underbody tool boxes and measures out to be a tight fit.
-
Thanks for the explanation. Never have taken this one out of the box but it has it's bracket and electrical plug included for mounting and connecting up. Truck never had a drier in the past and I really never had any problems over the years, (other than tanks rotting out) I drove it, but now with air ride and the ability to be a portable air source for tools, I'd like dry air. I have a new "Sharpe" 606A drier which is the type I used in the shop when operating and they work well as a point of use drier. Probably overkill with the second drier but I don't like rust in my air tools; some of which are 40+ years old and still work well with the care given them.
-
I really don't know the differences between many of them except the AD-2 which is very tall and thin when compared to the others. I had several AD-4 series on my trucks and those are really the only ones I've messed with meaning routine service. This AD-9 was given to me by a friend whom retired and closed his shop. It is new but several years old.
-
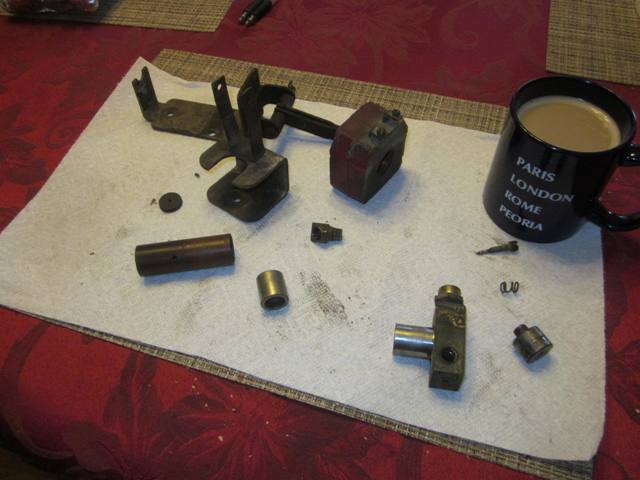
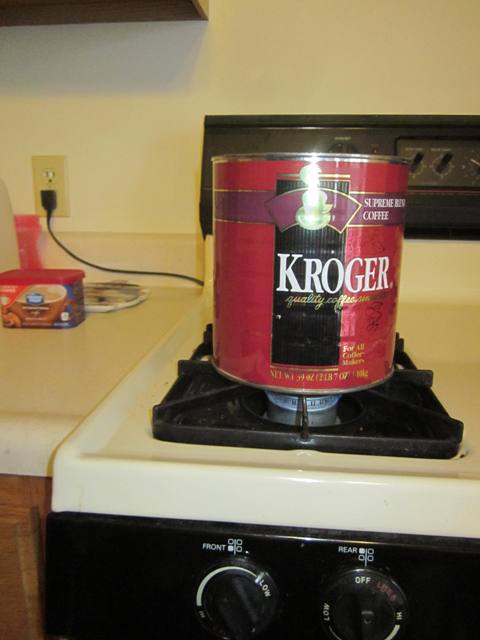
My wife learned long ago that bitching about anything I do falls on deaf ears so she quit with that nonsense. I've rebuilt carburetors, governors, and pumps on the kitchen table and boiled the same castings on the stove. This is the governor for my Hobart engine drive welder: She says it "stinks up the whole house" to where I just think it smells more "Natural". However, I will tell you she really does not like the smell of methylene chloride which excels at cleaning parts not containing rubber. You are correct in the submerging of an air receiver to check for leaks. I too have seen air start systems hold air for months but they use much higher quality sealing valves than this simple Bendix steel wafer disc style. At the shop I have a 60 gallon oblong galvanized livestock watering tank I use for truck tires and such. It is large enough to submerge about 1/2 of an 11R-24.5 tire into to look for bubbles. I usually use a soap solution generally marketed towards the HVAC trades as it is very slow to evaporate and readily makes bubbles being sensitive to leakage. I gotta try the movie ticket trick to get her out of my remaining hair for spell every now and then..... Thanks,
-
Going to install an air dryer when it goes back together. I have a good AD-9, and an AD-2 both freshly serviced. Also have several replacement cartridges for AD-4 series left over from my rollback/car carrier days. Which type air dryer is preferred and why? Thanks,
-
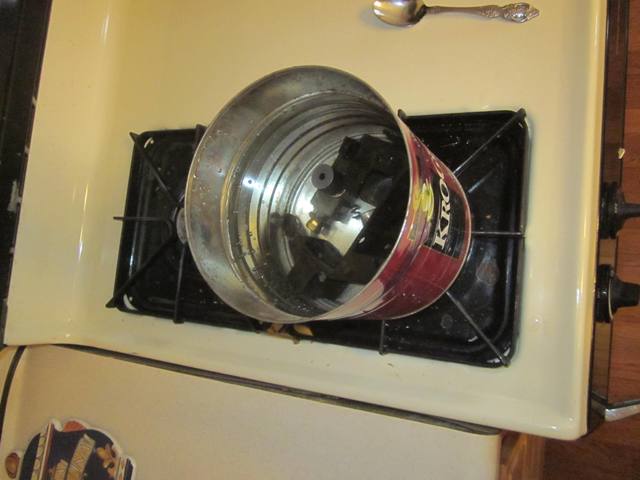
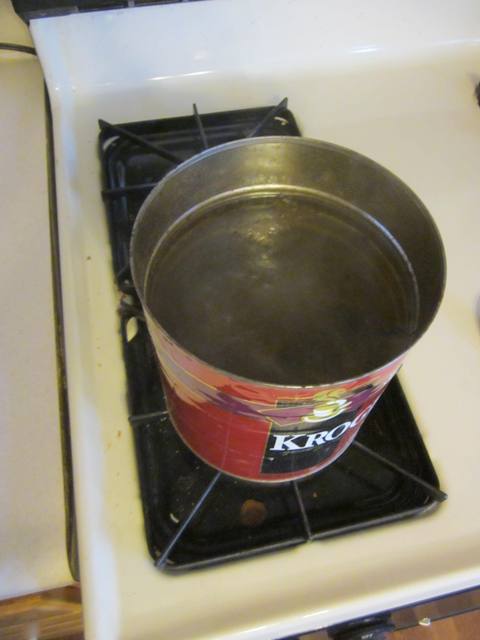
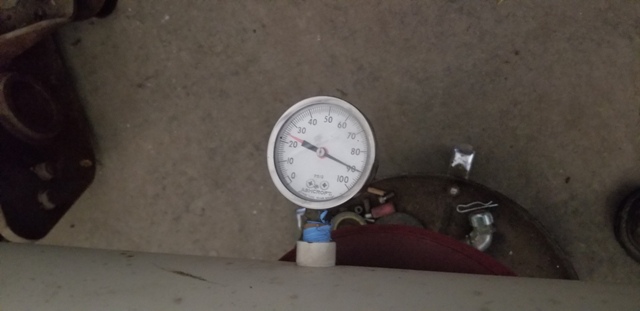
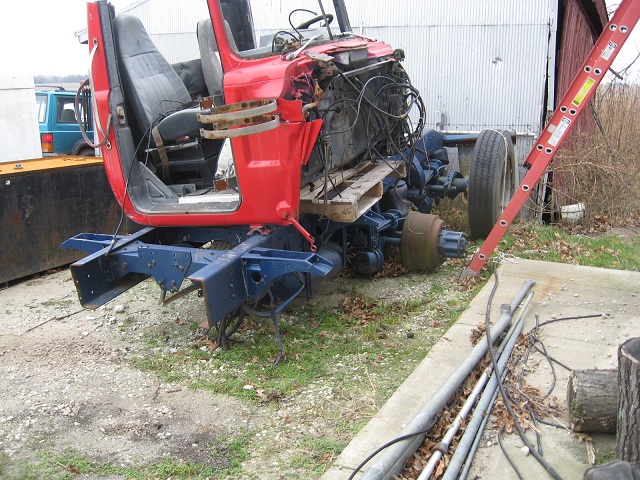
New wet tank. I want to ensure all tanks are good before installing under the truck. This one is new in 2000 but never installed and shows the inlet check valve holding the pressure back for the past two days. It was charged via the Tu-Flow Bendix compressor discharge line of the B-61: Charged to 100psi, (indicated) on Thursday afternoon: A loss of 10psi over two days is probably acceptable but I can't ascertain where the leak would be with soap bubble solution. These tanks were less than a year old when the the truck had a cab fire. The rear rear is under my B-61 after total suspension rebuild: I suppose R model Mack donor cabs really haven't quite figured out how to properly set on a Peterbilt frame???? Needing to grab a few fittings from the hardware store to plug openings in the other tanks to evaluate them later.


-
Two minutes? Ted has STAMINA!!!!
-
Yes, that does lessen the "dig" but the tractor is heavy on the front and the ground is still quite soft from the spring rains. It will improve as it dries up a bit. Thanks,
-
Oh man, new blades on the deck coupled with adquate power to drive it and the cut is as good as you would get with a lawn tractor in your residence front yard. Extremely nice to be able to drop a gear to slow down for manipulating near structures and the PTO not stop turning too. Going to need to address the front end "dig" when turning however. Maybe lose the front weights on the tractor as the outer wheel in a turn will really cut a "trench" in the turf if not gradual enough. No slippage on the 35, (or so) degree ditch sides in front of the shop and tractor is very stable mowing these. I have to hold onto the arm wrest as the seat bun is larger than my ass, (believe it or not) and slippery vinyl so easy to slide around in. Tried various ground speeds and like 3rd speed gear in medium range. The cut quality begins to suffer if faster although most would still find this acceptable. Lots of fun learning new equipment sometimes and this is no exception.
-
One on the right looks like somebody should close the casket and be done with it.
-

63 B61 Clutch pedal shaft bearings
Rob replied to HugeHugh's topic in Antique and Classic Mack Trucks General Discussion
I've seen the roller bearing setup in the spring shackle setups in the past. All I've seen need much more attention than they get in practice. Wear in these parts is seemingly accelerated but the ride quality coupled with a parabolic spring arch is unsurpassed when all parts are new. -
63 B61 Clutch pedal shaft bearings
Rob replied to HugeHugh's topic in Antique and Classic Mack Trucks General Discussion
Try these guys: https://www.maxitrucks.com/products/spring-insulator-for-mack-10qk332a?variant=83348750340 -
63 B61 Clutch pedal shaft bearings
Rob replied to HugeHugh's topic in Antique and Classic Mack Trucks General Discussion
When I did my front springs many years ago the early R model rubber blocks were the same as the B series used. I purchased them from NAPA but they are probably long discontinued through them. I think, but not positive, they are still available from a supplier I use but will have to do some research. You wouldn't need to harden the clutch cross shaft if bushing with 660 bronze after welding up and turning to dimension. The needle bearings originally rode on that shaft and it was thinly case hardened to withstand this stress. The stress imparted by the clutch and pressure plate setup will be much less and spread out with a bronze bushing at each end. Just keep them greased. -
Loose U-joint Caps
Rob replied to h67st's topic in Antique and Classic Mack Trucks General Discussion
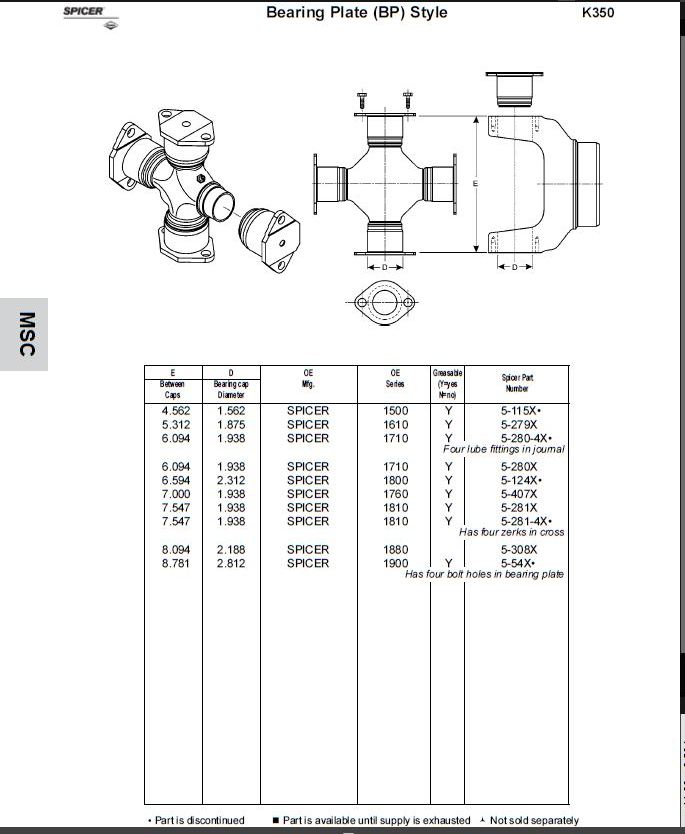
This will help in determining spread. I was incorrect earlier measuring across the inner dimension. It is 6.094 across the outer bearing plate mating surface for the 1710 series: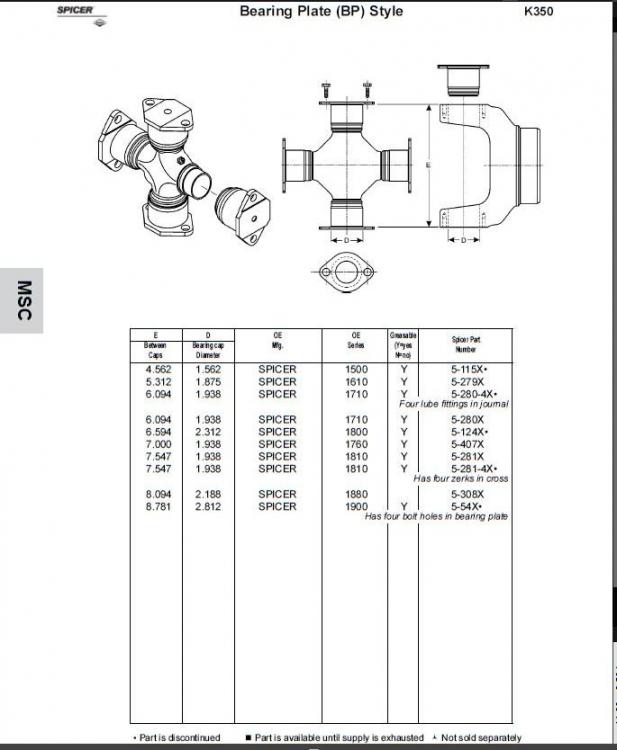
-
I went to squish two of those hooks closed a bit to fit between the inner side of the trailer rub rail, and out side rail. Both snapped so they must be heat treated after being bent into form.
-
63 B61 Clutch pedal shaft bearings
Rob replied to HugeHugh's topic in Antique and Classic Mack Trucks General Discussion
SAE 660 bronze is also known as "Oilite" bronze and is impregnated with SAE30 oil. It is the best repair for your problem. If you weld up the shaft and turn it to correct dimension it will work for a while but the weld deposition is much softer than the shaft and wear will return at an exponential rate if using a needle bearing setup as original. I line bored my B-61 back in 1980 or 1981 and used SAE 660 bronze after building the shaft up and grinding it to dimension after hardening. It's been fine since but I did incorporate grease zerks also. -
Loose U-joint Caps
Rob replied to h67st's topic in Antique and Classic Mack Trucks General Discussion
Being a hobby truck you could tighten them up with green loctite but they really need replaced. The 1710 series driveline was common to oblong those bores as well as spread the yoke so that should be checked also. IIRC the inner dimension on the 1710 is 3.092" and if spread much they will not retain grease in the joints. On a hobby truck not so bad but a working unit tends to spit the driveline citing lack of maintenance. -
The only one of these I've ever seen out of spec was a Maxidyne engine rebuild with a later aluminum flywheel housing incorporated. The fasteners retaining the flywheel housing to the block were not used with a thread locker and given the thermal expansion differences between aluminum and cast iron, they worked loose. In fact the flywheel housing being softer than the dowel pins was destroyed. A replacement cast iron flywheel housing was slipped onto new dowel pins and it was within circular runout tolerance upon reassembly and never another problem. This was a Fuller transmission install and owner operator end dump truck application. Never was a fan of aluminum flywheel housings myself except on maybe a two stroke Detroit engine which did not have the "off idle" torque rise of others. There is a lot of torque absorbed through the flywheel and clutch housing upon acceleration and the fasteners need to remain tight to absorb it.


BMT Forum Logo
