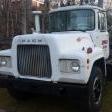
doubleclutchinweasel Posted July 15, 2012 Share Posted July 15, 2012 Hello, Everybody!Looks like I have a couple of broken leaves in my left front spring on the '70 R600. The front axle is an FA-535.I've never pulled one of these springs out before. So, assuming everything is blocked-up safely, what's the routine?Looks like the front of the spring is attached by a pin. I would assume there is a locking bolt of some kind under all that crud which releases the pin.I can't tell much about the rear attachment, as it disappears into the rear spring box. Do you separate the halves of the hanger box to get it out? Is the rear solidly mounted, or does it slide in that box (one end has to give, right?!).I have access to more of these springs (looks like standard 12 X 0.323" leaves), but I can also get the later 3-leaf "tapered leaf" springs. How difficult is that swap, assuming all the spacer blocks and caps are there? Is that spring a direct interchange? Do different axles have different mounting pads, or is there some commonality?Anything y'all can tell me about spring removal/replacement, and about swapping-in those later ones, would be much appreciated. And, as always, pictures are great.Thanks, Everybody!Kent Quote "Eagles may soar, but weasels don't get sucked into jet engines." Link to comment Share on other sites More sharing options...
Rob Posted July 15, 2012 Share Posted July 15, 2012 Hello, Everybody!Looks like I have a couple of broken leaves in my left front spring on the '70 R600. The front axle is an FA-535.I've never pulled one of these springs out before. So, assuming everything is blocked-up safely, what's the routine?Looks like the front of the spring is attached by a pin. I would assume there is a locking bolt of some kind under all that crud which releases the pin.I can't tell much about the rear attachment, as it disappears into the rear spring box. Do you separate the halves of the hanger box to get it out? Is the rear solidly mounted, or does it slide in that box (one end has to give, right?!).I have access to more of these springs (looks like standard 12 X 0.323" leaves), but I can also get the later 3-leaf "tapered leaf" springs. How difficult is that swap, assuming all the spacer blocks and caps are there? Is that spring a direct interchange? Do different axles have different mounting pads, or is there some commonality?Anything y'all can tell me about spring removal/replacement, and about swapping-in those later ones, would be much appreciated. And, as always, pictures are great.Thanks, Everybody!KentA lot of front spring pins on a Mack screw into the front hanger. The rear mounting if in a box, drop the rear cap and the assembly will need pried out but it is one piece rubber. This rubber allows for the spring to lengthen and shorten when in use.You will probably have a tough time putting parabolic springs under the front as they were not offered and are expensive to have custom made. It can be done however.Do you not have a TS-442 service manual? This book set by itself will answer near any question you would have on the older R model trucks. They are on ebay often.Rob Quote Plodding along with no job nor practical application for my existence, but still trying to fix what's broke. Link to comment Share on other sites More sharing options...
doubleclutchinweasel Posted July 15, 2012 Author Share Posted July 15, 2012 A lot of front spring pins on a Mack screw into the front hanger. The rear mounting if in a box, drop the rear cap and the assembly will need pried out but it is one piece rubber. This rubber allows for the spring to lengthen and shorten when in use.You will probably have a tough time putting parabolic springs under the front as they were not offered and are expensive to have custom made. It can be done however.Do you not have a TS-442 service manual? This book set by itself will answer near any question you would have on the older R model trucks. They are on ebay often.RobThanks, Rob.No, I don't have that manual. But, now that I know it exists, I can snag one.The different springs to which I am referring are the factory front springs Mack started putting under the Rs in the later '70s. The first ones appeared in either '75 or '76. From the looks of them, everything appeared the same, except for the springs and the riser block on which they sit.I was hoping one of our readers might have both an older and a newer truck, and might know about the interchangeability of them.If all else fails, I may grab a pair of them, and a pair of the originals, when I make my parts run. If they work, Fine. If they don't work, fine!I know that the first ones I ever noticed were on an R600 with an FA-535 axle. But, I didn't notice what year that truck was.More to come...Kent Quote "Eagles may soar, but weasels don't get sucked into jet engines." Link to comment Share on other sites More sharing options...
Rob Posted July 15, 2012 Share Posted July 15, 2012 Thanks, Rob.No, I don't have that manual. But, now that I know it exists, I can snag one.The different springs to which I am referring are the factory front springs Mack started putting under the Rs in the later '70s. The first ones appeared in either '75 or '76. From the looks of them, everything appeared the same, except for the springs and the riser block on which they sit.I was hoping one of our readers might have both an older and a newer truck, and might know about the interchangeability of them.If all else fails, I may grab a pair of them, and a pair of the originals, when I make my parts run. If they work, Fine. If they don't work, fine!I know that the first ones I ever noticed were on an R600 with an FA-535 axle. But, I didn't notice what year that truck was.More to come...KentKent,There are always a set of those manuals on ebay. It depends on the vintage whether it is two, or three books in total. These are the manual the dealers used and they are very good at explanations for repairs and give many helpful tips. My set was for my 16th b'day, (many years ago) and I still reference them often. I've seen them go from less than $10.00 per book, to over $50.00 per book. The last pages of the manual(s) give the revision dates so it would be best to get a manual that supports your project year.Rob Quote Plodding along with no job nor practical application for my existence, but still trying to fix what's broke. Link to comment Share on other sites More sharing options...
doubleclutchinweasel Posted July 15, 2012 Author Share Posted July 15, 2012 Kent,There are always a set of those manuals on ebay. It depends on the vintage whether it is two, or three books in total. These are the manual the dealers used and they are very good at explanations for repairs and give many helpful tips. My set was for my 16th b'day, (many years ago) and I still reference them often. I've seen them go from less than $10.00 per book, to over $50.00 per book. The last pages of the manual(s) give the revision dates so it would be best to get a manual that supports your project year.RobYeah, I've found a few already. Prices are much higher now. And, some need to be explained a little better (which volume, or what printing). I'll keep looking.Looking through some images of old brochures. Looks like the 3-leaf, tapered springs may be 55" lomg, as opposed to the older 54" springs. If so, it would probably take a lot more modification than I want to do. So, I may be better off to stay with the originals.More to come,,,Kent Quote "Eagles may soar, but weasels don't get sucked into jet engines." Link to comment Share on other sites More sharing options...
doubleclutchinweasel Posted July 15, 2012 Author Share Posted July 15, 2012 In the lower picture, I am showing the front of the spring, viewed from inboard. I cleaned it off a little with a screwdriver, and I believe the grease fitting is in this end of the pin. The other end appears flat. I see a small hex-head cap screw on the bottom of the hanger, which appears to line up perfectly with the pin itself. Would that be the retaining screw?On the other picture, I am showing the rear of the spring from the outside. I am assuming that split-line is where to take this end loose. It looks fairly obvious. Of course, I've already learned that, on stuff this old, nothing is ever simple!Kent 1 Quote "Eagles may soar, but weasels don't get sucked into jet engines." Link to comment Share on other sites More sharing options...
Rob Posted July 15, 2012 Share Posted July 15, 2012 In the lower picture, I am showing the front of the spring, viewed from inboard. I cleaned it off a little with a screwdriver, and I believe the grease fitting is in this end of the pin. The other end appears flat. I see a small hex-head cap screw on the bottom of the hanger, which appears to line up perfectly with the pin itself. Would that be the retaining screw?On the other picture, I am showing the rear of the spring from the outside. I am assuming that split-line is where to take this end loose. It looks fairly obvious. Of course, I've already learned that, on stuff this old, nothing is ever simple!KentThat is a jamb screw the hits a "flat" on the pin if I remember correctly. Most likely this pin will be frozen in place and will take a bit of persuasion to remove. Most ot the grease zerks I've seen in this setup are 90 degree fittings. Most of these pins are press fit but look closely at the ends of the pins. If it is a screw in pin, there will be two flats machined into the end of the pin for a wrench to grab onto. If it is a straight pin, then it will need to be pressed out with a large "C" clamp setup. These can take a tremendous amount of force to bust free but once they "pop" loose, you can almost push them out by hand.The rear spring hanger is fairly easy to do but the removing the bolts at times can be a chore. I like to heat the housing very warm, (don't incinerate the rubber insulator) so the bolts don't snap off in the cap, or hanger. I've seen severa old trucks requiring spring work and only have either two, or three bolts retaining the spring pocket cover.Rob Quote Plodding along with no job nor practical application for my existence, but still trying to fix what's broke. Link to comment Share on other sites More sharing options...
doubleclutchinweasel Posted July 15, 2012 Author Share Posted July 15, 2012 That is a jamb screw the hits a "flat" on the pin if I remember correctly. Most likely this pin will be frozen in place and will take a bit of persuasion to remove. Most ot the grease zerks I've seen in this setup are 90 degree fittings. Most of these pins are press fit but look closely at the ends of the pins. If it is a screw in pin, there will be two flats machined into the end of the pin for a wrench to grab onto. If it is a straight pin, then it will need to be pressed out with a large "C" clamp setup. These can take a tremendous amount of force to bust free but once they "pop" loose, you can almost push them out by hand.The rear spring hanger is fairly easy to do but the removing the bolts at times can be a chore. I like to heat the housing very warm, (don't incinerate the rubber insulator) so the bolts don't snap off in the cap, or hanger. I've seen severa old trucks requiring spring work and only have either two, or three bolts retaining the spring pocket cover.RobThanks again,Rob.Tricks I've leared through the years which have helped keep whatever sanity I have left are: (1) lots of penetrant (I like PB Blaster), (2) a little bit of heat, and (3) always hit the head of the bolt (like trying to drive it into the hole) before you try to remove it. And, usually, I "tighten" just a fuzz before loosening. I work every day on machine tools, and sometimes getting the screws out is the worst part of fixing them.If I recall correctly, isn't that rear housing aluminum? Steel bolts really hate aluminum threads!Kent Quote "Eagles may soar, but weasels don't get sucked into jet engines." Link to comment Share on other sites More sharing options...
doubleclutchinweasel Posted July 15, 2012 Author Share Posted July 15, 2012 That is a jamb screw the hits a "flat" on the pin if I remember correctly. Most likely this pin will be frozen in place and will take a bit of persuasion to remove. Most ot the grease zerks I've seen in this setup are 90 degree fittings. Most of these pins are press fit but look closely at the ends of the pins. If it is a screw in pin, there will be two flats machined into the end of the pin for a wrench to grab onto. If it is a straight pin, then it will need to be pressed out with a large "C" clamp setup. These can take a tremendous amount of force to bust free but once they "pop" loose, you can almost push them out by hand.The rear spring hanger is fairly easy to do but the removing the bolts at times can be a chore. I like to heat the housing very warm, (don't incinerate the rubber insulator) so the bolts don't snap off in the cap, or hanger. I've seen severa old trucks requiring spring work and only have either two, or three bolts retaining the spring pocket cover.RobGood news, Rob.I went out and laid down in the mudhole which used to be a yard before all this rain, and with very little fanfare, loosened and re-tightened those 4 bolts on the rear spring hanger.I grumble a lot about the build-up of grime on this old truck, but I really have to hand it to the guys who used it last. There is grease everywhere there is supposed to be grease. They apparently did maintain their trucks. Oh, there are frozen-up things here and there, but, by and large, most of the important bolts still turn.So, maybe this won't be all that bad. Of course, I still need to get a spring and new U-bolts. But, I feel better knowing the bolts aren't frozen!More to come...Kent Quote "Eagles may soar, but weasels don't get sucked into jet engines." Link to comment Share on other sites More sharing options...
Rob Posted July 15, 2012 Share Posted July 15, 2012 Good news, Rob.I went out and laid down in the mudhole which used to be a yard before all this rain, and with very little fanfare, loosened and re-tightened those 4 bolts on the rear spring hanger.I grumble a lot about the build-up of grime on this old truck, but I really have to hand it to the guys who used it last. There is grease everywhere there is supposed to be grease. They apparently did maintain their trucks. Oh, there are frozen-up things here and there, but, by and large, most of the important bolts still turn.So, maybe this won't be all that bad. Of course, I still need to get a spring and new U-bolts. But, I feel better knowing the bolts aren't frozen!More to come...KentYou are living right I'll tell you that. Good maintenance does pay off in many ways. I'd replace both springs as the other side will fail shortly after replacing the one side. That according to the law of averages that rules my life.......Rebuild machine tools eh? I'm certain you know what a blanchard stone is then and how to use them? There's the test for the day.RobRob Quote Plodding along with no job nor practical application for my existence, but still trying to fix what's broke. Link to comment Share on other sites More sharing options...
doubleclutchinweasel Posted July 16, 2012 Author Share Posted July 16, 2012 You are living right I'll tell you that. Good maintenance does pay off in many ways. I'd replace both springs as the other side will fail shortly after replacing the one side. That according to the law of averages that rules my life.......Rebuild machine tools eh? I'm certain you know what a blanchard stone is then and how to use them? There's the test for the day.RobRobOh, yeah. Very familiar with a Blanchard. The first night I went to work (been there 30 years this Thanksgiving), I ran a 48" blanchard grinder. Saw a guy forget to pull out the stone spacers (used when wheel segments got too short) when he put on new wheels. Touched the parts, and "poof"! New set of stones reduced to rubble. Funny as h%#l!Worked on maintaining and rebuilding CNCs, programming CNCs, buying CNCs, blah-blah-blah CNCs. Was part of the plant start-up crew when we built the plant I'm in now. Been designing tools and fixtures off and on for 25 years.For the past 8 years or so, I've been developing process and designing machines to in-source our own double-row tapered roller bearings, previously sourced from Timken.But, when it comes to figuring out exactly how to jack up the old Mack, and still manage to get jack stands under it, I'm a newbie!!!And, dang, them's gonna' be some tall jack stands, ain't they?Kent Quote "Eagles may soar, but weasels don't get sucked into jet engines." Link to comment Share on other sites More sharing options...
doubleclutchinweasel Posted July 16, 2012 Author Share Posted July 16, 2012 No, seriously Rob. How the heck do you block that thing up? Front crossmember, maybe?Kent Quote "Eagles may soar, but weasels don't get sucked into jet engines." Link to comment Share on other sites More sharing options...
Rob Posted July 16, 2012 Share Posted July 16, 2012 Oh, yeah. Very familiar with a Blanchard. The first night I went to work (been there 30 years this Thanksgiving), I ran a 48" blanchard grinder. Saw a guy forget to pull out the stone spacers (used when wheel segments got too short) when he put on new wheels. Touched the parts, and "poof"! New set of stones reduced to rubble. Funny as h%#l!Worked on maintaining and rebuilding CNCs, programming CNCs, buying CNCs, blah-blah-blah CNCs. Was part of the plant start-up crew when we built the plant I'm in now. Been designing tools and fixtures off and on for 25 years.For the past 8 years or so, I've been developing process and designing machines to in-source our own double-row tapered roller bearings, previously sourced from Timken.But, when it comes to figuring out exactly how to jack up the old Mack, and still manage to get jack stands under it, I'm a newbie!!!And, dang, them's gonna' be some tall jack stands, ain't they?KentExpensive stone segments too!! They come apart with some force and are very short. I seen a crankshaft grinding wheel come apart at speed once and the damage to a concrete block wall was enough to teach me to "ring test" any rotating vetrified wheel!!I usually block up behind the rear hangers of the front springs to hold the truck. I also place a single stand under the front xmember to take a little stress off the frame. I have tall stands but prior to having them, I used six, and 10 ton stands as they were long enough for the job.Rob Quote Plodding along with no job nor practical application for my existence, but still trying to fix what's broke. Link to comment Share on other sites More sharing options...
doubleclutchinweasel Posted July 16, 2012 Author Share Posted July 16, 2012 Expensive stone segments too!! They come apart with some force and are very short. I seen a crankshaft grinding wheel come apart at speed once and the damage to a concrete block wall was enough to teach me to "ring test" any rotating vetrified wheel!!I usually block up behind the rear hangers of the front springs to hold the truck. I also place a single stand under the front xmember to take a little stress off the frame. I have tall stands but prior to having them, I used six, and 10 ton stands as they were long enough for the job.RobOK. Those points all make sense. I just need to round up some decent tall jack stands.The company I work for is Dodge (no relation whatsoever to the auto maker). We make mechanical drive components (gearboxes, pullys, couplings, etc...). A few years ago, Rockwell sold us to Baldor. So, now Reliance and Baldor motors are part of the same company. Weird, considering the years of competition. Then, ABB, a Swedish outfit, bought the whole kit and kaboodle. Huge freakin' company. They paid something like a billion dollars CASH for the Baldor/Reliance/Dodge corporation.I've been lucky. Started as a machine operator. Worked on about every type of machine they had. Did maintenance. Did engineering. Modified and rebuilt machines. Designed machines. Traveled extensively (can't tell you how many times to Europe...lost count years ago). Was the engineering manager for 5 years. Hated it. Would rather do it myself. Am doing it myself now! Our plant is one of the most profitable facilities in the global organization (I take credit for that!). We do something like $140 million in business per year with only about 115 people total. Can't publically tell you the profit numbers, but they are obscene (again, I take credit for that!).But, with the headaches that come with high-profile projects, I need a release. The old Mack is just the ticket. Sure, it needs work. But, once I get the springs fixed, I can drive it. I'm working through the air system, but I try to leave it drivable most of the time. I dread the springs. It looks like it could be a royal pain in the rump!MUCH more to come...Kent Quote "Eagles may soar, but weasels don't get sucked into jet engines." Link to comment Share on other sites More sharing options...
Rob Posted July 17, 2012 Share Posted July 17, 2012 OK. Those points all make sense. I just need to round up some decent tall jack stands.The company I work for is Dodge (no relation whatsoever to the auto maker). We make mechanical drive components (gearboxes, pullys, couplings, etc...). A few years ago, Rockwell sold us to Baldor. So, now Reliance and Baldor motors are part of the same company. Weird, considering the years of competition. Then, ABB, a Swedish outfit, bought the whole kit and kaboodle. Huge freakin' company. They paid something like a billion dollars CASH for the Baldor/Reliance/Dodge corporation.I've been lucky. Started as a machine operator. Worked on about every type of machine they had. Did maintenance. Did engineering. Modified and rebuilt machines. Designed machines. Traveled extensively (can't tell you how many times to Europe...lost count years ago). Was the engineering manager for 5 years. Hated it. Would rather do it myself. Am doing it myself now! Our plant is one of the most profitable facilities in the global organization (I take credit for that!). We do something like $140 million in business per year with only about 115 people total. Can't publically tell you the profit numbers, but they are obscene (again, I take credit for that!).But, with the headaches that come with high-profile projects, I need a release. The old Mack is just the ticket. Sure, it needs work. But, once I get the springs fixed, I can drive it. I'm working through the air system, but I try to leave it drivable most of the time. I dread the springs. It looks like it could be a royal pain in the rump!MUCH more to come...KentThe spings with the exception of being tight are very straight forward to work with. If you are patient and work with the front spring pin, and don't bust something beating upon it, the job is not that difficult. Don't be under that spring when it comes loose from it's mount! Damned things are heavy.Used to use a lot of Dodge bearings and gearboxes, along with Tulsa, and Braden drives for mechanical power transmissions in the sawmill equipment manufacturing industry. Falk was another of the gear reducers used a lot but only in very large, (100+ horsepower) applications. Baldor/Reliance were always the motors of choice to use for quality and a long lasting product. Cheaper motors, well, you do get what you pay for.Rob Quote Plodding along with no job nor practical application for my existence, but still trying to fix what's broke. Link to comment Share on other sites More sharing options...
doubleclutchinweasel Posted July 17, 2012 Author Share Posted July 17, 2012 The spings with the exception of being tight are very straight forward to work with. If you are patient and work with the front spring pin, and don't bust something beating upon it, the job is not that difficult. Don't be under that spring when it comes loose from it's mount! Damned things are heavy.Used to use a lot of Dodge bearings and gearboxes, along with Tulsa, and Braden drives for mechanical power transmissions in the sawmill equipment manufacturing industry. Falk was another of the gear reducers used a lot but only in very large, (100+ horsepower) applications. Baldor/Reliance were always the motors of choice to use for quality and a long lasting product. Cheaper motors, well, you do get what you pay for.RobYeah, them's all familiar names, alright! I've always been in the Dodge group ("team green"). Made v-belt pulleys (sheaves) and couplings for 13-1/2 years, then moved when we built the new roller bearing plant in '96. Made our own housings for years, and used Timken (tapered) and FAG (spherical) inserts. Dodge had wanted to make their own tapered bearings for about 40 years, but couldn't make it happen. I was "lucky" enough to get to make it happen. No pressure, right? If you're ever here in western NC, I'd be glad to show you around.Kent Quote "Eagles may soar, but weasels don't get sucked into jet engines." Link to comment Share on other sites More sharing options...
b61mack Posted July 17, 2012 Share Posted July 17, 2012 Yeah, I've found a few already. Prices are much higher now. And, some need to be explained a little better (which volume, or what printing). I'll keep looking.Looking through some images of old brochures. Looks like the 3-leaf, tapered springs may be 55" lomg, as opposed to the older 54" springs. If so, it would probably take a lot more modification than I want to do. So, I may be better off to stay with the originals.More to come,,,Kent I have a 72 R model that i installed 3 leaf springs a few years ago, i got parts off of a 78. ( may be imposible to find ) but find you a late 70s early 80s U model that has 3 leaf springs. you need the rear spring hangers, blocks on the axle,springs,and the battery box brackets that bolt on the hanger. the front hangers are the same as the older R models. i think it does ride better with the 3 leaf front end. Ron Quote Link to comment Share on other sites More sharing options...
doubleclutchinweasel Posted July 17, 2012 Author Share Posted July 17, 2012 I have a 72 R model that i installed 3 leaf springs a few years ago, i got parts off of a 78. ( may be imposible to find ) but find you a late 70s early 80s U model that has 3 leaf springs. you need the rear spring hangers, blocks on the axle,springs,and the battery box brackets that bolt on the hanger. the front hangers are the same as the older R models. i think it does ride better with the 3 leaf front end. RonThanks, Ron.When you mention the rear spring hangers, I assume you're talking about the entire bracket which bolts to the frame.And, I also assume you re-used your original axle.Did yours have threaded front pins or straight front pins?Kent Quote "Eagles may soar, but weasels don't get sucked into jet engines." Link to comment Share on other sites More sharing options...
b61mack Posted July 18, 2012 Share Posted July 18, 2012 Thanks, Ron.When you mention the rear spring hangers, I assume you're talking about the entire bracket which bolts to the frame.And, I also assume you re-used your original axle.Did yours have threaded front pins or straight front pins?Kent Kent yes the complete bracket ass. i used the front axle out of i think 74 maybe 75 F model i wanted front brakes but it was the same 535 axle that came out of my R model. the front hanger had straight pins, the rear ones i used for the U model had the threaded pins. make sure you get all the parts for the hanger. you might get ahold of Counterman on this site ans if he has any mid to late U models laying around. Ron Quote Link to comment Share on other sites More sharing options...
doubleclutchinweasel Posted July 21, 2012 Author Share Posted July 21, 2012 Found a guy a couple of hours away who can make me a couple of replacement leaves fo $50 each. He's another old 40-year veteran spring maker, and was recommended by the Mack dealer there. So, I pulled the spring out this morning. Use a cut-up cross tie for blocks. Jacked up against the middle of the front crossmember. After spring was removed, put another block on the axle, and let it down until the frame rested on it. Also have a block under the front crossmember. Front pin wouldn't quite go out from the outside-in, because of a slightly tweaked bumper mount. So, I pushed it back in and went out the other way. Of course, the spring got out of kilter, and had to be weaseled into position before the pin would go in.Pictures of the hanger cap soaking, the truck blocked up, the spring cleaned up and resting comfortably in the back of the Tahoe (FUN by yourself!), and a close-up of the broken leaves. U-bolts came out with a little torque, so I didn't have to torch them. Should make it easier to duplicate them, having them in one piece! 1 Quote "Eagles may soar, but weasels don't get sucked into jet engines." Link to comment Share on other sites More sharing options...
doubleclutchinweasel Posted July 29, 2012 Author Share Posted July 29, 2012 New spring leaves are in. The guys in Knoxville, TN, at Suspensions Unlimited (aka Knoxville Spring Service) got me in and out in about an hour. Did 3 new leaves at $50/per, and 2 new U-bolts. Total cost: $211.They were planning to have to cut the spring bands off, but, like everything else under this truck, they came off with no problem. Sometimes it's good being covered in oil!They reminded me to re-torque the new U-bolts after a little driving. Will also re-chech the screws in the bands.So, this piece (1 of 10,000) is done. Now, back to brakes, lights, etc... Thanks for all the comments.More to come...Kent Quote "Eagles may soar, but weasels don't get sucked into jet engines." Link to comment Share on other sites More sharing options...


Recommended Posts
Join the conversation
You can post now and register later. If you have an account, sign in now to post with your account.