


Ol2Stroker
-
Posts
107 -
Joined
-
Last visited
-
Days Won
3
Content Type
Profiles
Forums
Gallery
Events
Blogs
BMT Wiki
Collections
Store
Everything posted by Ol2Stroker
-
SOLD
-
Ok that's all

-
Few more pics


-
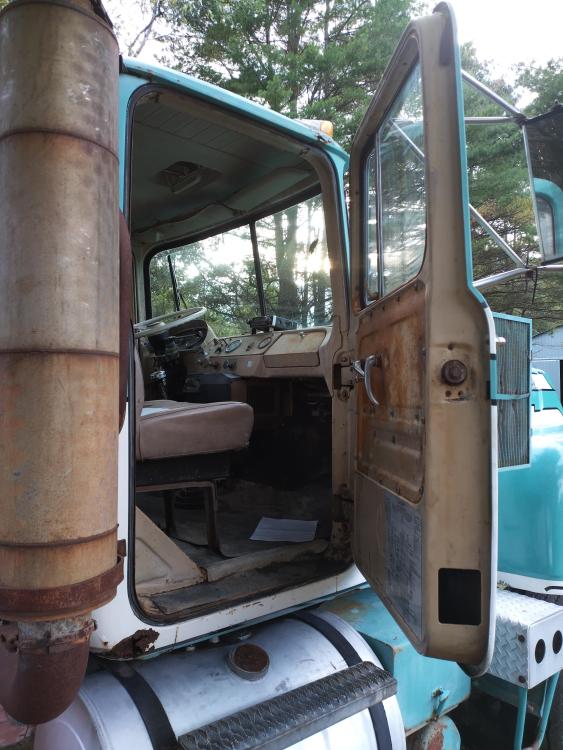
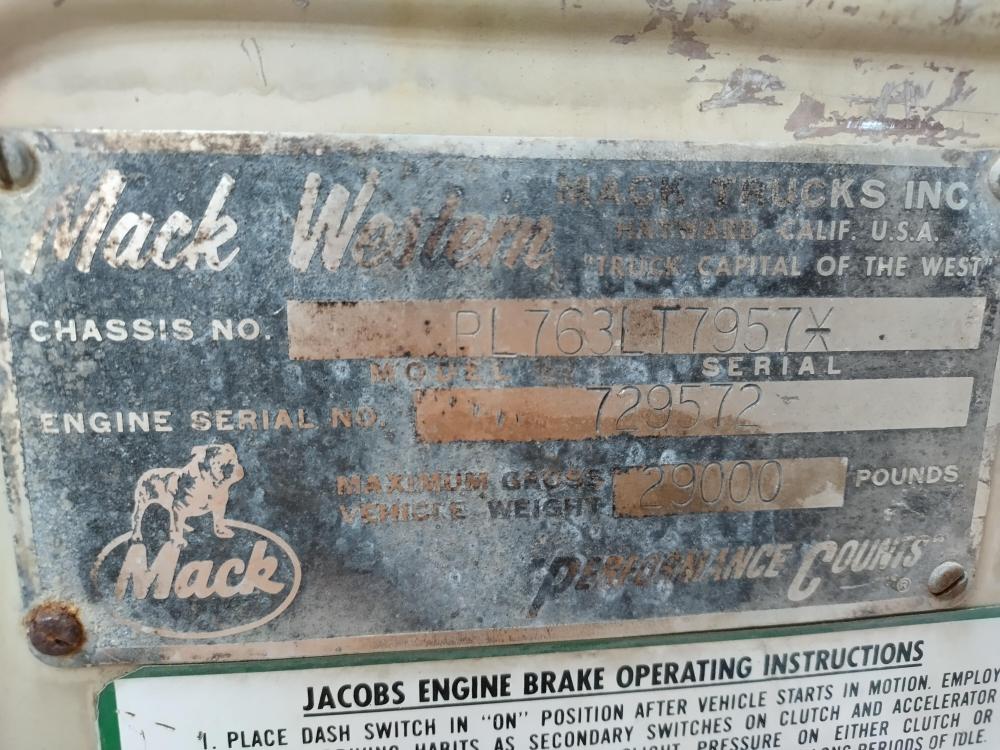
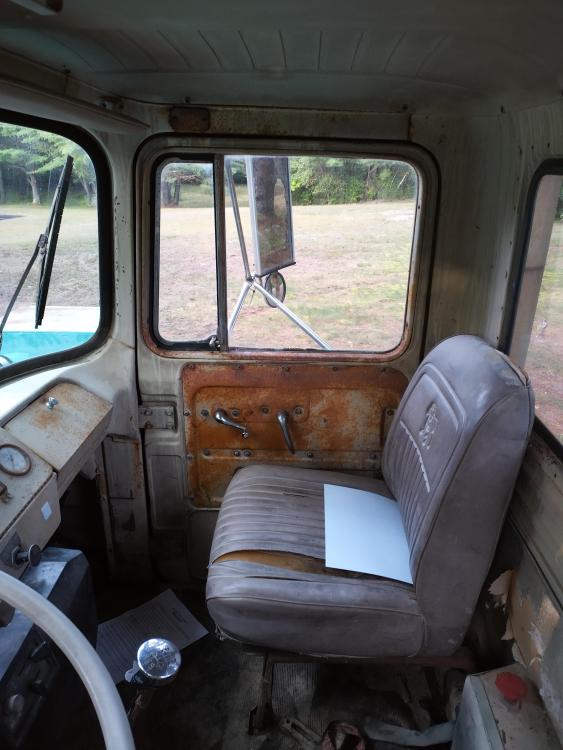
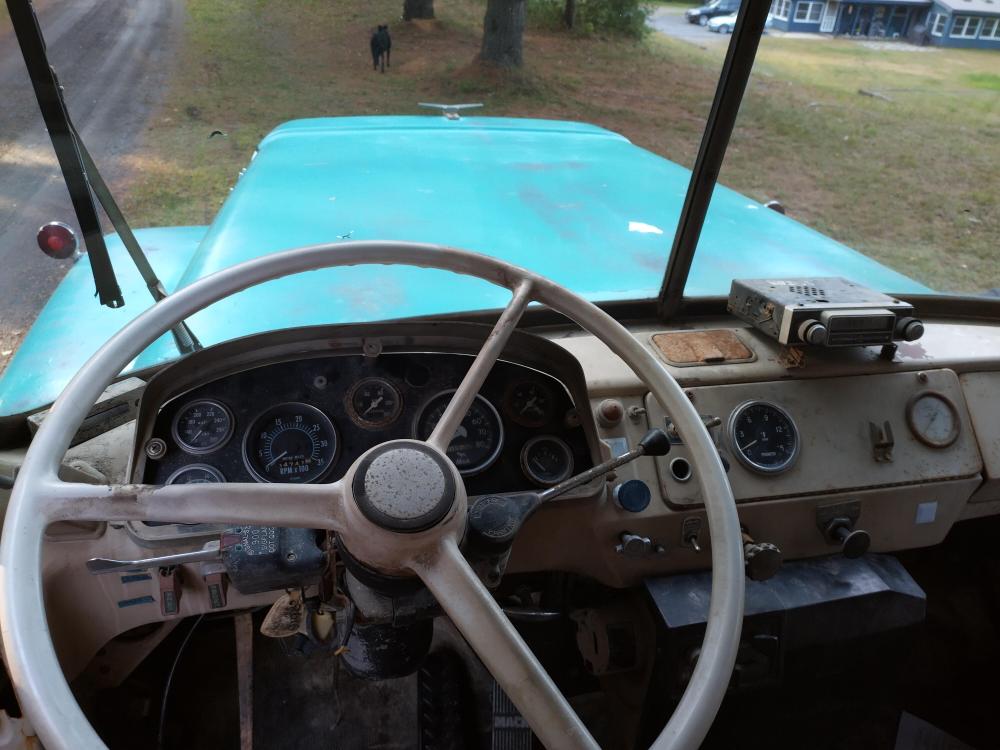
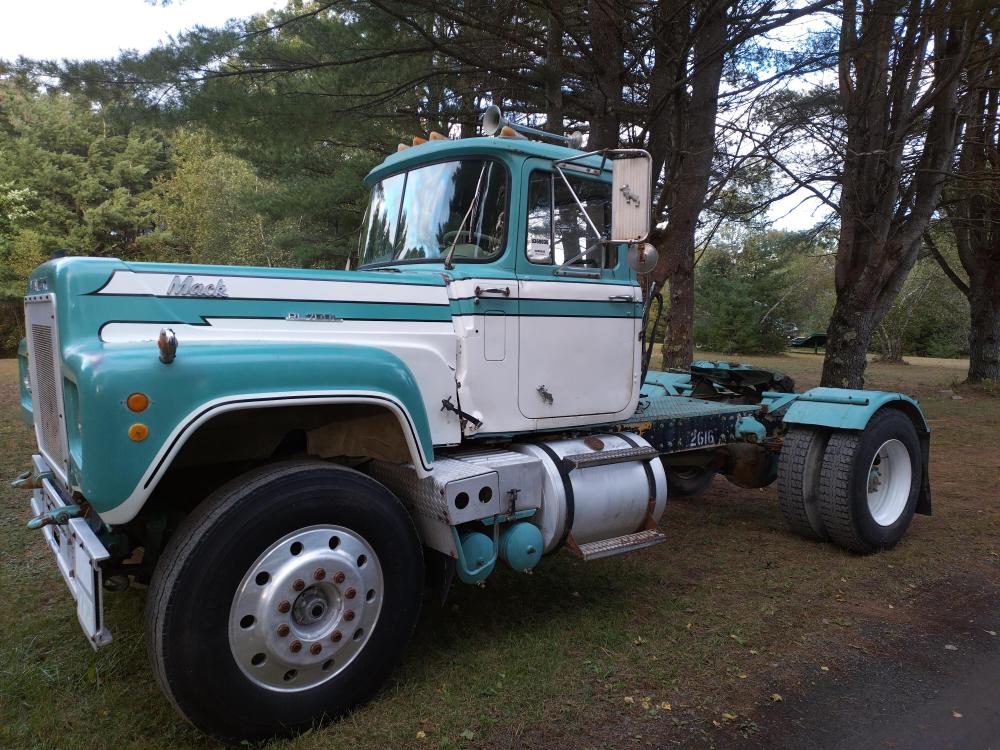
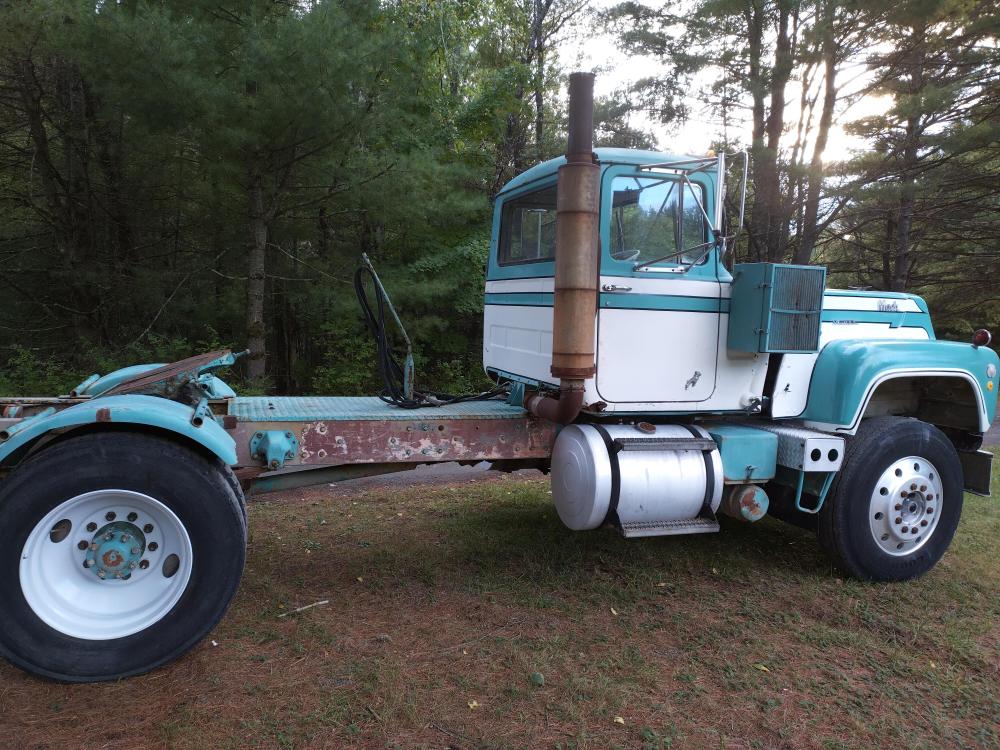
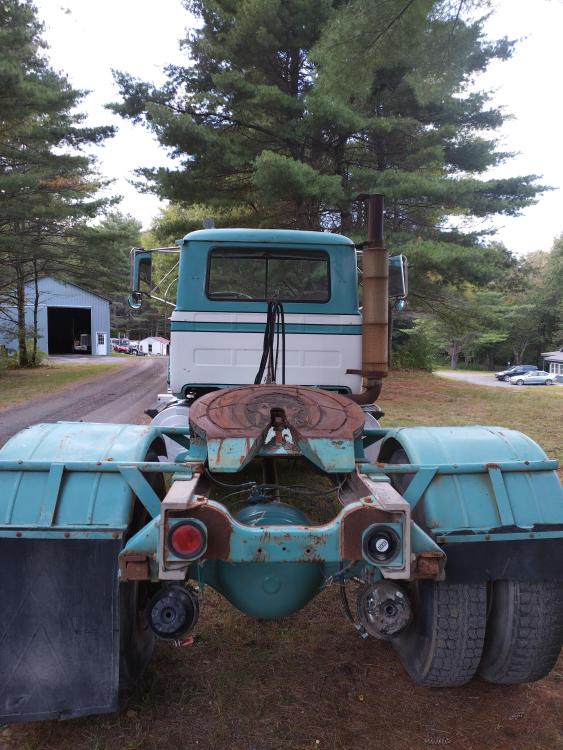
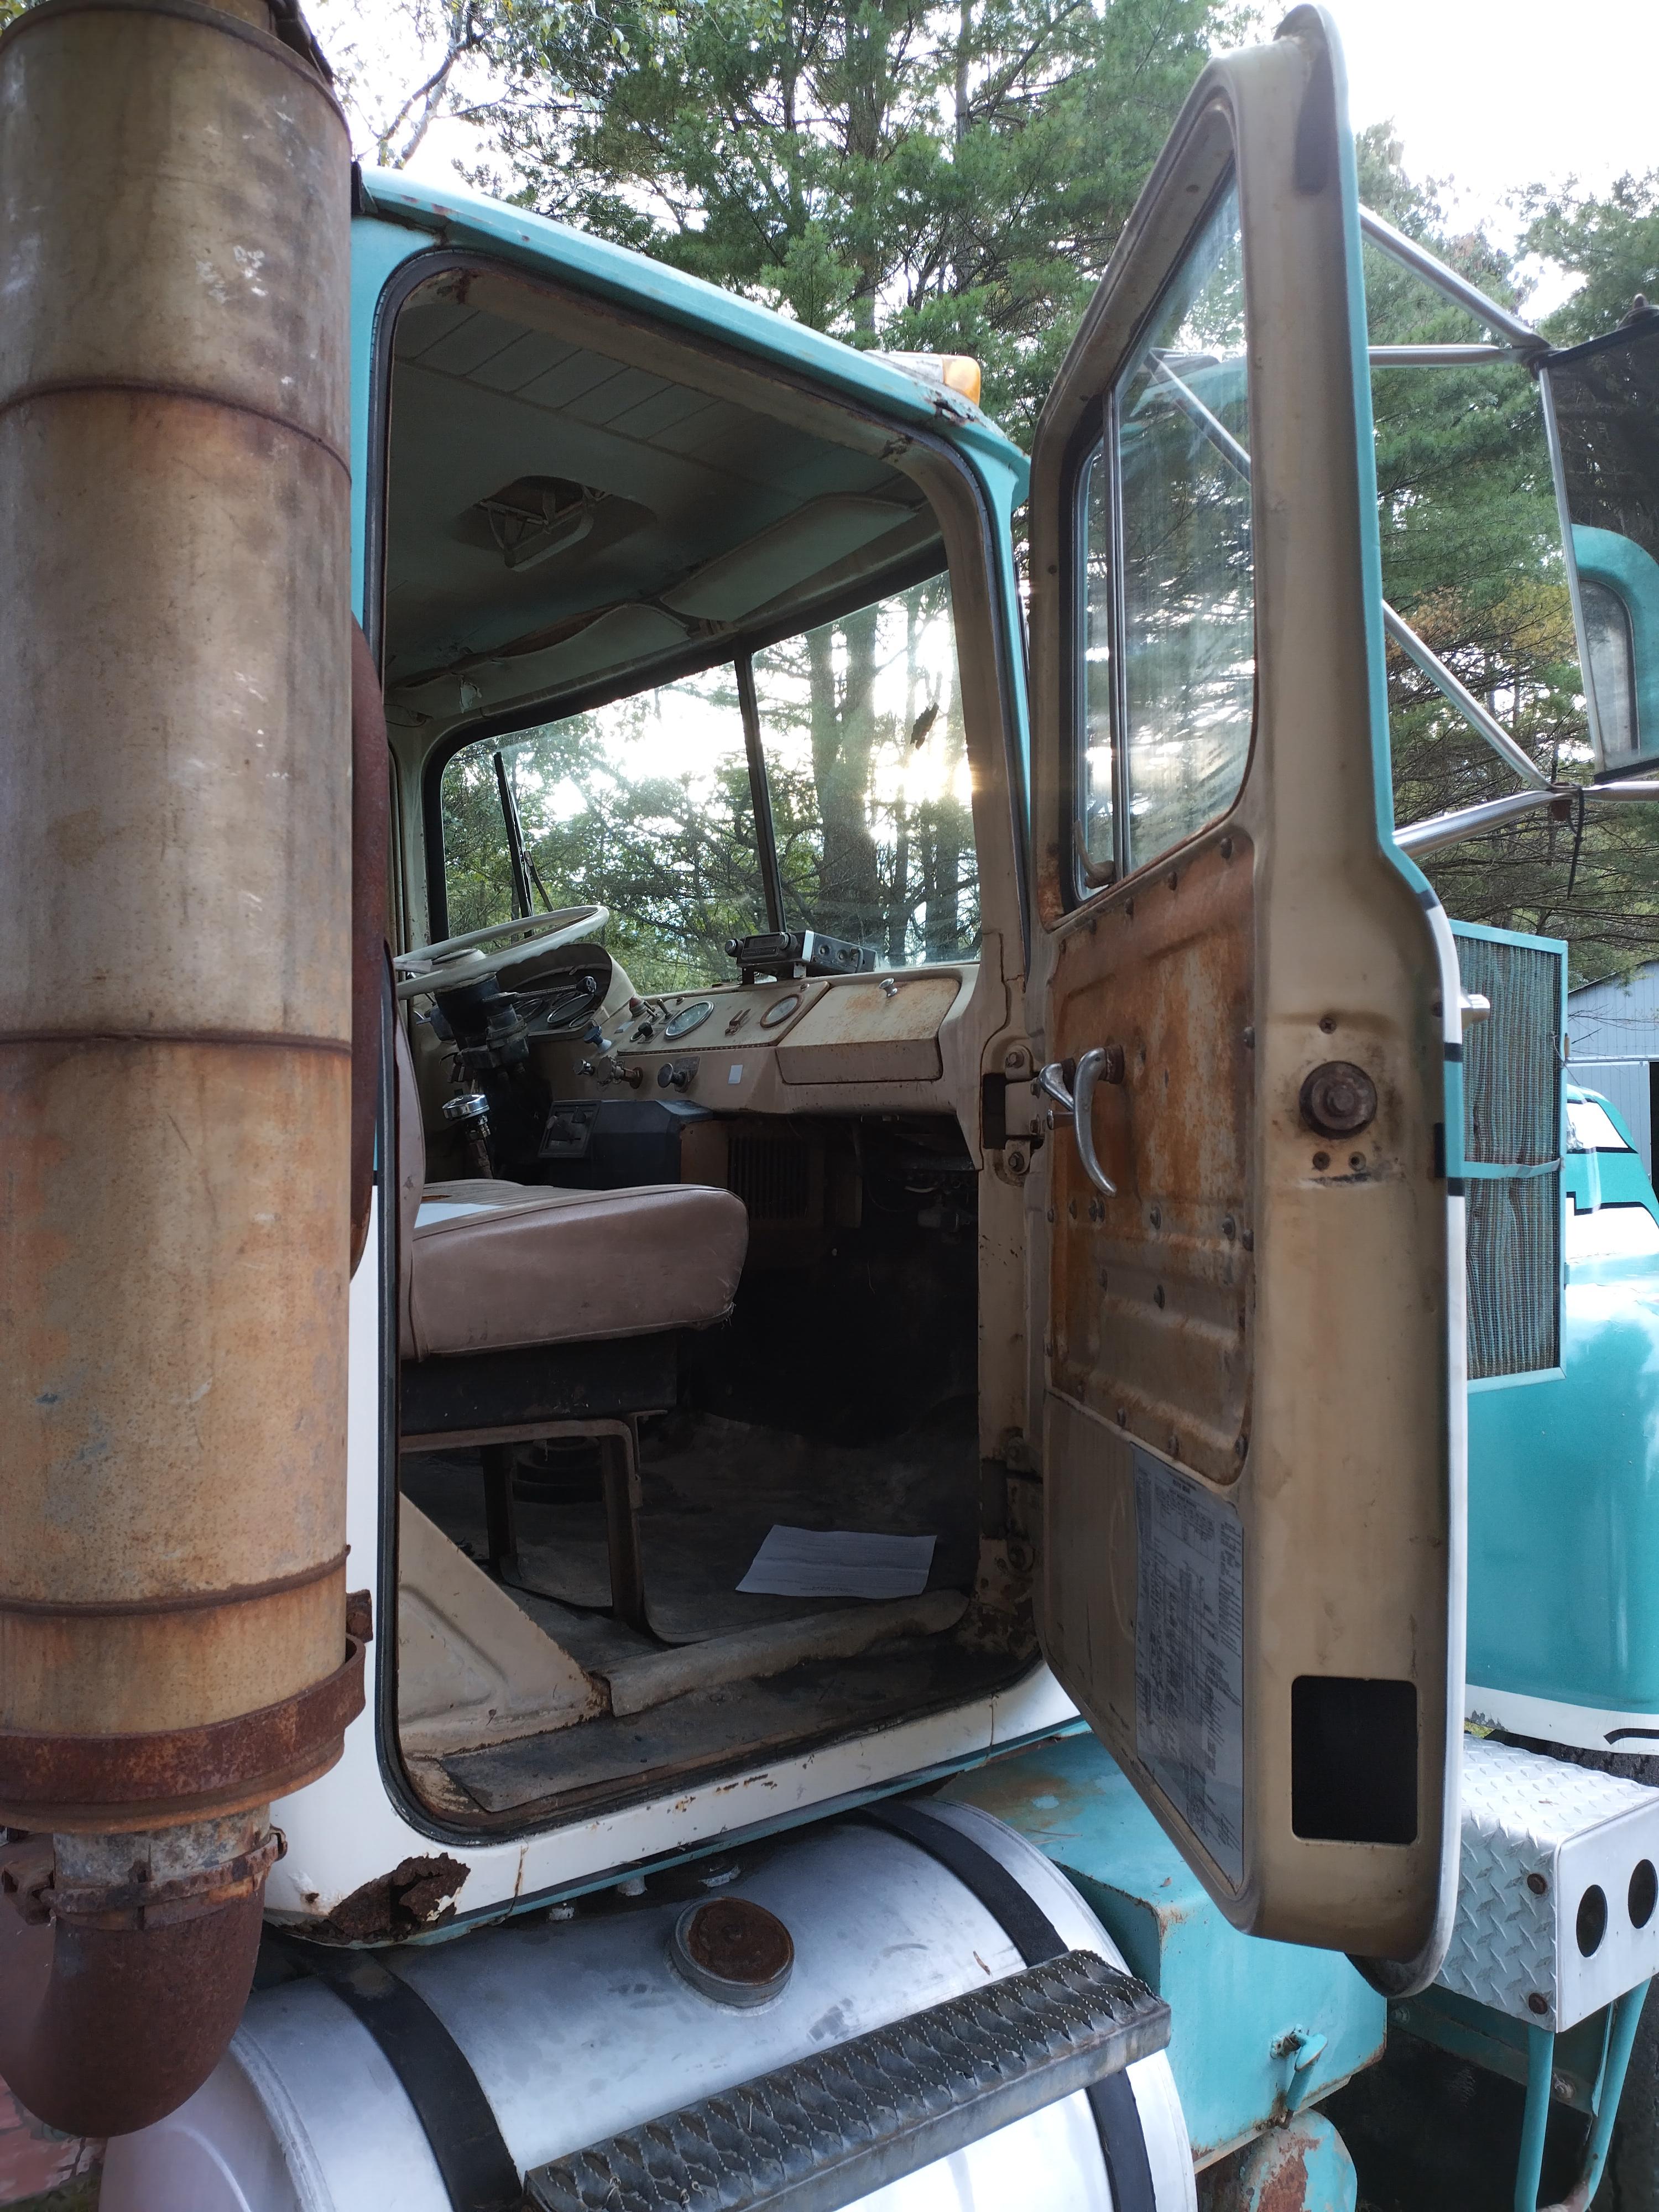
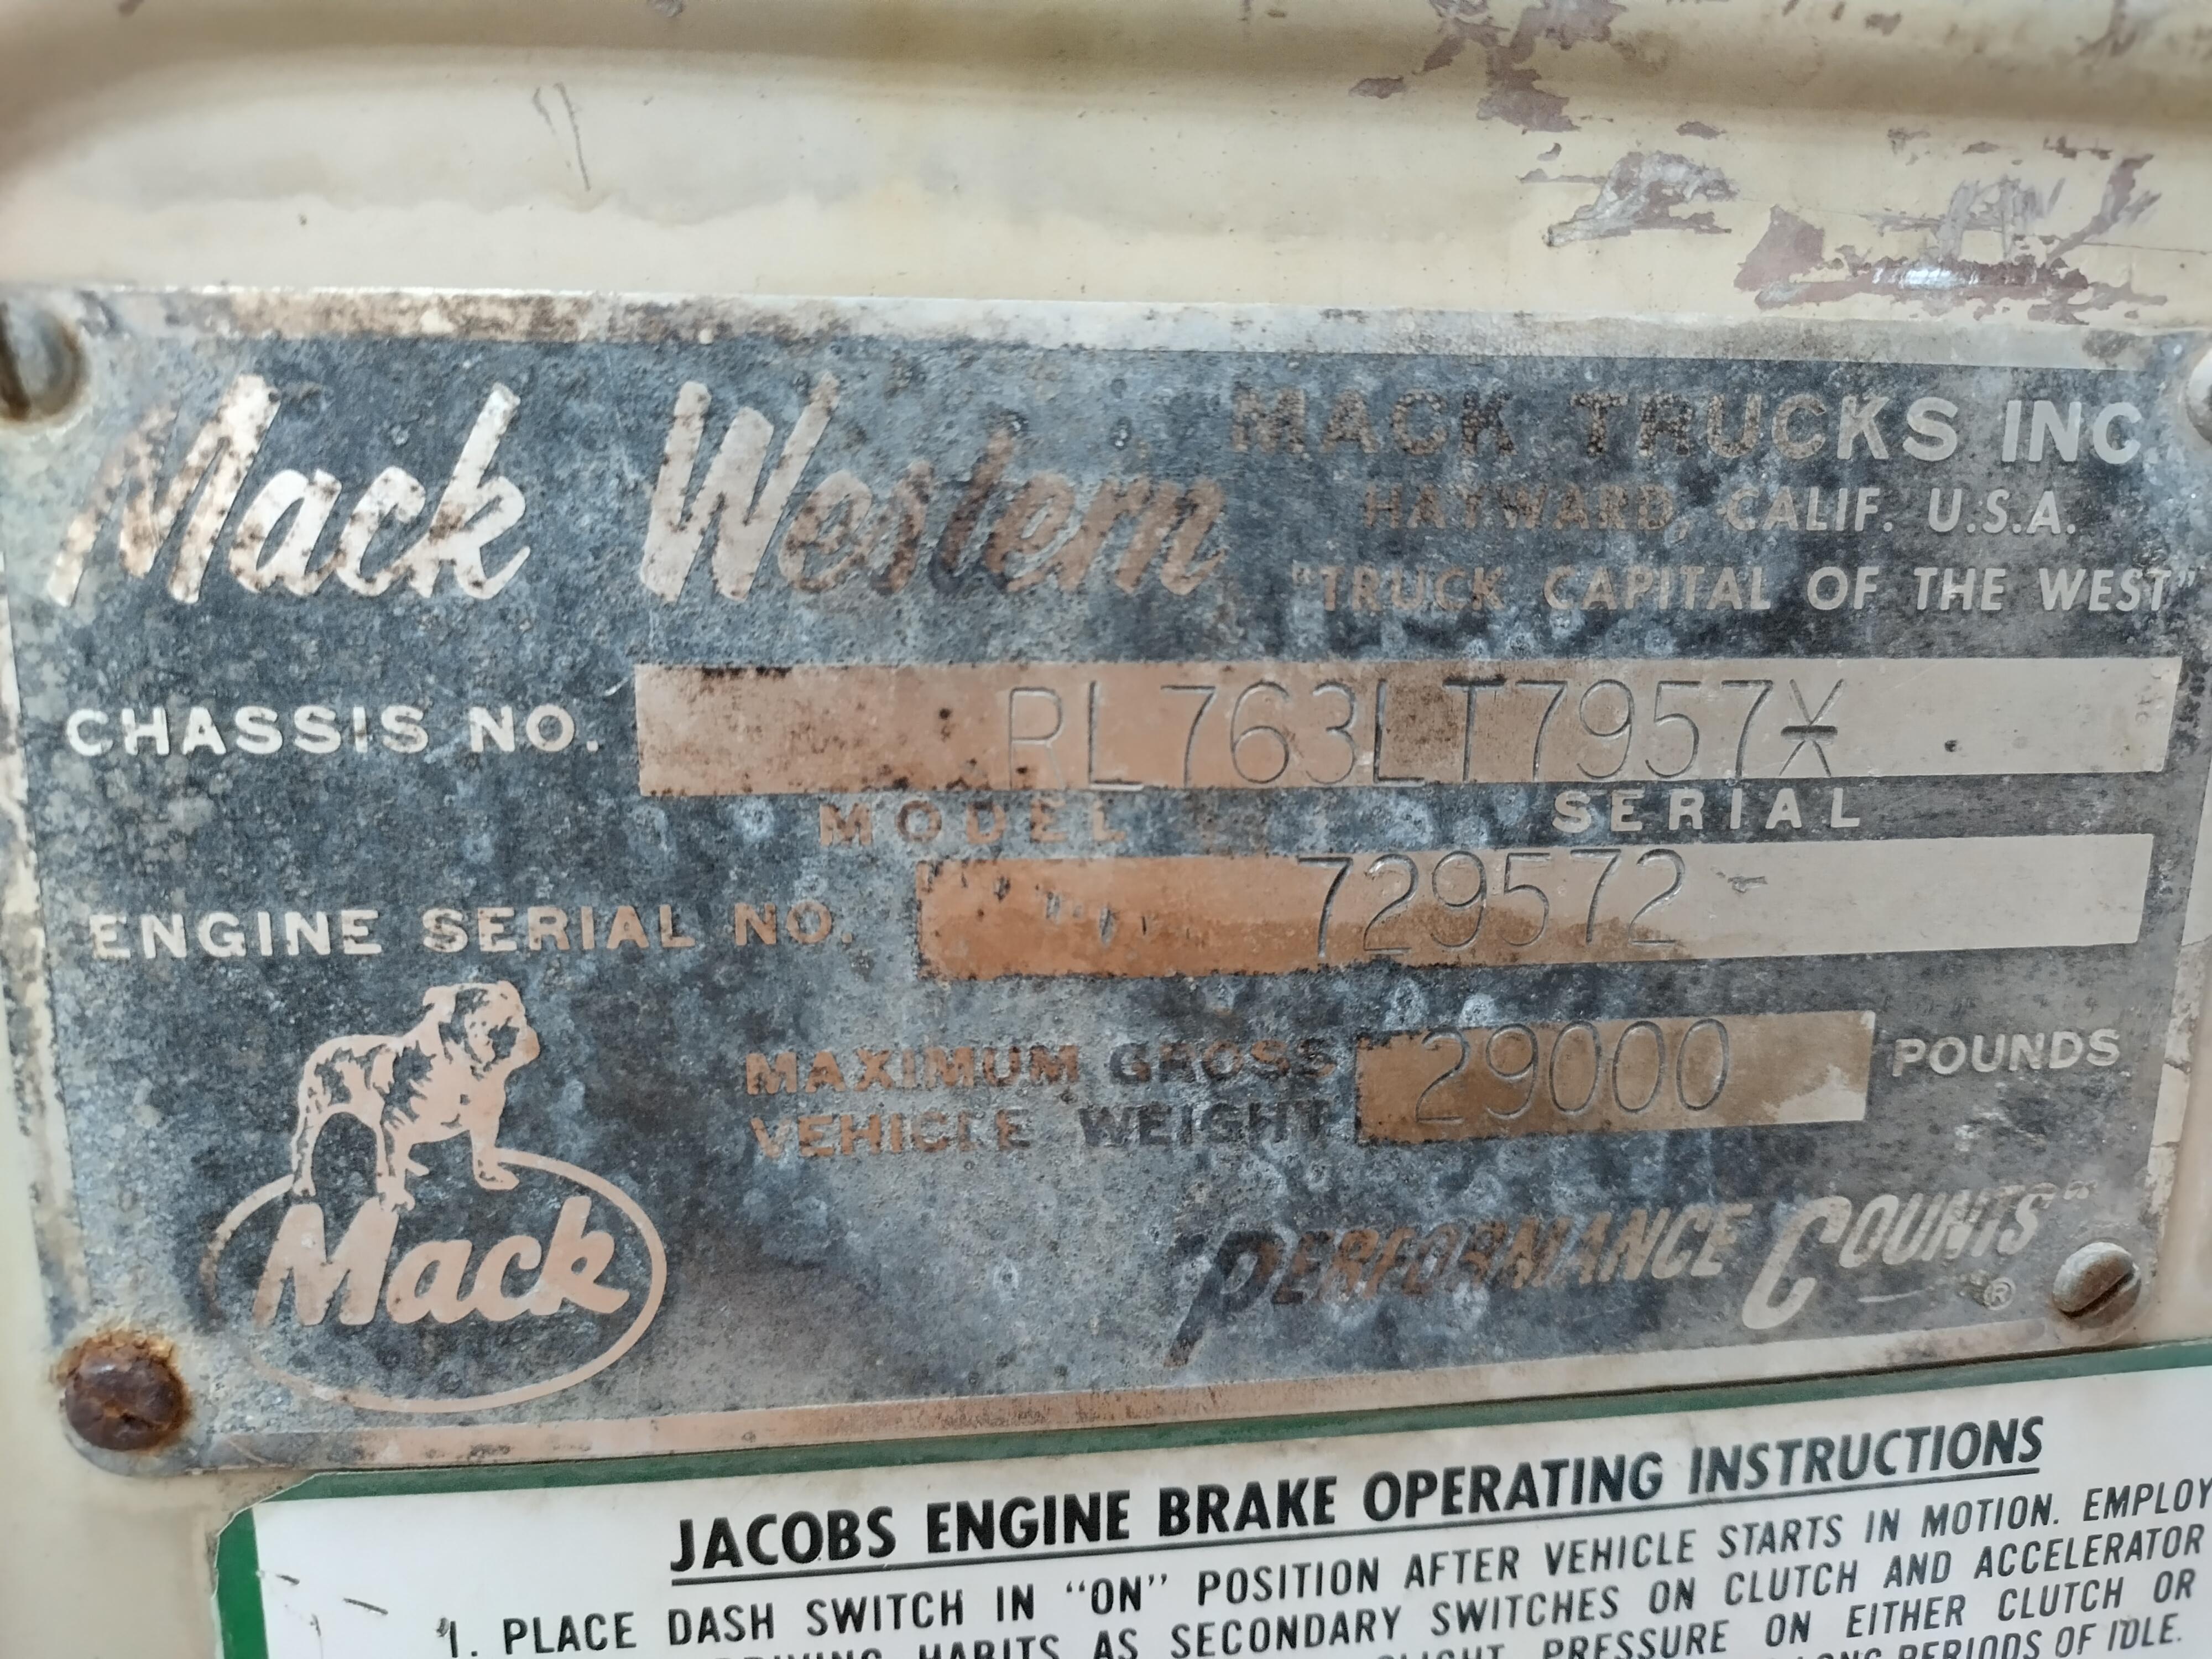
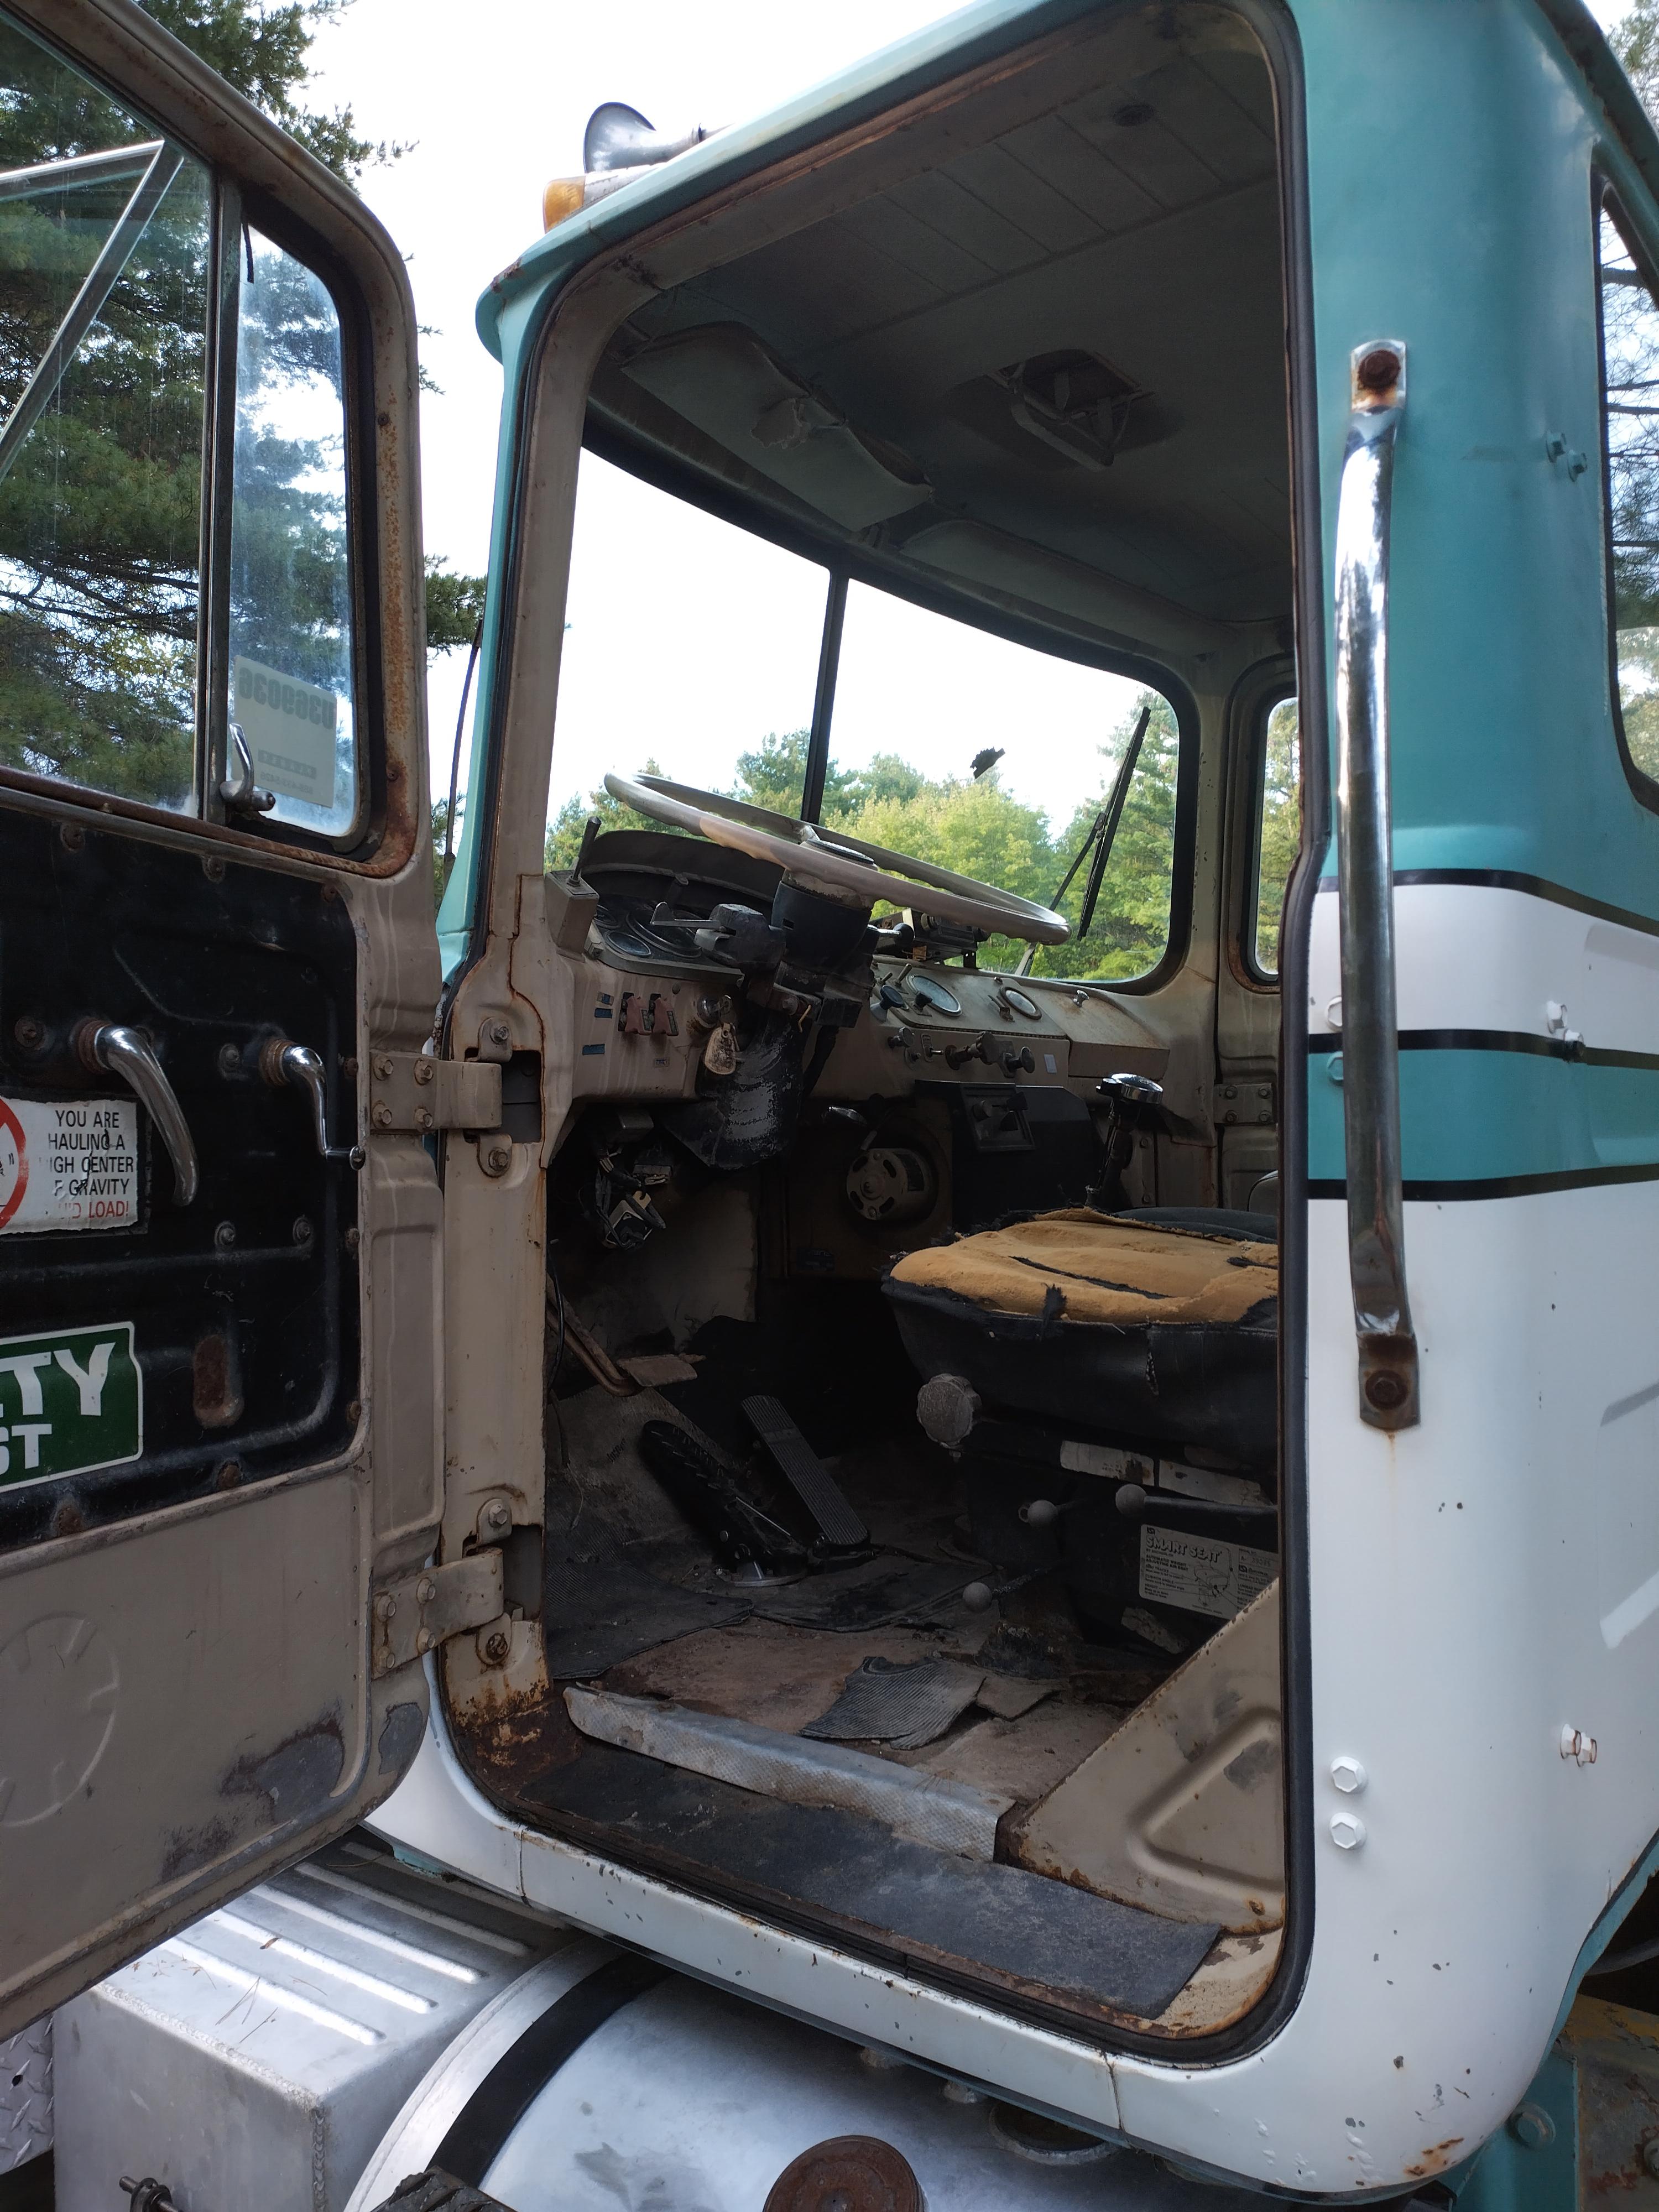
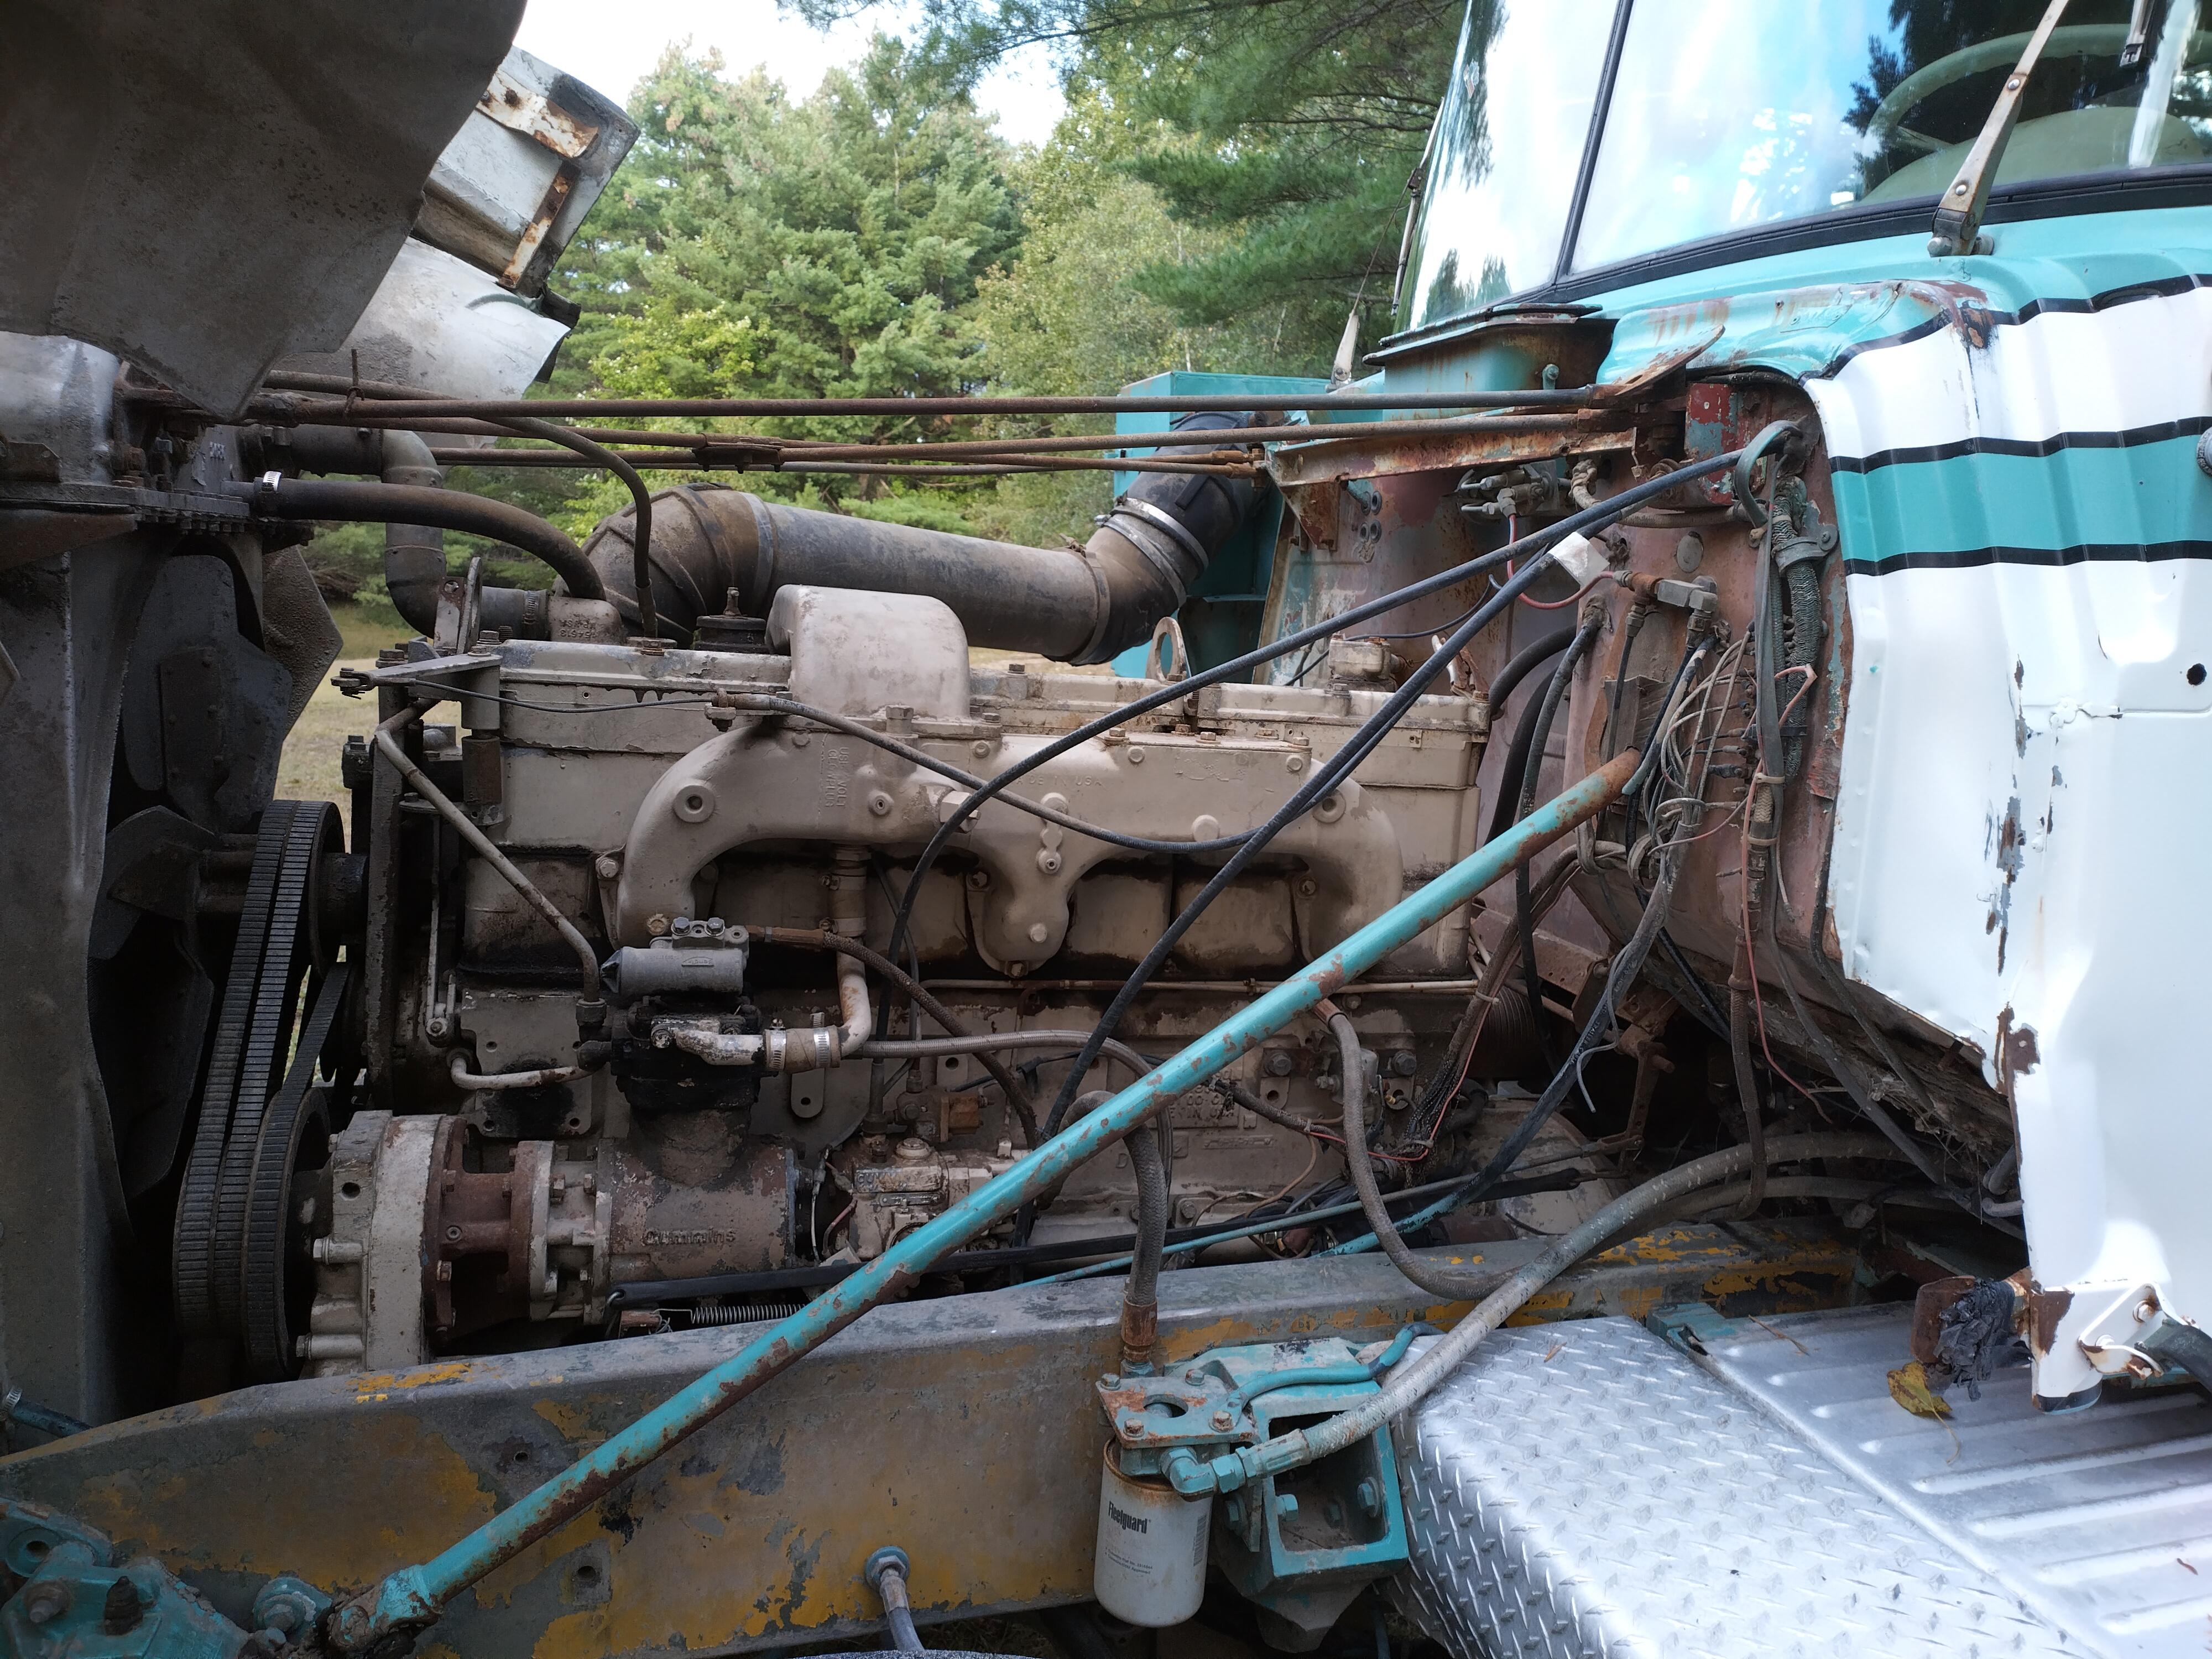
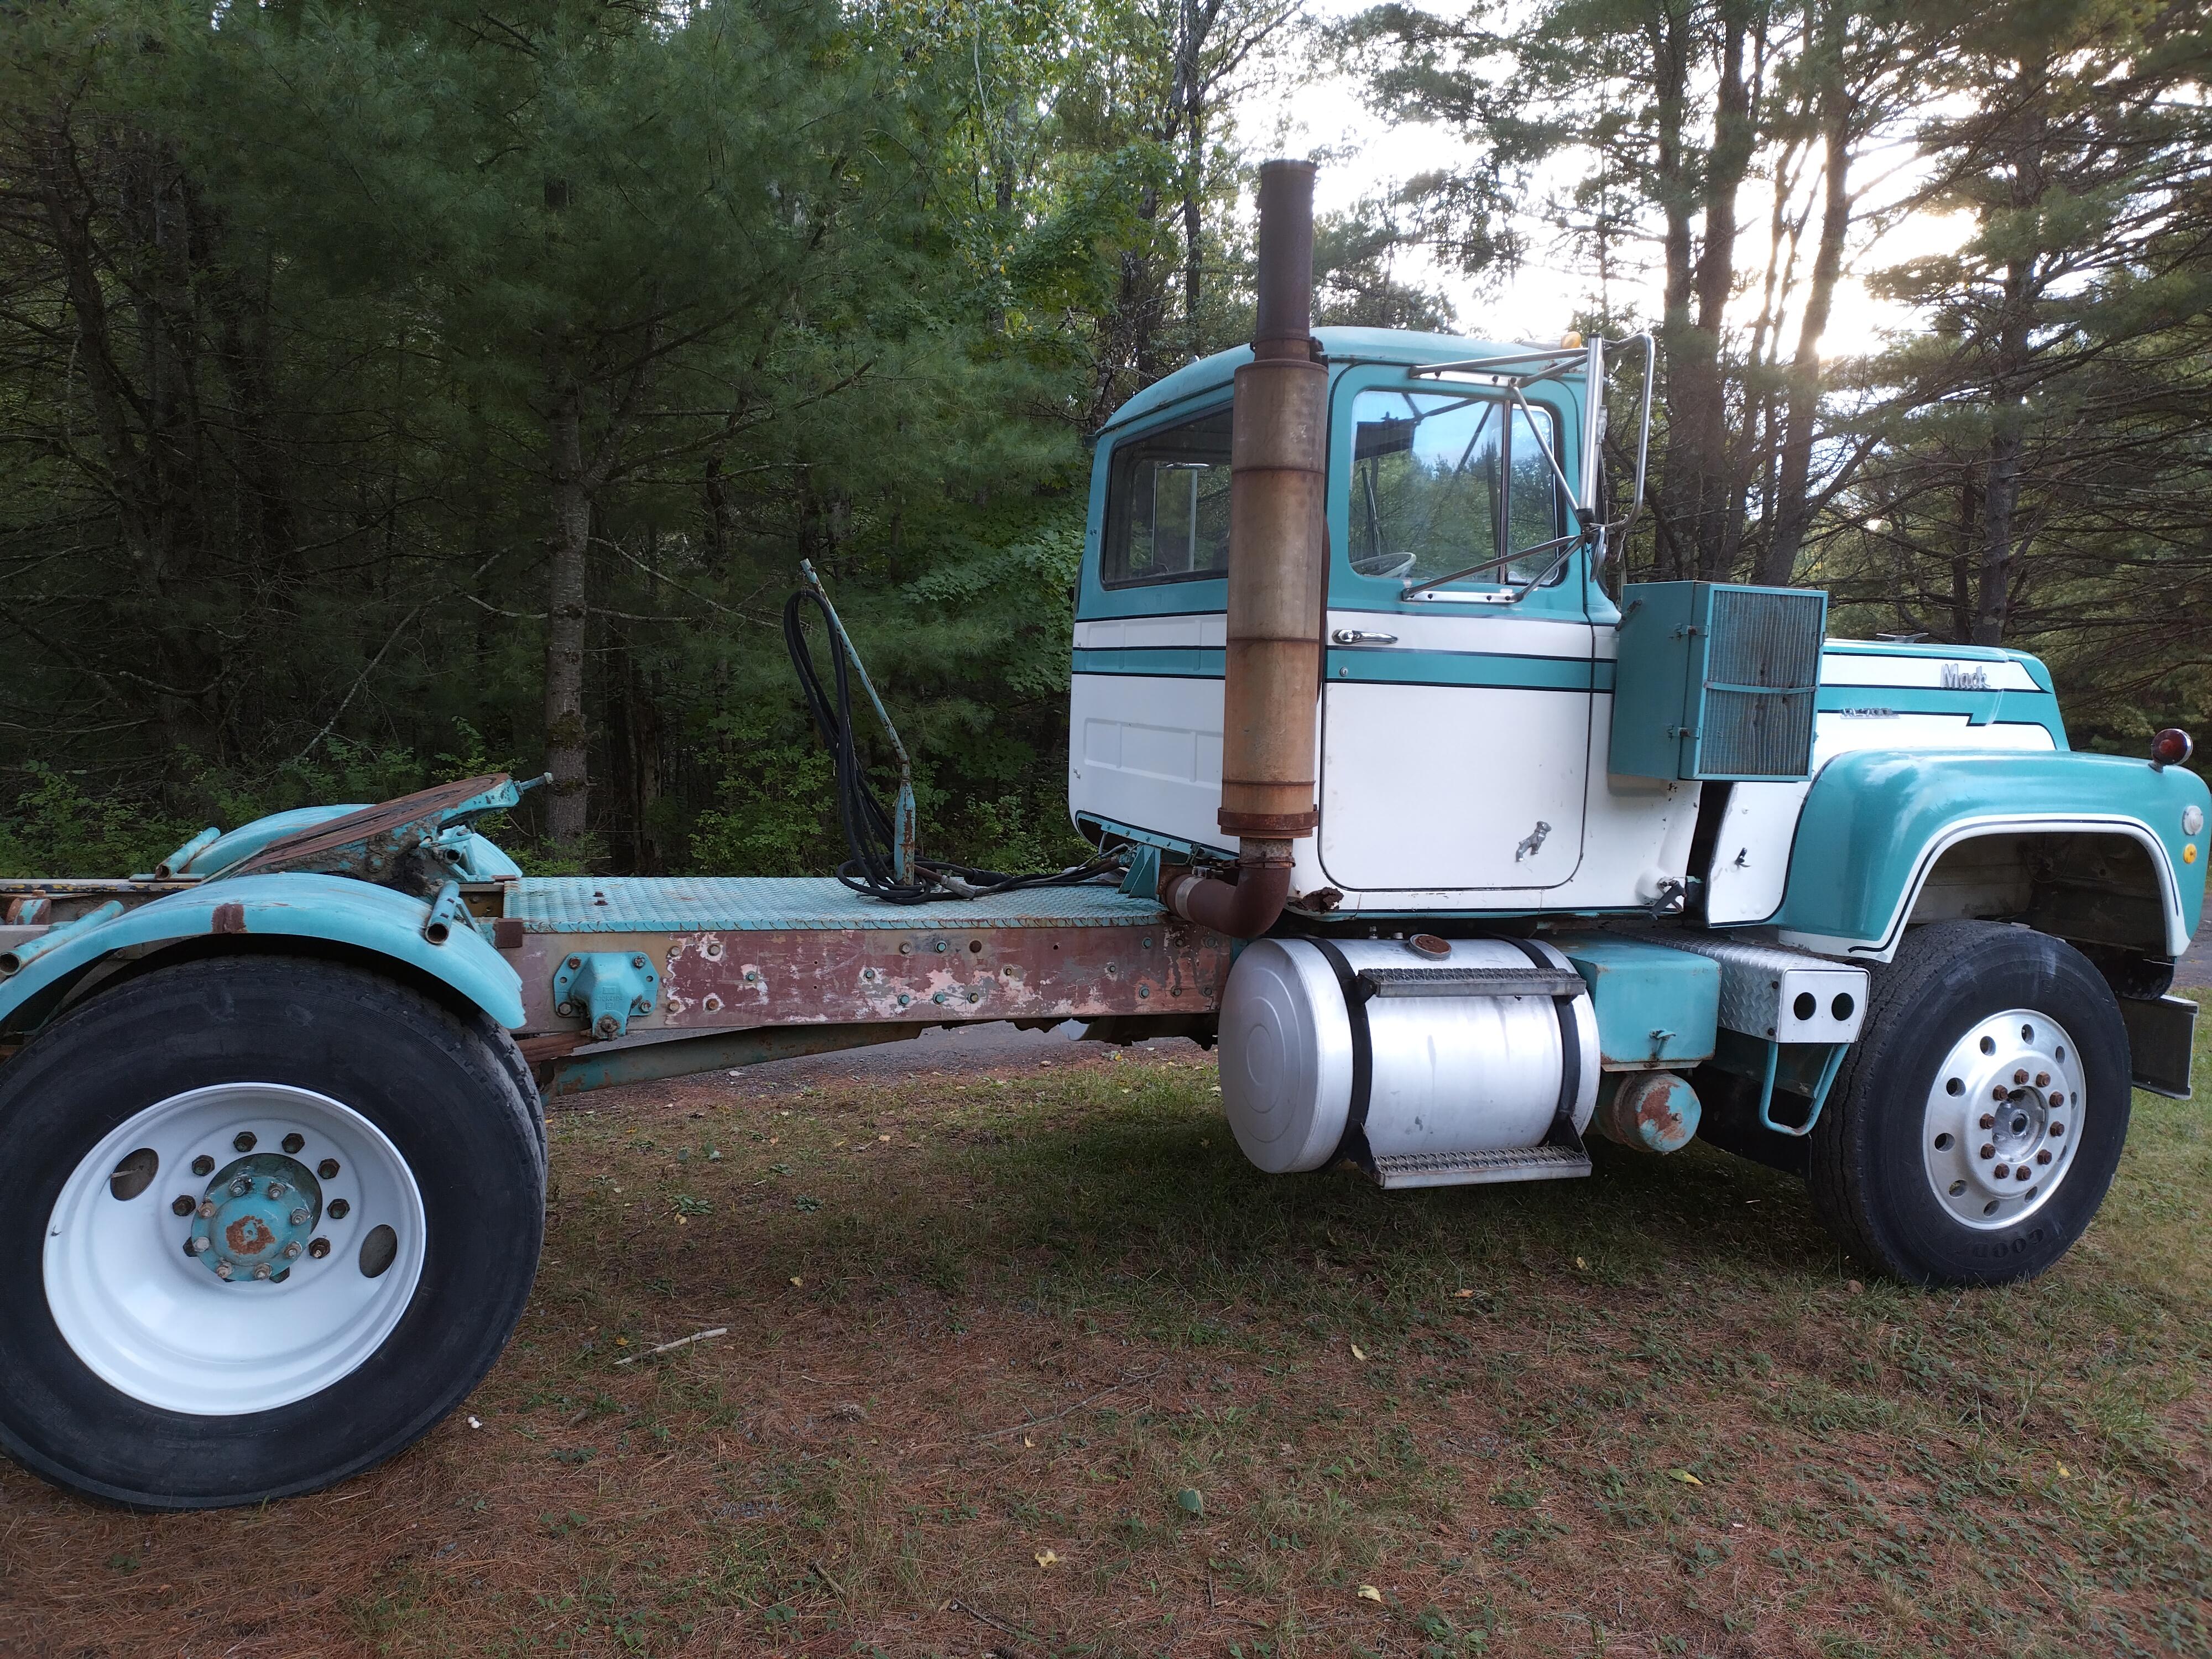
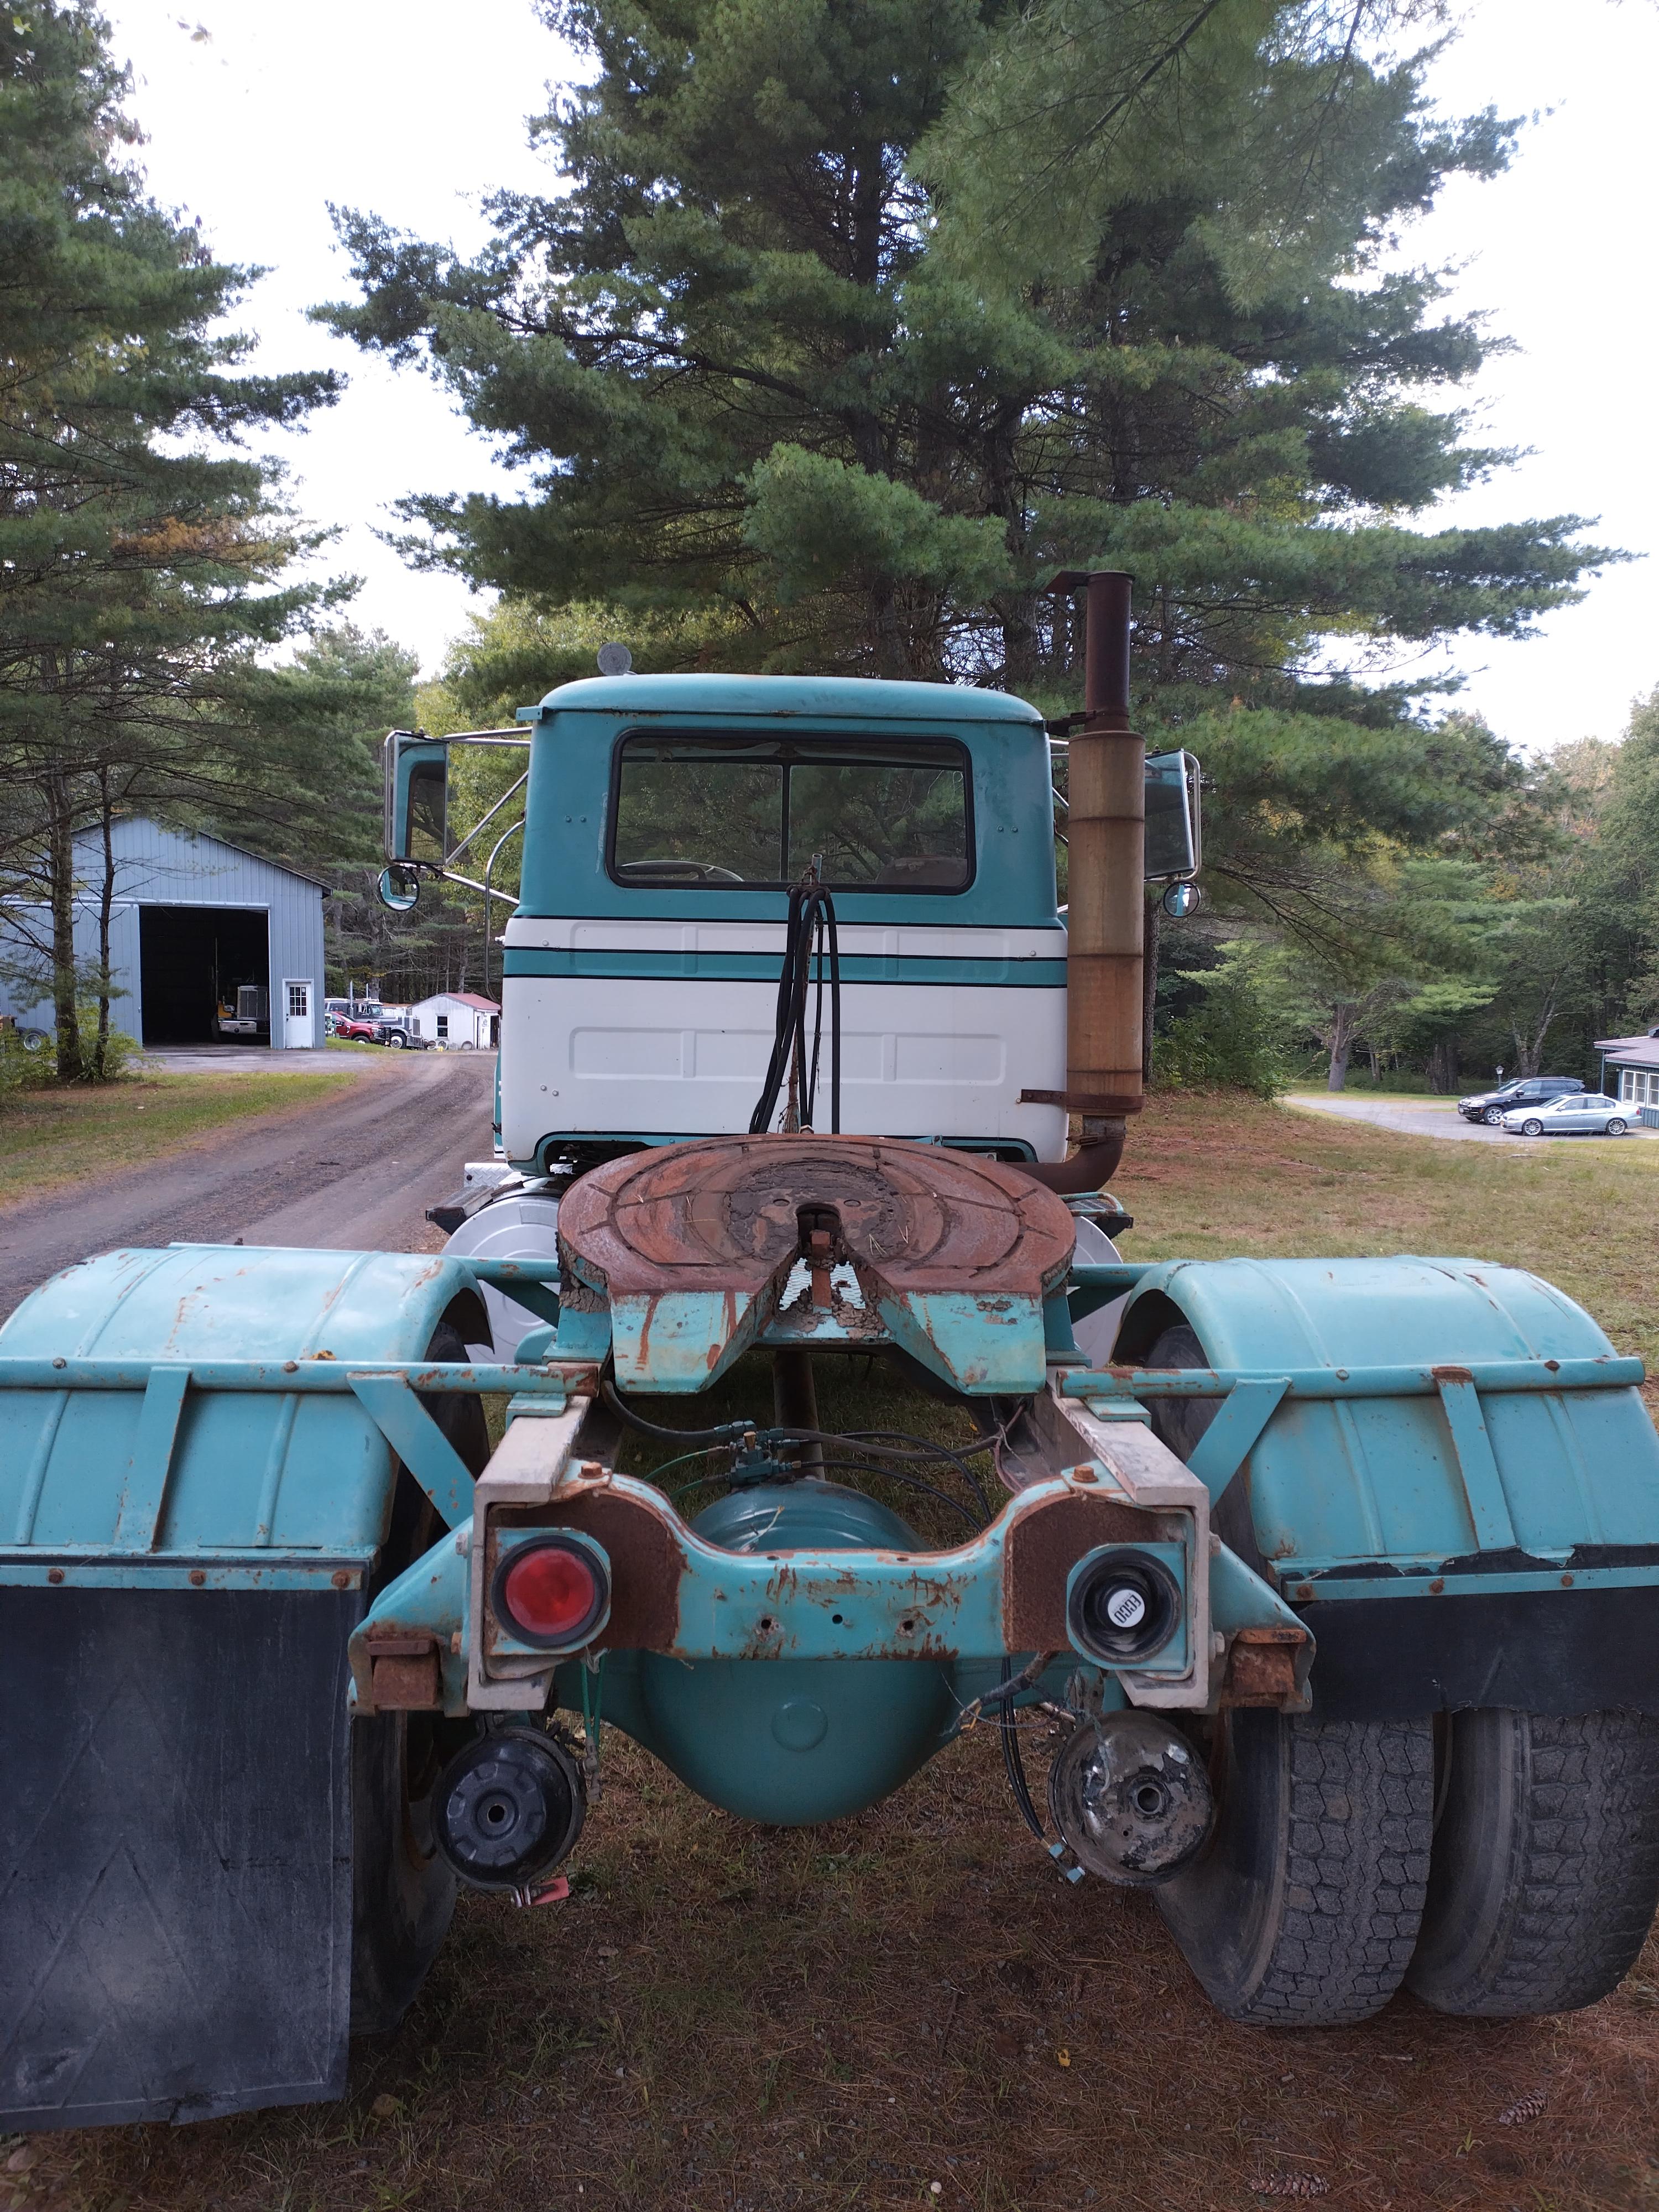
1971 Mack Western RL700L. California truck great shape. Owned by Shamrock Materials from new in 71 till 2017. 335 Cummins turned up with a 13 speed. Runs drive and stops great needs work on the wiring to be road worthy. Clean title Sweetheart of a truck. $12000
-
Hi guys I just got a new to me drop deck on 17.5 rubber and I'd like to convert it over to all aluminum out back so it matches my truck. I'm looking for 8 Alcoa 17.5s 10 lug stud pilot. Very serious, ready to buy today. Thanks!
-
Love the green one! I'm more of a Pete guy than anything else.
-
Hey guys I'm trying to save this old junk Brockway dump and I'm looking for 8 runnable 11r22.5 drives along with the dayton wheels to match and some 12r22.5s steers on daytons as well. I also need to find an RTO915 transmission. I'm in Duanesburg NY 12053. Thanks for the help in advance!
-
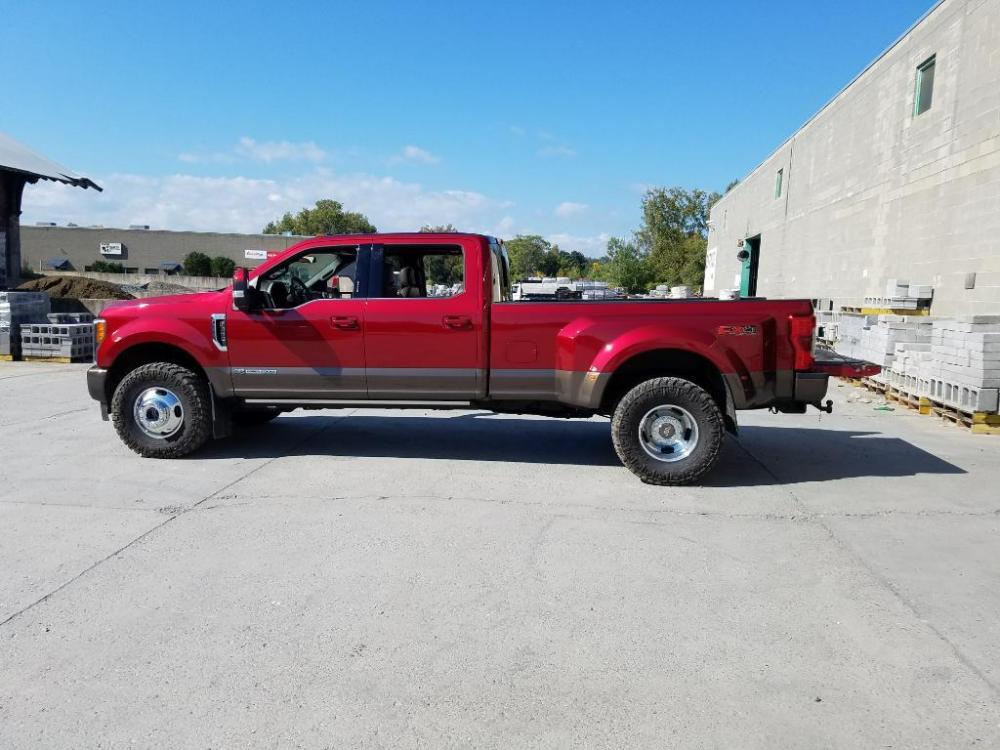
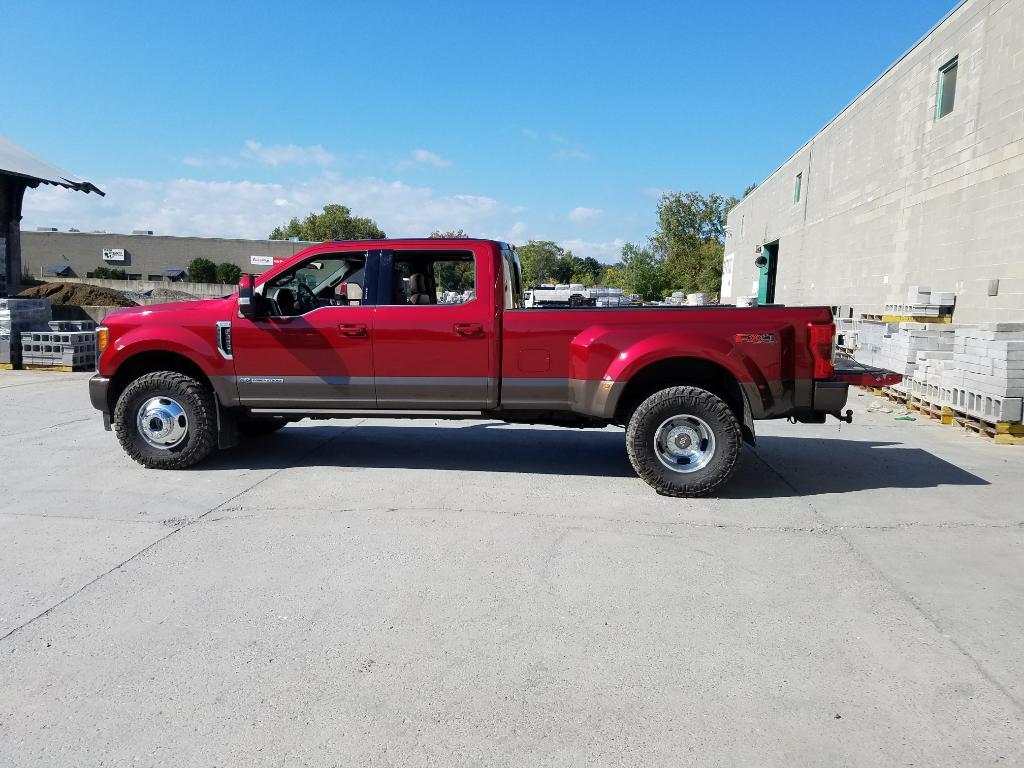
almost 6k on mine now. I'm getting low 12s unloaded. Fuck DEF. I'm not really all that impressed. It gets the same mileage with my unloaded 14k deckover behind me. lol power wise is nice but regens kill it in both power and mileage. EPA is ruining the diesel world it's a shame.
-
Put some time in the past few days. Sent from my SAMSUNG-SM-G891A using Tapatalk
-
Rt915 was originally a twin stick air shift. Don't think they hooked up the low.
-
Plan is to make road worthy and haul locally. Although we're still feeling out our relationship this may change lol.
-
Another quick video: Loving that old school alarm!!!<br/>
-
Yea been there at least 10. Im surprised nobody snatched it up sooner its actually pretty decent considering.
-
Yea I couldn't believe I found a decent one less than 20 miles from home!!!!
-
Here are a few pictures from the CL add. Accurately shows condition. Once I saw it I cut a deal and then figured a day and time to go back and pay, get title and hopefully move it. Not sure if you can tell from the pics but she was pretty buried in that yard. Obviously no intention of moving or using it any time soon. Probably took me and my buddy about an hour to clean out all the shit in front of the truck so we could move it out of the yard. Brought the support rig down on Monday and got the old girl fired up and out of the yard. It's in their private drive waiting until I can get a lowboy there.
-
god damnit google is junk. i'll get pics tonight. in the mean time here:
-
Snagged this old junk yesterday. Sitting at least 10 years it took me most of the day yesterday to get it running and moving. Hopefully have it home this weekend. Sent from my SAMSUNG-SM-G891A using Tapatalk
-
I sure hope it treats me well.
-
with the aux that low what would the rear driveshaft angle be?
-

1980 Peterbilt 359 International Transport
Ol2Stroker replied to Ol2Stroker's topic in Other Truck Makes
I dunno man... wouldn't be cheap though. Reality is when I'm done you'd be able to put it to work. -
1980 Peterbilt 359 International Transport
Ol2Stroker replied to Ol2Stroker's topic in Other Truck Makes
Yea that was the one thing they actually gave me worth a damn was genuine gaskets for the tanks.... So the gaskets cost me $400. LOL -
New to me, R770 wanna be
Ol2Stroker replied to 85snowdog's topic in Antique and Classic Mack Trucks General Discussion
So jealous this truck is so badass!!!! -
1980 Peterbilt 359 International Transport
Ol2Stroker replied to Ol2Stroker's topic in Other Truck Makes
Had to paint a few more miscellaneous items like this bracket for the leveling valve and also that shock mount i replaced. That brings us to present day with the back end all assembled with everything new. I was able to move it under its own power back into the weeds until spring. In the spring I will do all the air lines and finish buttoning it up. September 23rd is when I pulled this out of the weeds to get started and I just put it back again Sunday night 11/25. Not too bad of progress for 2 months. IMO. Thanks for reading through this mess, see yall in spring. -
1980 Peterbilt 359 International Transport
Ol2Stroker replied to Ol2Stroker's topic in Other Truck Makes
Successfully completed a pressure test! About time. I can't express how bad this thing fought me. Fully assembled and ready for install. I'm also painting the air bleeds for the upper hoses. In the mean time i flushed the cooling system with cummins RESTORE while at temperature and then about 5 times with water. https://youtu.be/nVpCi8bofA0 Then since my drums were in excellent shape with almost no lip my buddy was able to turn them for me and after that I blasted them. Then we got them and the tops of the bags and the fan painted up. Then I got the radiator and fan etc put back in the truck. Sure looks a bunch better. What you don't see in this picture is the truck got all new wheel bearings, races, seals, and s-cam bushings all the way around. Finally ready for some new brakes and slacks! Bitch was thirsty. Finally over the radiator hurdle and holding coolant! -
1980 Peterbilt 359 International Transport
Ol2Stroker replied to Ol2Stroker's topic in Other Truck Makes
Typical... have to tarp for rain again! Luckily paint cured just fine. It's as close as I could get it to the body color. I brought a panel with me to napa to match to when I bought the paint. With the truck paint cleaned up (not even buffed yet) it's a whole lot closer. Really excited to buff the truck next year now!! So what I haven't mentioned is that in the mean time the radiator has been at a radiator repair shop... now i did ALL the hard work and spent 12 hours removing all the fasteners and extracting broken ones etc. I loosely reassembled and punch marked everything for location and delivered to the shop to be cleaned, rodded etc. What I got back from them was half assembled radiator they said the core was bad on because of a small crack between 2 bolt holes on the header flange. They wanted $3000 for just the new core plus I had to pay $400 regardless for their halfass assembly work. I got this thing back and it wasn't even assembled properly let alone cleaned or painted. Didn't even bother removing corrosion in places. Needless to say I'll never bring anything to acme radiator in watervliet ny ever again. So now that the radiator is back home lets do it the right way... fully disassembled yet AGAIN. This time I sandblasted them myself. Since I had the blaster out I did the 5th and plate.... too bad the plate is wasted on the bottom side. Painting all my freshly blasted radiator parts: My buddy was able to fix the core no problem and the radiator shop did rod it before they found the crack so I figured I'd better paint it. Man she looks great all assembled right?!?!?! Sadly this radiator saga was far from over. Upon pressure test I found the sandblaster uncovered a porous casting on the lower tank. What you're seeing is water weeping through the casting in that spot. Back apart she comes. Took me twice to get it right but i finally ended up grinding it wide open and then using some DEVCON aluminum putty to repair.


BMT Forum Logo
