


mattb73lt
-
Posts
1,207 -
Joined
-
Last visited
-
Days Won
137
Content Type
Profiles
Forums
Gallery
Events
Blogs
BMT Wiki
Collections
Store
Posts posted by mattb73lt
-
-
1 hour ago, AZB755V8 said:
That is simply incredible!! The work that has been done and to just start to put it back together now. WOW!! It will be perfect I am sure. Are you keeping track of the hours and cost so far, what is the estimate on the total time and expenses you planned on? My L cab was in great shape to start when I restored it. I had a lot of money, my time and outside labor in it and NO body work was required, You are making a whole new body, just incredible. Is the frame, engine and all else being done to this level as well, it will be priceless!! I am starting to restore an 88 Superliner and almost ashamed to post the project compared to this.
Outstanding!!!

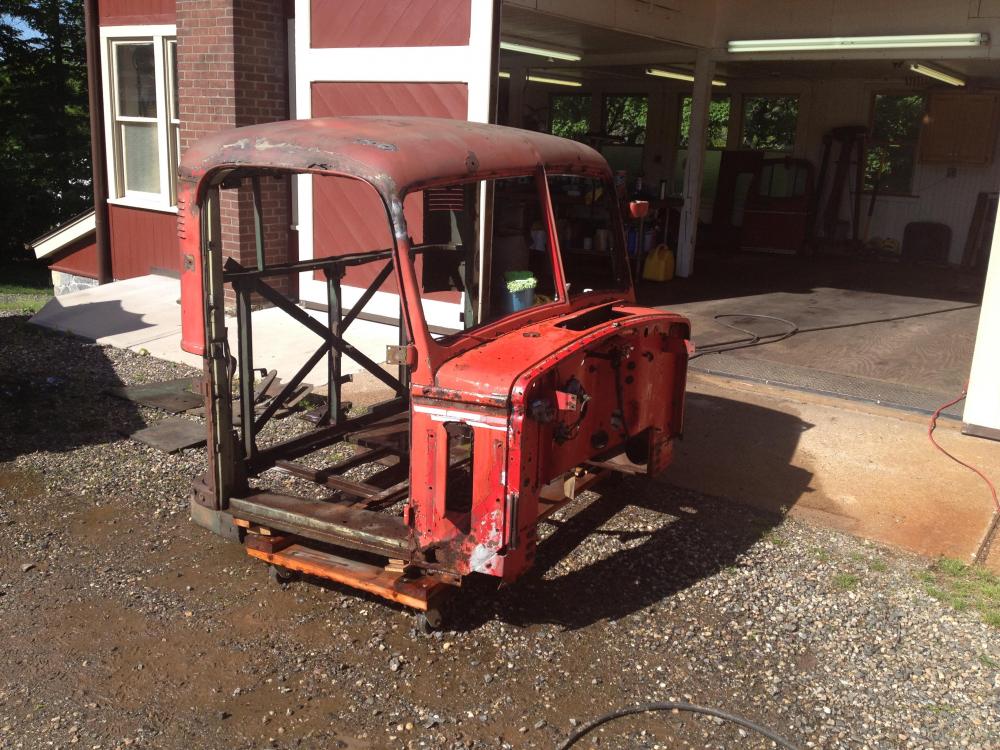
It's hard to estimate the man hours due to how long I've had it. It's always been a back burner project, as I was about to start my other B just when I found this one. So, I've done and collected what I needed over the years in between other projects. A lot of items are already done and stored, ready for assembly. This is the part I've dreaded, it's just dirty, time consuming work. I have the knowledge and experience to go this deep, just not all the equipment to do it. Fabrication is adding to it's cost, but it would be even higher to buy the equipment for what I see as a one time restoration. The cab has always been the roughest part. The truck was used hard up until, from what I could figure, around 1987 when the engine was removed and it was essentially abandoned outside until I found it in 1998. With that and the typical New England climate, rust has taken it's toll. Almost all of that is gone now, with new panels to go back in or existing ones repaired. It would have been nice to find one from your area, but getting it home would have been cost prohibitive. This style cab is somewhat rare and not easy to find. I saw one for sale up in Canada, but a close look at the photo's it looked like it might need similar work and again the cast of getting it home. This is certainly the most in depth restoration I've attempted and there won't be hardly anything that hasn't been touched.
-
- Popular Post
- Popular Post
OMG....What have I done!!!!
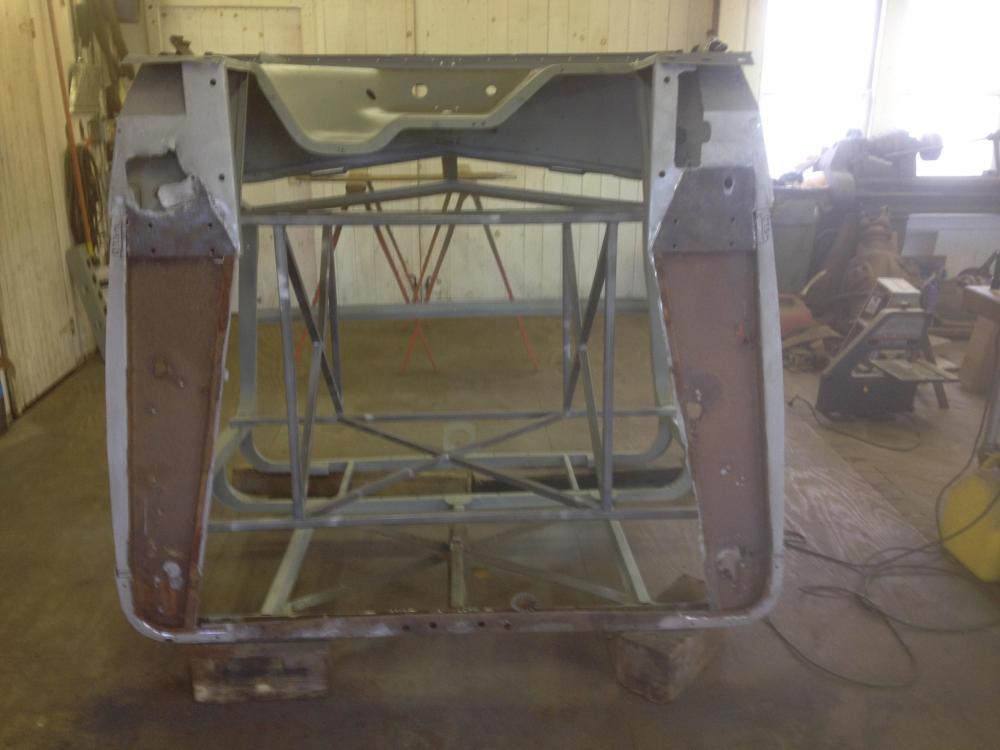
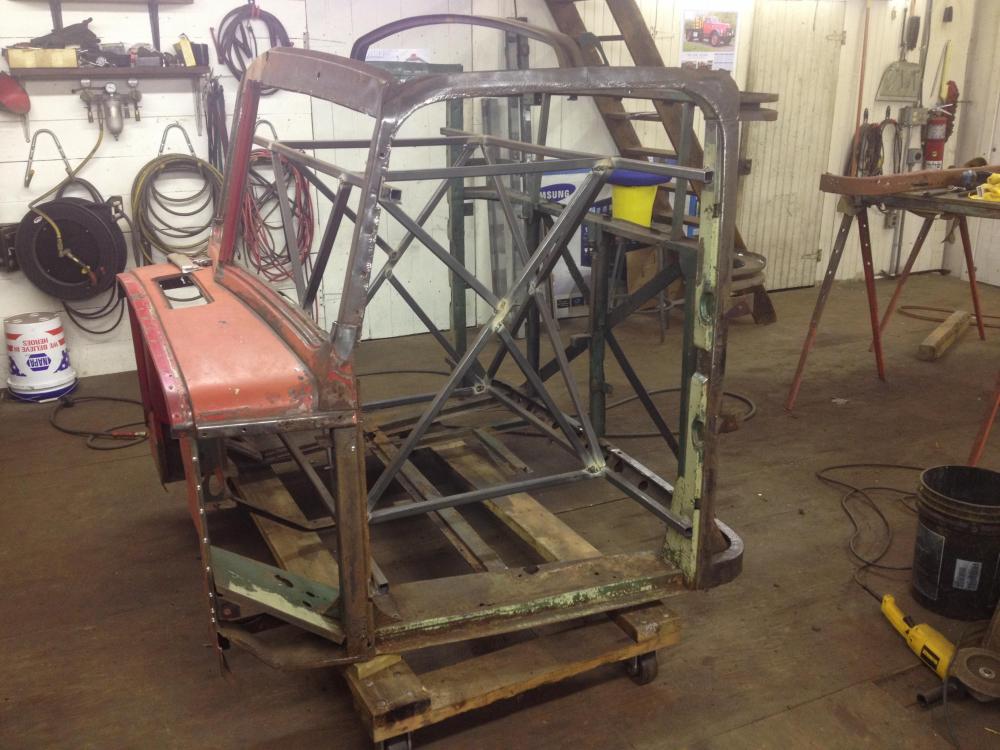
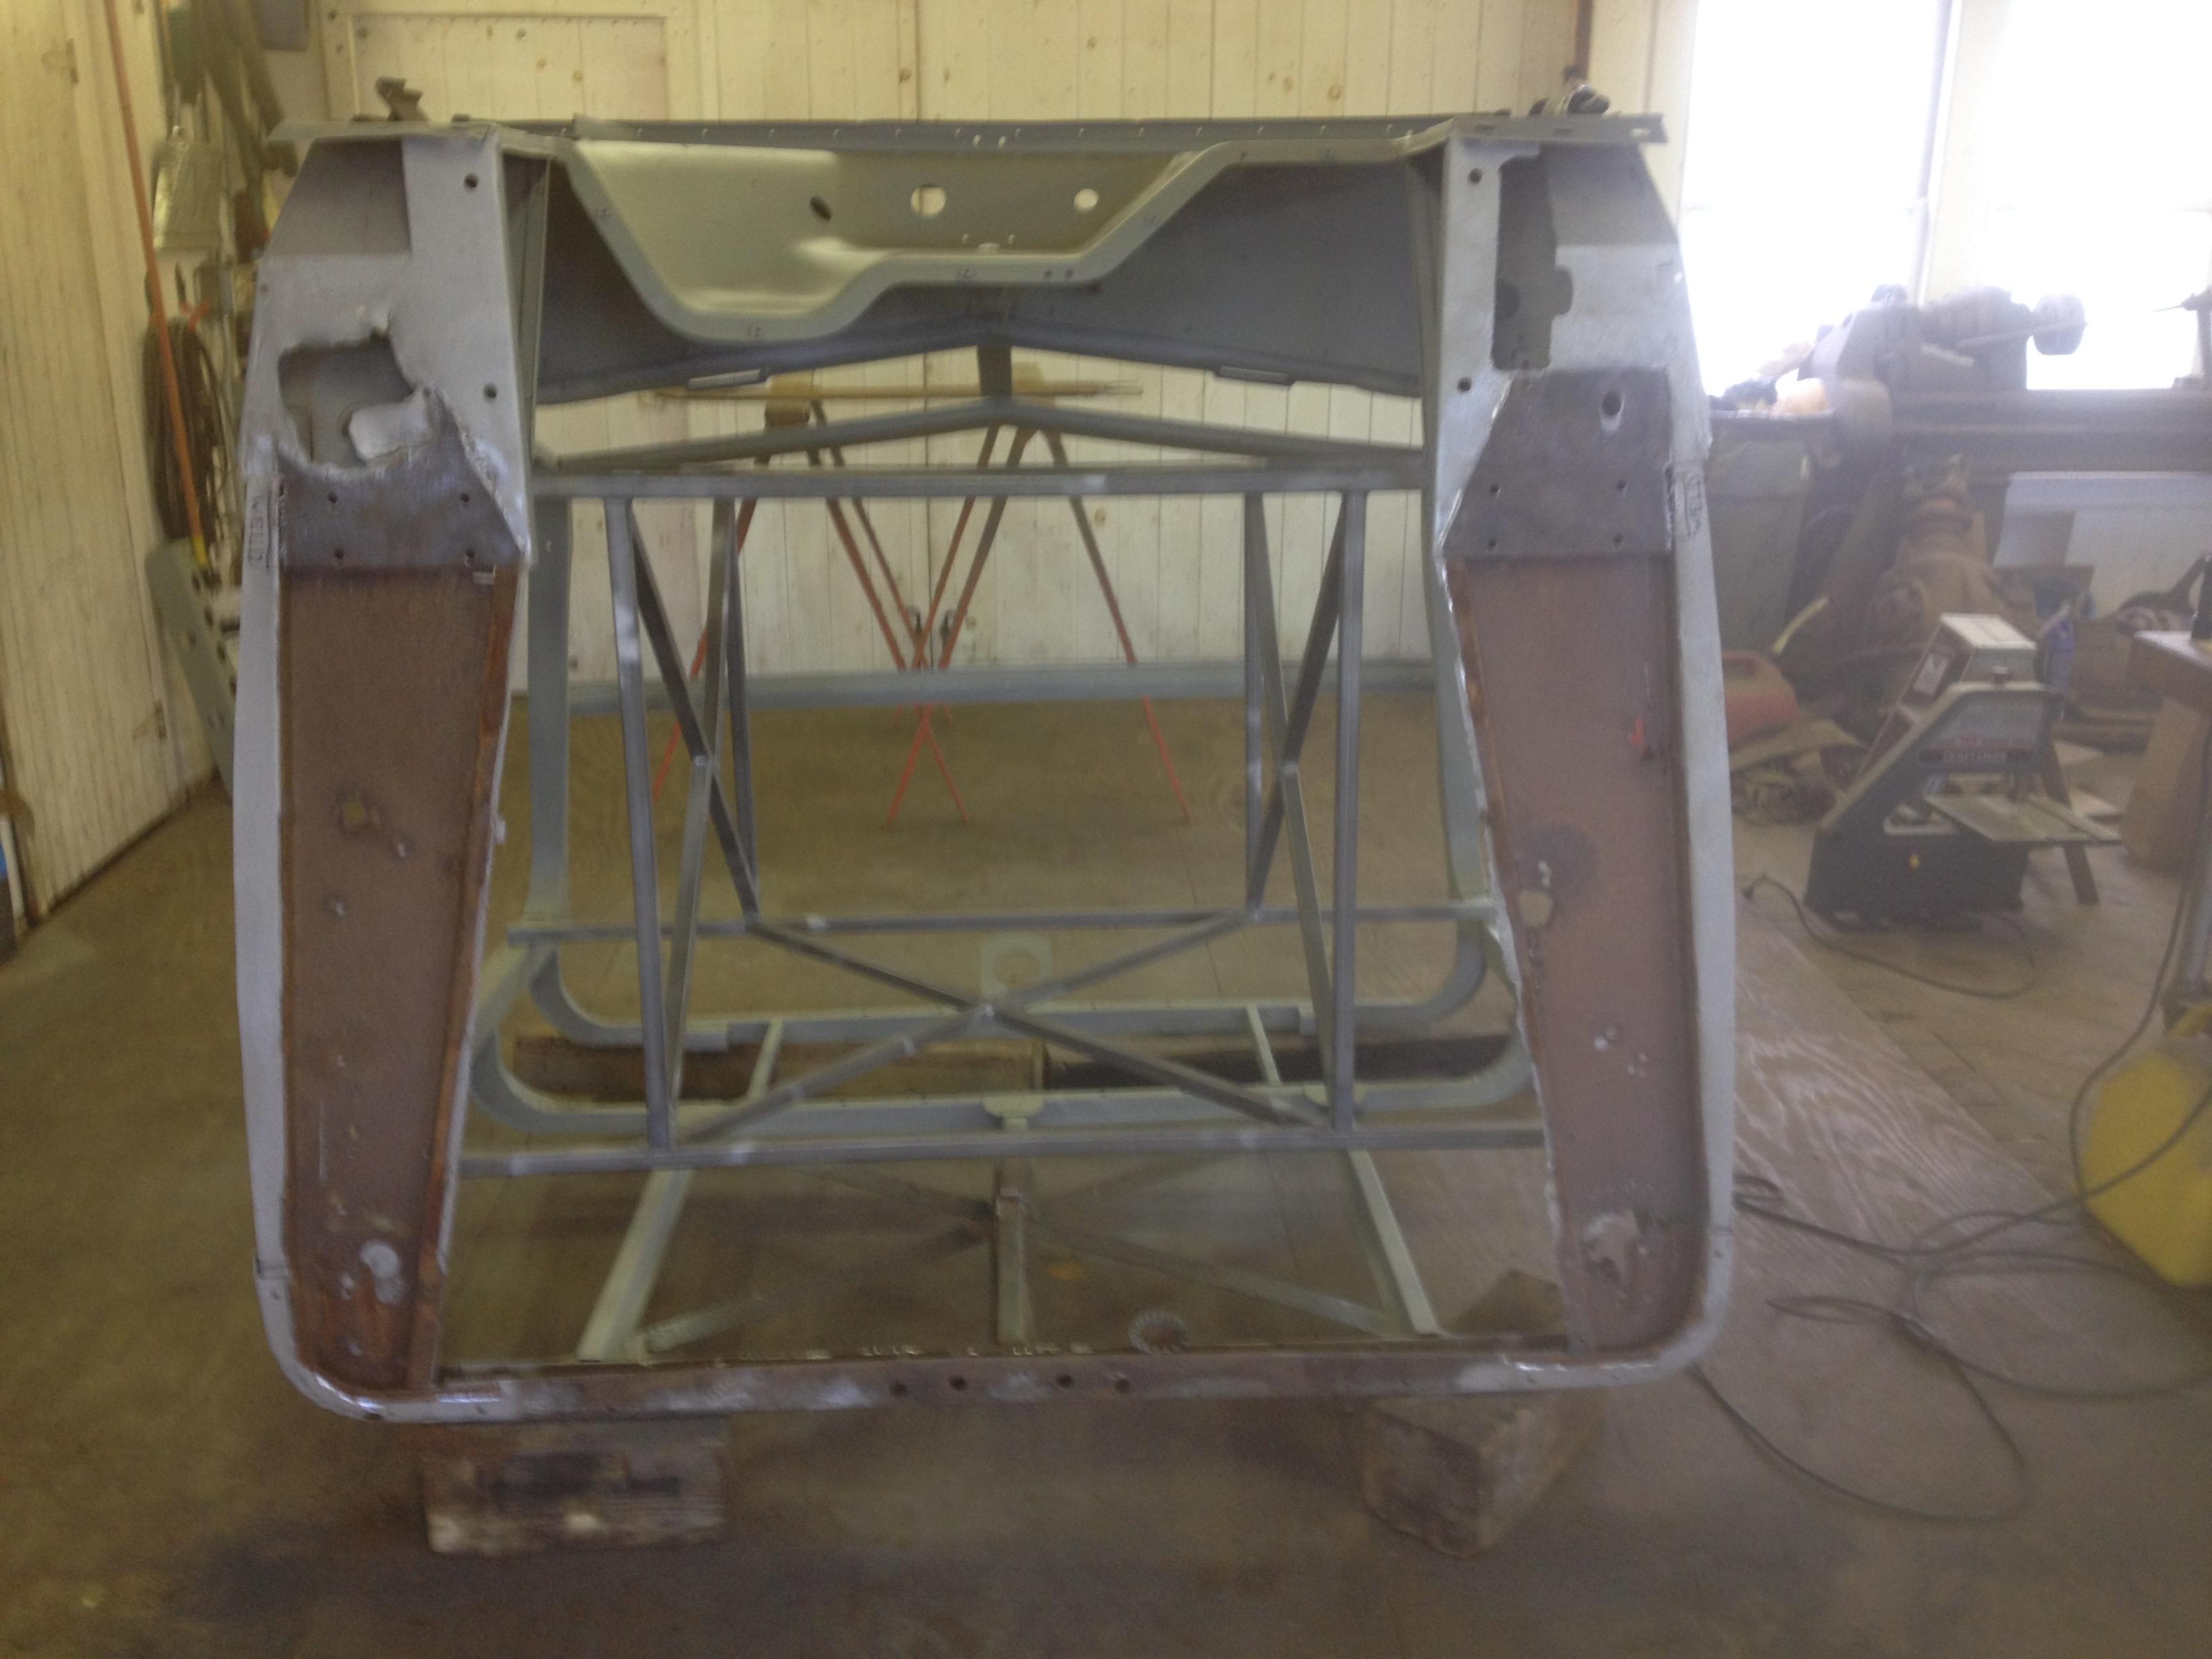
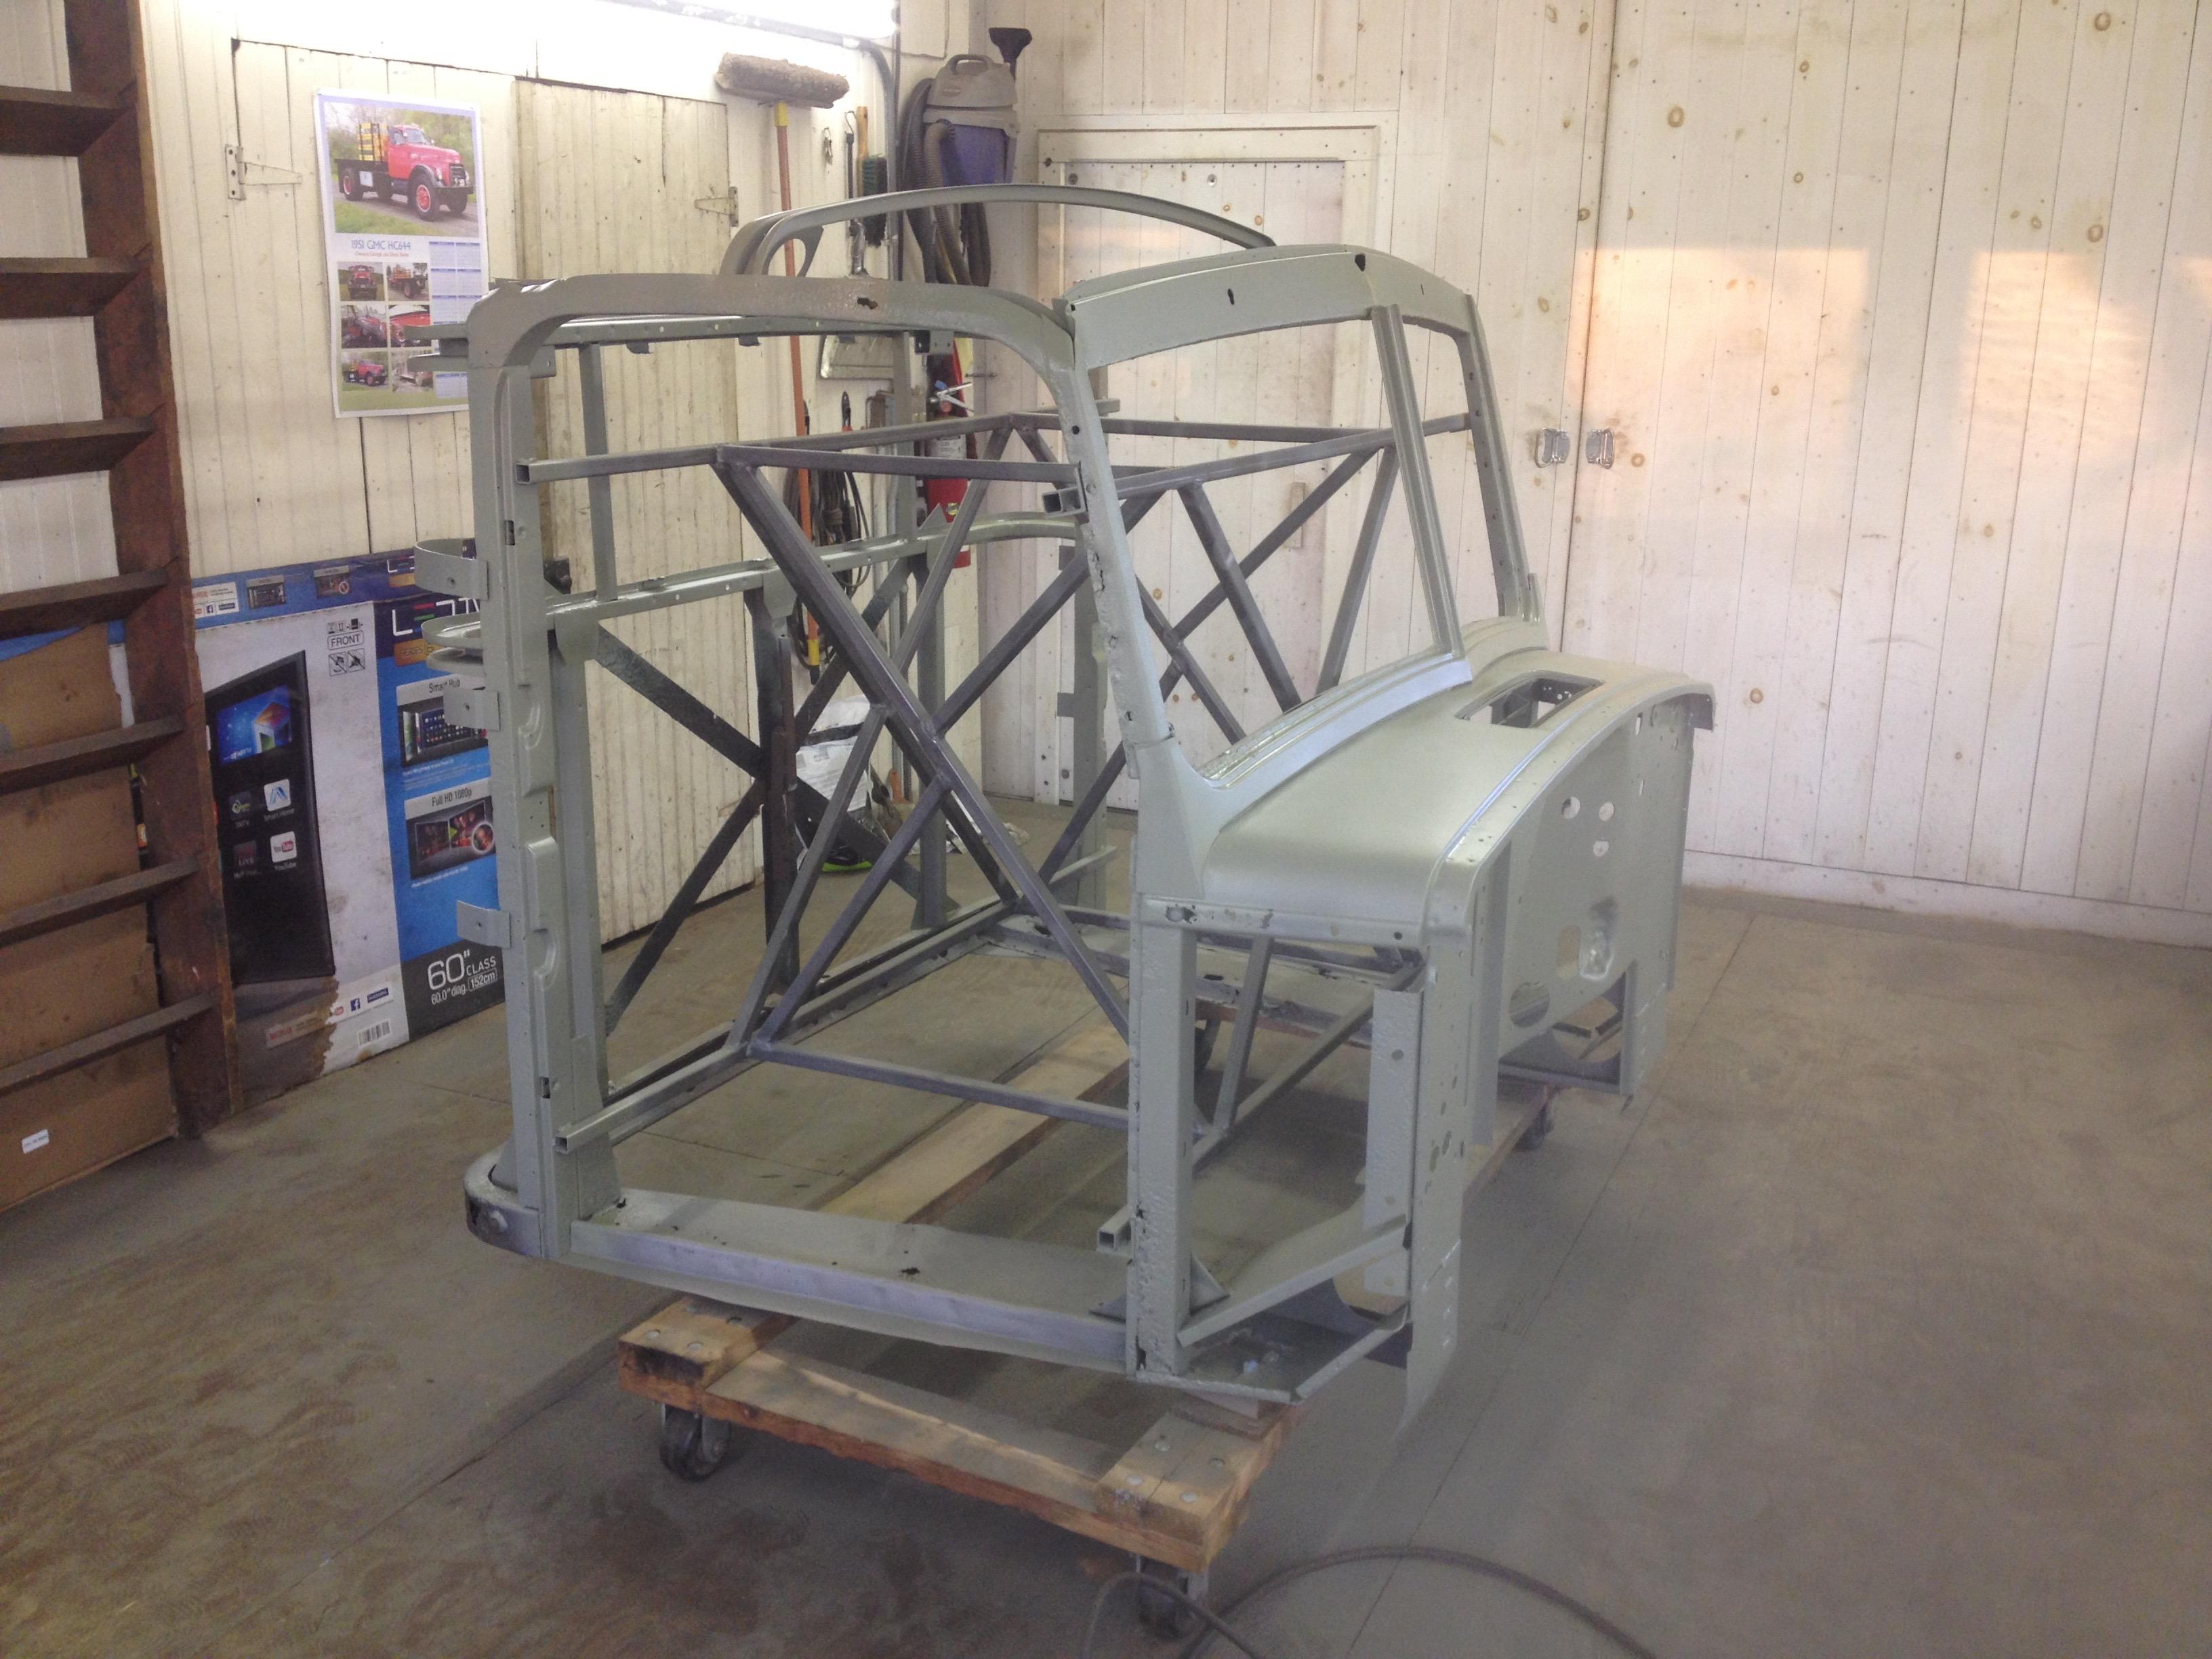
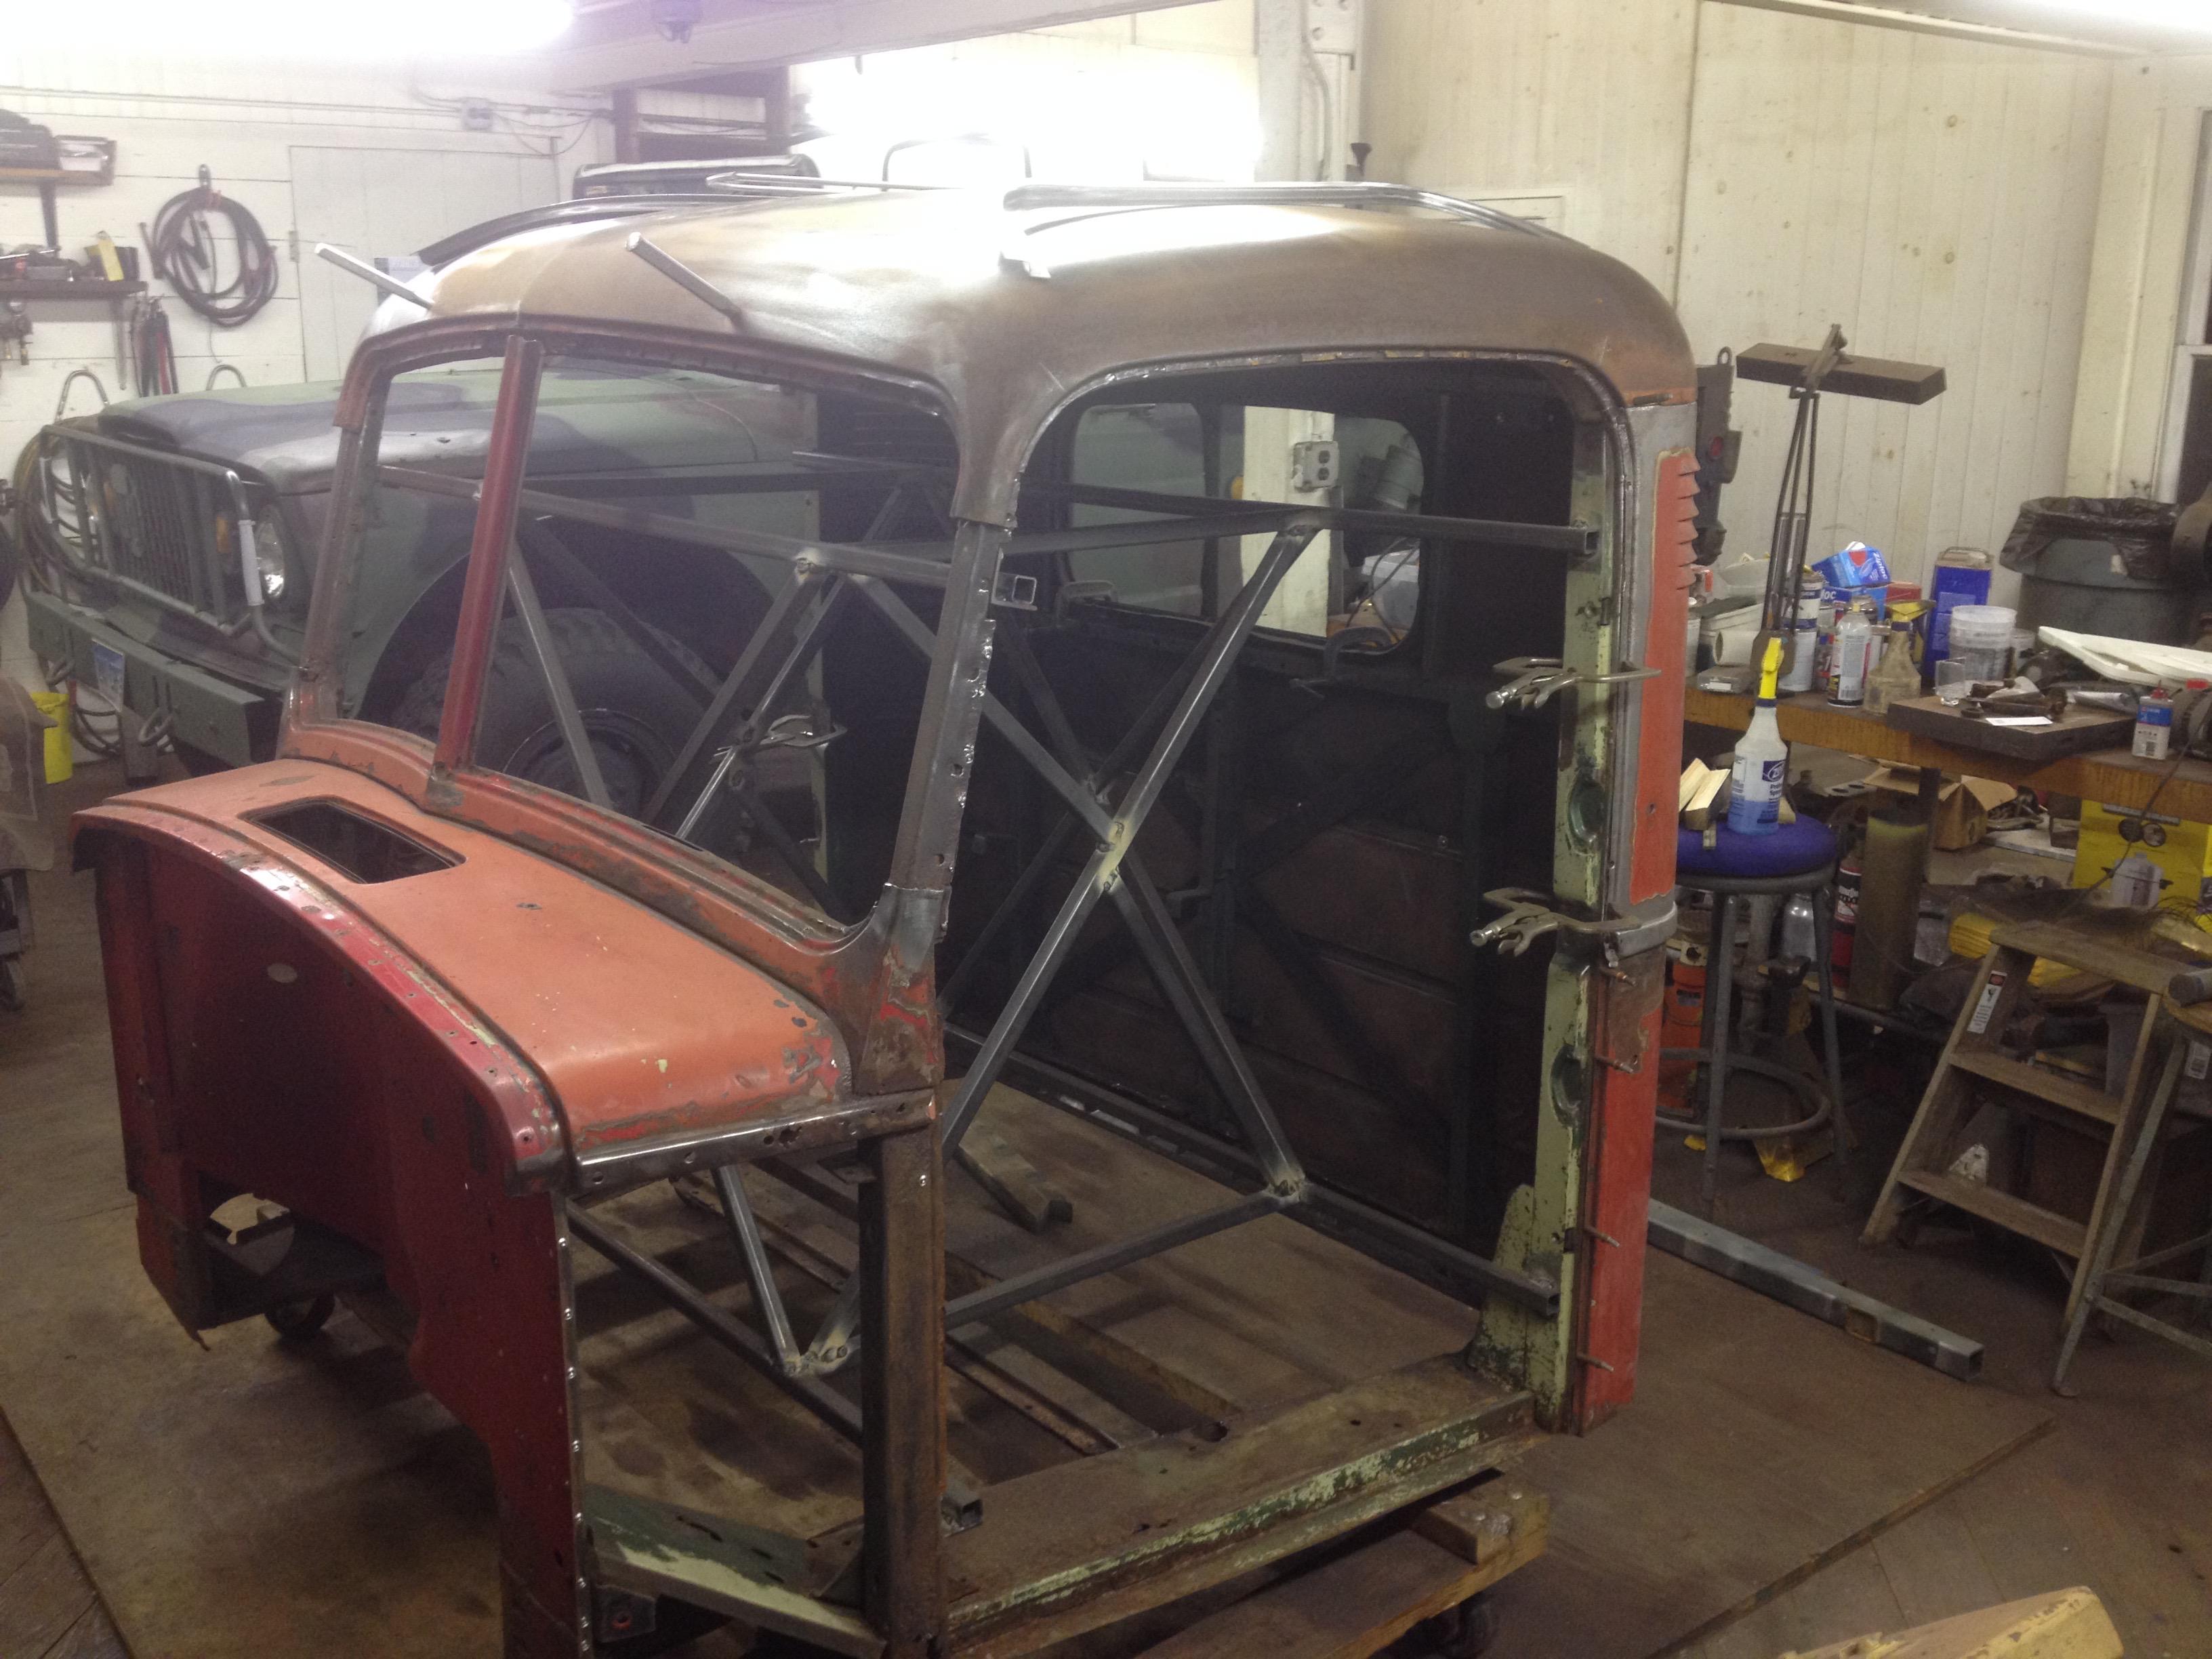
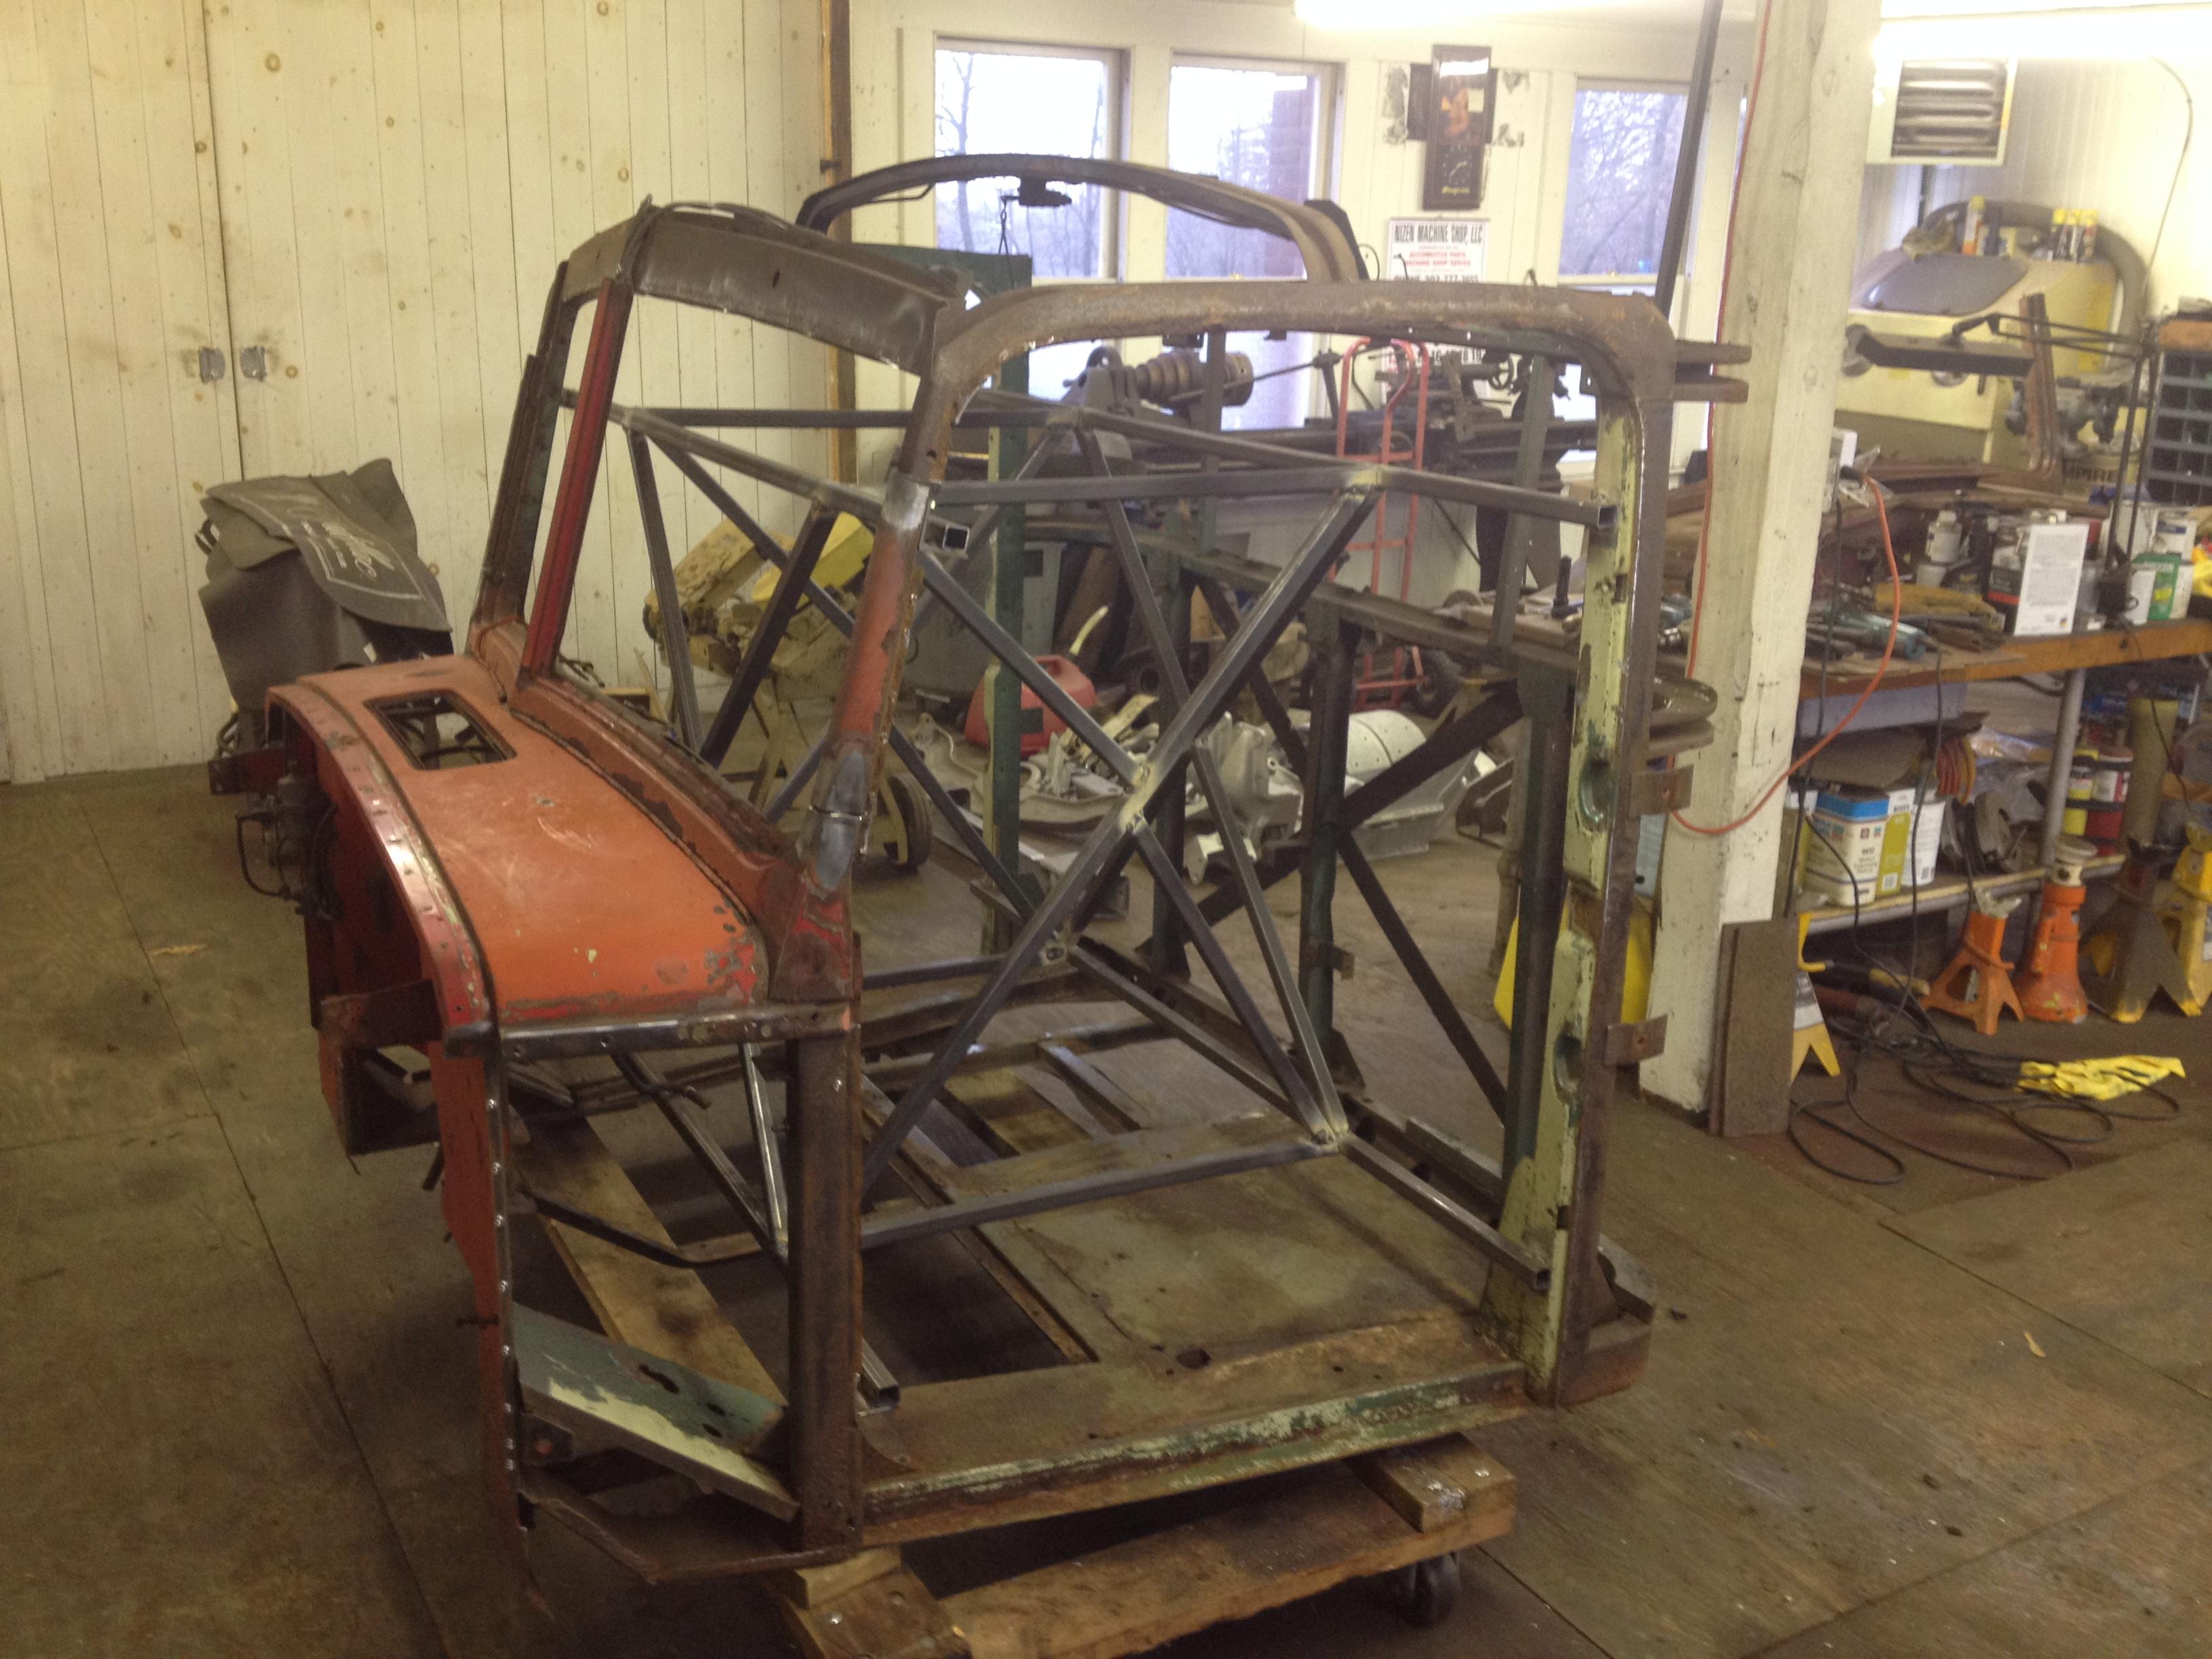
Final cutting today and the most serious. The cab is where I need it to start the repairs. Sills are carefully cut apart and completely removed. On to working on the new panels to fit and modify them. My framework seems to be doing it's job and nothing seems to have shifted. It'll be a while before I post so there's more significant progress to report.


-
 5
5
-
- Popular Post
- Popular Post
Got the cab back quicker than expected, like less than two days. I was expecting at least a week. No big surprises. Got some primer on it late today, tomorrow I'll start cutting in to the sills for their replacement.


-
6
-
2 hours ago, terry said:
love that P/U haven't seen one of those for a long long time!! that one might be a little newer that I was thing of, what year? seems we had some of those in Viet Nam. terry👍👍
 good luck on the blaster!!
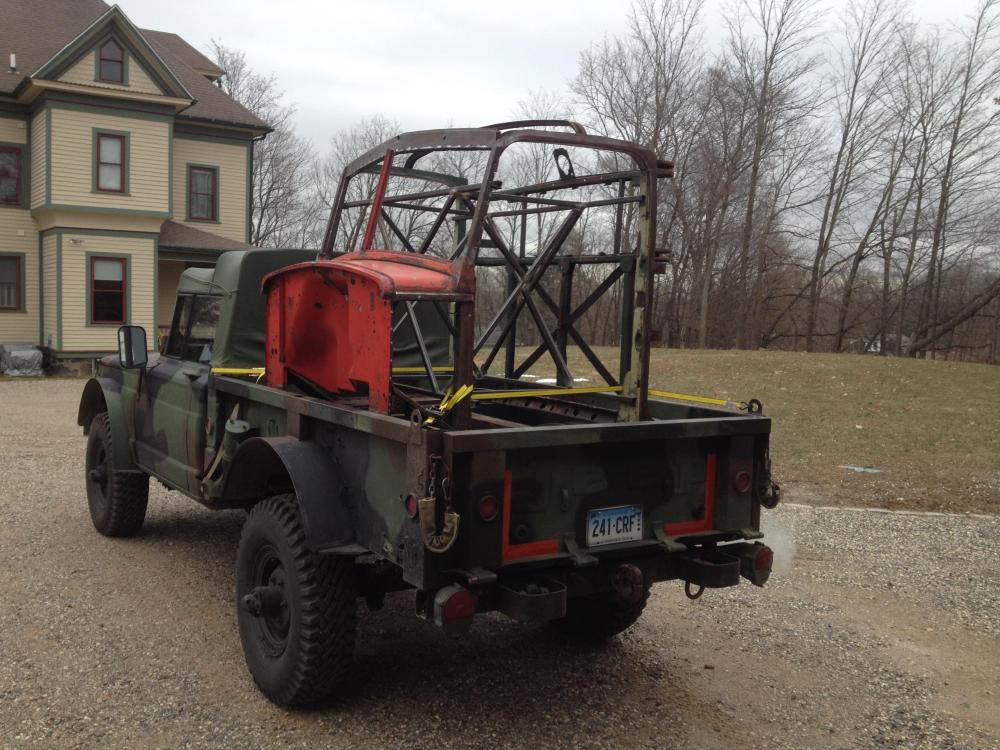
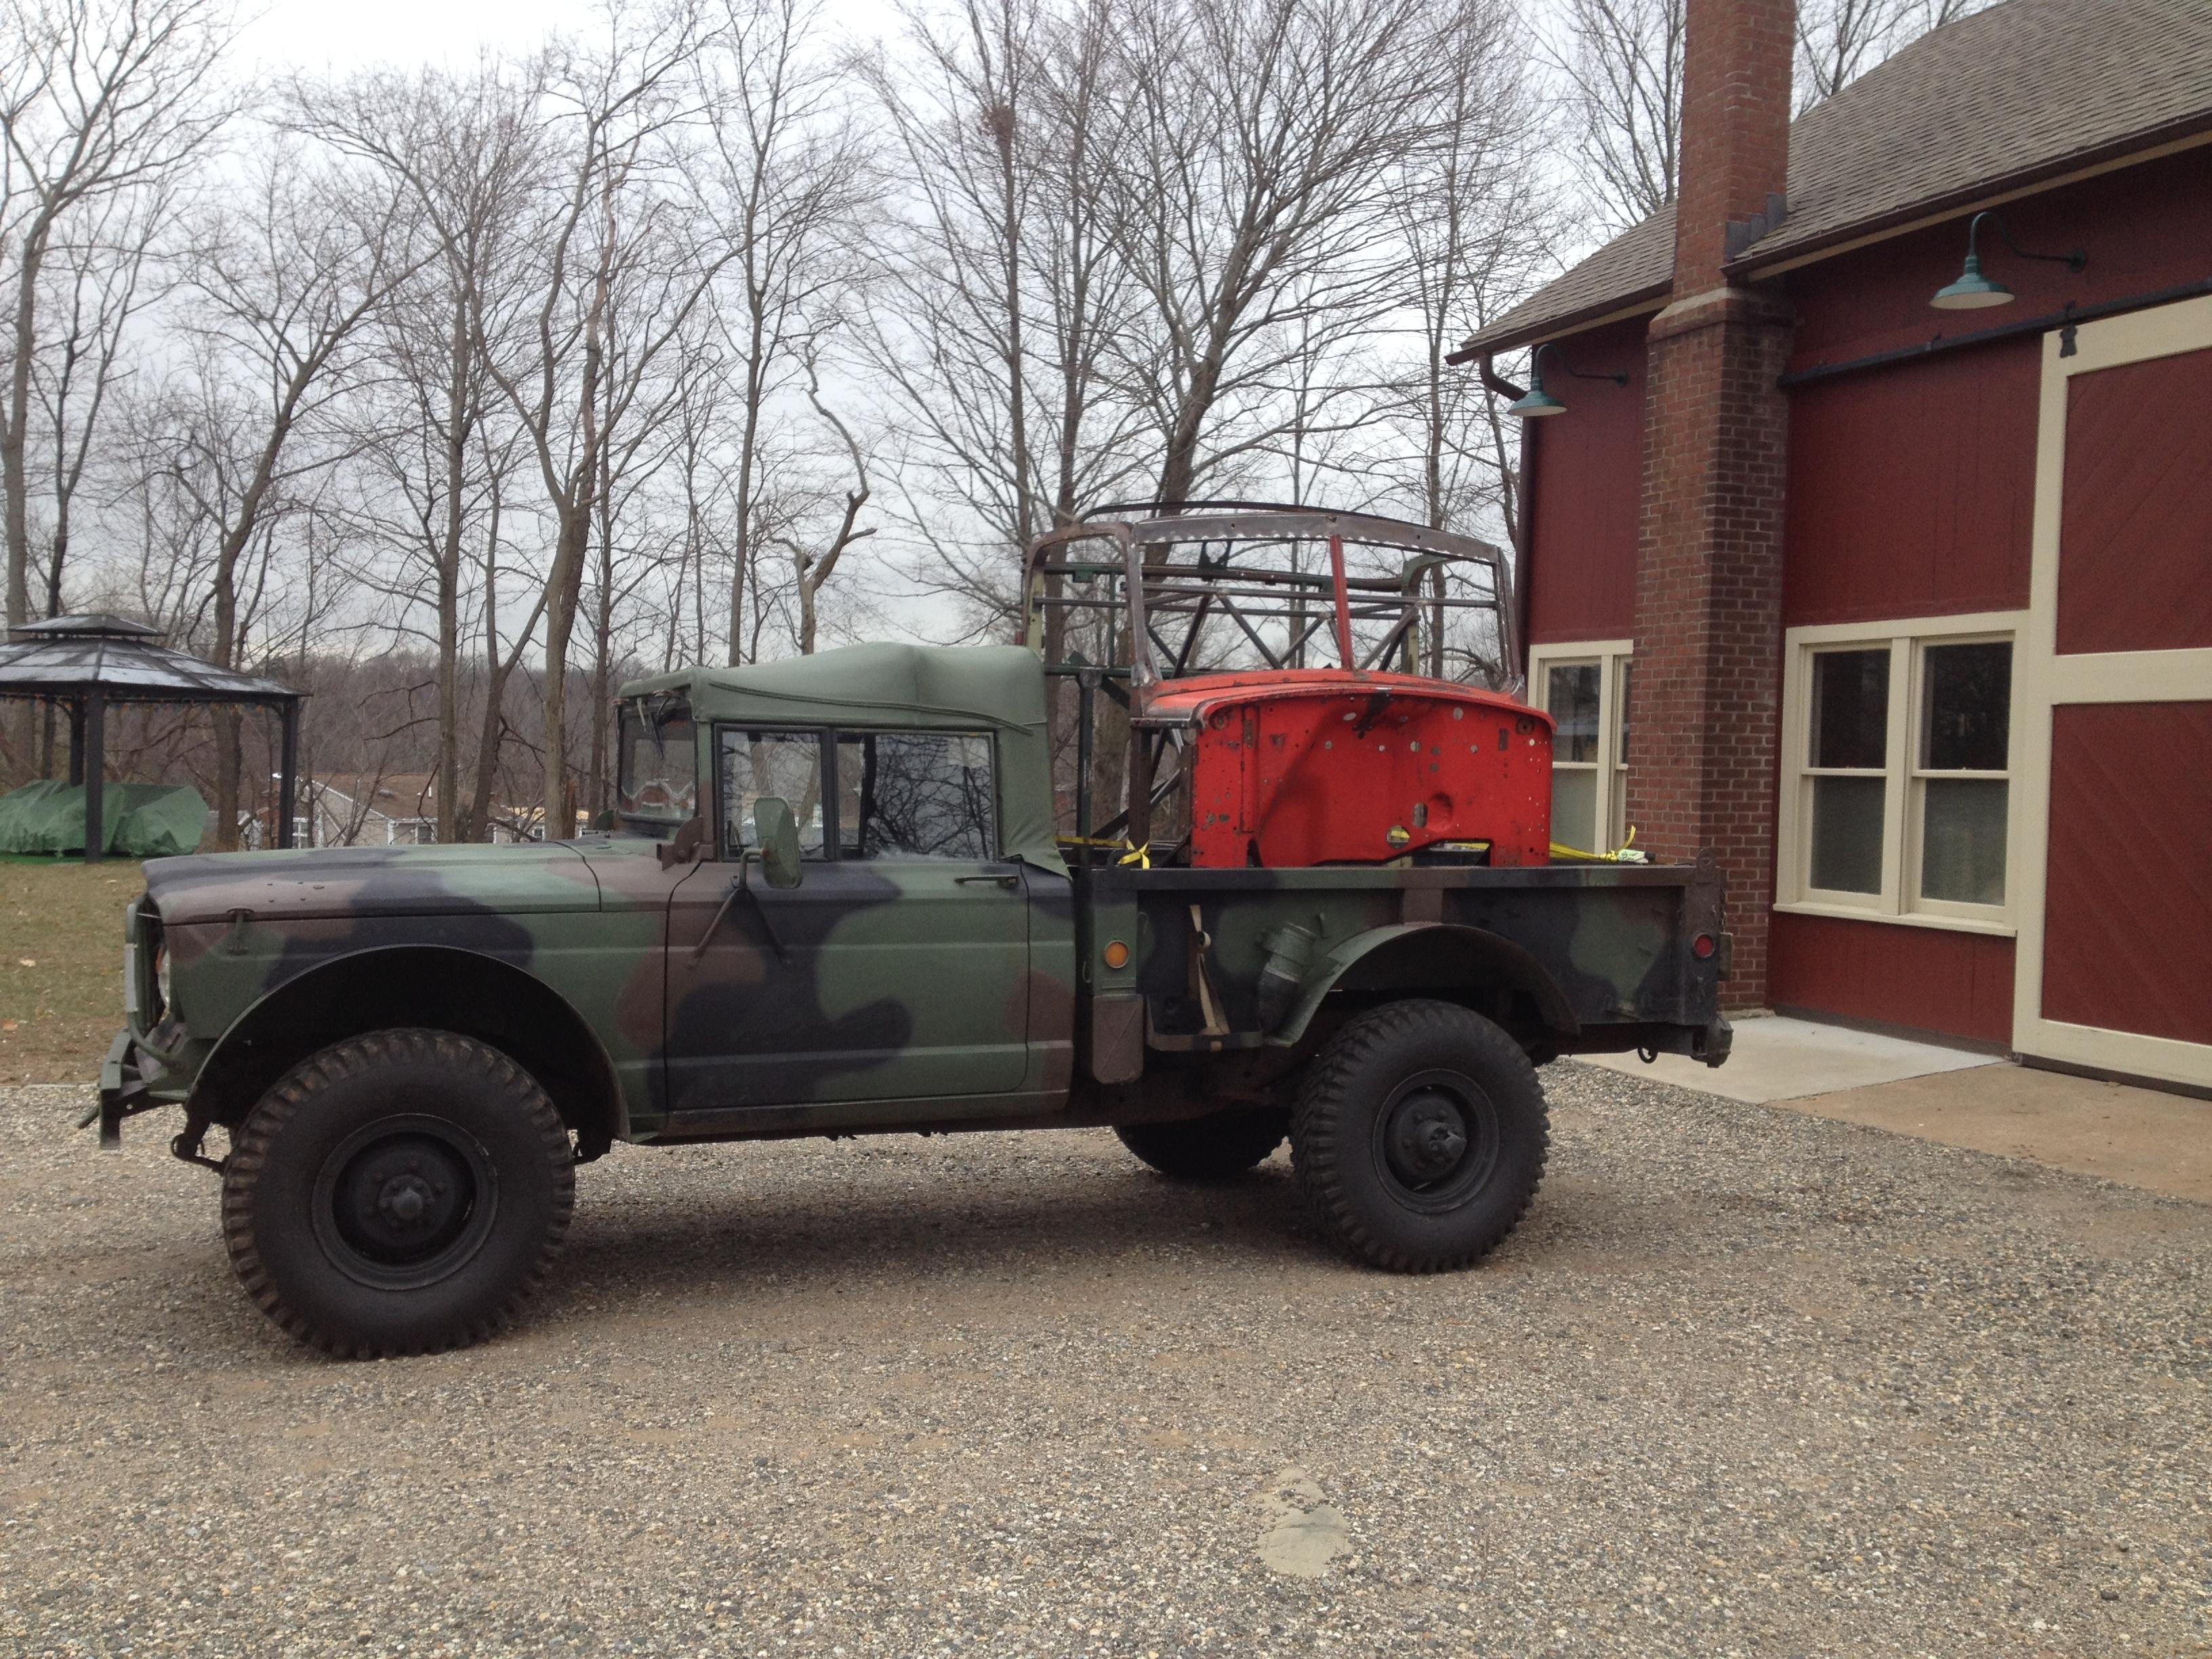
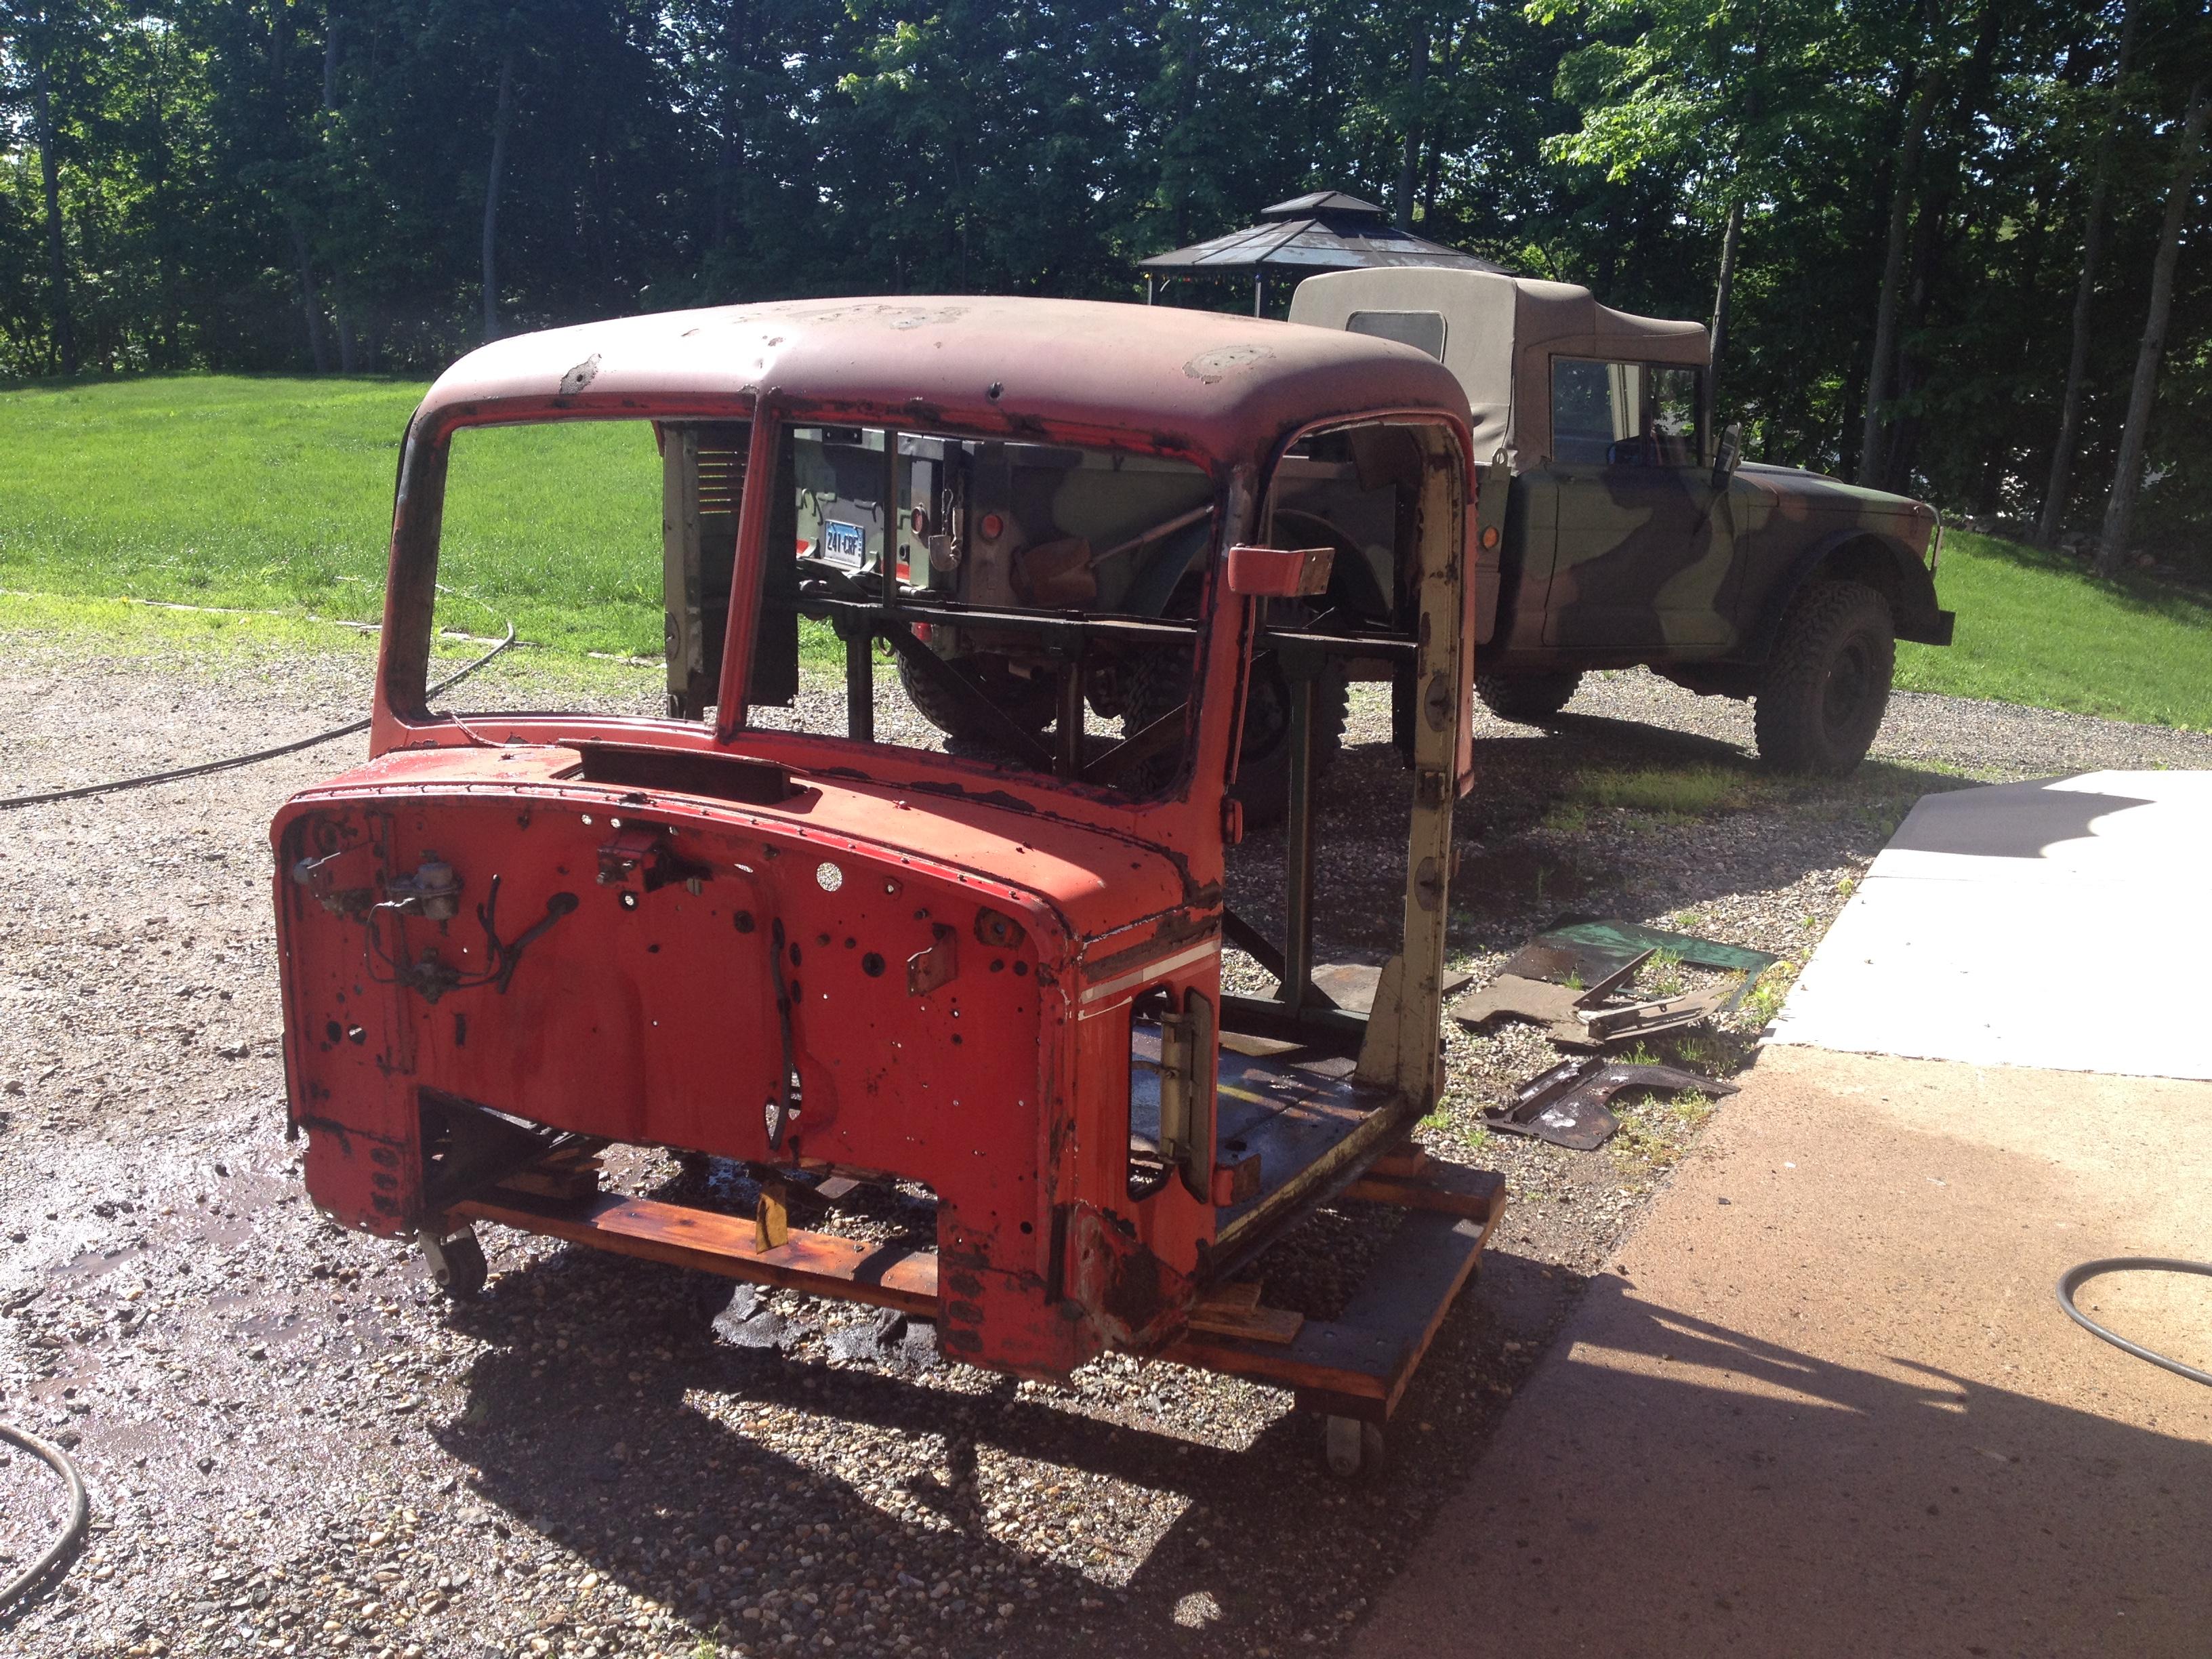
It's a 1968 Kaiser Jeep M715 5/4 (1 1/4) ton. Not quite stock, SBC 350, p/s, p/b, 12 Volts and 4.10 gears (from 5.86 stock). All so it's drivable. It's been getting a good workout helping with the restoration.
-
2
-
-
A quick test drive to see how the new ventilation system works.
Actually, off to the dry stripper. We'll see how much comes back or if disaster awaits!!

-
2
-
-
3 hours ago, Vladislav said:
Thank you for the reference pictures. I see your story is moving along. Glad to observe the pogress.
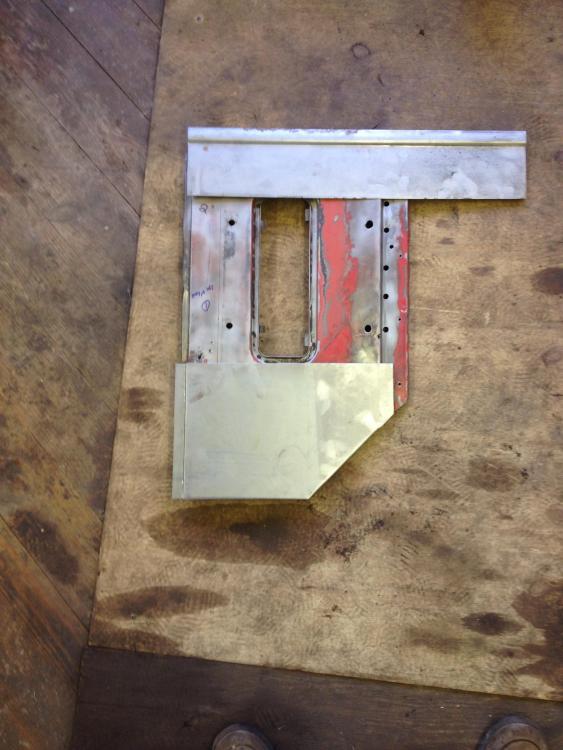
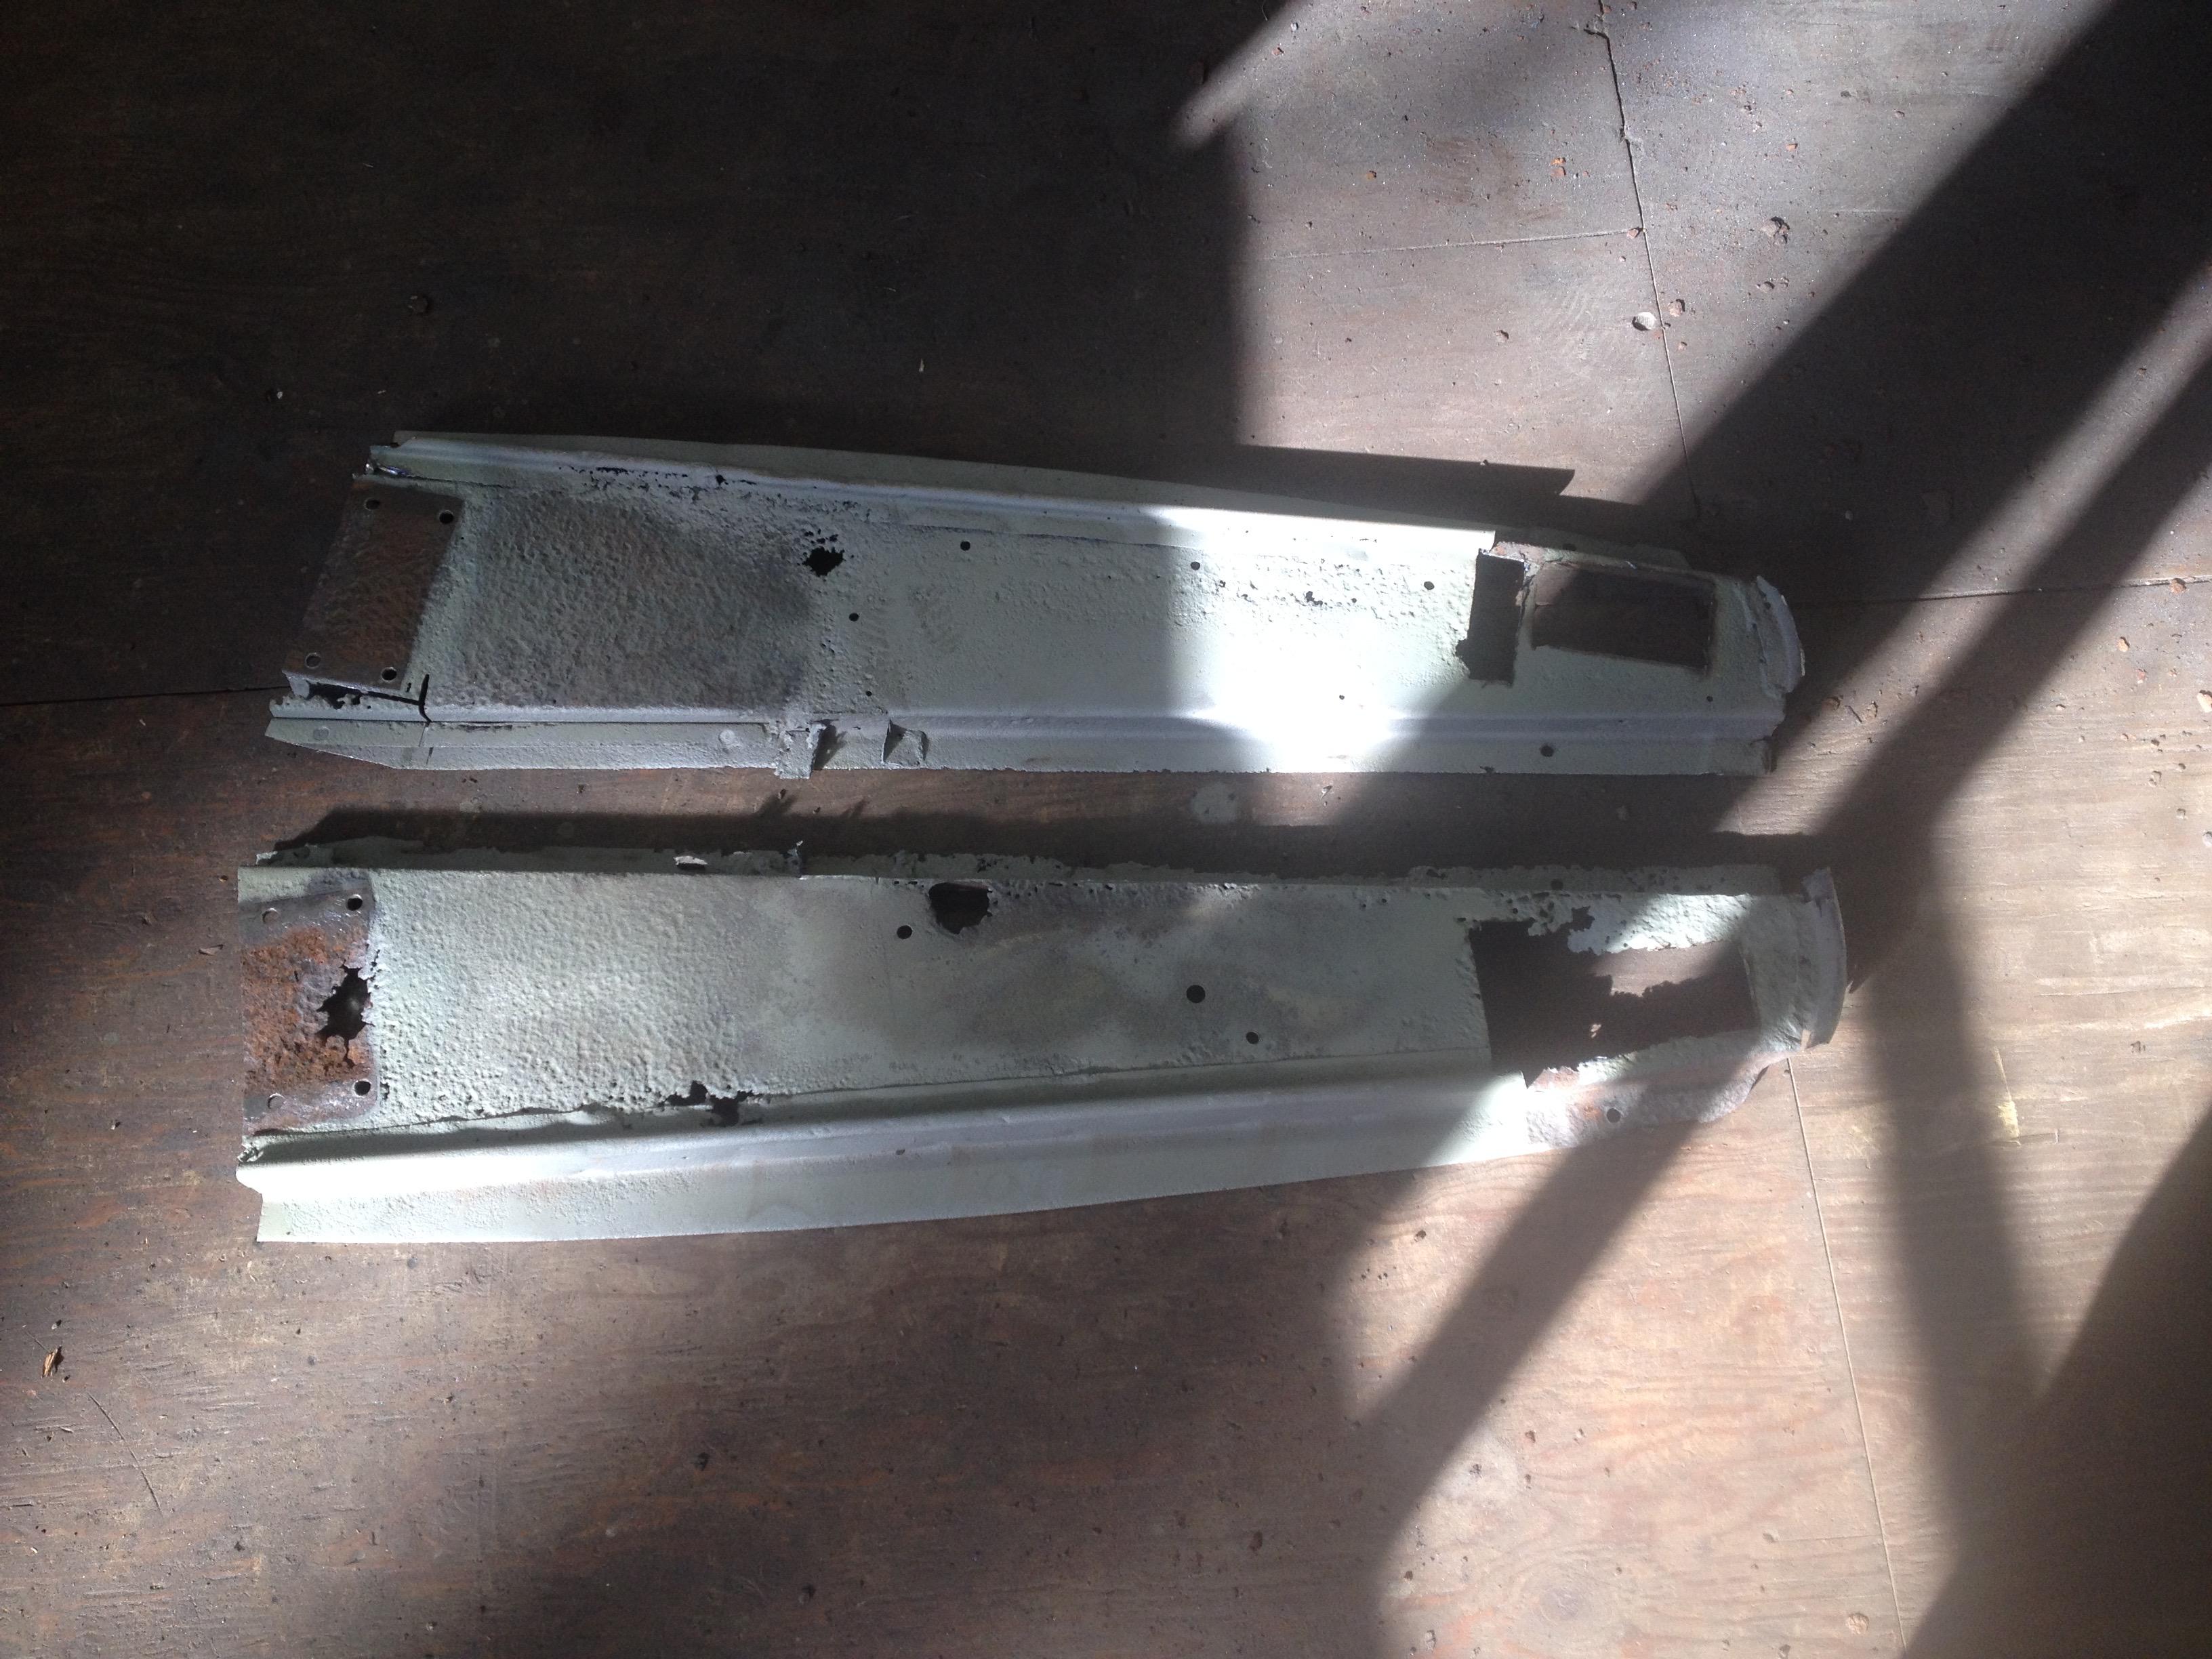
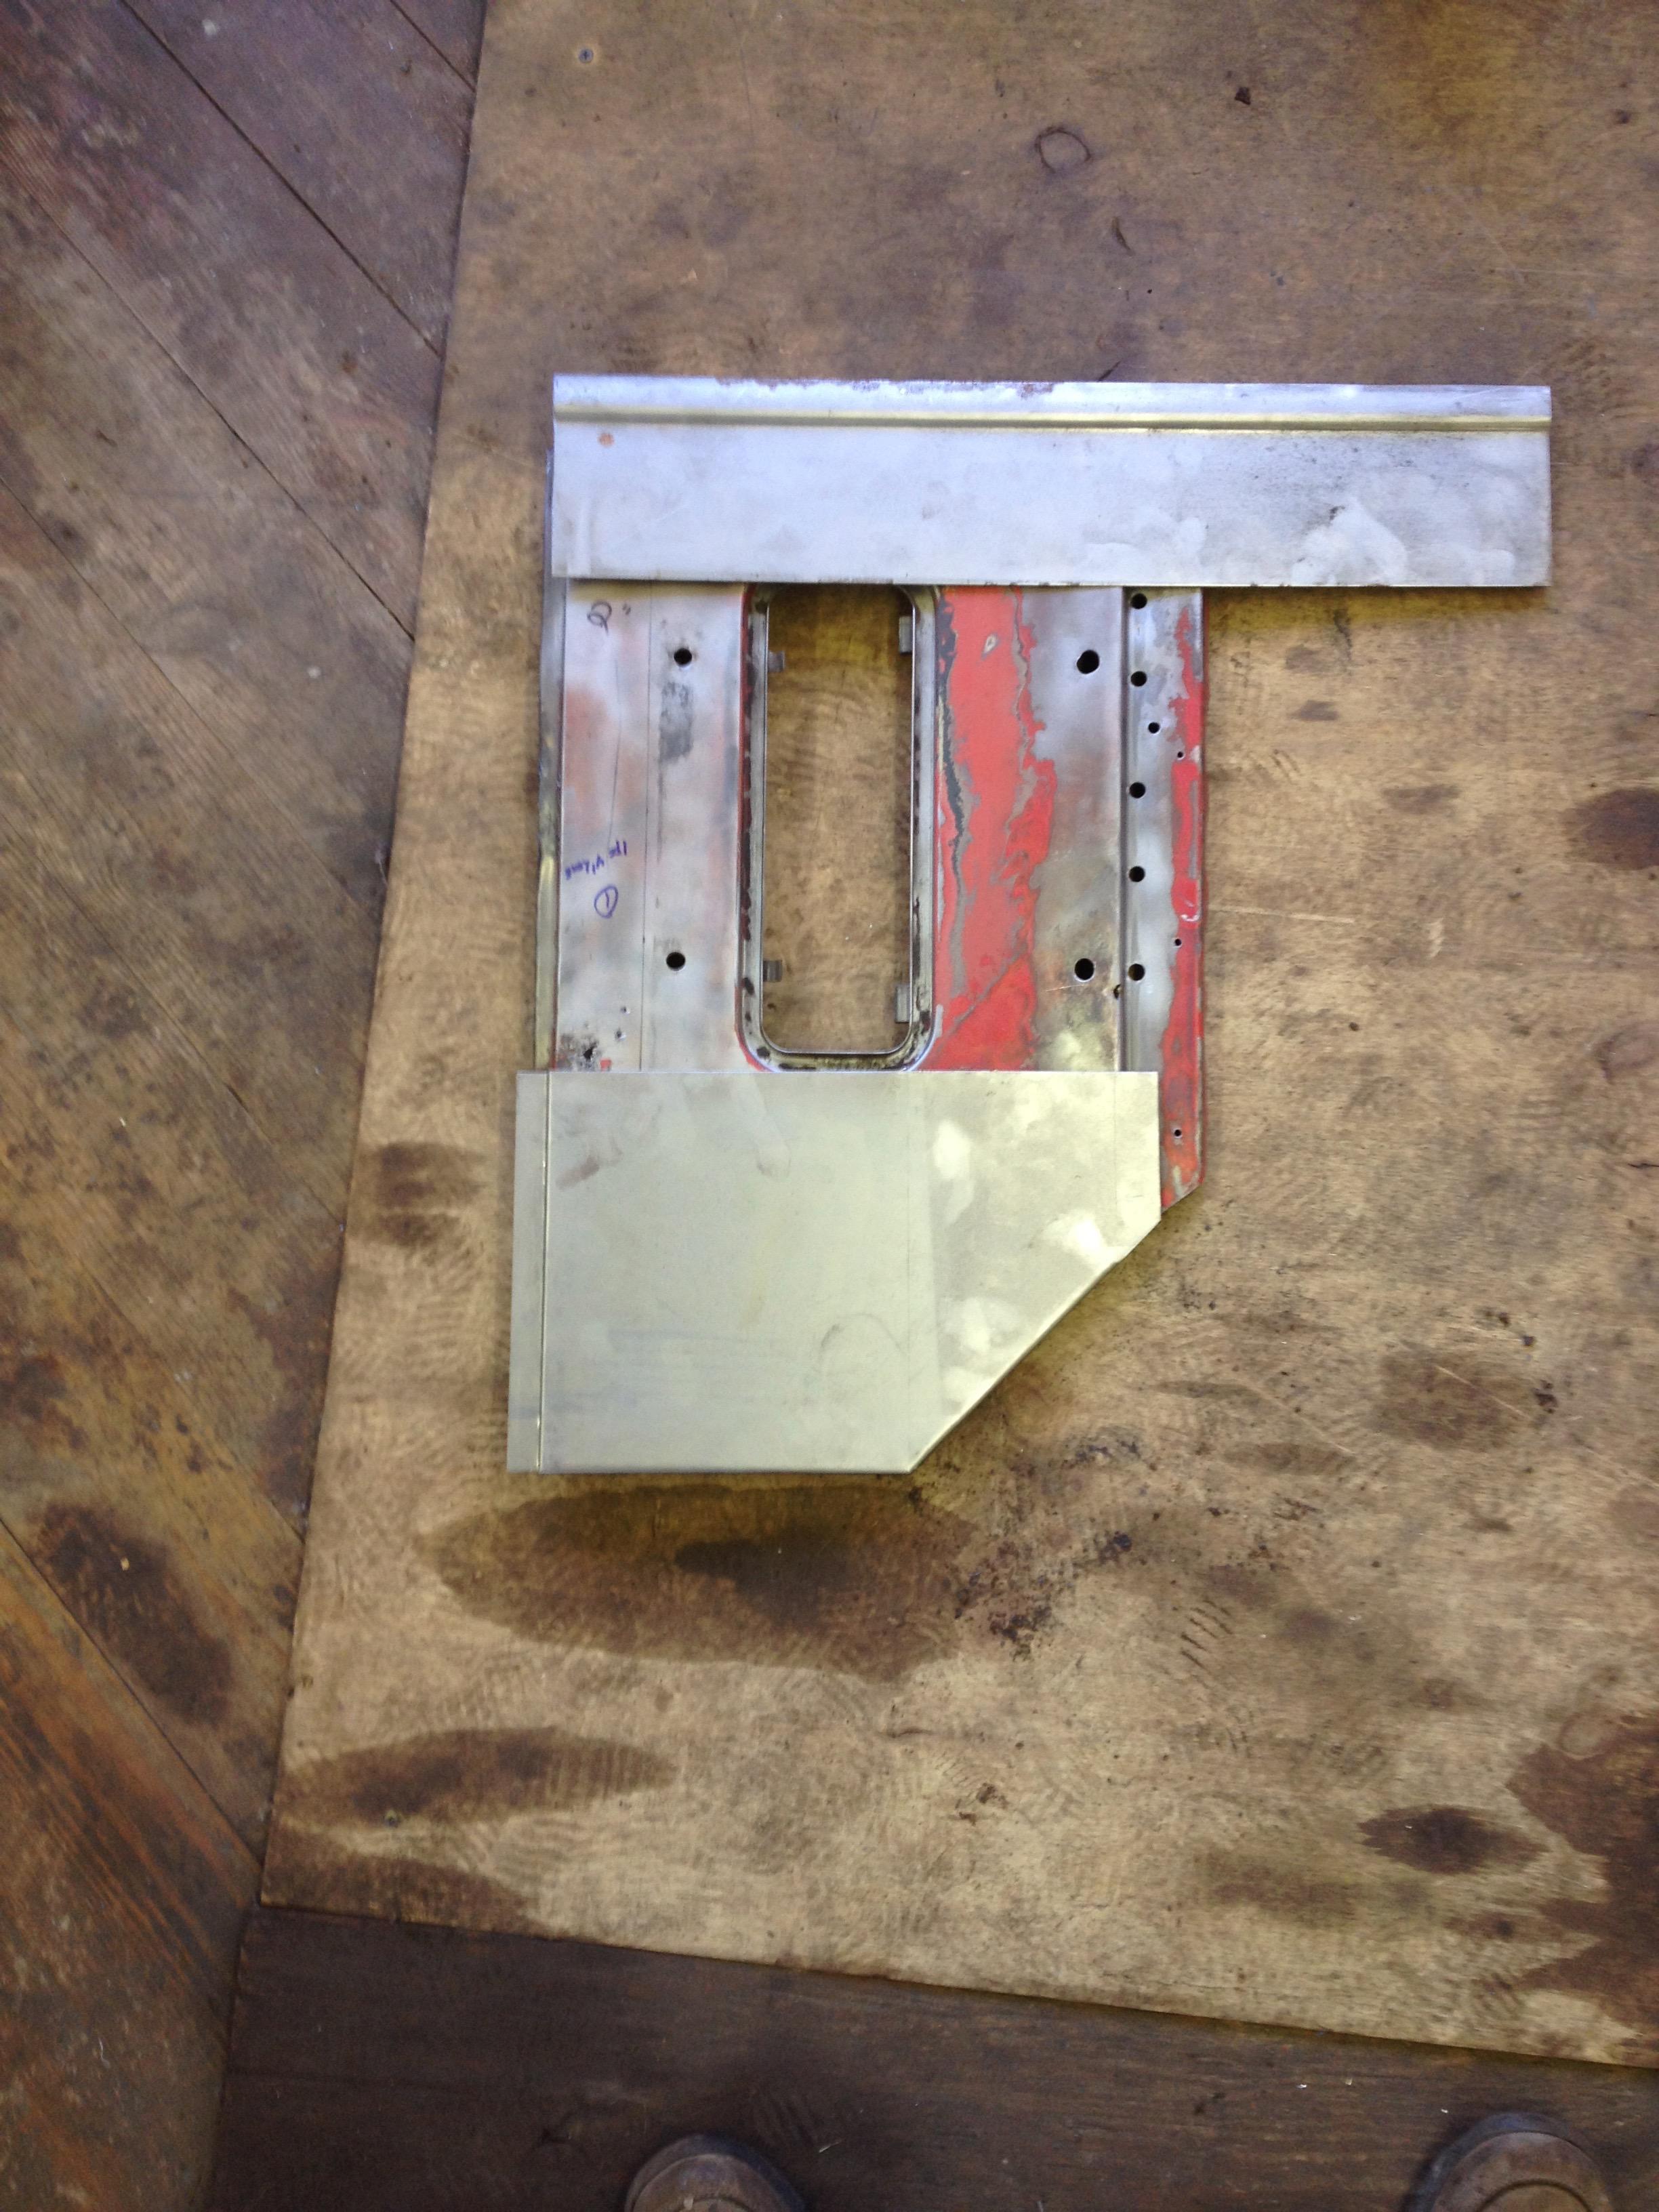
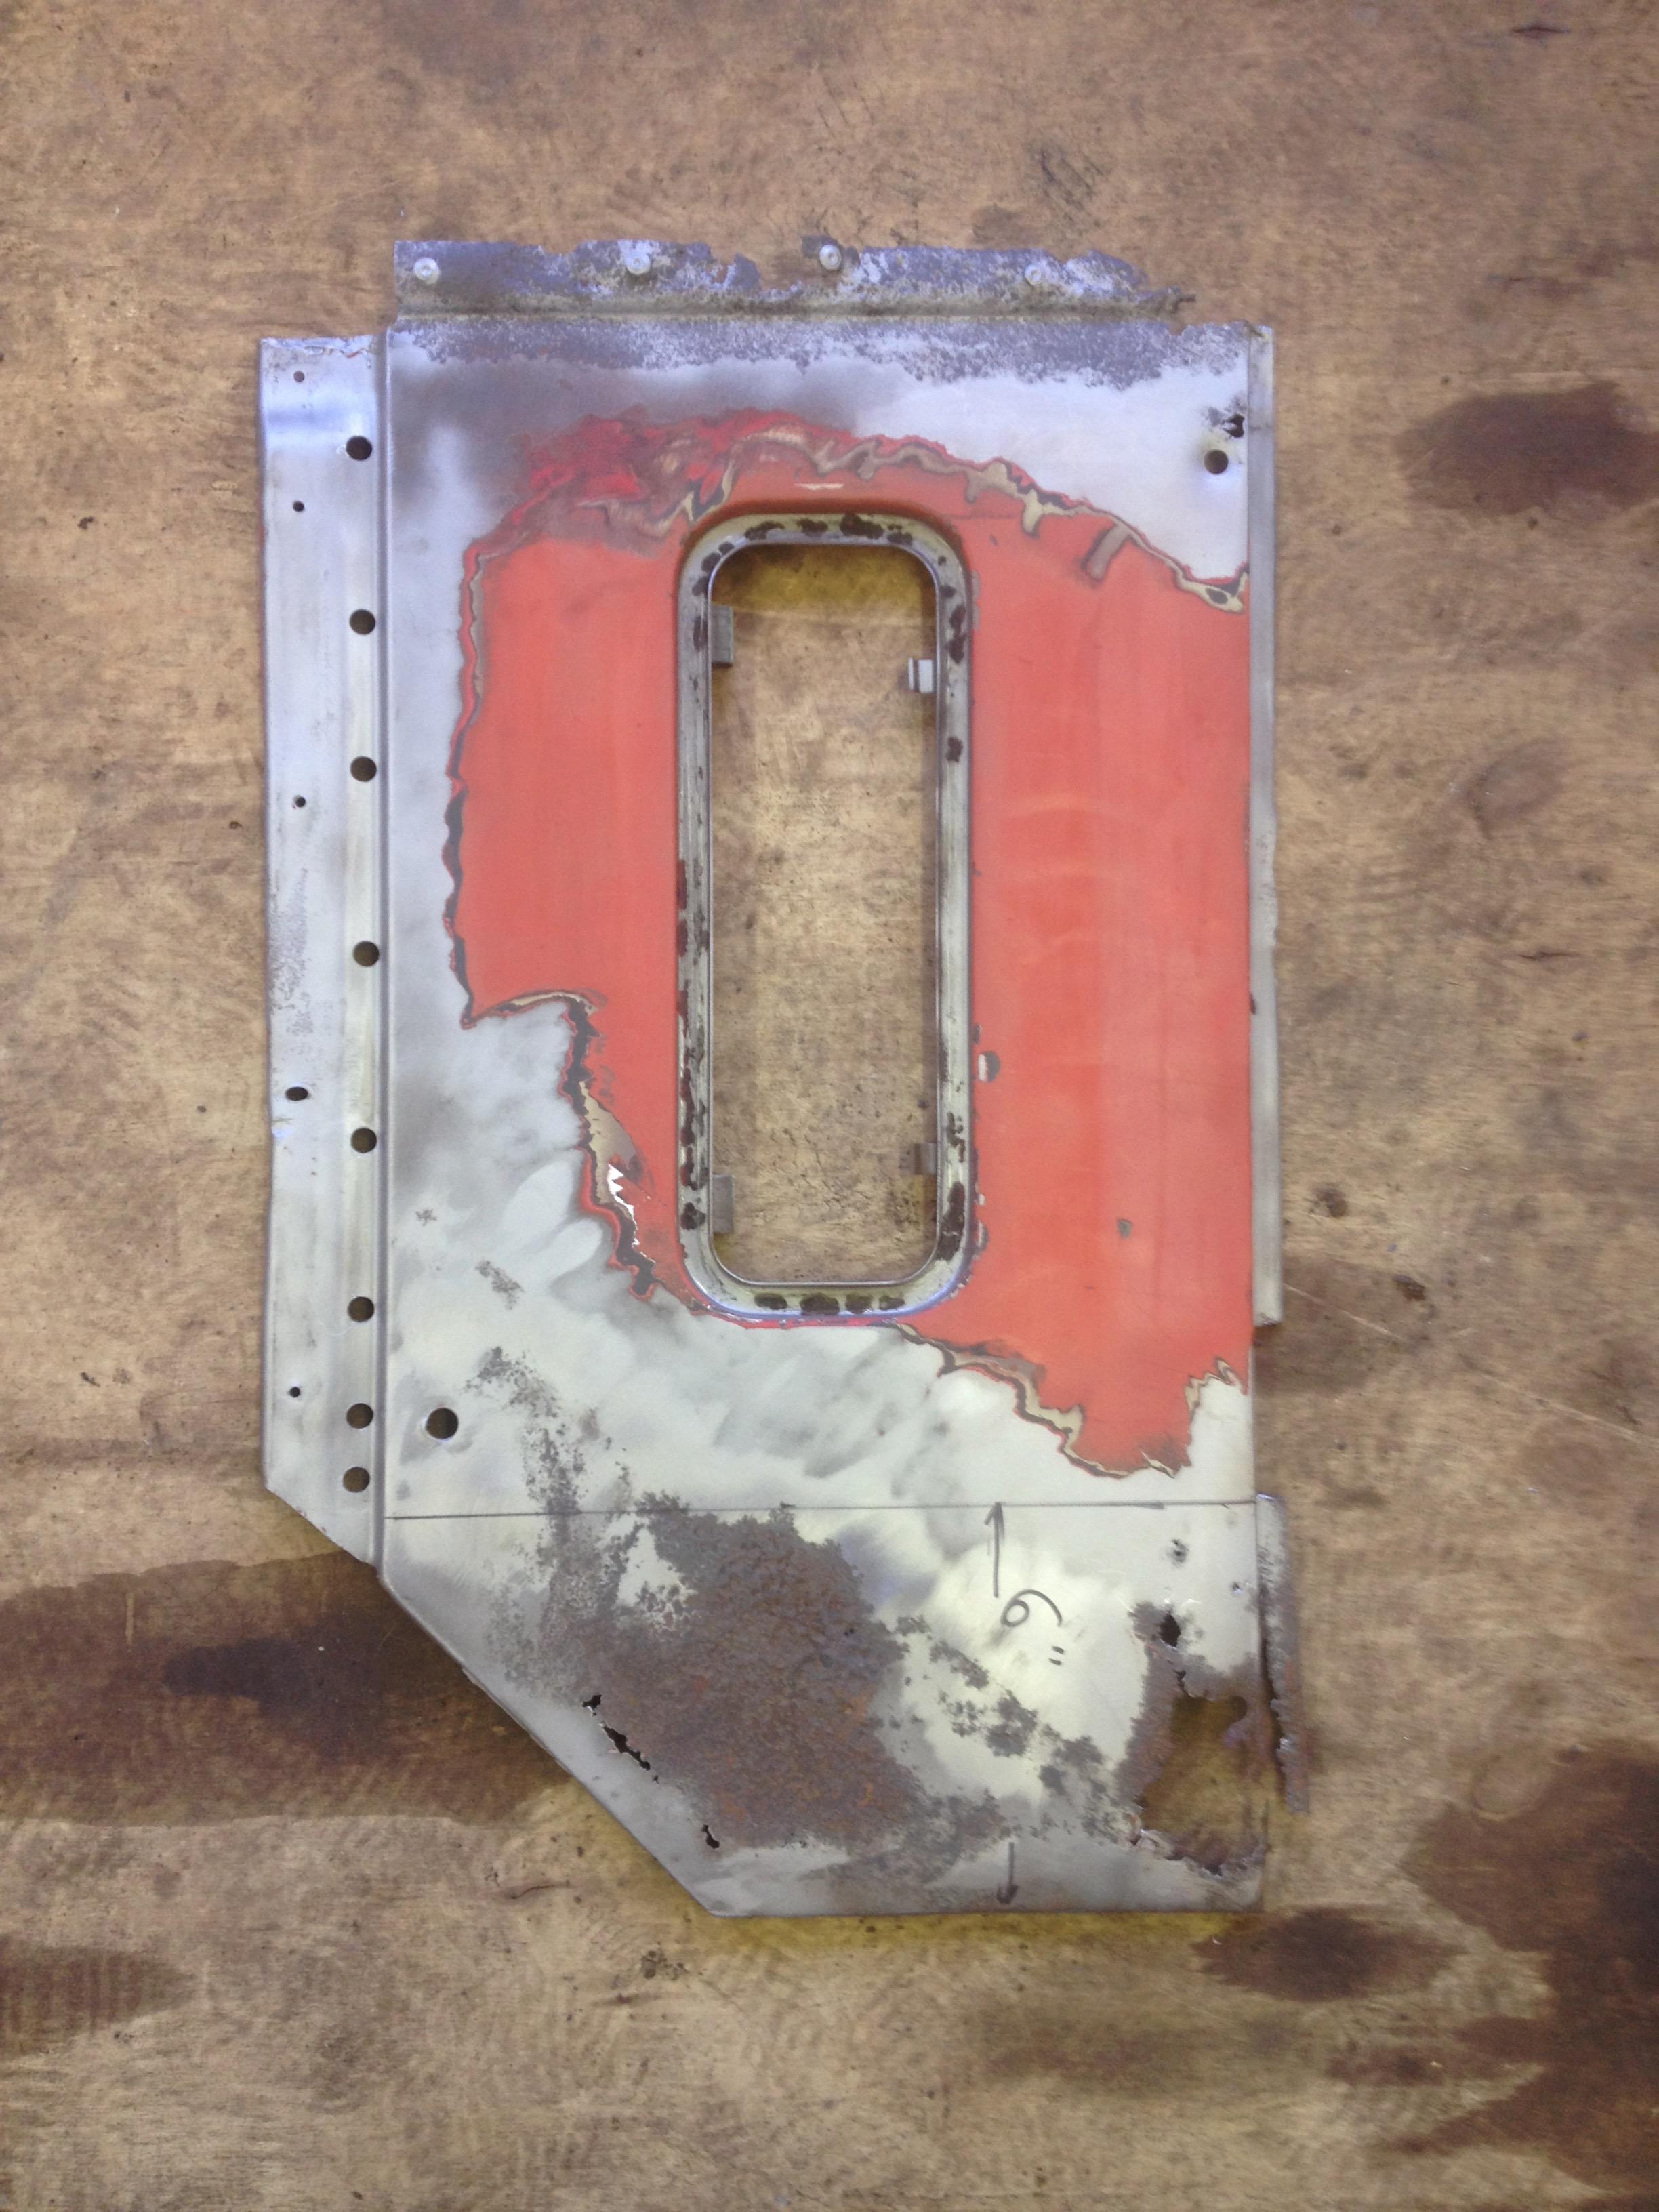
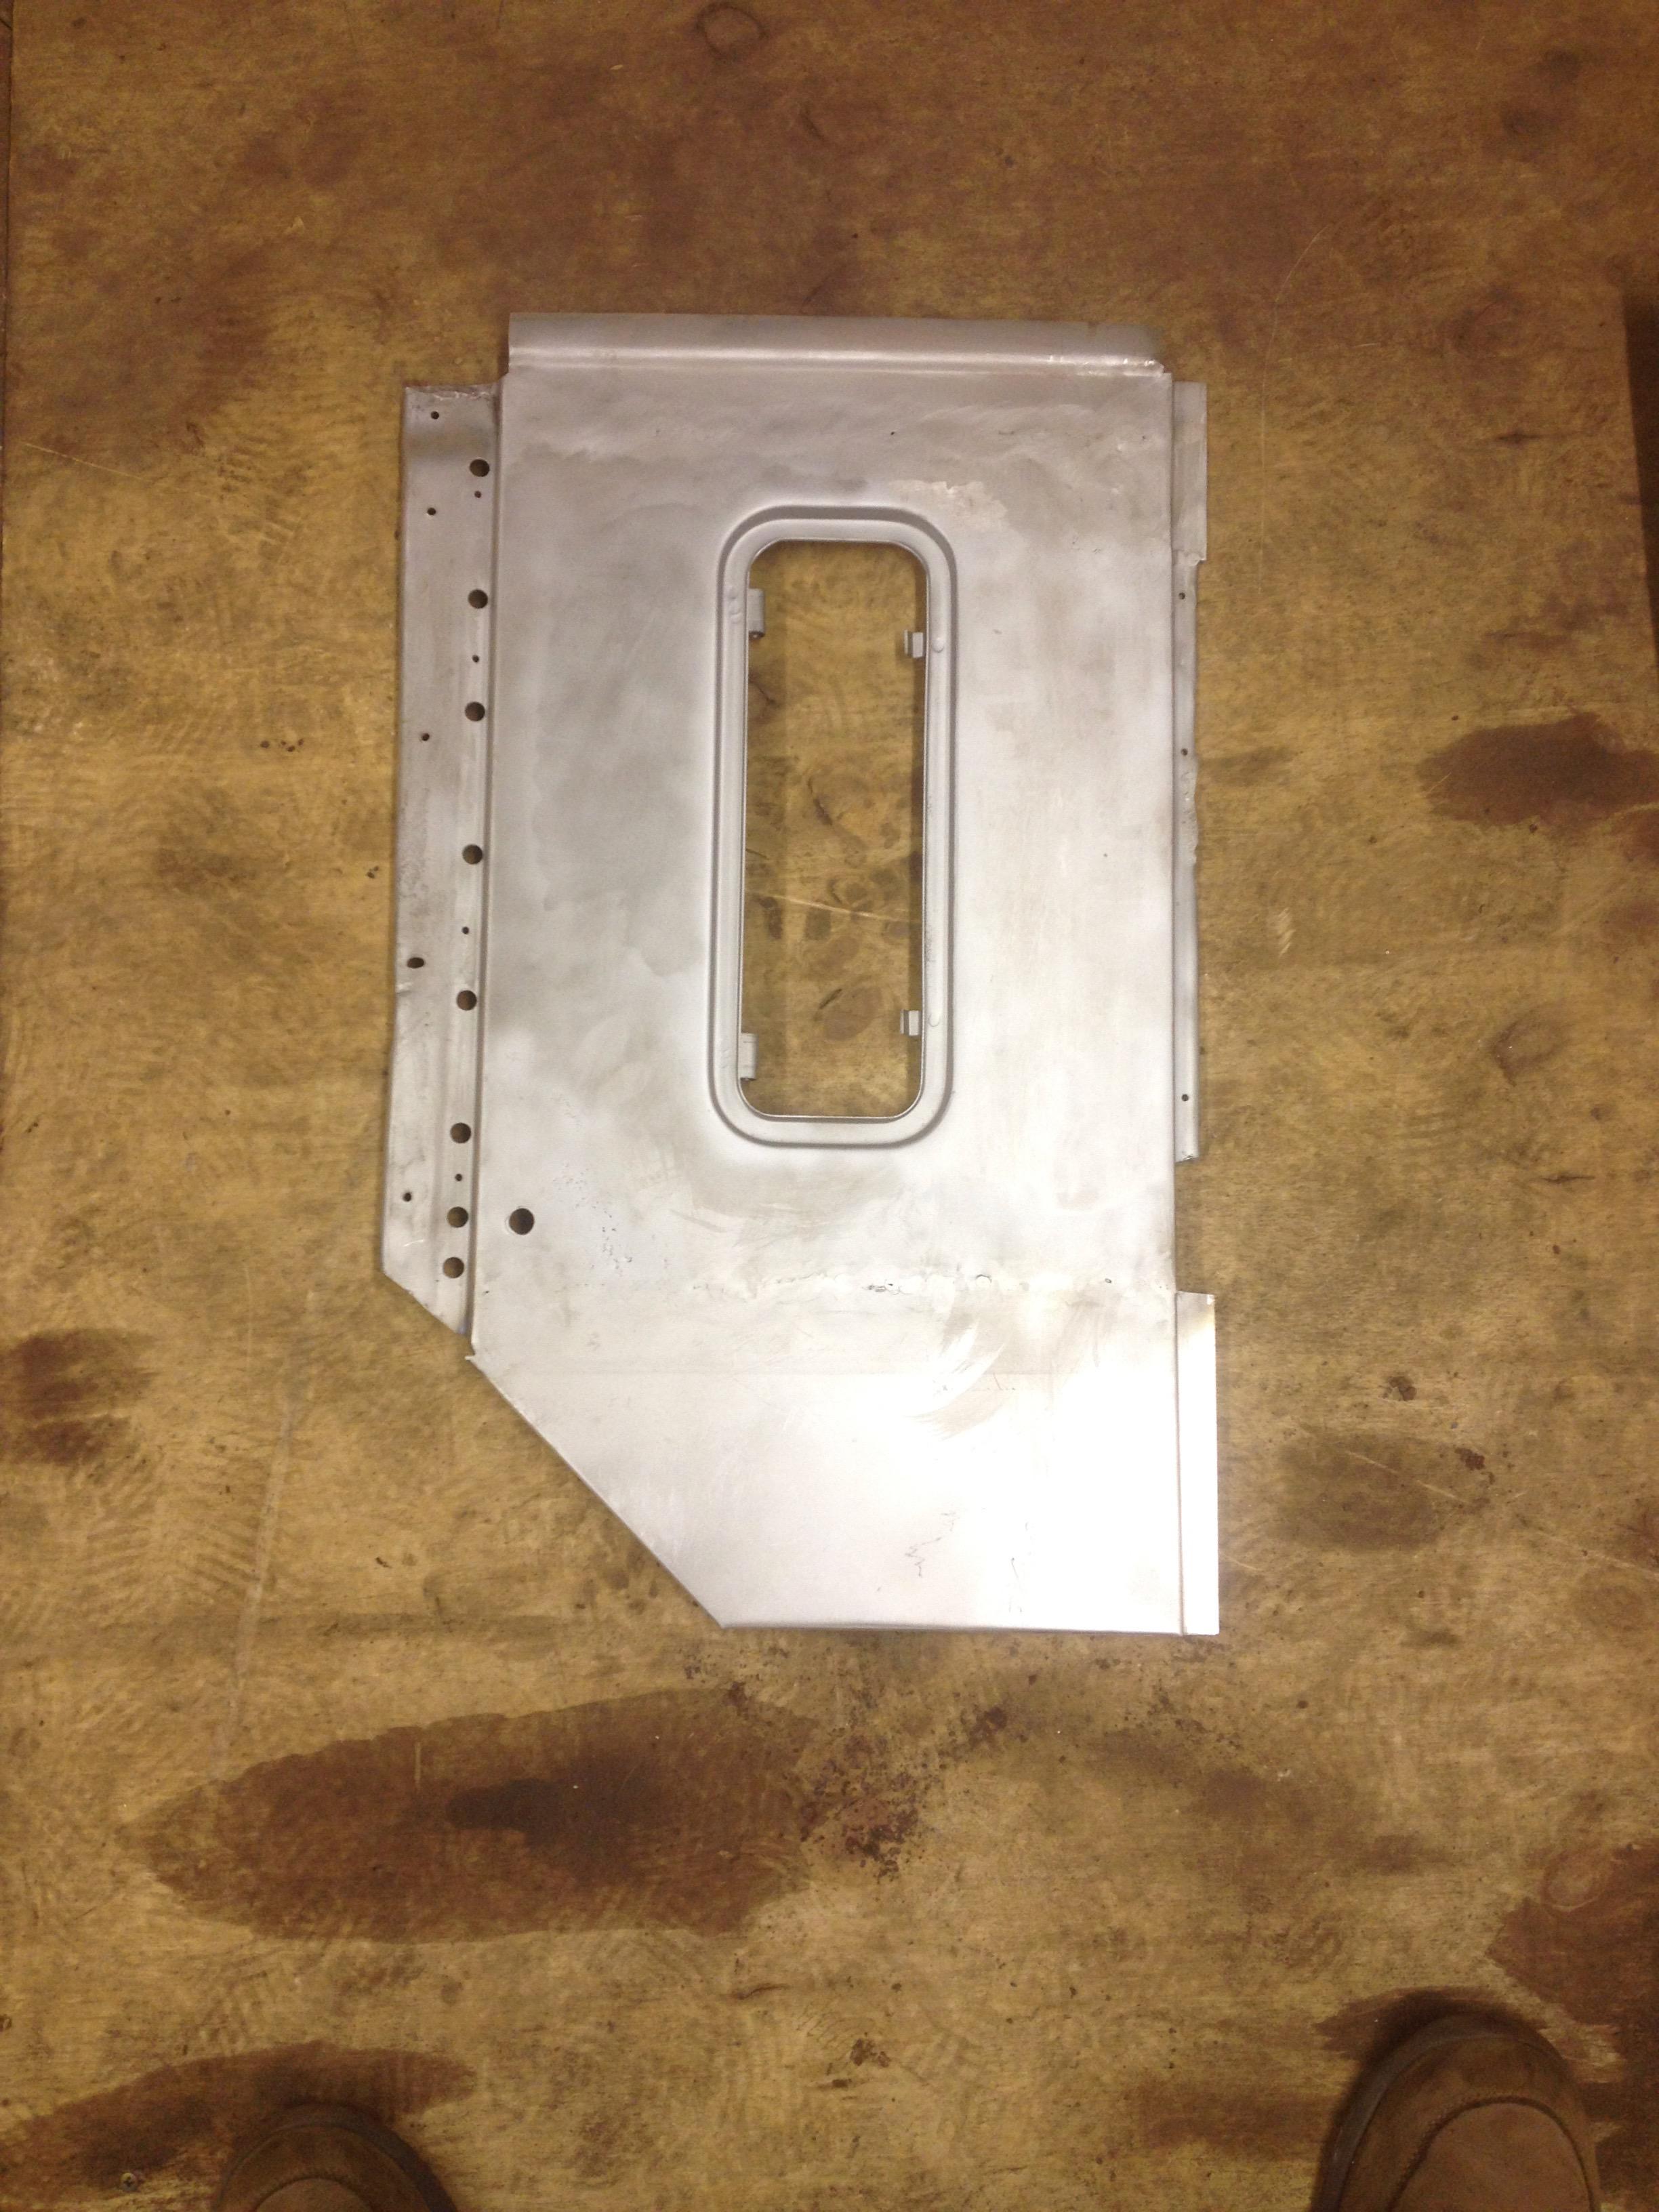
Those side cowl panels also present on my cab. But of easier style having no vents. So the plan is to order them completely new. The issue seem the front and rear edges have double bend with small distance between. Locally the most of shops have limitation on the minimal distance between two bends. So my hope is on personal egeunity or just luck. So far I prepair to open the can of warms closer to the summer.
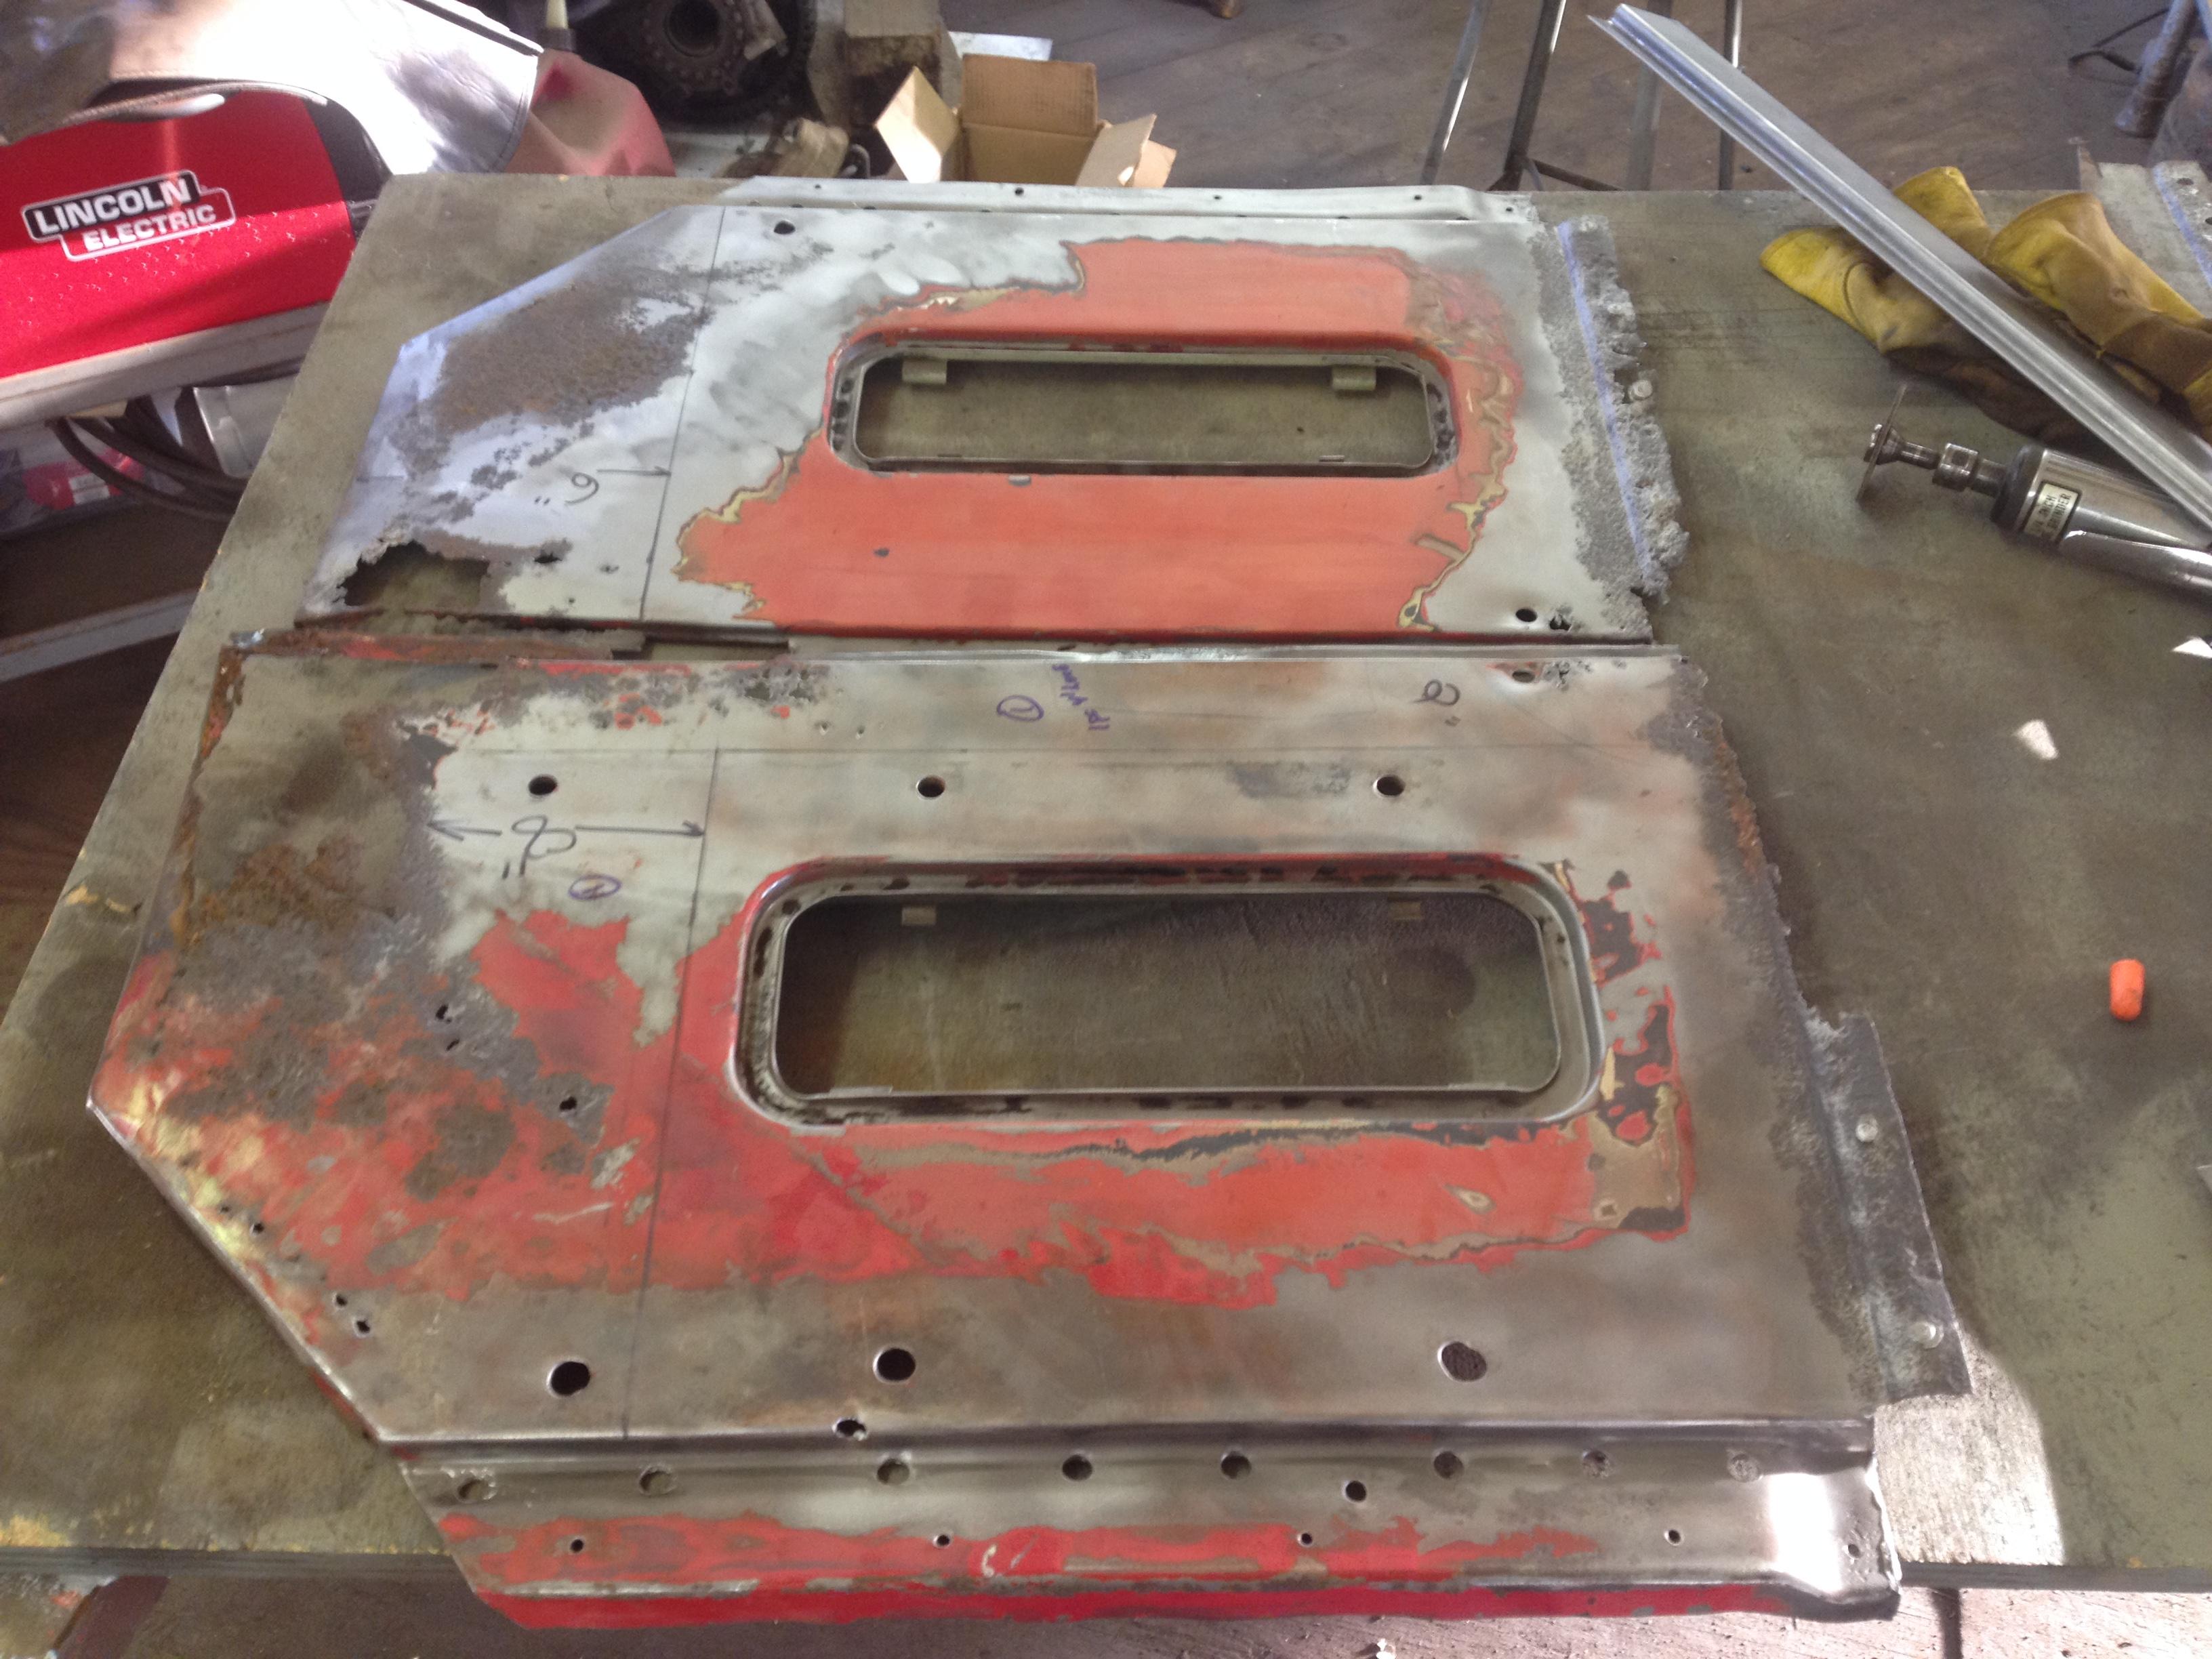
Ok, glad these are helping you. There is a small step on the door side of the panel, where the door closes flush to it. Having no cowl vent door, it would be a lot easier to fabricate the whole panel. I just roughed out the passenger side, today. It was a little rougher than the other and required three sides of it to be repaired. I over lapped the repair panels over the damaged areas. They're now trimmed, fitted and tacked together. I'll finish welding this on Monday.

-
2
-
-
- Popular Post
- Popular Post
On 1/8/2019 at 3:38 PM, Vladislav said:Looks like the things are doing cool. Would like to see the cowl patch pieces.
Observing your progress I even started crawling over my military Mack cab with a measure band and a caliper to figure out which parts I would be able to order fabricated. The cab has many things in common with your one being basically a L-model cab. But since it's an open one the rocker channels were made different. Consit of lower and upper panels. Your cab has the upper ones only.
Here's some pic's from today. The patches were made locally and in the same gage and made longer to overlap damaged areas to allow for trimming. pretty simple bends and no curves. Hope these help.


-
6
-
- Popular Post
- Popular Post
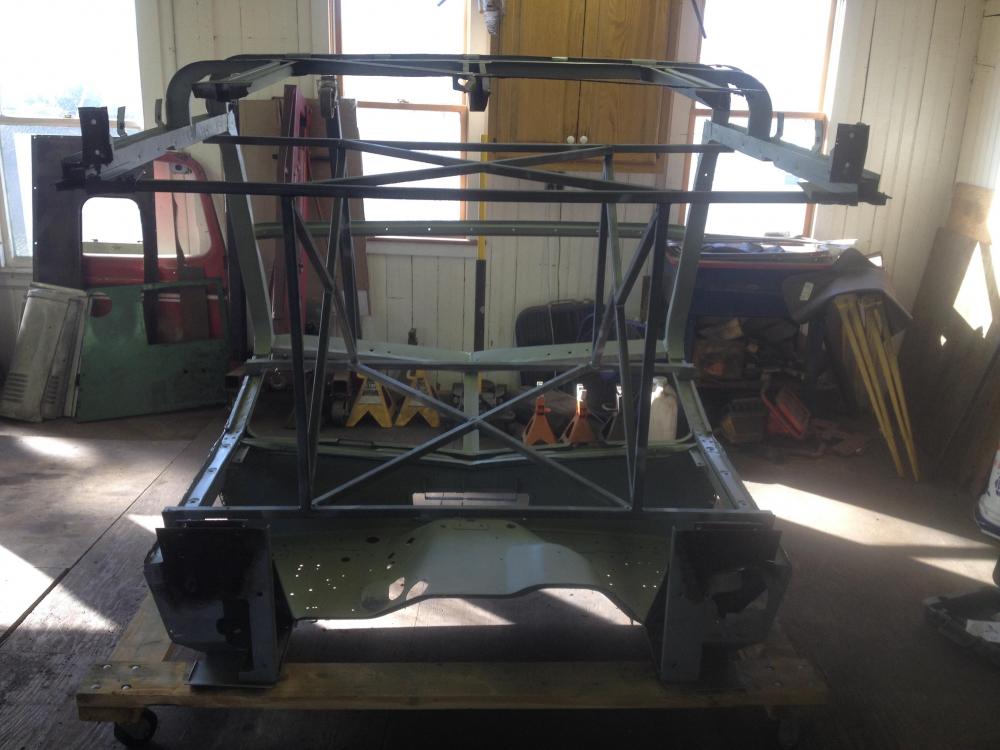
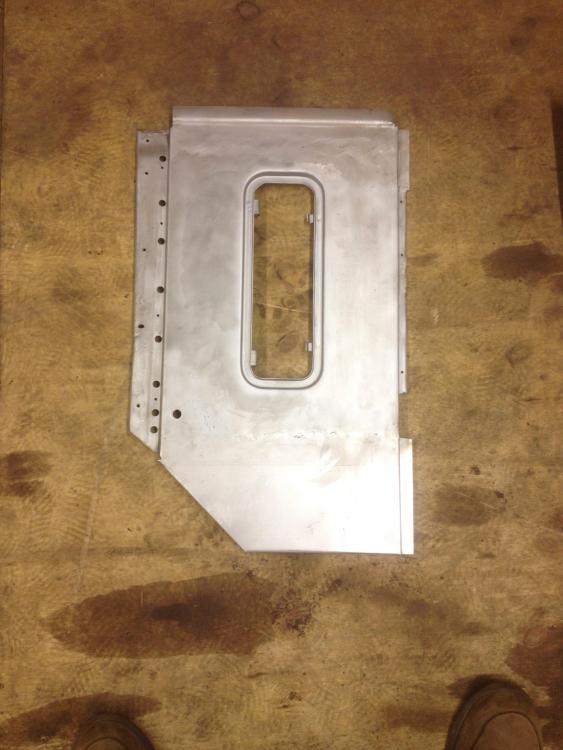
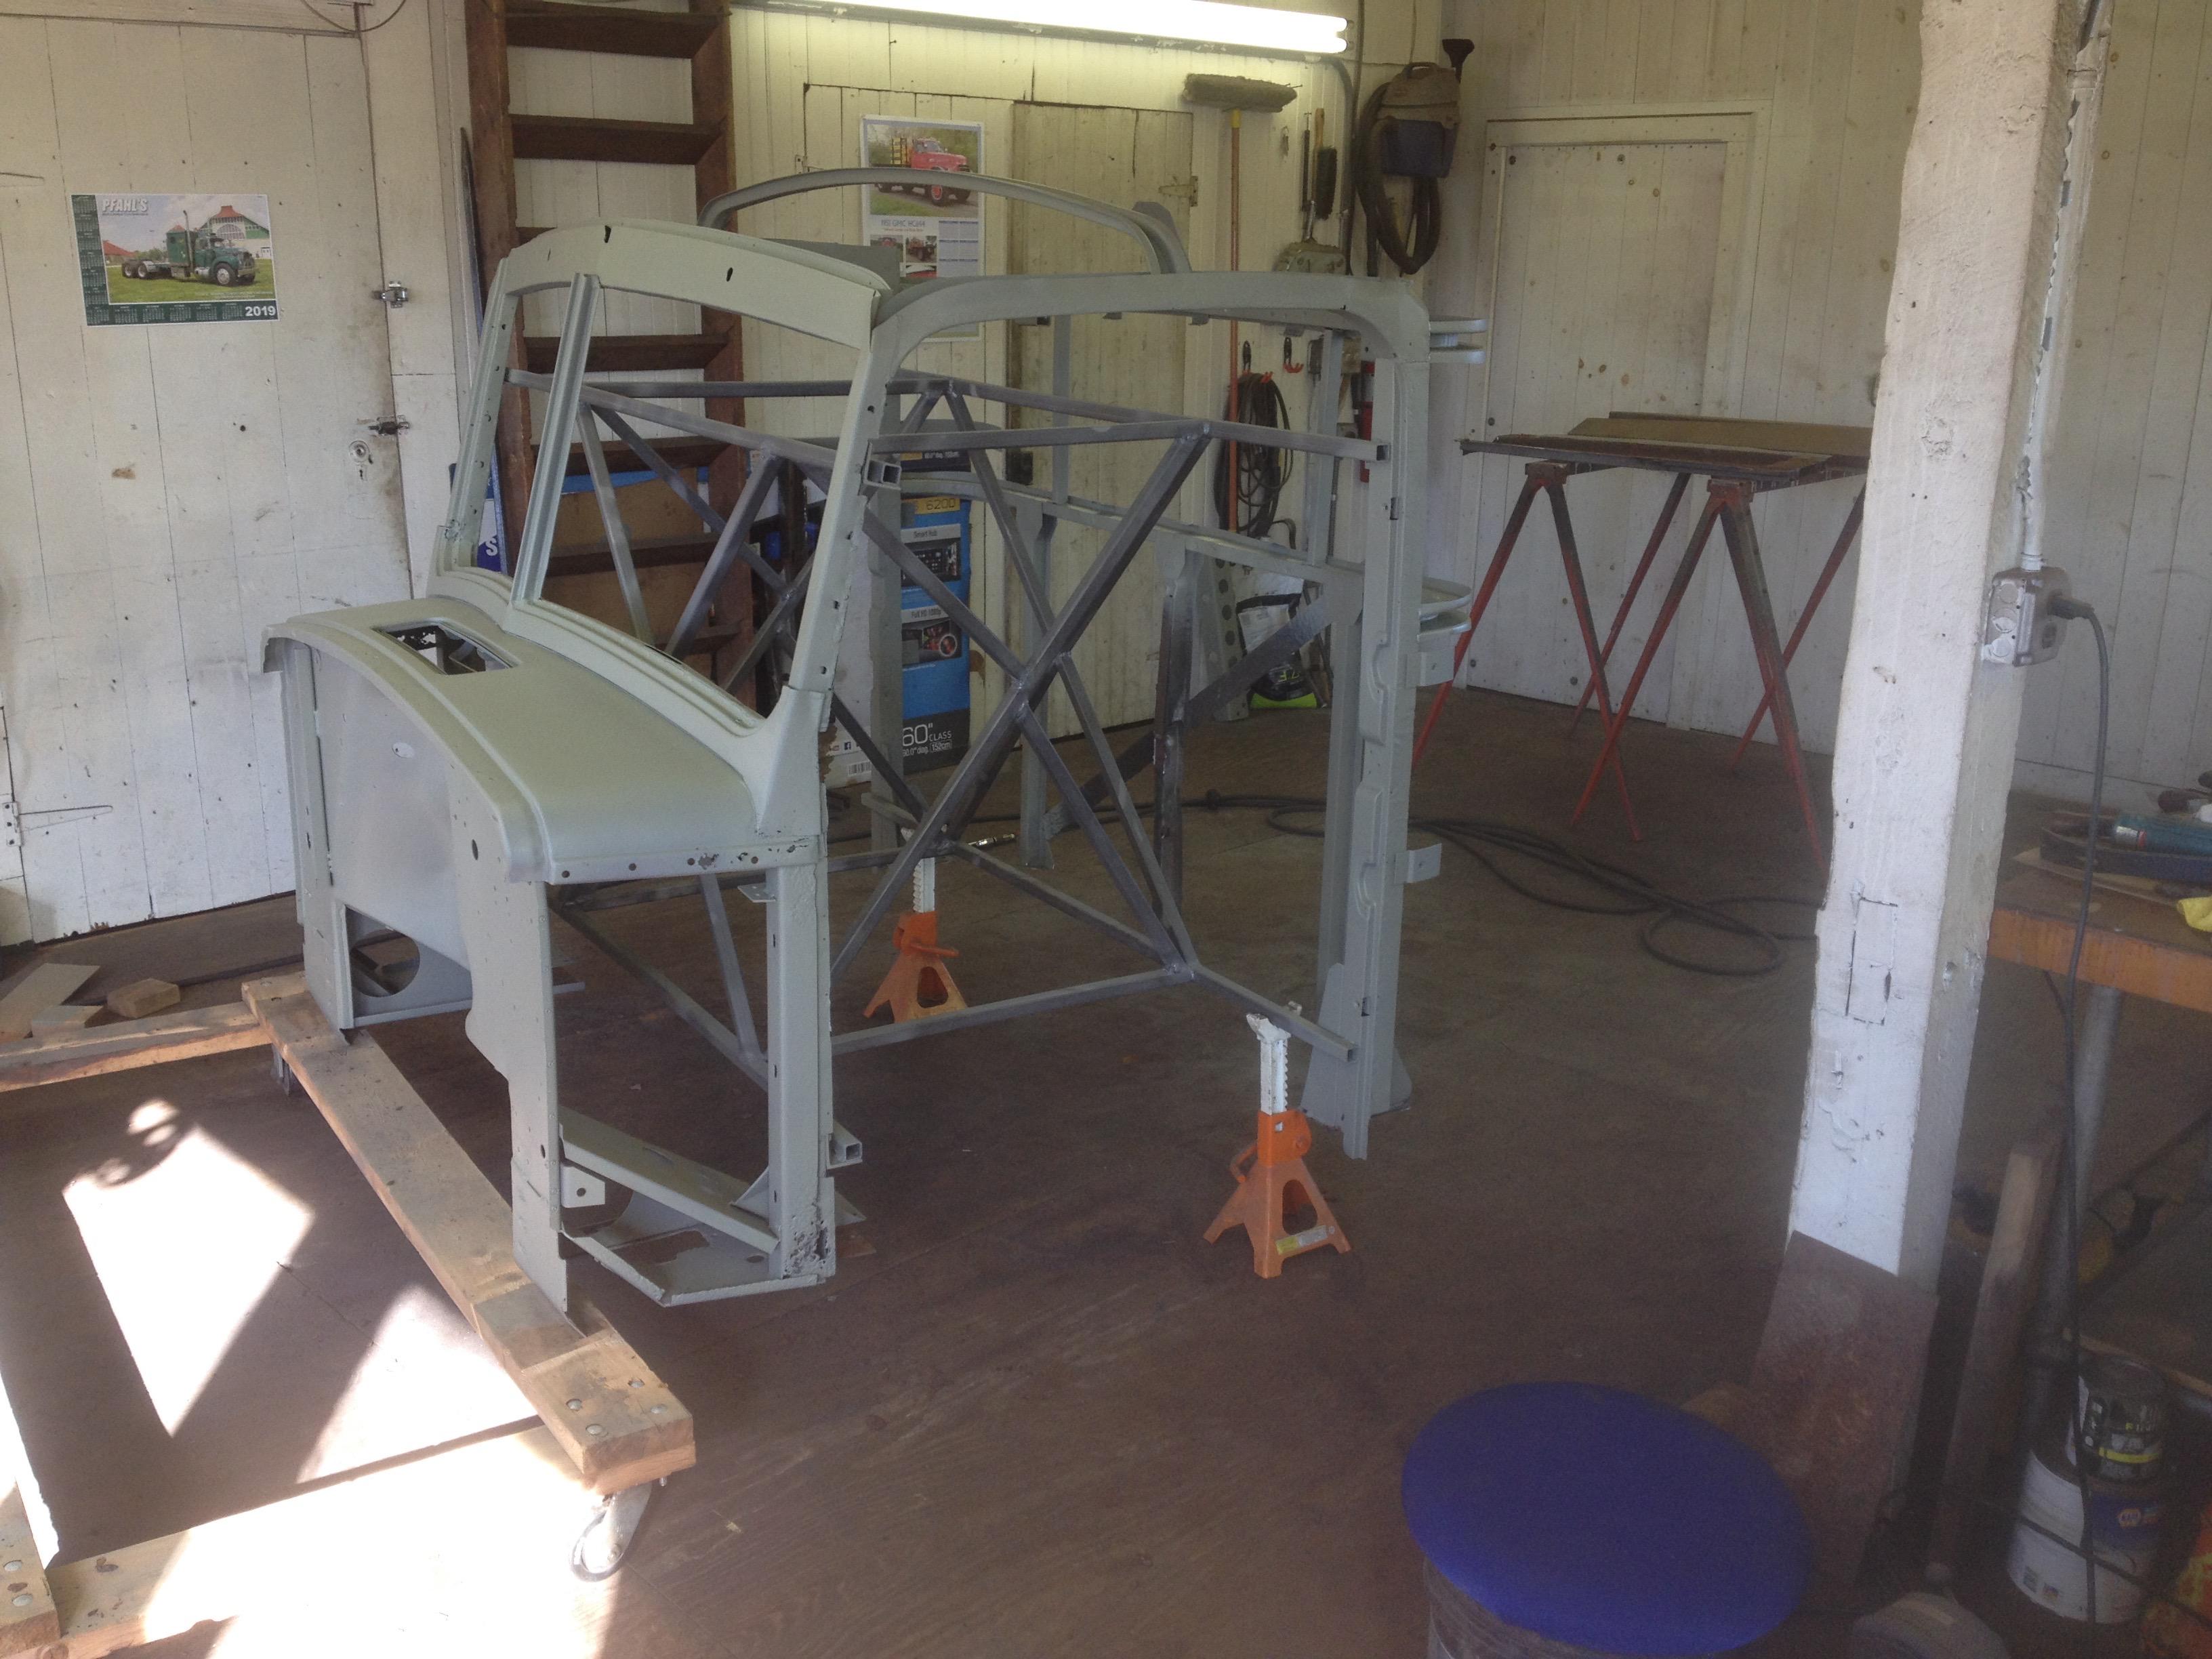
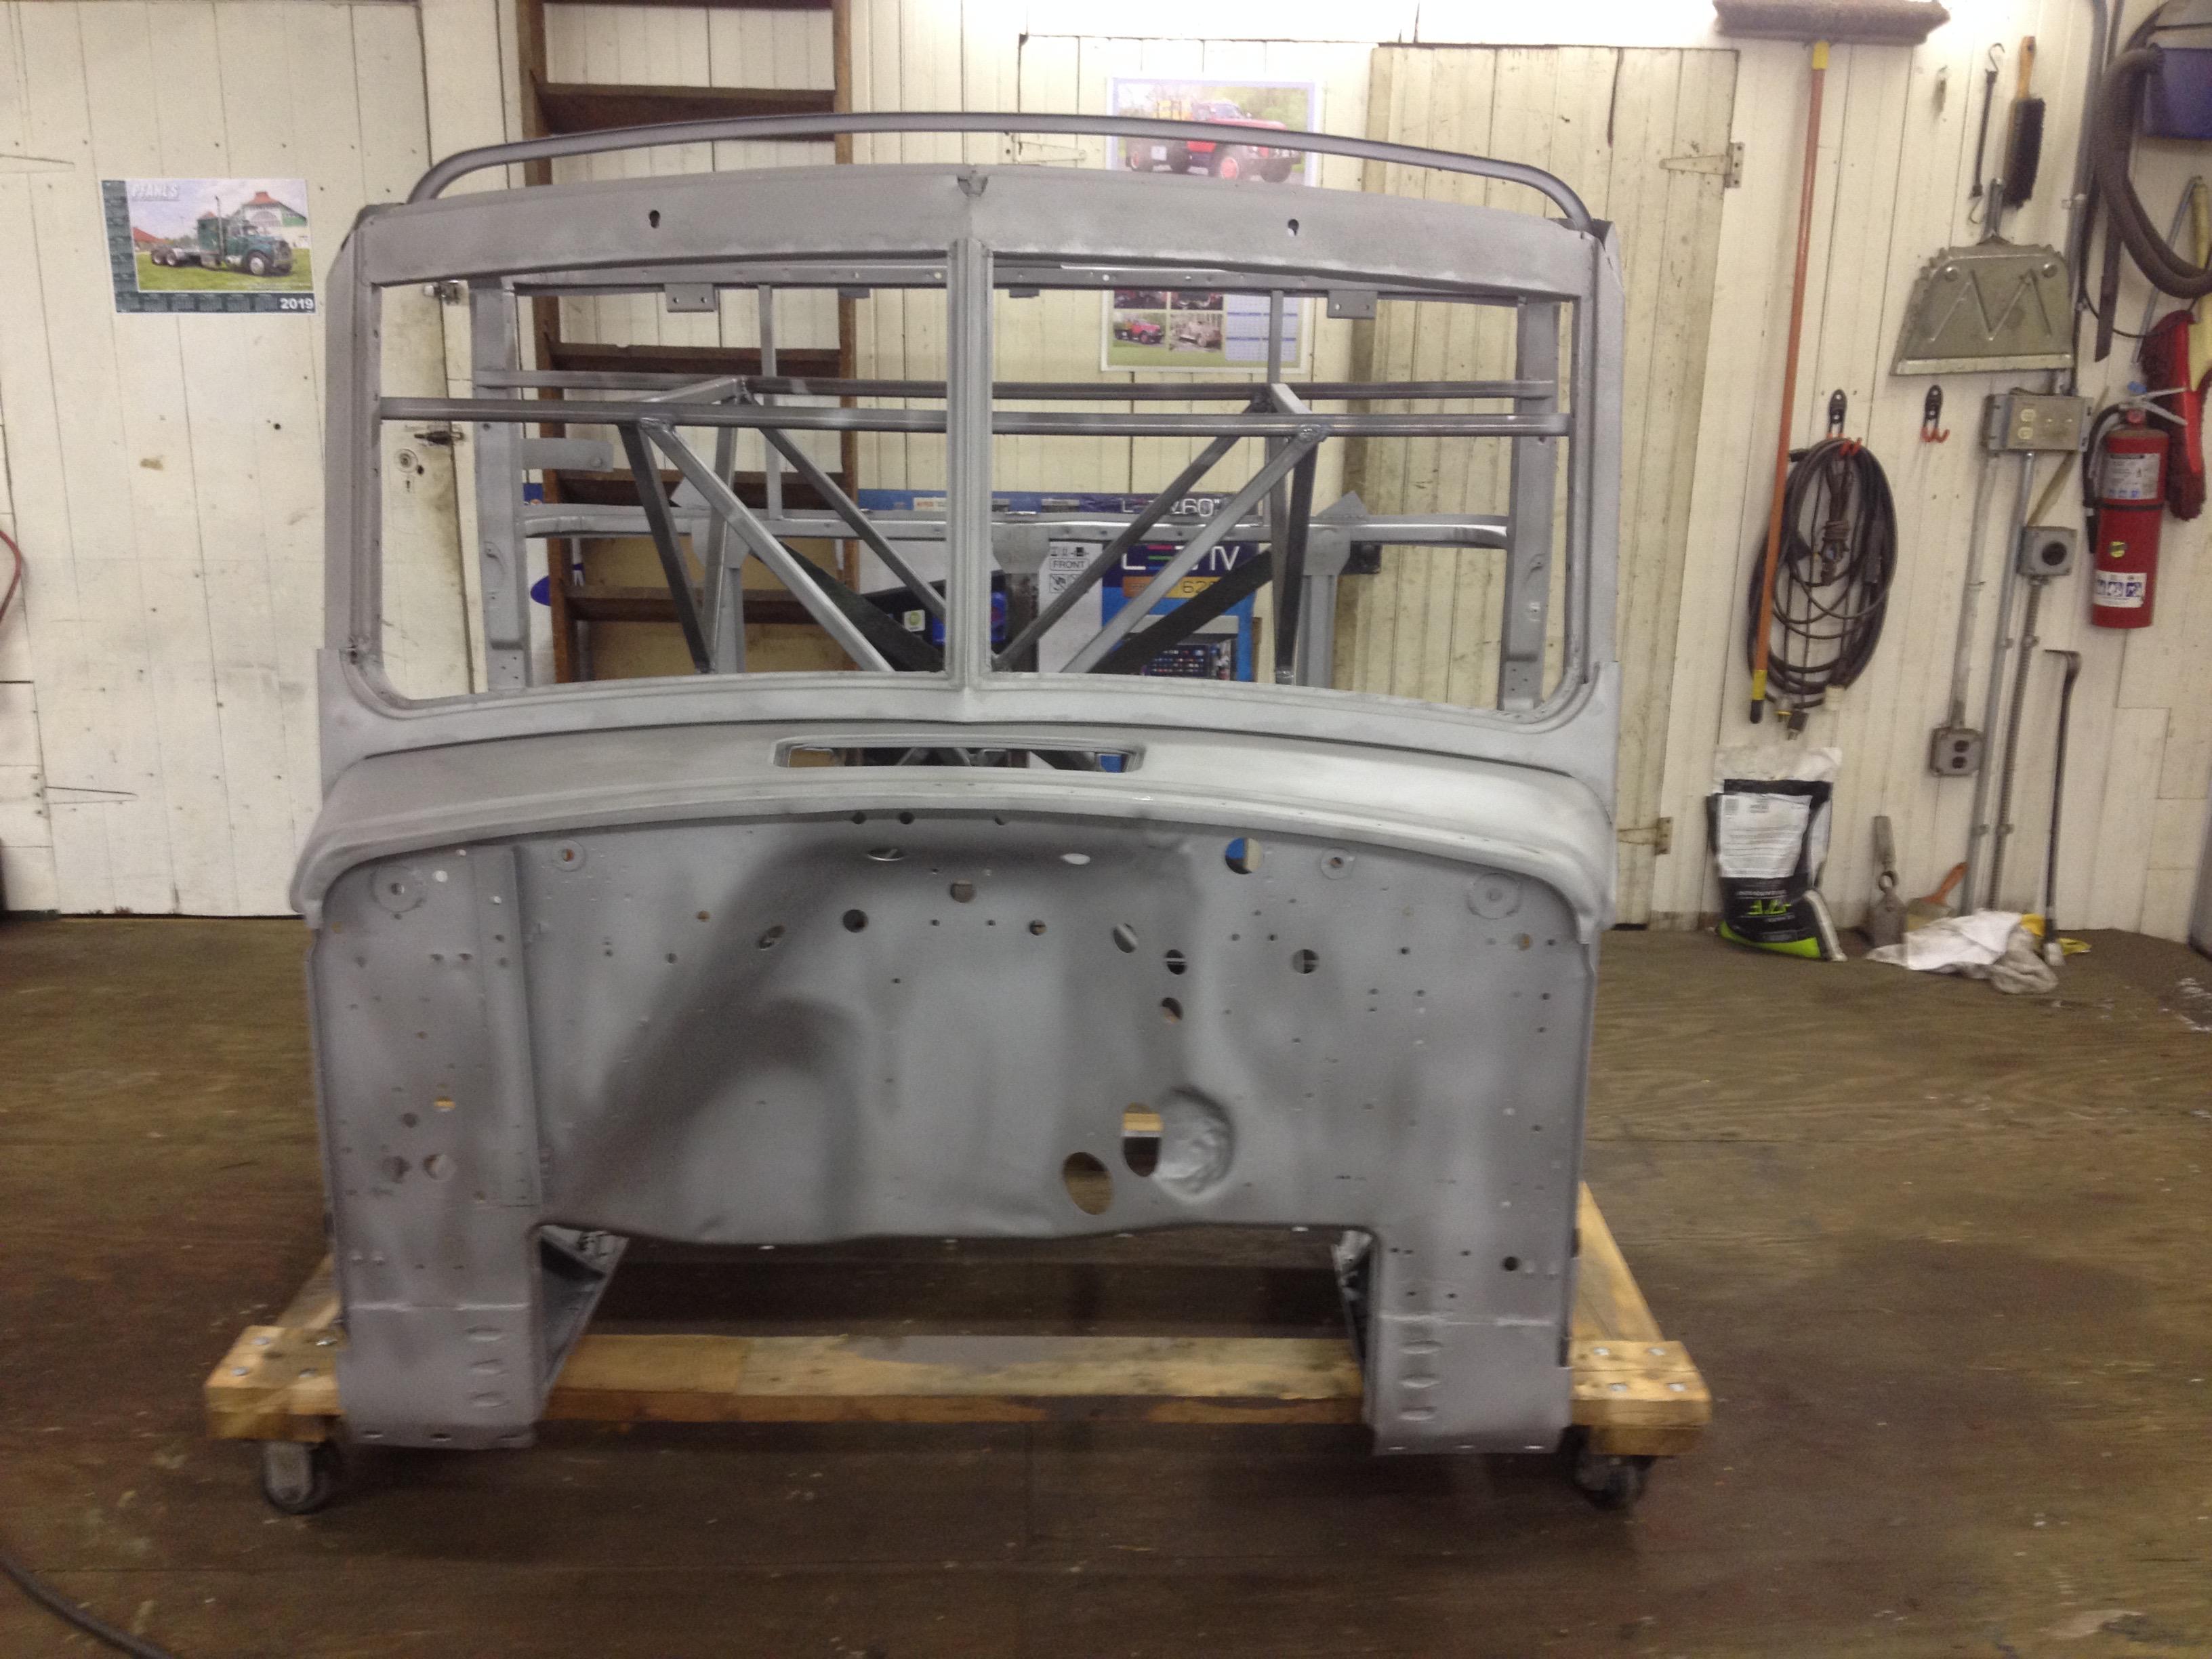
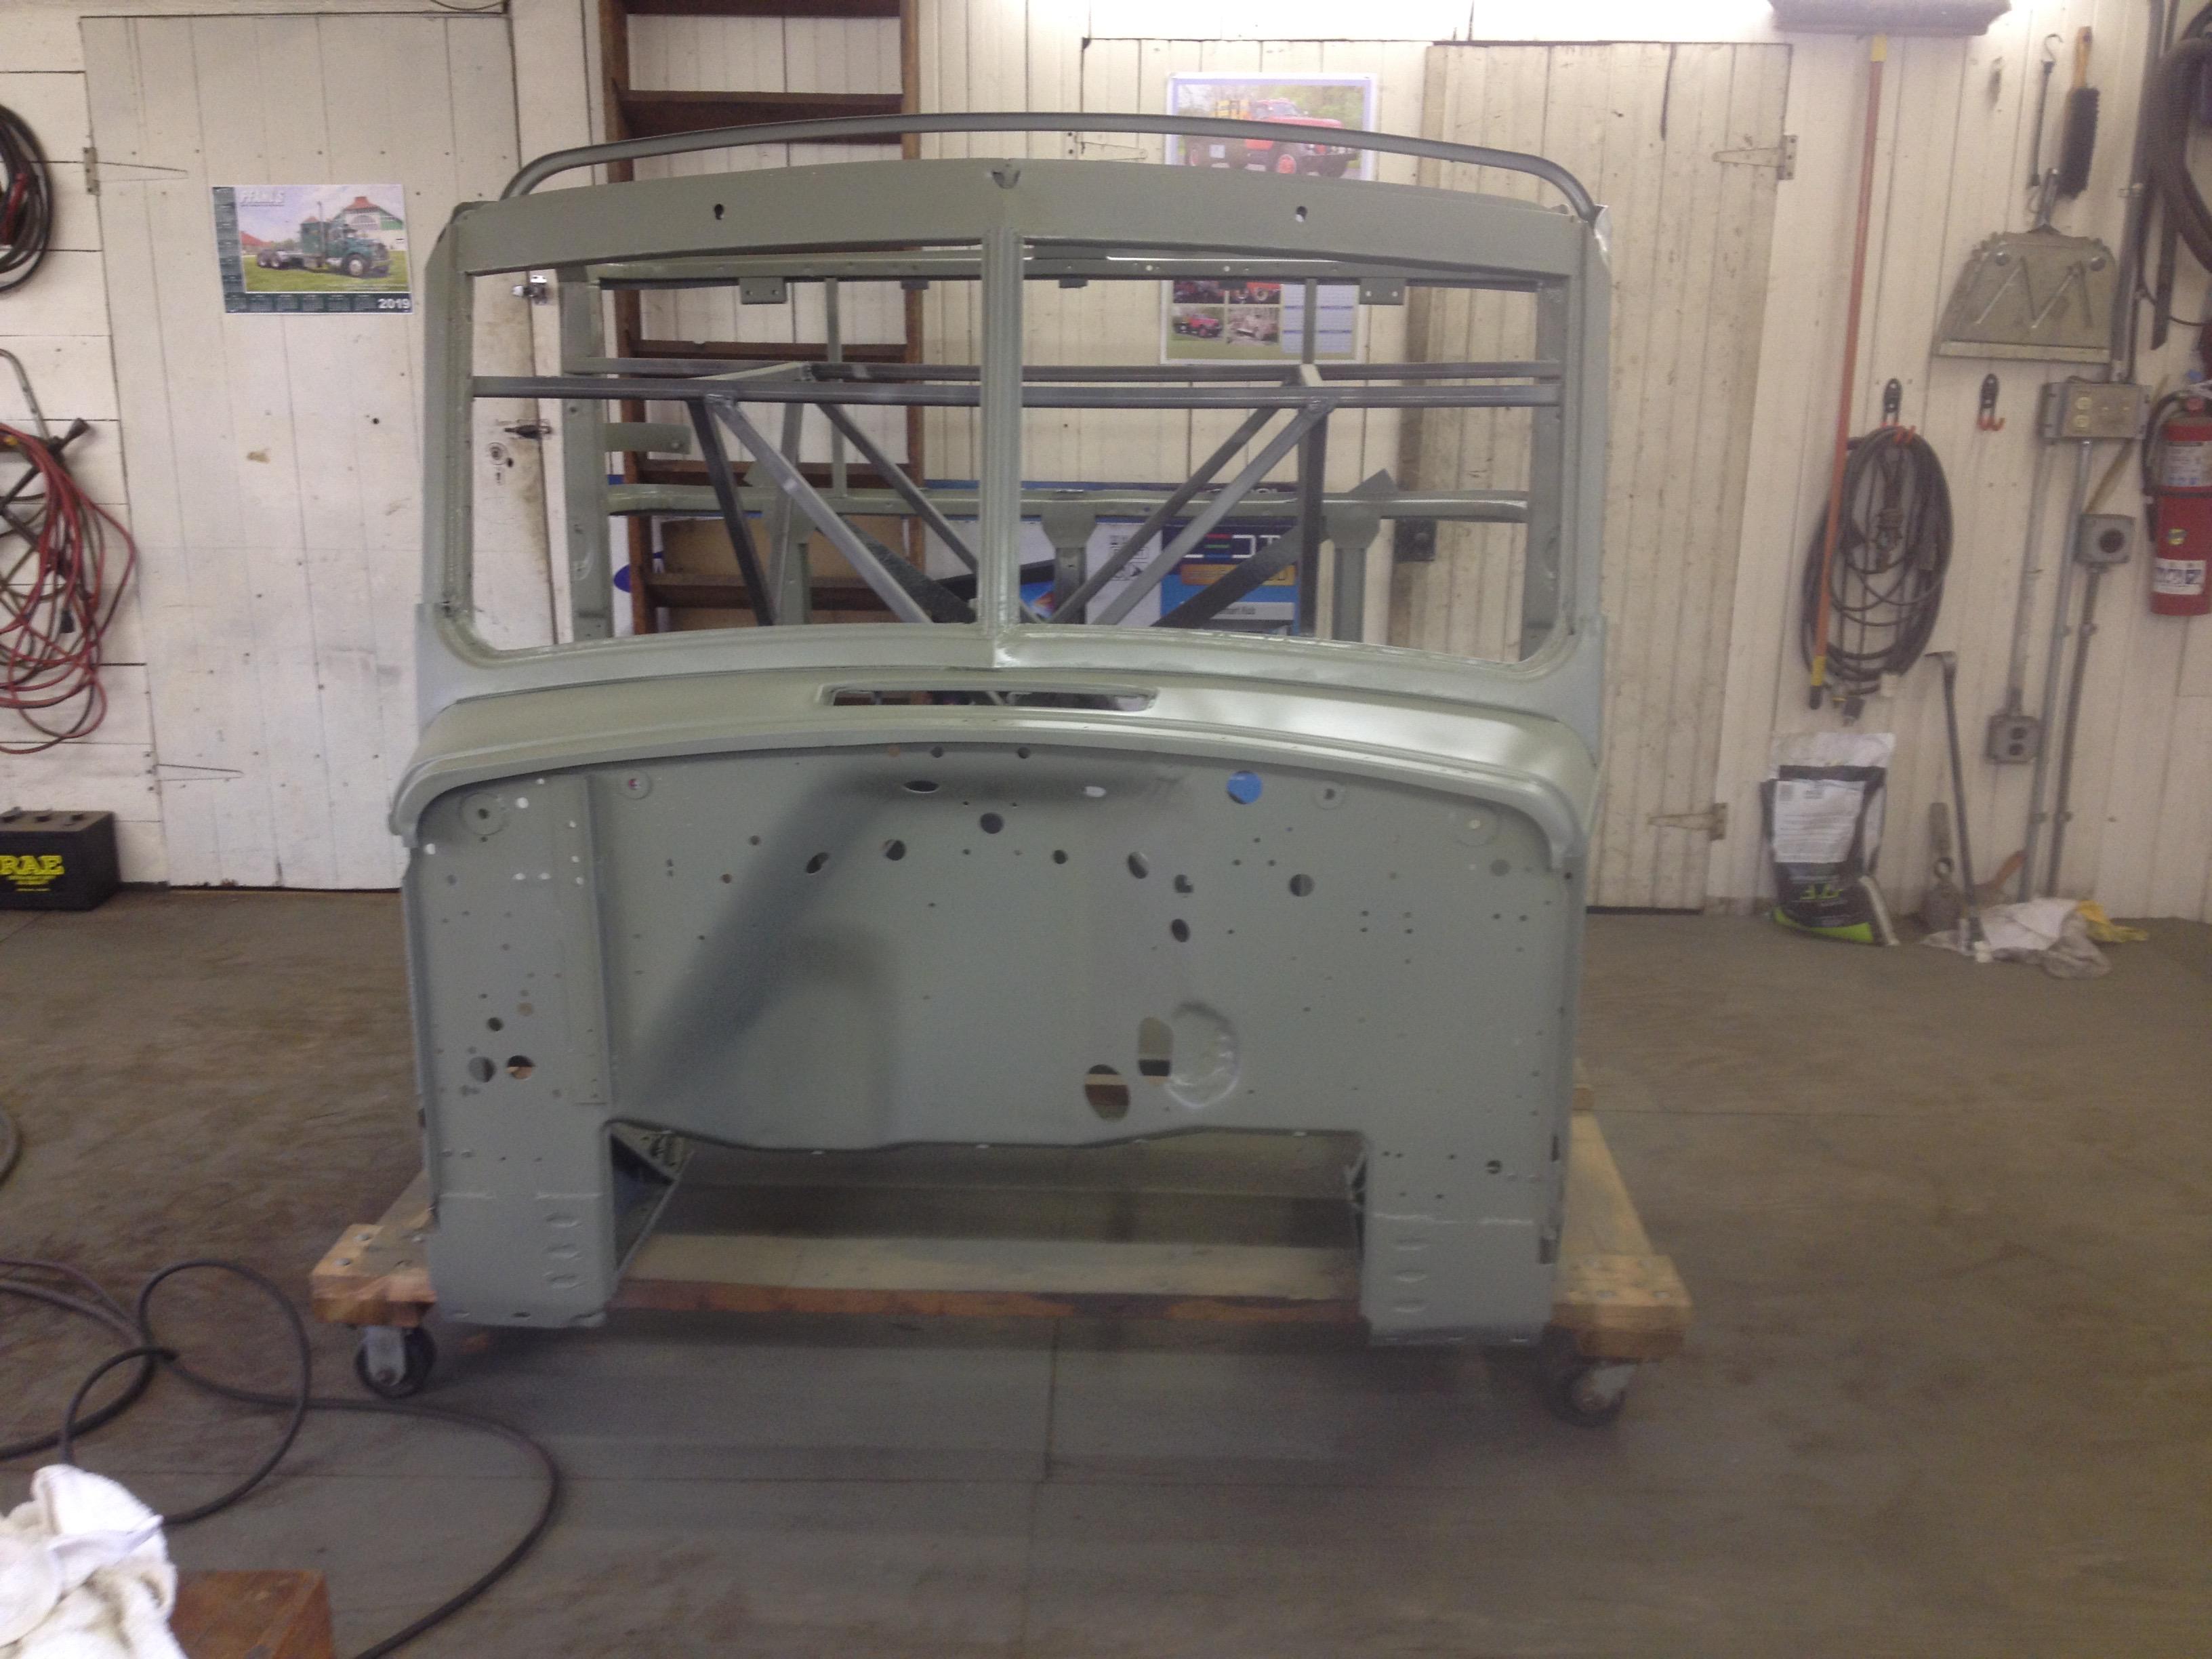
Straightened out several of the rear formers that had damage and getting back some more pieces from the fabricator. Local shop, that's been really good to work with and fast. Test fit all the rear sheetmetal and the donor cab top together for fitment. It all lined up, even the factory holes on the top to the original pieces. I think the top dates from 1948 and the cab is 1960. I have some hope this will all go back together.


-
6
-
 1
1
-
58 minutes ago, h67st said:
When you say "new" roof, is it from a donor cab?
Yes, it was salvaged from a fire truck a friend gave me. The cab was rough, but I carefully dissected it and ended up with some better pieces or at least patterns to make replacements.
-
- Popular Post
- Popular Post
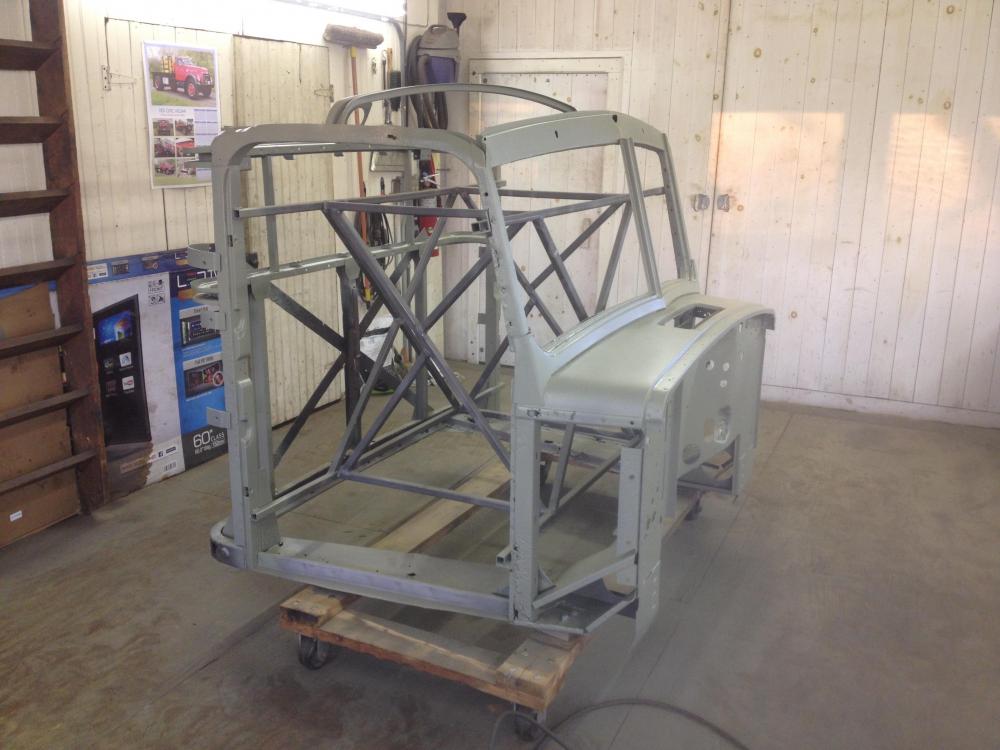
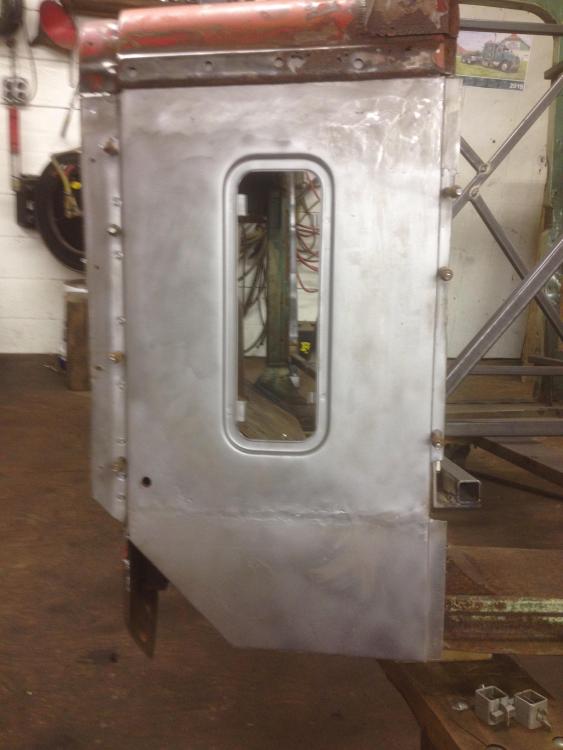
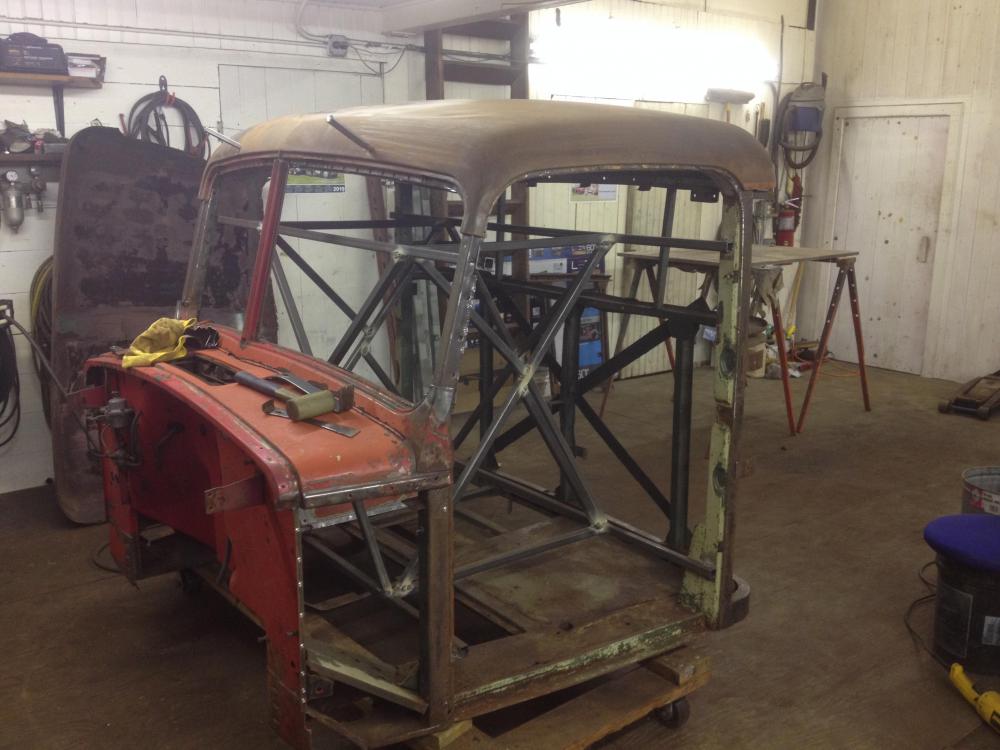
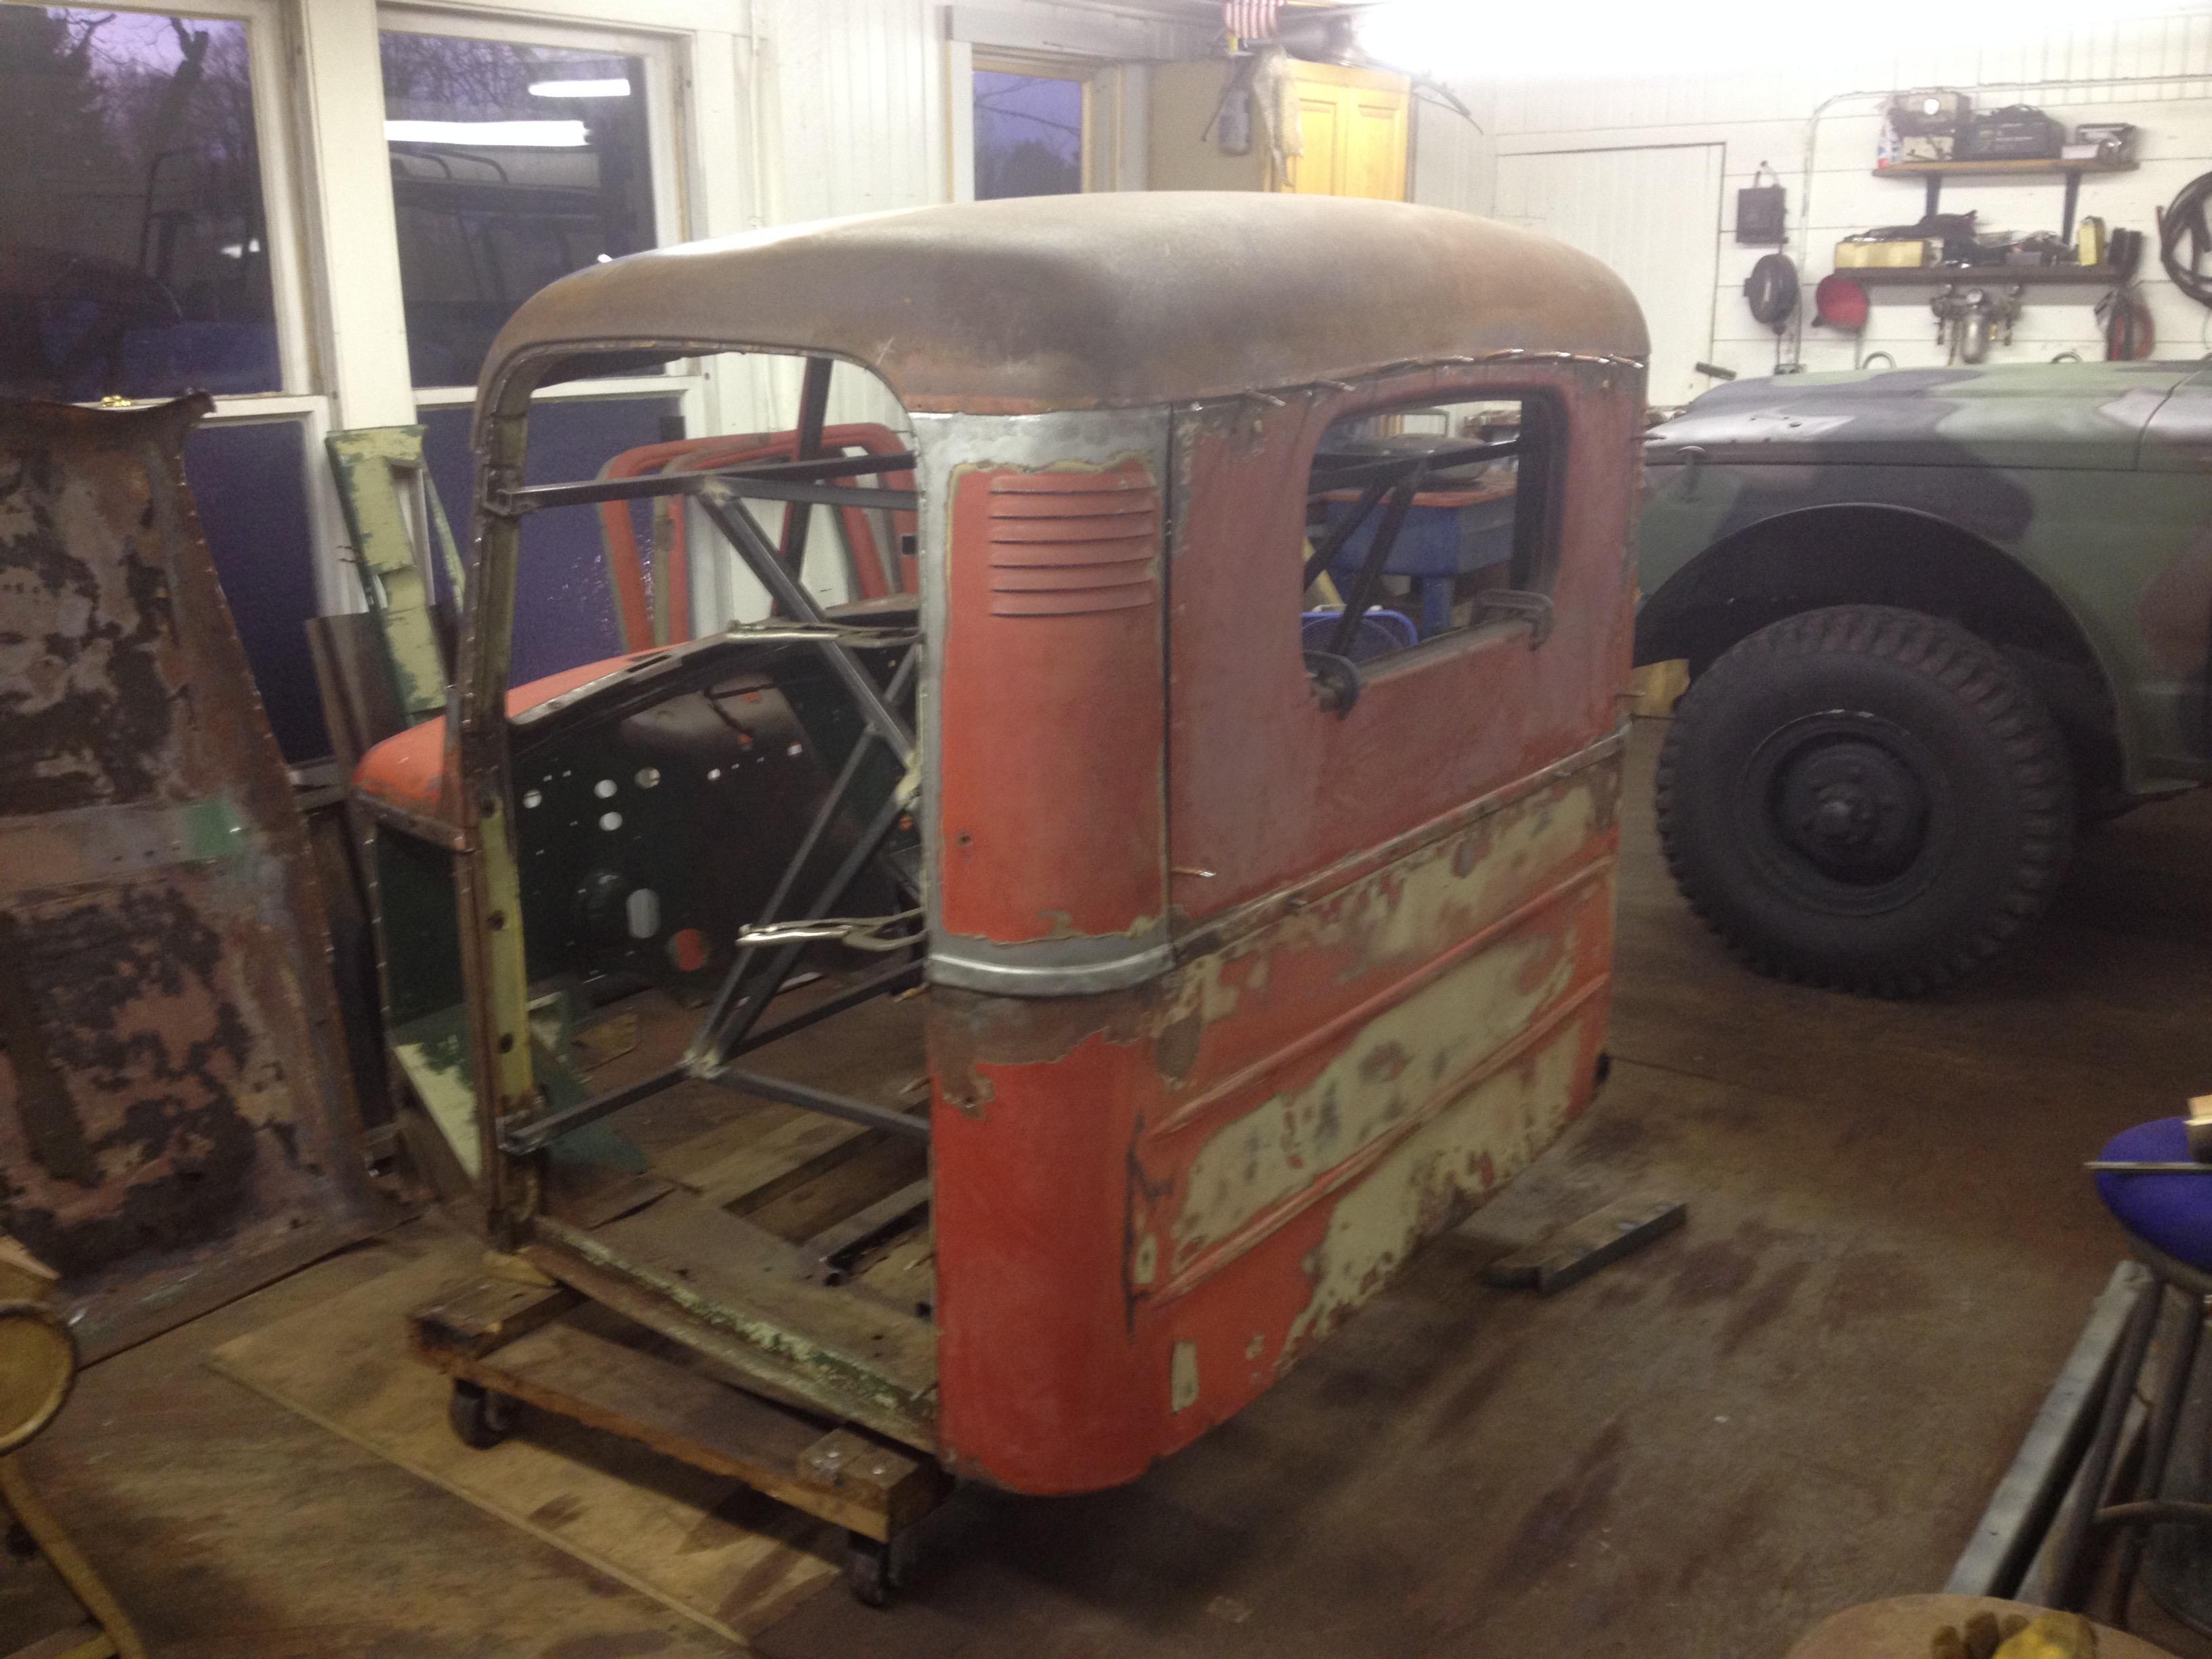
Slugging away at this cab. Test fit the "new" cab roof, had a local fab shop bend up some patch pieces for the cowl sides. Got those back today, he was fast!! Parts are still coming off and a big part of the floor came out today. The cage I welded into the cab is starting to come into play as I'm slicing away. I may have to slow up on the cab, as I'll need to get it to the dry stripper before much more comes off, as my roll back is in storage. Still surprising how much dirt and debri keeps coming out, even after the big steam cleaning I gave it. Probably swept up 5+ lbs over the last week.

-
5
-
23 hours ago, MACKTRUCKS4 said:
FYI, Doug no longer makes the stainless bumpers, just steel. I bought a steel one and the stainless grill guard two years ago for my B755. He said he will no longer make the stainless bumpers because they scratch too easy and are really hard to make because of that.
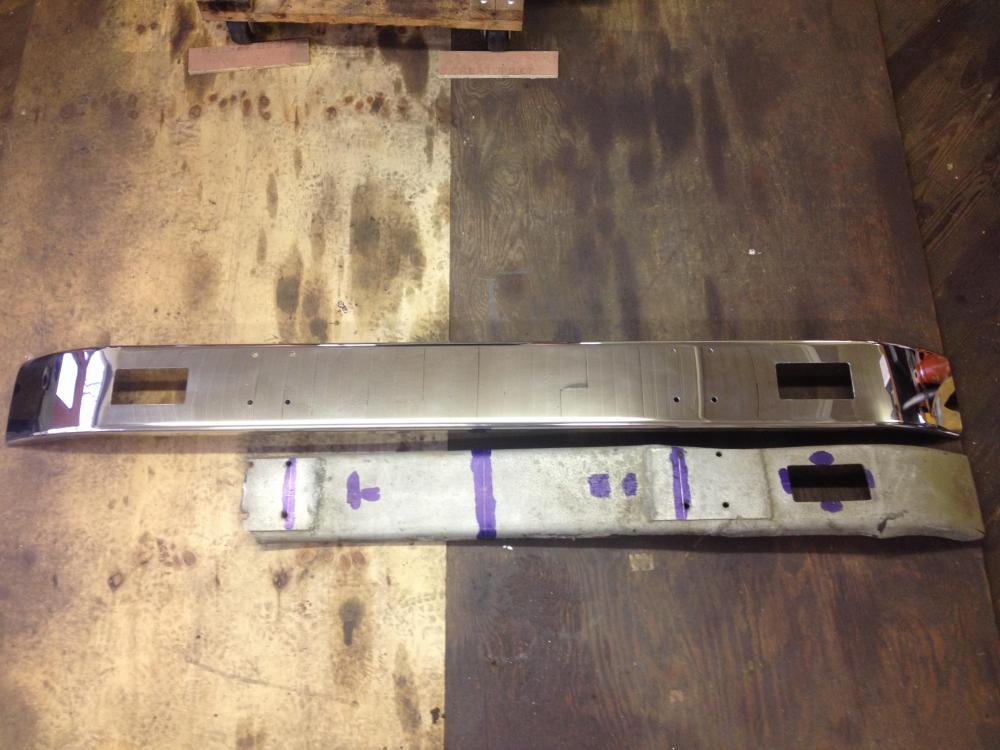
Good thing I didn’t mess it up while machining it up then! I have one of his steel ones on my B-42. They do look nice.
-
6 hours ago, Vladislav said:
Was it a bumper for a B-model or any other one you found with the dimentions matched?
Looks excellent. Nothing compares to polished stainless steel.
I bought it from Doug Fetterly about 16+ years ago. He makes and markets repro steel and stainless B model bumpers.
-
- Popular Post
- Popular Post
1 hour ago, h67st said:You made that bumper? Looks great...I wish I could do metal work like that!!
No, I bought it years ago. Just machined the footsteps and mounting holes from the remnants of the original. Took a little ingenuity to support it while working on it. Then I rebuffed it.

-
3
-
- Popular Post
- Popular Post
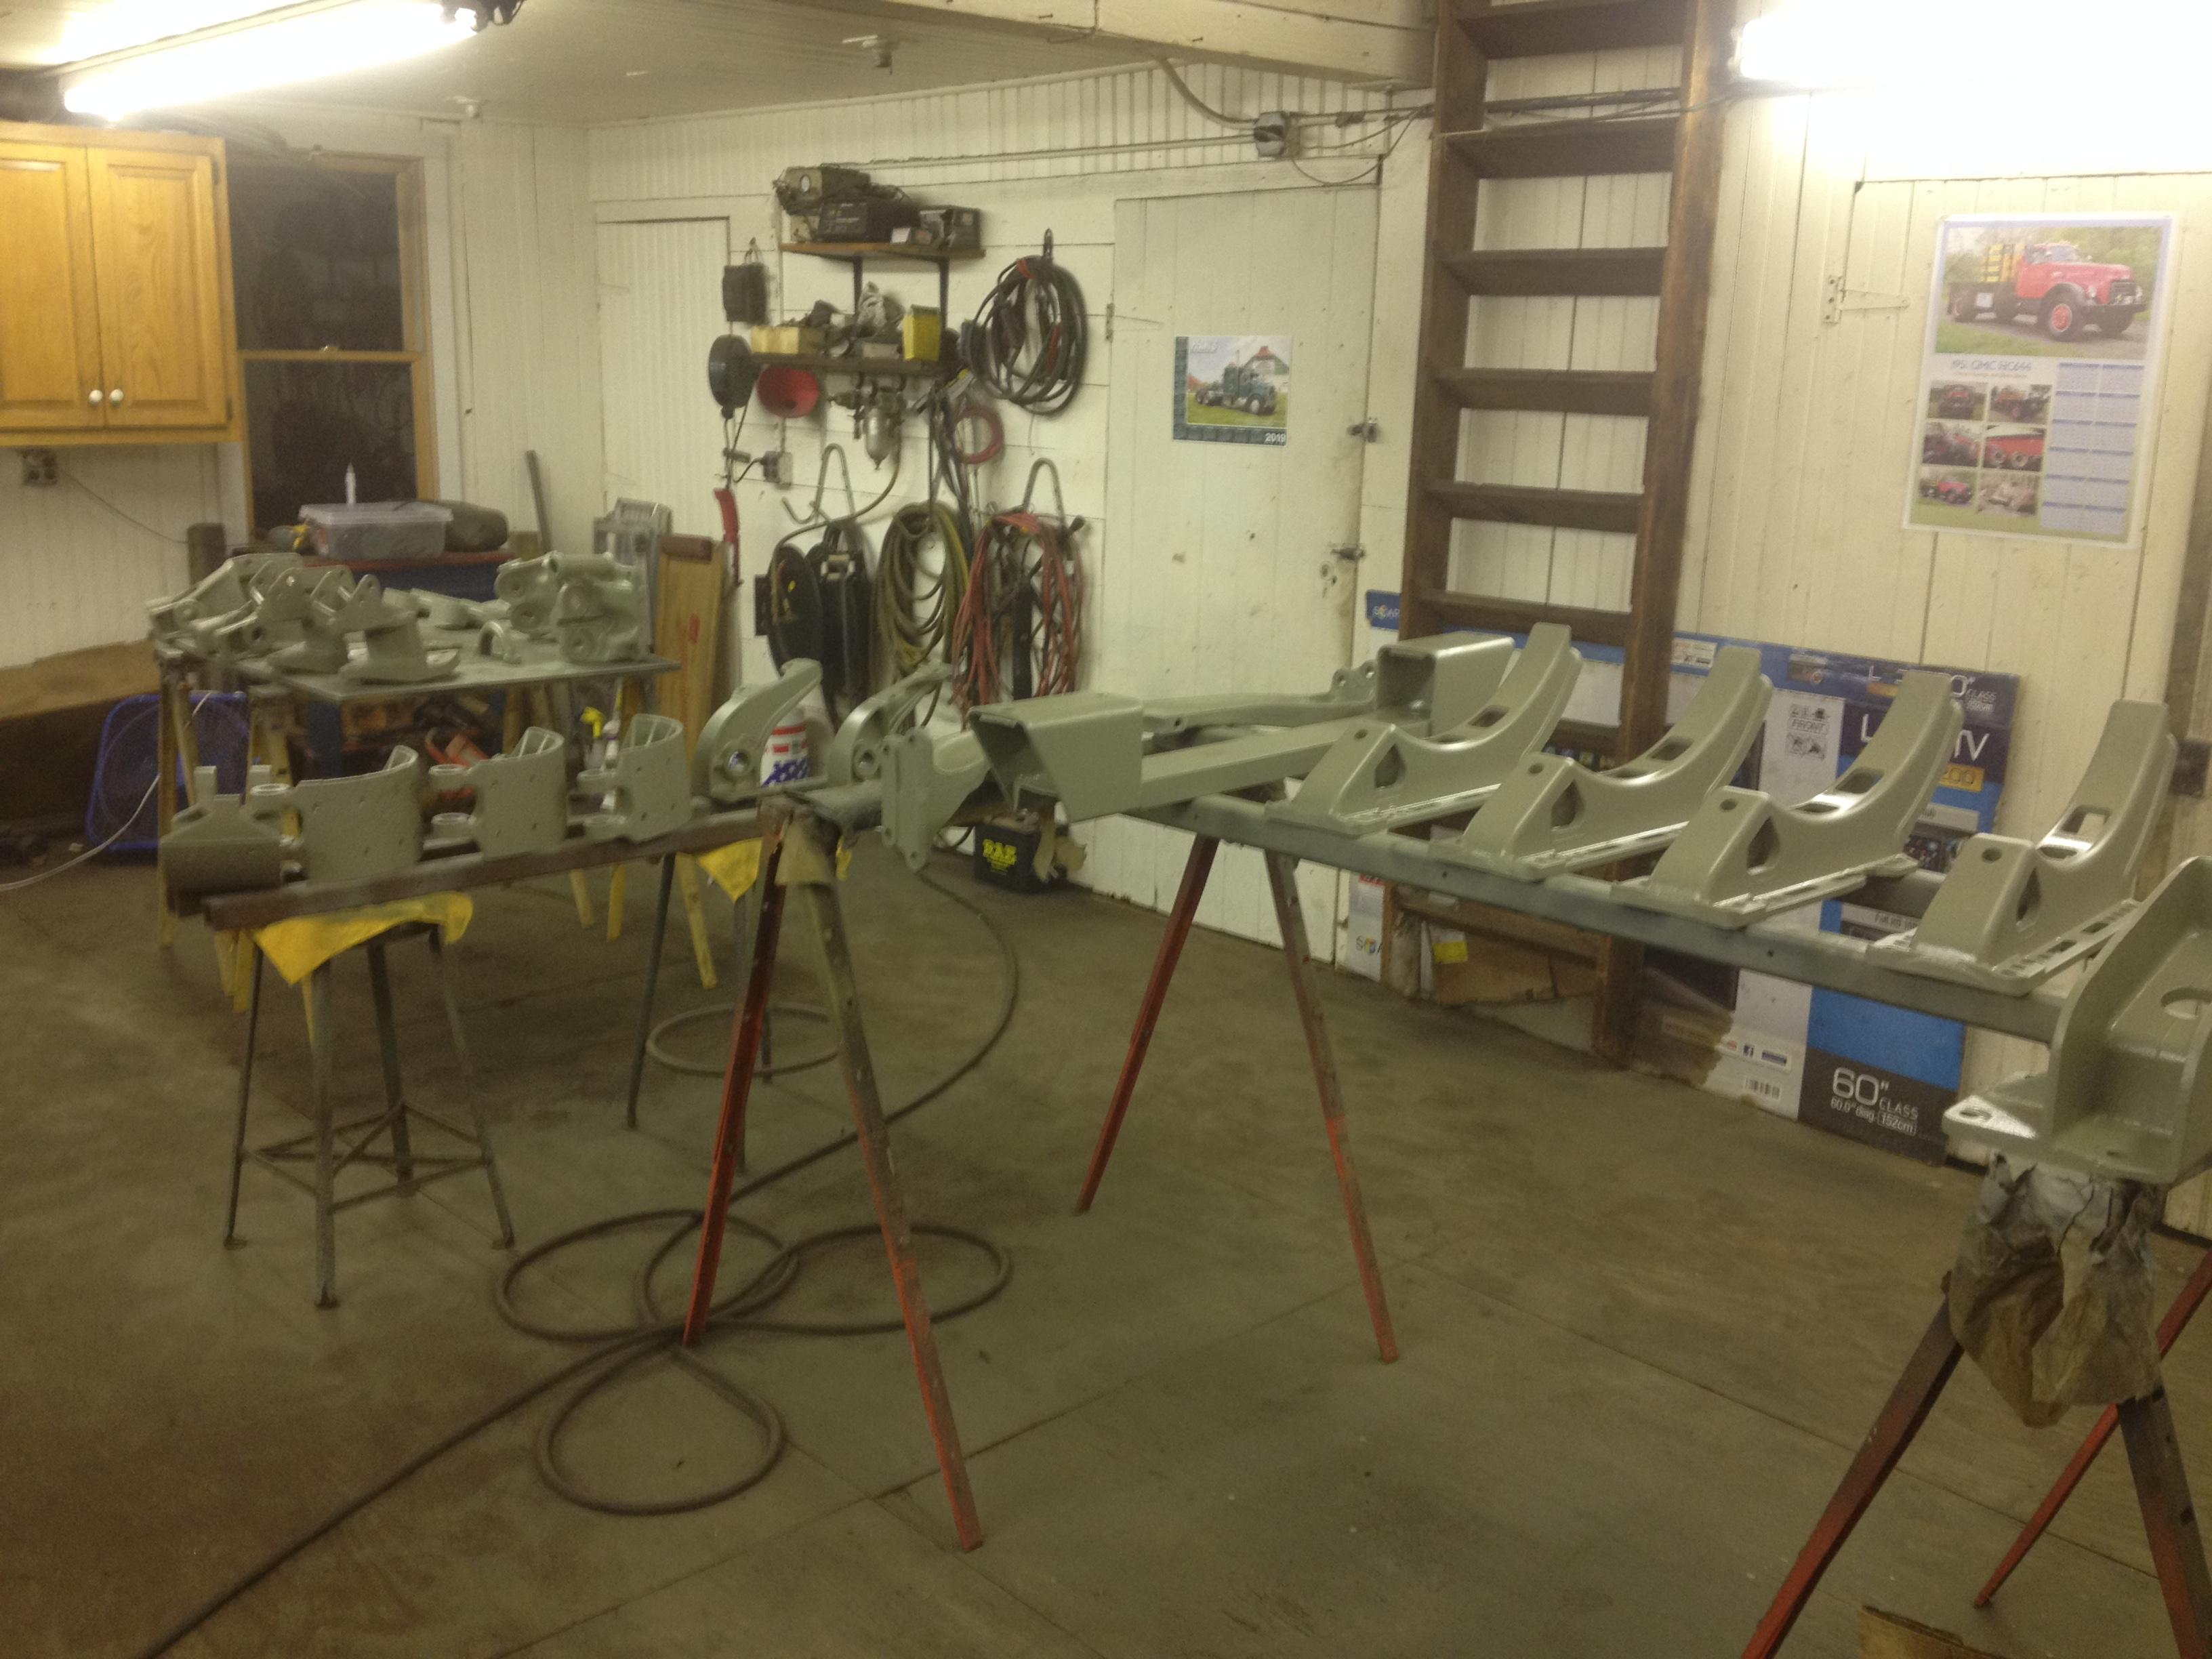
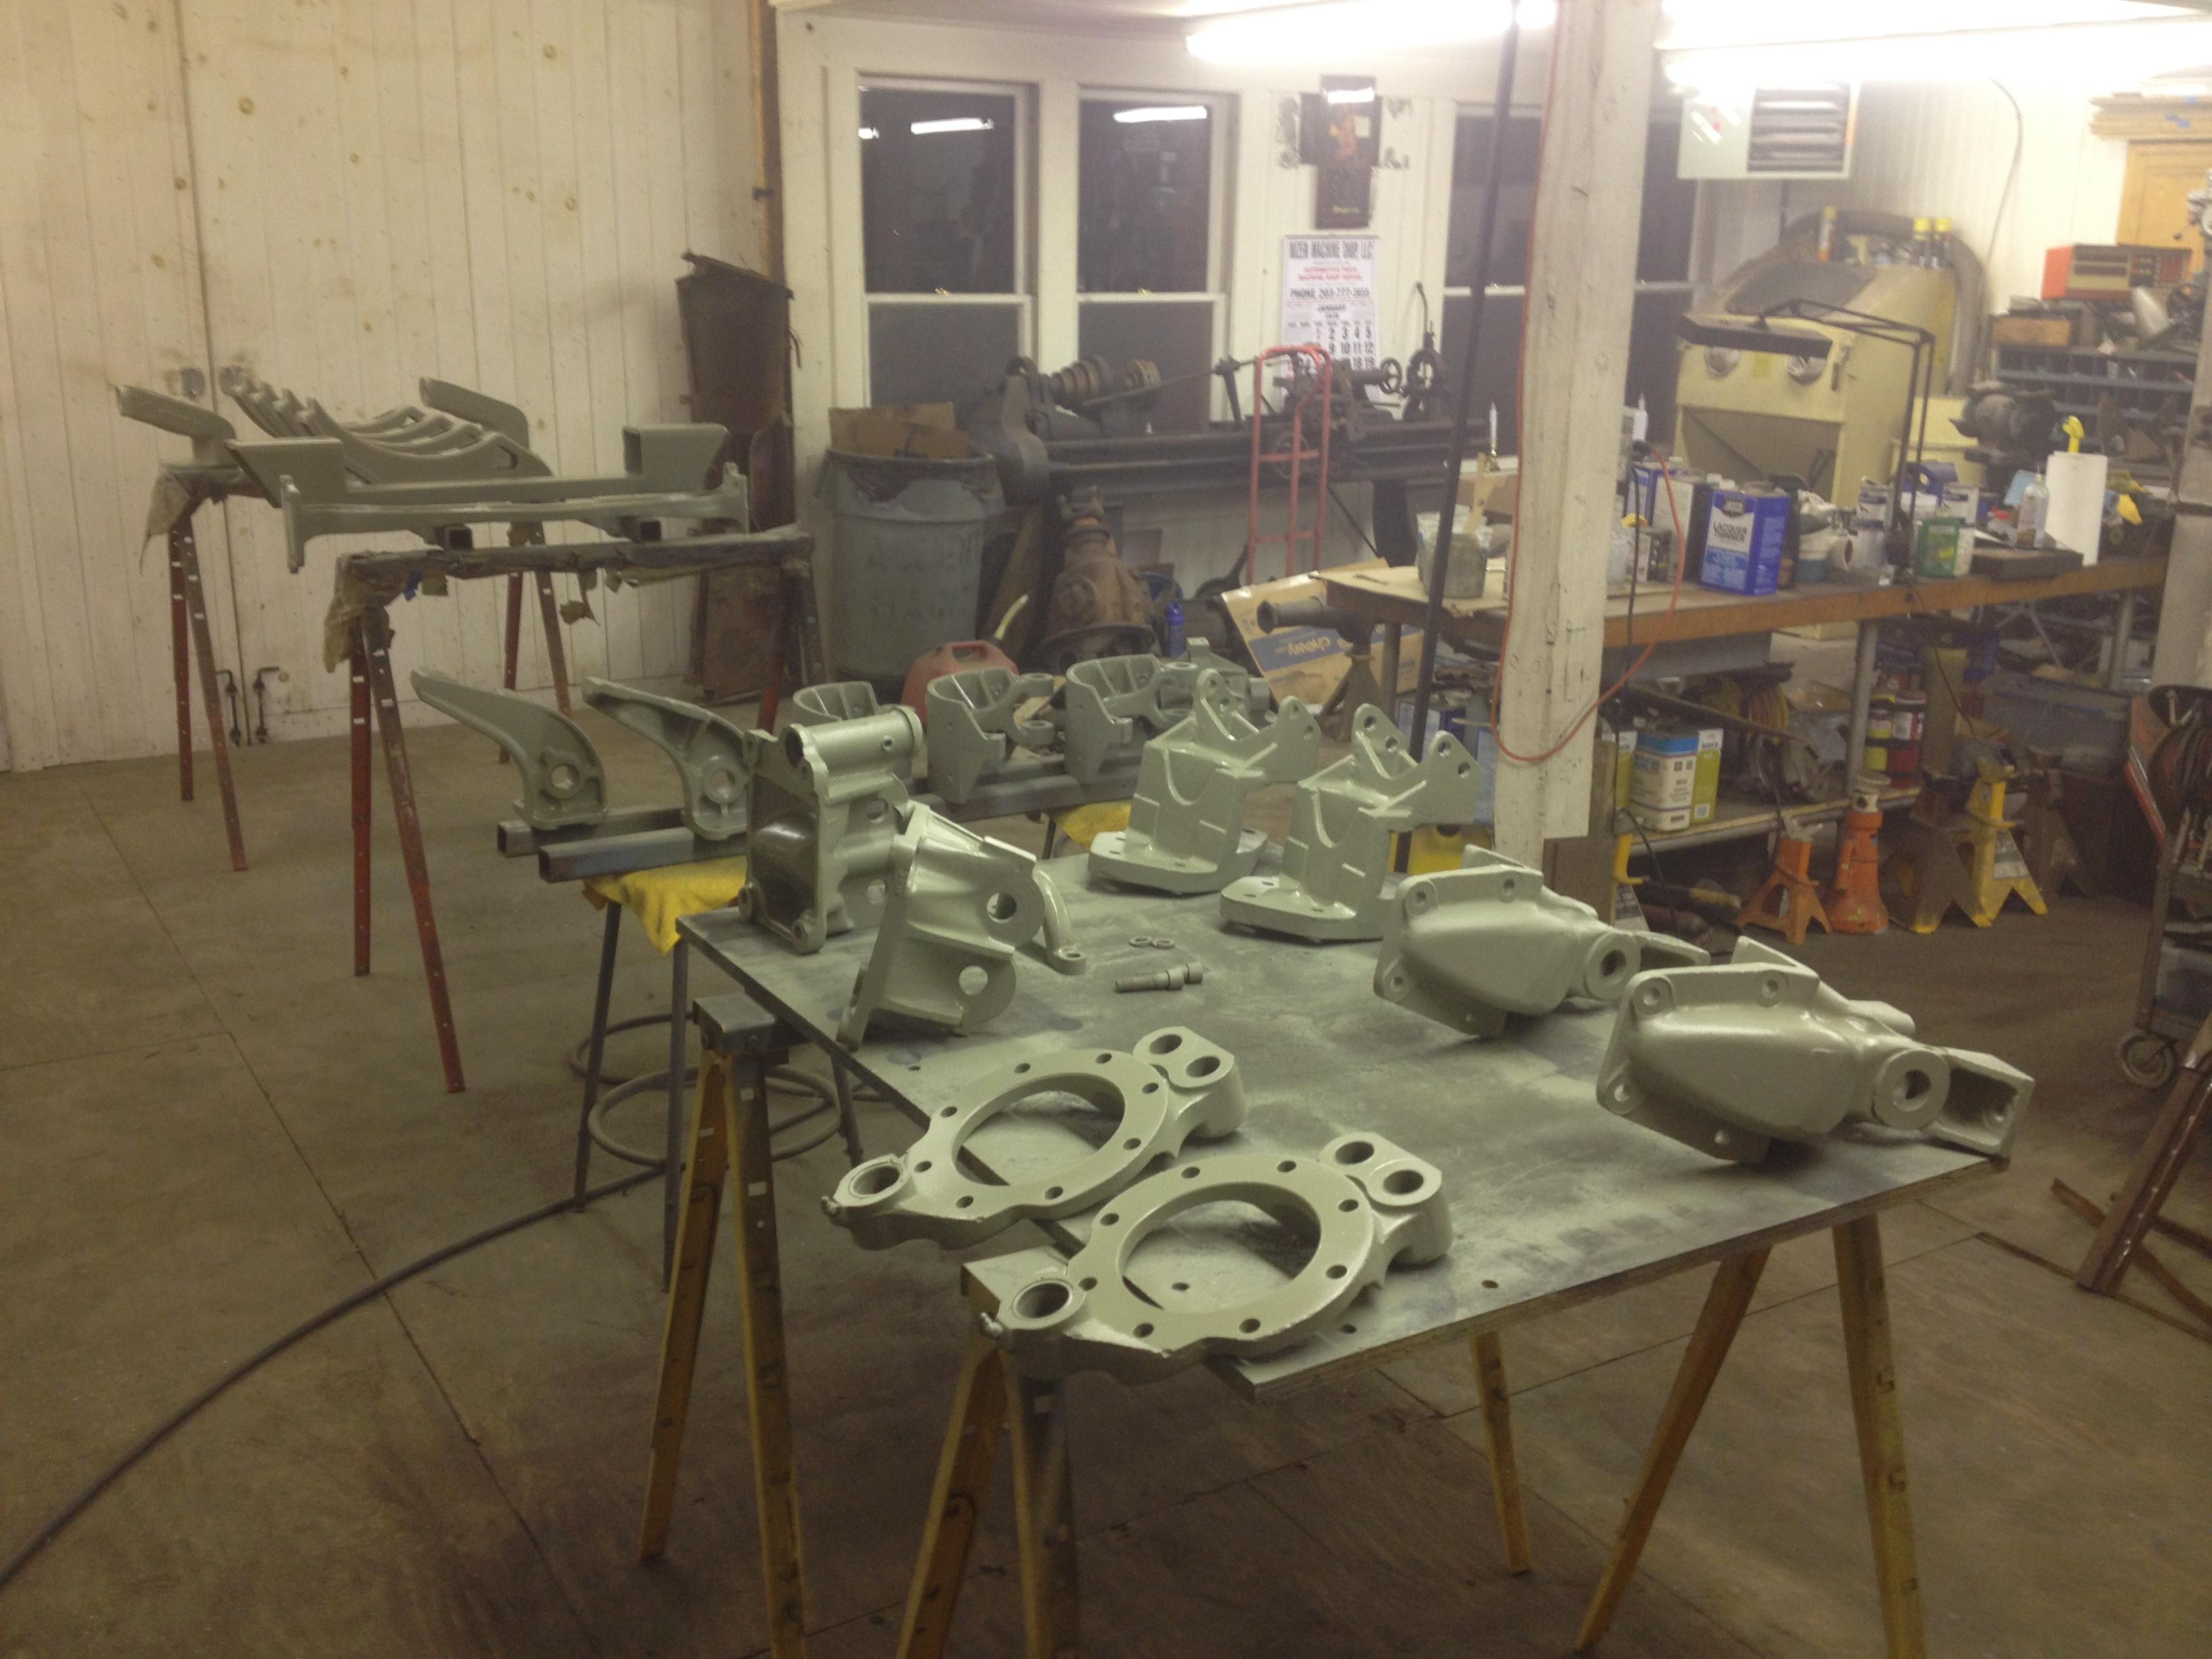
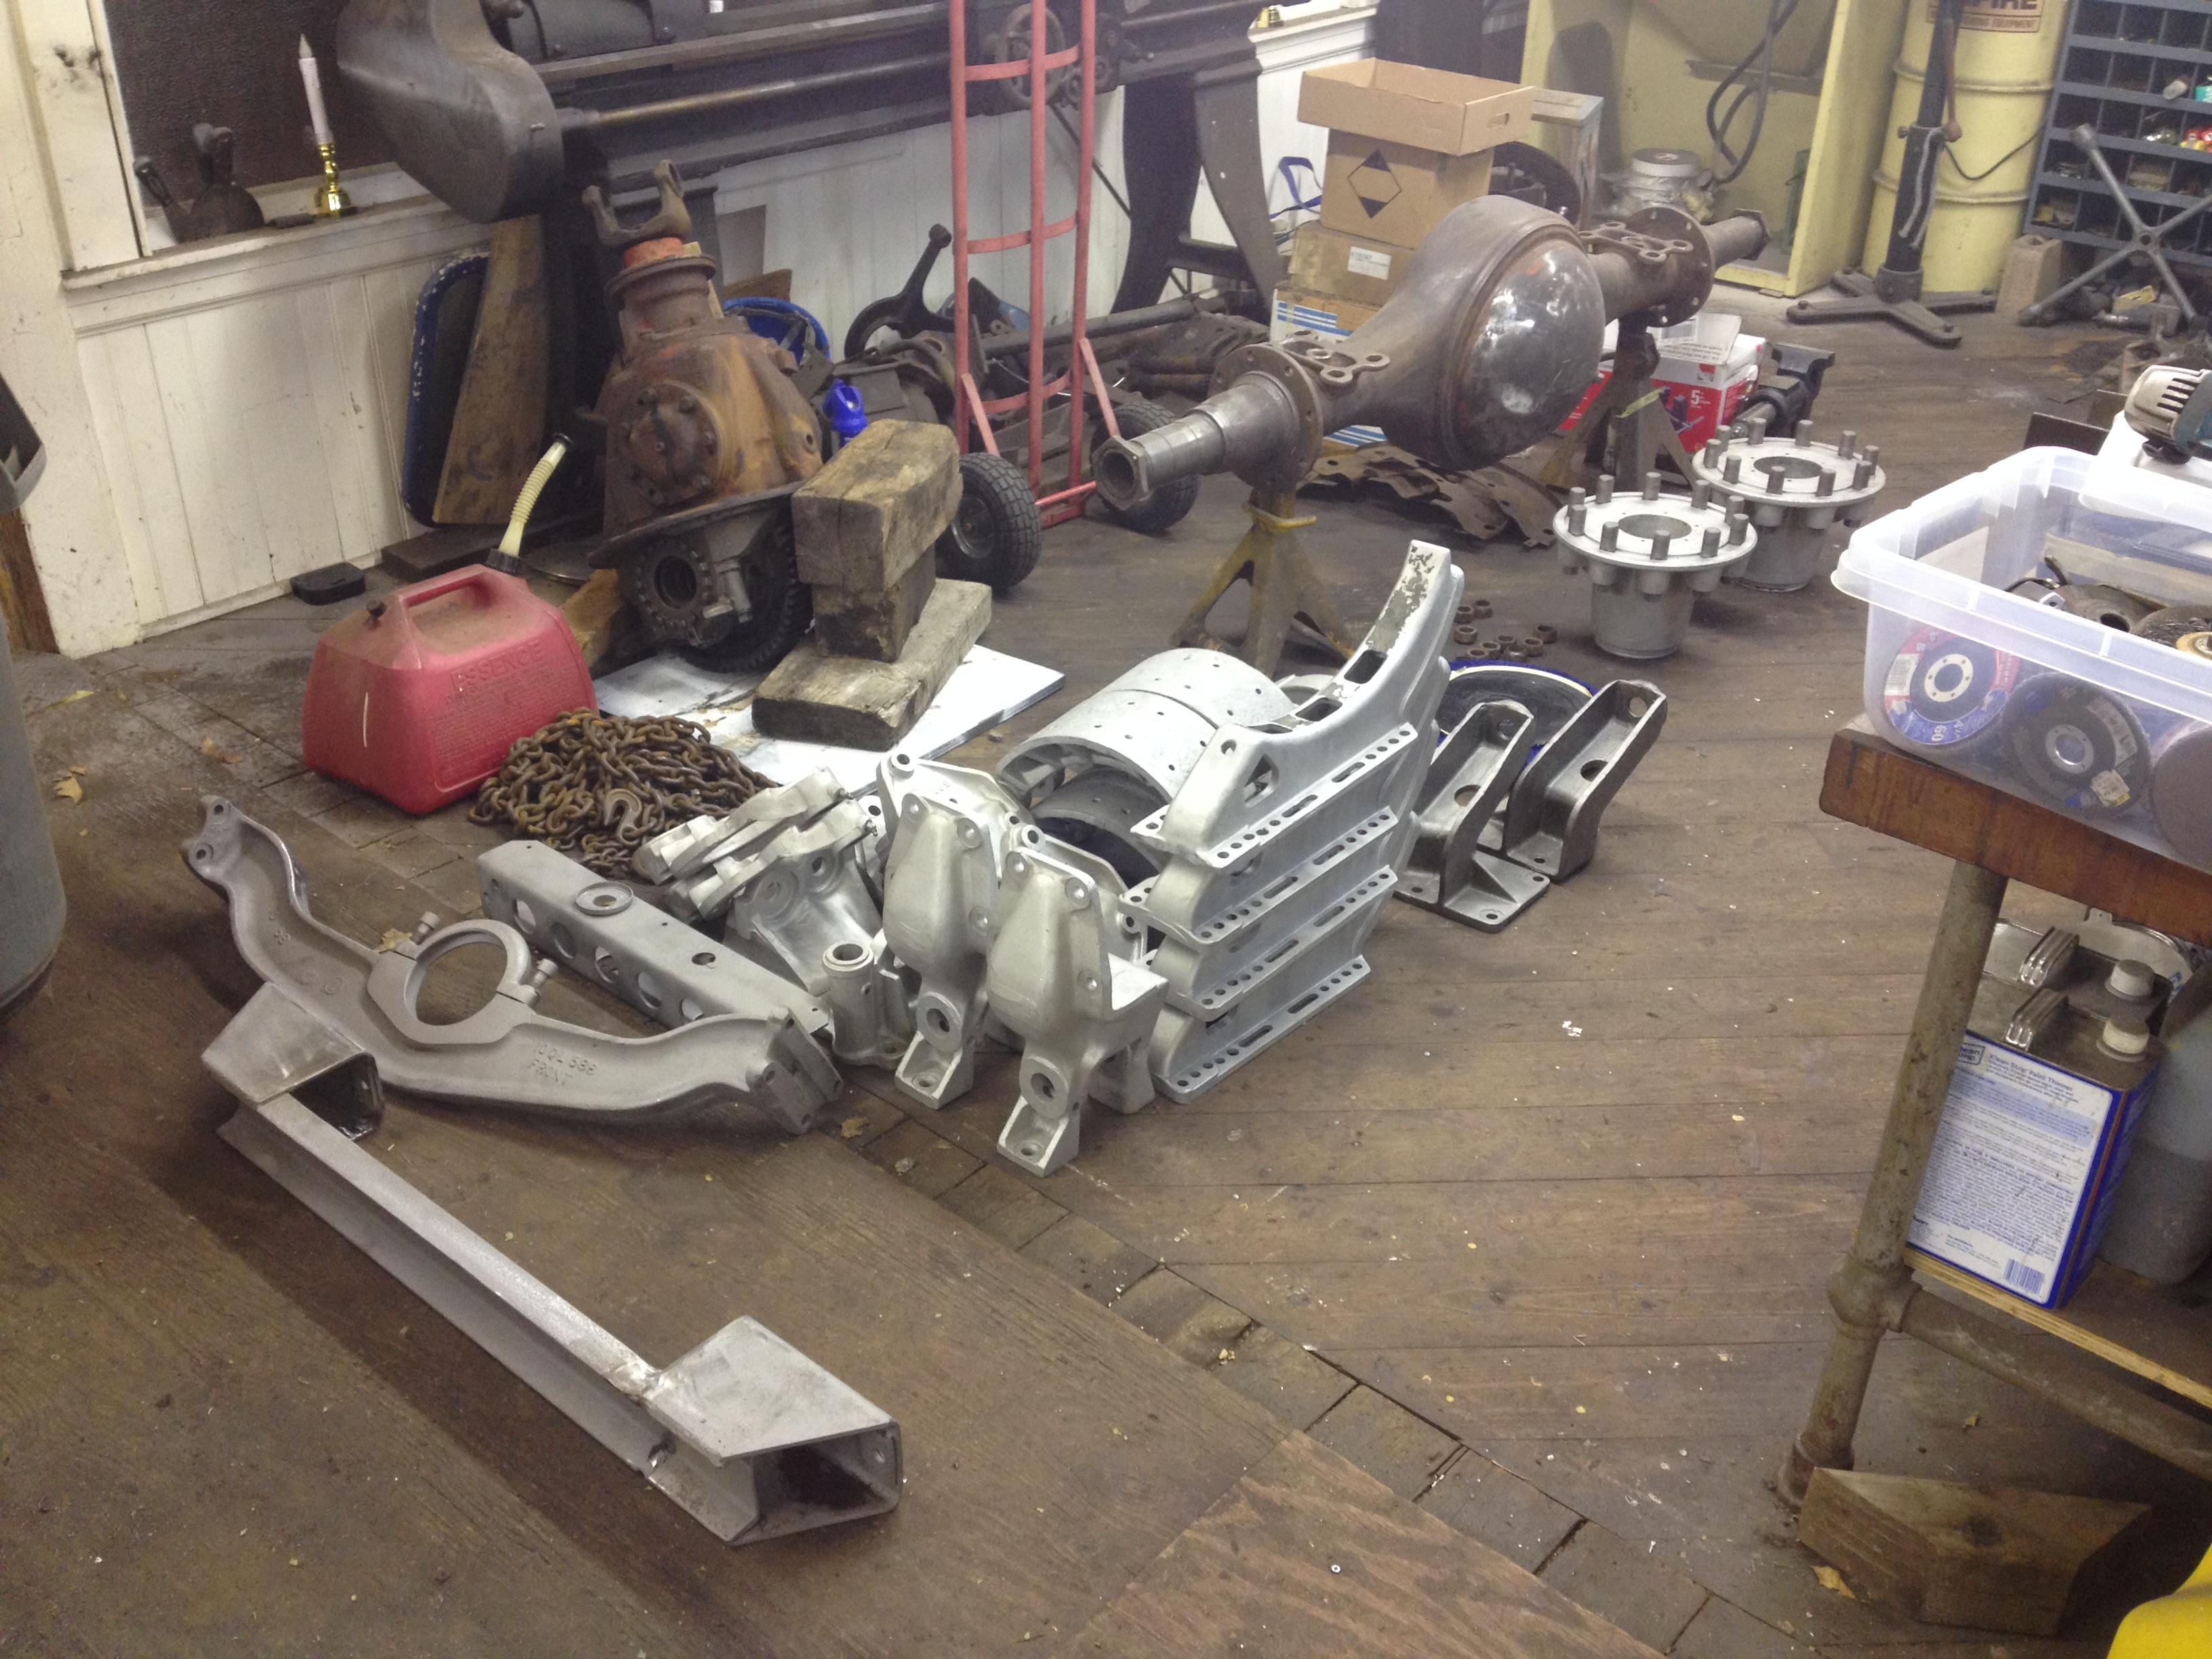
Primed all the repaired parts, cross members and mounts for the frame and driveline. I'll store them until I'm ready to start assembly. Due to much improved working hours, this truck could be back on the road in shorter time.


-
3
-
- Popular Post
- Popular Post
3 hours ago, terry said:That is a bare bones cab!! Should look real good when you are done, like a new truck!! terry👍👍👍
Hopefully, It will. After I repair the lower cab and a few other areas, I'll start repairing the panels one by one. Then start the reinstallation. Just going to worry about it one panel/repair at a time. It's kind of daunting looking at it as a whole. This is the worst part of the whole restoration.
-
3
-
- Popular Post
- Popular Post
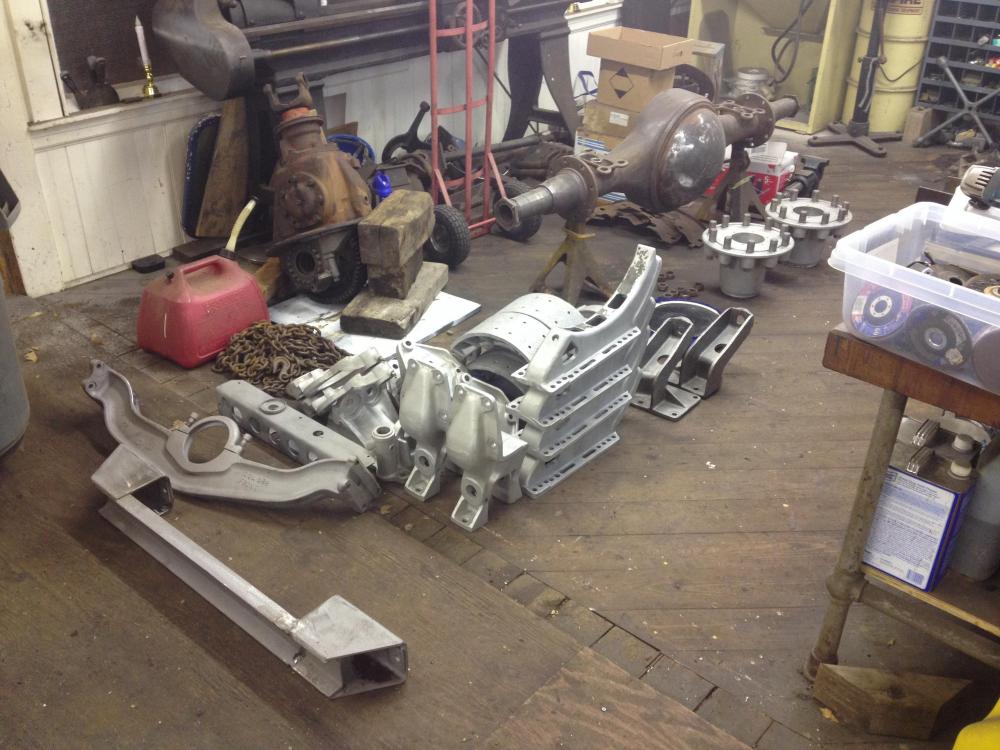
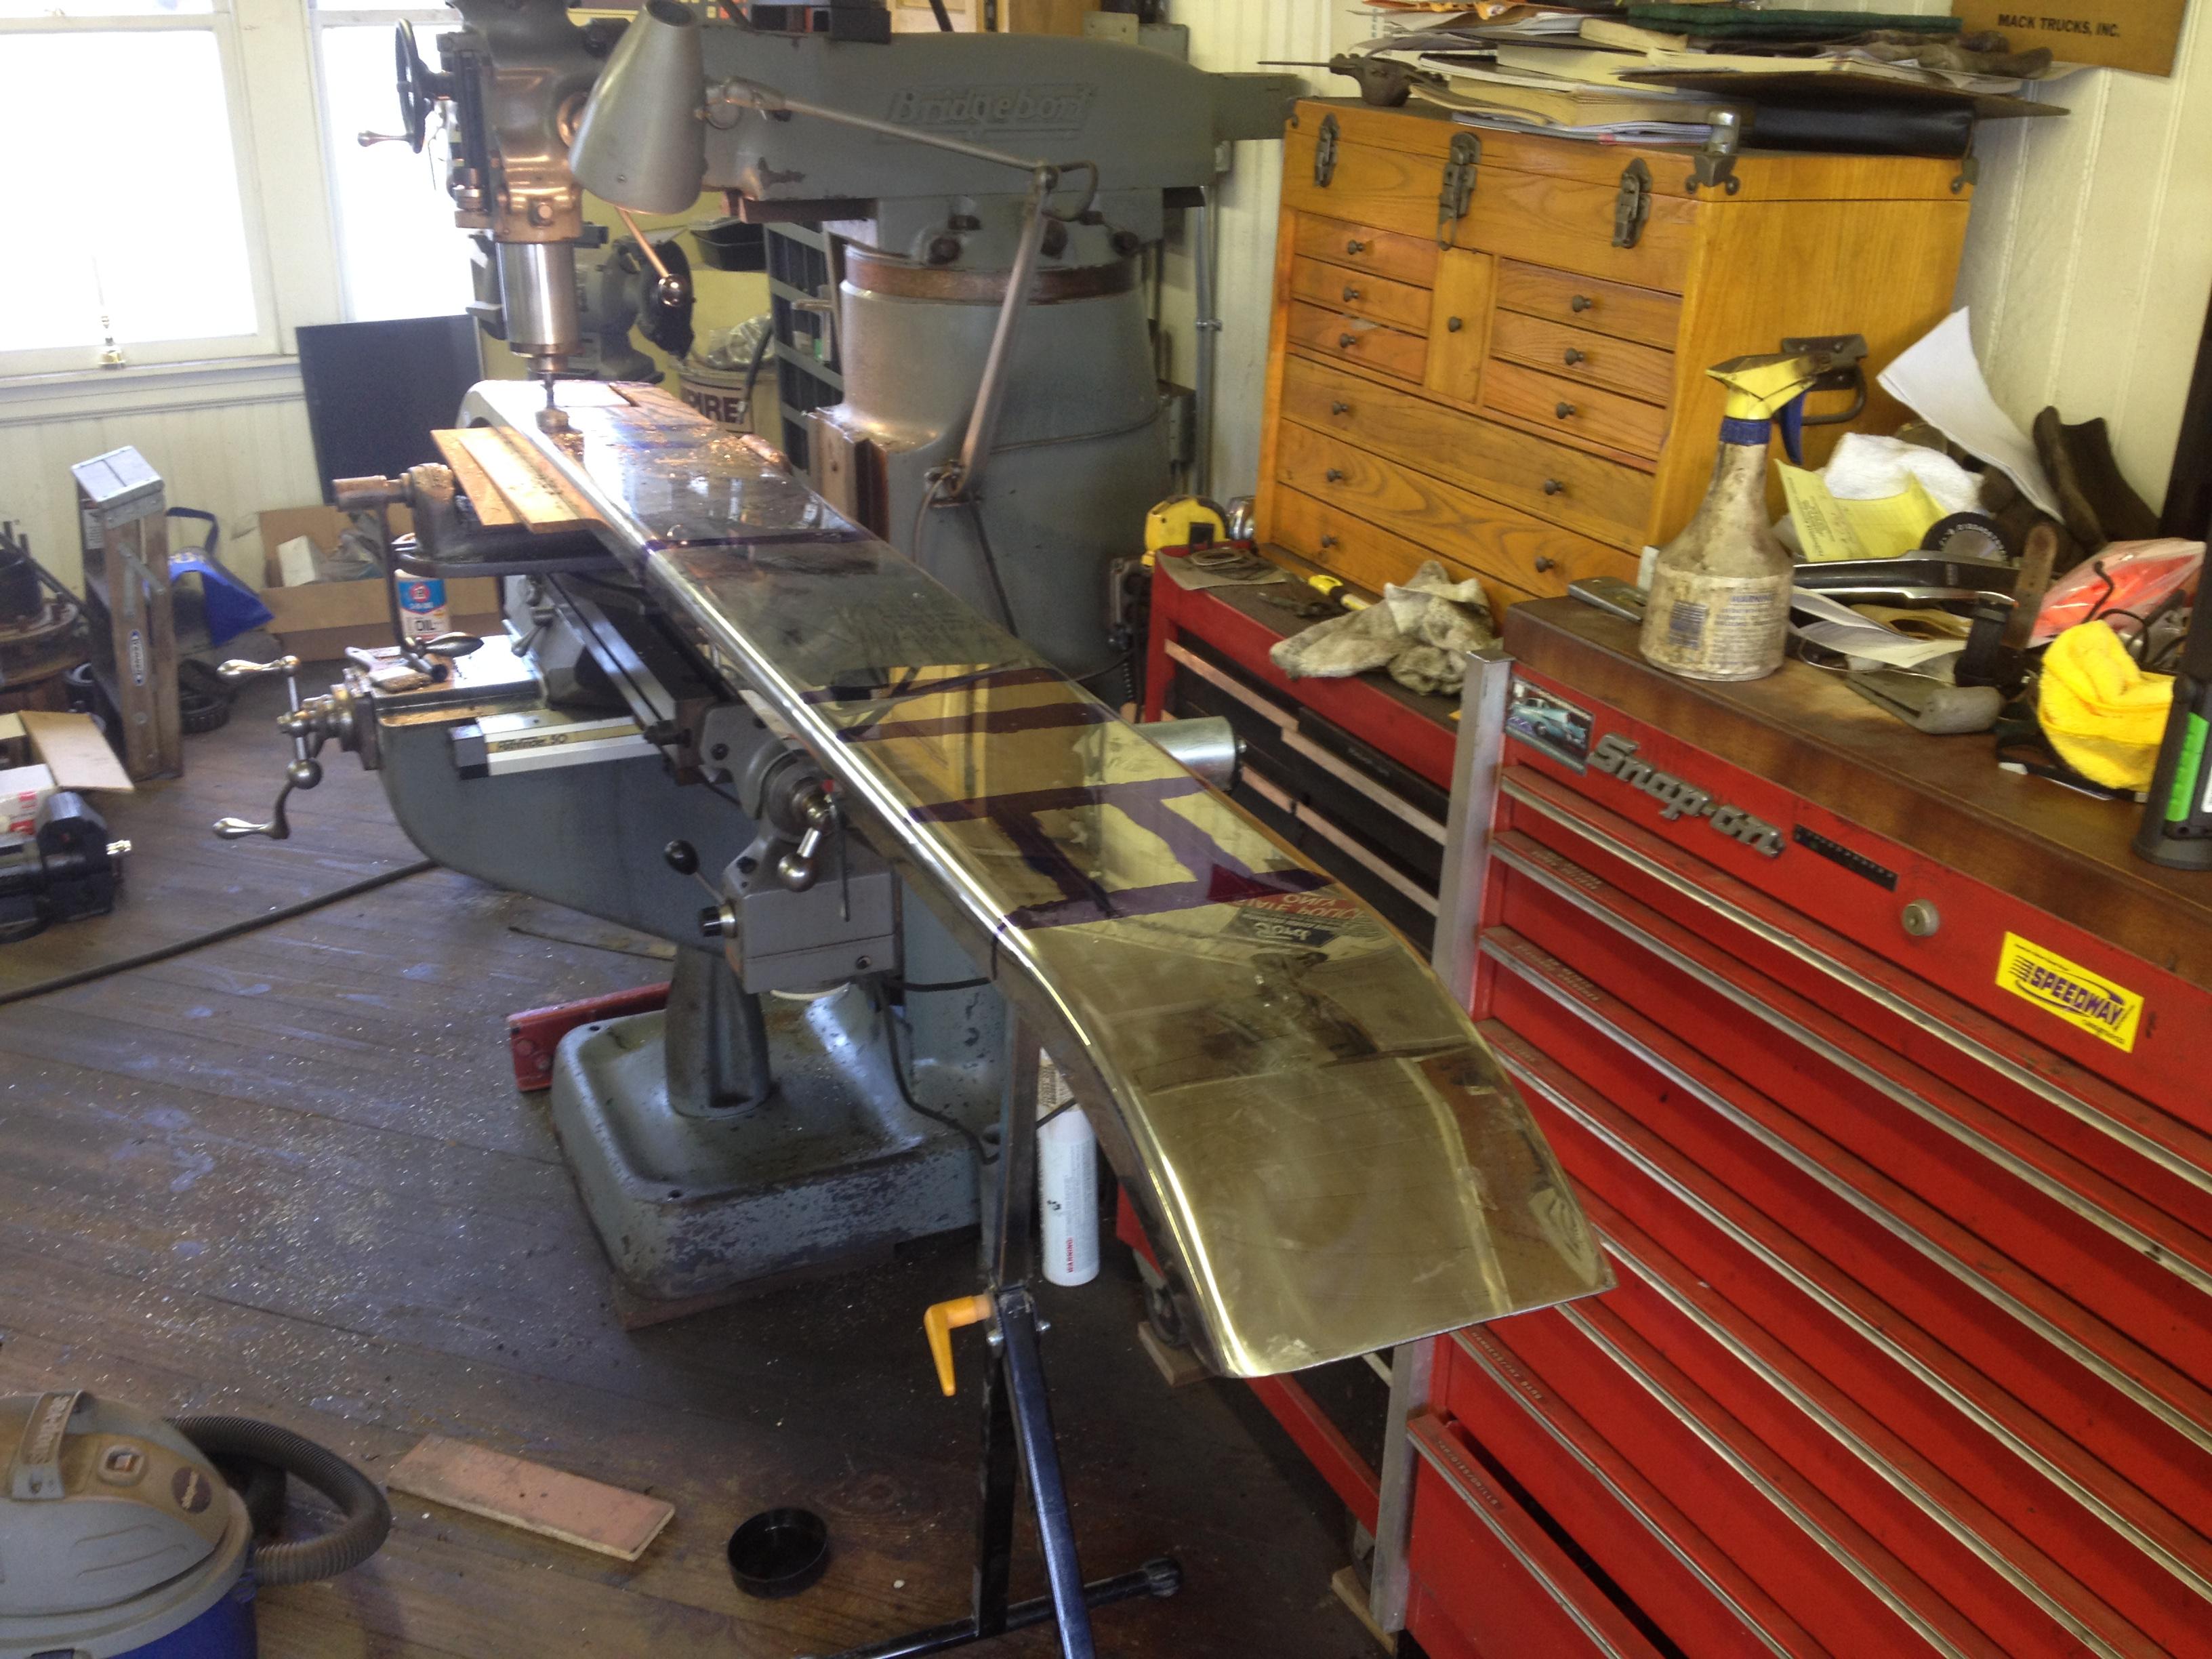
Back at it again. I've had some consistent time to devote and have gotten a lot accomplished. I had all the aluminum frame castings repaired where needed. Then I machined all the repairs and replaced all the holes on the Bridgeport. While I was doing that work, I made up a polished stainless bumper to replace the mangled aluminum one. Finally, welded in about 60' of 1" square tubing to brace it as a removed the final panels for repair.

-
6
-
But it has the rare sun roof factory option!! It's worth it just for that, in somebody's wild dreams.
-
1
-
-
3 hours ago, harrybarbon said:
Matt, no need for the dynamat, apply the 2 lizard skin products all non painted areas both inside and out, including both sides of the firewall. On the engine side of firewall, we applied 1 coat of the 2 products then light sand to smooth it out (lizard skin when dry is like a golf ball finish) then a second application to fill the golf ball type holes, then light rub back then we applied hyfill which we added about 35% flex additive to allow the hyfill to be compatible with the lizard skin (it is flexible - hence it's sealing quality and wont crack when dry) and did same with the hyfill a rub back and then another coat then paint undercoat with the 30-35% flex additive and same again with the top / final paint finish - we achieved result on the engine firewall side as the finished external paint and now 3 years since painted no cracking of any kind on the fire wall and withstands the heat from the engine, the sound control is good check out the lizard skin video the guy does a sound decible rating
I think I might go that route, I like that you can paint overt it.
-
38 minutes ago, Red Horse said:
Nice- I won't look for it at Brooklyn this year-maybe next for sure😎
Hopefully! I will have to have some small parts fabricated locally, but I have all the major pieces.
-
4 hours ago, Red Horse said:
Nice Matt-but I assume when you talk about "replacing" sections this means you are fabricating all these pieces-no donor involved?
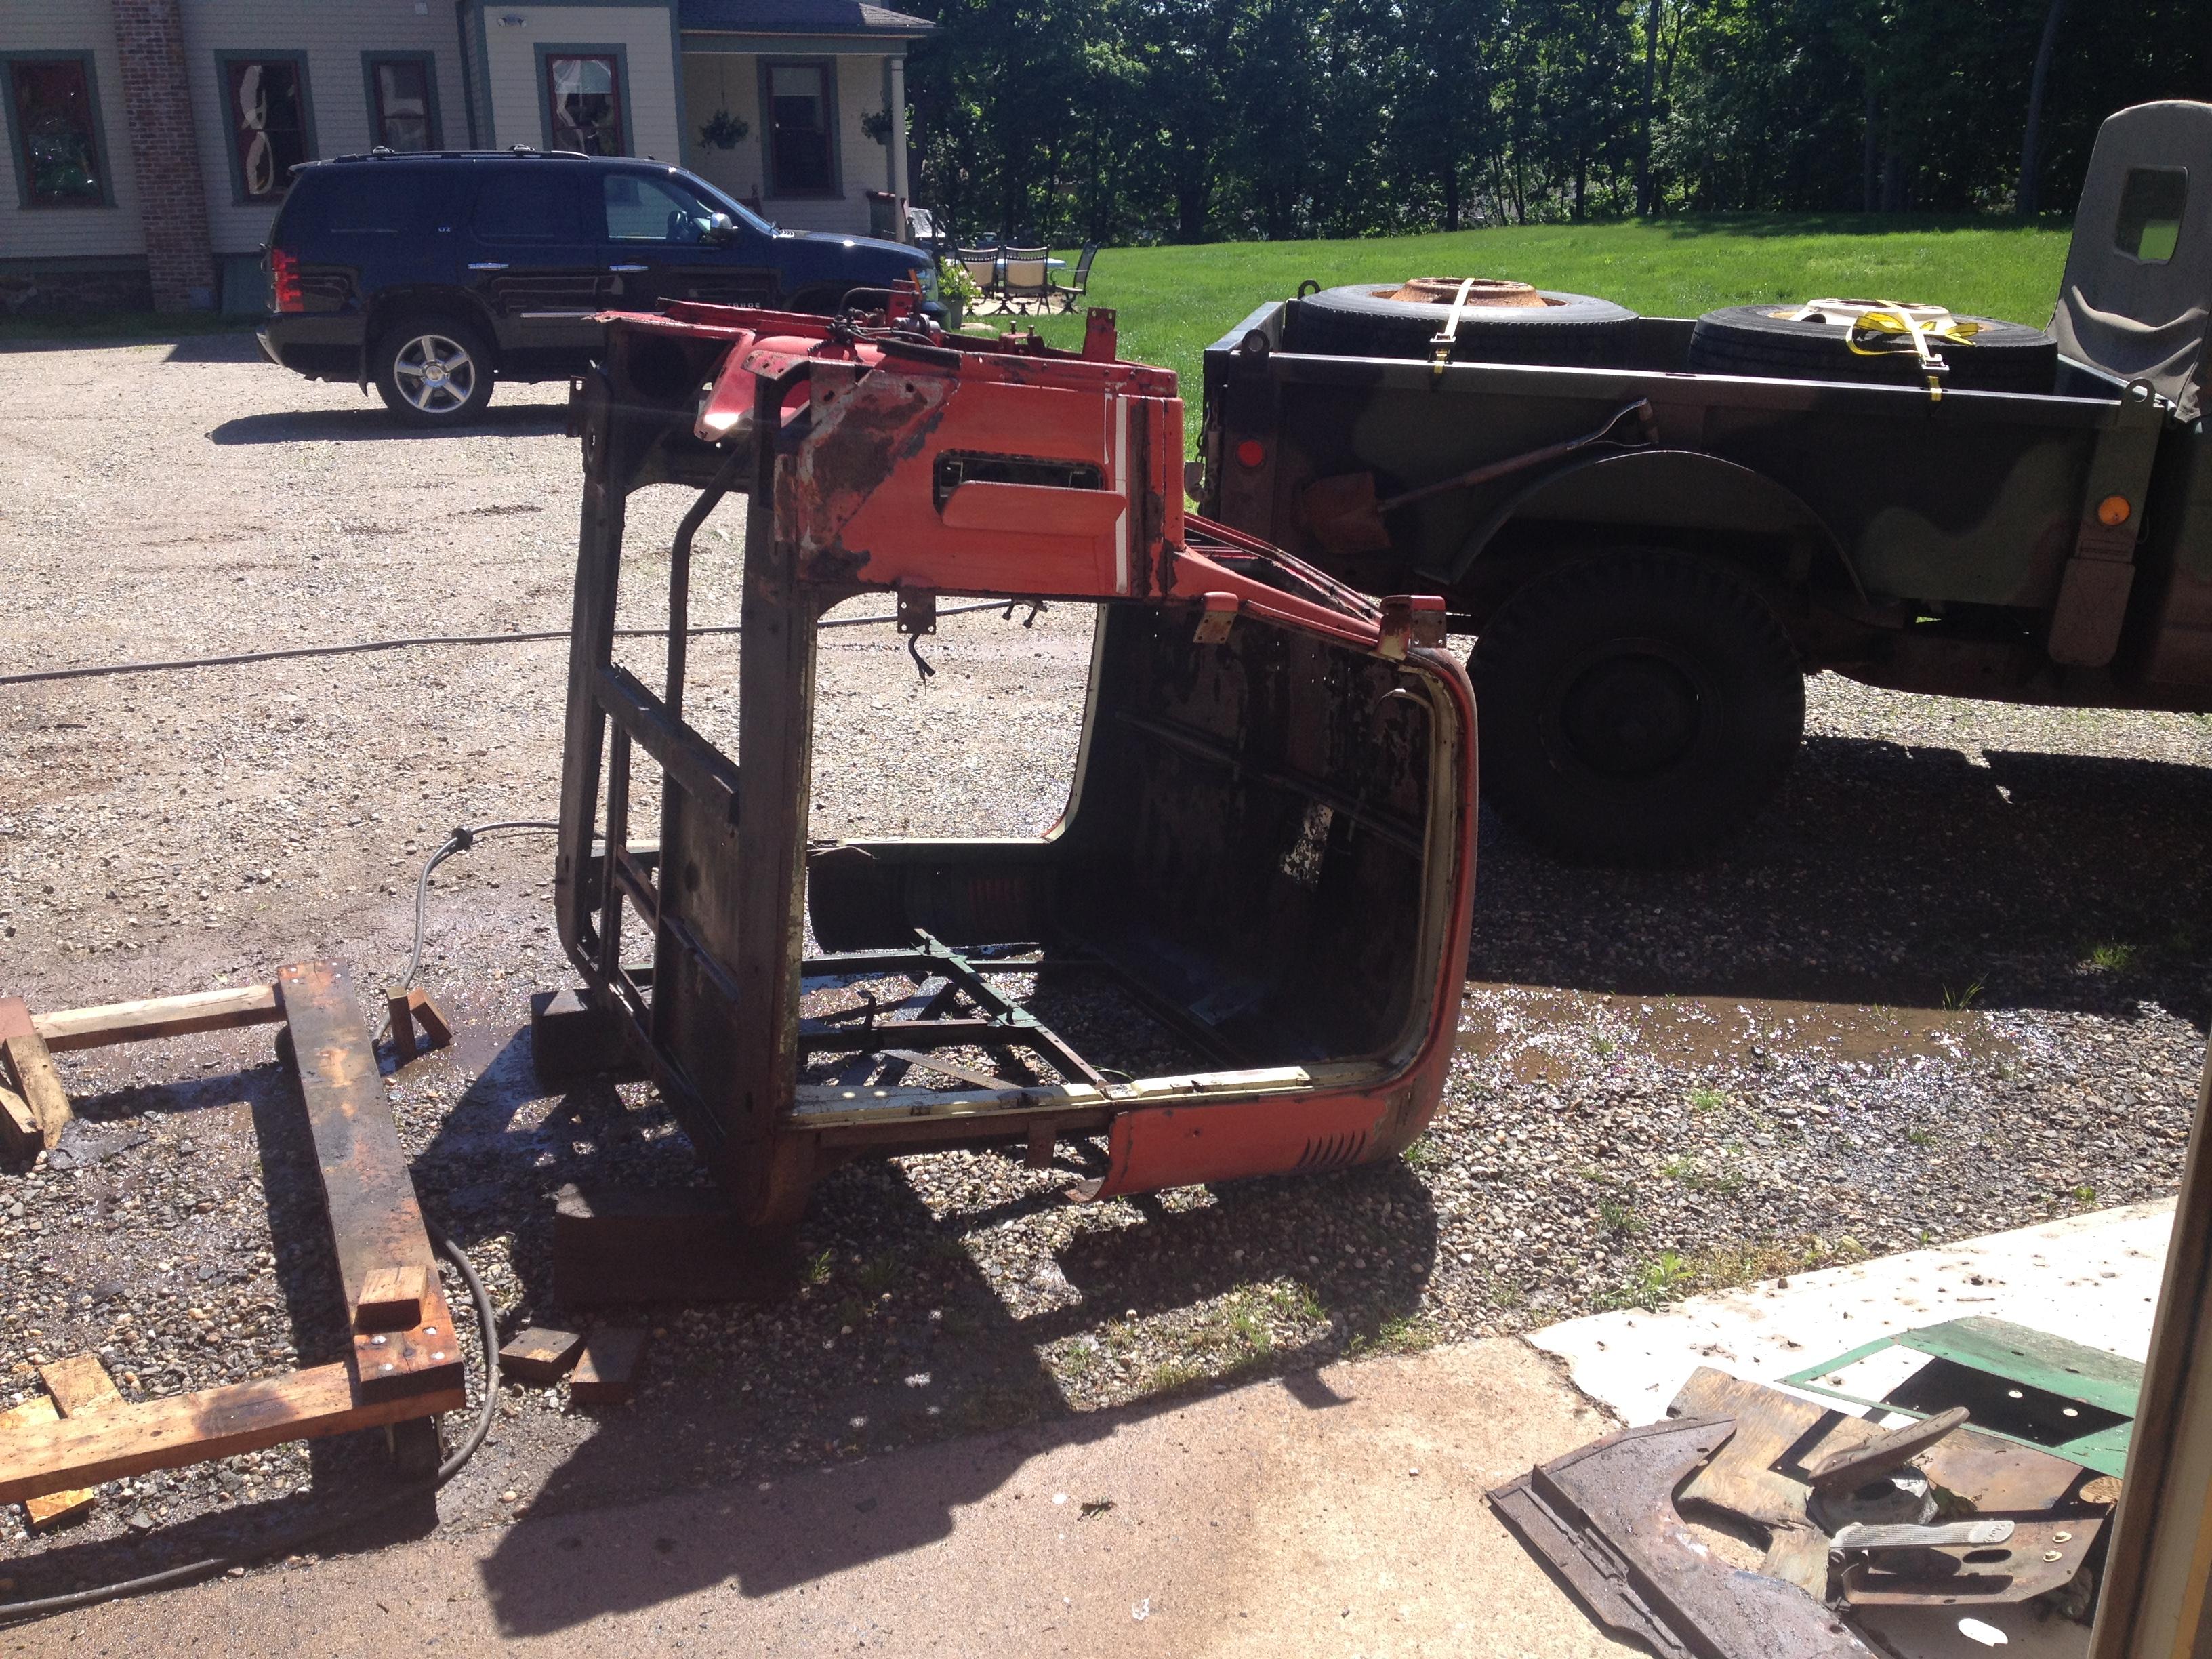
I've collected up numerous pieces that are re-production (sills, cab back) and a lot of donor pieces. I was lucky enough to have a friend give me a Bridgeport, Ct fire truck cab. It was really gone on the bottom end but all the upper metal was good. I carefully cut it apart and was able to get the cab top, under structure for it, cowl and windshield area.
-
1
-
-
2 hours ago, harrybarbon said:
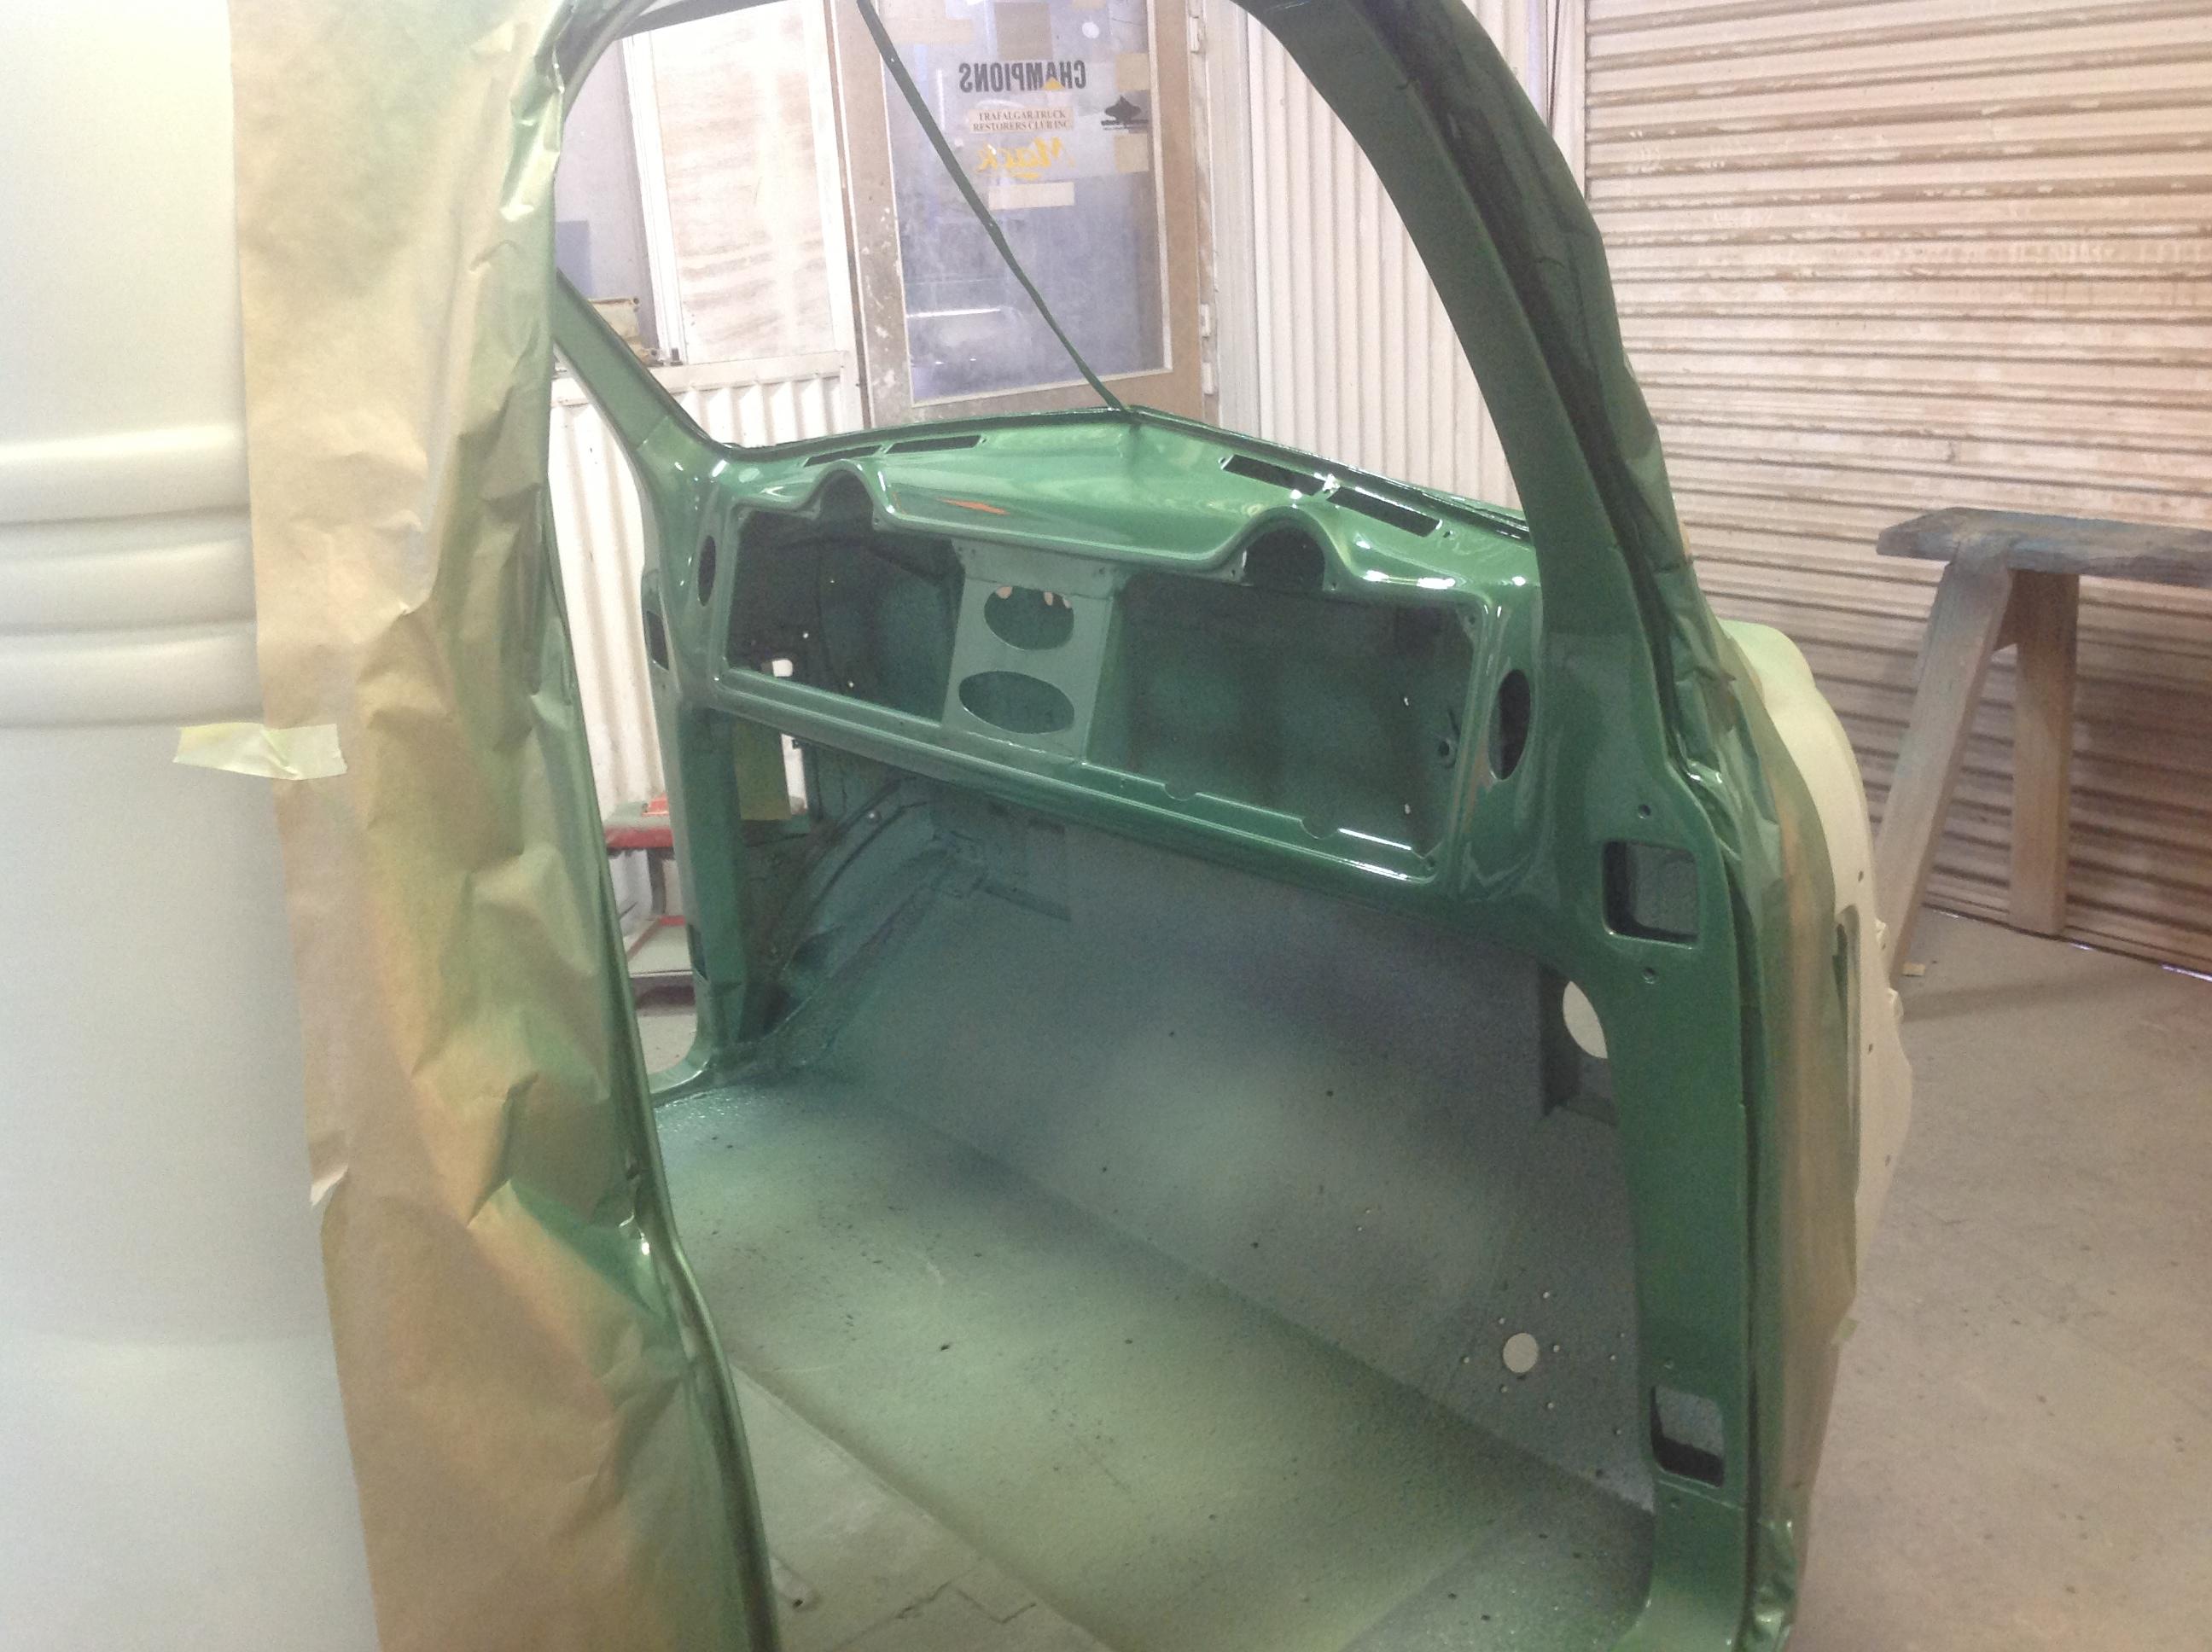
Great effort Matt, congratulations for your determination. Considering the near complete refabrication of the cab frame and panels work you are doing, for long term rust and sound and thermal protection/benefits, you may like to have a look at Lizard skin. We used it throughout our B model rebuild as have others restoring / rebuilding their Macks. It is easy to apply and being a water based non toxic liquid paste it will flow into all joints, cracks, corners and pockets of the cab and frame, resulting in 100% seal/protection. It dries quick in warm weather, and you apply no more than thickness of a credit card. If you apply the 2 lizard products, first sound protection and then the original lizard skin you will achieve the best result. And you also should apply inside the door cavities and walls, especially at bottom inside of the doors where water dust and moisture combines. Pictures of our cab and door with the 2 products applied, sound control first and lizard skin on top - must be in this order. We also did underside of the cab, engine side of firewall, underside of fenders and hood. No need to put any other stick on products. There are some good videos on you tube and the lizard skin web site to watch. We found the product around 2003 from a hot rod restoration magazine, it has been available at least 16 years.


I was going to use Lizard skin on the entire bottom, then Dynamat over the entire interior. Probably go double thick under the mat for the firewall.
-
12 hours ago, Hobert62 said:
I wish I had the skill and nerve to cut into something that far. Looking good.
It’s going to get a lot worse, soon. I need to cross brace everything first before going further. The roof is coming off and the lower cab sills will get replaced. I don’t think the L cab is as sturdy as the standard B cab and more prone to rust. The back panels on this one were replaced early in its life and weren’t done well so they came off easily. This is certainly the worst part of this project and it’ll take a bunch of time to fix.
-
2
-
-
- Popular Post
- Popular Post
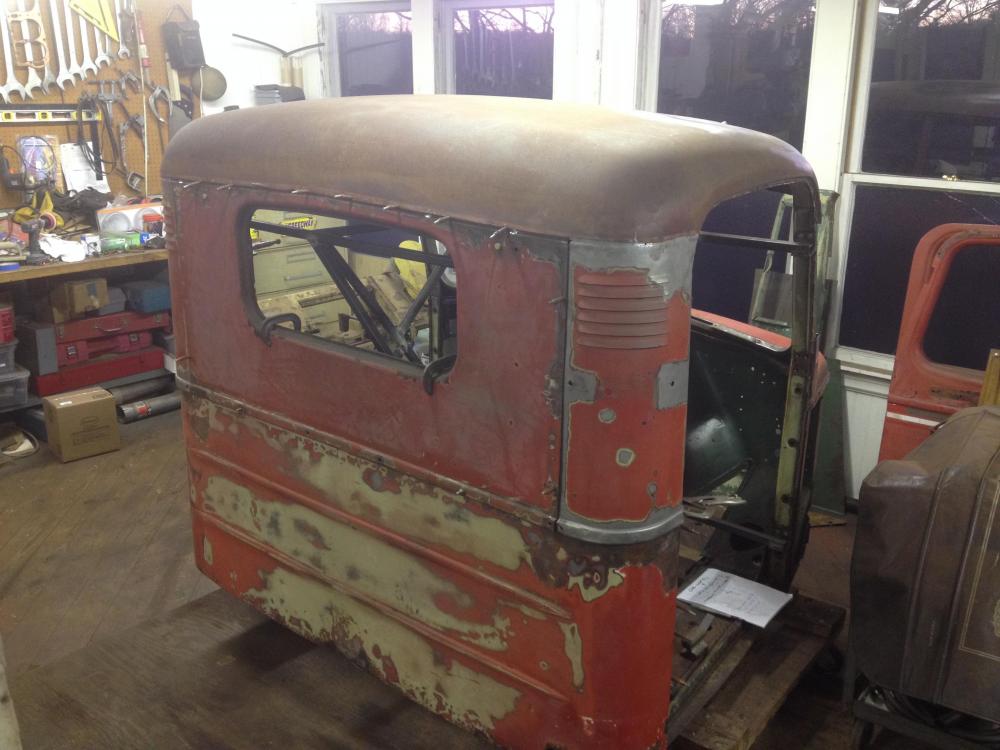
Steam cleaned the crap out of the cab today. Amazing the amount of dirt and grease that came out of it!! Spent three hours on it once it got set up this morning. It's squeaky clean now and ready for more work


-
4
-
13 hours ago, h67st said:
Nice looking motor! With that block heater, looks like you're planning to run this truck in the winter. Will that paint on the manifold hold up to exhaust heat? Is it just hi-temp paint?
It should, ive had very good luck with it on other engines. Pretty durable


BMT Forum Logo

B-73 Restoration
in Antique and Classic Mack Trucks General Discussion
Posted
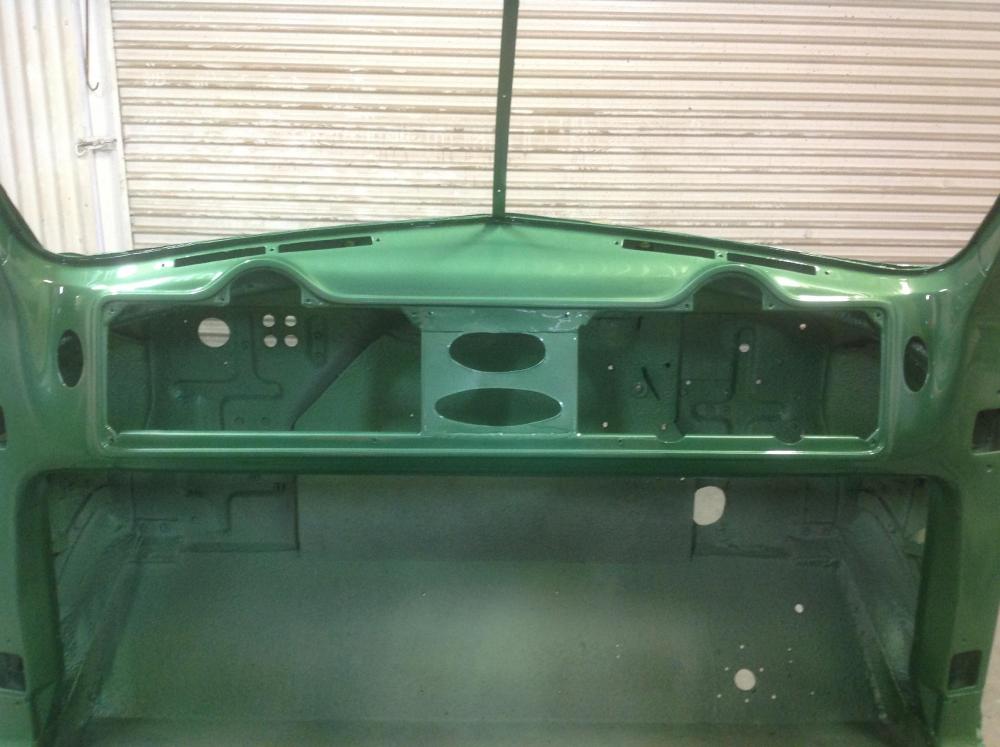
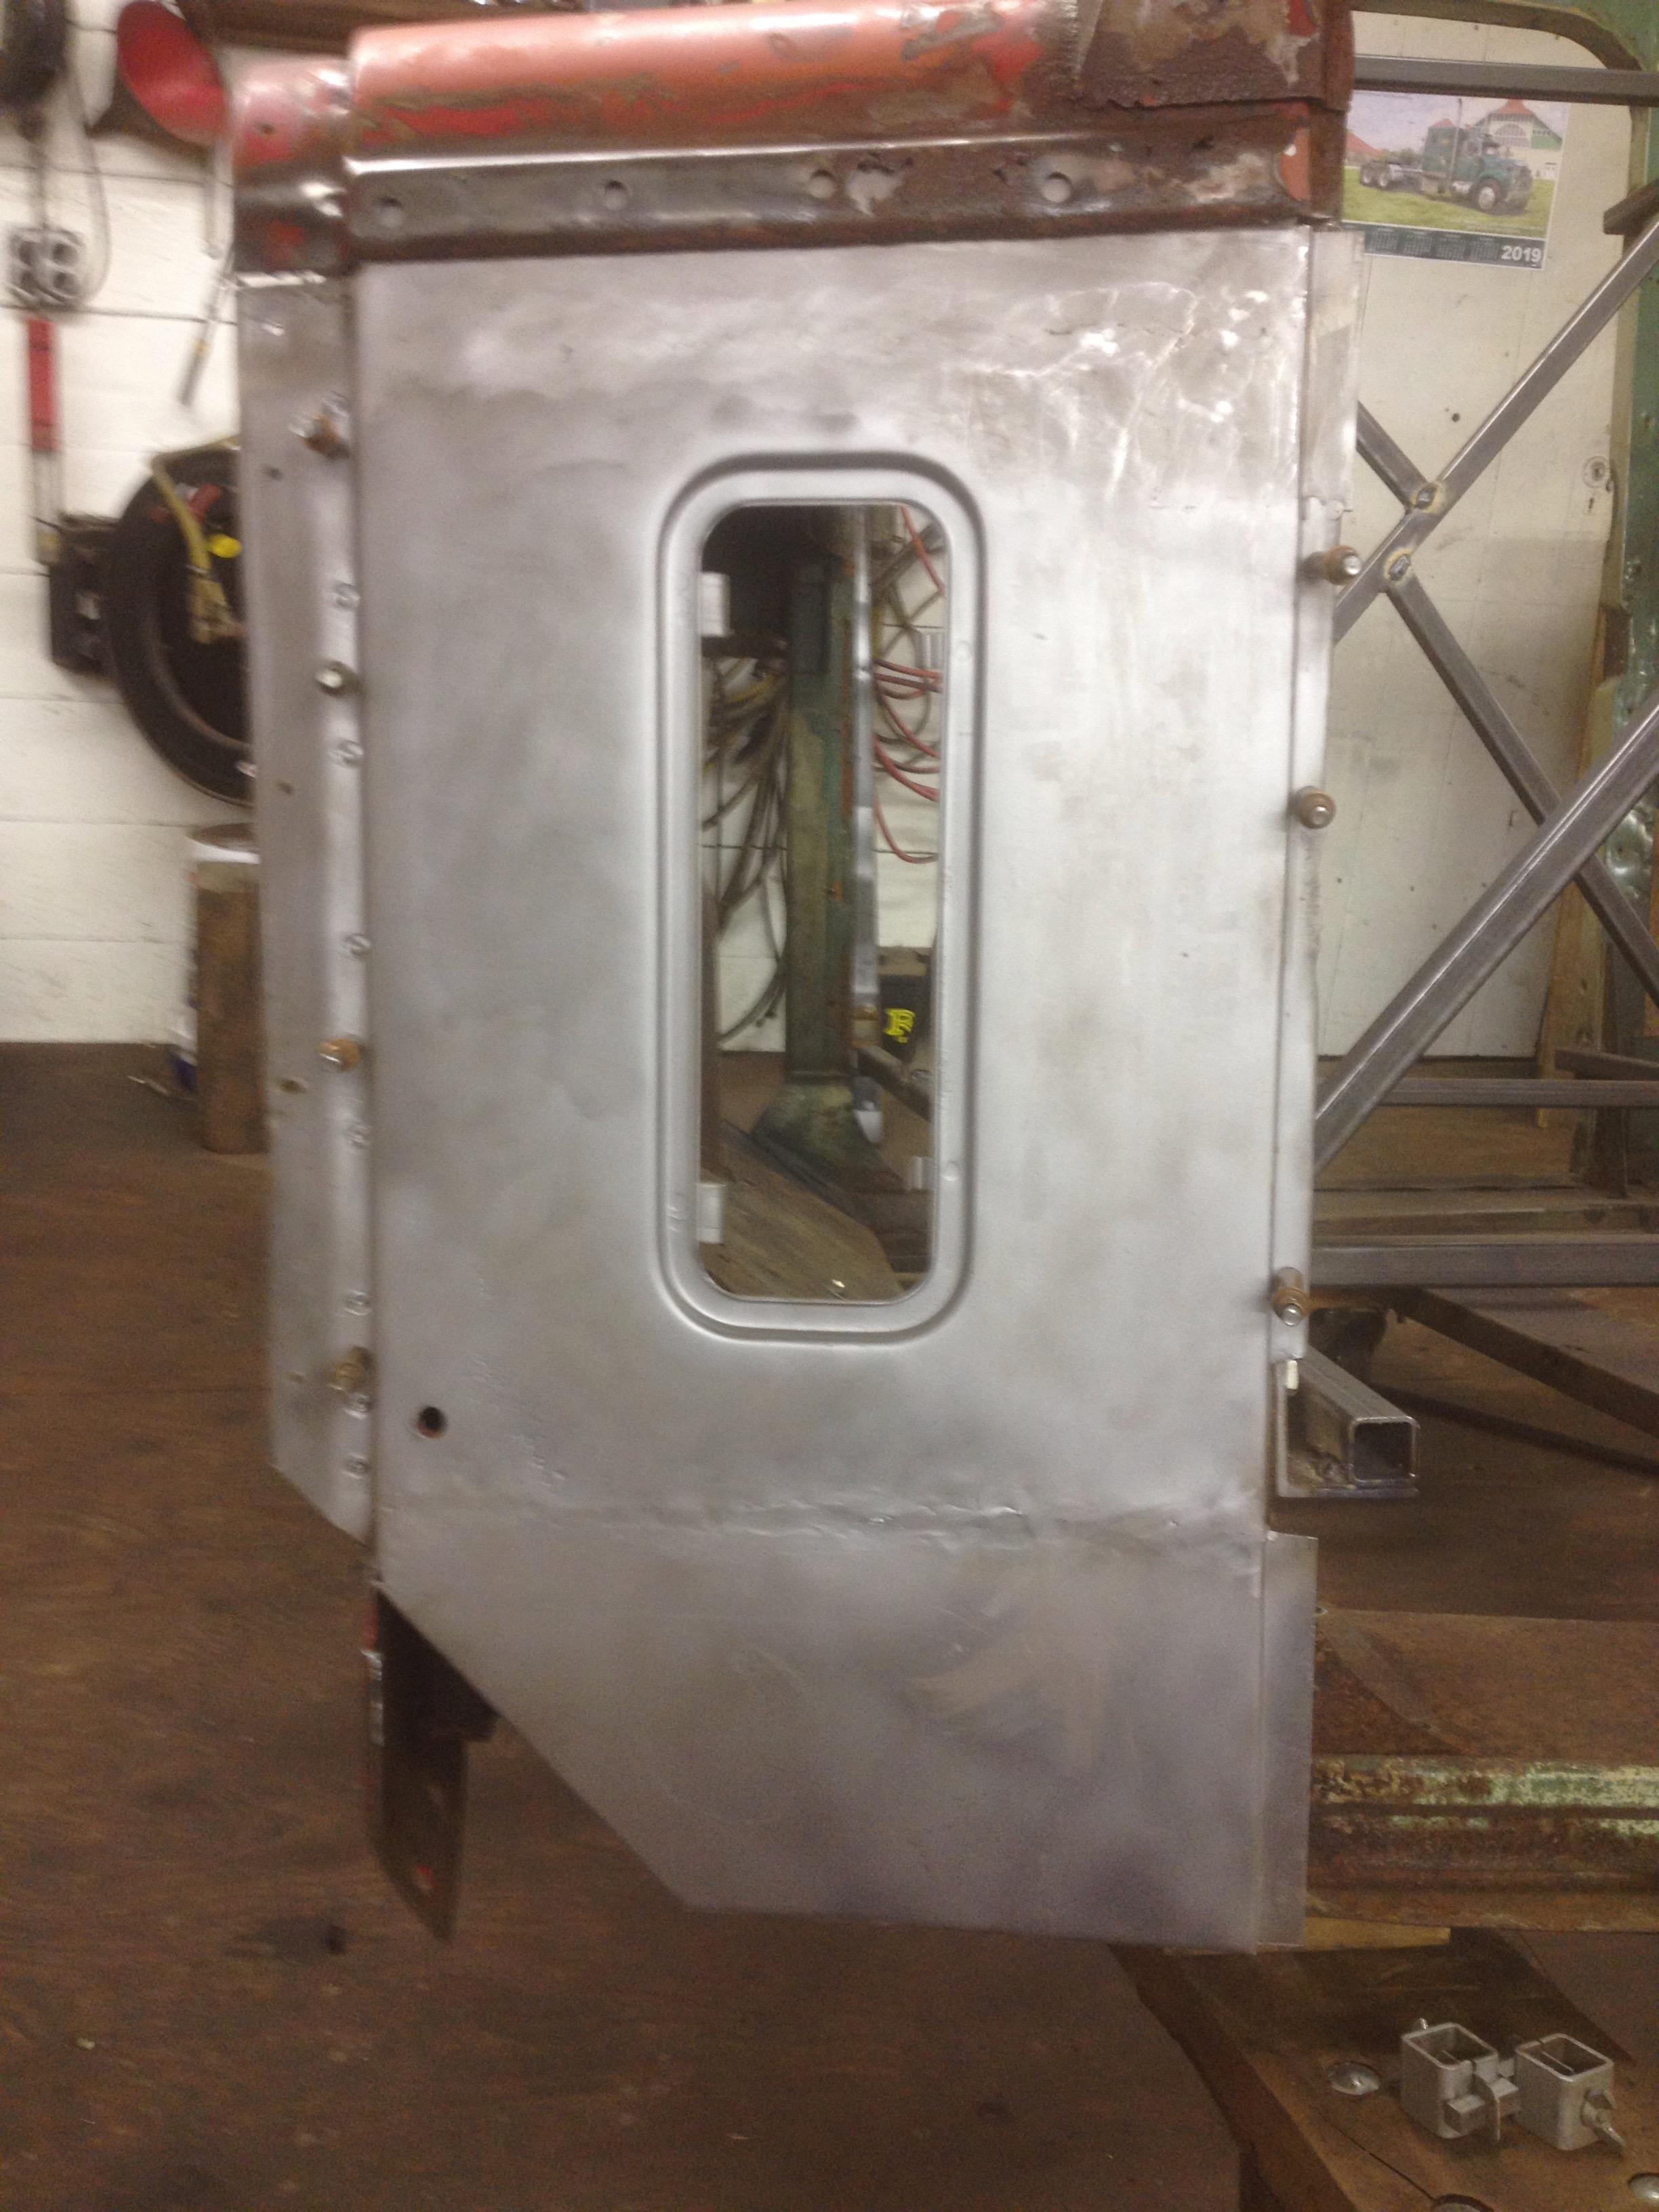
Luckily no surprises when I got it back from the blaster. The areas that were slated for replacement opened up a little more, but the rest was solid. And no real bondo, several layers of paint was about it. Now to start putting it back together so it doesn't look like a rolling jigsaw puzzle when I'm done.