

Todd W. White
-
Posts
144 -
Joined
-
Last visited
Content Type
Profiles
Forums
Gallery
Events
Blogs
BMT Wiki
Collections
Store
Everything posted by Todd W. White
-
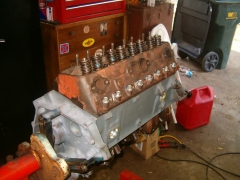
Bother heads for the 283 installed
Todd W. White posted a gallery image in BMT Member's Gallery - Click here to view our member's albums!
From the album: New Engine for Mack, Jr.
Here are both heads with new push rods, installed. -
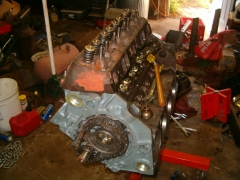
Heads for the 283, Pic #2
Todd W. White posted a gallery image in BMT Member's Gallery - Click here to view our member's albums!
From the album: New Engine for Mack, Jr.
Installing other head. -
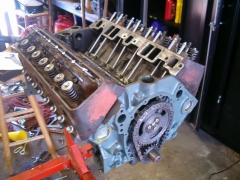
Heads for the 283, Pic #1
Todd W. White posted a gallery image in BMT Member's Gallery - Click here to view our member's albums!
From the album: New Engine for Mack, Jr.
Installing head on one side of the newly rebuilt 283 CID V-8 -
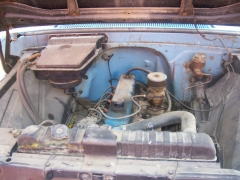
Original Engine
Todd W. White posted a gallery image in BMT Member's Gallery - Click here to view our member's albums!

From the album: New Engine for Mack, Jr.
This is the original 230 CID Inline 6-cylinder engine that came with the truck. It had a bad headgasket when we picked it up in Kansas, which we replaced before driving it home. Saved me $1,000 off of the selling price (worth the price of a new headgasket!). Been really reliable, but not enough power, and it's developing a pretty noisy knock. -
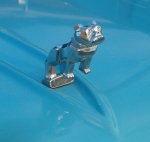
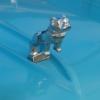
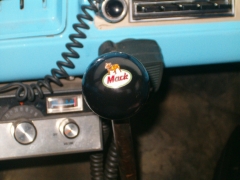
New "Mack" GearShift Knob!
Todd W. White posted a gallery image in BMT Member's Gallery - Click here to view our member's albums!
From the album: "Mackification"
Got this great-looking Gearshift Knob off of a fellow on eBay. It's VERY nice, well made, and wasn't horribly expensive. Comes with all sorts of thread sizes - all I had to do was tell him what threads my shifter had on it, and he sent the appropriate adaptors. Looks real nice, I think! -
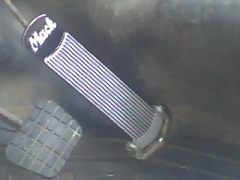
New "Mack" Accelerator Pedal
Todd W. White posted a gallery image in BMT Member's Gallery - Click here to view our member's albums!
From the album: "Mackification"
Found a NOS accelerator pedal on Ebay for a B-model. I installed in place of original using stainless steel sheet metal screws. LOVE IT! Works good - angled it to match my foot and put the Teflon piece from the original Chevrolet pedal on the back using double-sided adhesive foam tape in order to keep it quiet. A little lube to make it operate smoothly, and it's done! -
New Horn Button for Mack, Jr.
Todd W. White posted a gallery image in BMT Member's Gallery - Click here to view our member's albums!

From the album: "Mackification"
After MUCH looking, I found a horn button from an R-model I was able to remove the metal ring, clean it, buff it (took a lot of work), then had it silkscreened as shown. Finally, a coat of clearcoat for metal surfaces went on top protect the lettering. Using the original rubber mount off of the factory horn button and some silicone, I was able to assemble the horn button and install it, as can be seen here. Neat, huh? -
-
What It Looked Like Before...
Todd W. White posted a gallery image in BMT Member's Gallery - Click here to view our member's albums!
From the album: General Repairs & Restoration
Yuck! -
Hello fans! I've added some more pictures to my gallery! Here are pictures of my new CB rig - The Hustler RG27 Antenna's: My vintage NOS Johnson Messenger 123B 23-channel CB Radio: Check out my heater restoration project here: Heater Restoration Project Hope ya'll like them! - Todd
-
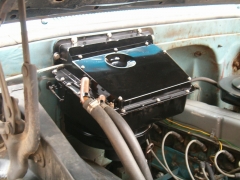
FINALLY INSTALLED! Pic #4
Todd W. White posted a gallery image in BMT Member's Gallery - Click here to view our member's albums!
From the album: General Repairs & Restoration
View from the other side. Oh, and IT WORKS GREAT! -
FINALLY INSTALLED! Pic #3
Todd W. White posted a gallery image in BMT Member's Gallery - Click here to view our member's albums!
From the album: General Repairs & Restoration
Looking directly at it from the front... -
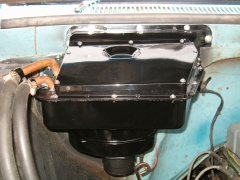
FINALLY INSTALLED! Pic #2
Todd W. White posted a gallery image in BMT Member's Gallery - Click here to view our member's albums!
From the album: General Repairs & Restoration
Another view. -
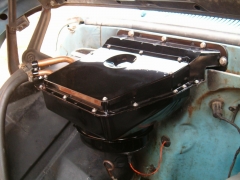
FINALLY INSTALLED! Pic #1
Todd W. White posted a gallery image in BMT Member's Gallery - Click here to view our member's albums!

From the album: General Repairs & Restoration
HOORAY! -
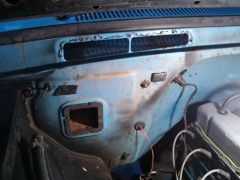
The Truck Is Waiting...
Todd W. White posted a gallery image in BMT Member's Gallery - Click here to view our member's albums!
From the album: General Repairs & Restoration
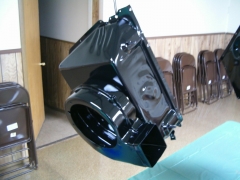
I put silicone on the face that mates with the gasket that I installed on the top half of the assembly. Also note the gasket that goes around the air flow duct. -
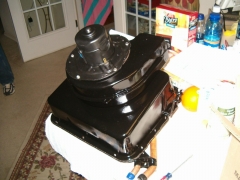
From the album: General Repairs & Restoration
Here is the full assembly, including the new blower motor (and custom-made gasket) installed, ready to go back in the truck. Hope it works! -
New Heater Core Installed, Pic #2
Todd W. White posted a gallery image in BMT Member's Gallery - Click here to view our member's albums!
From the album: General Repairs & Restoration
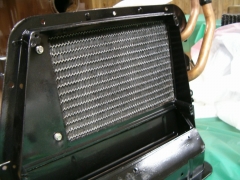
Looking at the new heater core from the top side of the top half of the assembly. Note that you can see two of the stainless steel screws mentioned before - had to put three washers under each screw head. Also, I put rubber washers under all of the screws (or washers in this case), in order to prevent the metal from scratching and, thus, causing rust. -
New Heater Core Installed, Pic #1
Todd W. White posted a gallery image in BMT Member's Gallery - Click here to view our member's albums!
From the album: General Repairs & Restoration
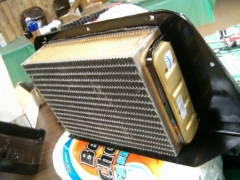
The new heater core is now installed. Note the restored brackets holding it to the underside of the top half of the assembly. Also note the gasketing I installed to make sure there was a good seal between the metal housing and the core - it focuses air flow loss around the core, and prevents scratching of the metal, thus causing rust. I had to use washers to prevent the screws holding the brackets from puncturing the end tanks of the core, as I used new stainless steel screws throughout, and it is not possible to get 1/4" long #8 sheet metal screws, so I had to use 1/2" (didn't have to use washers anywhere else, though). -
Making Gaskets That Don't Exist...
Todd W. White posted a gallery image in BMT Member's Gallery - Click here to view our member's albums!
From the album: General Repairs & Restoration
Apparently, GM didn't make gasketing to go between the pieces in the heater assembly. To me, this is silly - if you don't have it, the parts, over time, will rub the paint off of each other in spots, thus exposing the bare metal to the elements, and the rust begins all over again. This tar-impregnated cork material comes in a roll from the parts house - I cut the strips to fit. This was placed on all mating surfaces except the lid, where the tolerances wouldn't allow it. I used black silicone there, instead (just gotta do the best you can). Really works well, and it doesn't rot like rubber or allow for metal rubbing like silicone. -
PAINTED ALSO!
Todd W. White posted a gallery image in BMT Member's Gallery - Click here to view our member's albums!
From the album: General Repairs & Restoration
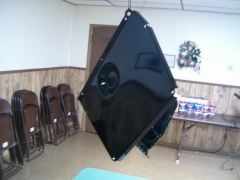
Here is the bottom half after three coats of Rustoleum High Gloss Black Enamel. -
PAINTED!
Todd W. White posted a gallery image in BMT Member's Gallery - Click here to view our member's albums!
From the album: General Repairs & Restoration
Here is the lid after three coats of Rustoleum High Gloss Black Enamel. -
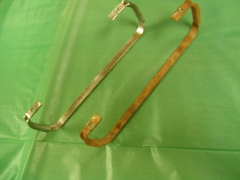
From the album: General Repairs & Restoration
These were the worst, as far as rust goes, as they were in direct contact with the leaking antifreeze. They were also the hardest to clean, due to their small size, the curves, and the grooves. When you replace your heater core, make sure you get new ones with your new core, or be sure and clean, prime, and pain your old ones. My guess is they will not always be available... -
Primer Coat Pic #3
Todd W. White posted a gallery image in BMT Member's Gallery - Click here to view our member's albums!
From the album: General Repairs & Restoration
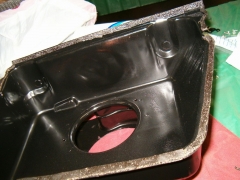
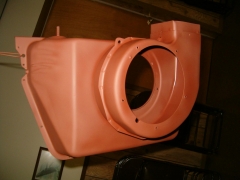
Here's a view of the bottom half (note the opening for the blower motor) with the primer on, as it is drying. -
Primer Coat Pic #2
Todd W. White posted a gallery image in BMT Member's Gallery - Click here to view our member's albums!
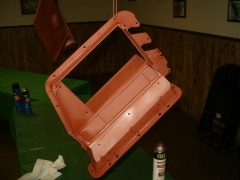
From the album: General Repairs & Restoration
Here's a view of the top half (the part with the flap) with the primer on, as it is drying. -
Primer Coat Pic #1
Todd W. White posted a gallery image in BMT Member's Gallery - Click here to view our member's albums!
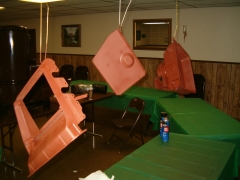
From the album: General Repairs & Restoration
Here's a view of all three parts with the primer on, as they're drying.

BMT Forum Logo
