

Todd W. White
-
Posts
144 -
Joined
-
Last visited
Content Type
Profiles
Forums
Gallery
Events
Blogs
BMT Wiki
Collections
Store
Everything posted by Todd W. White
-
New 12SI Alternator Installed
Todd W. White posted a gallery image in BMT Member's Gallery - Click here to view our member's albums!
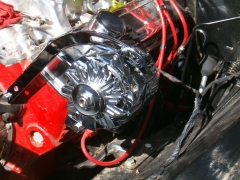
From the album: New Engine for Mack, Jr.
Here's the new chrome 12SI Alternator, now installed!© 2012 by Todd W. White
-
INSTALLED
Todd W. White commented on Todd W. White's gallery image in BMT Member's Gallery - Click here to view our member's albums!
 THANKS! More pics soon....
 -
Thanks guys! I bought that Messenger III NOS in the original box! I've ordered the remaining parts needed to get it going. After the mechanicals are all done, then it's on to the body work.
-
Hello All! After 2 years, I'm almost ready to put "Mack Jr" back on the road. My son Seth and I are trying to get it roadworthy before Thanksgiving. I'll be posting more as we get things done. I've added a few photo's here: http://www.bigmacktr...album&album=412
-
Stainless Battery Box Installed
Todd W. White posted a gallery image in BMT Member's Gallery - Click here to view our member's albums!
From the album: New Engine for Mack, Jr.
© 2012 by Todd W. White
-
From the album: New Engine for Mack, Jr.
Shifter And Backup Switch In operation.© 2012 by Todd W. White
-
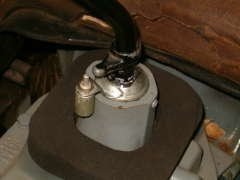
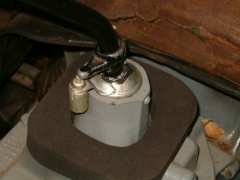
From the album: New Engine for Mack, Jr.
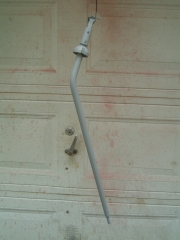
Here's the SM420 Shifter and Backup Switch installed. Clever way for the GM engineers to adapt the old SM420 for the then-new federal regulations that all vehicles had to have backup lights from the factory, starting in 1966.© 2012 by Todd W. White
-
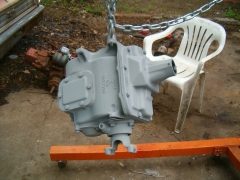
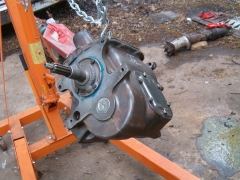
SM420 Installed
Todd W. White posted a gallery image in BMT Member's Gallery - Click here to view our member's albums!
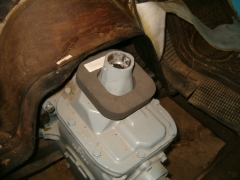
From the album: New Engine for Mack, Jr.
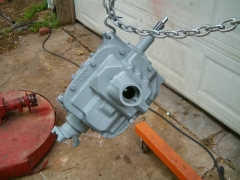
Here's the rebuilt SM420 Transmission installed with the new Clutch and spherical connecting rods, ready for the shift rod and backup light switch.© 2012 by Todd W. White
-
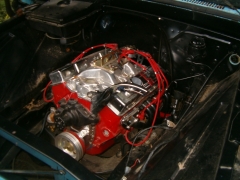
INSTALLED
Todd W. White posted a gallery image in BMT Member's Gallery - Click here to view our member's albums!
From the album: New Engine for Mack, Jr.
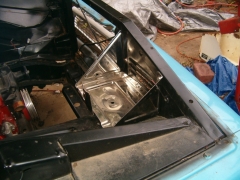
Here's the rebuilt 283 installed. Though not the best of photo's (I'll make more soon), at least now we can see it in place! We're hoping to have the truck running before Thanksgiving.© 2012 by Todd W. White
-
Thanks! I'll be posting more soon - we're about to start putting the truck back together. - Todd
-
From the album: New Engine for Mack, Jr.
-

From the album: New Engine for Mack, Jr.
-
From the album: New Engine for Mack, Jr.
-
From the album: New Engine for Mack, Jr.
-
From the album: New Engine for Mack, Jr.
-
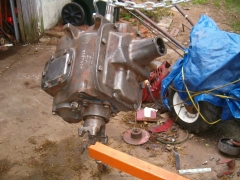
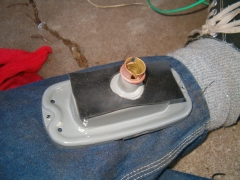
Rebuilt Transmission - Now Primered!
Todd W. White posted a gallery image in BMT Member's Gallery - Click here to view our member's albums!
From the album: New Engine for Mack, Jr.
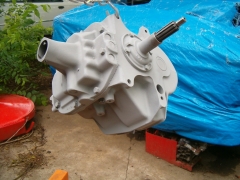
I used a high-quality gray primer, because my final paint will be gray enamel. This is a rust inhibiting primer, which I hope will prevent the transmission from rusting again. Though it only had surface rust (inhibited by the grease and oil I had to steamclean off), I don't want it to rust again if I can help it. -
From the album: New Engine for Mack, Jr.
-
From the album: New Engine for Mack, Jr.
A little more rust removal, and it will be ready for cleaning and priming. -
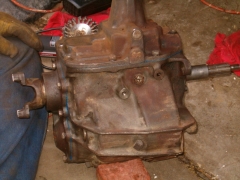
From the album: New Engine for Mack, Jr.
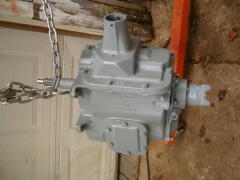
Seth rebuilt the SM420 and I got it back from him. Here it is ready to be wirewheeled, cleaned, primed with rust stopping primer, and painted. -
Name: Chevrolet C10 (1965) Date Added: 15 October 2008 - 08:03 AM Owner: Todd W. White Short Description: This is "Mack, Jr." - my 1965 Chevrolet C10 1/2-ton 2WD Pickup that I am "Mackifying". View Vehicle
-
Final Product - Right Hand Side
Todd W. White posted a gallery image in BMT Member's Gallery - Click here to view our member's albums!
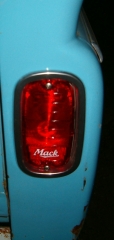
From the album: "Mackification"
Here's a picture taken of the right side with the flash on from a standing position - I think it gives a pretty good idea to anyone who is not actually present to see the truck what the new tail lights look like. I hope ya'll like it! -
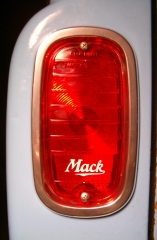
From the album: "Mackification"
WELLA! I took this photo without a flash using a hand-held light to make it easier to see the lens. Reproduction lenses are available for about $10 each, and they can be purchased without the "bowtie" logo molded into the plastic, as you saw in the first of this series of pictures. I had my friend the silkscreener put the logo where the bowtie would have been. Though the word doesn't show up when you brake (I didn't really want it to), it does look GREAT (I think) when the lights are off. It also looks pretty cool when the tail lights are on, but not the brake lights. I used the longer-life Sylvania bulbs here - I hope I don't have top replace them for a while. One more thing - the gaskets that come with the lenses are really thing and flimsy, and didn't seal the lens well against the bucket. Even the original lenses didn't fit well in the buckets before I started all of this. So.... I took two for each side, glued them together and put a light coat on the lens side (only) and installed them with new #10 x 1" stainless steel sheet metal screws. This should keep moisture out, though the two holes at the bottom of each bucket, which are there, presumably, to allow for drainage of condensation and any moisture that does get in there, probably don't do much to keep the inside very dry. -
Restored Housing Installed!
Todd W. White posted a gallery image in BMT Member's Gallery - Click here to view our member's albums!
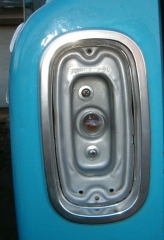
From the album: "Mackification"
With the newly repaired wiring pigtail, the newly installed dedicated ground wire, and the new bezel (the old ones were really messed up), the housing is secured to the inside mounting bracket, ready for the icing on the cake. -
Making Gaskets #2
Todd W. White posted a gallery image in BMT Member's Gallery - Click here to view our member's albums!
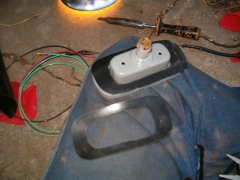
From the album: "Mackification"
This gasket prevents the bucket from being scratched by the new Bezel. What's interesting is that the original install used screws to hold the bucket that had insulating washers under them, presumably to prevent moisture from coming in. The probably really only made for it to have a harder time getting a good ground. I installed all stainless hardware in this project, including new rubber insulated washers and sheet metal screws to secure the buckets to their mounting brackets. -
Making Gaskets #1
Todd W. White posted a gallery image in BMT Member's Gallery - Click here to view our member's albums!
From the album: "Mackification"
One of the design flaws this truck had in this area was that it had no provision for protecting the painted metal surfaces from being rubbed raw by adjoining pieces. Another was the silly idea that the lights could get a good ground via all of these rubbing parts. I've made and installed rubber gaskets to prevent this, like I did for my heater. I soldered a new dedicated ground wire for each bucket so as to assure proper grounding. This gasket prevents the bucket from getting scratched by the mounting bracket it attaches to.

BMT Forum Logo
