

Todd W. White
-
Posts
144 -
Joined
-
Last visited
Content Type
Profiles
Forums
Gallery
Events
Blogs
BMT Wiki
Collections
Store
Everything posted by Todd W. White
-
Primed & Painted!
Todd W. White posted a gallery image in BMT Member's Gallery - Click here to view our member's albums!
From the album: "Mackification"
After a good coat of primer, I painted the exterior with a gray machine enamel. The interior was given two light coats of metallic silver, seen here. Not seen is the final coat of "Reflective Paint" I used to make the metallic paint reflect light more. READY FOR THE RE-INSTALL! -
From the album: "Mackification"
Here's a view from the back just prior to priming & painting. You can see Jr. sitting behind it waiting for his newly rebuilt engine and transmission (we hope to get them back in soon). -
From the album: "Mackification"
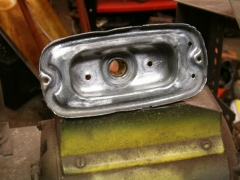
Here's one of the "buckets" ready for priming and painting after having been cleaned thoroughly with Brake Cleaner and wiped down. -
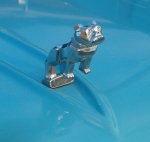
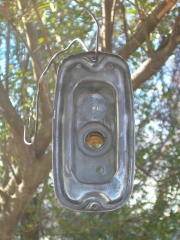
Tail Light Housing After Derusting
Todd W. White posted a gallery image in BMT Member's Gallery - Click here to view our member's albums!
From the album: "Mackification"
Lot's of work with the wirewheel and a small metal-bristled toothbrush got all of the rust off it... -
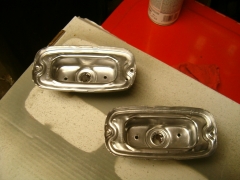
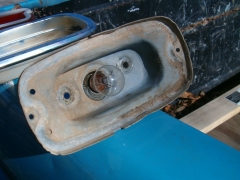
Tail Lights Before DeRusting
Todd W. White posted a gallery image in BMT Member's Gallery - Click here to view our member's albums!
From the album: "Mackification"
Here's what happens when you don't prepare your metal to last forever - after 45 years, it's pretty nasty. Both sides looked like this. -
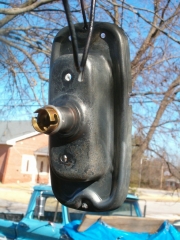
Now For The Tail Lights....#2
Todd W. White posted a gallery image in BMT Member's Gallery - Click here to view our member's albums!
From the album: "Mackification"
Here's the Right Tail Light after 45 years of use and abuse. It's bezel is also damaged. -
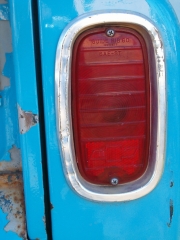
Now For The Tail Lights....#1
Todd W. White posted a gallery image in BMT Member's Gallery - Click here to view our member's albums!
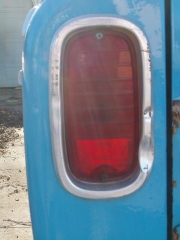
From the album: "Mackification"
Now it's time to do the Tail Lights before it gets cold. Here's the Left Tail Light after 45 years of use and abuse (notice the bent bezel). Also take not of the "Bowtie" emblem at the bottom of the lens... -
How AWFUL! We've never done that before or since - thanks for the warning! The progress on the truck is slow - everything takes money, and, unless I win the local $10,000 "Buy Local" drawing on 12/18/10, we'll keep on doing things as funds allow. Right now, the goal is to get it back on the road... Thanks for your interest!
-
Hi Other Dog! Yeah, it seems like a LOT of people bought them new. Most wish they'd kept them. No, we won't make that mistake again...
-
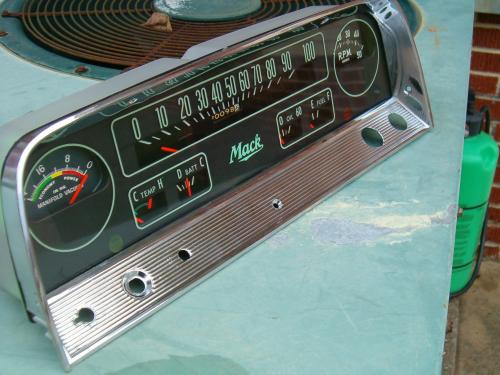
Hello All! Well, I'm making progress! * The SM420 transmission will be back together next week, then we reassemble the engine, clutch, and transmission, then start installing it. * I've finished rebuilding the Instrument Cluster for the dash. I'm converting to Gauges from idiot lights, and made some, well, Mackifications to it. Below is a pic of the finished product, replete with NOS gauges. Check out the rest of the pictures here: http://www.bigmacktrucks.com/index.php?app=gallery&module=user&user=1766&do=view_album&album=412
-
Instrument Cluster - Pic #14
Todd W. White posted a gallery image in BMT Member's Gallery - Click here to view our member's albums!
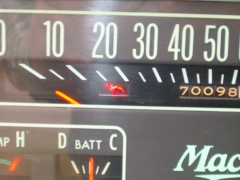
From the album: "Mackification"
Here's the surprise! I took a speedometer face from an R-model (thanks Glenn!) to the silkscreening guy. He scanned it, cleaned it up (it's SO perfect - you ought to see it! Hi-res, too!) and made it fit the opening where GM had the word "BRIGHT" show through when you hit your high beams. -
Instrument Cluster - Pic #13
Todd W. White posted a gallery image in BMT Member's Gallery - Click here to view our member's albums!
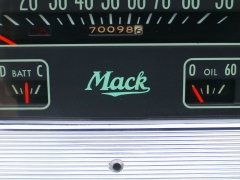
From the album: "Mackification"
Here's the logo up close - pretty cool, huh? The only thing I didn't replace was the odometer wheels. They're painted and are hard to clean without totally ruing them. I did a light cleaning and decided to leave them alone, seeing as how I had the speedometer rebuilt and didn't want to void the warranty. -
Instrument Cluster - Pic #12
Todd W. White posted a gallery image in BMT Member's Gallery - Click here to view our member's albums!

From the album: "Mackification"
Here's the completed instrument cluster. It has a few "changes", namely, I removed the original "Bowtie" logo in the middle using a single-edged razor blade, then polished the area with professional plastic polish. I then had the local silkscreening company I use develop the logo and print it in a green that was as close as they could get to the original colors silksreeneed on the rear of the lens. I also added a surprise... -
Instrument Cluster - Pic #11
Todd W. White posted a gallery image in BMT Member's Gallery - Click here to view our member's albums!
From the album: "Mackification"
Yet one more view. -
Instrument Cluster - Pic #10
Todd W. White posted a gallery image in BMT Member's Gallery - Click here to view our member's albums!
From the album: "Mackification"
Another view. -
Instrument Cluster - Pic #9
Todd W. White posted a gallery image in BMT Member's Gallery - Click here to view our member's albums!
From the album: "Mackification"
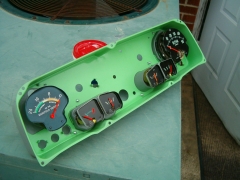
Here are the NOS Gauges, the vintage Sun Tach with updated internals, and the Vacuum Gauge installed. Speedometer to follow. With the exception of the tach, all of the needles have been repainted with the special fluorescent orange paint designed specifically for GM products. -
Instrument Cluster - Pic #8
Todd W. White posted a gallery image in BMT Member's Gallery - Click here to view our member's albums!
From the album: "Mackification"
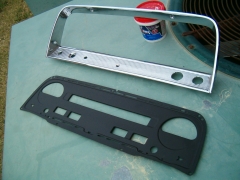
Here is the newly chromed metal bezel, and the derusted, primed and painted Cluster Face. -
Instrument Cluster - Pic #7
Todd W. White posted a gallery image in BMT Member's Gallery - Click here to view our member's albums!
From the album: "Mackification"
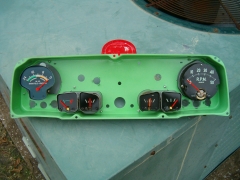
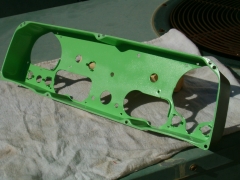
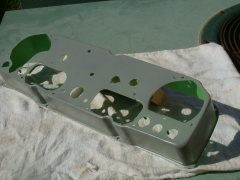
Here is a front view of the Housing for the Instrument Cluster after electrolysis, priming, and painting. I took the original to a professional auto paint supply house and had them mix up a can of the correct interior color for me. Looks great! -
Instrument Cluster - Pic #6
Todd W. White posted a gallery image in BMT Member's Gallery - Click here to view our member's albums!
From the album: "Mackification"
Here is a rear view of the Housing for the Instrument Cluster after electrolysis, priming, and painting. -
Instrument Cluster - Pic #5
Todd W. White posted a gallery image in BMT Member's Gallery - Click here to view our member's albums!
From the album: "Mackification"
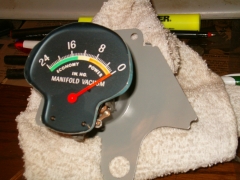
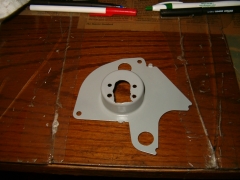
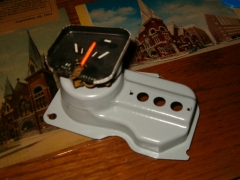
Here is the adapted delete plate fitted with the Vacuum Gauge. I'm going to try to brighten up the colored bars before I install it in the Cluster. -
Instrument Cluster - Pic #4
Todd W. White posted a gallery image in BMT Member's Gallery - Click here to view our member's albums!
From the album: "Mackification"
The original Instrument Cluster didn't have a Tach or a Vacuum Gauge. After electrolysis, I took one of the delete plates they had in place of a Vacuum Gauge and modified it to fit a gauge I got off of eBay for a '66 LeMans (or was it a Firebird?). Anyway, it's got a bluish tint to it, but I believe it will be hard to notice once it's all assembled. -
Instrument Cluster - Pic #3
Todd W. White posted a gallery image in BMT Member's Gallery - Click here to view our member's albums!
From the album: "Mackification"
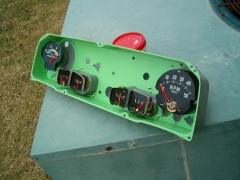
After electrolysis, all of the rust has been removed. The mounting assembly was then primed and painted. One original gauge is installed, but it will soon be replaced with a NOS one I found on the Internet. This shows, though, the restoration work done on the metal parts. -
Instrument Cluster - Pic #2
Todd W. White posted a gallery image in BMT Member's Gallery - Click here to view our member's albums!
From the album: "Mackification"
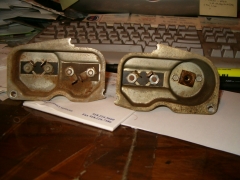
Here is a rear view of the Gauge Mounting Assemblies before eletrolysis. -
Instrument Cluster - Pic #1
Todd W. White posted a gallery image in BMT Member's Gallery - Click here to view our member's albums!
From the album: "Mackification"
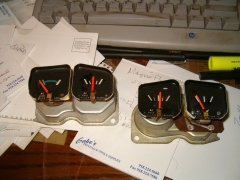
These are the original gauges before any work was done to the dashboard Instrument Cluster. -
Well, it's been a year, but I FINALLY got the old engine out and am getting ready to put the "new" one in. Check it out here: Engine Rebuild Gallery

BMT Forum Logo
