
- Popular Post


mattb73lt
-
Posts
1,185 -
Joined
-
Last visited
-
Days Won
137
Content Type
Profiles
Forums
Gallery
Events
Blogs
BMT Wiki
Collections
Store
Posts posted by mattb73lt
-
-
- Popular Post
- Popular Post
That would be cool to have the Mack oval and Bulldog branded in, in the style they used for the 100th anniversary.
-
 1
1
-
 2
2
-
- Popular Post
- Popular Post
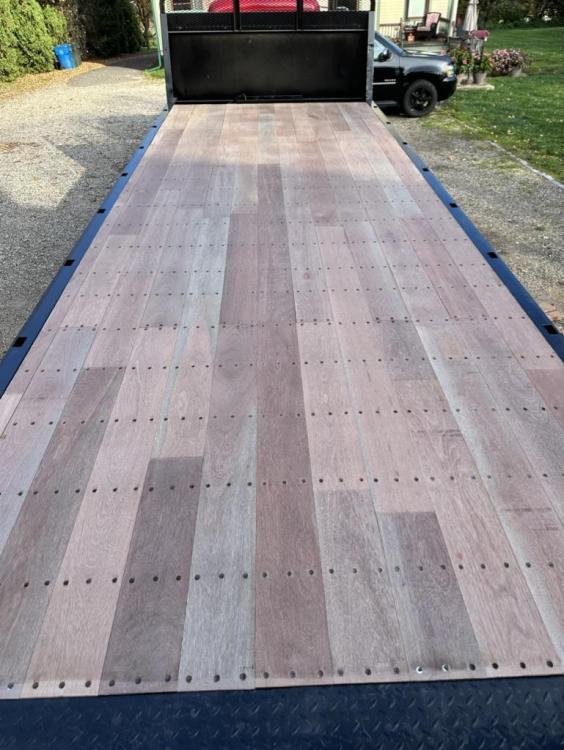
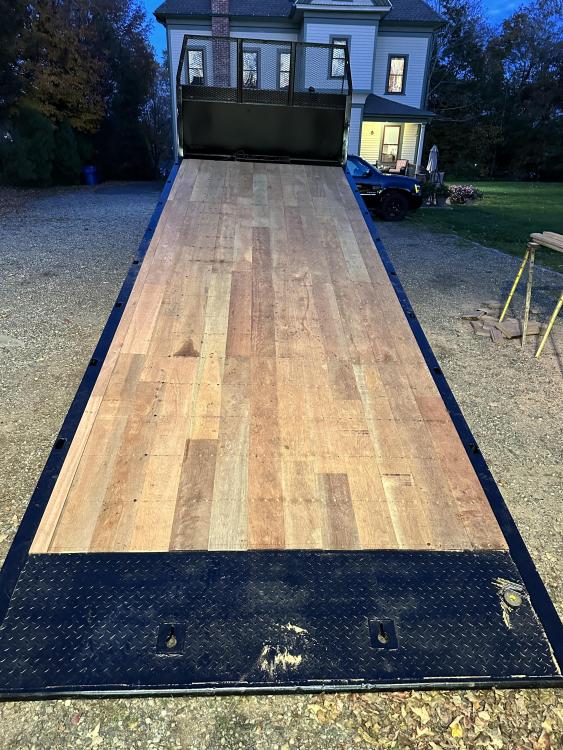
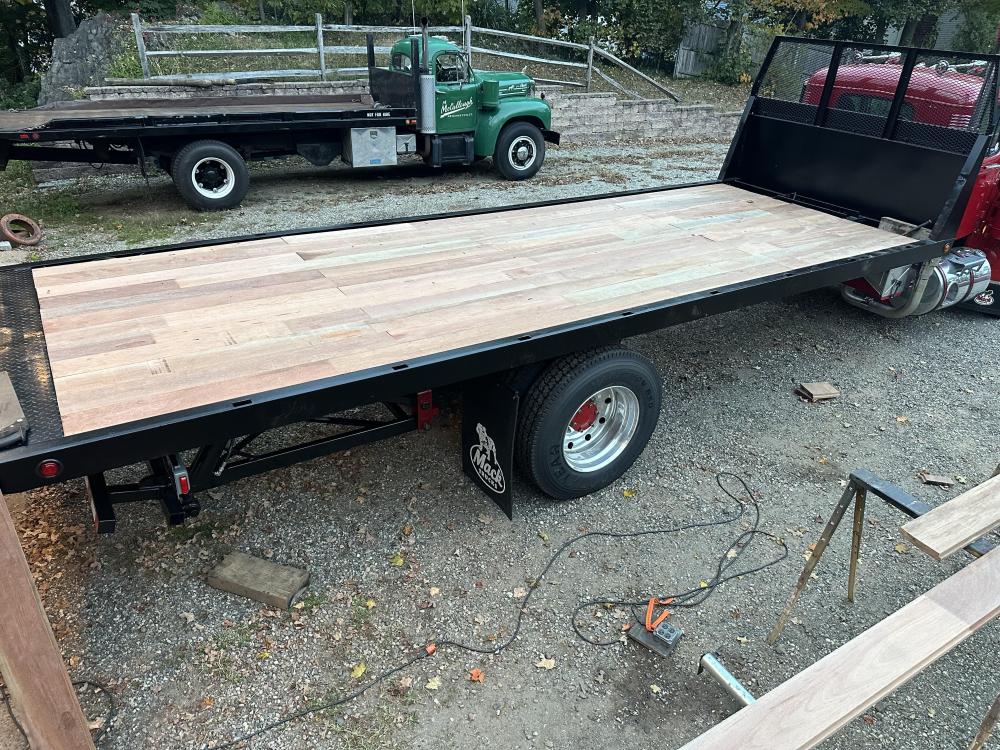
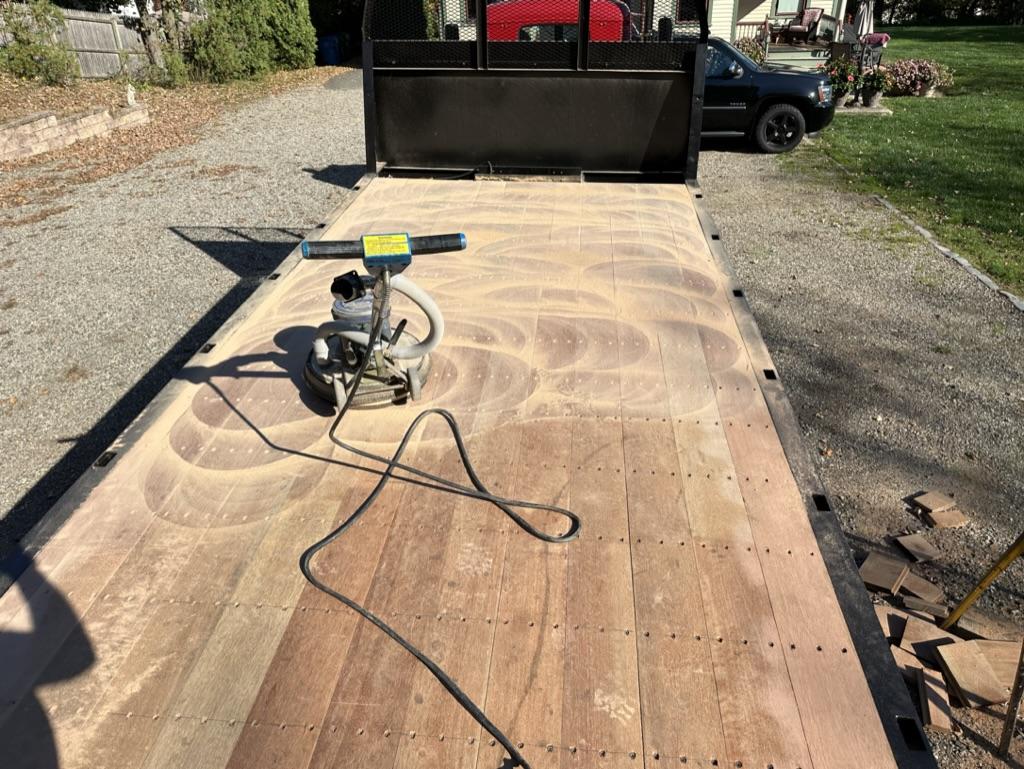
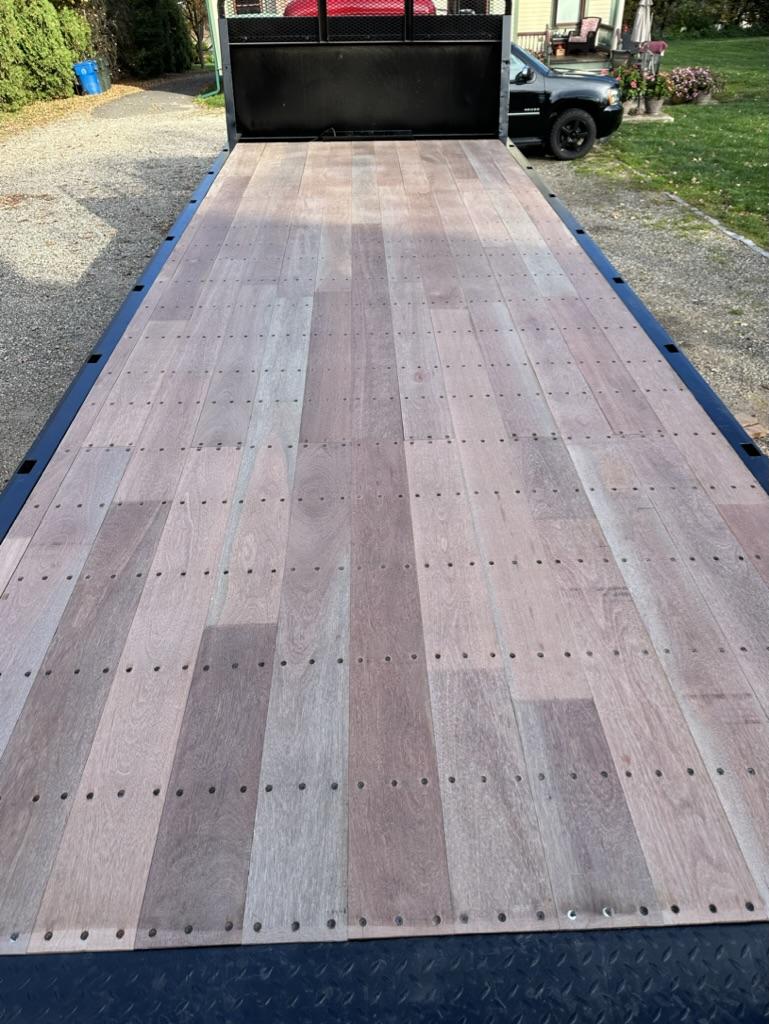
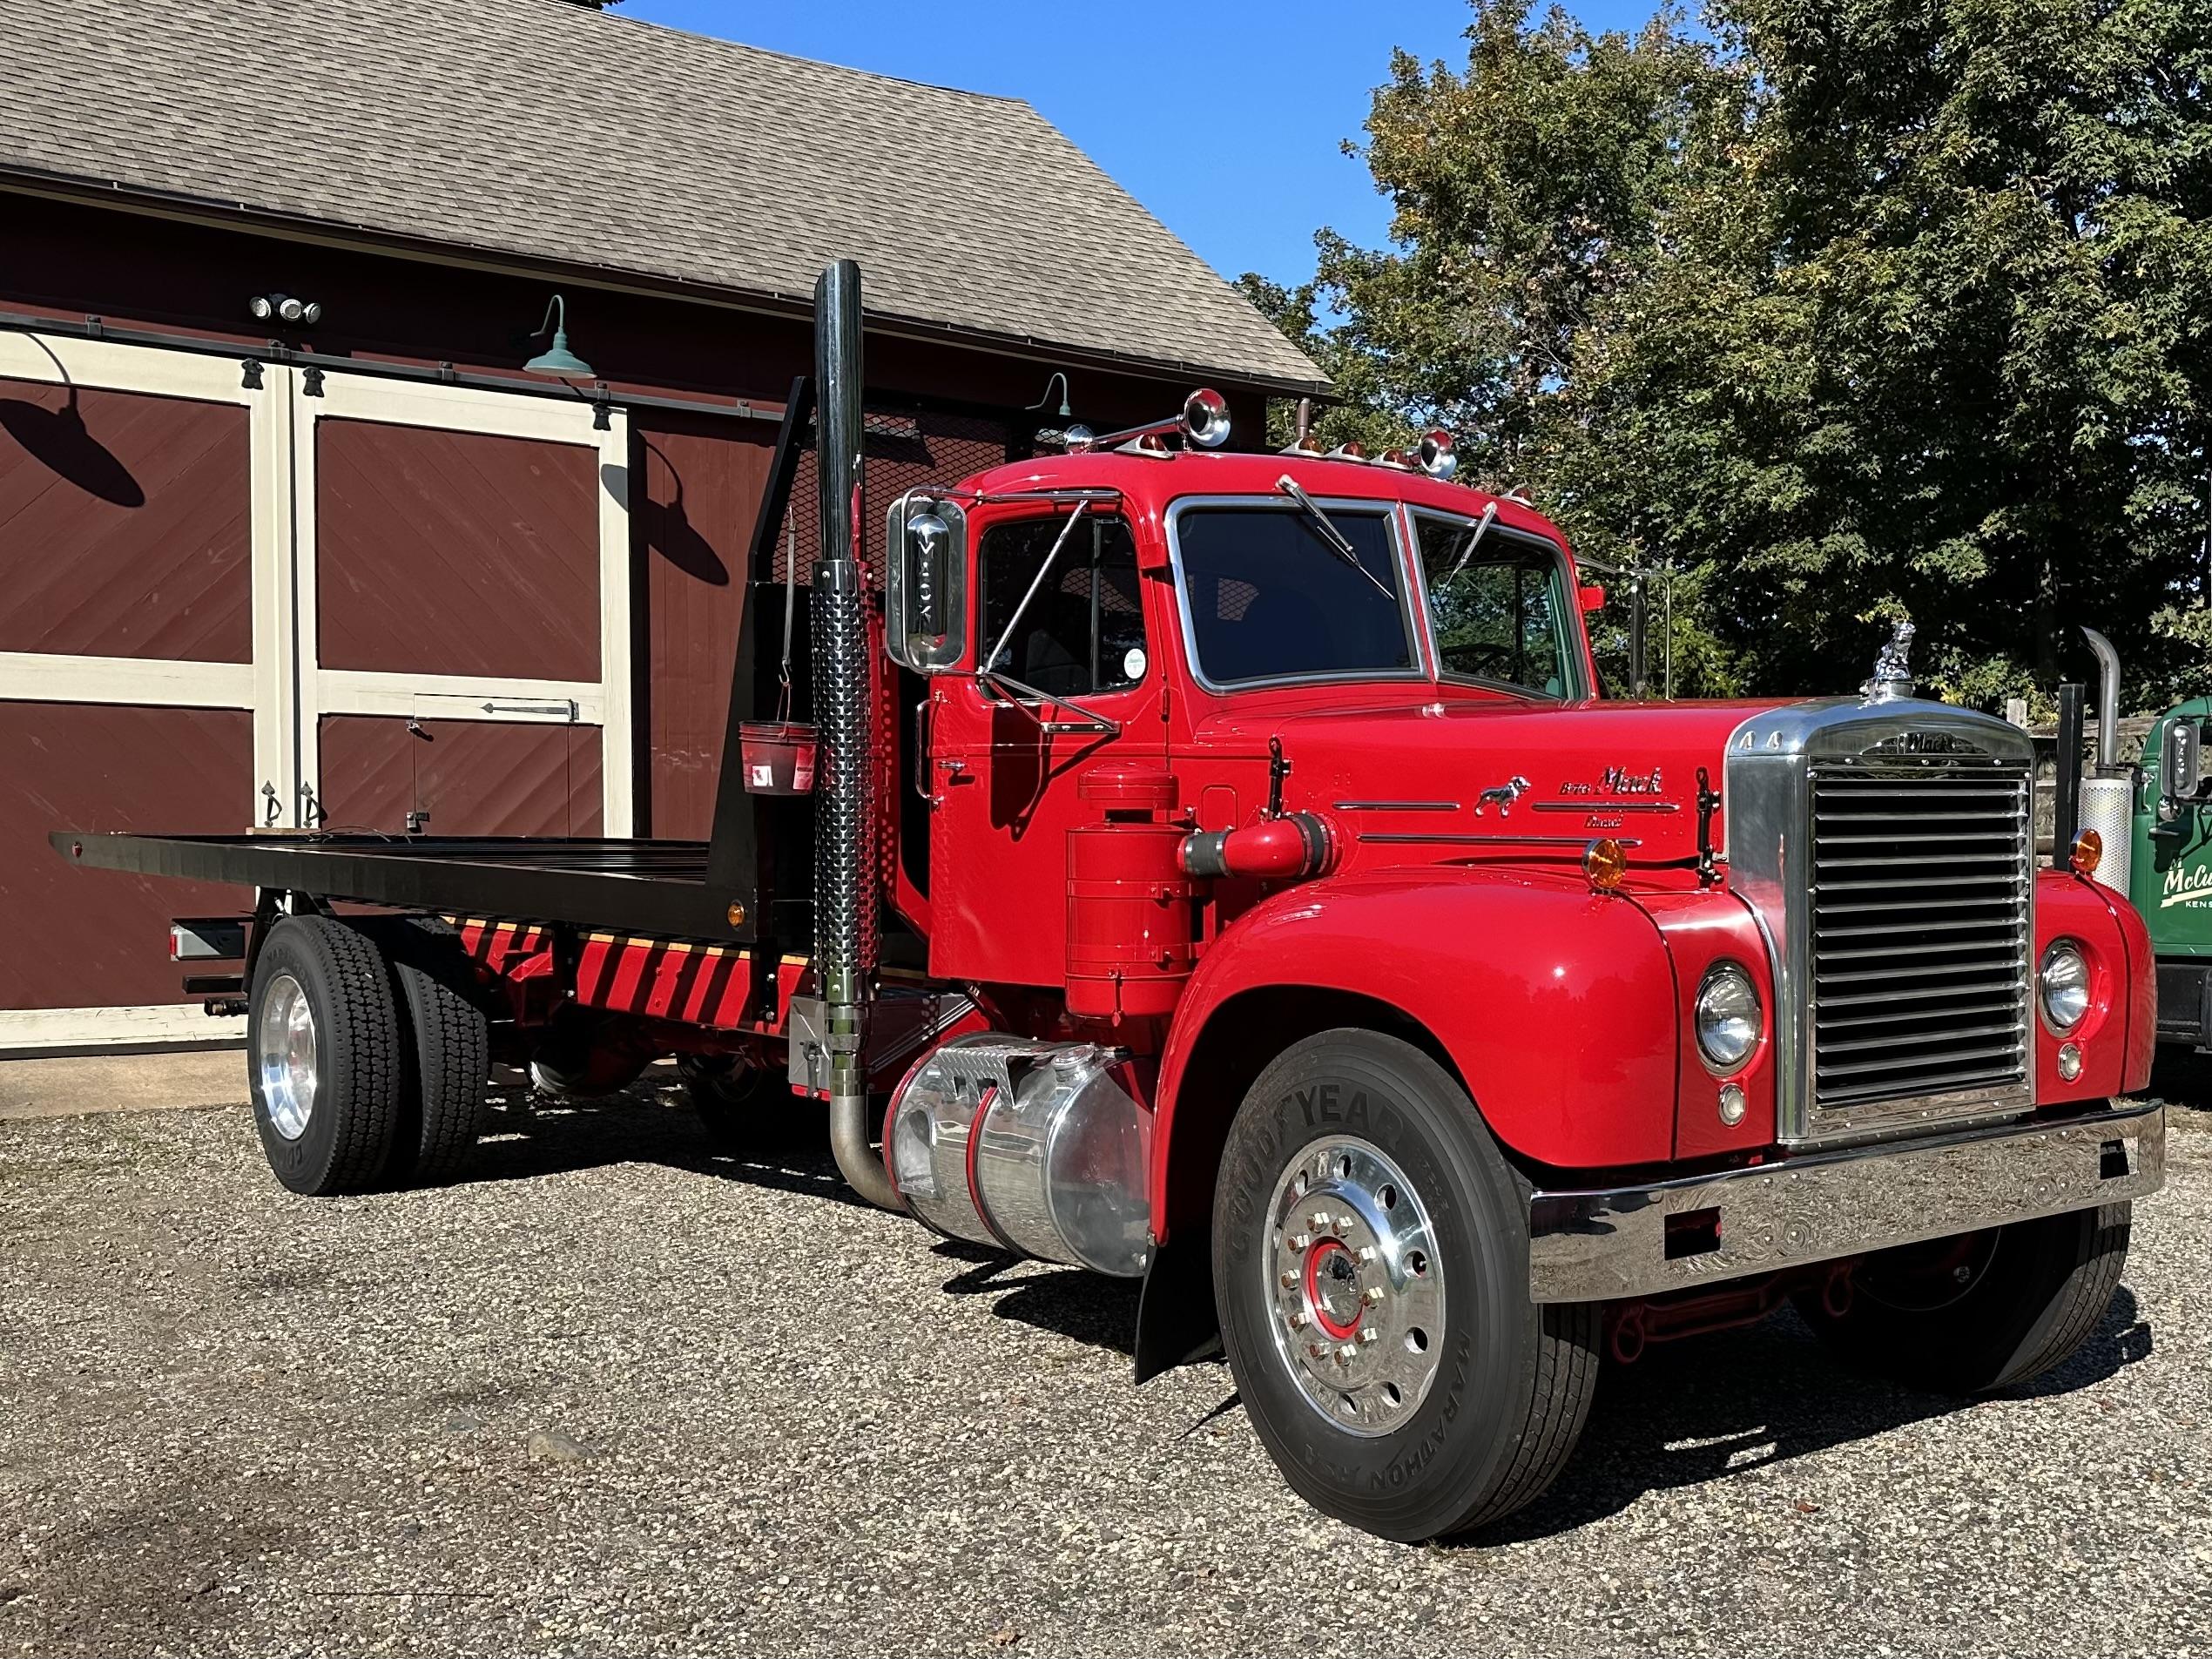
Called upon my Army floor buffer skills today. I have a modified floor buffer I use for sanding the floors in the house. It sands in a 17" swath so it made quick work of the deck, after I cut the edges in with a belt sander. Gave it a good cleaning and applied the first coat of oil to it. I used a clear type because I knew it would darken the wood some. I'll put a couple more coats on before I'm done. I wish it would stay in it's raw state, but it'll stain and fade if not treated. Not bad for a hack carpenter!

-
9
-
4
-
1 hour ago, Red Horse said:
where is that? Is that a prefabbed section that gets rolled into place???
I-95 Exit 17 In Westport, CT over Route 33. The spans were constructed on site, then slid into place one side at a time as each old span was demolished. They did it over last weekend.
-
- Popular Post
- Popular Post
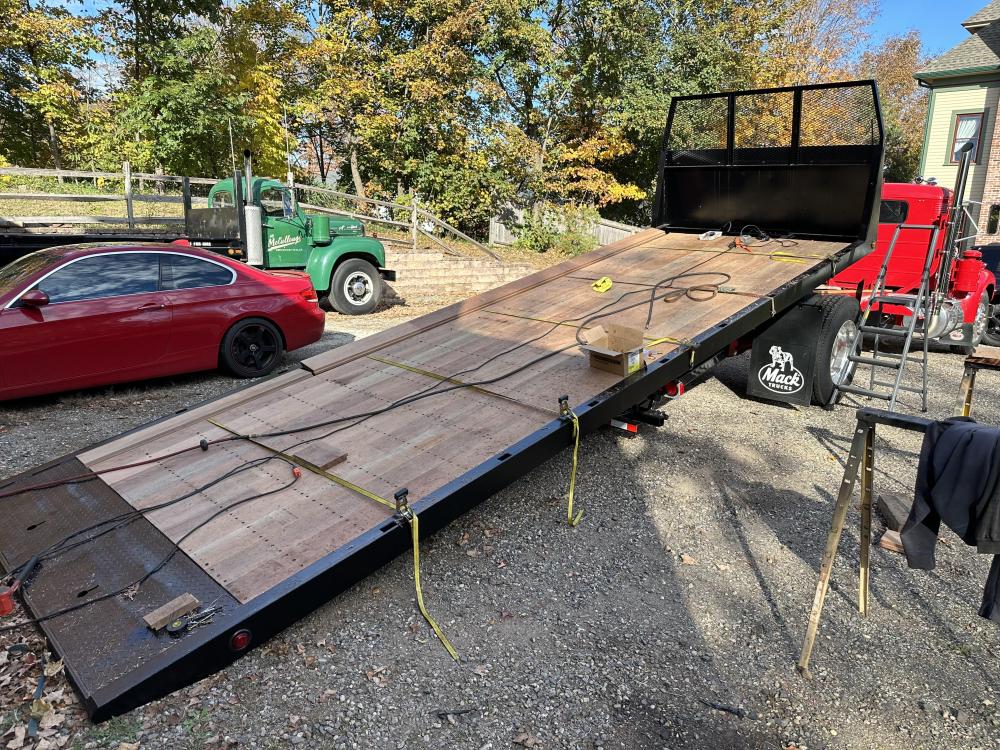
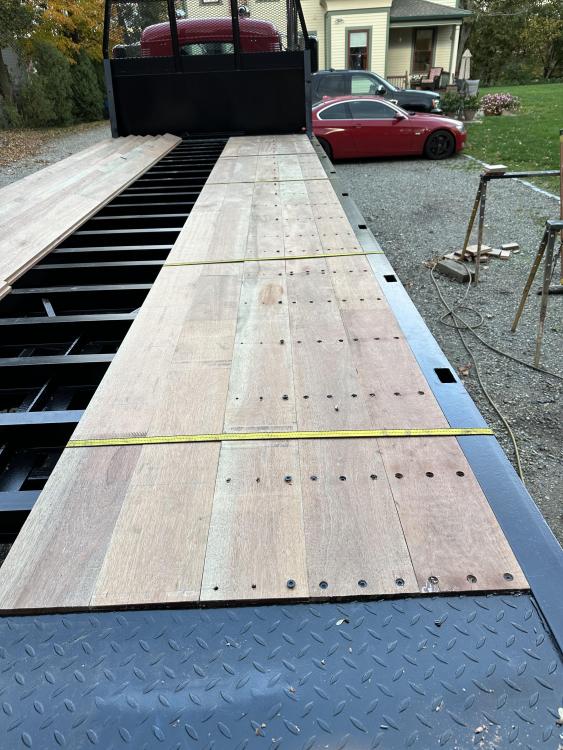
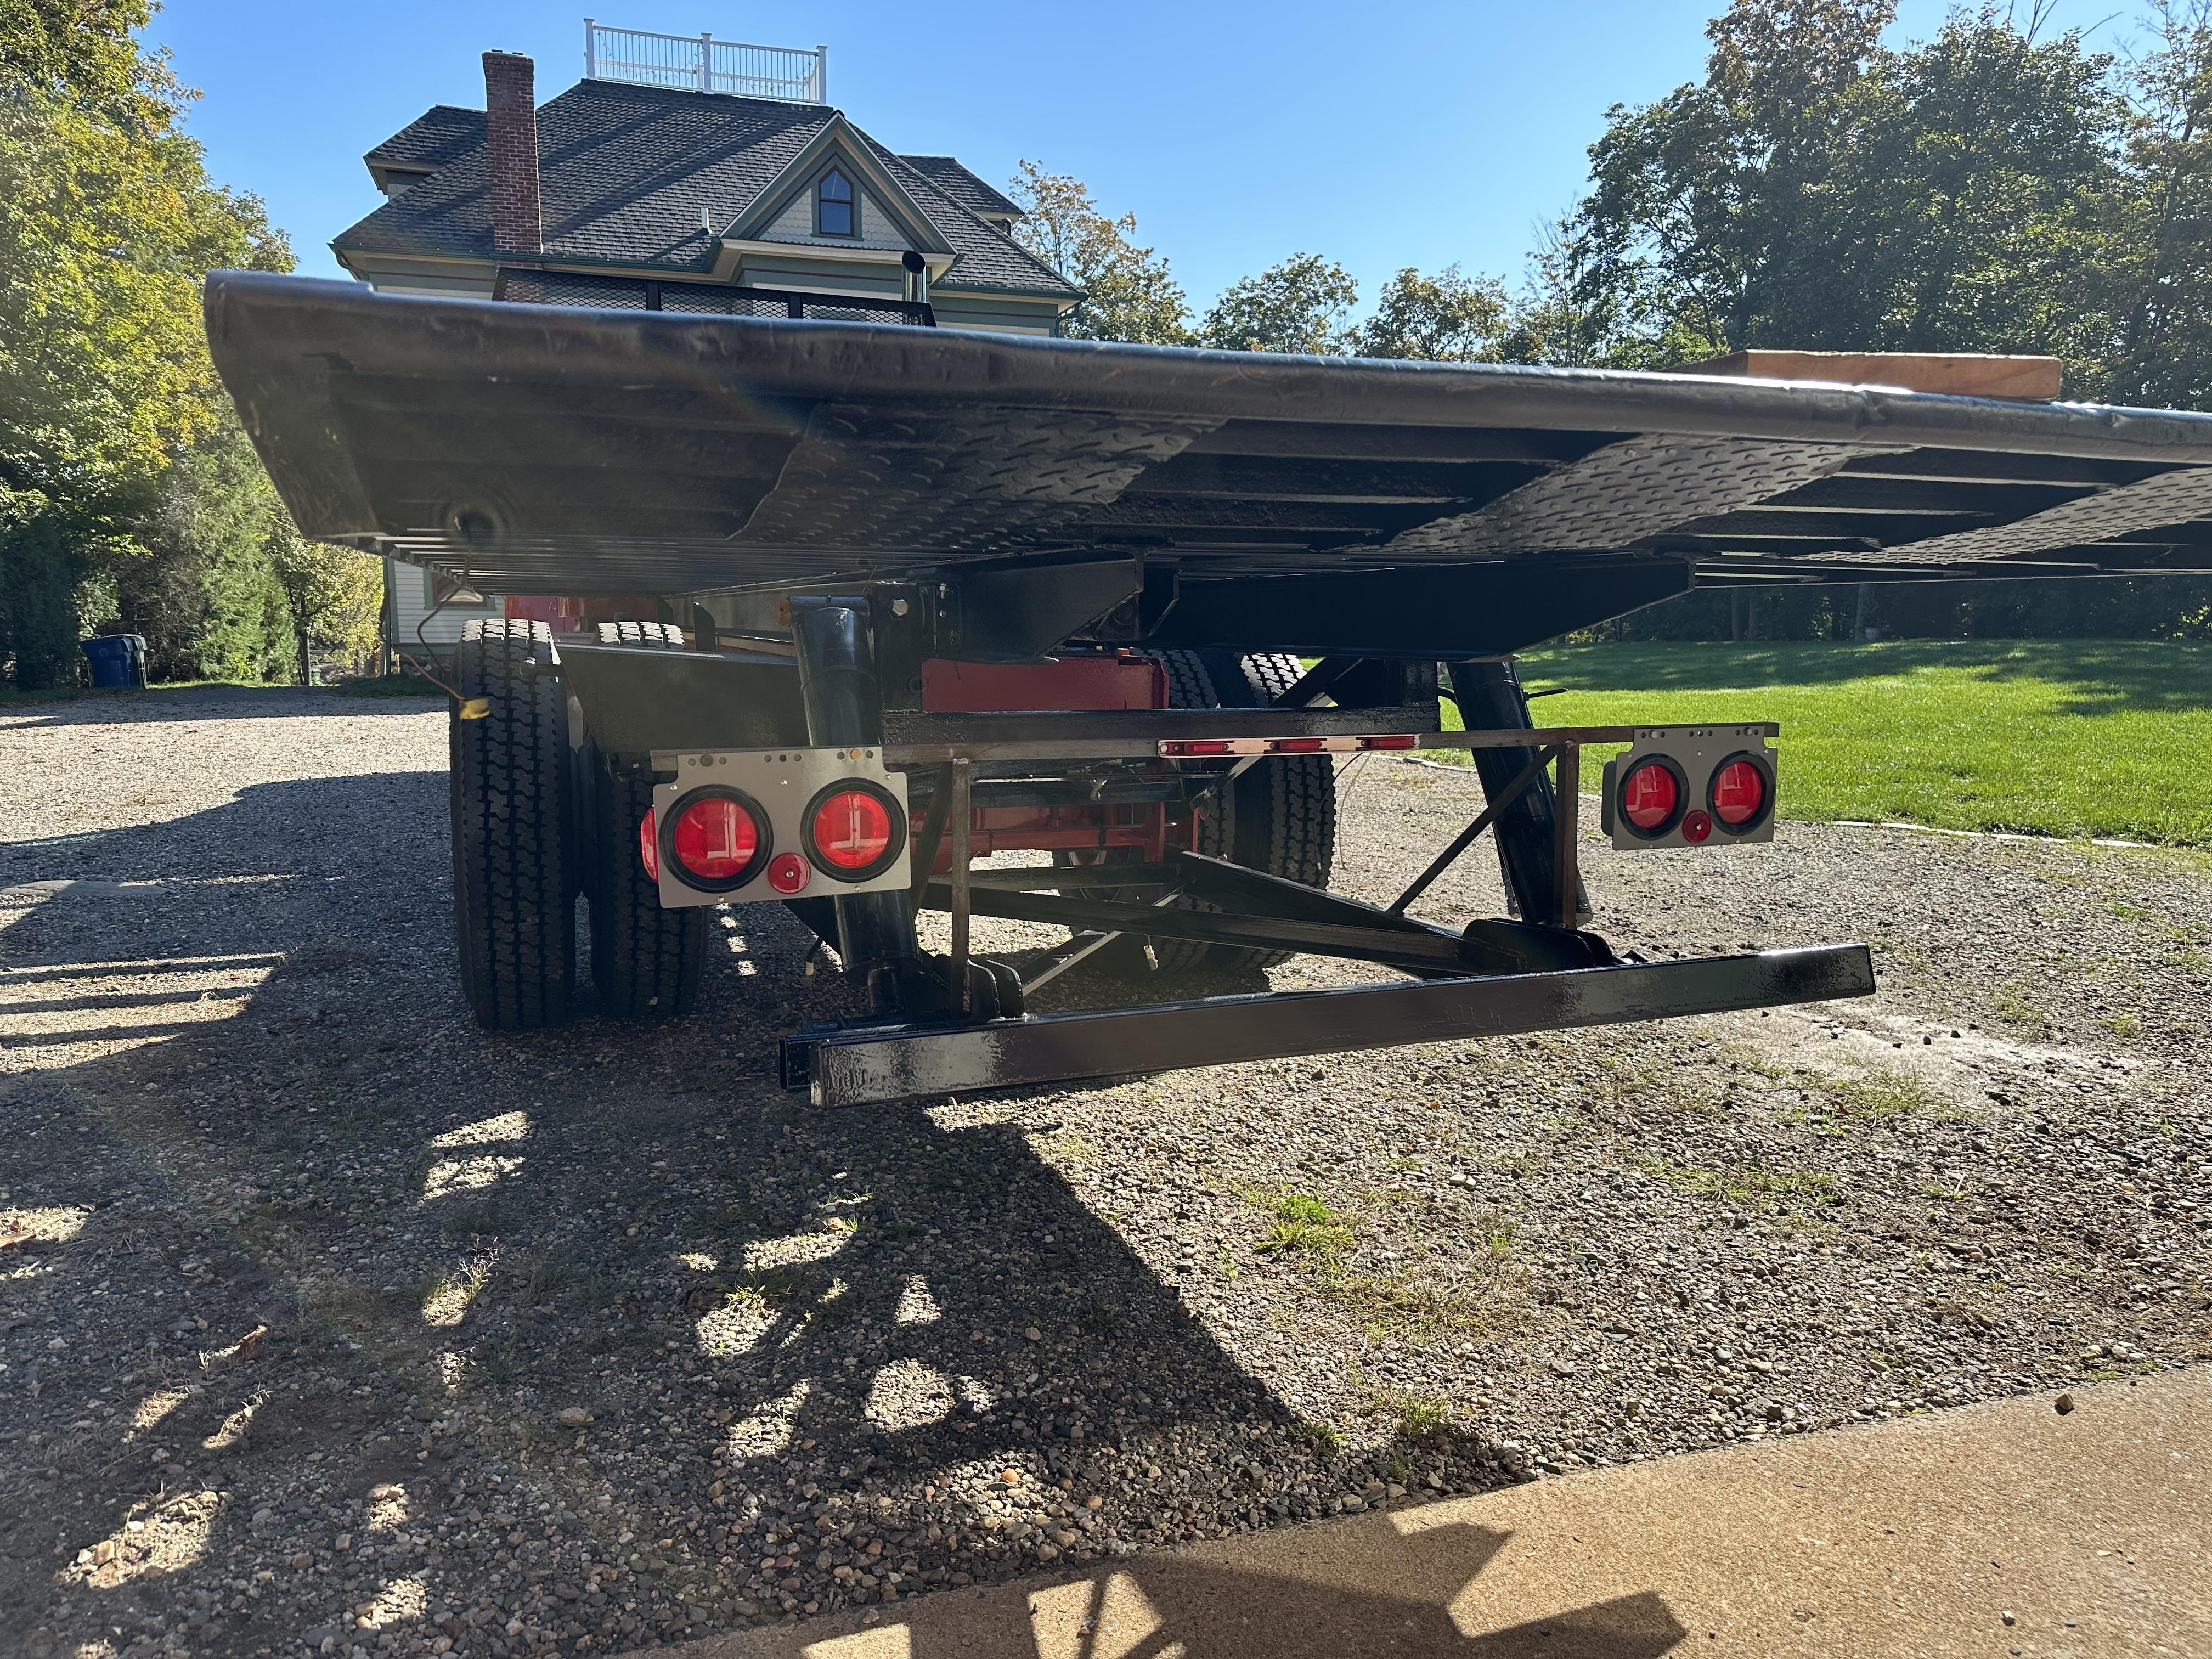
Just about finished. Three full, long days followed by long hot showers and a fistful of Advil PM each night. Just set the filler pieces as I lost day light today. A few hours tomorrow should have the deck down and I should have a few screws leftover. This was definitely one of the more tedious tasks to complete on this project. With it mostly screwed down the deck is amazingly stout and several hundred pounds heavier. My screw count was way off. It took 851 screws to anchor it down.
-
12
-
1
-
- Popular Post
- Popular Post
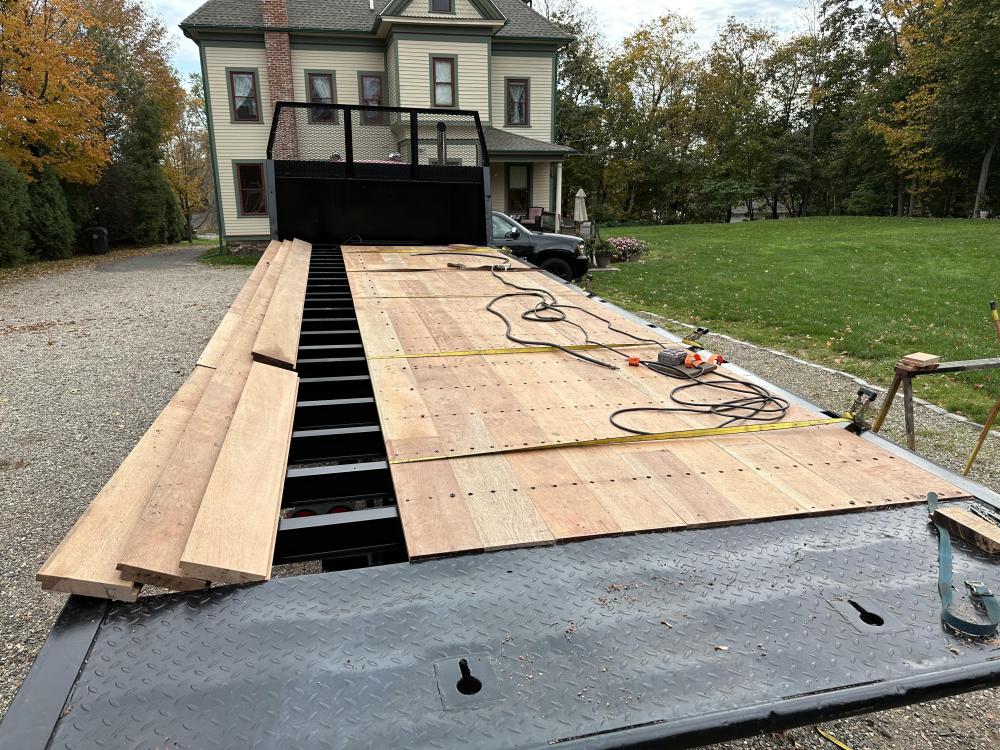
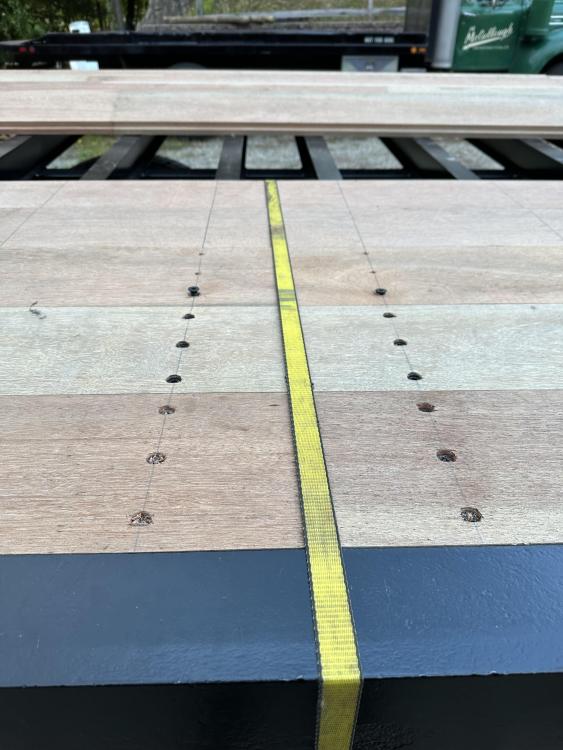
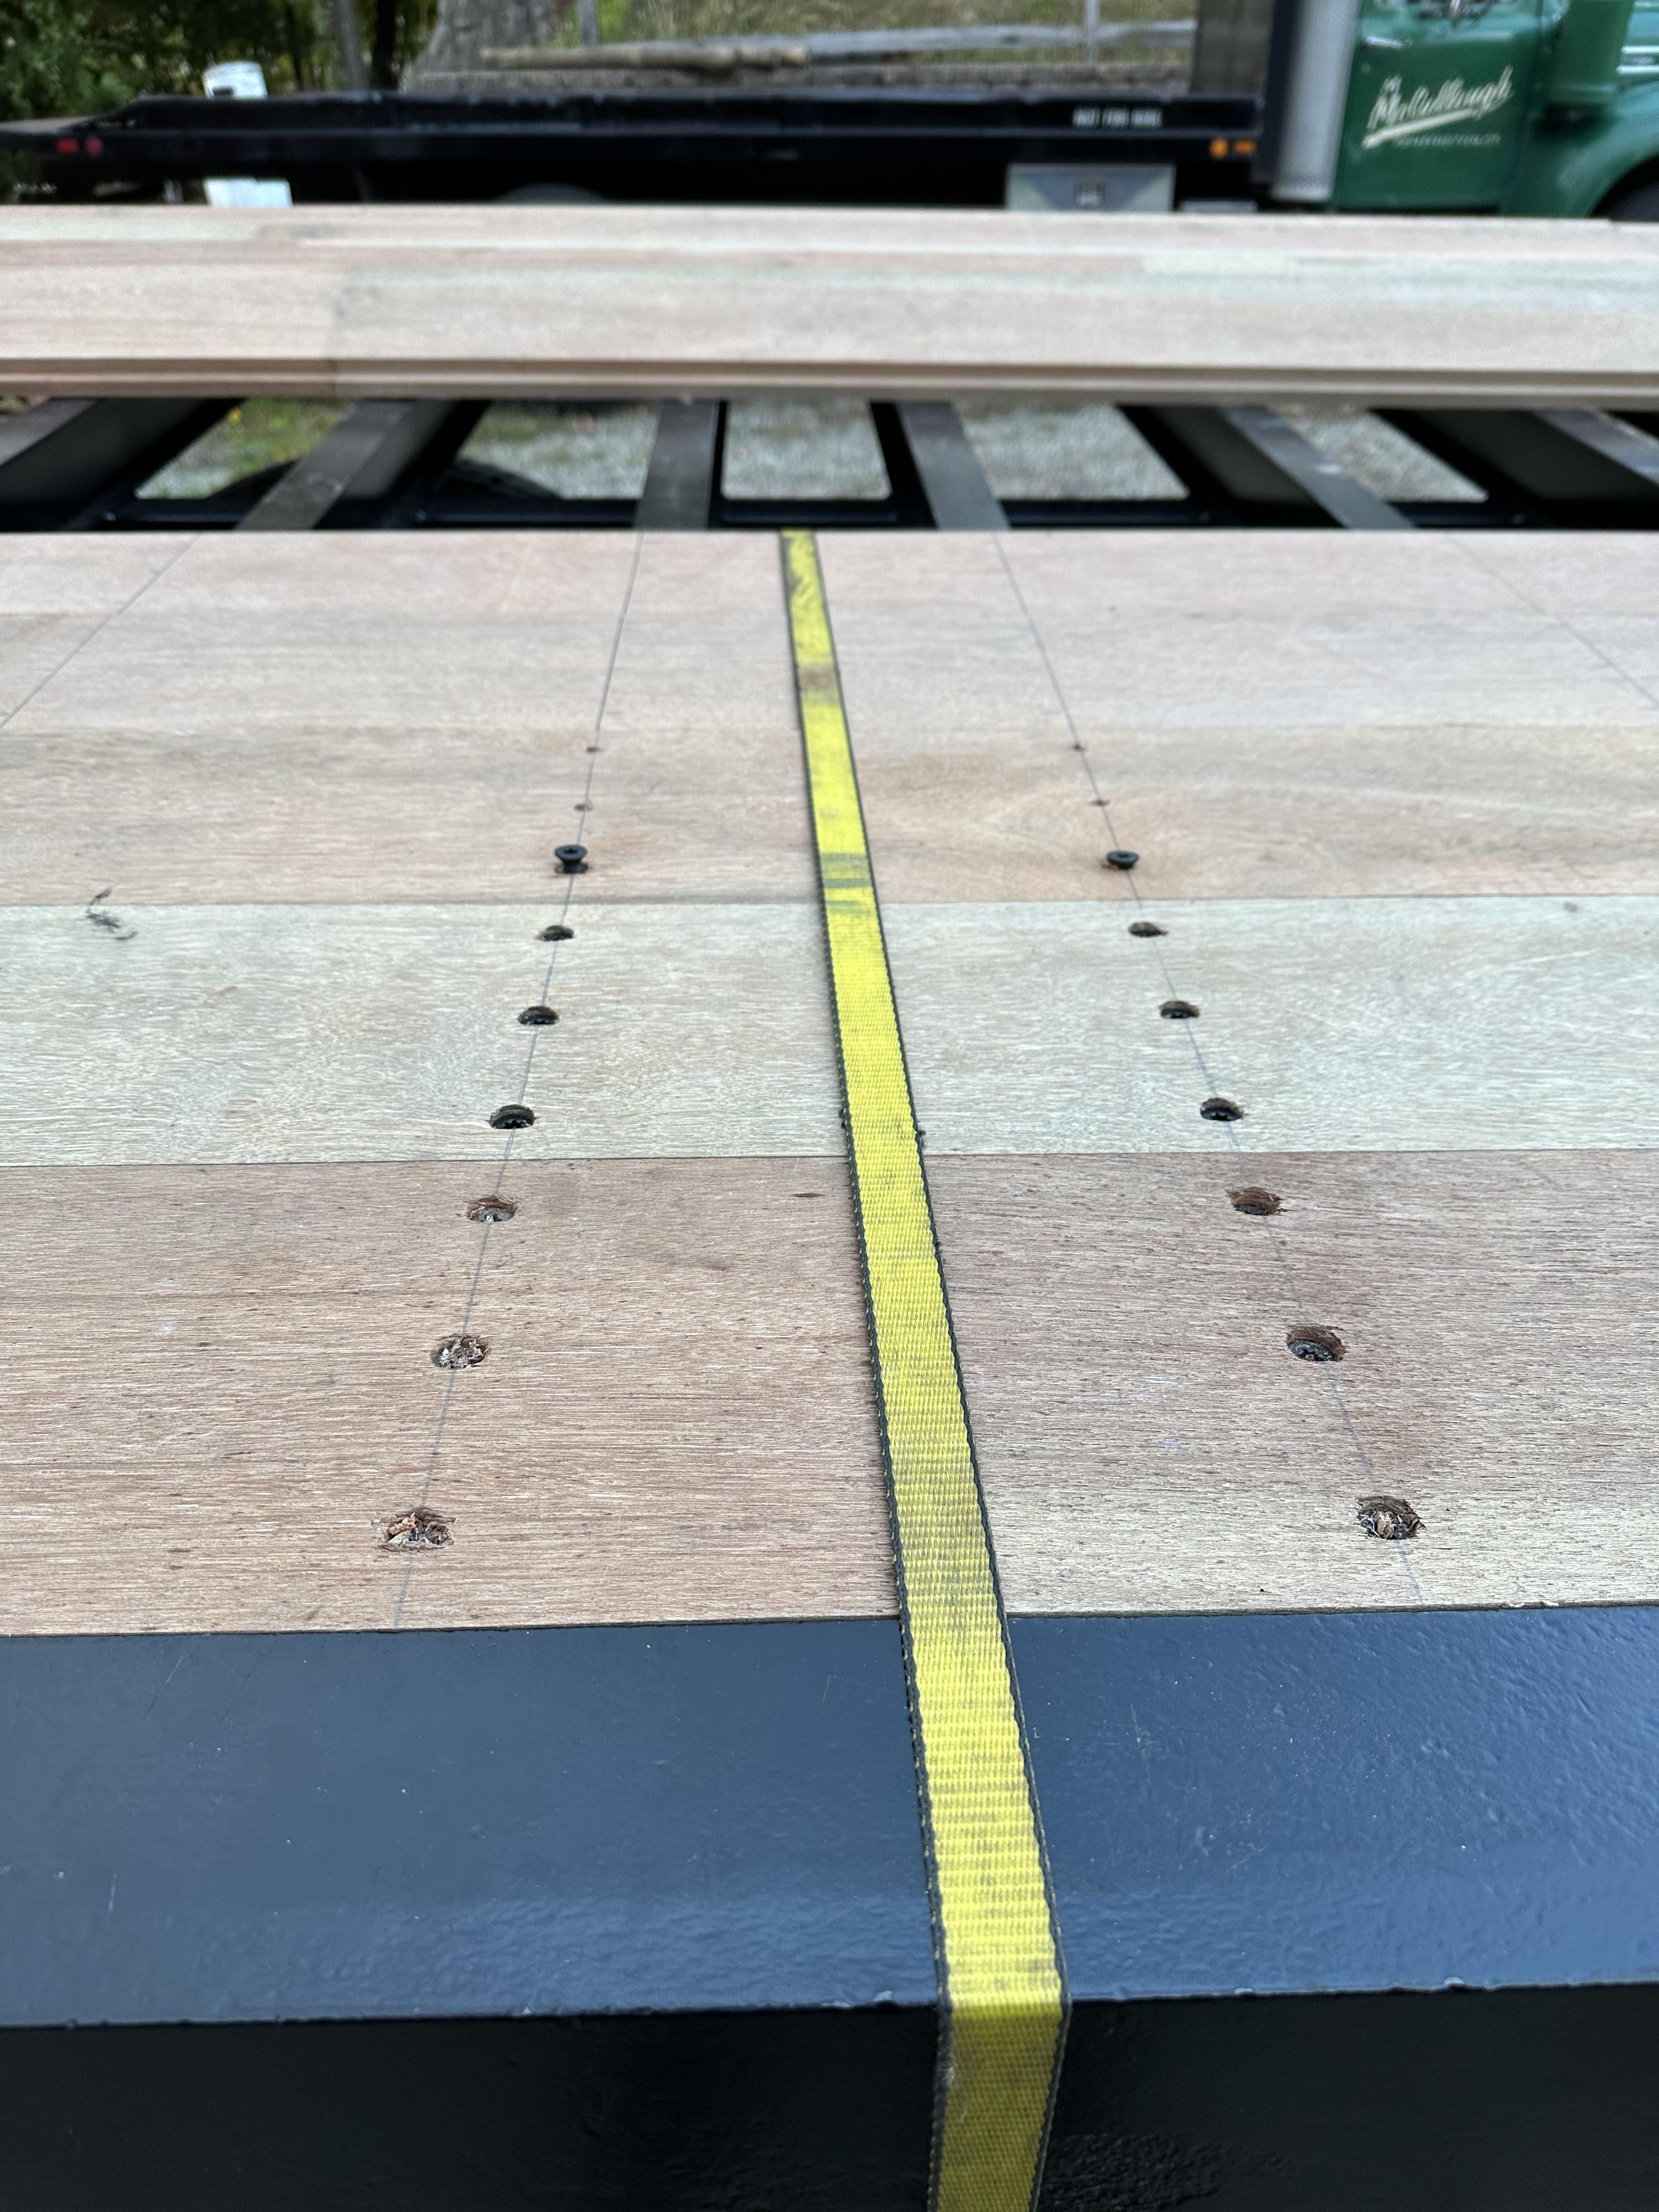
You guys are over engineering this thing!! The hardware is 2 1/2” Torx drive self tapping countersunk screws, same as what the factory did to secure the wood. Elevator bolt and carriage bolt heads are too big and would protrude too much. I started fastening it together late morning today. I started countersinking the first few holes, but found driving the screws directly and getting the heads below the surface was a better method. Each run takes 207 screws to do. There’s 12 runs and a filler I’ll cut on the driver’s side. But, that’s 2500 screws to set the deck. It’s going to take a bunch of time to get the deck on. At least another full day and maybe a little bit more. I found that setting several boards and closing all the gaps with several ratchet straps allowed me to set two boards at a time. Each run goes a little faster as I get my practice down.
As for elevator bolts, I did use them when I re-secured the cowl to the cab, back when I was doing that part. It’s interesting what Mack did during assembly of these cabs. On the L cab they run down the forward door jamb and pass through the cowl side.
-
9
-
3
-
It's ship lap cuts, one over laps the other. A lot of screws, but the original deck lasted 40 years so this should be fine.
-
1
-
-
The fastening system for this deck was originally self tapping screws into the cross members. I'm going to use the same thing. I'll drill and then countersink the holes to keep the heads below the surface. the wood is Apitong and very dense and hard. It's very durable, nearly impervious to rot and doesn't really swell.
-
1
-
1
-
-
- Popular Post
PAI might be a source? When I did my Cummins NH220 over this past winter, most everything came from them. Liner/ Piston kit was around $1500. They had gaskets kits a several things no one else did.
-
3
-
That's a great truck. Hopefully, the rain will hold off and you can enjoy the trip and show.
-
1
-
-
- Popular Post
- Popular Post
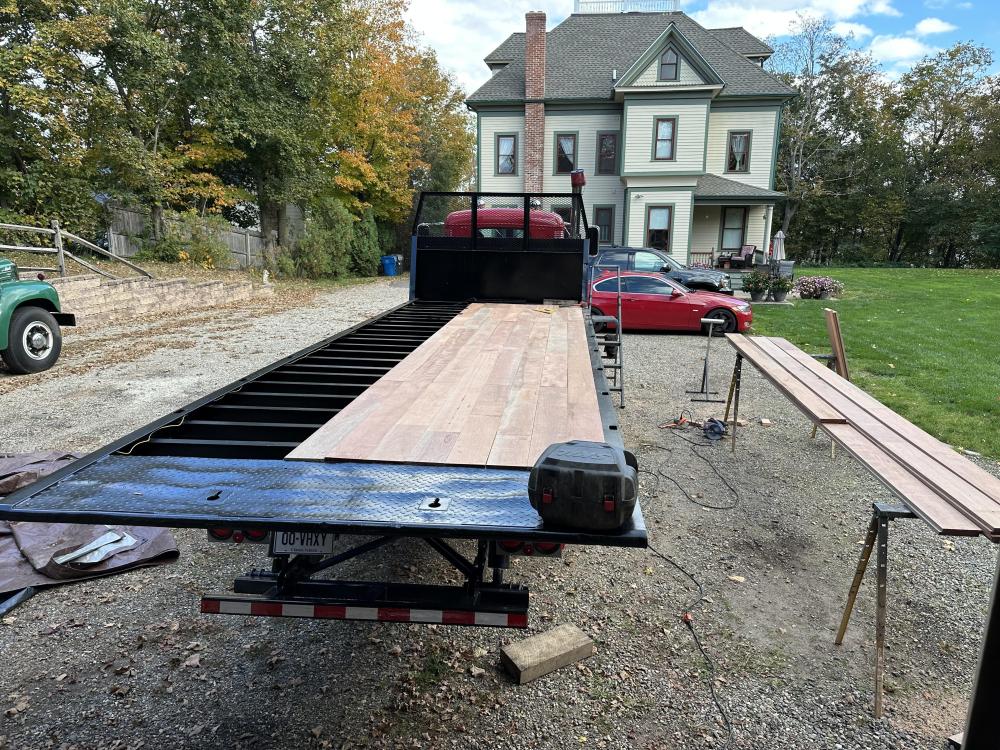
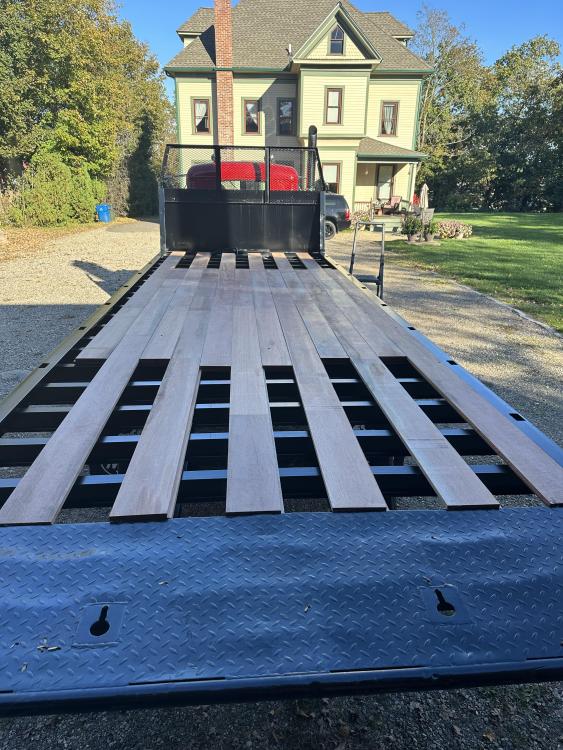
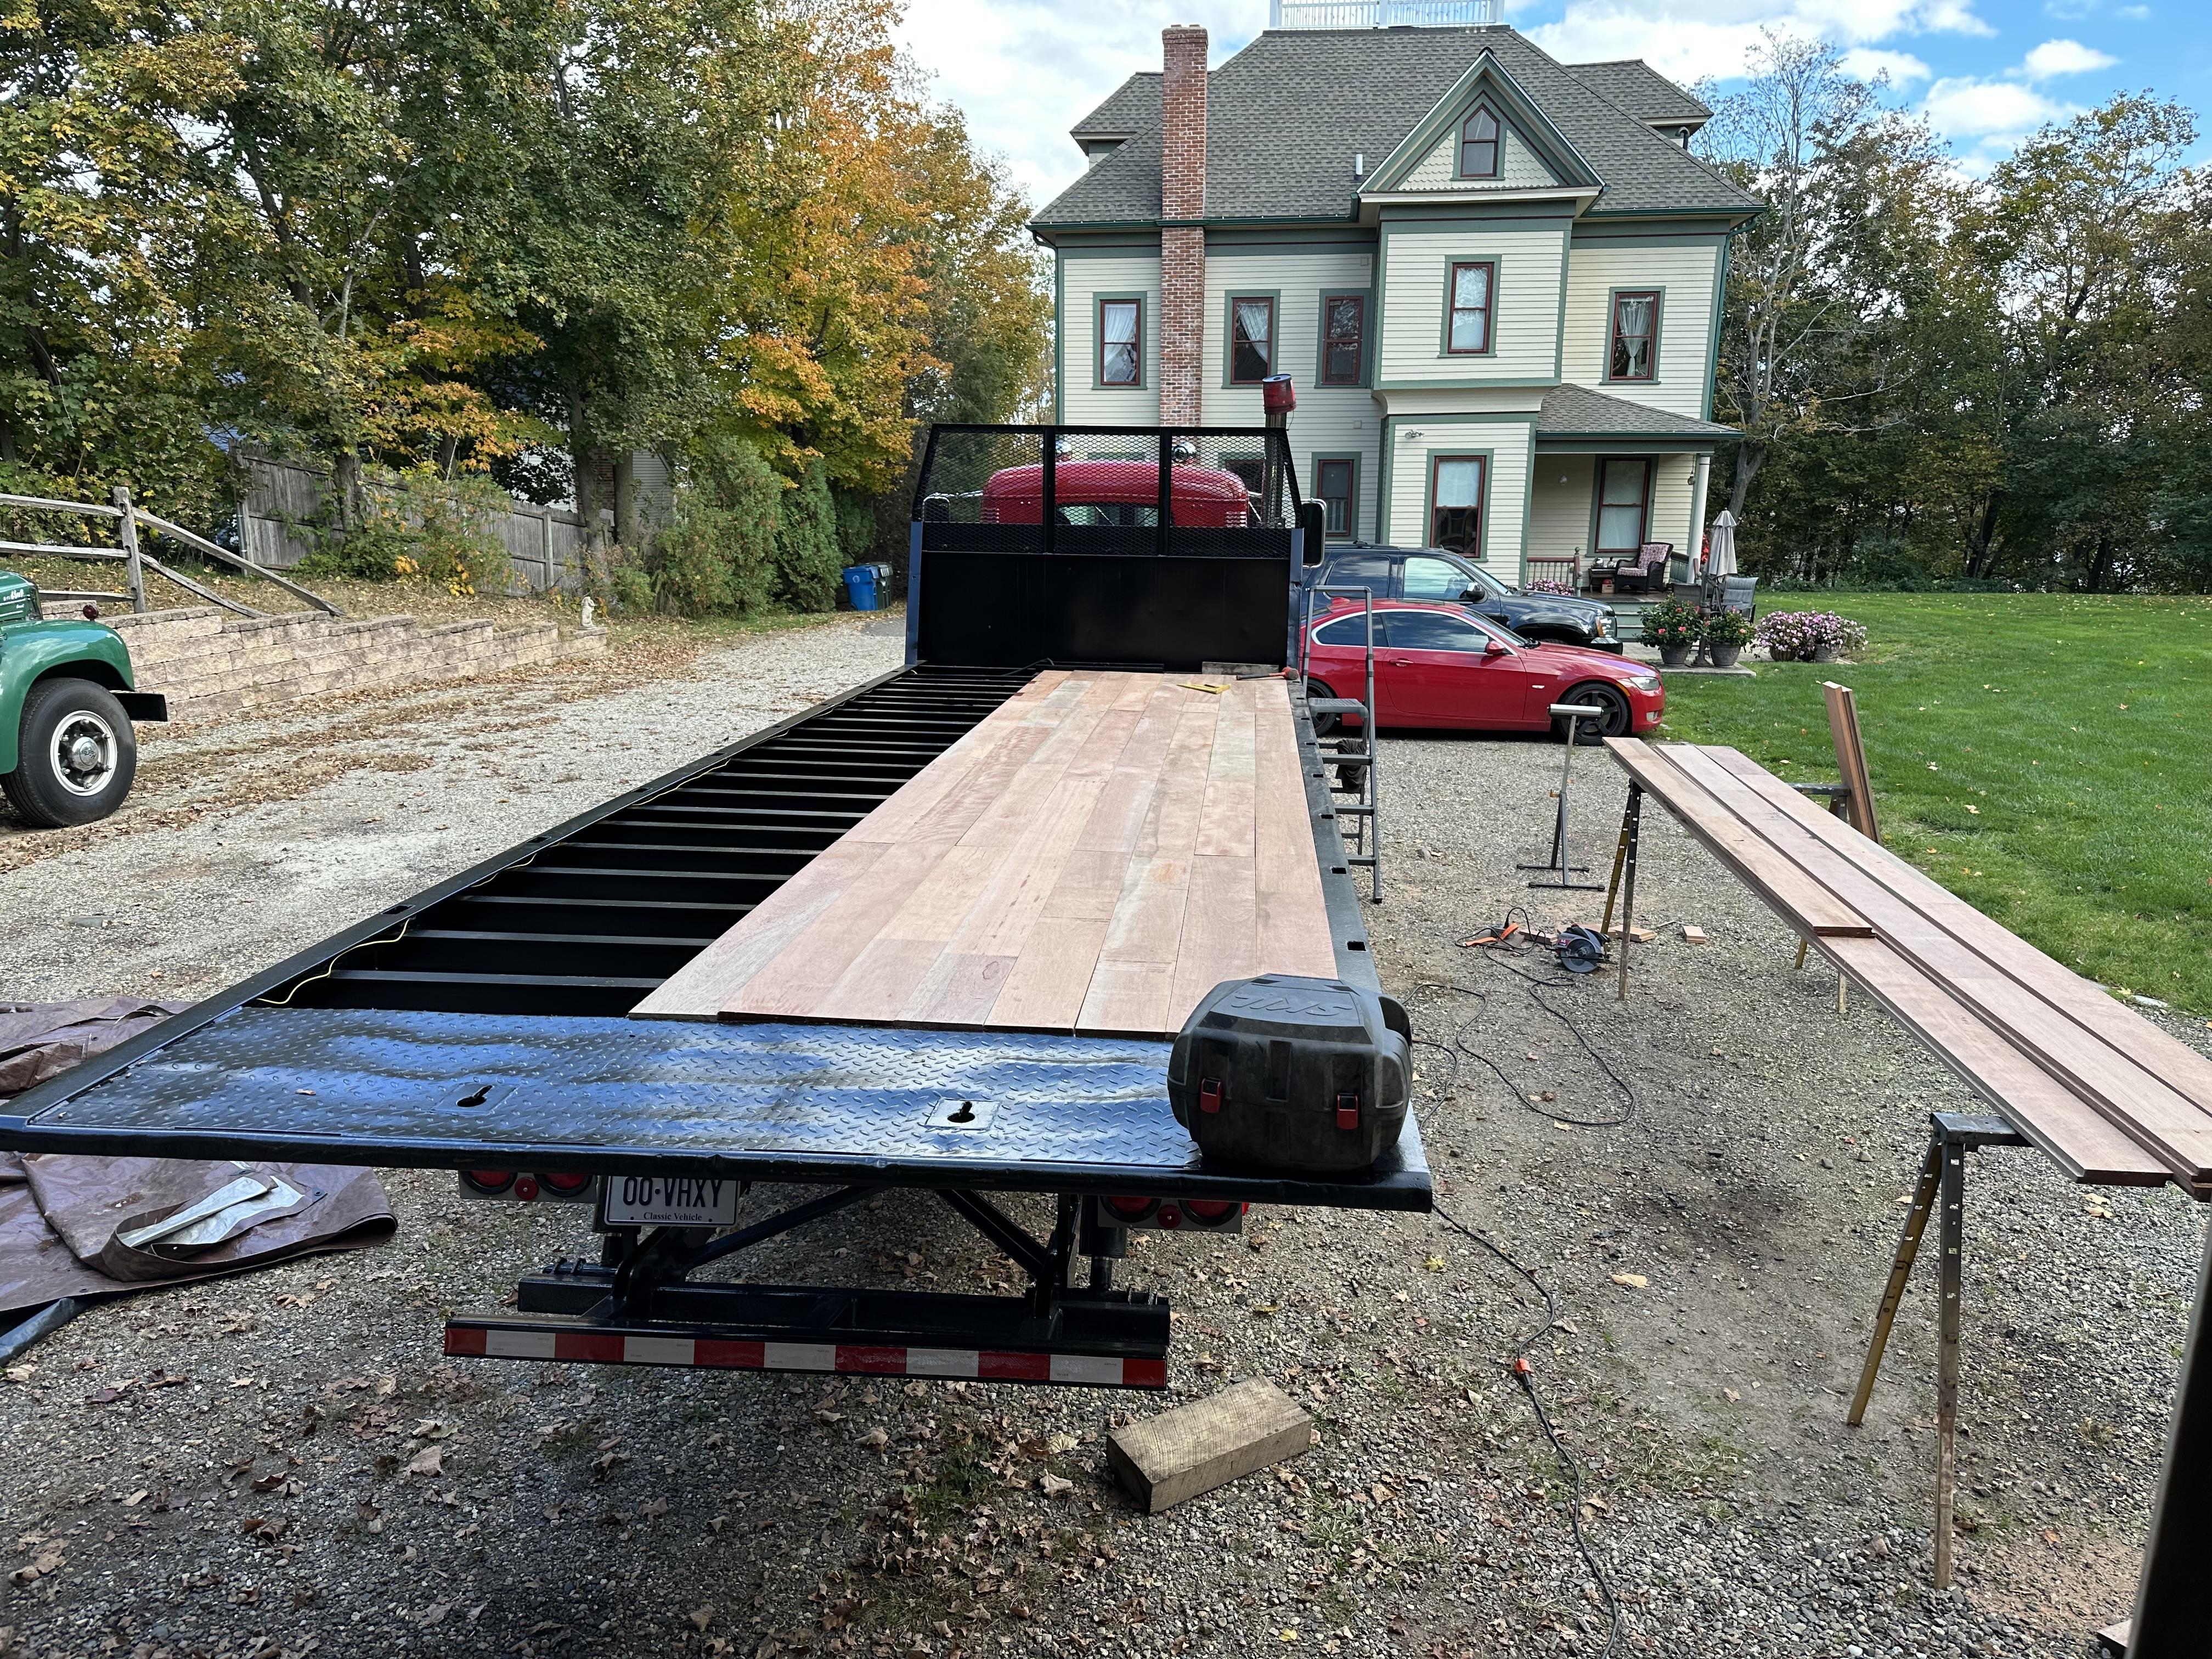
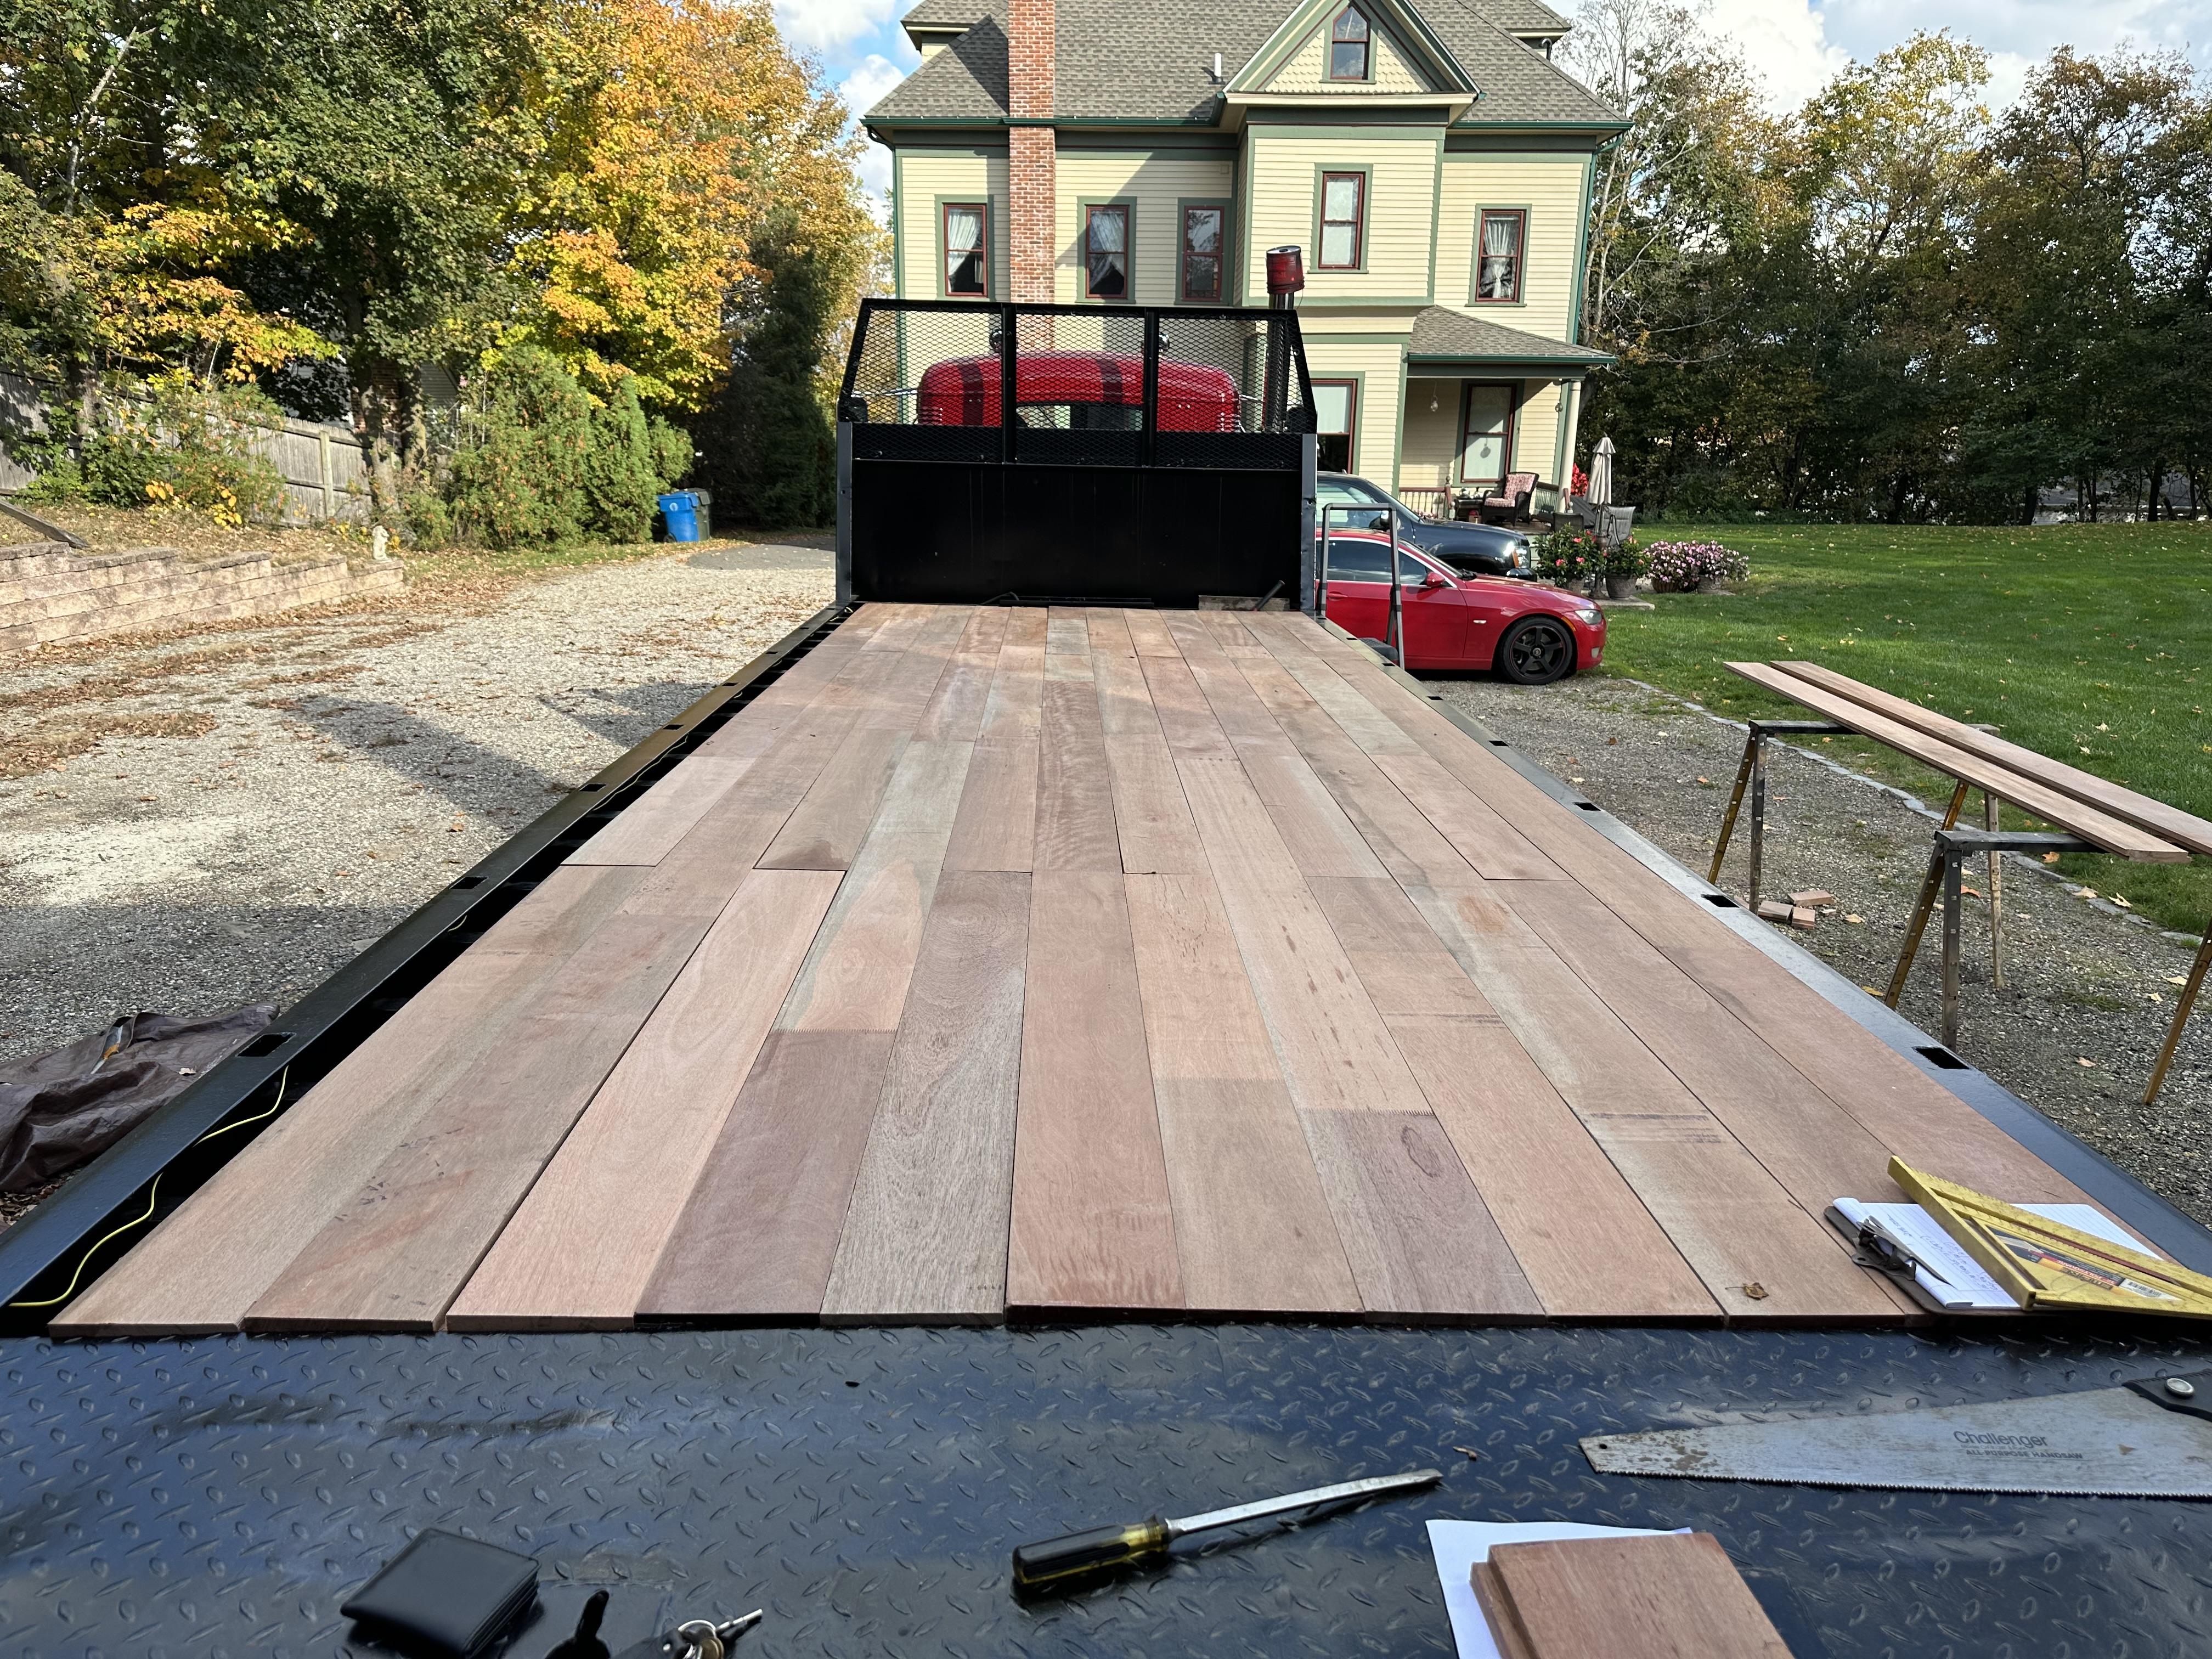
I have it all cut out and placed, minus the very last boards. Those need to be ripped down to a specific size once all the other boards are set in place. I was short one board that I had to run back over to get. Now I have enough to finish. Tomorrow, I’ll start screwing everything thing down. I’ve got almost 1,000 screws to drill in and that’ll take some time. Hopefully, the rain will hold off tomorrow.

-
5
-
 1
1
-
I could be way off here, so please disregard if so. I was under the assumption that early Mack’s were of the 6 volt variety. This comes from fire trucks I’ve worked on. The earliest being a 1934 BG. If so, 6 volt parts don’t always do well getting 12.
-
2
-
-
- Popular Post
- Popular Post
7 minutes ago, mowerman said:My god,,, Matt,,,, you never stop to take a breath of fresh air lol looks great good luck.. bob
If I stop, I may have a hard time getting going again. Besides, I need to get this done before I lose the outside weather and I'm freezing my ass off. I did spend last weekend on Nantucket with the wife and friends.
-
3
-
 1
1
-
- Popular Post
- Popular Post
Trying to get my lay out right on the decking to create as little waste as possible. Not matter how I do it, I’ll probably need to get a few extra boards due to where the crossmembers fall. I’ll need to trim all of them to get the joints to fall on a crossmember to secure the ends.
-
7
-
2
-
It has been a long time, welcome back!
-
Not sure there are many left in our area this year. Looking to bring it to our club luncheon up at Matt Pfahl's on Sunday the 29th.
-
1
-
-
That's Tucker, "The Super Mutt", eyeballing me. Great dog and loves to hang out with me.
-
1
-
1
-
-
- Popular Post
- Popular Post
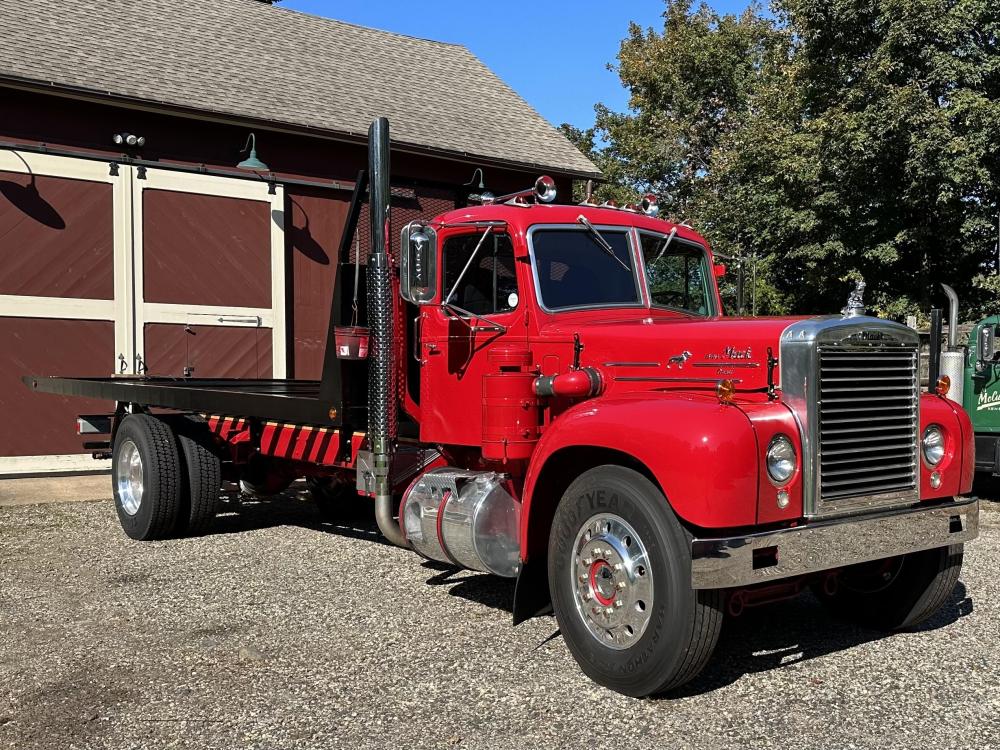
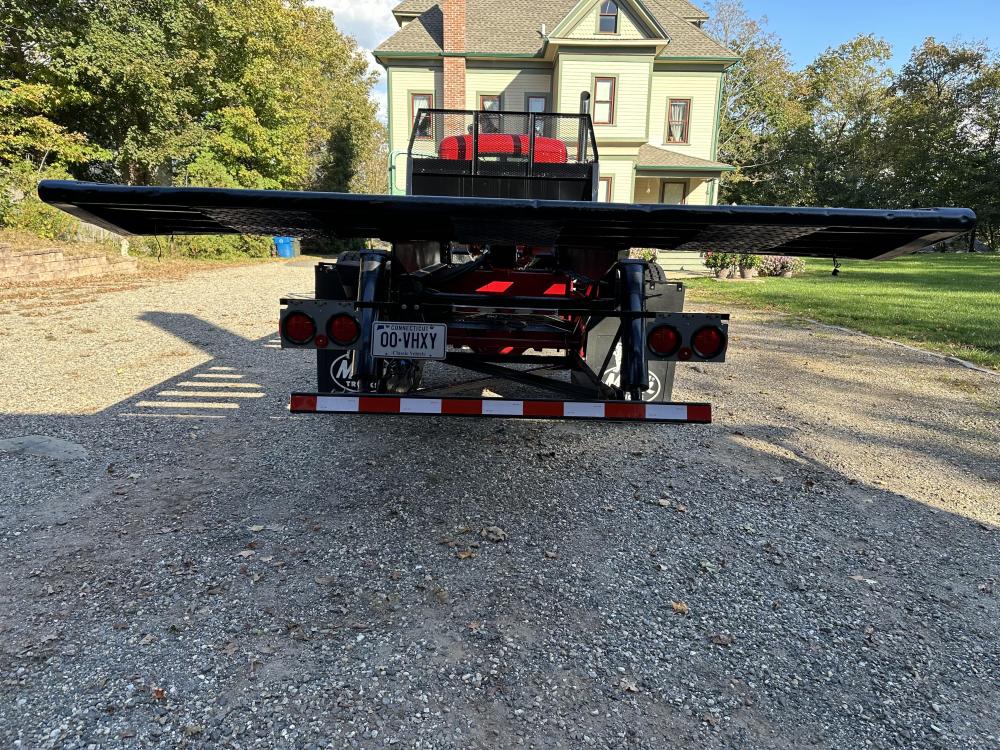
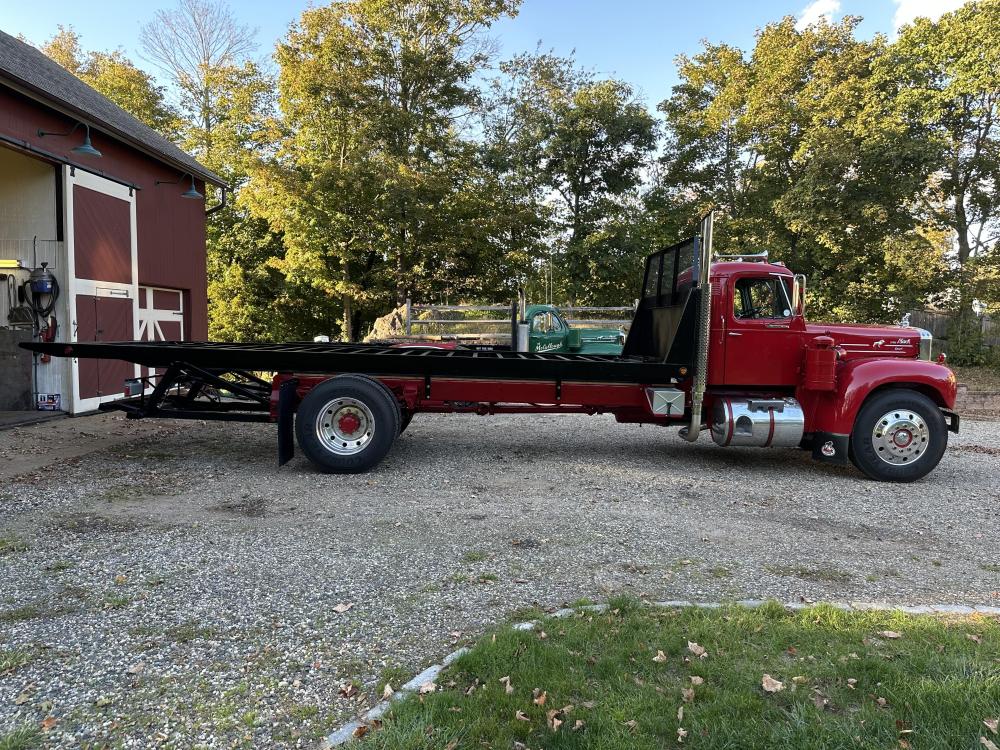
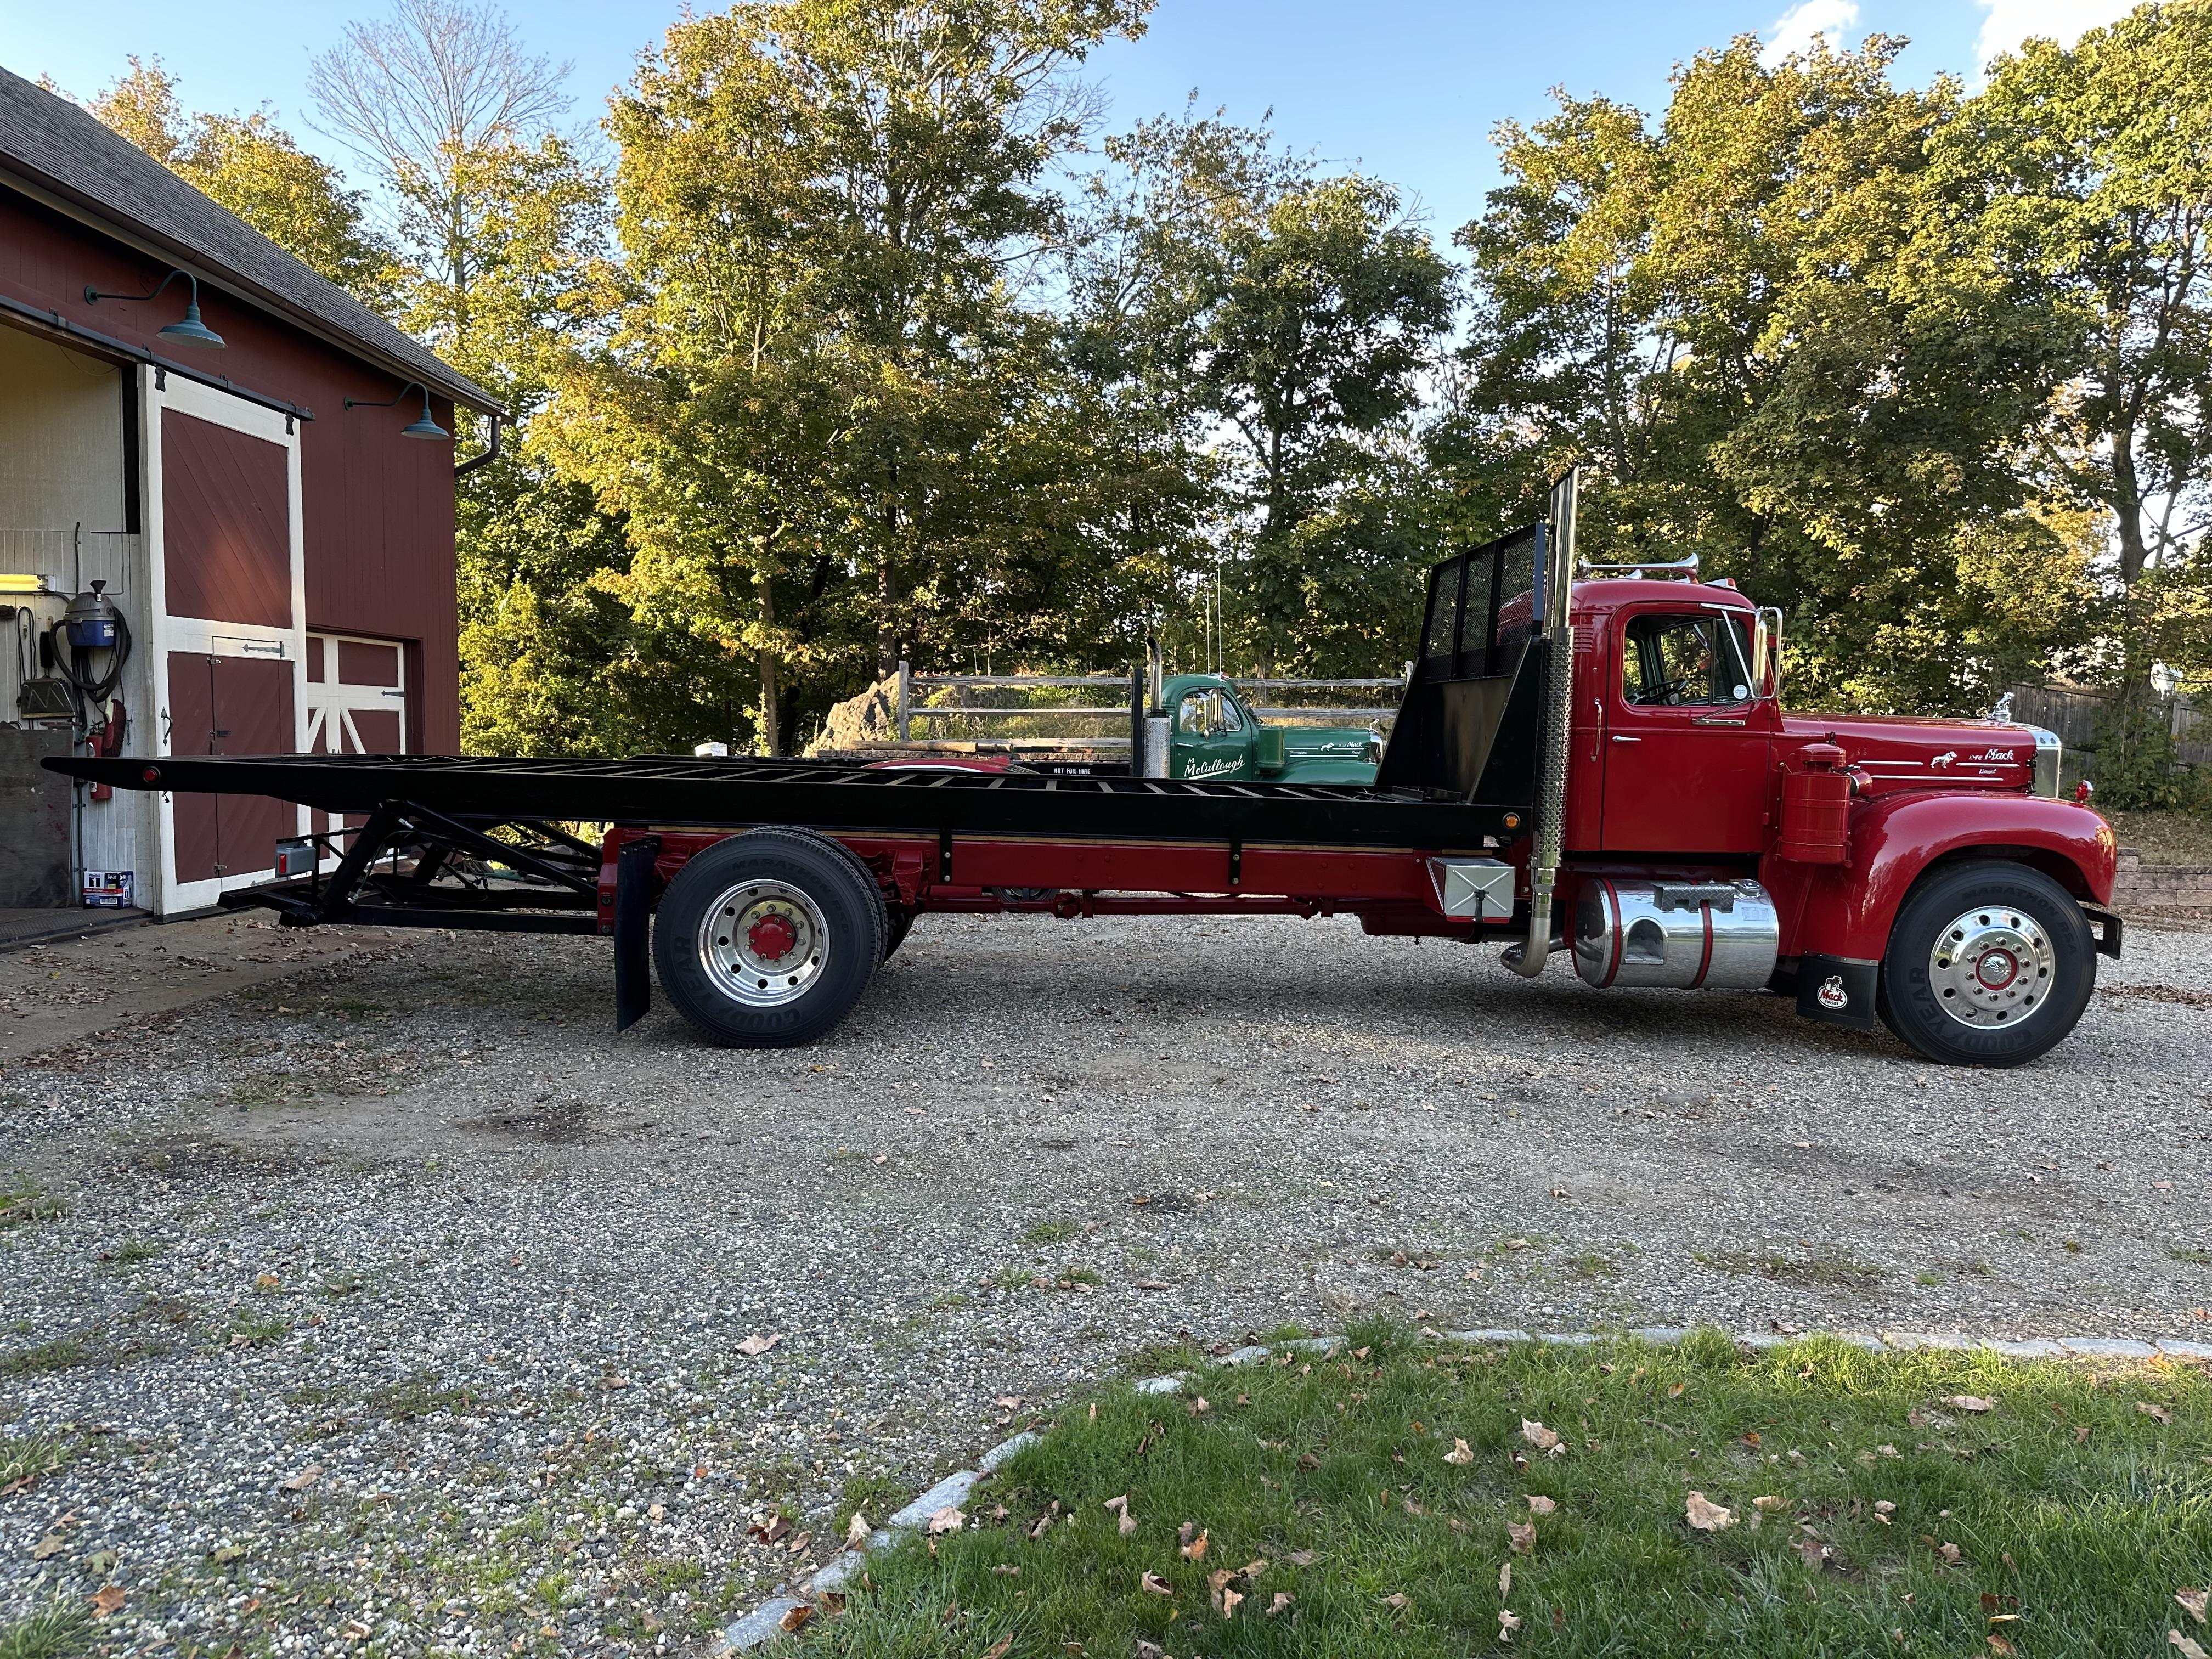
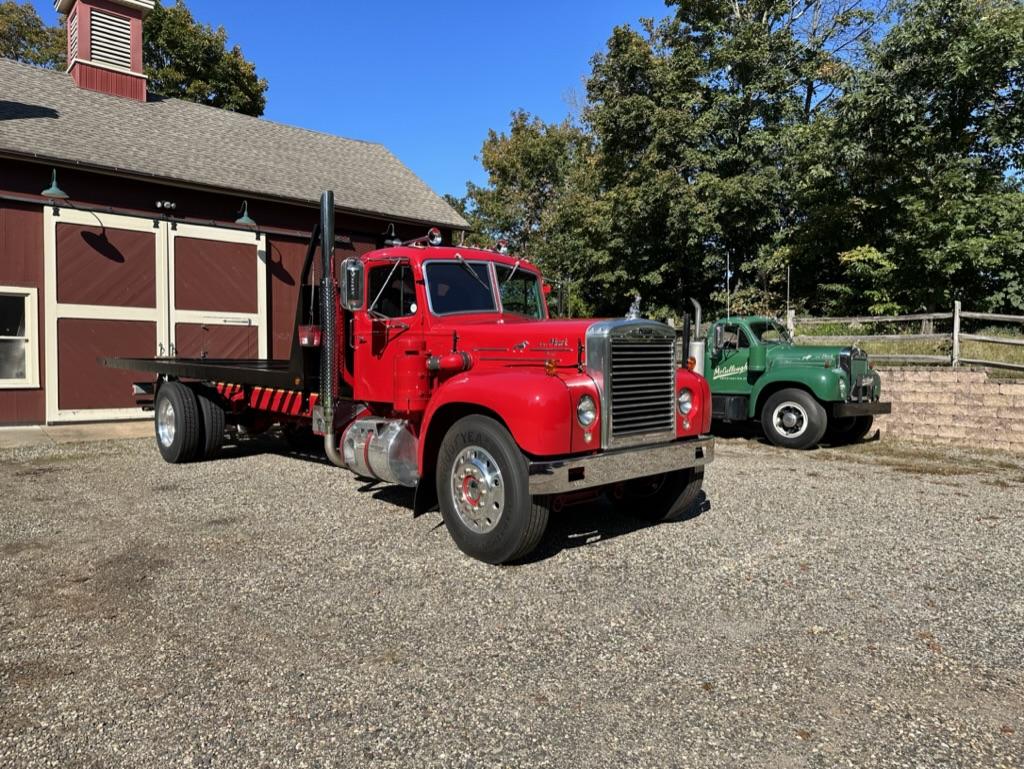
Tail lights are done. I just need to finish the deck lights and add a light for the plate. Took it out for a test drive for the first time since adding the deck on. Completely different ride with the extra weight. Smooth, no hopping around over bumps. Just a few more things to do and I should be onto the deck wood next week, the last big thing to do to it and some small stuff to finish. I added a side shot to the post, quite the long truck, now!!
-
10
-
3
-
I would wait also, until you’re ready to put it on the road and for the same reason. I bought some “yard rollers” for my project. They were round and held air. Then bought what I needed as I got closer to the road.
-
1
-
-
I put the pictures in sequence on the previous page to show it.
-
1
-
-
- Popular Post
- Popular Post
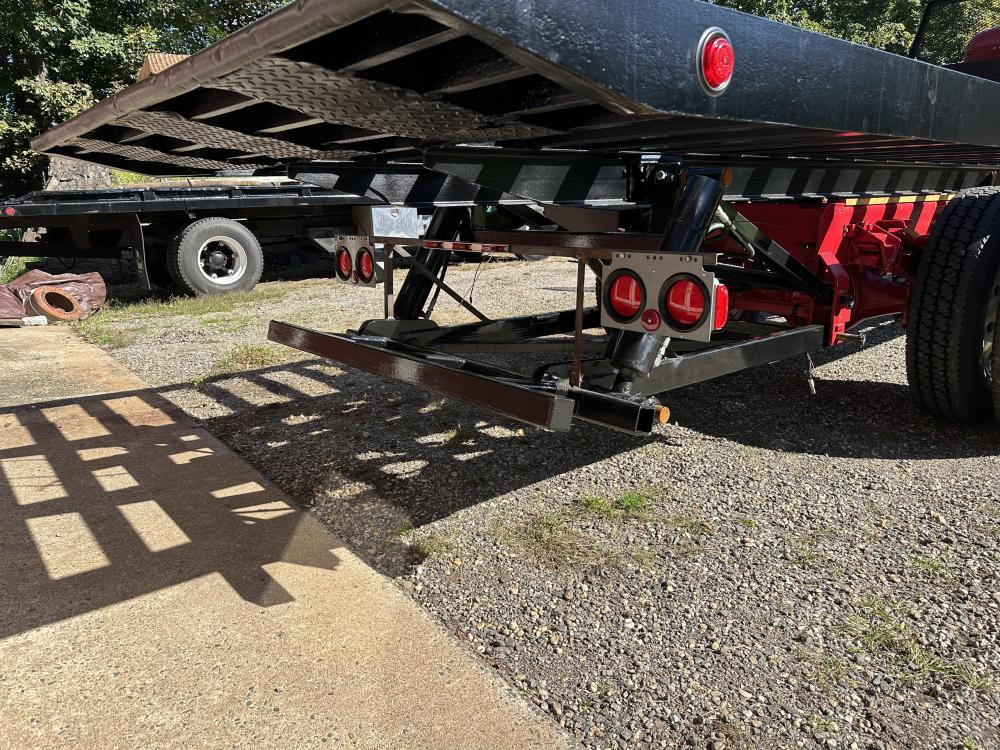
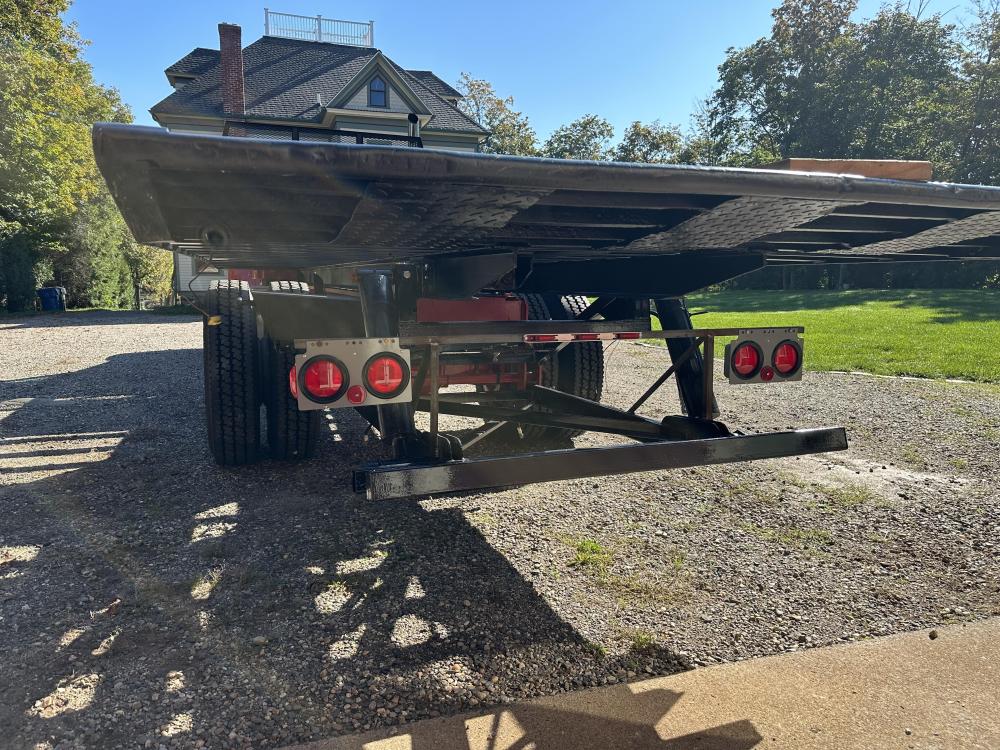
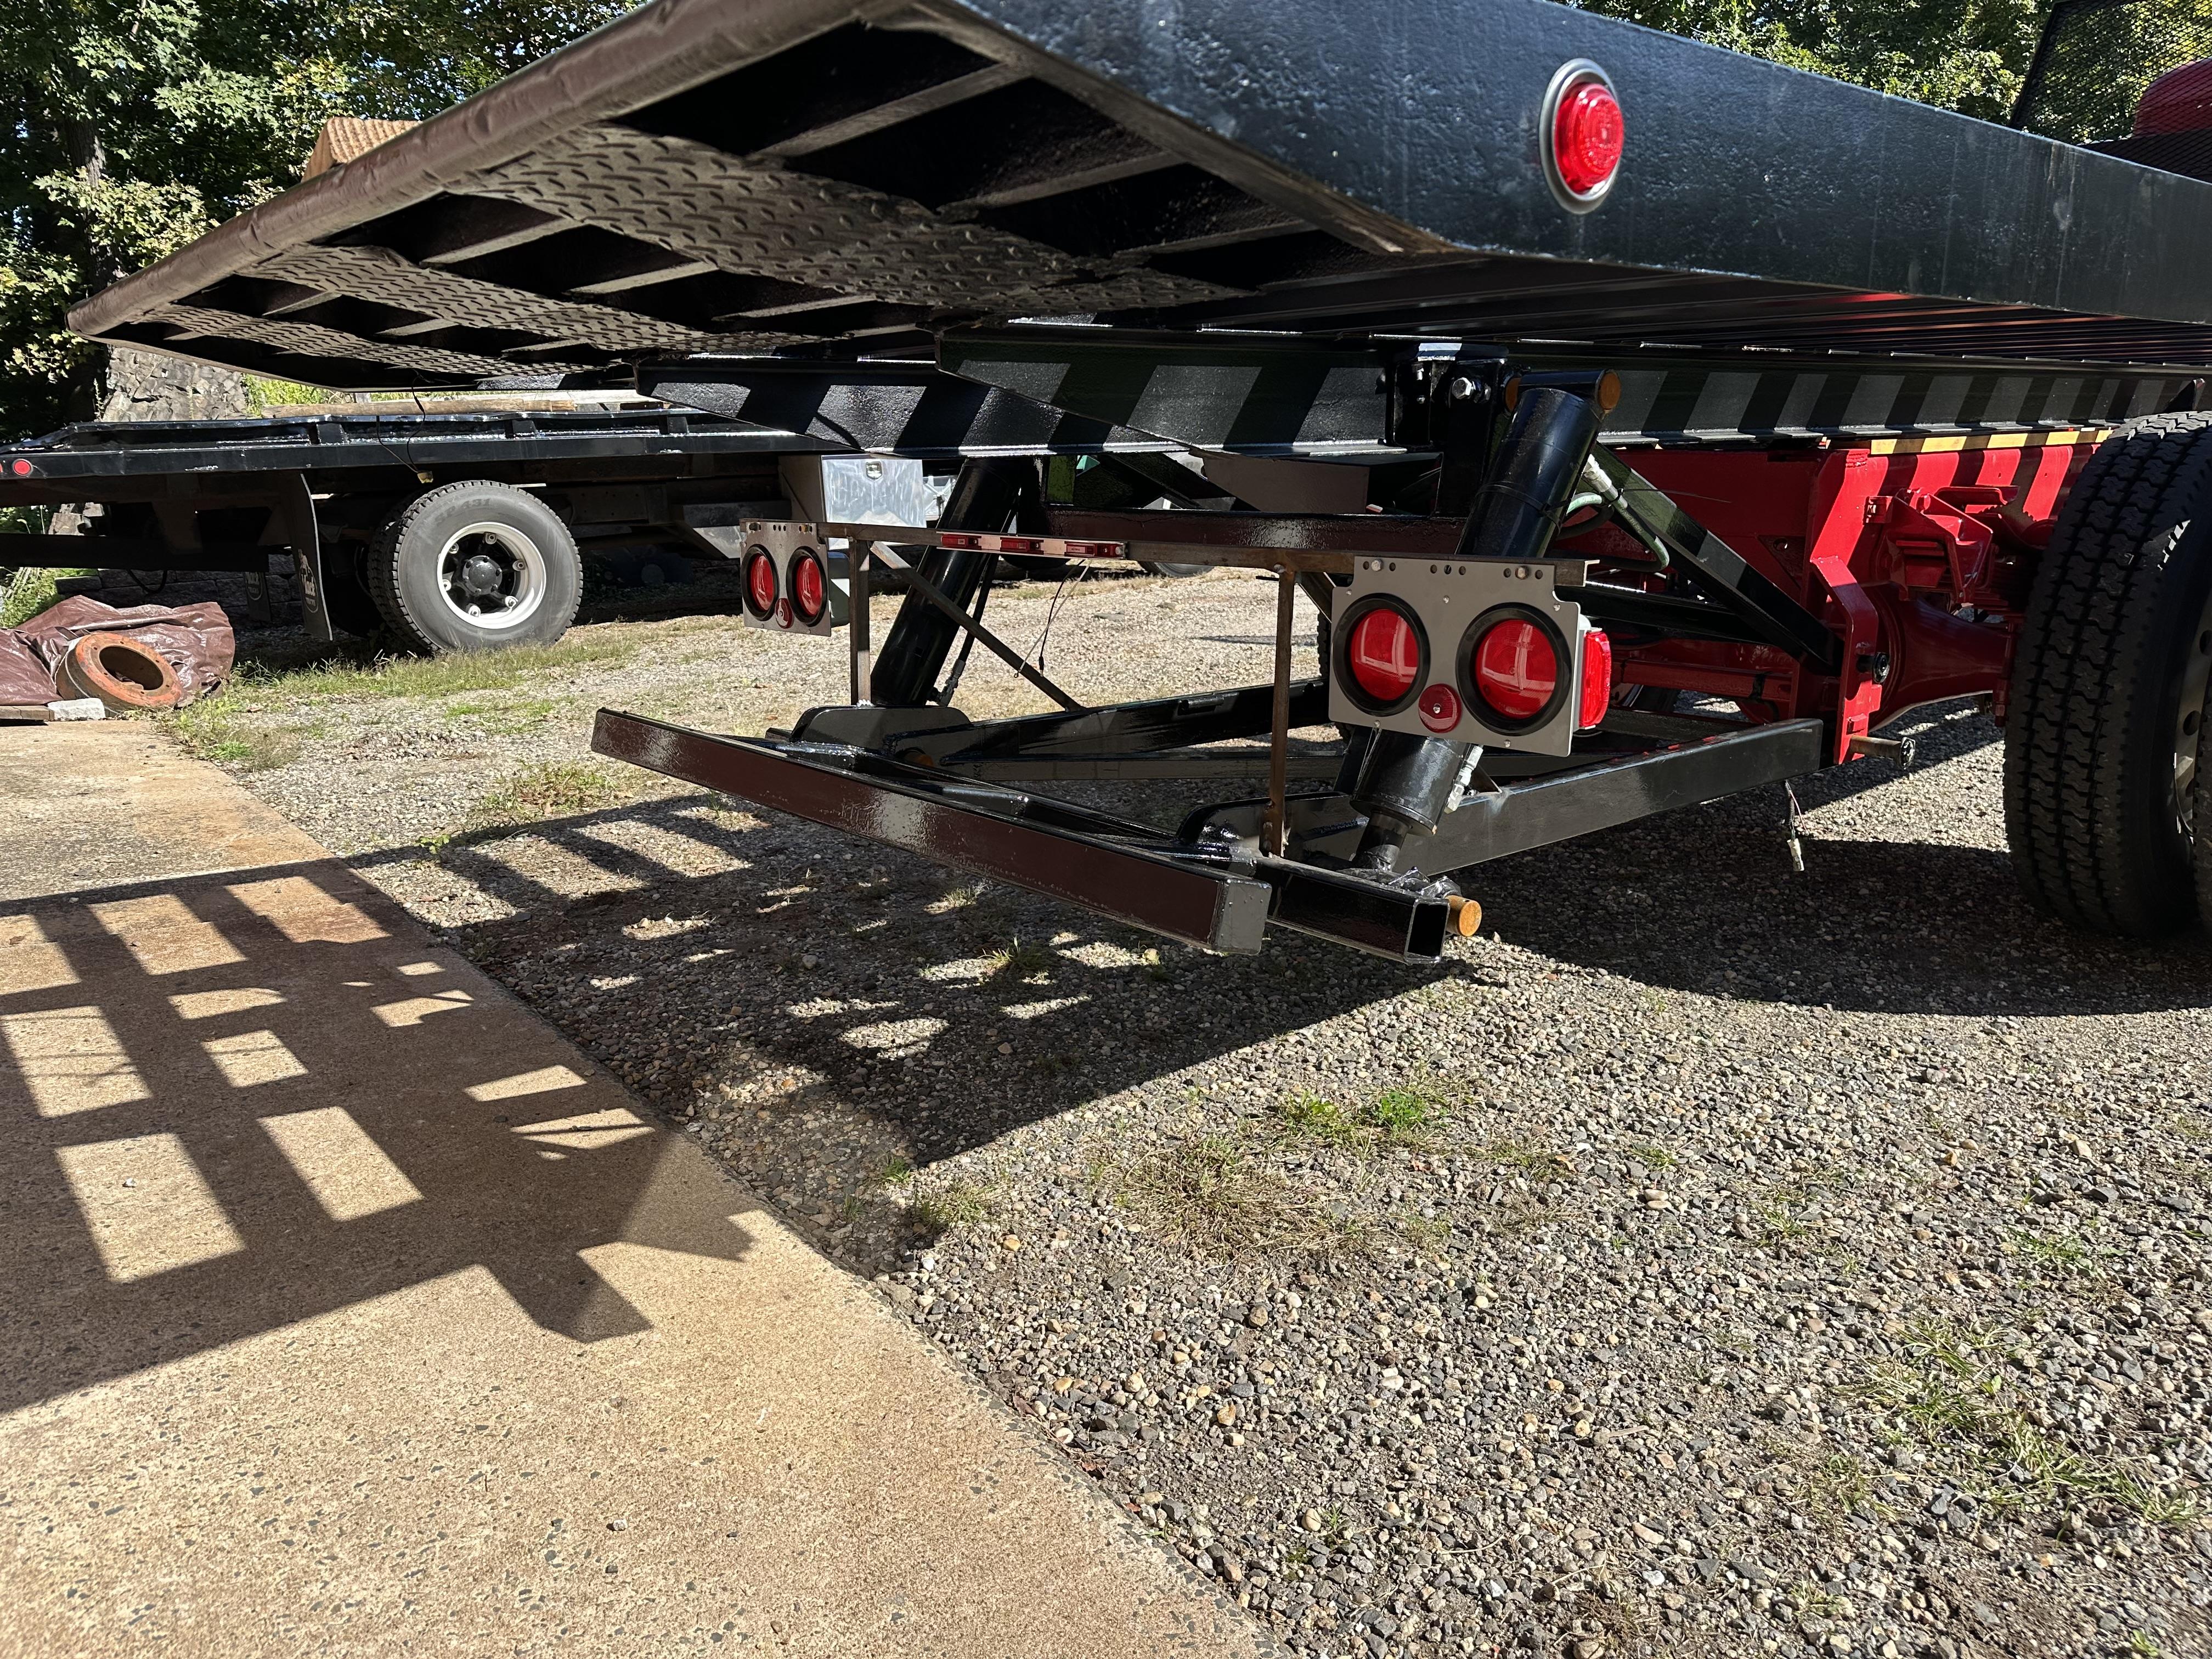
No, you got it right. Lower the gear, bring the body back and then lower the bed by raising the gear. The gear controls the rate and angle of the bed. Once the load is on the deck, start retracting the bed. Lower the gear which raises the bed, before you pass the center of gravity or the bed will raise itself without control.
-
4
-
1
-
- Popular Post
- Popular Post
Mechohaulic, That's not a lever, it's a chain binder from when I had it strapped to the bed of the other truck. There are two screen chain pockets on either side of the winch area for storage. Future plans have two polished aluminum storage boxes on either side of the frame. I'm looking for two vertical chain storage lockers to mount on both sides of the head board. Probably pin striping and door lettering to dress it up a little and finish it. It does look good, though!

-
7
-
1
-
- Popular Post
- Popular Post
Works been kinda busy. So, not a lot of time to spare. I did fabricate the tail light bracket and have them roughed in. Paint and wiring next then the bed decking next.
-
6
-
1
-
- Popular Post
It is sad that a lot of the skills and knowledge to manufacture parts like that are disappearing. When I see a raw casting like that, my mind immediately goes to how I need to set it up to machine it into a useful part. That comes from my technical education in high school taking a Machine, Tool & Die course. At the state technical school I went to we had a huge machine shop and a large class. The classes behind us were smaller each year. The overall school population declined through the years and the state closed it for several years. When it reopened a few years ago one of the shops that was cut was the machine shop. One of the largest spaces in the school is now occupied by a Nursing course. I went there nearly 40 years ago and still call upon what I learned there all the time. The younger generation doesn't seem to have much interest in learning hands on skills anymore. It gets harder every year to find places to do work like what you've shown.
-
4
-
No, it’ll gravity dump if you don’t put the leg down and then run the body out. It operates a little different than the Chevron deck on the other truck. That one is power up and down.
-
2
-


BMT Forum Logo

B-73 Restoration
in Antique and Classic Mack Trucks General Discussion
Posted
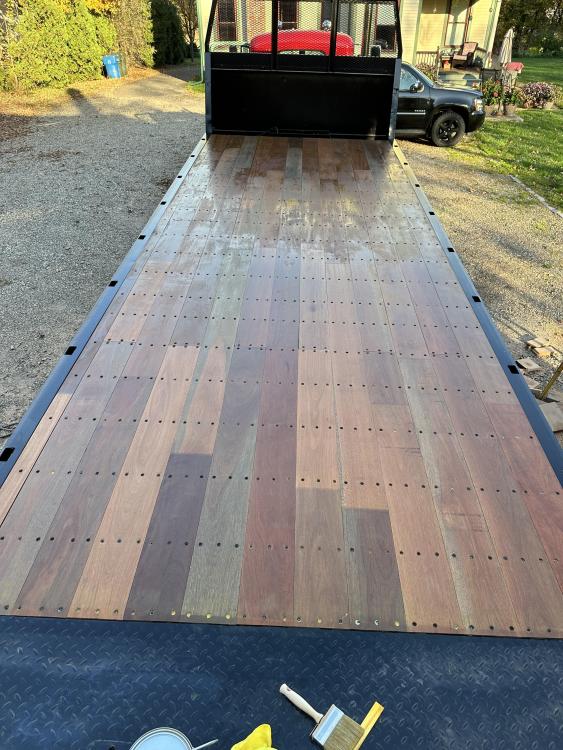
Third and final coat this morning and it looks amazing!