
Keith S
-
Posts
385 -
Joined
-
Last visited
-
Days Won
1
Content Type
Profiles
Forums
Gallery
Events
Blogs
BMT Wiki
Collections
Store
Image Comments posted by Keith S
-
-
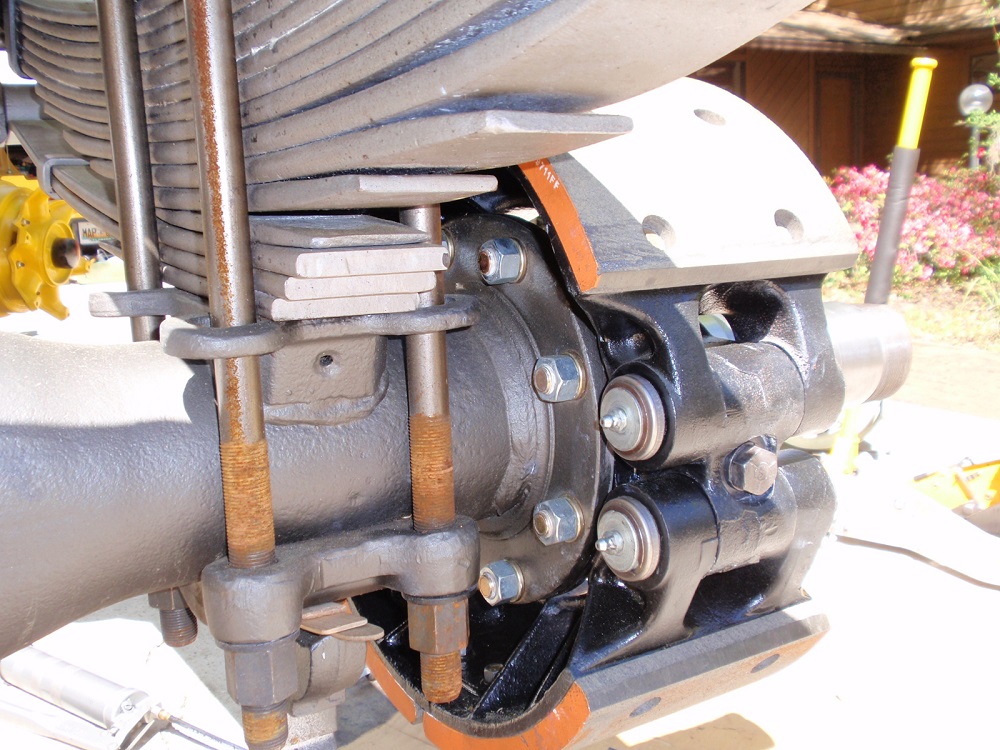
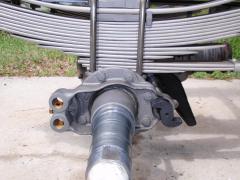
My chamber support bracket has three flanges. I added some cracked-weld pics: S-Cam Repair & Cracked welds
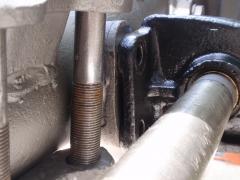
5/8"-18 is what's on my axle tubes - the threads were badly butchered. I still haven't found a 5/8"-18 thread chaser - 9/16" seems to be the biggest.
- A thread-chaser is not, and never will be, a tap
- A thread-chaser re-forms the existing threads
-
Dulling a tap can make it a thread-chaser
- Use a on a wire-wheel on a bench grinder to dull the tap.
- Be really, really aggressive in dulling the tap - you want the "dull tap" to re-form the existing threads, not cut new ones.
- With fine threads, false starting the dull-tap/chaser is easy so take your time
If the hole is beyond saving, there's always helicoil repair - which is a lot easier said than done for a 5/8" bolt, on really hard/tough steel. Not a job for the biggest 1/2" drill.
-
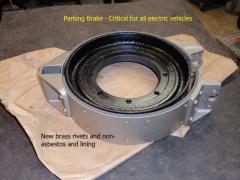
The linings are all the same and symmetric. The shoes are not. The casting's are imprinted with either "Upper Left / Lower Right", or "Upper Right / Lower Left". Before I took the other side apart I thought there were four different shoes and linings. They shoes only fit one way... well, when put together correctly. Here are some before's and after's.

-
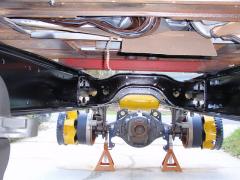
I won't be removing any springs at this stage - just want to get the thing road legal. While all the electrics are not as heavy as the gas engine, the front end will have about 1000 lbs (motor is 250 lbs and the front battery pack is about 700 lbs). The two side tanks (battery packs) are about 300 lbs each. Except for the gas engine, the drivetrain is all Mack (heavy).
-
On 1/25/2018 at 7:43 AM, h67st said:
Cool! Is that Stemco catalog online? I have a different axle, I'll have to look at it again but I think it's an FA511.
It's a cross-reference pdf file http://www.stemco.com/qbin/335.pdf
Not the easiest system to use and search. I replaced the wheel bearings and was able to use those numbers to double check the part dimensions and find the spacer and seal. You might lucky and find something referencing the FA511. I spend a lot of time looking for parts. I probably stumbled across something that referenced something that led to something else...
-
2 hours ago, h67st said:
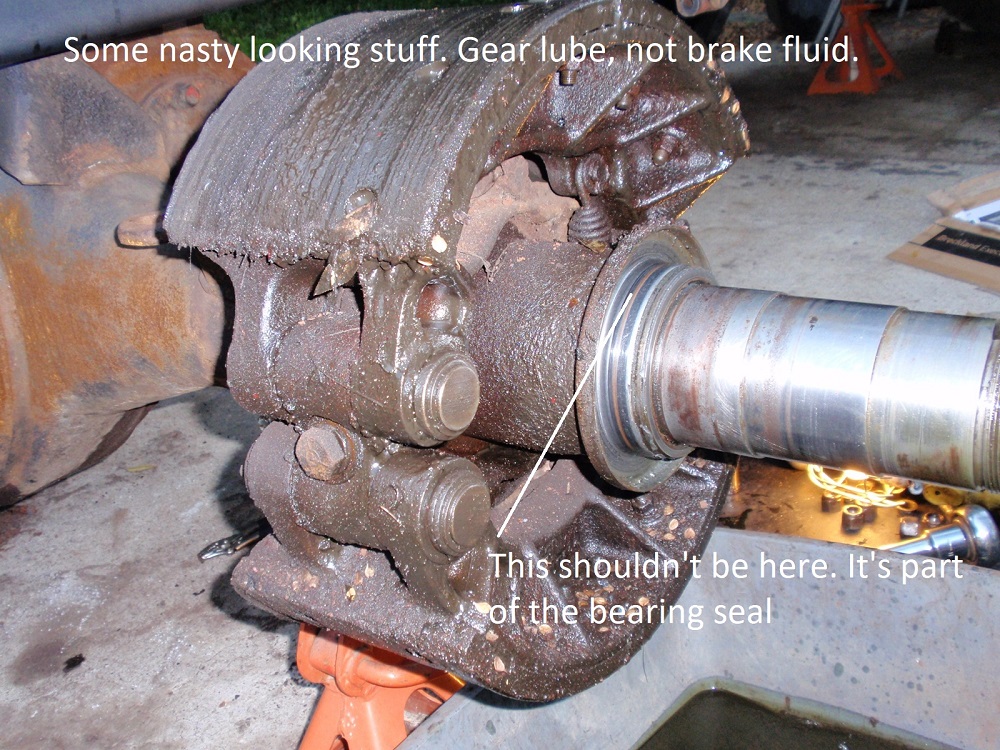
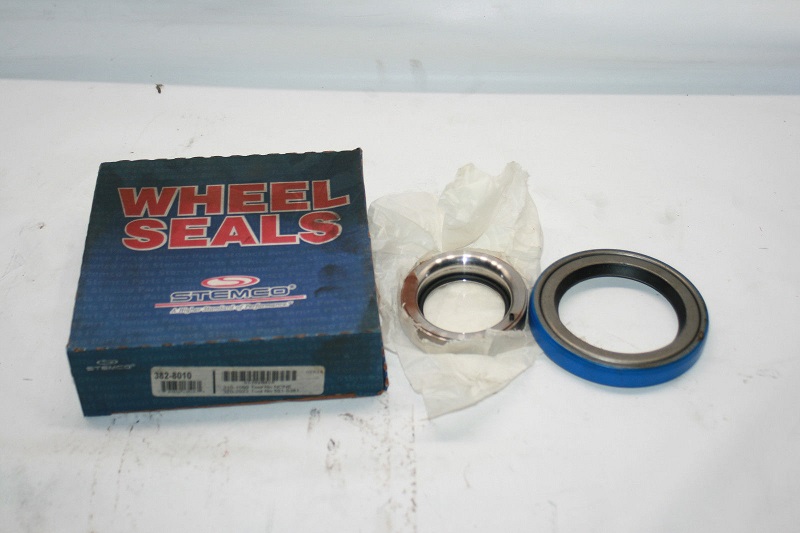
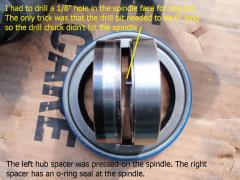
What is the purpose of the pin? Also, where did you get your seals?
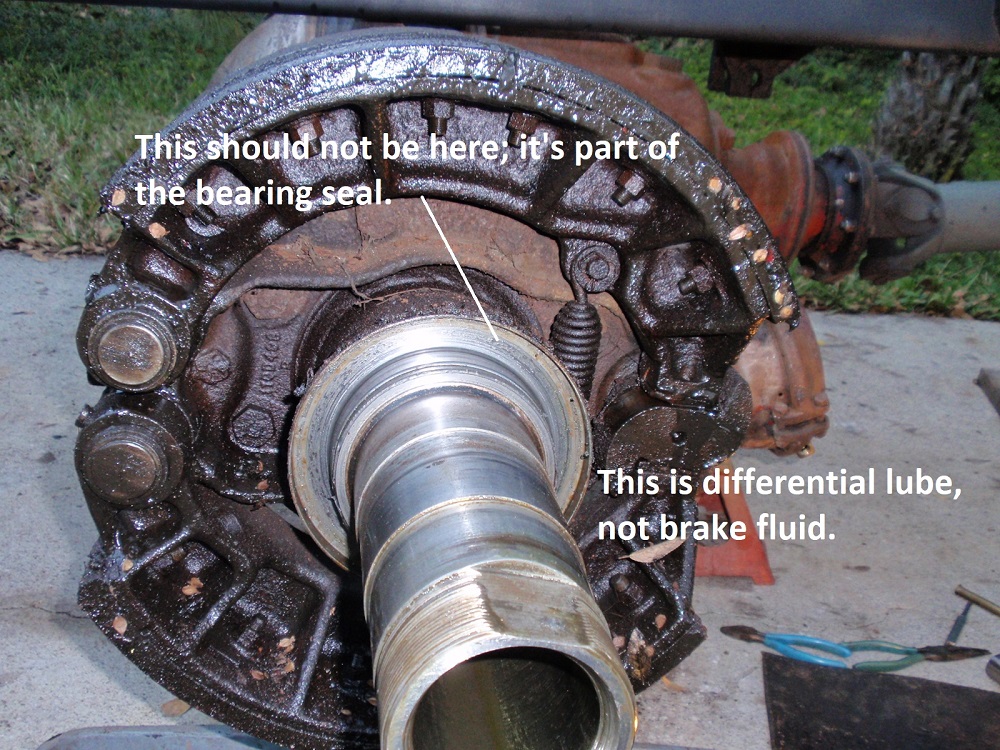
I bought the seal and bearing hub as a set - I bought 2 sets as both sides were worn. I got them from ebay ($. One big trick was finding what this thing is called! I finally found a Stemco catalog and part number. These are Stemco Grit Guard, 382-8010 - $20.00 each
-
On 1/3/2018 at 8:21 AM, h67st said:
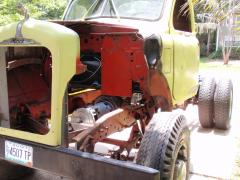
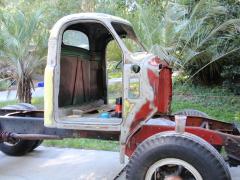
The truck is looking great so far! Nothing like getting all the rust and crud cleaned off and a new coat of paint.
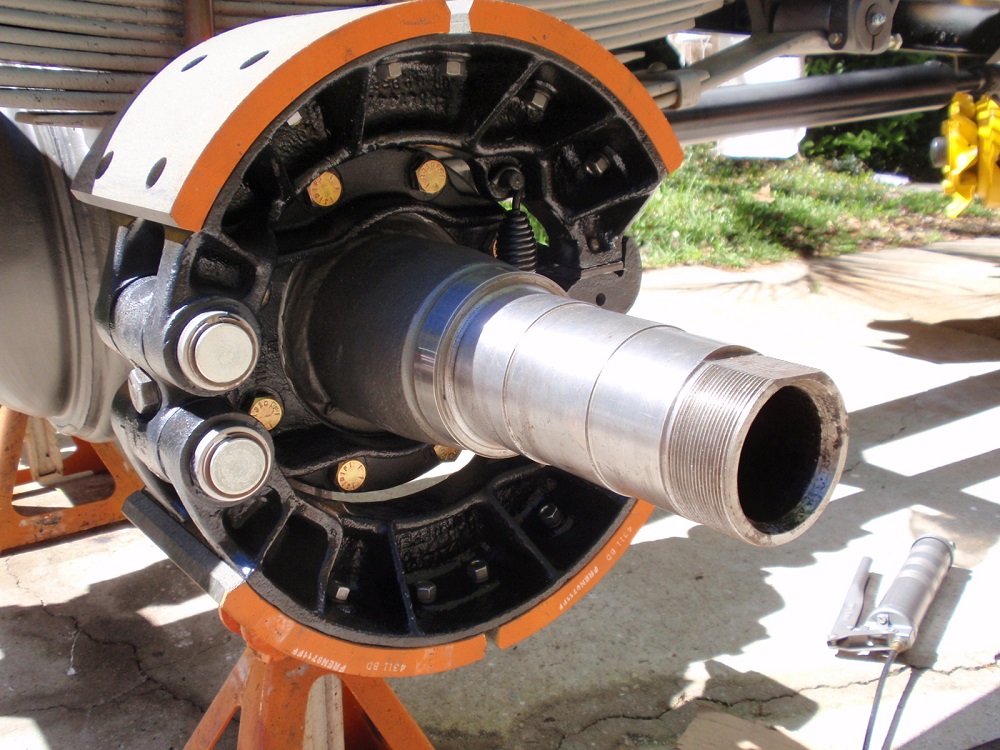
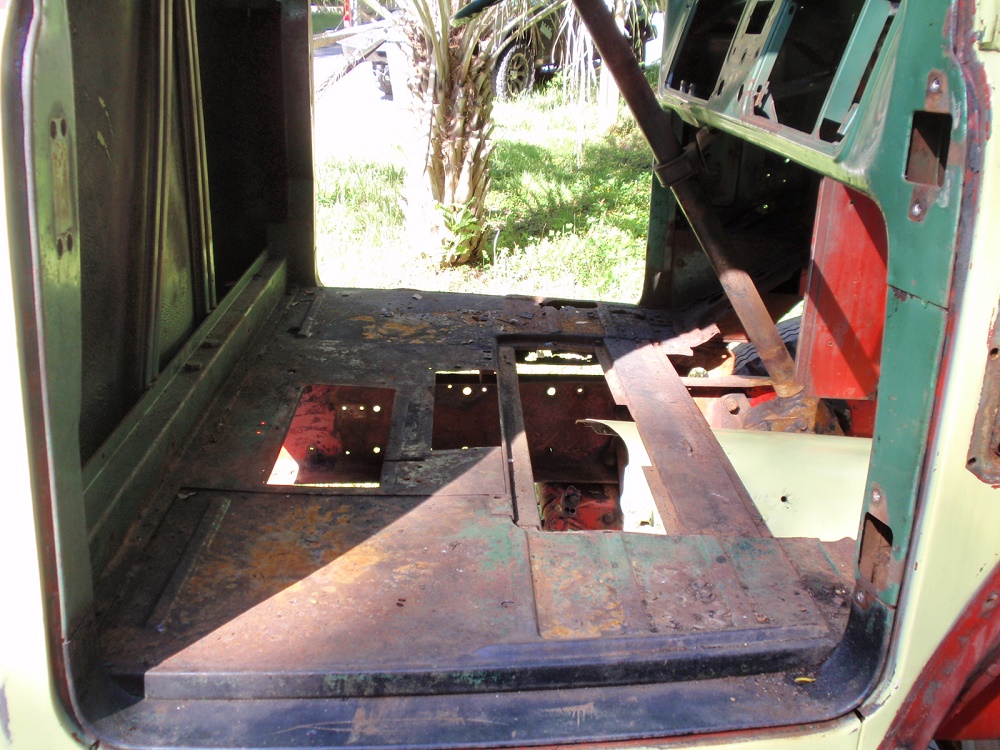
So much old grease, grime, acorns, fluff, and crud! Just when I think I'm done I find another pocket somewhere in the bowels. Now however, I think it's clean!
-
Two of the hinges were too far gone for the quick-and-dirty "One-Shot" knurling & reaming. I ended up drilling and reaming all of them for metric pins.
-
That's an option. Slightly larger with 9mm pin would work - but now you're mixing inch & metric which can be annoying. Going larger for 3/8" pin... now you weakening the hinge. Everything's a compromise.
-
3 hours ago, h67st said:
All those technical terms are making my head spin.
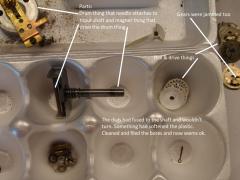
If it weren't for the drum, magnet, and drive thingies it wouldn't work.
-
11 hours ago, h67st said:
I want to put new style chambers on my 1960 H67T...I hope I don't run into the same problem you have.
If you're changing the support brackets I'd cross my fingers. If the chambers fit on the existing support the alignment shouldn't be worse.
-
On 6/5/2017 at 9:00 AM, Freightrain said:
Wonder if the axle tube is bent, thus making the S cam bracket not line up with mounting surface?
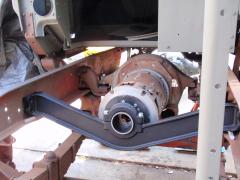
Removing the spider was super easy - just loosened the bolts. Checked the S-Cam bore for squareness with the base and it was fine.
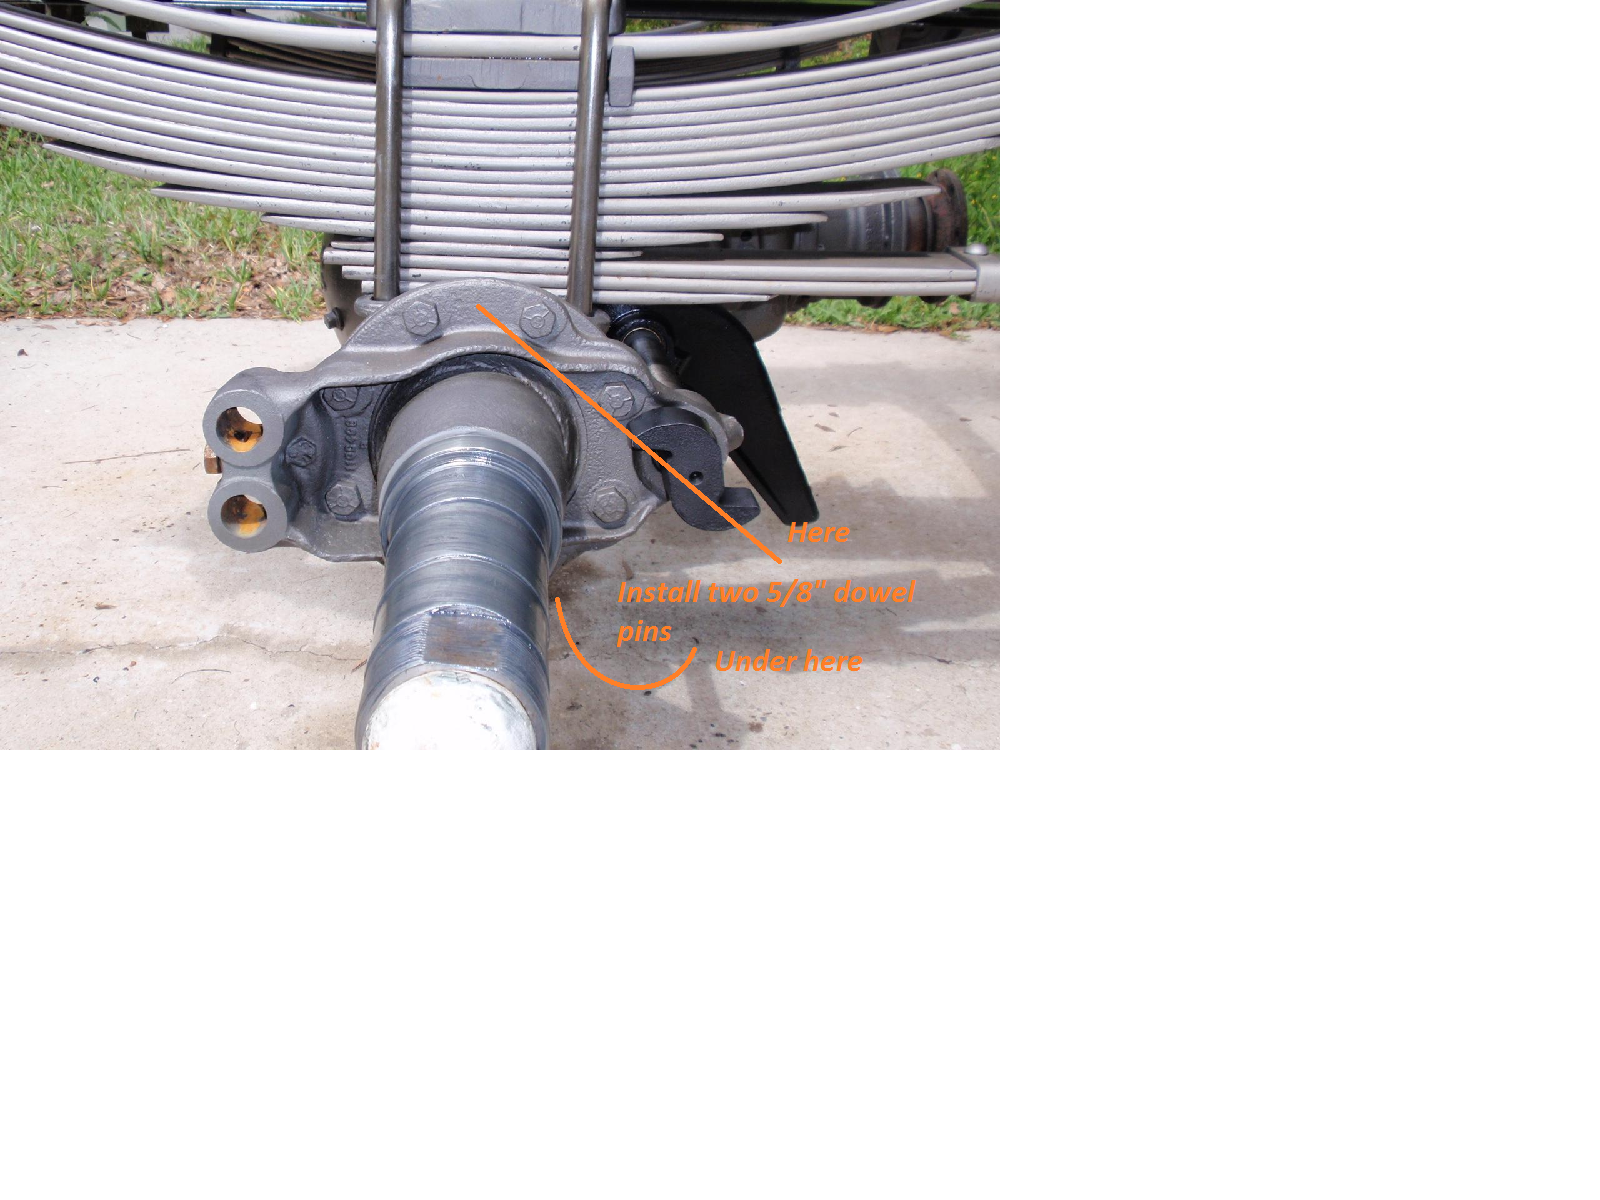
So, I'm not thrilled with this idea, but I'm seriously considering:
- Replace the 5/8" bolts with 9/16" gr8 - that gives enough rotational slop to allow the s-cam to nicely align.
- Drill and ream two 5/8" holes through the spider and backing - top and bottom in picture.
- Press in two 5/8" stainless steel dowel pins to keep spider from rotating.
The dowel pins are to keep the spider from rotating because of the bolt slop. Then tighten the hell out of the gr8 9/16" bolts.
What do you guys think?

-
On 5/30/2017 at 4:38 PM, mrsmackpaul said:
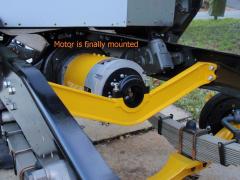
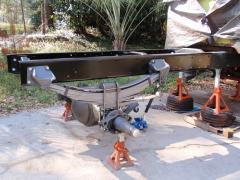
the motor looks small down there , how many hp is the motor ???? any idea on expected range of the truck when done ?
It does looks small. It's a Warp11 (11.75" diameter) DC series motor. With electric motors, torque is the big thing. Motor torque is based on how amps you can push through it. Motor HP is based on how much voltage you push through it. Cruising you need HP; accelerating you need torque.
This little motor's torque (at 1,800 amps) is about 550lb-ft from 0-1500 rpm. Those are dyno numbers, but not reality. I'm limiting this motor to 200 volts, and 1000 amps. Unless I floor the accelerator while in 4th or 5th gear, it'll never hit 1000 amps. Max amps will probably spike at 750 amps for a fraction of a second.
Range: With stop-and-go driving I should get around 130 miles. Highway cruising range (55-60 mph) will be much less - I'll be surprised and really happy to get 80 miles.
-
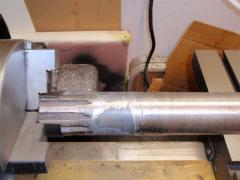
I used to grind crankshafts and considered having it welded and then ground. If it was someone else's money, I might. But, there are two journals on each S-cam and a lot of heat is generated during welding journals. My biggest concern with welding and then grinding the journals is that I don't know anything about the hardening and heat treating used on the S-cams.
There was several ways I could have "repaired" the s-cams. The epoxy approach was Plan A. It was the least destructive to the base material. The epoxy was $45 and claims to be suitable for repairing this type of bearing. If this stuff flakes off I can always get more aggressive/destructive with grinding then sleeve it - still no loss of base "hardening". The last and most aggressive/destructive of the original part is grinding, welding, then grinding again.
-
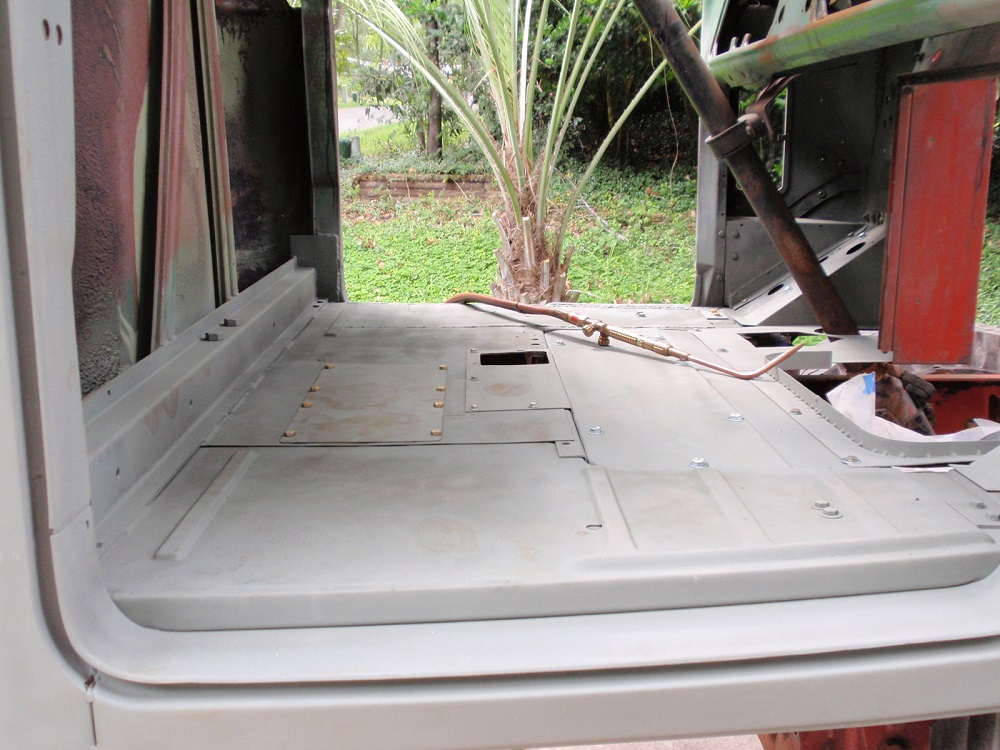
There is no engine, so no compression too slowdown or hold the vehicle stationary. Automatic transmissions have a Parking Pawl that jams into a cog that indirectly locks the transmission to the chassis... sort of like a driveshaft mounted parking brake. Except instead of a cog and a pawl, it's friction band around a drum.
-
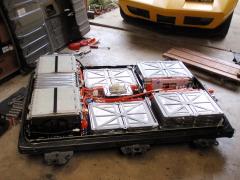
The batteries are lithium-ion - no gassing. They're safe enough for Nissan, Toyota, Chevy, Ford, Tesla...
-
I bought a wreaked Leaf through Copart ($4200) and stripped a lot of the drivetrain. It was a 2015 and still had that new-car smell. The second pack I found on ebay - it's new ($3100). It was a warranty replacement that was damaged during shipping (the external connector was damaged).
-
Range - without regeneration and city driving I'm shooting for 150 miles
Safety
- 1 high-current contactor (relay) inside each battery tank.
- 1 fuse external for each battery tank.
- 1 main contactor between pack-positive and the motor.
- 2 parallel electrical switch disconnects.
-
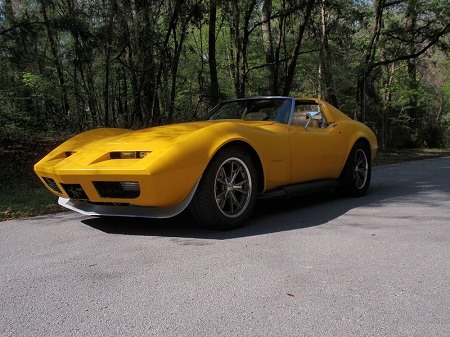
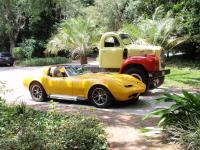
I like Wheeler Dealer but didn't see that episode. The truck is a '63 B-46.
-
The casting # of the hub with the three cracks that I welded is 8QJ8131P1. It's a poor casting - a lot of scabbing on the inside of the spokes. It also has a much bigger outer bearing (the inner is the same size as the other hub #8QJ414).
-
- 11" DC motor
- 2000 amp controller (set limit to 1000 amps)
- Two Nissan Leaf battery packs; configured as four (4) 200 volt packs in parallel
- 120 mile range (stop & go traffic) without kinetic energy recovery system (KERS)
- 200 mile range (stop & go traffic) with KERS


BMT Forum Logo

P5051895.JPG
in BMT Member's Gallery - Click here to view our member's albums!
Posted
For the B-model emblem I'm thinking about $20 each. Price is based on:
So, that's the deal.