


SkippyMack
-
Posts
151 -
Joined
-
Last visited
-
Days Won
21
Content Type
Profiles
Forums
Gallery
Events
Blogs
BMT Wiki
Collections
Store
Everything posted by SkippyMack
-

New here! B60T project
SkippyMack replied to SkippyMack's topic in Antique and Classic Mack Trucks General Discussion
Thank you for these ideas! -
New here! B60T project
SkippyMack replied to SkippyMack's topic in Antique and Classic Mack Trucks General Discussion
Bench seat is done! I've been doing little things today including replacing the rubber seal around the dash panel. Most recent pictures load first: https://sjcreativevt.pixieset.com/skippymack/ -
New here! B60T project
SkippyMack replied to SkippyMack's topic in Antique and Classic Mack Trucks General Discussion
Nope, just a master plan for domination of my own little world! 😆 -
New here! B60T project
SkippyMack replied to SkippyMack's topic in Antique and Classic Mack Trucks General Discussion
It's all part of my master plan...it will come together visually! -
New here! B60T project
SkippyMack replied to SkippyMack's topic in Antique and Classic Mack Trucks General Discussion
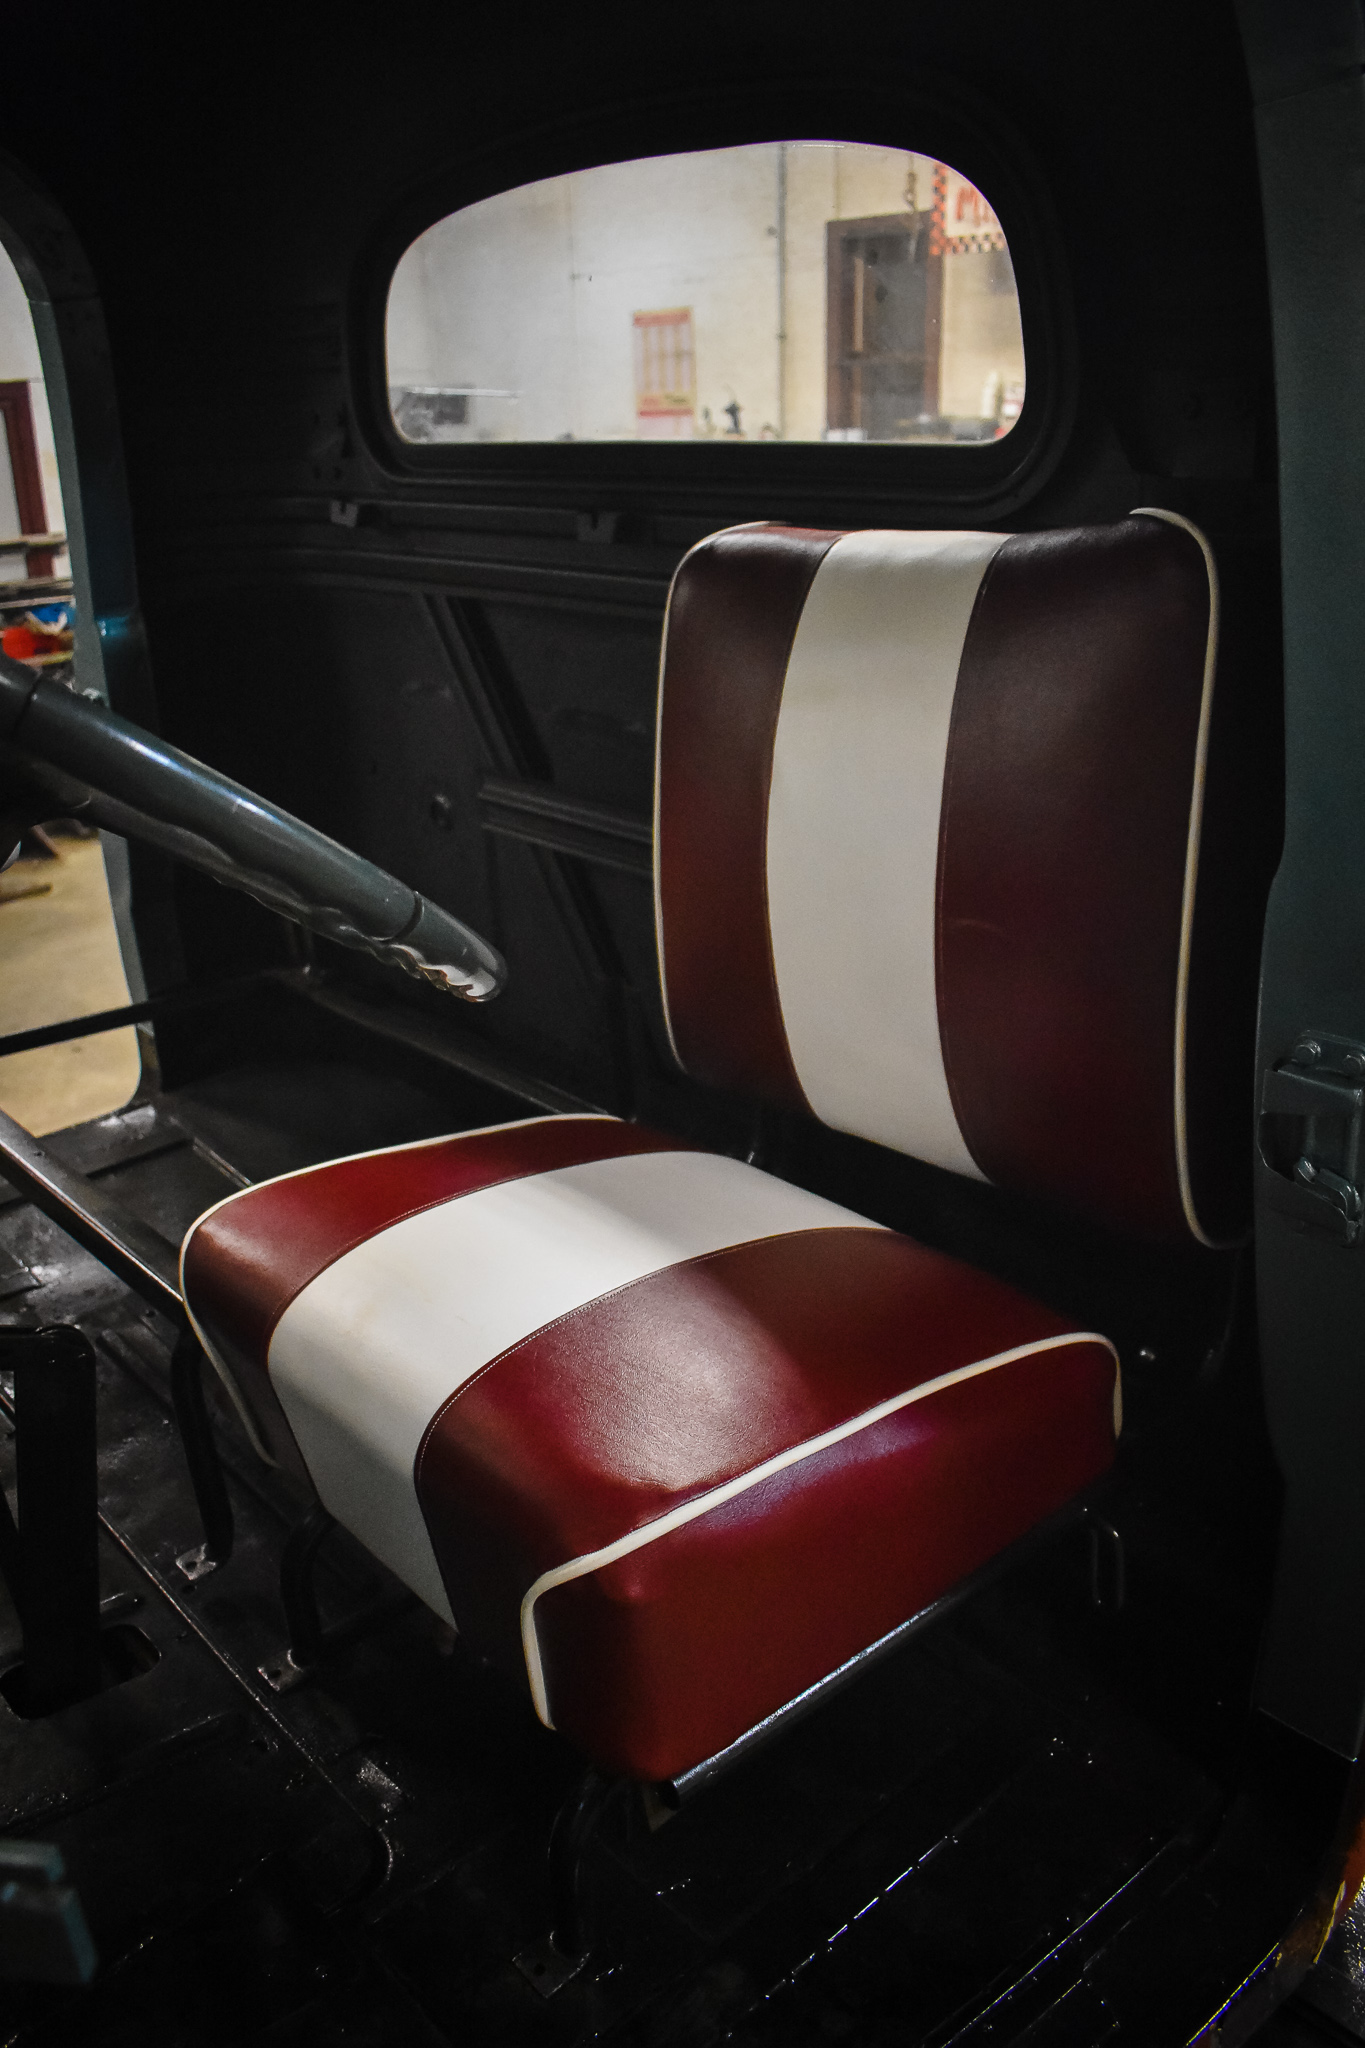
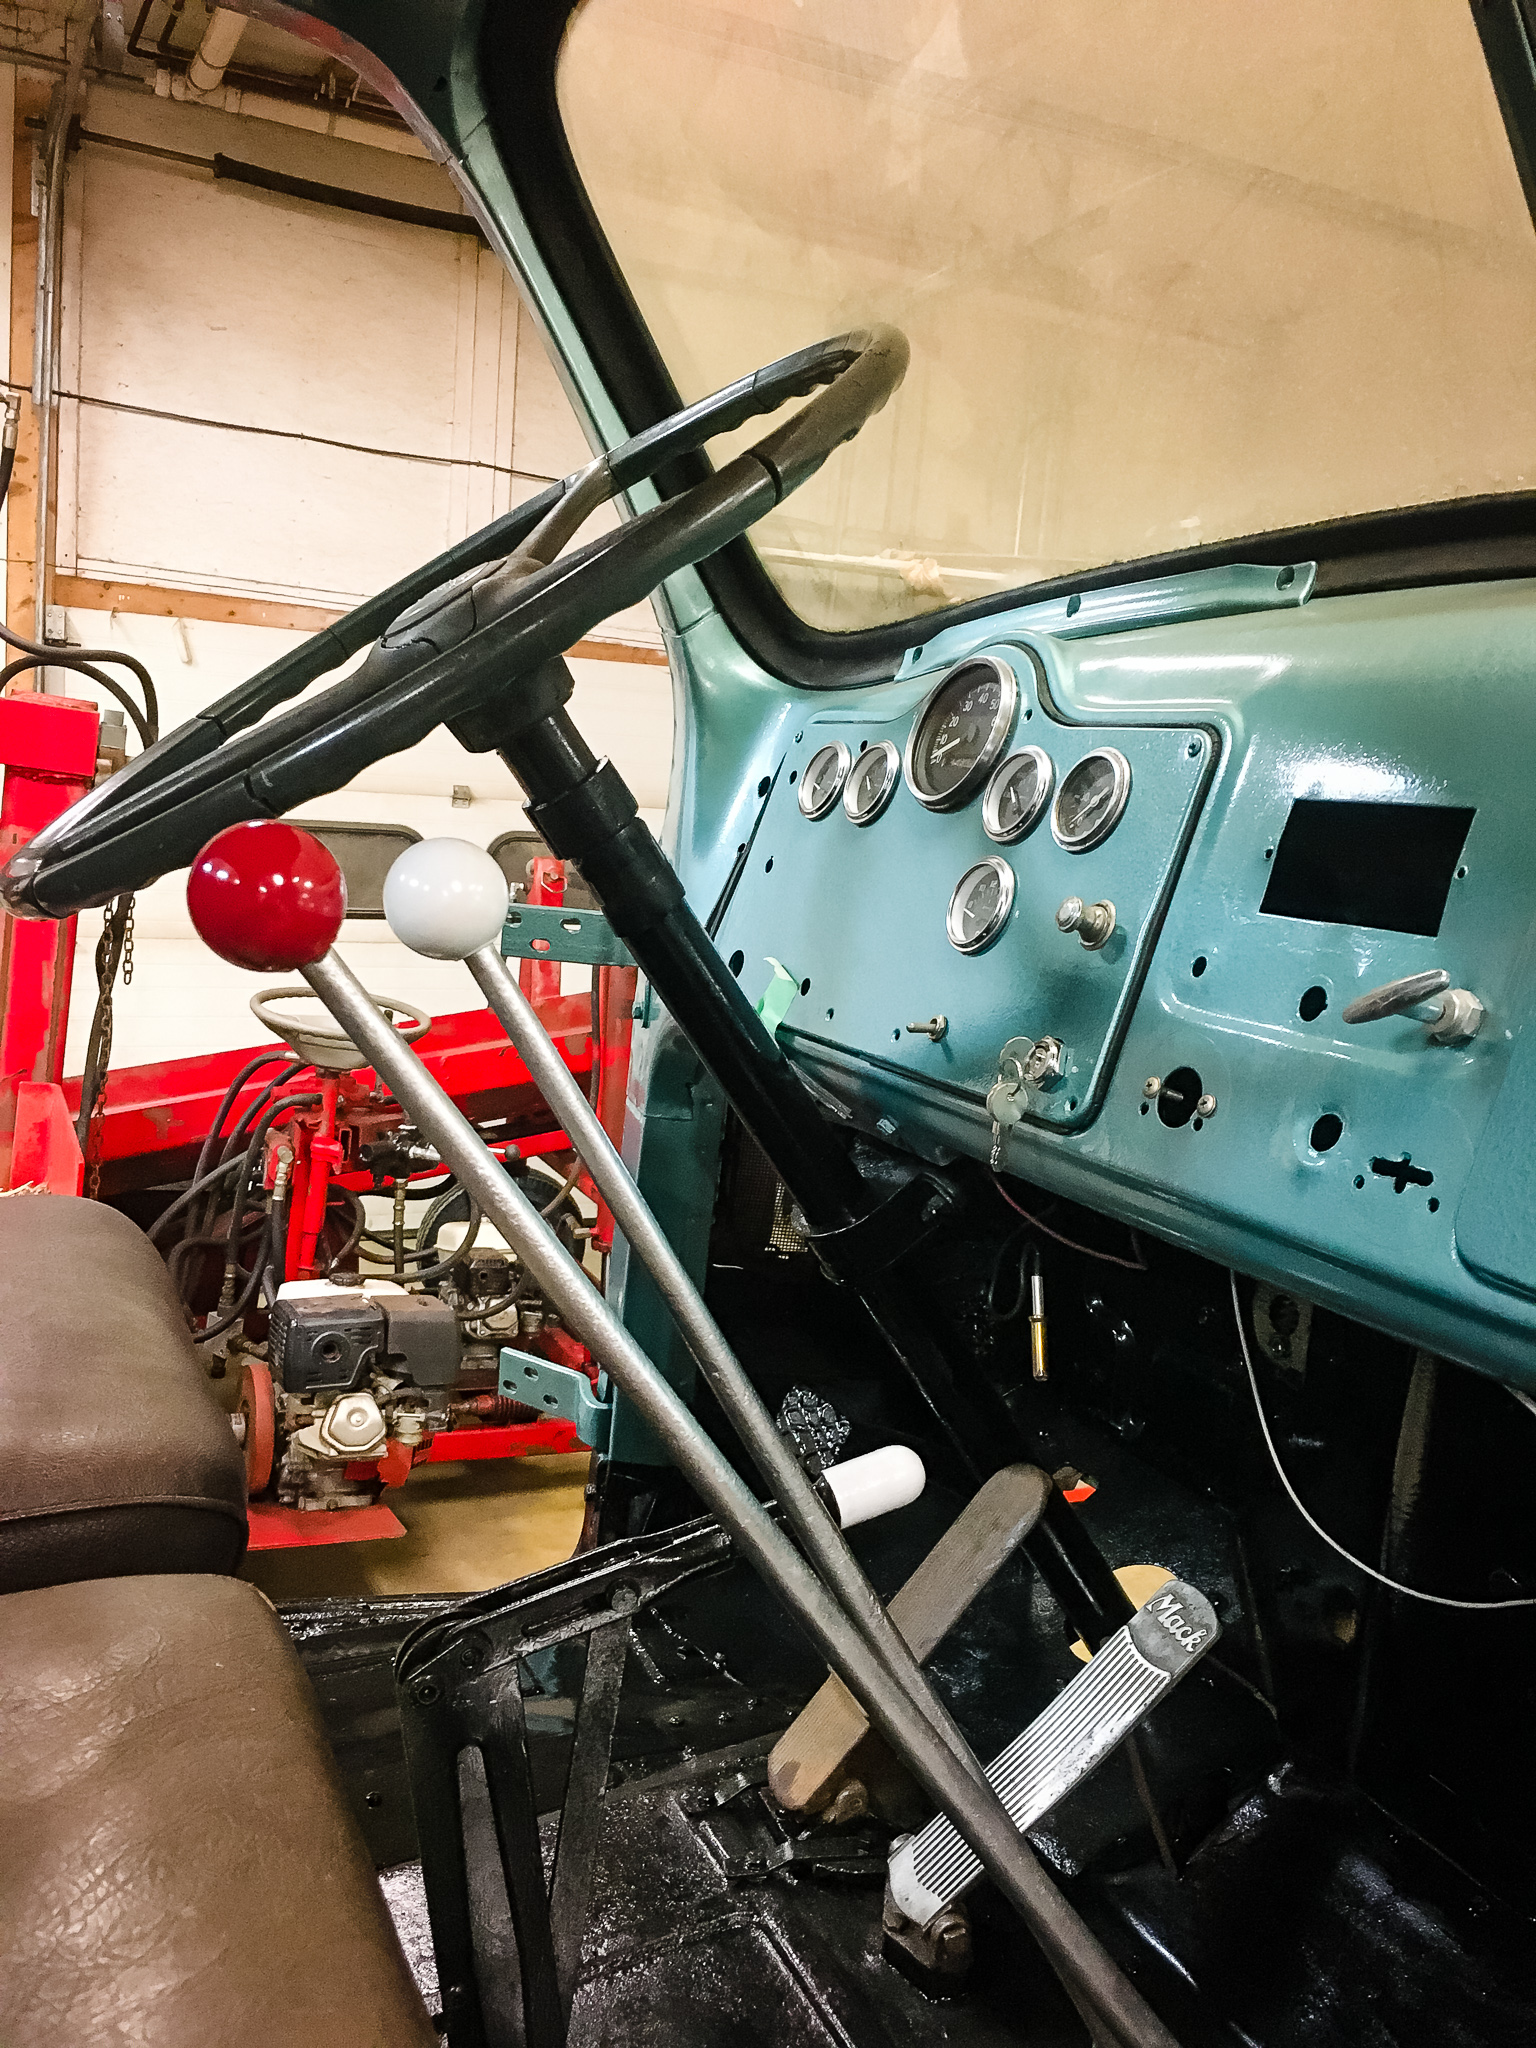
I'm just thrilled with the way the driver's seat came out! My husband has a rich background in racing (of all kinds) so everything we build has deck stripes somewhere...it's just embedded in our family culture! The Mack is getting her's on the seats! Sewing up the bottom cushion was twice as fast after fumbling my way through with the first one. Bench seat is next - by the weekend! Tonight my husband finished welding out the rear plate (repairing a previous welding job and reinforcing it). We put the transmission fluid back in (after draining it to remove the PTO), and reinstalled the exhaust (just need a turn-out to complete that system). Ready to pack bearings and put new seals in along with wiring lights - both could be a weekend project this week...and then we'll start attacking body panels! My husband has decided to build a chopper in the month of February as a creative side endeavor, so I'm cutting him some slack! Fortunately, there's plenty I can do on my own right now! Still on track to drive this old girl, completed on my birthday: April 18th. Just two new pictures tonight: https://sjcreativevt.pixieset.com/skippymack/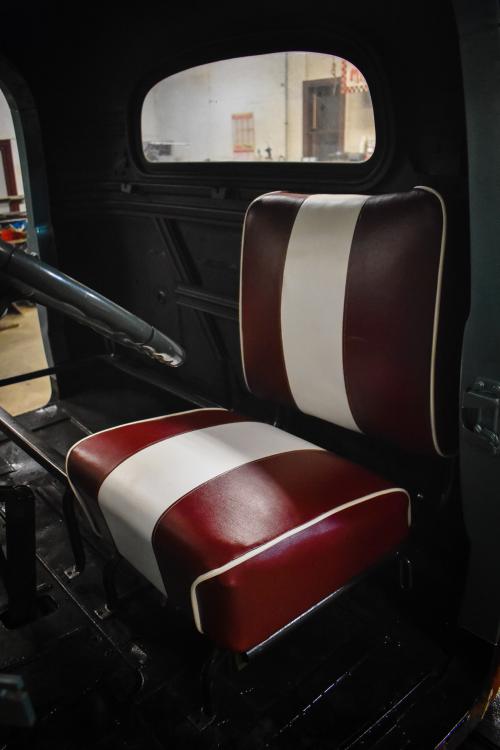
-
New here! B60T project
SkippyMack replied to SkippyMack's topic in Antique and Classic Mack Trucks General Discussion
I think I will have had my fill for a while by the time mine is done! 😆 -
New here! B60T project
SkippyMack replied to SkippyMack's topic in Antique and Classic Mack Trucks General Discussion
Over the moon excited about how the first seat cushion came out tonight! Finishing the driver's seat tomorrow night and the bench seat this weekend!
-
New here! B60T project
SkippyMack replied to SkippyMack's topic in Antique and Classic Mack Trucks General Discussion
I don't. My pedal doesn't have a rubber pad, not sure if the texture was welded on aftermarket or was manufactured like that. I simply painted it. -
New here! B60T project
SkippyMack replied to SkippyMack's topic in Antique and Classic Mack Trucks General Discussion
So cool! -
New here! B60T project
SkippyMack replied to SkippyMack's topic in Antique and Classic Mack Trucks General Discussion
The bottom cushion of the driver's seat was clearly not made at the same time as the other cushions. It was evident before I got to this tag, although the exterior was a near perfect match. Based on the condition of the back cushion, I suspect it had worn through and was replaced with this one. I sent some pictures over to Royersford Spring Company - still in business in Pennsylvania and got the attached response.
-
New here! B60T project
SkippyMack replied to SkippyMack's topic in Antique and Classic Mack Trucks General Discussion
Hello! It's been a week a good progress! I finished the door jambs and am working on painting the last section of frame - to be done today. We were able to get into the wheels, pulled bearings and seals and got things cleaned up. Brakes are good, so that's a relief. My husband got the hitch receiver welded in so we can wrap up the back of truck, too. This weekend I took the driver seat apart. The springs and boards are in great shape, so I'm now ready to reupholster. Both sets of seat springs still had the manufacturer tag attached. Love those kinds of finds - they will stay put. Lots of new pictures. Newest will load first: https://sjcreativevt.pixieset.com/skippymack/ Cheers, SJ
-
New here! B60T project
SkippyMack replied to SkippyMack's topic in Antique and Classic Mack Trucks General Discussion
Popped the seat frames and original seats in tonight so I could sit in my truck for the first time on something other than a milk crate! Don't mind me...I'll be here making "vroom-vroom" noises and grinning from ear to ear!!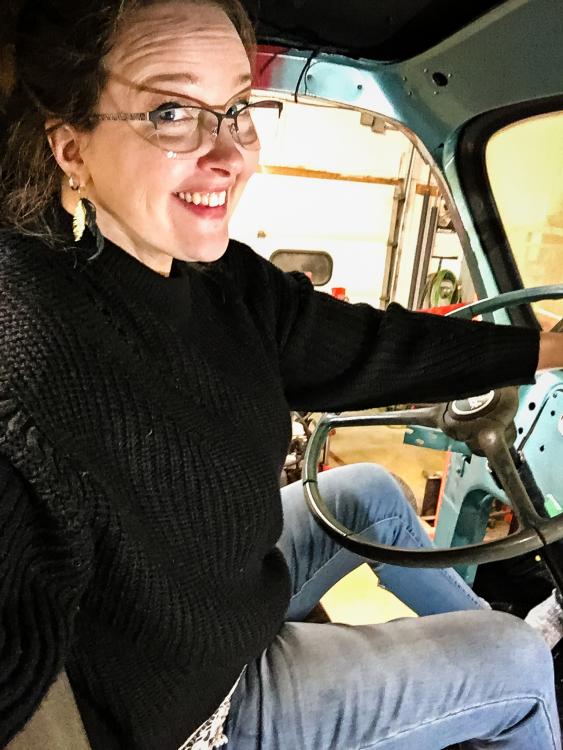

- 446 replies
-
- 11
-

-

-

-
New here! B60T project
SkippyMack replied to SkippyMack's topic in Antique and Classic Mack Trucks General Discussion
Still have my question about removing the inner hub covers and am also wondering about door rubber seals. I only have a couple of little sections still present, but it's so badly dried that I can't remove it without it crumbling. Trying to determine if the universal "D" shape 3M stripping will work. Also still pondering a creative headliner solution. Now that the interior is painted I don't feel like it's so urgent, the flat black kind of makes the roof "disappear" for now. Any thoughts on any of these? Today? I donned my respirator and got the rest of the interior painted this morning. Now tackling the door jambs with my retro hammered paint in small sections. Shifting levers are detailed and ready to reinstall. Just ordered the last of the supplies I need to start upholstery. My husband and I tackled two big dents in the cab (one across the back above the window and one above the driver's seat (under the horn mount). With a little patience they have been worked out. Sure am glad to have married a fabricator! 🤩 The work is getting visually gratifying and exciting! Thanks for following along. Cheers! Most recent pictures (just a couple today) will load first: https://sjcreativevt.pixieset.com/skippymack/ -
New here! B60T project
SkippyMack replied to SkippyMack's topic in Antique and Classic Mack Trucks General Discussion
We pulled the hub covers on the front wheels tonight. There is an inner dust cover. Wondering how to remove it. Didn't seem to pull off or turn easily. Didn't want to bang on it without knowing more about it's removal! Thanks in advance for any insights. Did a lot of interior detail work today, painting. Tomorrow is a day off for me (MLK Jr. Day) so I plan to do lots more and will post pictures tomorrow. Cheers! -
New here! B60T project
SkippyMack replied to SkippyMack's topic in Antique and Classic Mack Trucks General Discussion
Hope everyone is doing well. It's been a couple of weeks and I'm still making good progress! The cab floor is the part of this project that my husband has been dreading. If this was going to be a pristine, "back to showroom" restoration we would have started over - we agreed to a route that repaired the rotted areas around the doors, and reinforced the floor for stability and safe installation of the seats, etc... After several really annoying nights of cutting, grinding, fabricating, and welding, my "Frankenfloor" is done, strong, and functional. I scuffed and painted it and the firewall this morning. I'm pretty confident I can reuse the floor liners (one was like oil cloth and the other rubber) that were it when I bought it - and add some floor mats and be good to go! Tomorrow I'll paint the rest of the cab interior. I have also removed the cushions from the seat frames, cleaned up the frames and painted them. Reupholstery looks like it's going to be a straight-forward project to complete by the end of the month. Other little details like painting the shifting levers, and exhaust brackets is also done. This old girl is going to start "turning a corner" really soon. Cheers! Most recent pictures load first: https://sjcreativevt.pixieset.com/skippymack/ -
New here! B60T project
SkippyMack replied to SkippyMack's topic in Antique and Classic Mack Trucks General Discussion
Today we cleaned the shop and my husband invested some time helping our nine-year-old break down and clean his go-kart engine in preparation for overhaul. After that endeavor, truck progress included removing the PTO from the transmission and installing a custom knock-off plate, removing the old muffler, painting the brackets in preparation for the new muffler, and removing the passenger door for easier access to the cab - as we prepare to work on the floor (tomorrow). Tonight I took a break and made Miss Mackie a sweater and scarf to match the truck's new interior. It started out as a joke, but I admit, it ended up being quite a project! 🤣 🧶 I'll post progress pictures later tonight. Cheers!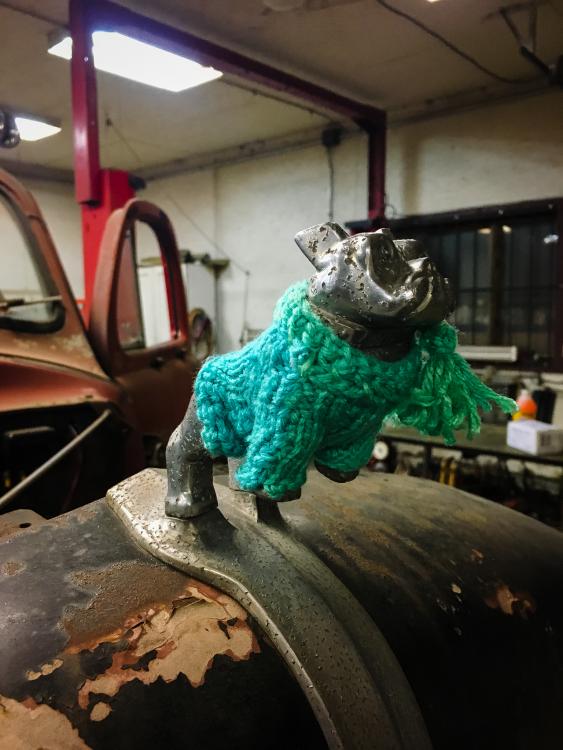
-
New here! B60T project
SkippyMack replied to SkippyMack's topic in Antique and Classic Mack Trucks General Discussion
Sorry! I updated the link: https://sjcreativevt.pixieset.com/skippymack/ -
New here! B60T project
SkippyMack replied to SkippyMack's topic in Antique and Classic Mack Trucks General Discussion
We're beginning to bring body panels home to the shop. Wondering if anyone has a diagram or clear explanation about how the fenders/hood attach to the chassis. Cheers! -
New here! B60T project
SkippyMack replied to SkippyMack's topic in Antique and Classic Mack Trucks General Discussion
Happy New Year! Here's to a productive 2021! Most recent pictures load first: https://sjcreativevt.pixieset.com/skippymack/ -
New here! B60T project
SkippyMack replied to SkippyMack's topic in Antique and Classic Mack Trucks General Discussion
Friends, Who has a resource for explaining how the front end sheet metal attaches to the chassis? A diagram? A clear description? Cheers!
-
New here! B60T project
SkippyMack replied to SkippyMack's topic in Antique and Classic Mack Trucks General Discussion
At one point she had a dump body. We're building a custom bed for her. No fifth wheel. The plate on the back has some really gory welds that will be grounded down and repaired, as you can see it's not worthy of towing anything right now! She'll get a receiver hitch when that area is repaired and reinforced. I think I'll cap that back with diamond plate. Stay tuned! -
New here! B60T project
SkippyMack replied to SkippyMack's topic in Antique and Classic Mack Trucks General Discussion
Hello friends! If you celebrated Christmas last week, I hope you had a good one! I took a few days off from the Mack project to enjoy some much needed downtime and the holiday. It was a "Mack Christmas" as my husband and I agreed we'd only do things for each other that helped our truck projects move forward. I got so many "treats" including all of the wiring, switches, and lights I need; a new muffler; vintage air and electric horns; and the last indicator lights I needed. Tonight I pulled the air tanks, cleaned, prepped, and painted them; finished painting the rear end and rear frame; installed the freshly painted battery box; and painted the newly installed rear light panel. Lots of progress being made this week! Tomorrow night we'll install the new exhaust and may start on the interior floor. Most recent pictures load first: https://sjcreativevt.pixieset.com/skippymack/ -
New here! B60T project
SkippyMack replied to SkippyMack's topic in Antique and Classic Mack Trucks General Discussion
We understand each other's love languages 😂😍 -
New here! B60T project
SkippyMack replied to SkippyMack's topic in Antique and Classic Mack Trucks General Discussion
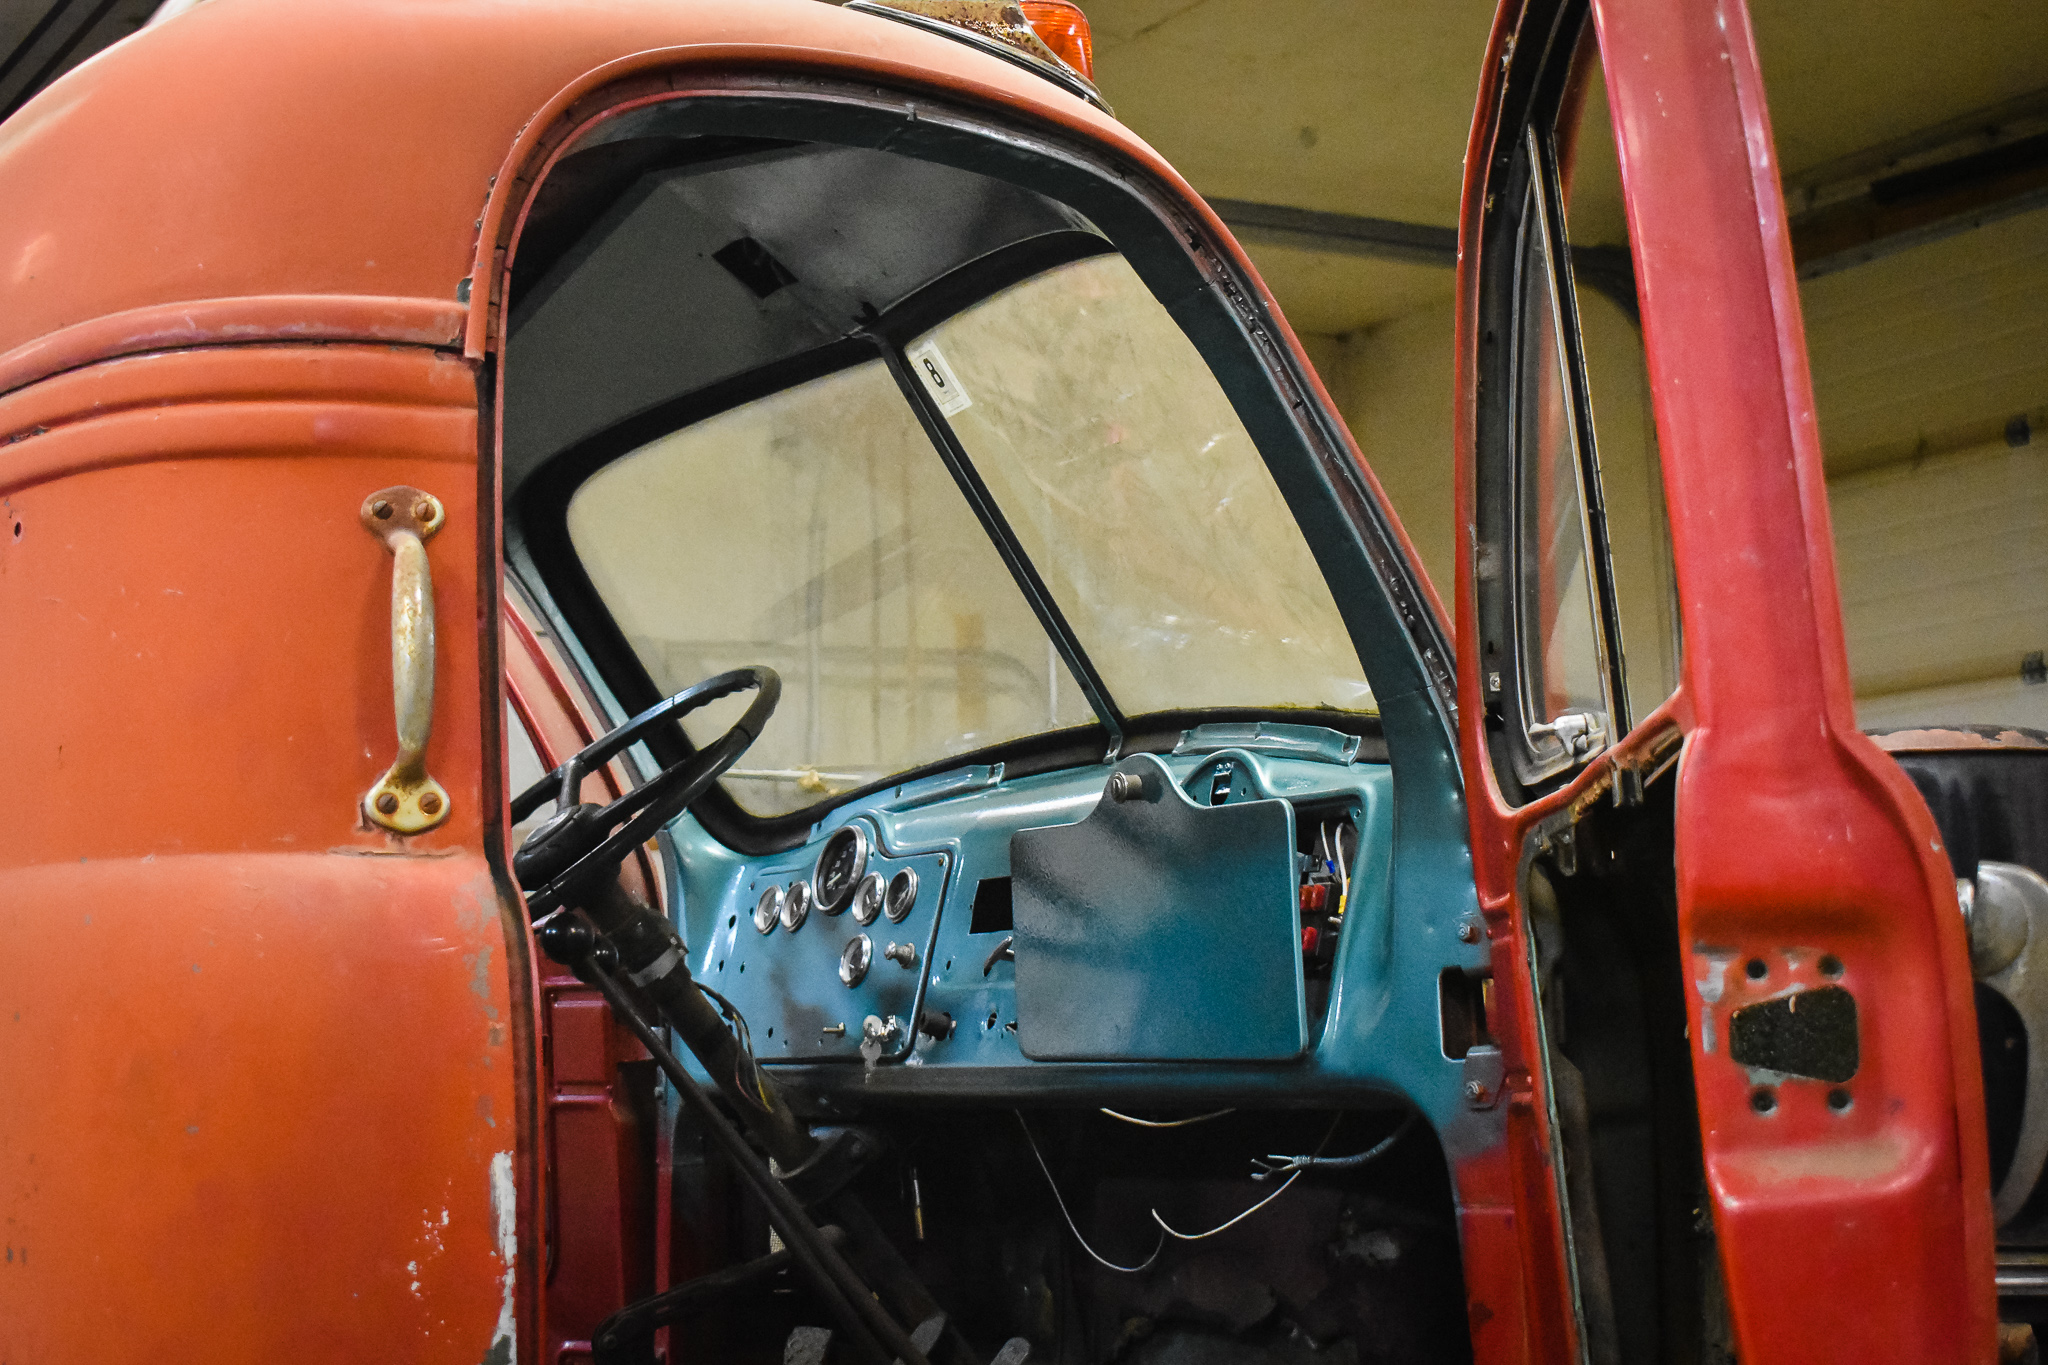
I'm in love with how the dash came out! Gauges are ready to be hooked up. There are still some little things to add like the high beam indicator light, electric horn, headlight switch. Glove compartment hinges need some adjusting, but it's close. I had to scrap the ash tray, it was completely deteriorated, but I think I'm going to put the shifting pattern tag there, it fits over the opening perfectly. The upper panel where it originally was has some rot, so I'm going to do a nice aluminum access panel up there, larger than what was there before. My husband had my generator rebuilt as an early Christmas present and we installed it today! A guy at a local starter shop that we've used for years, had the experience and parts on the shelf (that had been collecting dust for decades) and it's got a new lease on life now! My pressing mission is to finish painting the frame so we can get the wheels back on and take the old girl for a test drive. On the vacation to-do list is reinforcing/repairing the cab floor so I can get the seats installed for that drive! Most recent pictures load first: https://sjcreativevt.pixieset.com/skippymack/
-
New here! B60T project
SkippyMack replied to SkippyMack's topic in Antique and Classic Mack Trucks General Discussion
Thanks, Paul. So the inner portion doesn't come out? Does anyone know the specs on oil for this cleaner? (Type/amount/procedure)


BMT Forum Logo
