


timmer62
-
Posts
8 -
Joined
-
Last visited
timmer62's Achievements
")


-
I have a 2022 Granite that also has intermittent diff lock alarm. Mack recall service was done, and still get the alarm coming on intermittently. When this happens, the diff lock was on earlier in the day, then turned off, then the alarm comes on itself shortly thereafter (anywhere from 10-45 minutes later). Driver quickly pulls over, engages and disengages the diff lock, and continues on. Checked the solenoid (both electrically and pneumatically) to confirm that air was not inadvertently actuating the diff lock to due an electrical short or failed valve and found no issues. I have considered changing the spring that retracts the plunger (and unlocks the diff) once the air pressure is turned off, and am very curious about Mackpro's comment on the spring. Mackpro, is there a stronger spring available? Is this a common issue?
-
New/low mileage Granite with wandering axles
timmer62 replied to timmer62's topic in Driveline and Suspension
Gents, finally have this resolved and thought I would give a summary update. Dealer advised that trunnion bushings, isolators and u-bolts would need to be replaced. After lots of investigation, and guidance from this expert forum, concluded that only the u-bolts needed to be replaced (maybe even only tightened, but given the amount of twisting they had experienced I opted to replace them). Found that the u-bolts could not be installed without lifting the axles off of the springs due to an interference with the frame rails. Being able to rotate the springs forward and aft around the trunnion along with a very slight tip of the leaf spring to the side (away from the frame rail) gave just enough clearance. So in the end, I replaced the isolator pads too since they had to be removed to raise the axles anyway. However, once I removed the isolator pads they looked quite good. For those who might chose to do this, thought I would point out a few tools that you will definitely need: torque multiplier. I picked up a used Williams unit with a 13.6:1 ratio. No way to get to the prescribed u-bolt torque without a good torque multiplier, and the 3:1 multiplier I already have just did not have enough juice. Not cheap, but figure I can use it to re-torque going forward. porta-power. I did not plan on using one for this job, but found I needed to use it three times. I did one axle at a time, and when I lifted the driver side axle off the springs the axles shifted a little bit since the passenger side axle was still attached to the spring. I used the porta-power to get the driver side axles positioned over the top isolators once they were placed back on the spring. Without the porta-power I could not get the isolator boxes and isolators aligned properly. Had to do the same on the passenger side. The third time I used the porta-power was to align the springs parallel to the truck frame before re-tightening the u-bolts so the wheels would run true. Plenty of pb-blaster or equiv, applied liberally the day before you start. This may seem obvious to the experienced, but I struggled mightily to get a few bolts loose (specifically, the passenger side isolator box bolts that thread directly into the top half of the box). Even my 2000 ft-lb impact could not break them loose. I sprayed these bolts down mid day with PB-blaster, and still couldn't break them end of day (when I applied PB-blaster again before heading home). Came in the next day committed to using heat, but they broke free easily without any heat. Patience is a virtue, and so is planning, so plan to put lots of pb-blaster on early so you don't have to be patient. Doing this my first time, this repair took about 24 hours, but it took me quite a while to solve the alignment issues (see porta-power comments above) and break those bolts loose (see pb-blaster comments above). To save time, I would do both axles at the same time. Hopefully, I won't have to do this again, but if I do I think I could probably do it in about 12-16 hours. Axles wander is now gone! I appreciate everyone's help and input, and hope that these comments will be helpful to others in the future. -
New/low mileage Granite with wandering axles
timmer62 replied to timmer62's topic in Driveline and Suspension
Good afternoon gents. The trunnions shared by JoeH and FJH would clearly be superior, no doubt. I inspected my other trucks and they all have the exact same trunnion/saddle as my wandering axle truck, and none have this issue. Given this, I attempted to re-torque the bolts, but a few of the nuts would not turn smoothly and kept jumping when in the vicinity of the torque spec (hear a pop and the nut would rotate a few degrees), so I don't trust that I can torque them to the correct spec and also concerned the shock may damage the torque multiplier. I am going to replace the u-bolts next... hopefully then this issue will be behind me. BTW, Mack says no warranty coverage as I did not re-torque the bolts "soon enough". Never mind that it has been like this since delivery and never mind that the vehicle manuals don't articulate when they should be re-torqued. -
New/low mileage Granite with wandering axles
timmer62 replied to timmer62's topic in Driveline and Suspension
Thank you FJH and Macks. I will be checking my other trucks to see if they have the same saddle config. Maybe that is why only one of my trucks has this issue. Waiting on delivery of a torque multiplier to attempt tightening the u-bolts. I don't have enough umpfh to use my 3:1. If I elect to replace the u-bolts, can you advise if this installation procedure is correct: lift truck center the axles under the truck (match spacing between the rims and the frame on all four wheels) torch off old u-bolts align the springs in the leafs (can I tap them into alignment without removing the spring bolt, or is it necessary to remove the spring bolt?) Install new u-bolts Progressively torque the u-bolts -
New/low mileage Granite with wandering axles
timmer62 replied to timmer62's topic in Driveline and Suspension
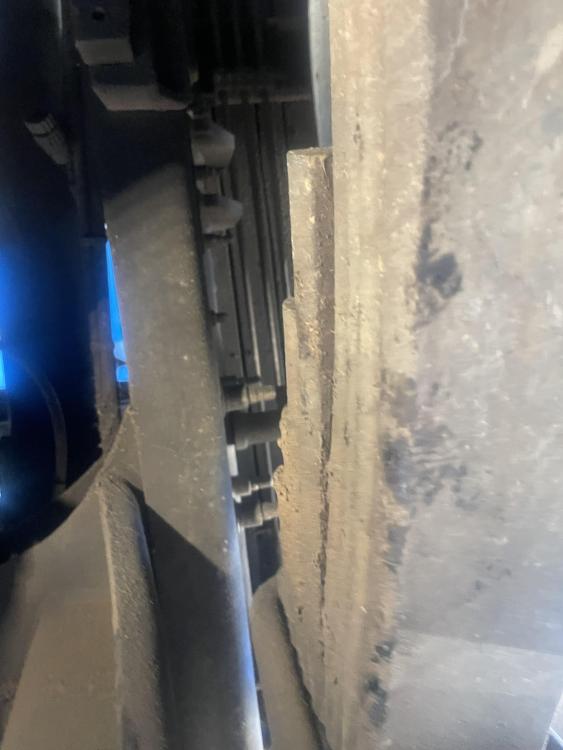
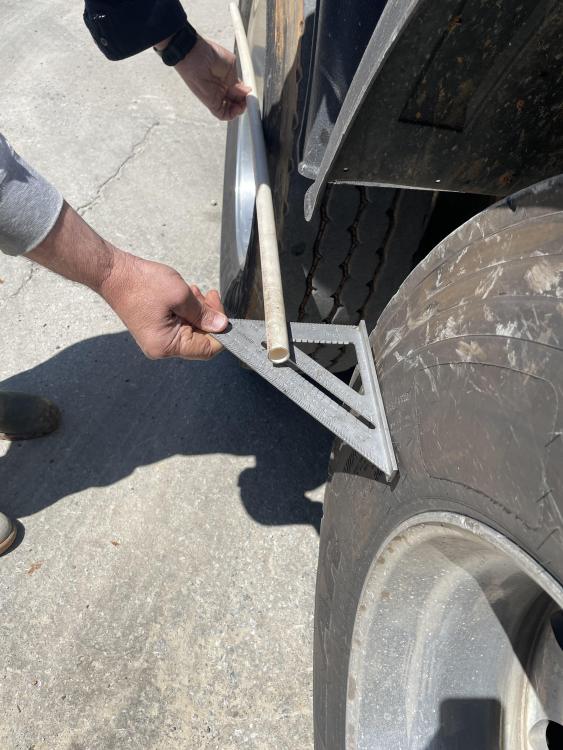
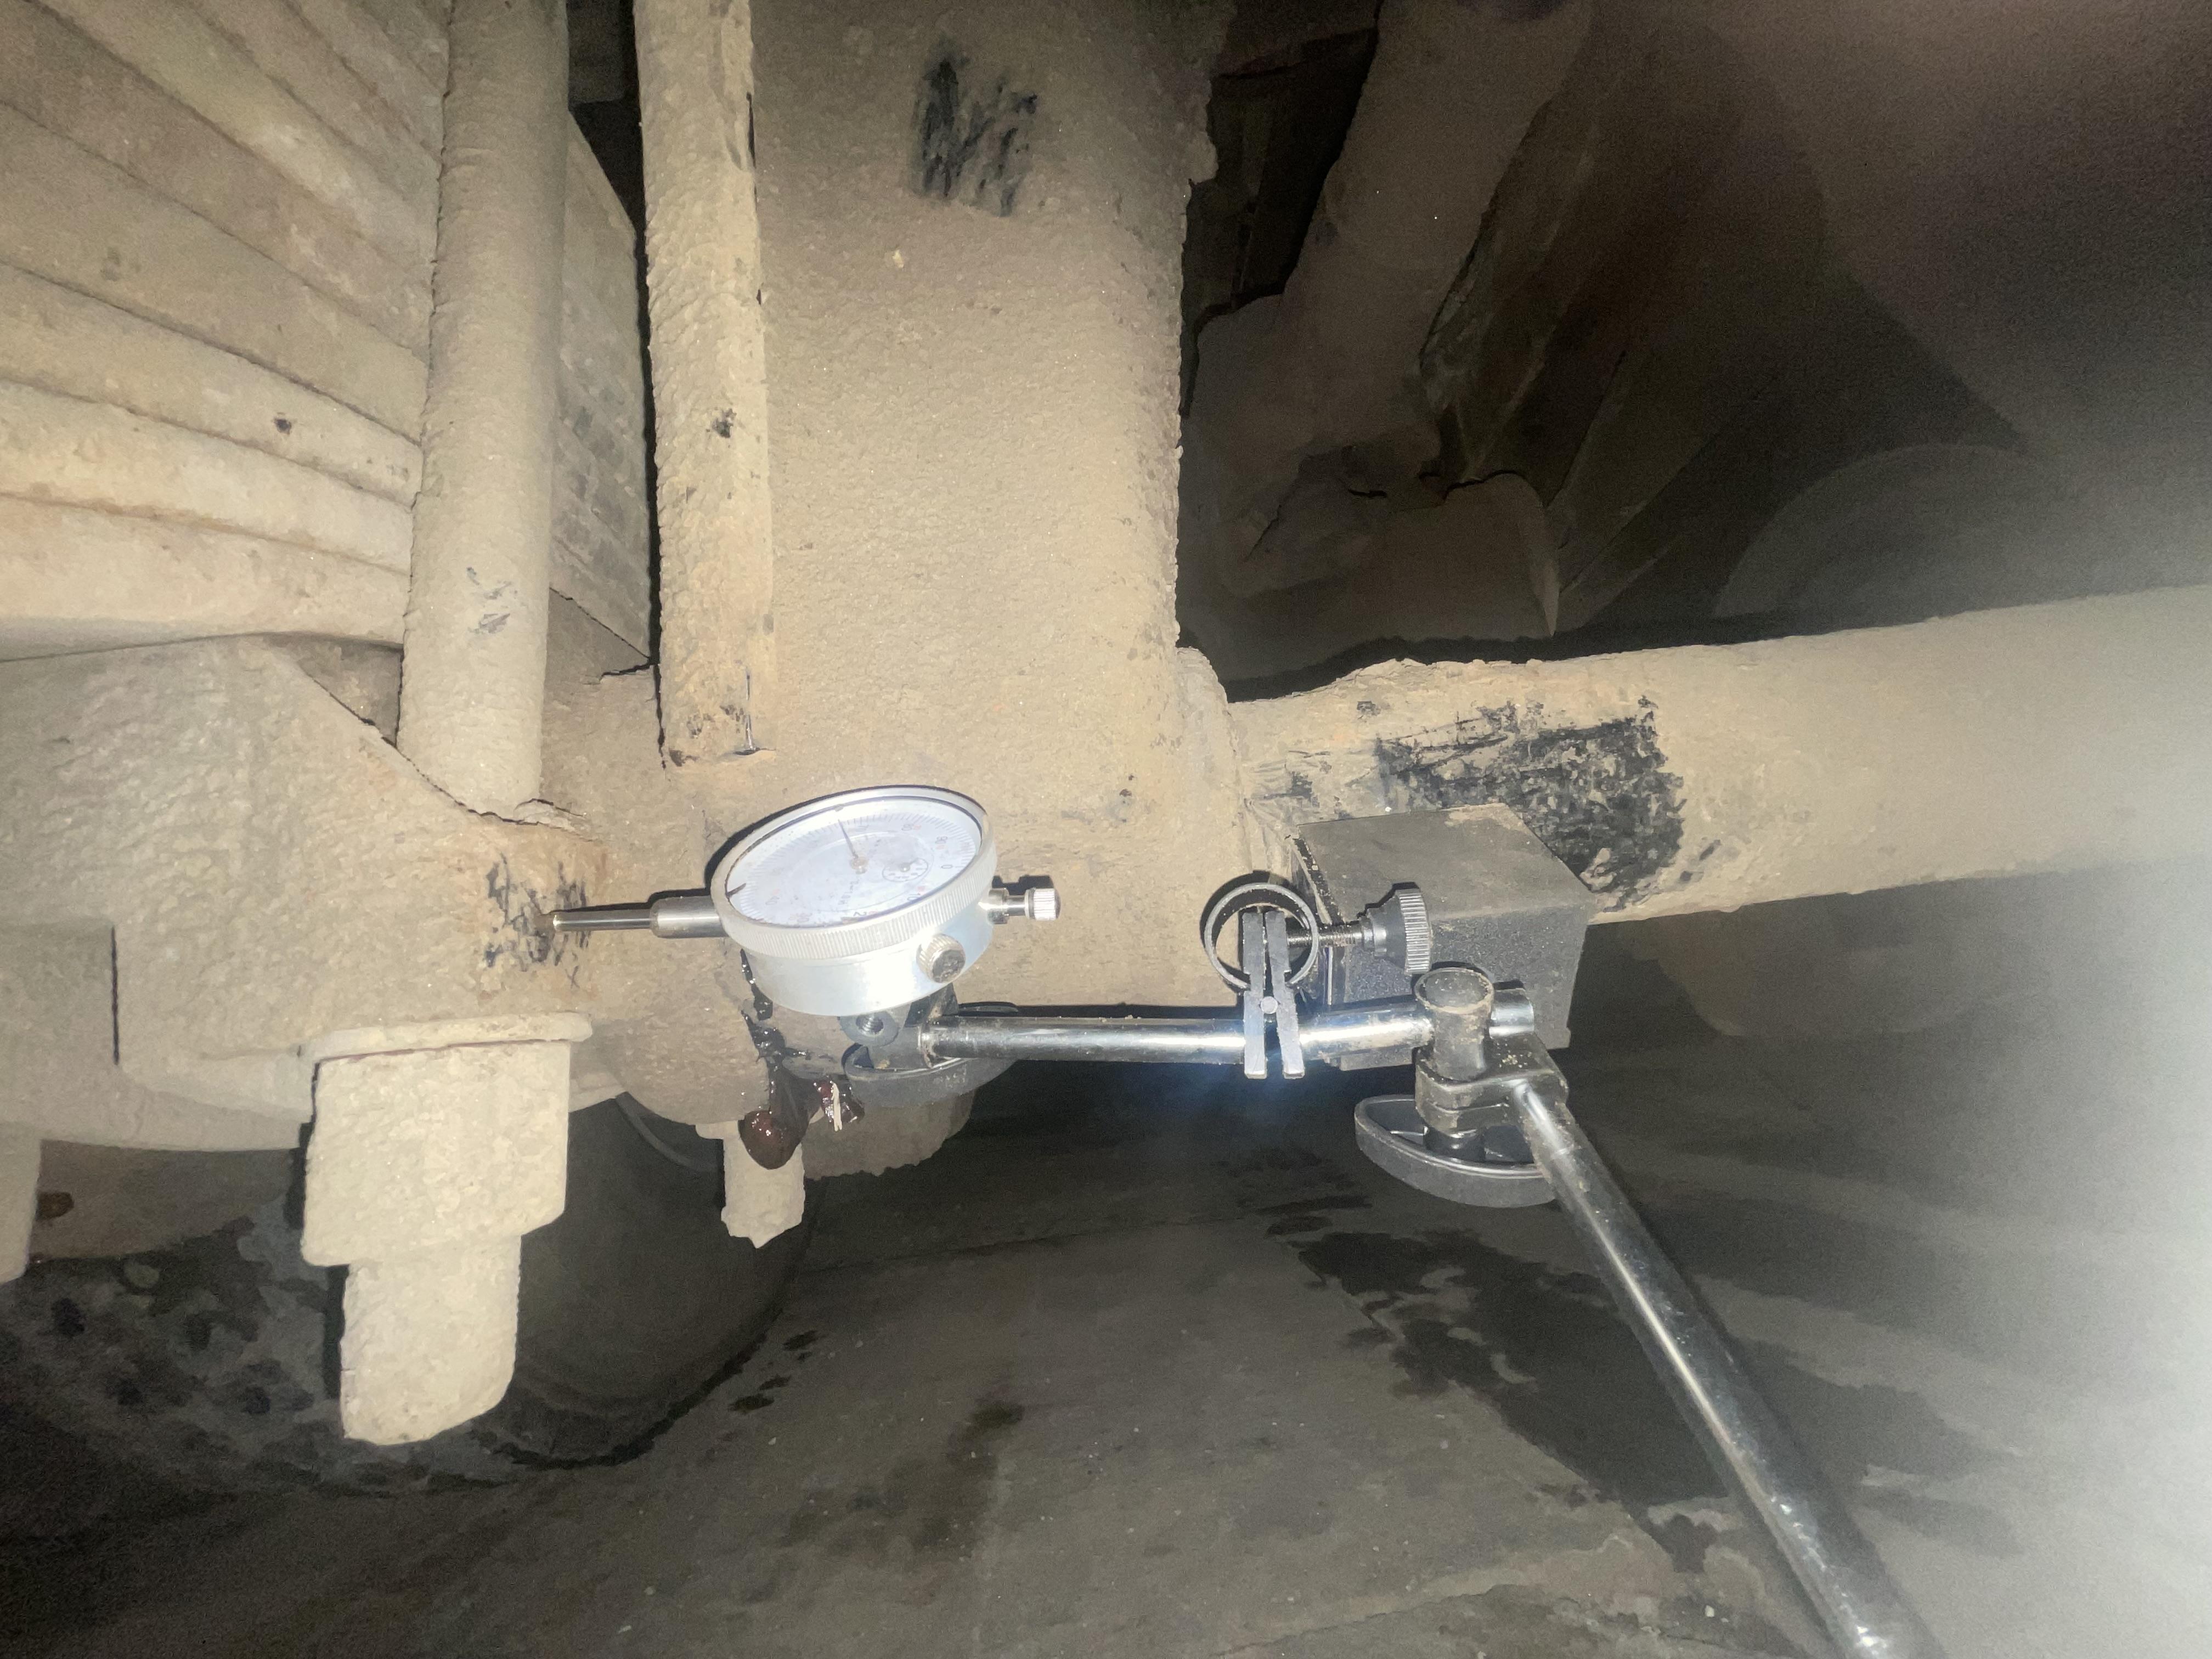
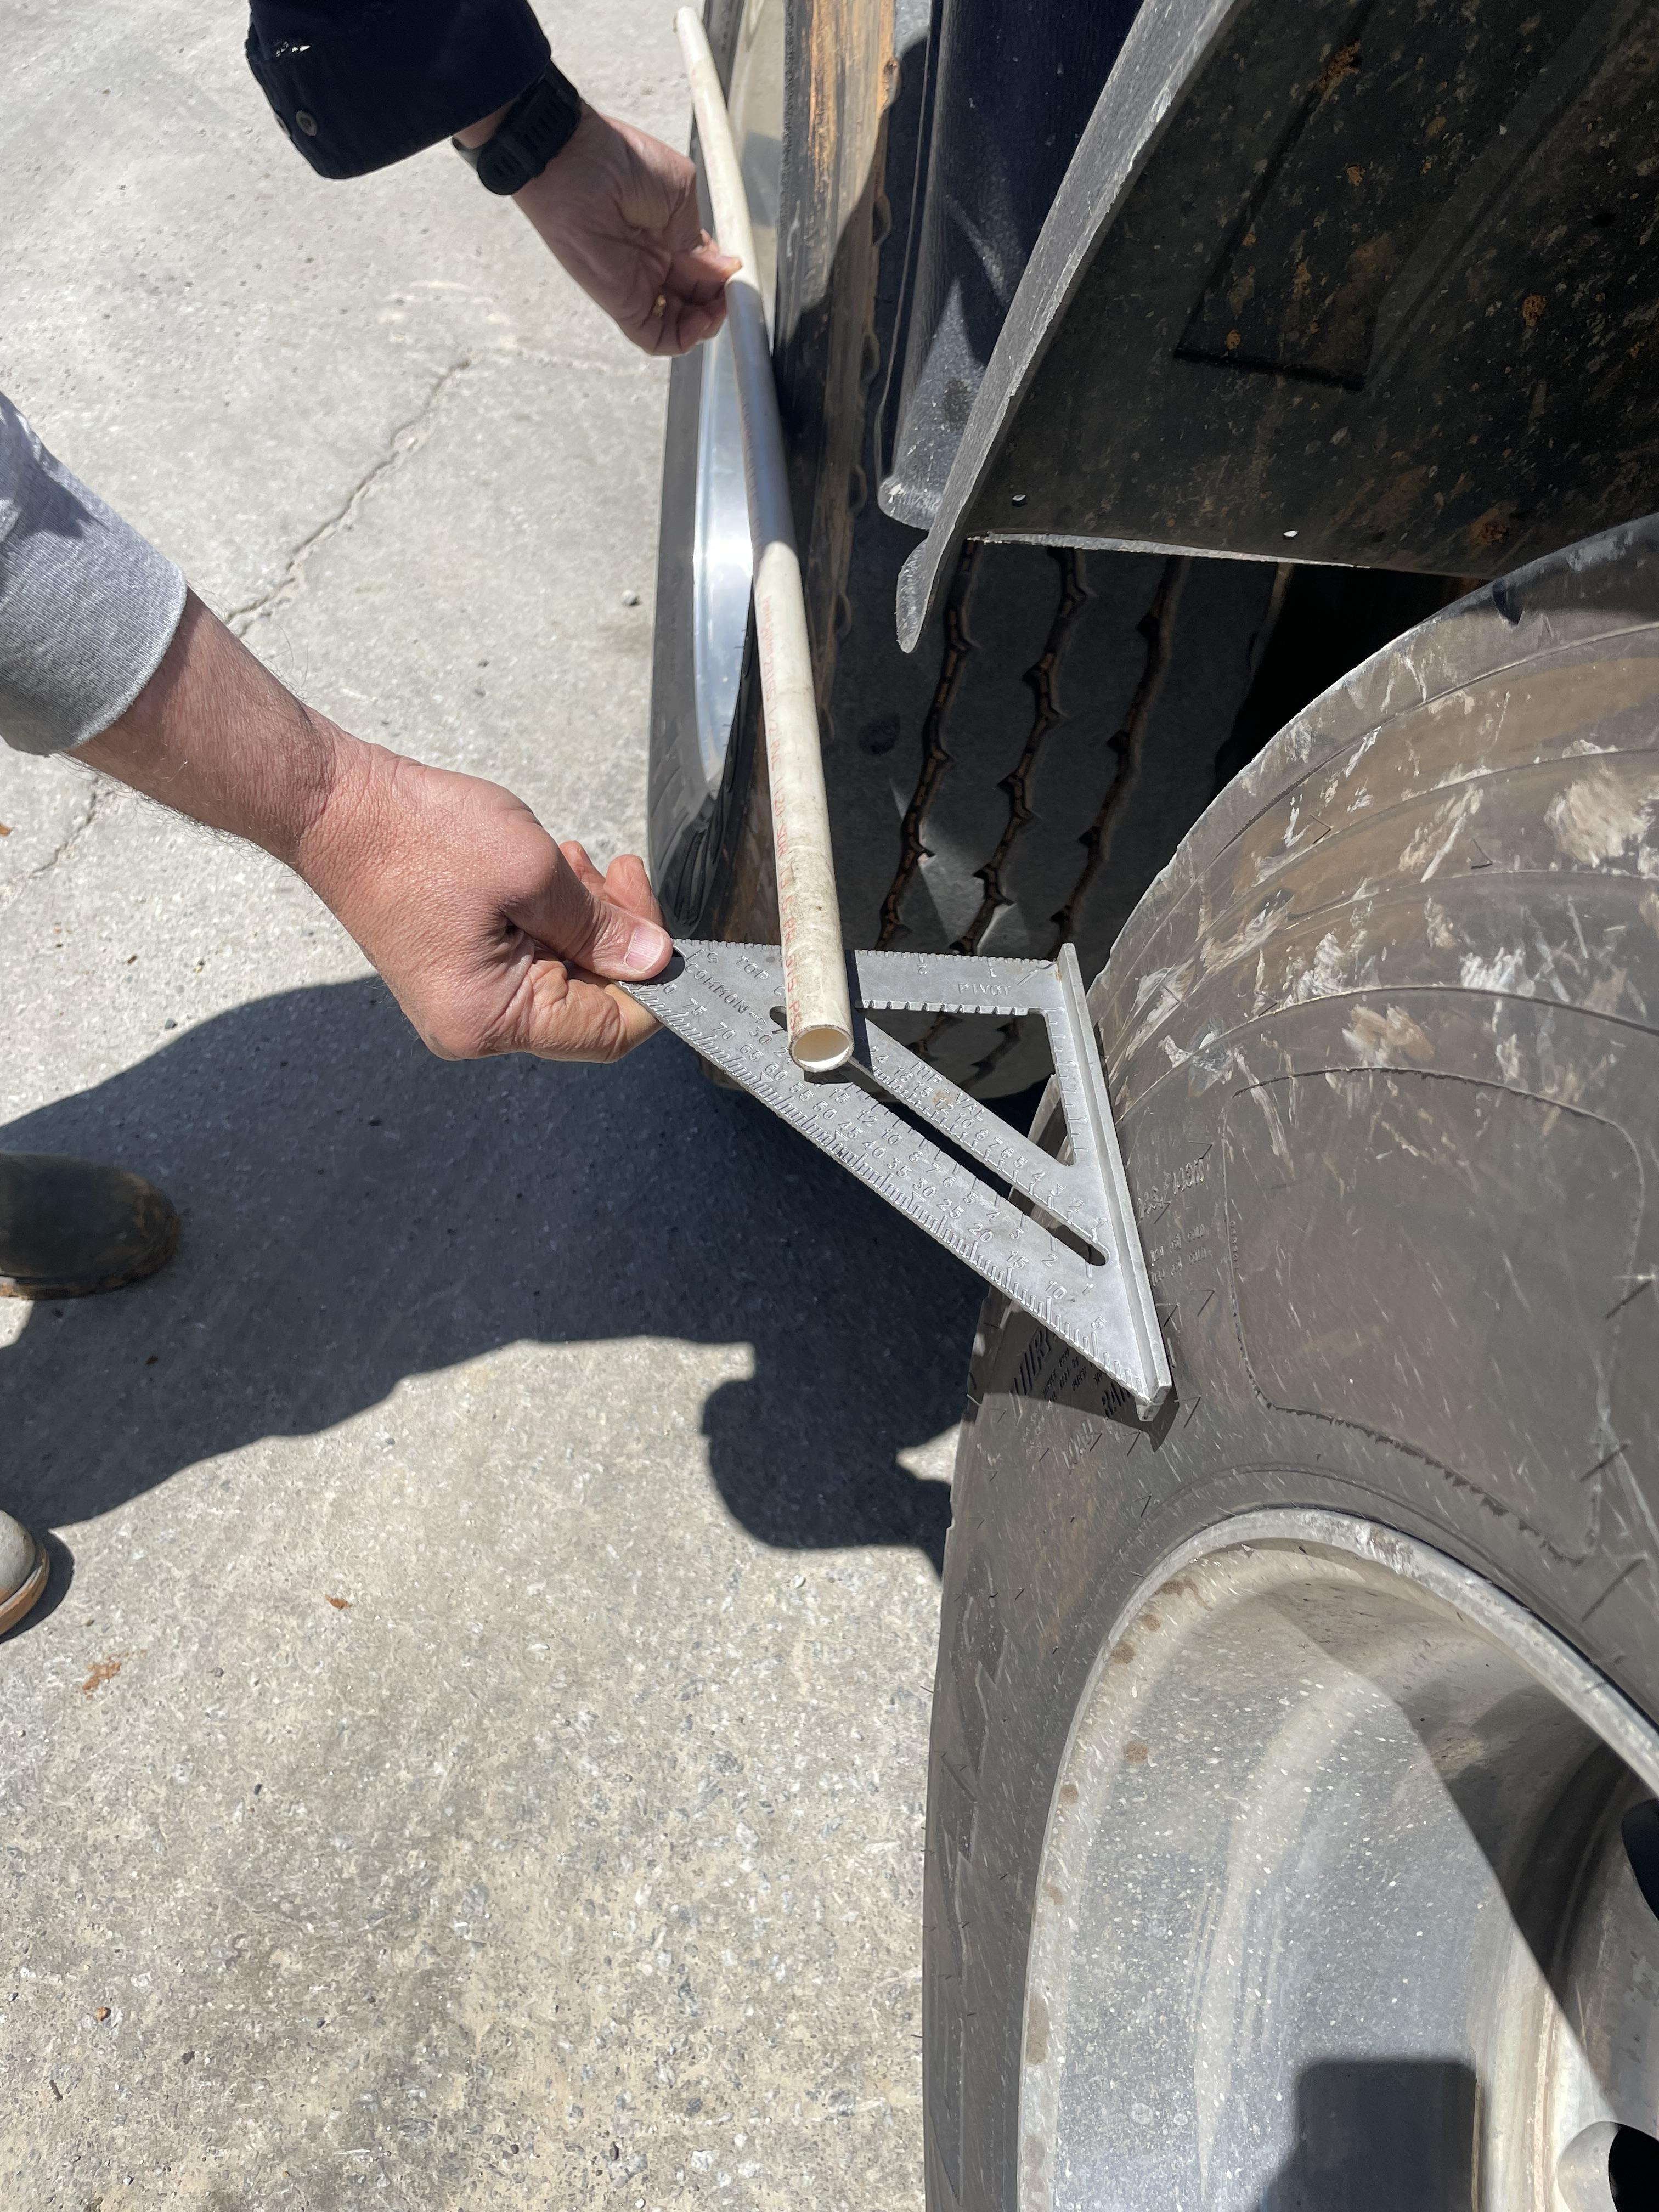
Thank you Joey Mack, fjh, and JoeH. I lifted the truck with the pump outriggers and removed the trunnion caps, wiped out the grease and visually inspected the parts. Both the thrust washer and notched D ring spin (normal?) and no evidence of abrasions or brass shavings were noted. While lifted and open, I shot it with grease and grease came out the bottom side of the bushing. I stitched it back together, dropped it back on the ground and shot it with grease again to get the top side of the bushing. Some grease also came out of the backside of the trunnion I backed the truck up on a tight radius to create about 2" of axle displacement, put the dial indicator on (see 2nd pic), and then used the pump outriggers to lift the truck. Once lifted, the axle displacement dropped from 2" to about 0.5". The trunnions only moved about 0.020" (well below the Joey Mack 0.100" threshold). Parked the truck after a hard right turn and inspected the springs, and again after a hard left turn. I was able to confirm that the leaf springs are rotating on top of the trunions a few degrees (3 degrees of rotation turn into 3 inches of wander on a 48" wheelbase). By hand, I attempted to wiggle/move the spring bolt on each leaf both when the truck was lifted and on the ground, and could not detect any play, so suspect that the spring bolts are intact. The springs are rotating in the isolator boxes, minimizing tire scrub when the axles are displaced (no unusual tire wear on this truck). Isolator pads look good and there is no play front-to-back, side-to-side, or up-and down when the truck is on the ground or jacked up. I ran out of daylight before I could tighten the u-bolts, so will tackle today. So a few questions are the thrust ring and notched ring in the trunnion supposed to spin? was my dial indicator set up correctly? was my spring bolt test adequate, or is there a better way to test for bolt shear that does not involve disassembling the leaf? one spring is rotated out of alignment from the other springs (see pic) by about 0.5". Any risk of leaving this as is, or essential to realign? thoughts on re-torquing the existing u-bolts, or replace? Thanks gents, greatly appreciate your experience and expertise on practical repairs.
-
New/low mileage Granite with wandering axles
timmer62 replied to timmer62's topic in Driveline and Suspension
Thanks for the comments, JoeH. None of my eight 38 meter boom pumps (same as this one) have transverse torque/stabilizer arms. The pump kit mounted on the truck sits between the chassis rails, and I was told years ago that the clearance between the carriers and the pump cylinders is insufficient for the transverse torque arms to be installed, particularly on shorter boom pumps. It is noteworthy that all of my 38m pumps have axle stops to prevent the carrier from pushing up and striking the pump cylinders, which I am constantly inspecting. This is the only one of my pumps that has this wander. Correspondingly, my longer pumps (47 meter and 56 meter) have more clearance and all of them have the transverse torque arms. They also have Hendrickson or Neway suspensions. I took the pump to the dealer who tells me the wander is due to shot trunnions and pads. This diagnosis makes no sense to me for the following reasons: wander has been present since day 1 (new) The brass trunion bushings are only about 1/8 inch thick, and the play from worn bushings would be way less than 3 inches (closer to 1/4 inch) springs are snug in the boxes with no extrusion of pads I will be opening up the trunnions myself tomorrow to inspect them. The only thing that makes sense to me as a cause of the wander is that the u-bolts are loose and the springs are rotating slightly from left to right on top of the trunnionsl during turns. Only 3 degrees of rotation would be enough to cause 3 inches of wander, if I can still do geometry. I’ll be trying out my new torque multiplier tomorrow. appreciate any other ideas anyone may have. -
I have a Mack Granite GR64B with Camelback suspension (44k). The rear axles wander and show significant displacement from each other (see image) particularly in tight turns. The pictures shown were taken at 20k miles, but the wander has been present since new. The truck is a concrete pumper, and 99%+ of its driving is on freeways or surface streets. Brought this up to my dealer some time ago who told me "this is a hallmark of camelbacks... they are designed to have lots of compliance". Recently after reading a few other threads, I am skeptical, particularly since none of my other 7 trucks (all supposedly identical) show this behavior. The other 7 trucks have very little wander (inch or less). The truck is quite drive-able (no complaints from any drivers) and the tires show no unusual wear, just looks strange as hell to me. The unit has brass bushings in the trunions and urethane isolators with isolator spacers (so-called "twinkies"). Both carriers have longitudinal torque rods. Neither carrier has a transverse torque rod. I don't see evidence of loose fasteners on the trunions or boxes (u-bolts or bolts) such as gaps, abrasions, rubs, wear or exposed threads, etc. I don't see evidence of the leaf springs shifting forward or aft on the top half of the trunions which makes me think the u-bolts are properly torqued, and the bottom three leafs are aligned and centered in the isolator boxes (which makes me think the isolator boxes are properly torqued). The only two observations I can make that might be clues are that (1) the third spring from the top of the driver's side leaf spring is twisted and is out of alignment with the other springs in the leaf by about 0.5 inch and (2) the isolator pads (twinkies) are loose and rattle from side to side in the isolator boxes. I am very surprised that the isolator pads are loose... if the pads are extruding outward under the axle load, I would expect the twinkies to be pressed outward against the box and not be loose at all. What would be the root cause of 2-3 inches of axle wander on a new and/or very low mileage truck? What would make the twinkies loose? Why would one leaf be twisted out of alignment? I appreciate your help.

-
I have a 2017 Mack MRU 613 with an MP7 engine (concrete pump truck). The engine intermittently is cutting off. Some days as often as 10-20 times. Other days (like today), it did not cut off once. Completely unpredictable. When it cuts off, the dash remains illuminated (fuel gauge shows level, coolant temp gauge registers temp, etc.). However the DEF tank registers zero empty even though the def tank is full. Whatever the cause is, whenever it occurs the def level sensor is somehow not When it cuts off while in motion, it restarts after coasting briefly. After restart, def tank registers correctly. When in PTO, most of the time it can be restarted without delay from the ignition switch. Occasionally it won't start immediately. Due to the erroneous def tank reading, my operator/driver has been wiggling the def tank wiring harness when it won't immediately restart. Not sure if this is helping or not, or simply allowing enough time to elapse for a circuit breaker or an ecu to reset, but he can typically get it started within a minute or two of it cutting off. After restart, def tank registers correctly in this case too. I ran the truck myself all day today so that I could try and diagnose the issue when it cut off, but it did not cut off once. I tried wiggling the wiring harness on the def tank to reproduce what my operator believes is a loose connection. I could not recreate the cut off. I disconnected all of the connectors and checked them for contamination, but all were clean and dry with pins intact. I put the truck on J-pro and disconnected the def line heaters (the wires my operator wiggles) and other than a open circuit fault, there was no consequence or cutoff. I disconnected the level sensor, and the def tank registered empty, but the truck kept running. These findings make me suspect that there is not loose wire or bad connection, but ... hard to be sure. I located the ACM (mounted on the opposite of the truck next to the battery box) as I have seen other posts suggesting a wire from the battery to the ACM can be the culprit. Those posts were pertaining to older model Macks than mine, so not sure if this would apply to my 2017, but gave it a look. I could not find a wire going directly from the battery to the ACM. The ACM had only one connector, which was under a cover, clean and dry, and looked just like the ECU connectors on the engine block. Not sure what the cause is, maybe the ACM itself (do they intermittently mis-behave?). Been focusing on the def system due to the erroneous gauge reading right after it shuts off, but could be something else I suppose. Appreciate any insight anyone may have on this issue.


BMT Forum Logo
