

J Mack
-
Posts
35 -
Joined
-
Last visited
-
Days Won
1
Content Type
Profiles
Forums
Gallery
Events
Blogs
BMT Wiki
Collections
Store
Posts posted by J Mack
-
-
On 6/27/2020 at 10:39 AM, B73Buddy said:
Shell $200
I'll take it if you're willing to ship.
-
I’ve been looking for better pictures of the factory running boards like the ones on this truck, I don’t believe I’ll be able to find a set in good shape and most likely going to need to recreate them here from photos.
Would you happen to have anything in your photo archive?
Thanks,
Jim
-
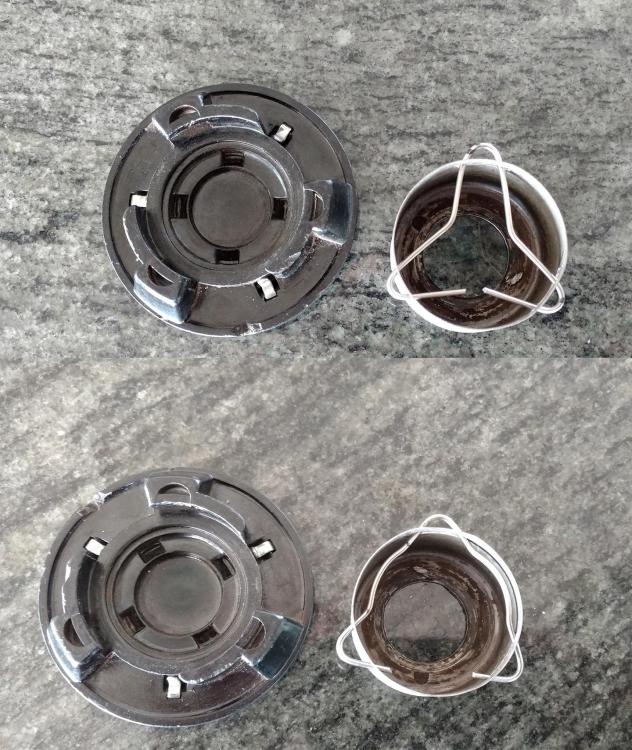
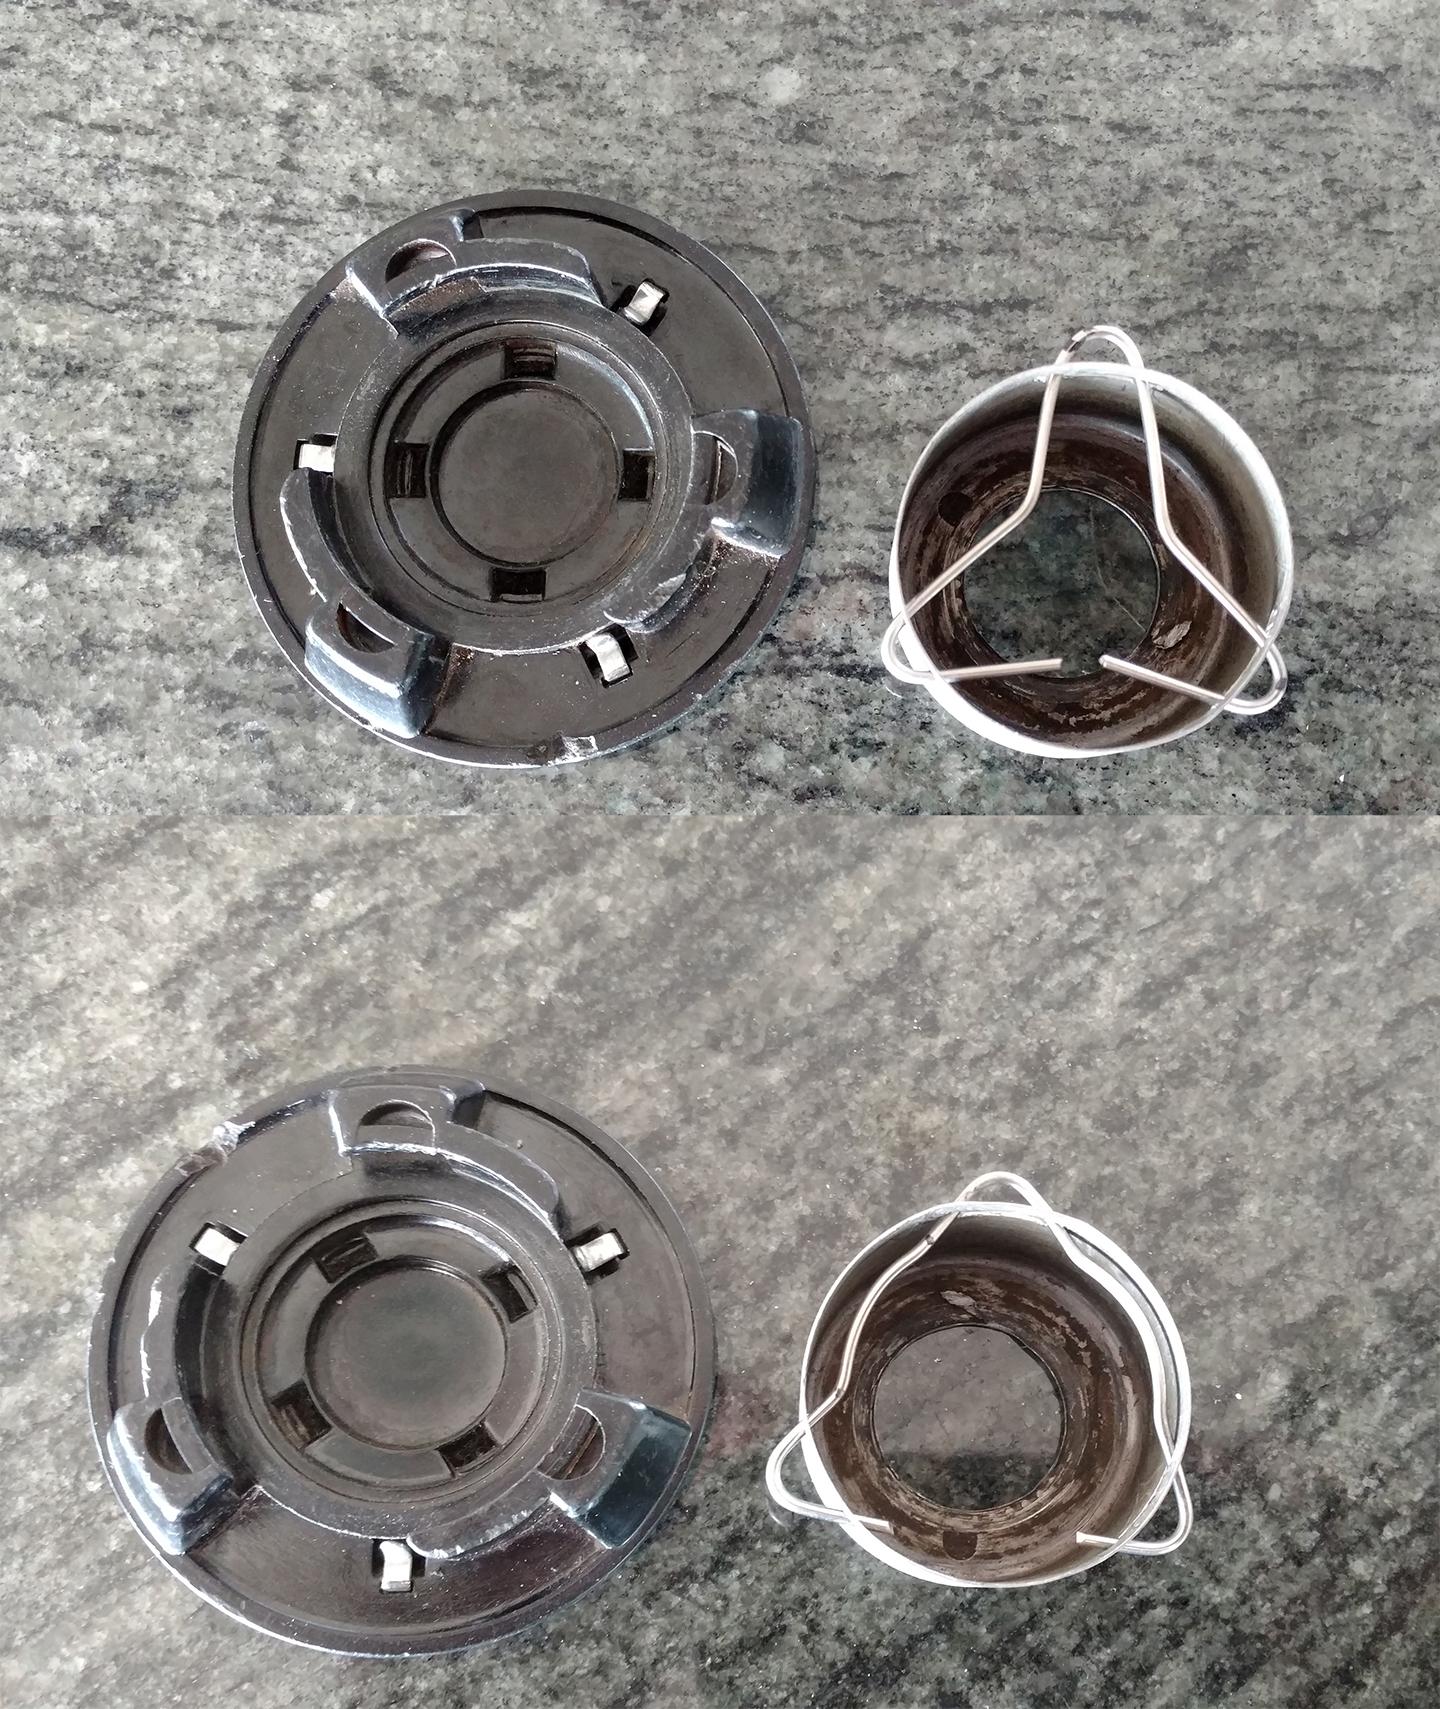
Thank you @ j hancock , That is exactly what I needed.
I was bending wire into a triangle like the top photo and it worked but wouldn’t keep the button tight and seemed like it would rattle quite a bit. I scaled your photo and bent a wire to fit and it works great!
-
 1
1
-
-
I've checked Watt's and cant find anything but again I'm not sure exactly what I'm looking for. Any help would be greatly appreciated.
-
Thank you guys!
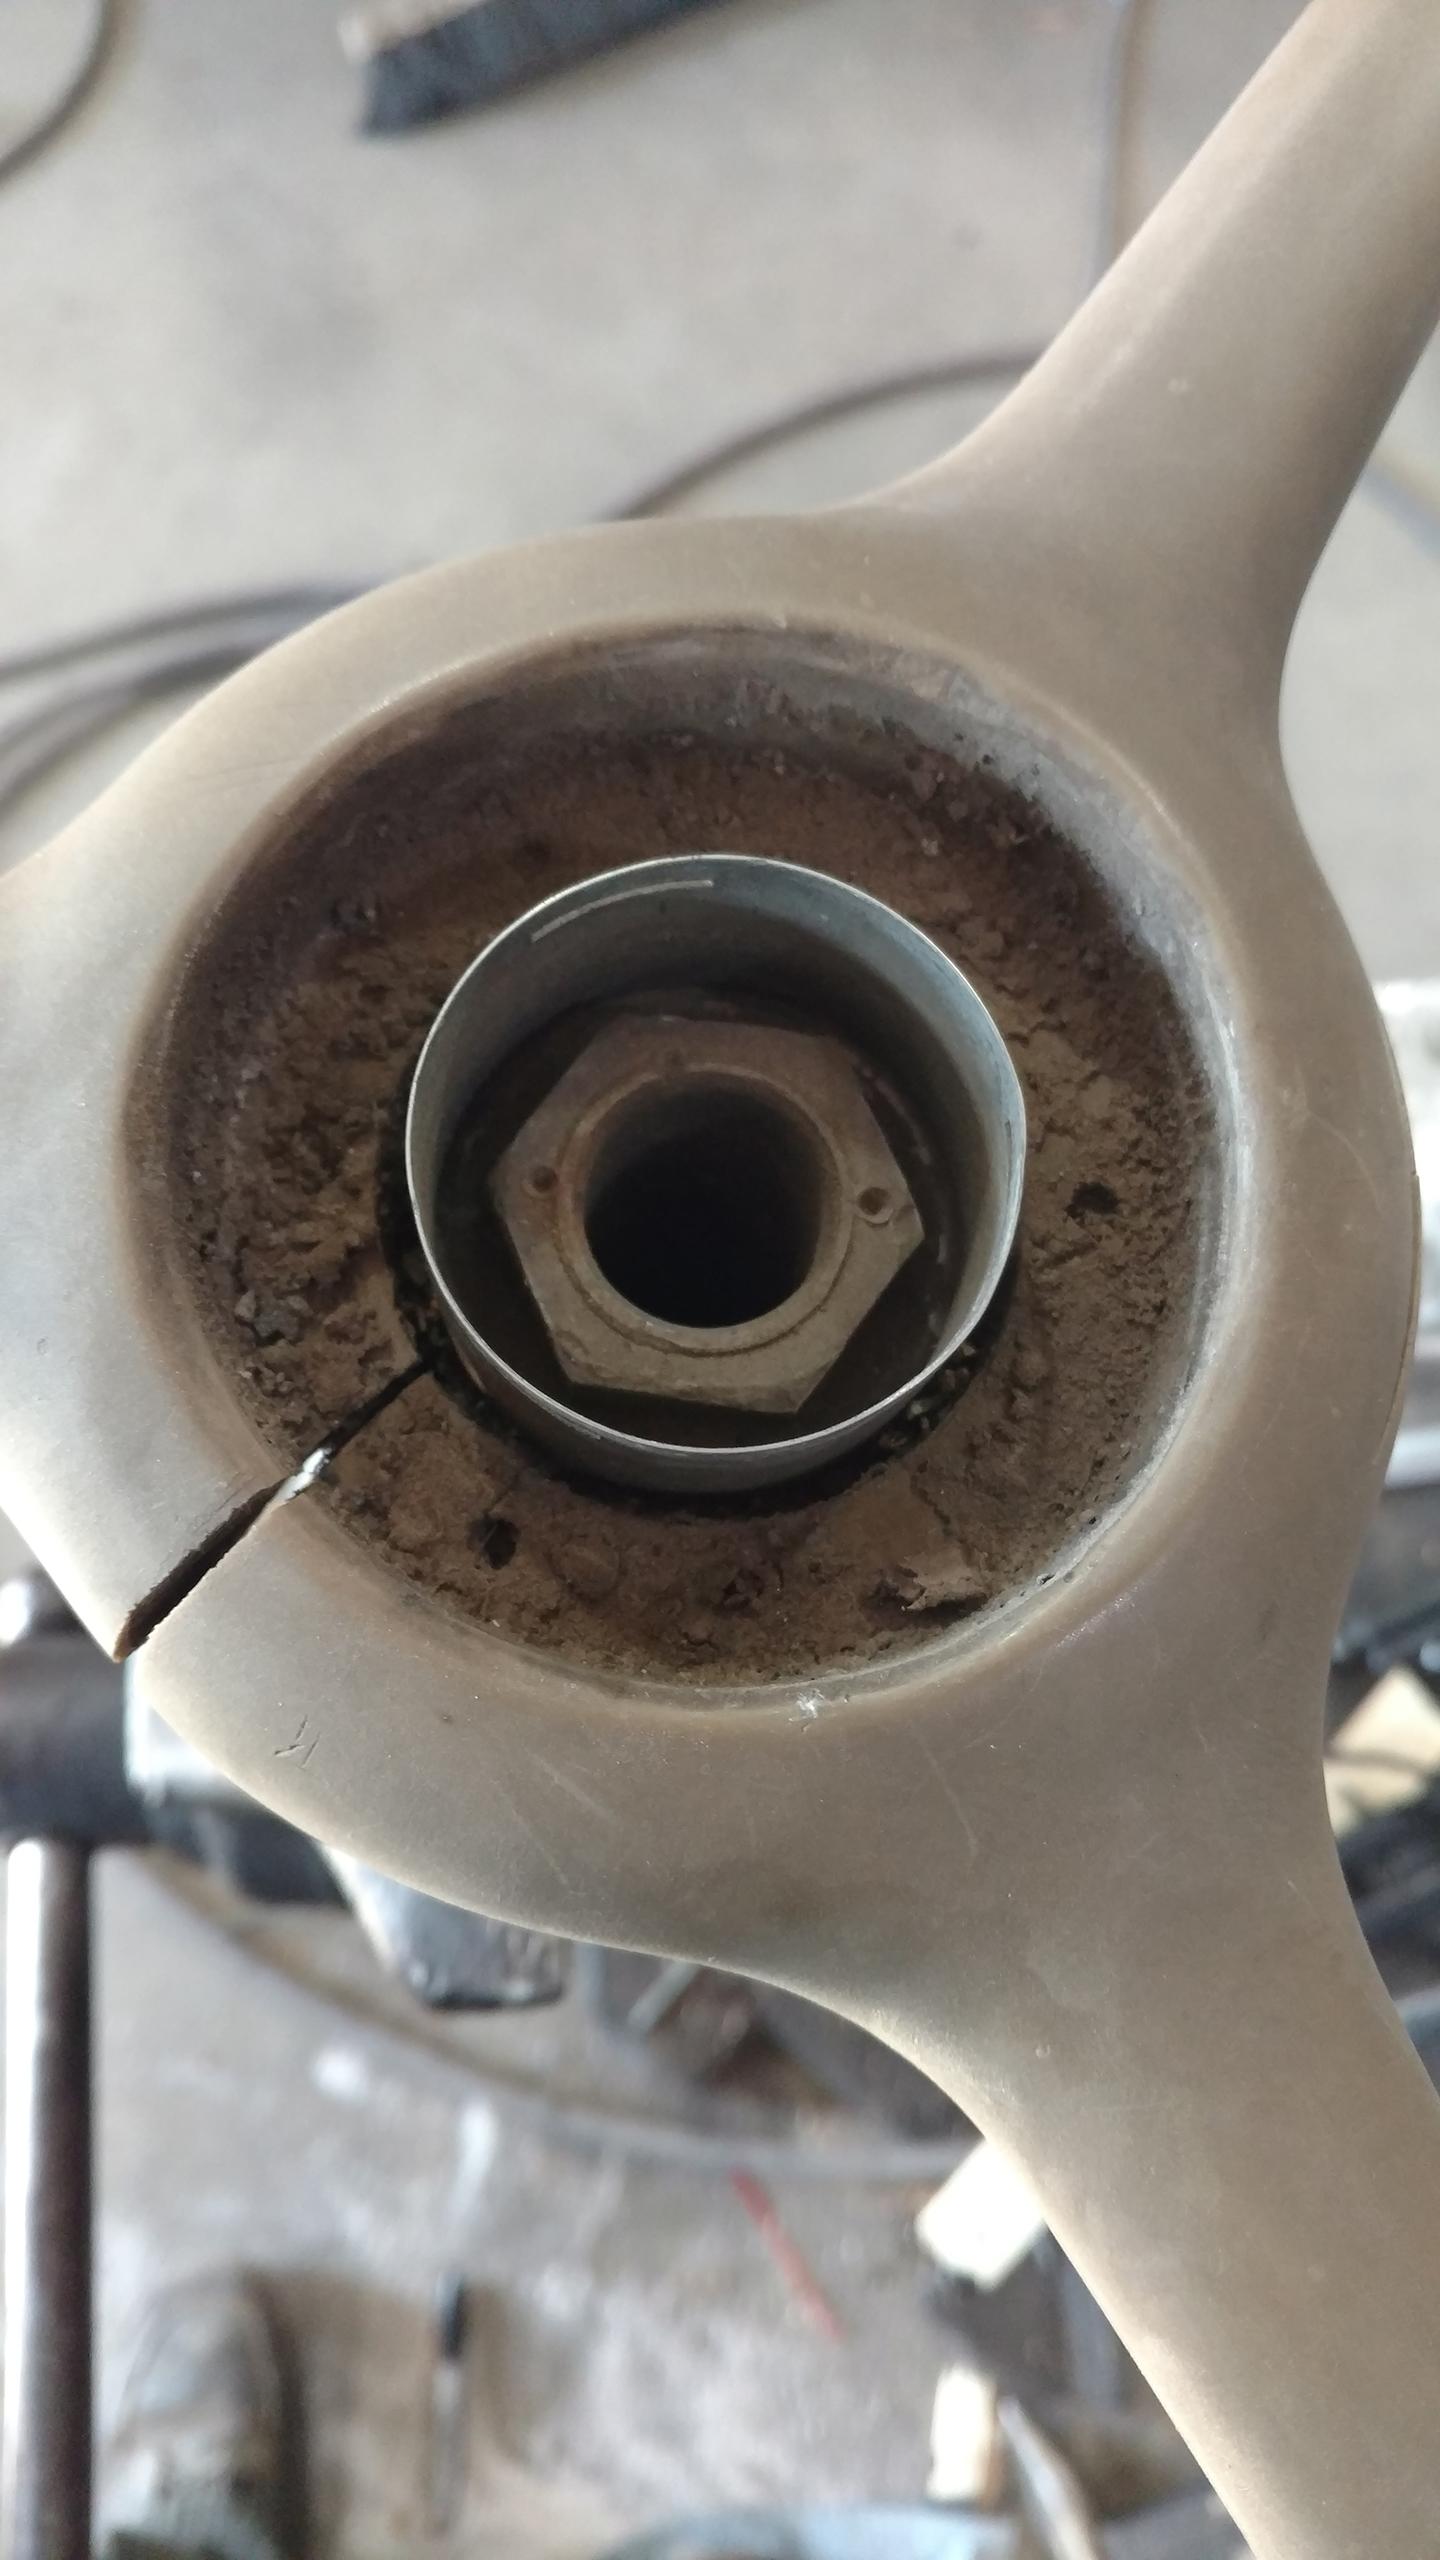
I believe I need some sort of spring clip that would fit inside the tin cup in the middle of the steering wheel, trying to find a picture of the assembly now to see what it might look like.
-
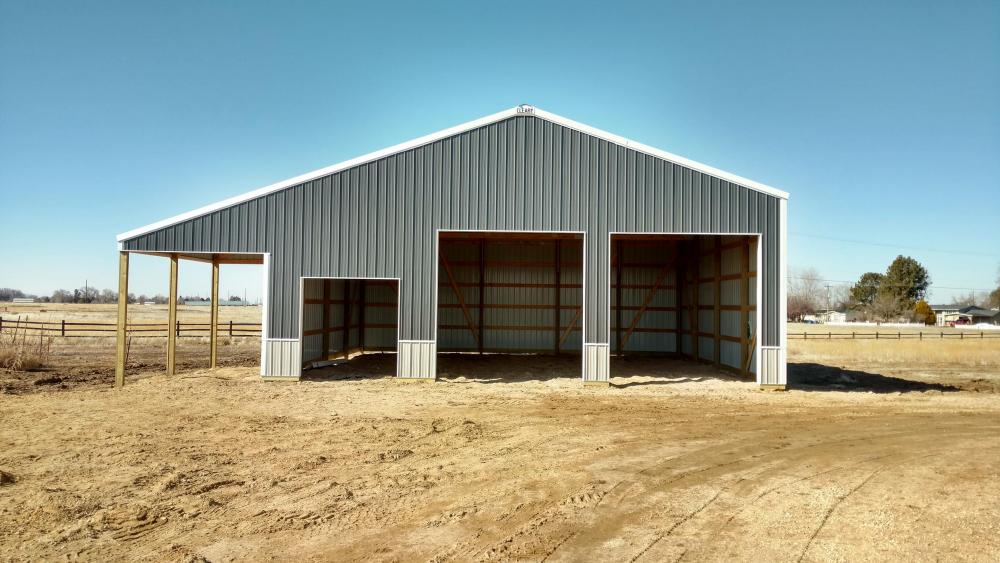
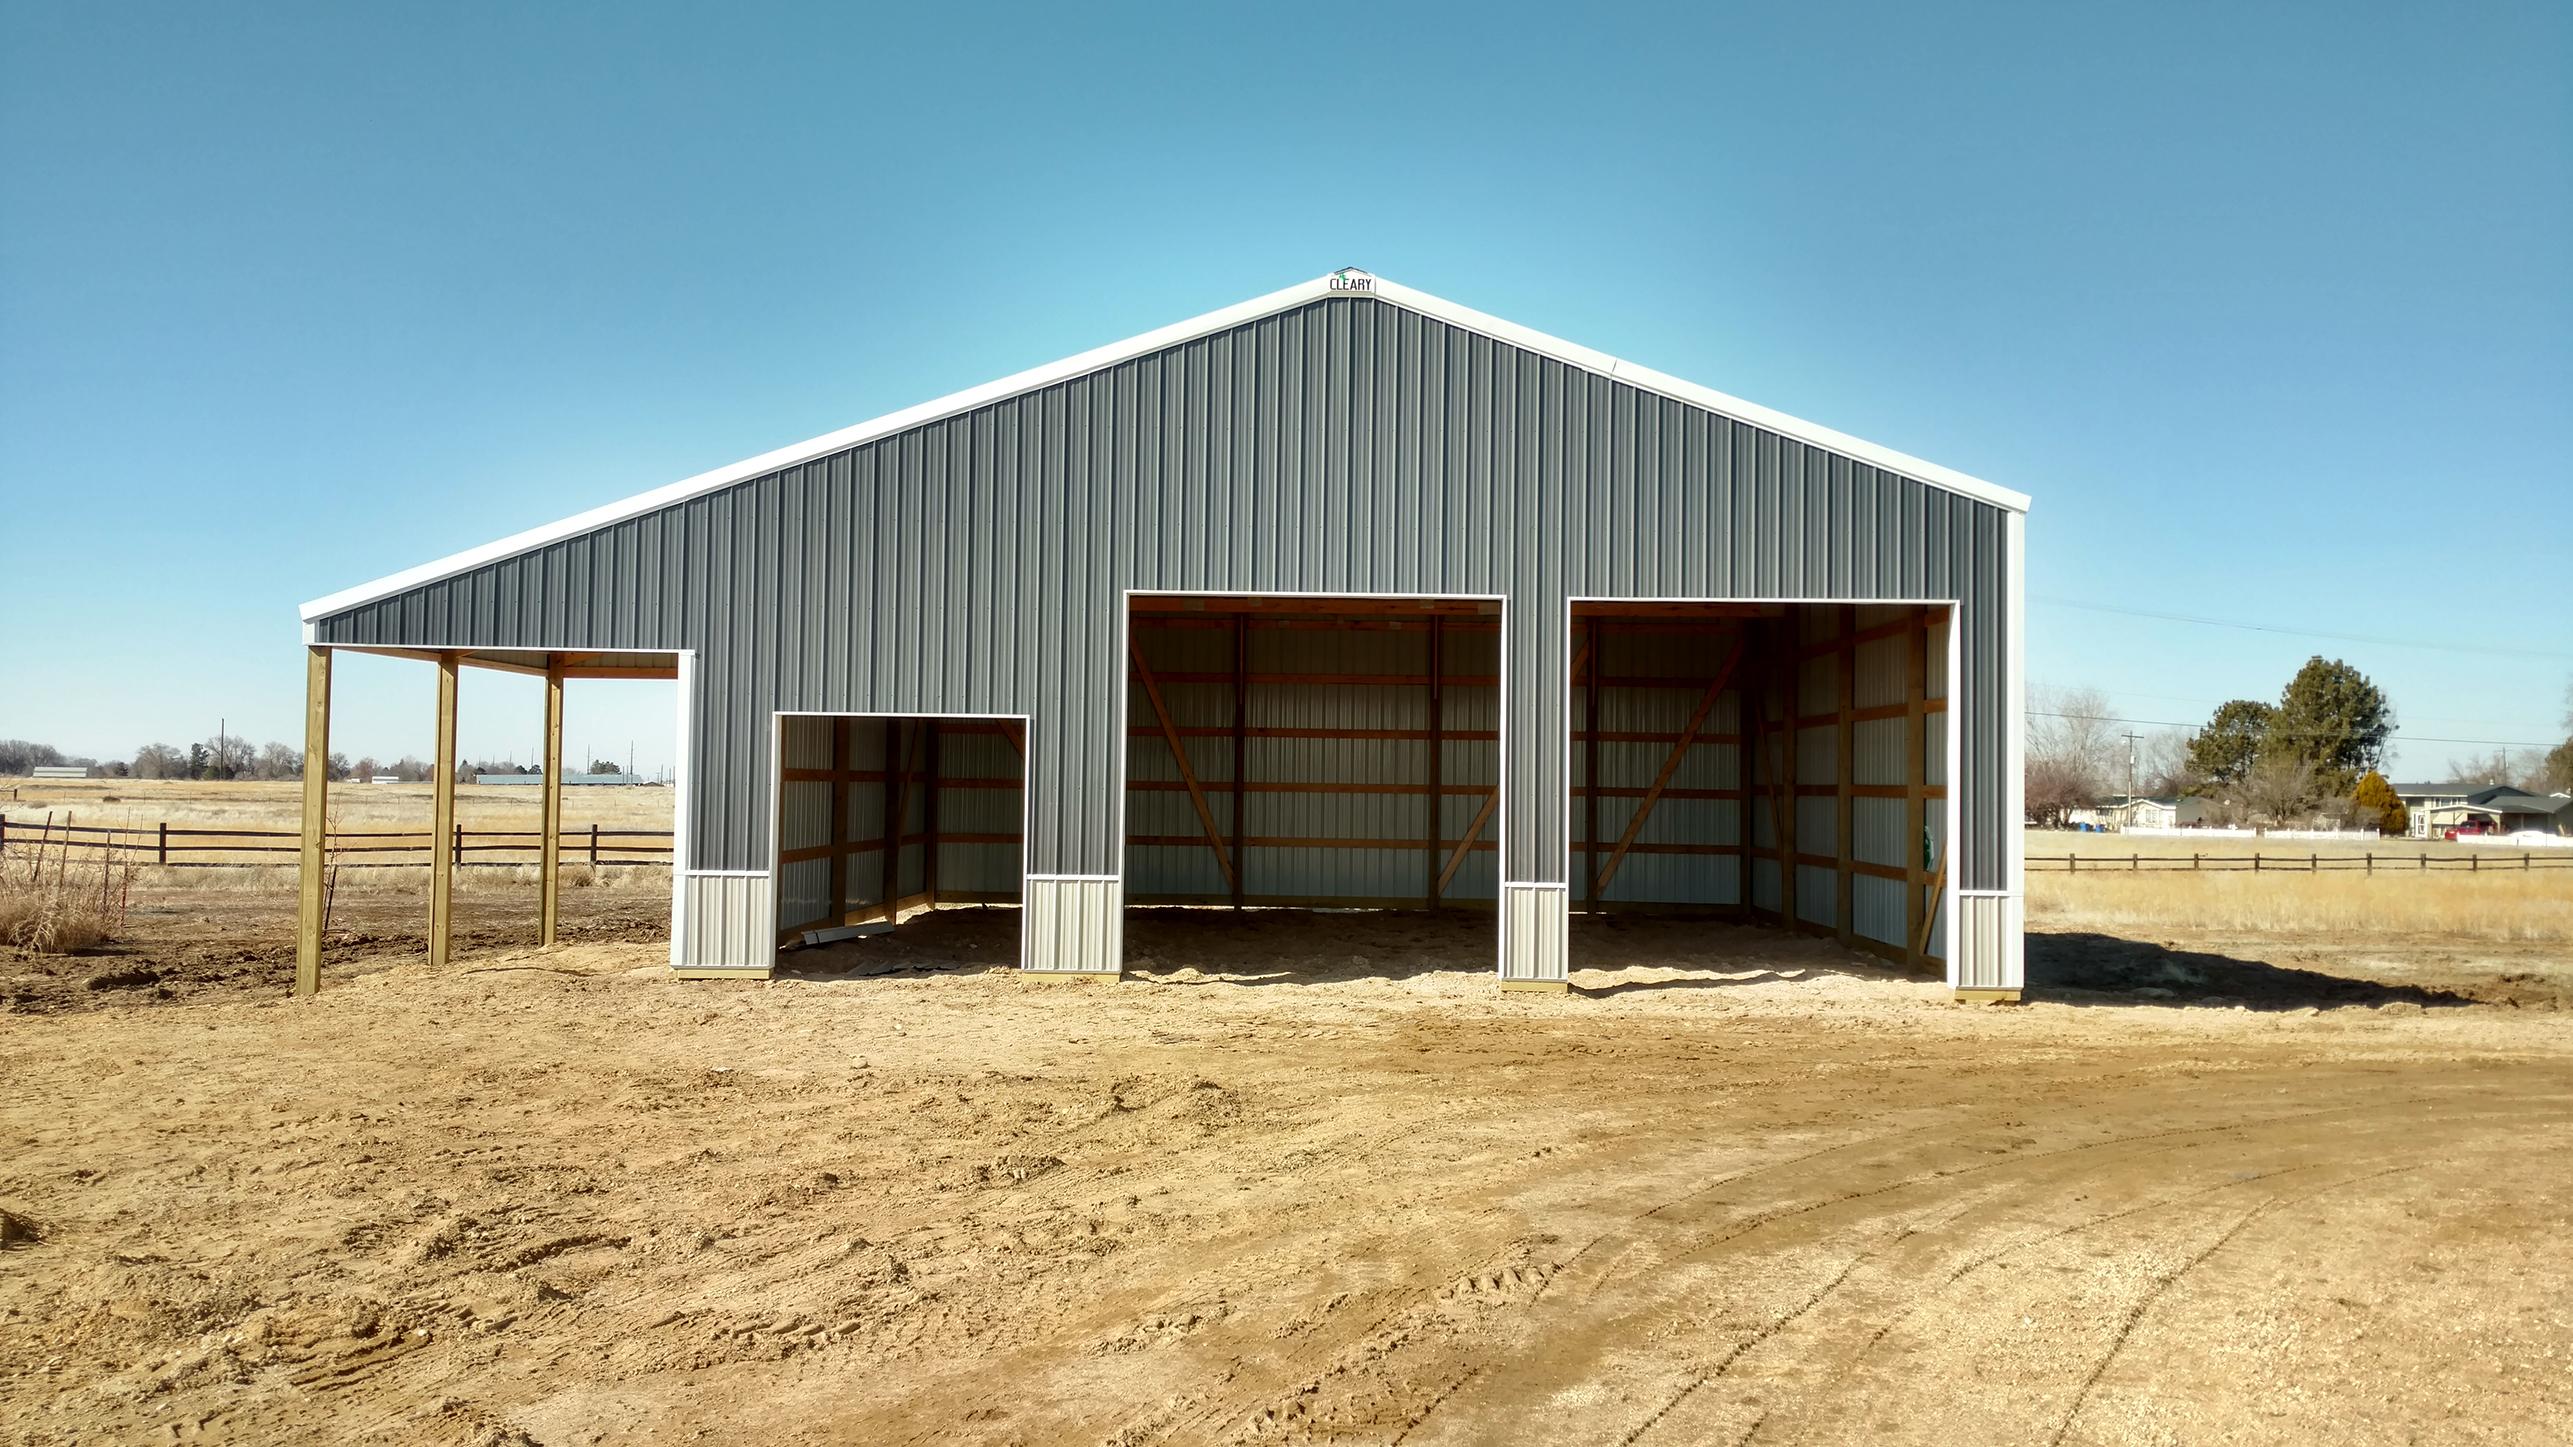
Well about the time I was thinking I could make some progress on the old Mack we decided to build a shed to park the truck in and that took all of February.
So parking shed is mostly done and now I hope to get back to the Mack.
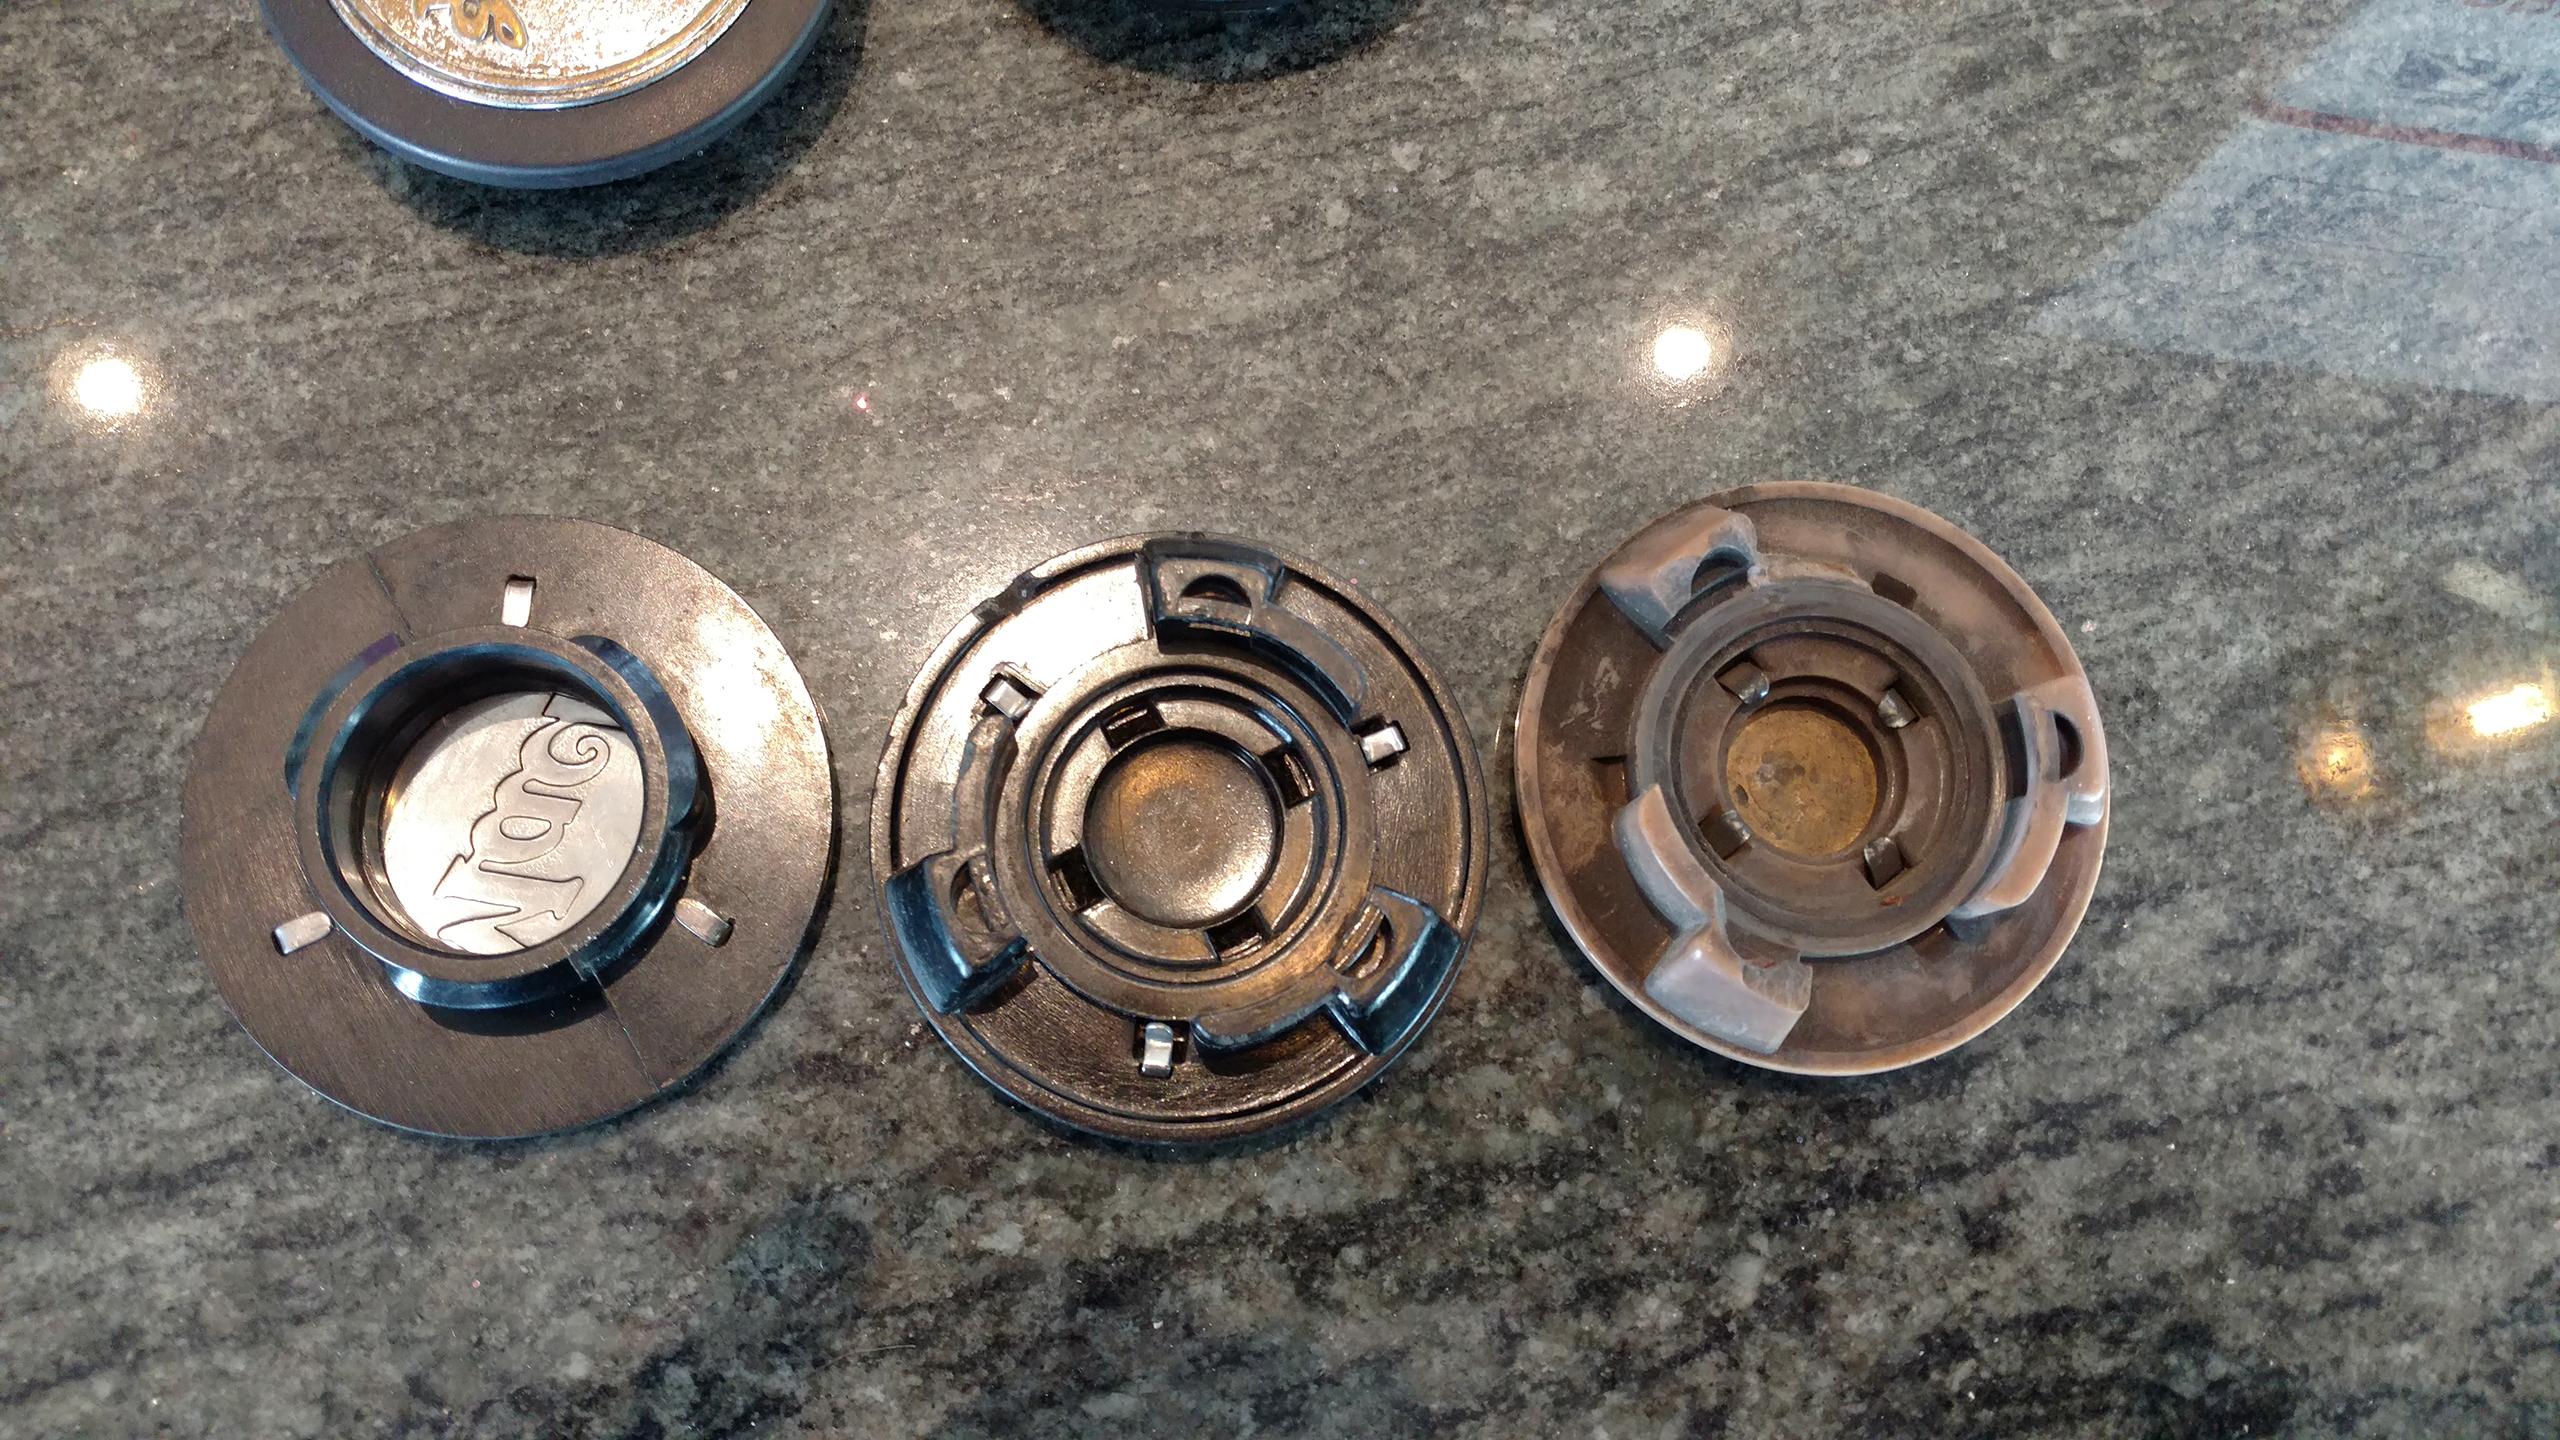
I’ve been trying to get a correct horn button but obviously I’m missing something here.
The tan button on the right is the one that came with the truck and the ears are broken, I assumed that was the reason it wouldn’t say in the steering wheel so I ordered the one in the center but it doesn’t fit either, I ordered the one on the left thinking it would be what I needed but no luck.

Can one of you guys tell me what parts I would need to get one of these buttons to work with my wheel or what the correct button for my wheel would look like?
-
Sold pending funds.
-
- Popular Post
- Popular Post
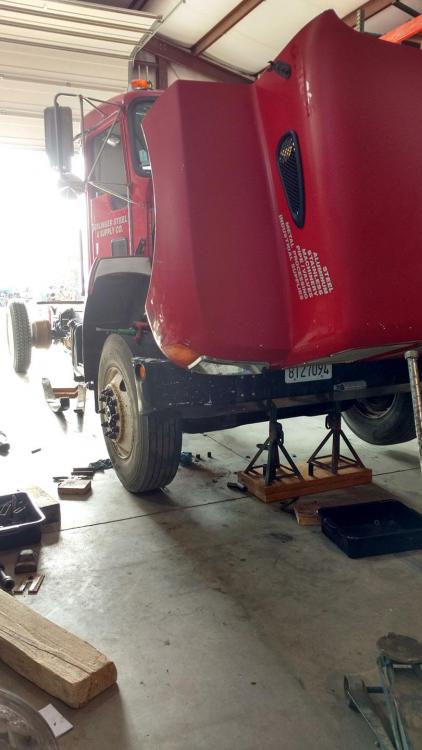
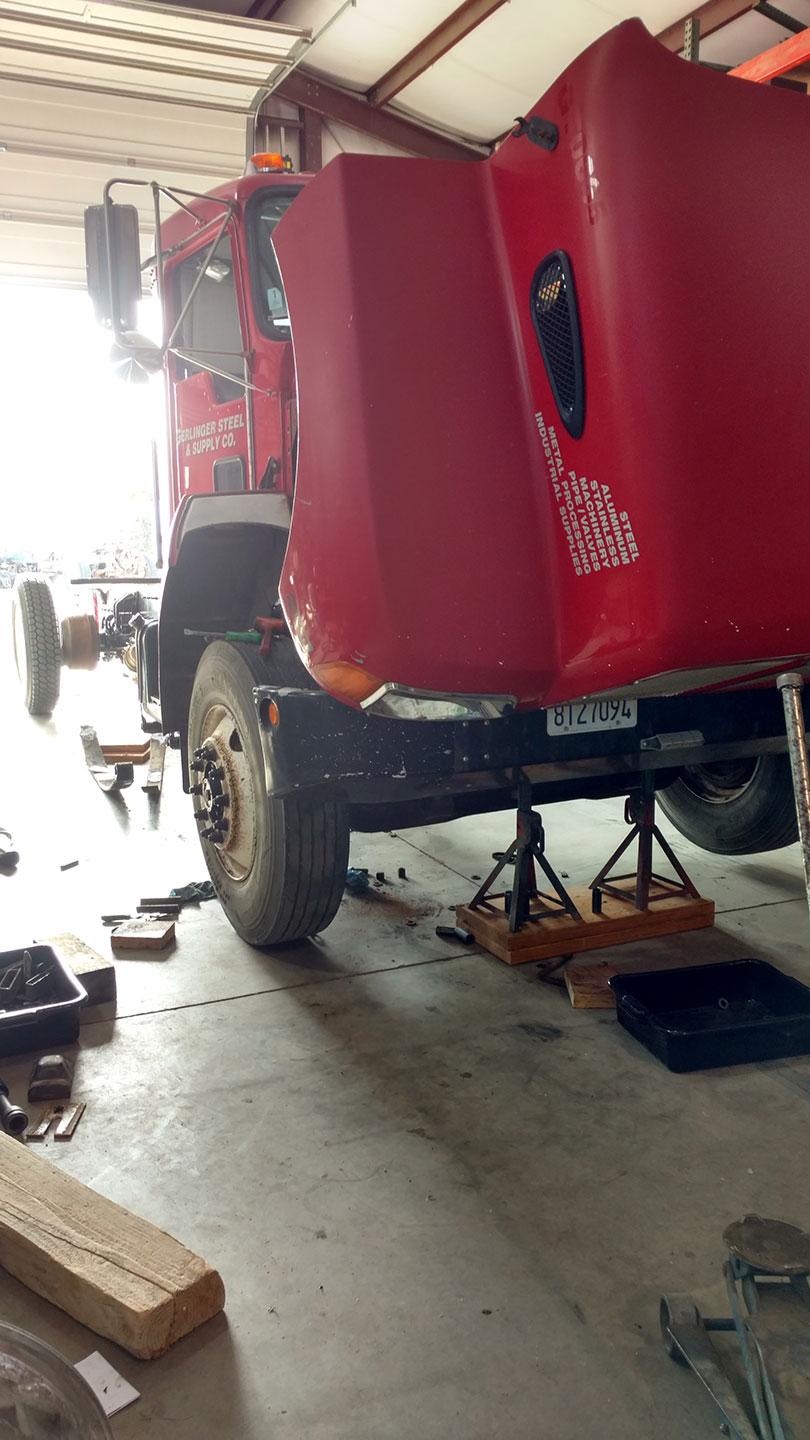
Holidays set me back a bit from working on the Mack but now I’m back out in the shop and trying to make some forward progress.
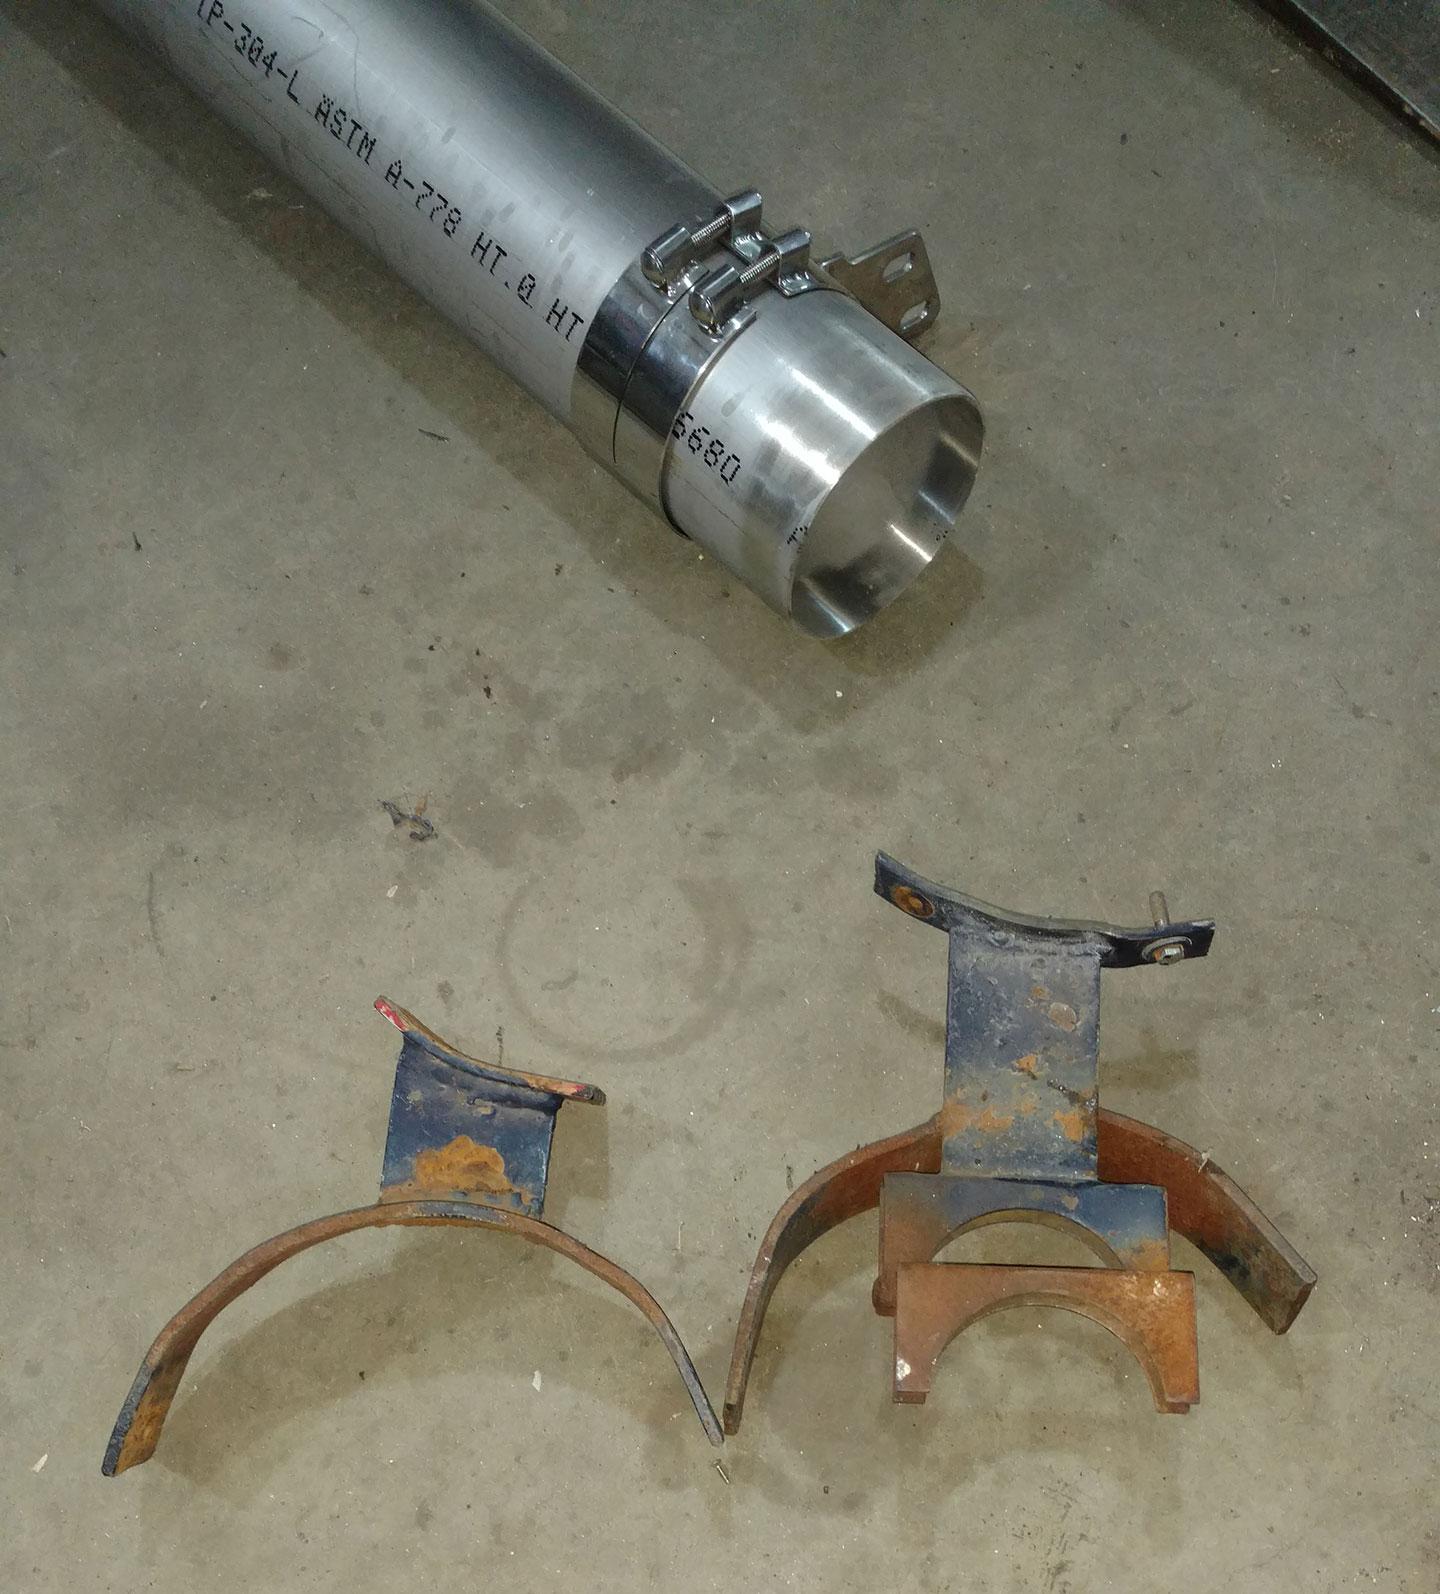
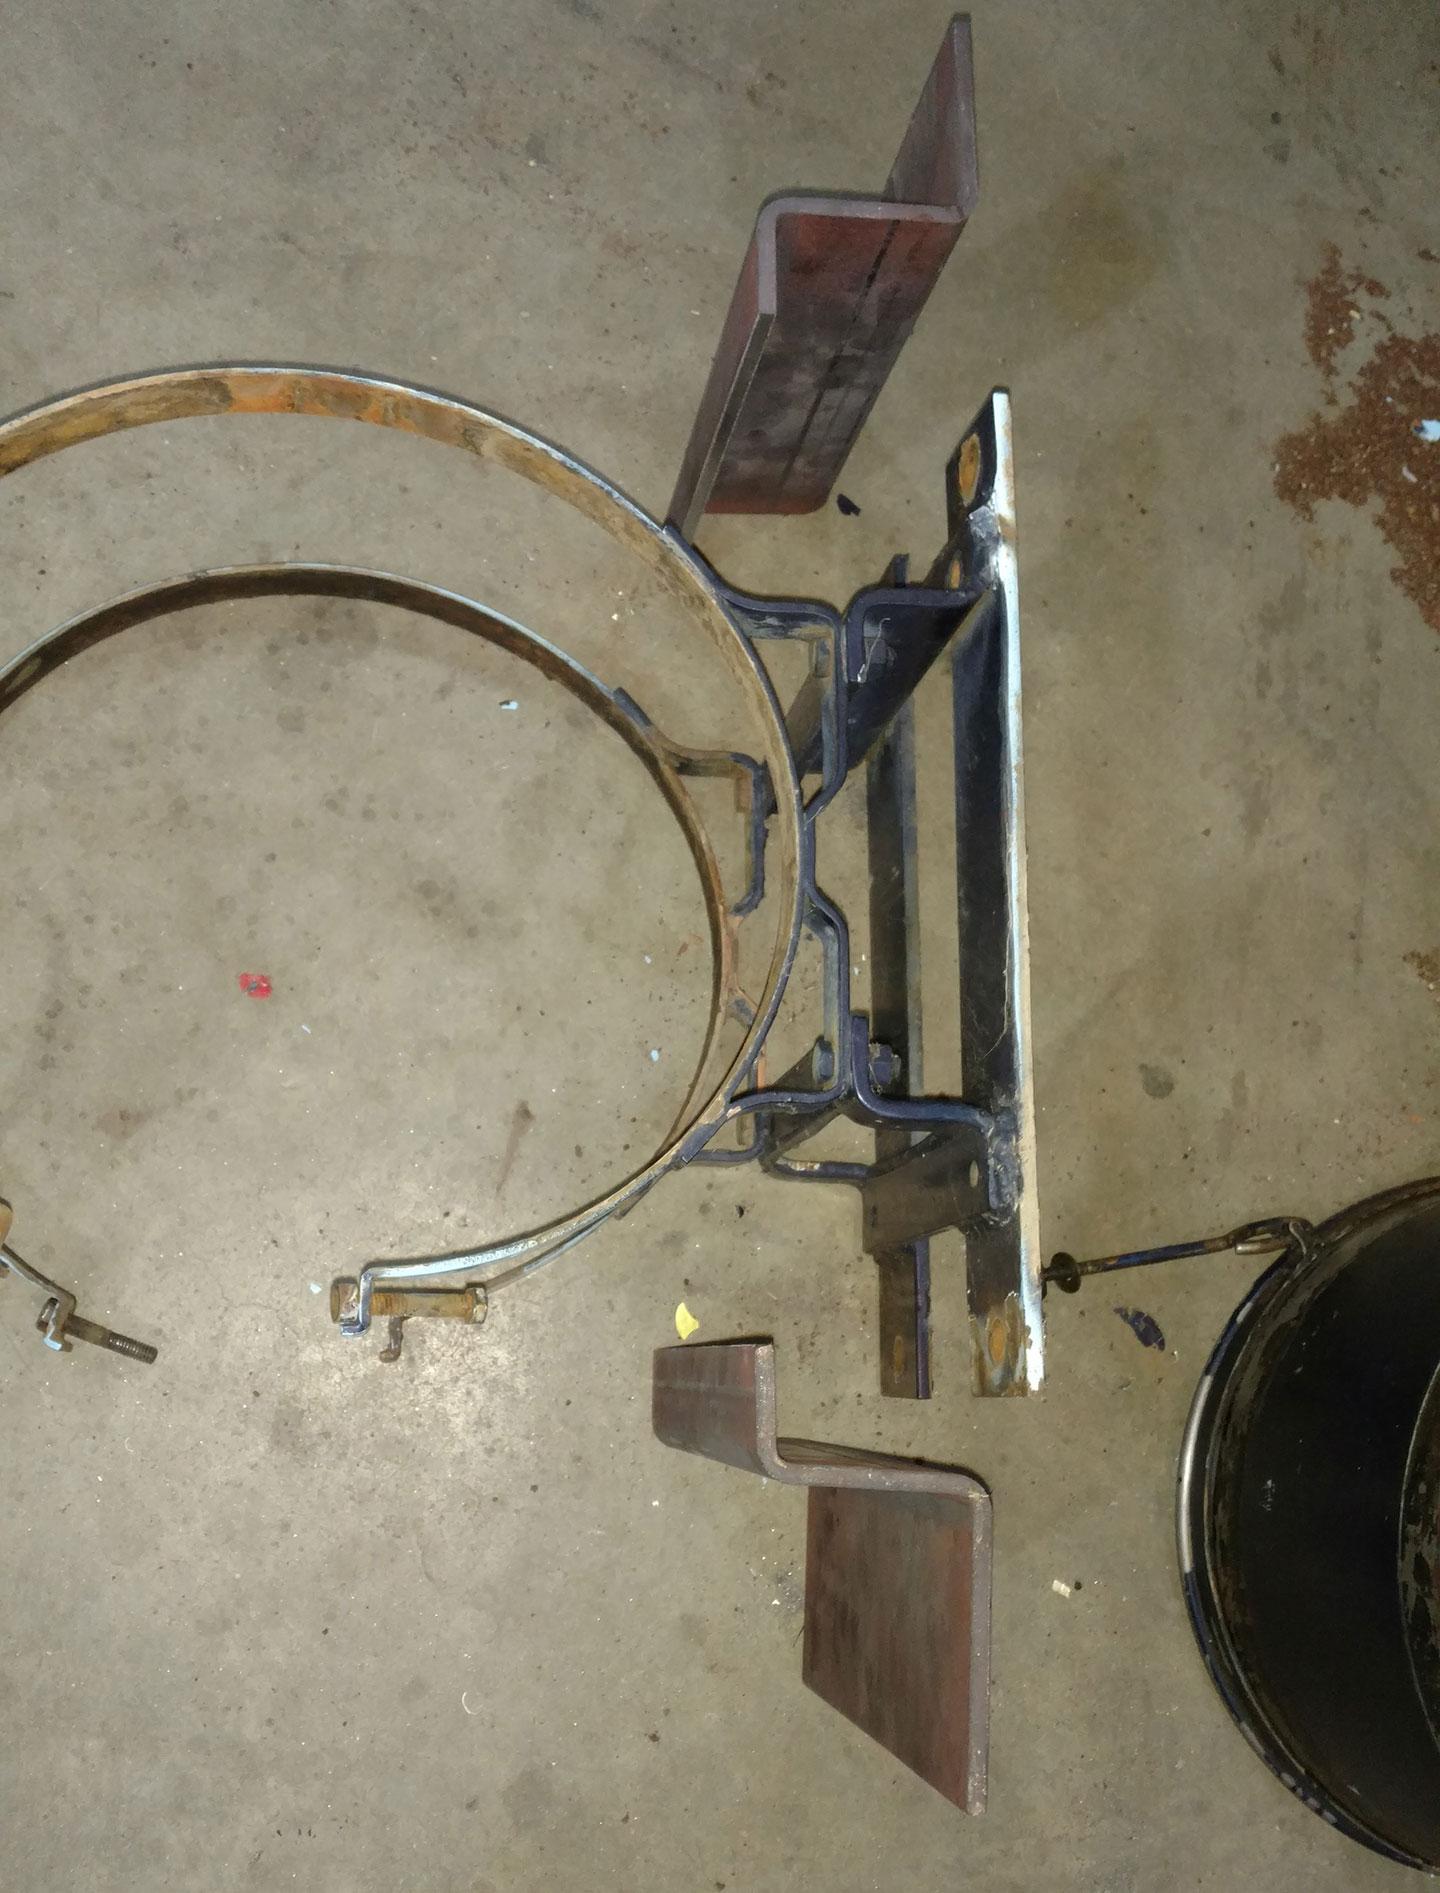
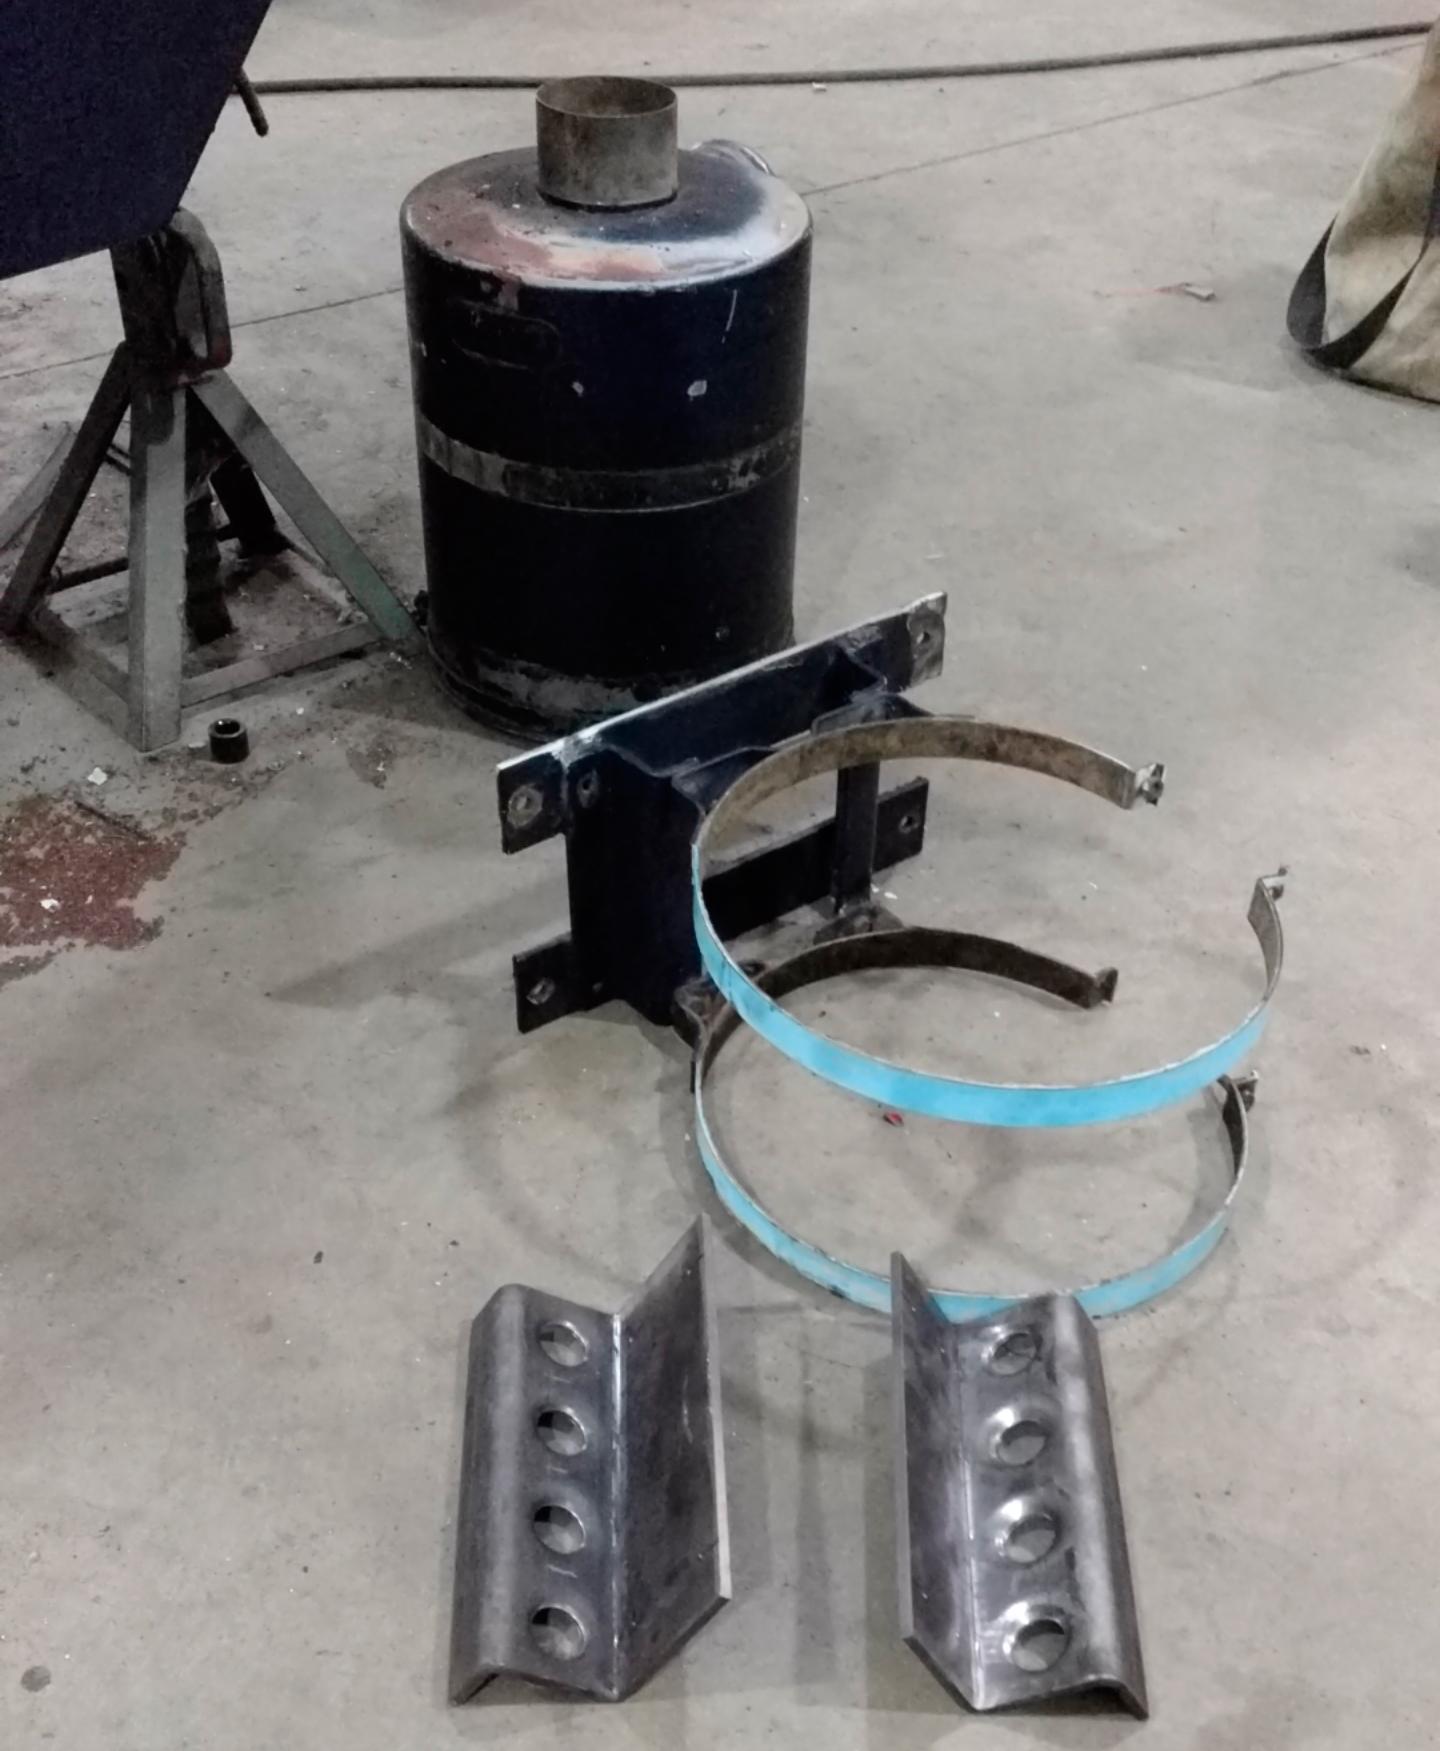
The exhaust brackets where a horror show so I needed to come up with something better to get me by for now.

I found some Peterbilt mounts that fit the Mack body reasonably well so I’m going to run them until I find time and money to repaint the Mack.
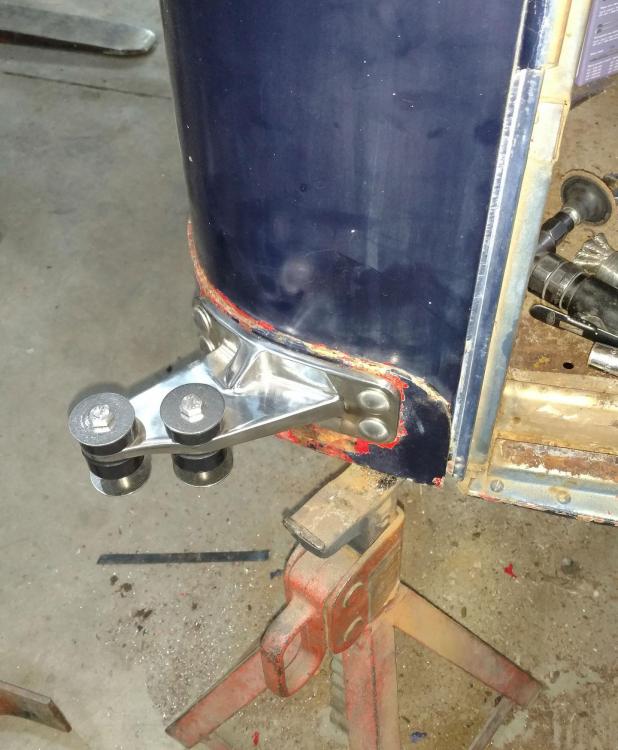
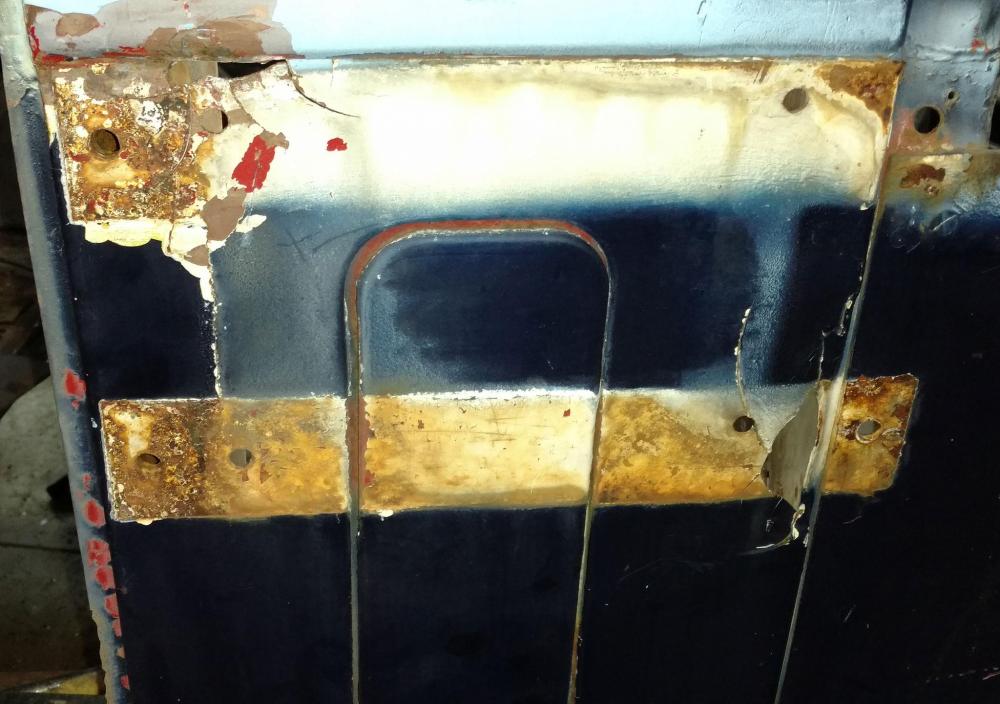
Next on the list was the oil bath air cleaner, I removed the guts and converted the housing to a Donaldson pleated air filter to go better with the turbo engine going back in the Mack. I figured while I was working on the air cleaner I would remove the mount and clean it up a little when I discovered this mess, looks like when they originally mounted the oil bath they attached the mount directly to the cab sheet metal and at some point in this trucks career the weight of the oil bath ripped out the bolts from the sheet metal sides and the fix was to add some flat bar over the side vent and drill through the A pillar and the added chunk of ¼ plate forward of the cab.
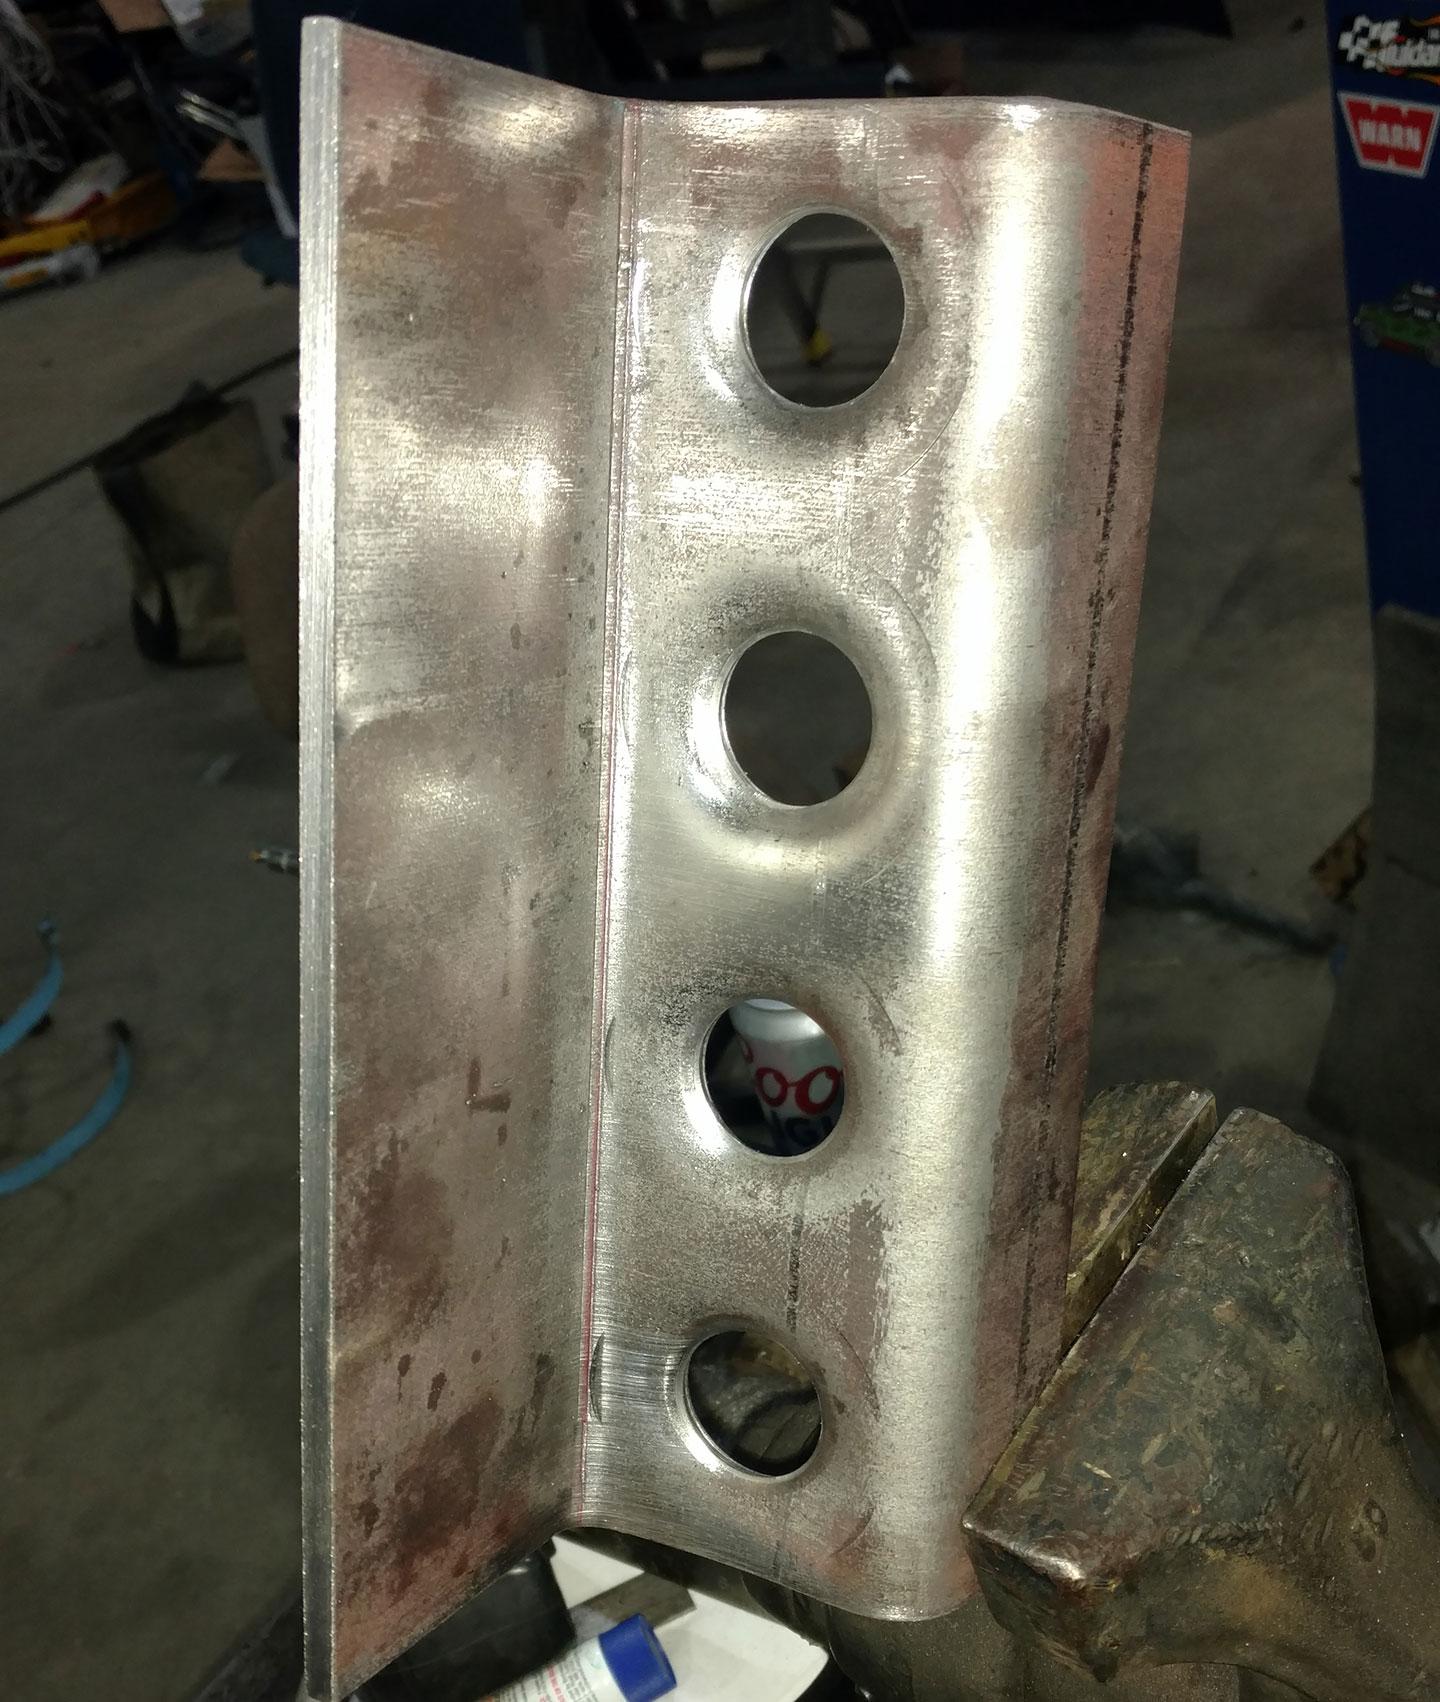
I needed to find a clean solution to cover this mess until the time comes to do it right so I dug around the scrap pile and found some 3/16” flat stock and cut & bent it into sections big enough to mount the air cleaner and cover the $hit show underneath.
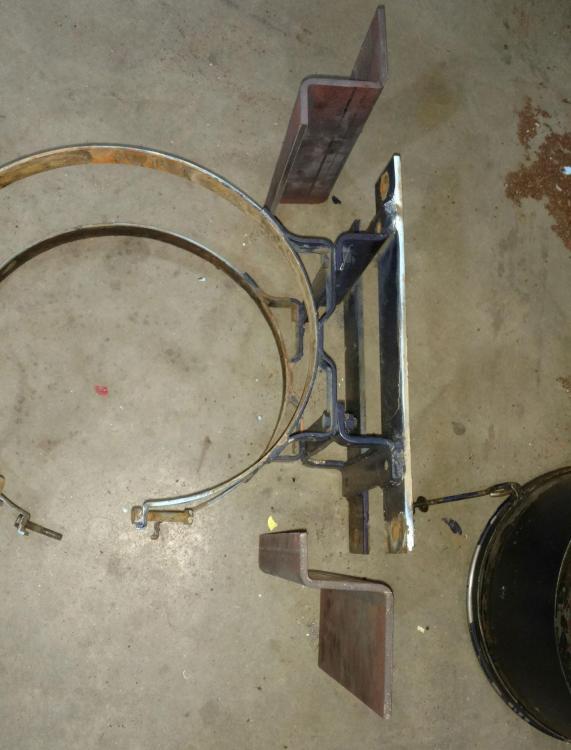
The mounts looked a bit chunky so I added some speed holes.
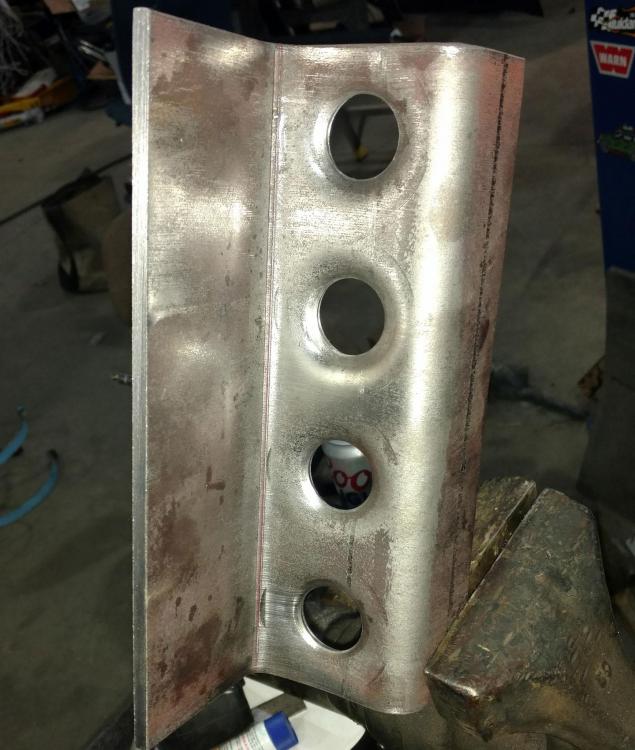
Both mounts are done and now I need to make some doubler plates to go on the inside.

-
4
-
Good to know, thank you!
-
I was thinking $20.00 a piece should buy me the lights when I set out to find them, the only set I've been able to find with the thicker gaskets was on eBay.
I'll keep looking and at some point might be willing to give close to $100 each but for now I need to keep moving forward within a reasonable budget if I want to get this truck back on the road. I had no idea how much some of this vintage truck parts could cost when I started but I'm getting a quick education.
-
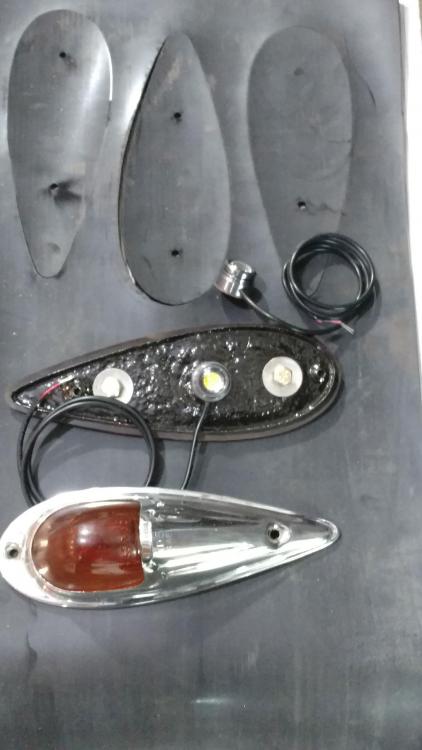
Pretty close to my fabercobble plan, I laser cut some 3/16”EDPM 40 durometer rubber gaskets, sandblasted the rusty bases and coated with POR-15, glued the glass lenses into the tops with DOW 999-A glazing sealant in the hopes of keeping the bulk of the water out of the light fixture itself, I bought some self-contained water tight LED light modules to replace the rusted out original sockets.
I’ll run a bead of DOWSIL 795 silicone building sealant under the gasket to help seal the difference in shape between the light and roof, probably less than ideal but should get me by for a year or two while I find time and money for the next phase.
-
I have a fairly narrow window of time to get this cab ready to put on the chassis and without an unlimited budget I’m going to need to prioritize mechanical over cosmetic needs/wants and keep moving forward. The plan for now is to track down as much of the Mack L-cab specific parts like rubber, glass and interior panels and deal with paint and body work at a later date.

Pulled the front glass, drilled out all the broken screws and welded up a few minor rust holes. For now the plan is to paint all the bare steel with POR-15 and hit all the seams with SEM 39377 seam sealer before I put the new rubber and glass back in.
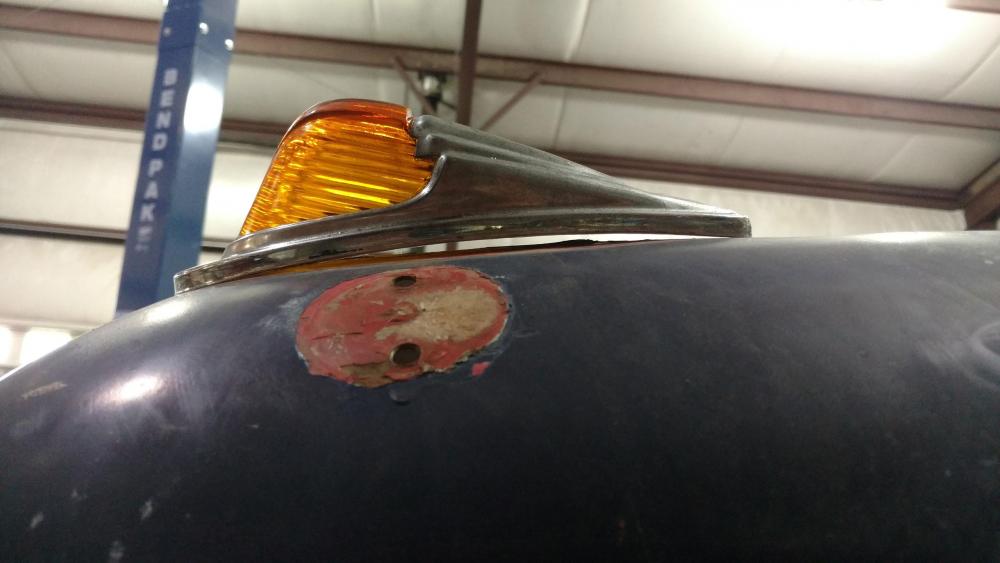
Today I need to come up with a plan for the KD 517 Marker Lights, someone installed the lights with the flat gaskets instead of the thicker gaskets for a flat cab and was letting dirt and moisture collect under them, I found a set of NOS lights with the correct gaskets but at $450 they are a bit more than I want to spend on lights right now.
-
15 hours ago, terry said:
I have a brand new firewall pad
I will definitely contact you if I’m able to keep the factory L firewall.
At this point nothing is set in stone for the firewall and floor in the L cab, floor is pretty rusty and has a few sketchy patches. The firewall also has some patches and most of the pass through holes appear unusable for the Kenworth power and air needs.
Kenworth floor and firewall are in great condition but they’re aluminum so I’m weighing the options of bolting and bonding verses fabricating new panels and welding them in.
-
1
-
-
14 minutes ago, j hancock said:
You are officially on your own. Lancaster Upholstery used to make a kit for the L model cardboard headliner and back of cab liner but they stopped producing it about 4-5 years ago.
Thank you so much.
I gave them a call on the off chance they would still be willing to make one and they had one in stock ready to ship!!
-
 1
1
-
-
Still trying to track down some parts, I need to find a Headliner Kit for the L cab.
I called Watt’s to see if they could get something and they suggested to ask here.
If anyone knows of someone making them I would appreciate a link or phone number.
-
Thank you Joe, without the internet and folks like you willing to help guys like me projects like this one wouldn’t be possible.
-
Thanks guys, I’m getting tools as I need to work on the trucks. Had to buy jacks, jack stands, impact guns and sockets just to remove the wheels & tires that weren’t in the budget. Luckily I have an awesome wife that sees these daily deliveries of tools and parts for this project and so far so good.
I’m a one man show working on this in my spare time and I way underestimated the weight of some of these parts like the rear end, as much as I wanted to keep the Cummins 220 not sure how I would have mocked that up in a new frame without an A frame crane of some sort. I’m sure lots of new tools and equipment will find its way to my shop before it’s all said and done, still on my bucket list to restore an old Mack EEU so I don’t mind gearing up on this truck to be more prepared if I find the right EEU.
-
2
-
-
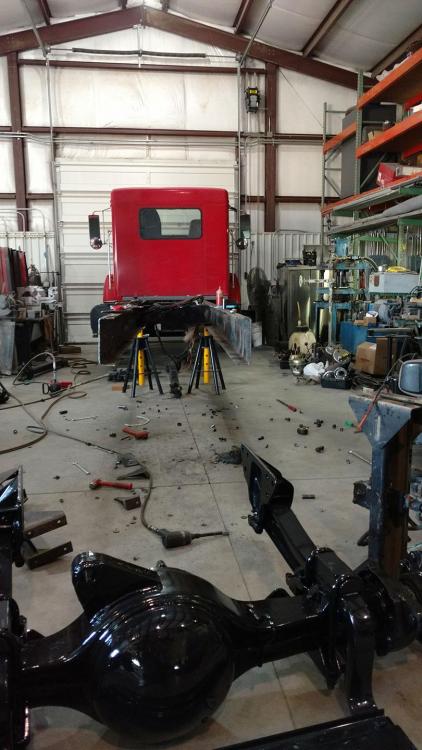
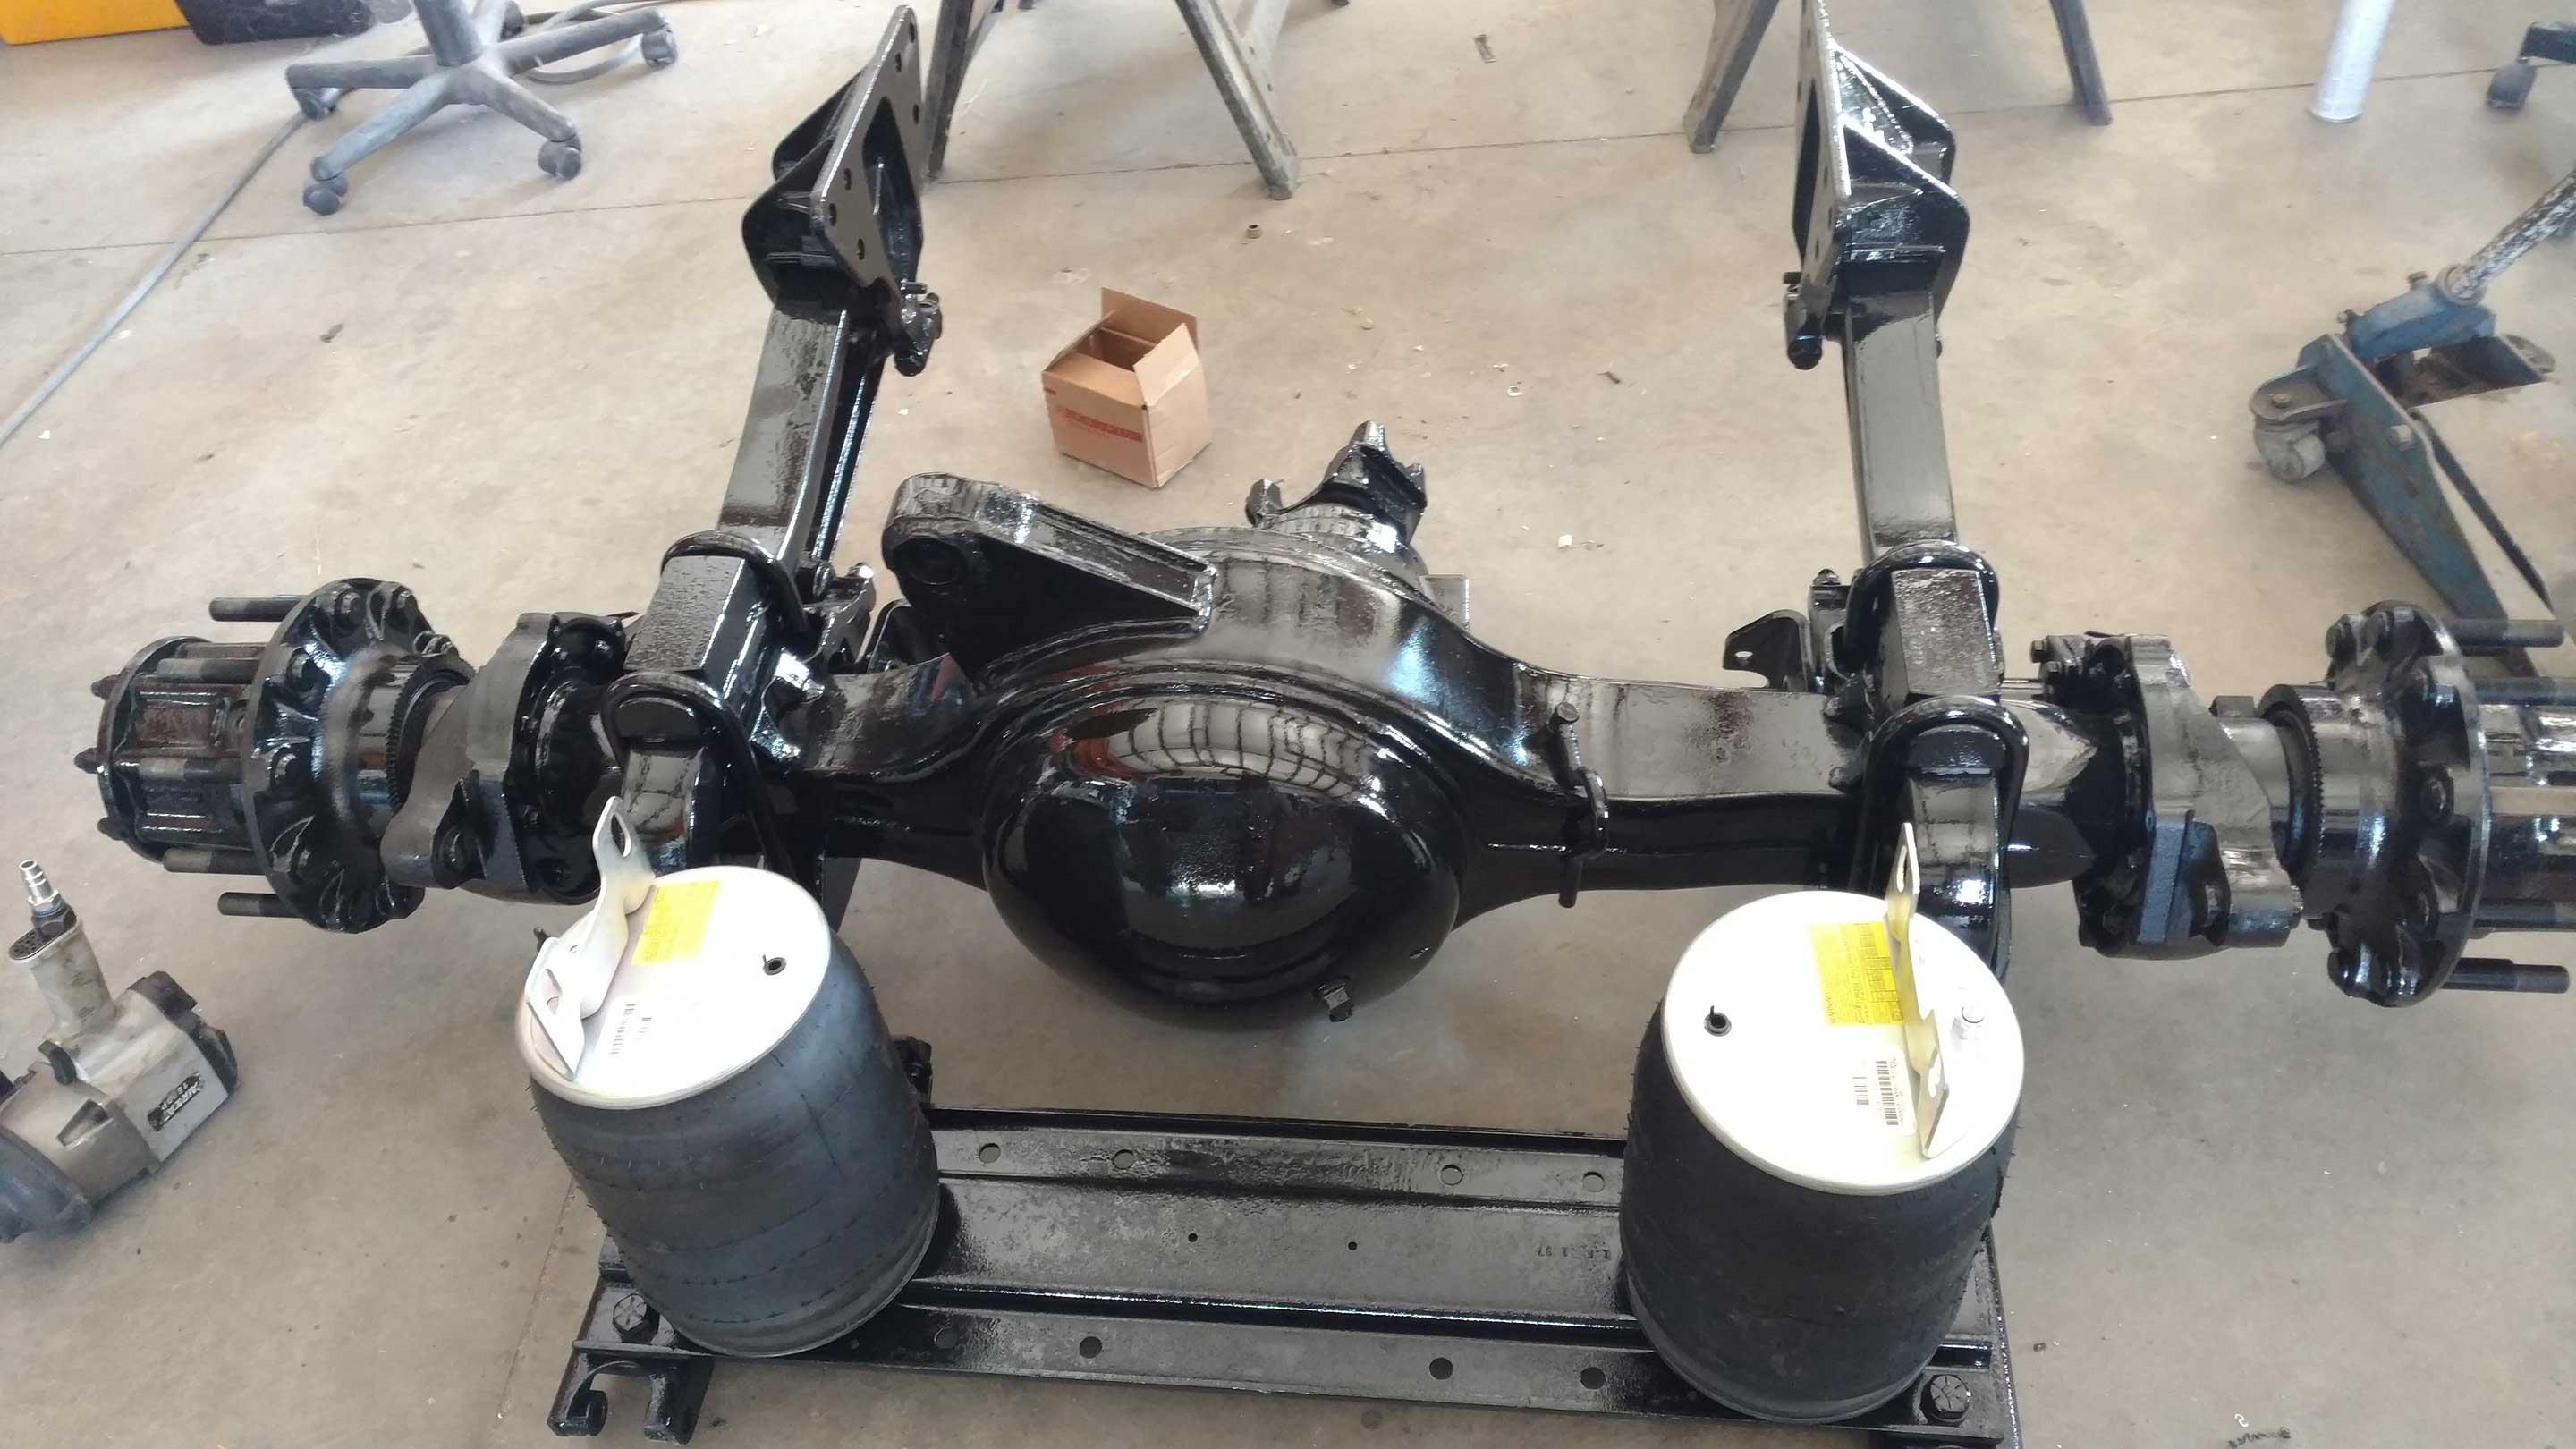
Kenworth suspension is complete now I need to get back to the Mack cab rebuilding everything.
The goal for this project is to get the Mack back on the road and get an education on Mack trucks so I don’t repeat my mistakes when I buy the next one.

-
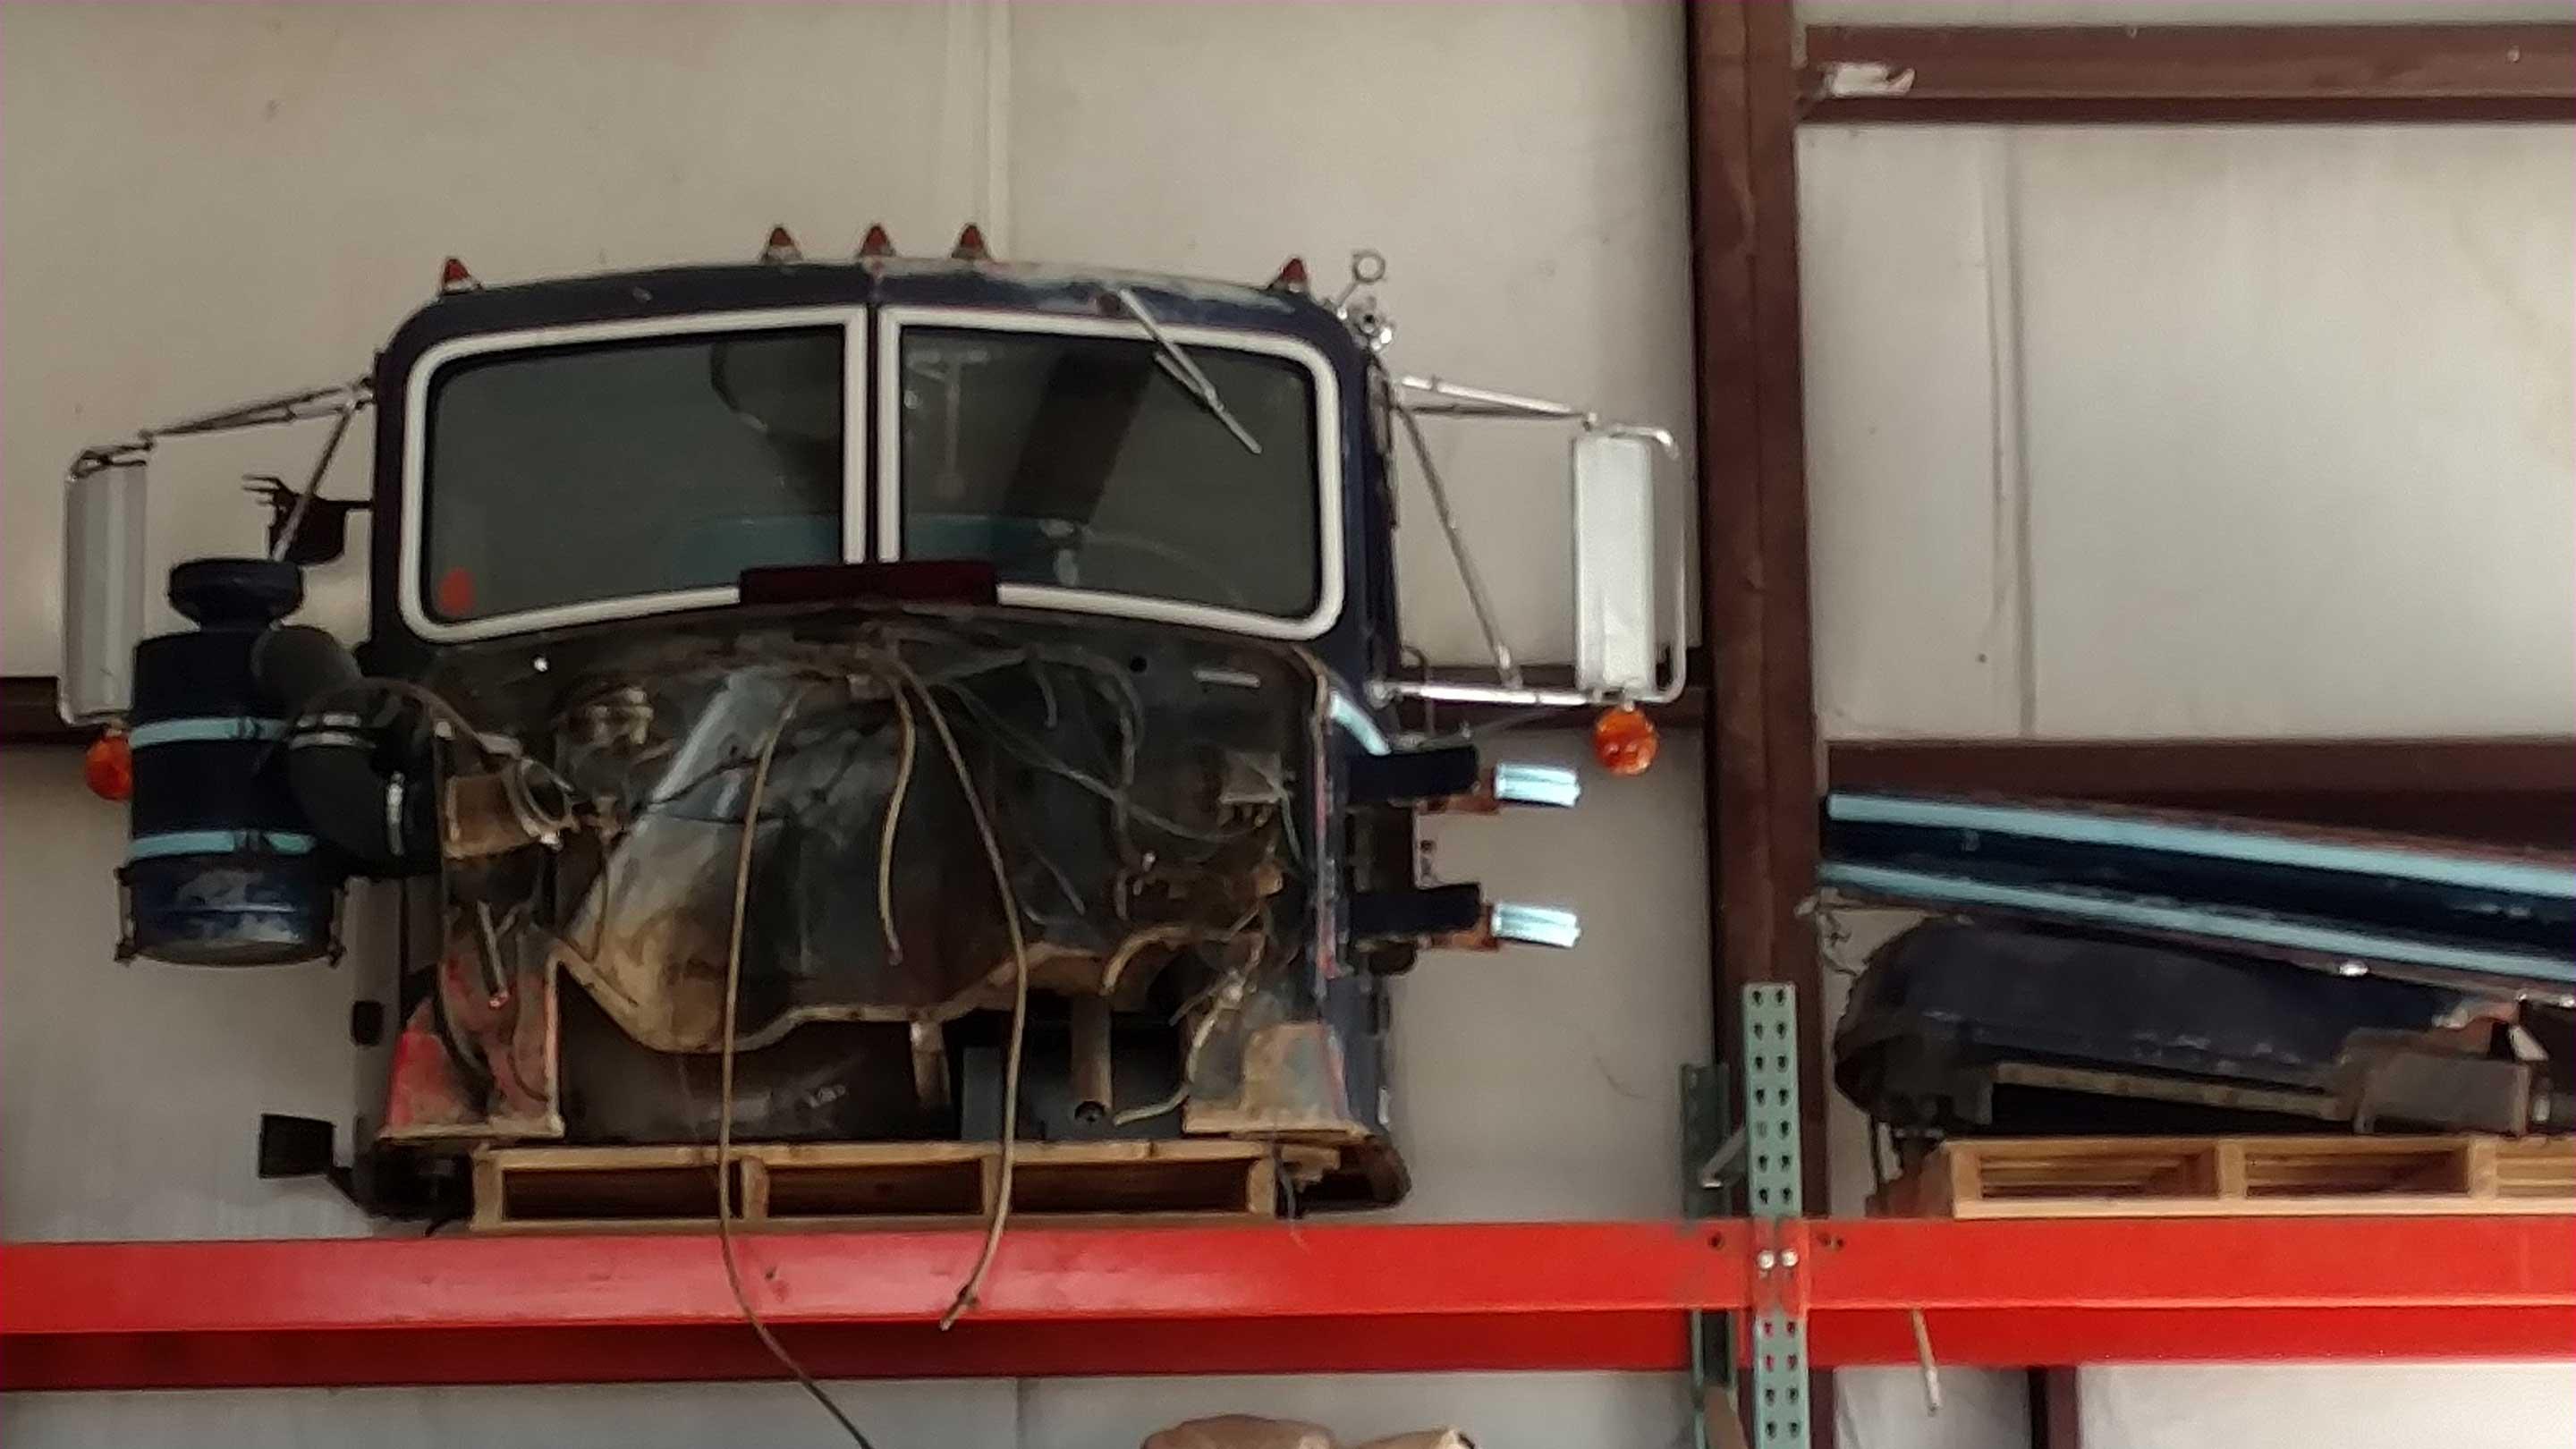
Mack truck was dissembled and all the parts that are going to be reused put up on the shelf.

Drove the Kenworth back to Idaho and spent some time measuring everything to confirm it would work.
Then got to work shortening the frame and converting it to air suspension

-
1
-
-
- Popular Post
- Popular Post
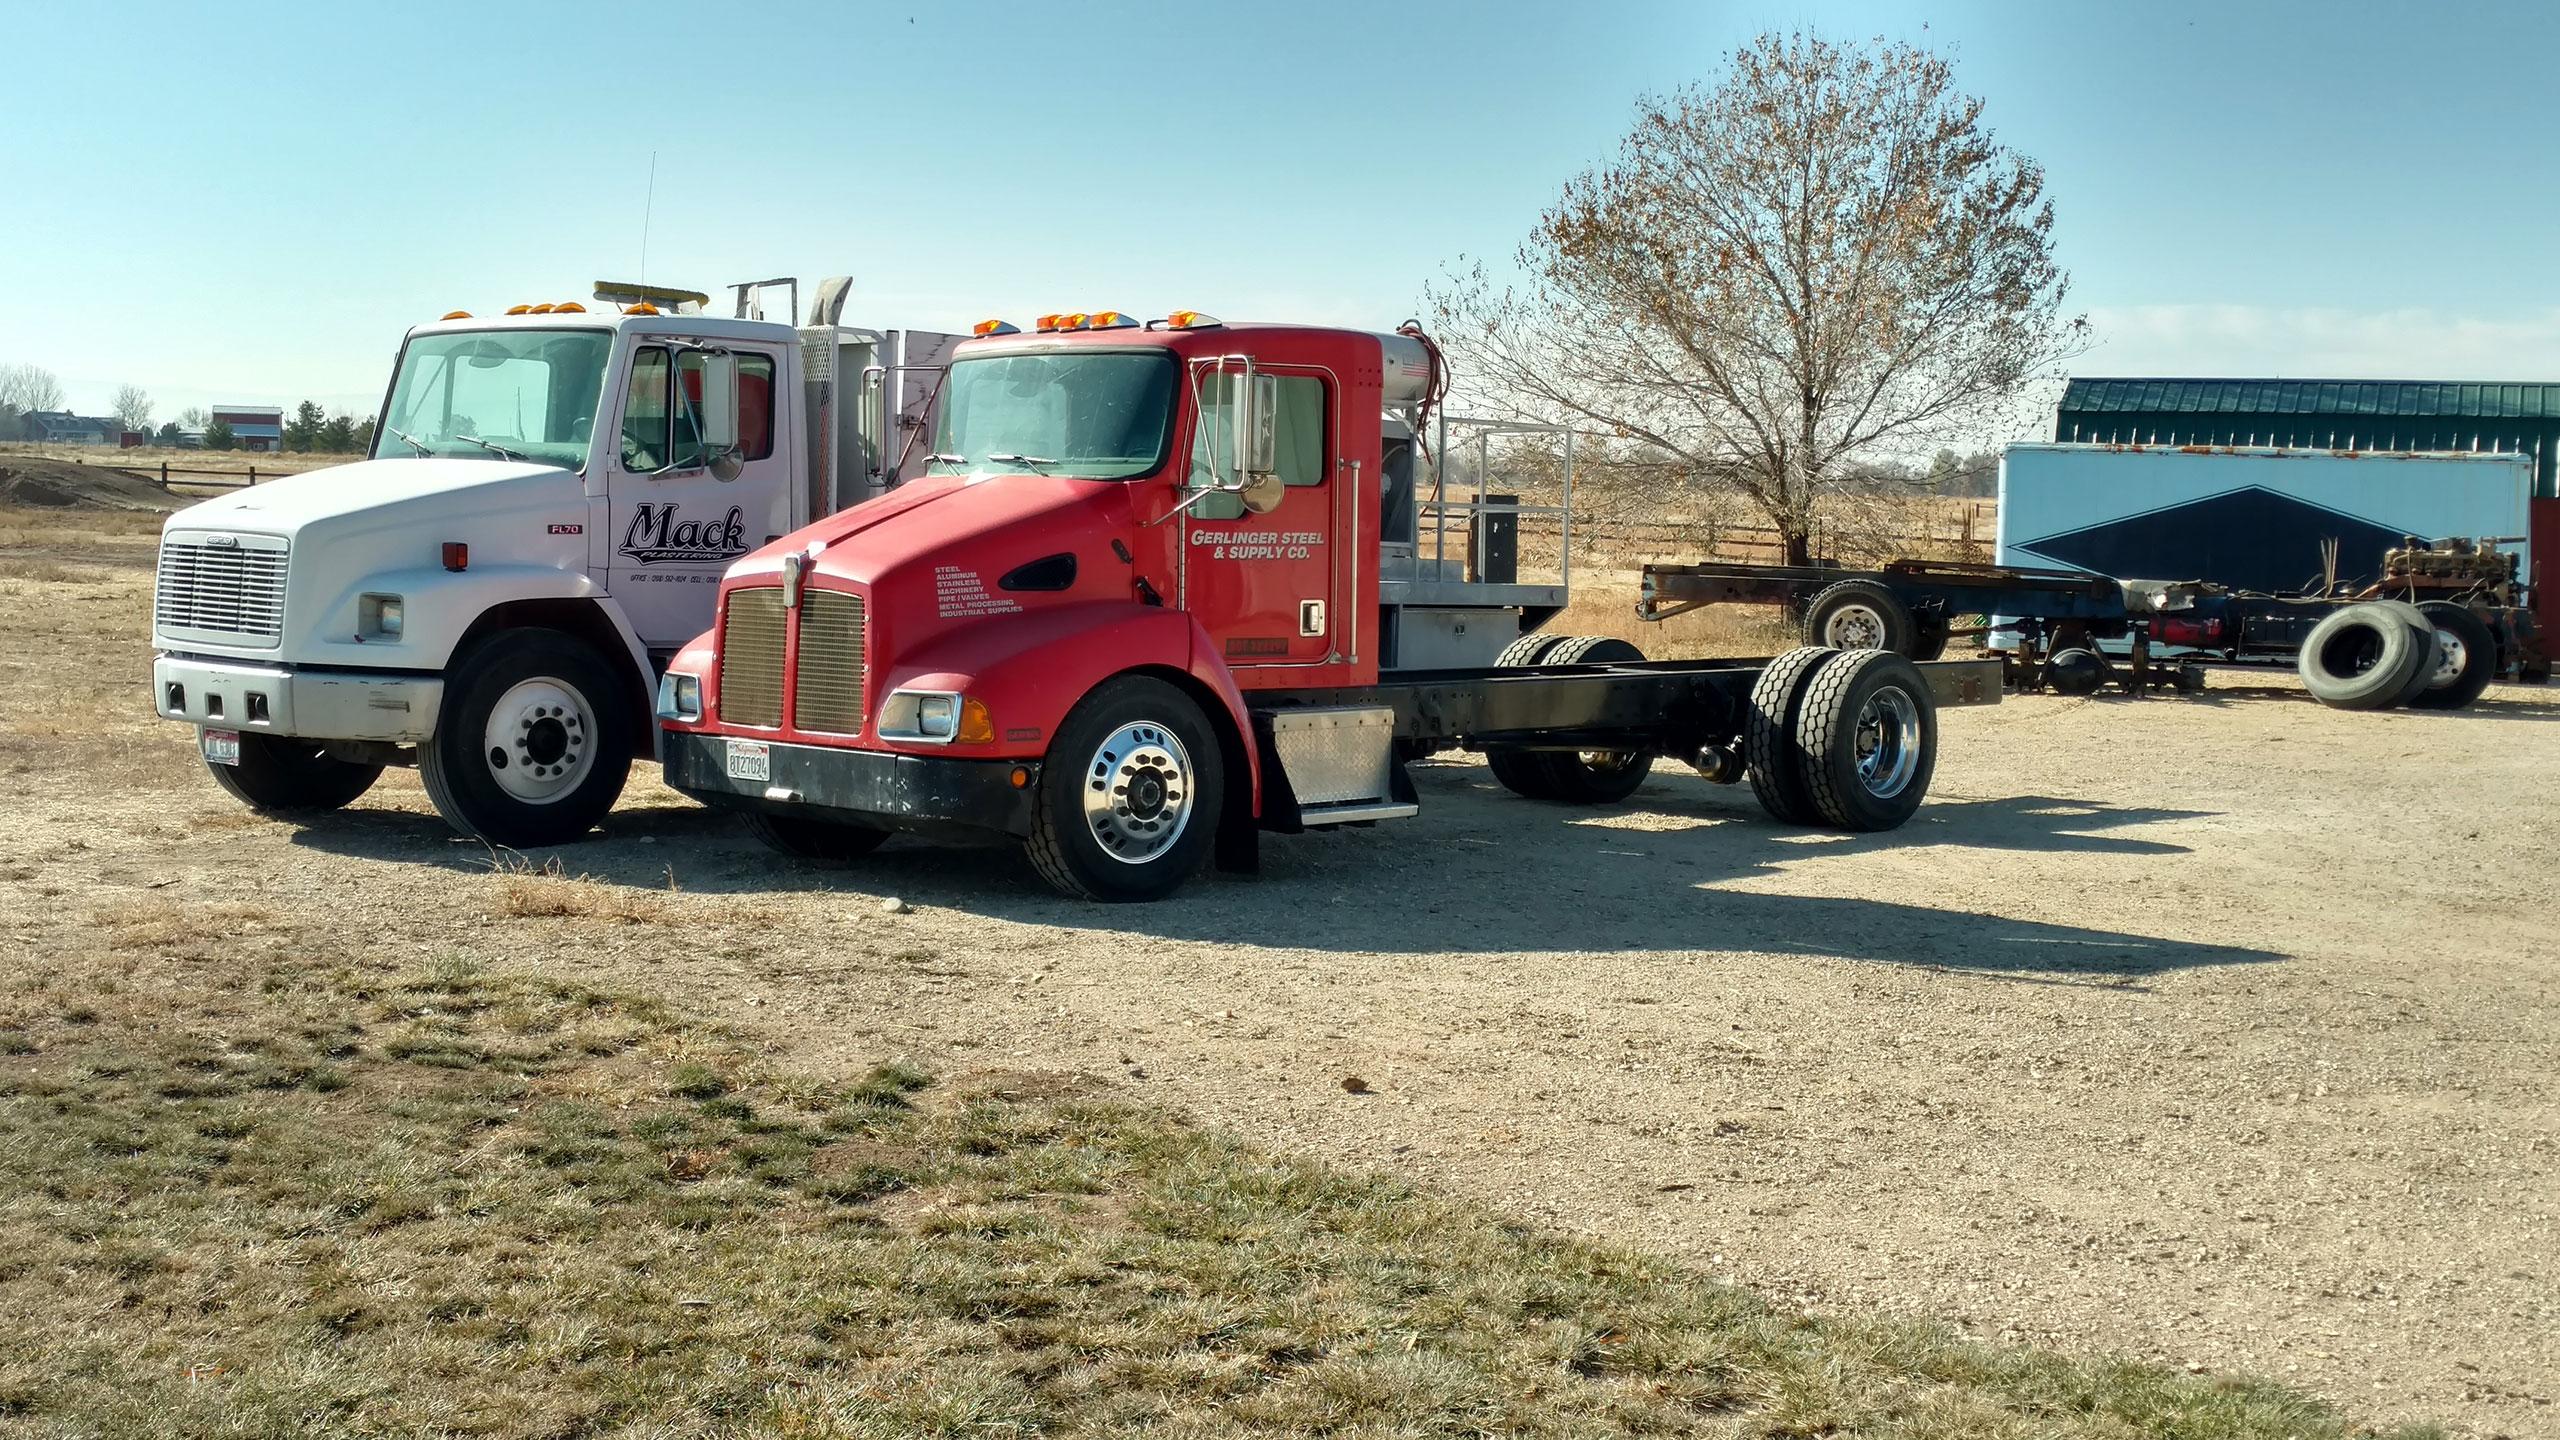
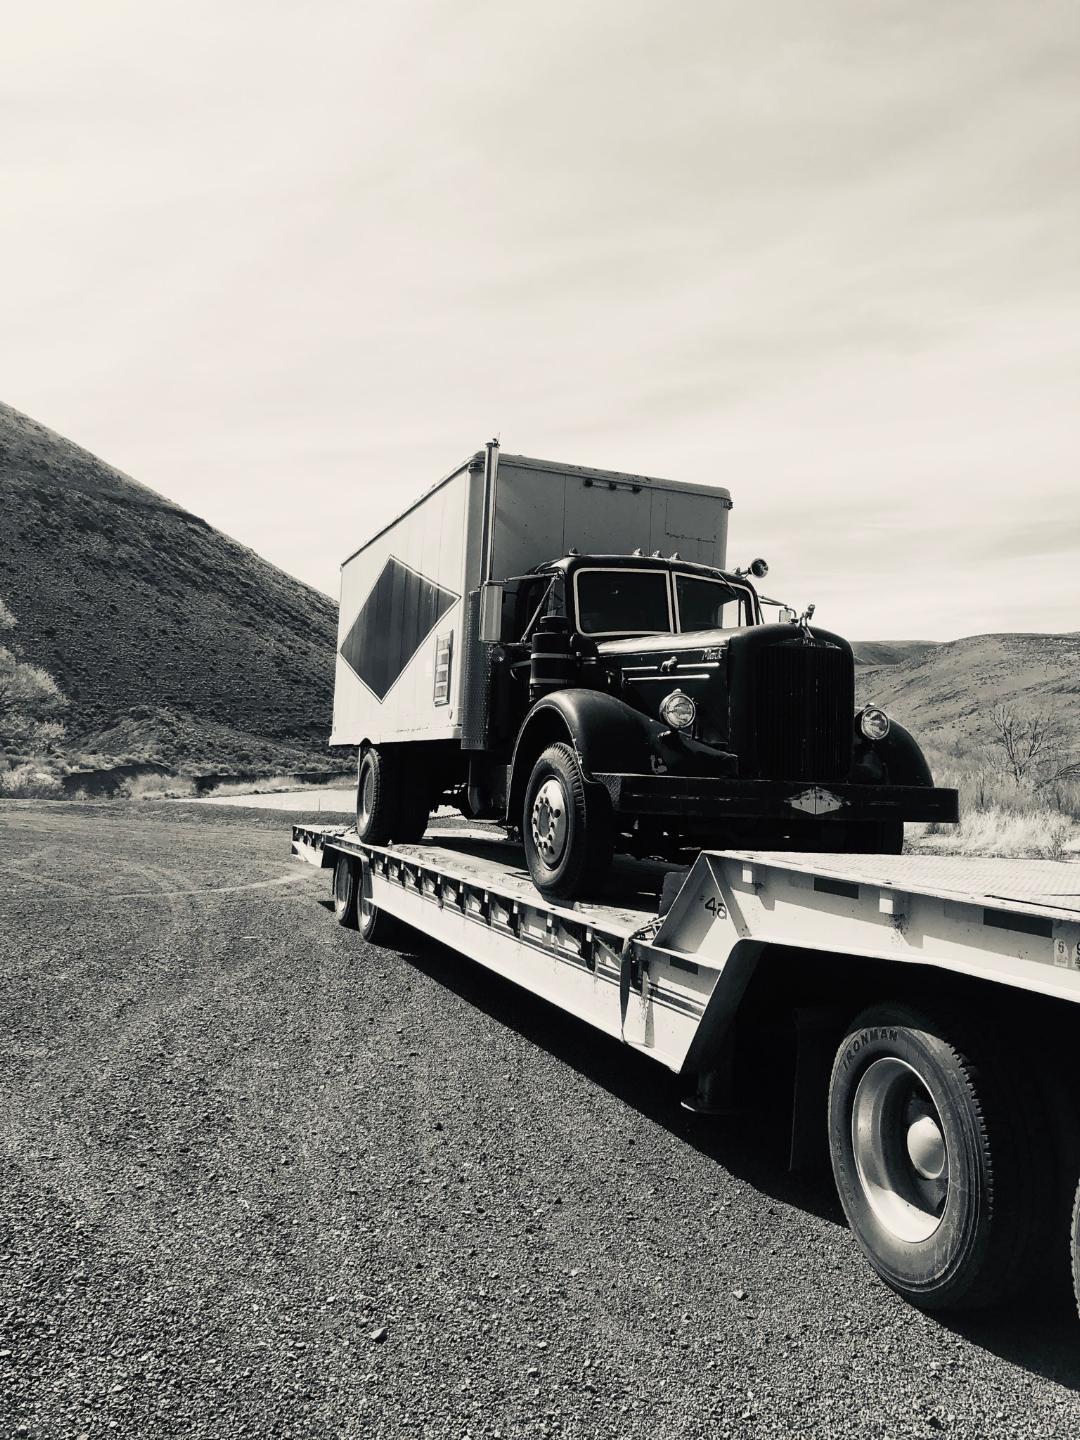
I’ve been fascinated with Mack Trucks since I was a little kid but never felt the need to own one until recently, we have an off road car that we haul around on a car trailer but limit our trips to local events that don’t require overnight camping. My wife and I have been wanting to do more out of state events and I starting looking at car haulers with living quarters and came up with the idea of building a Mack camper hauler.
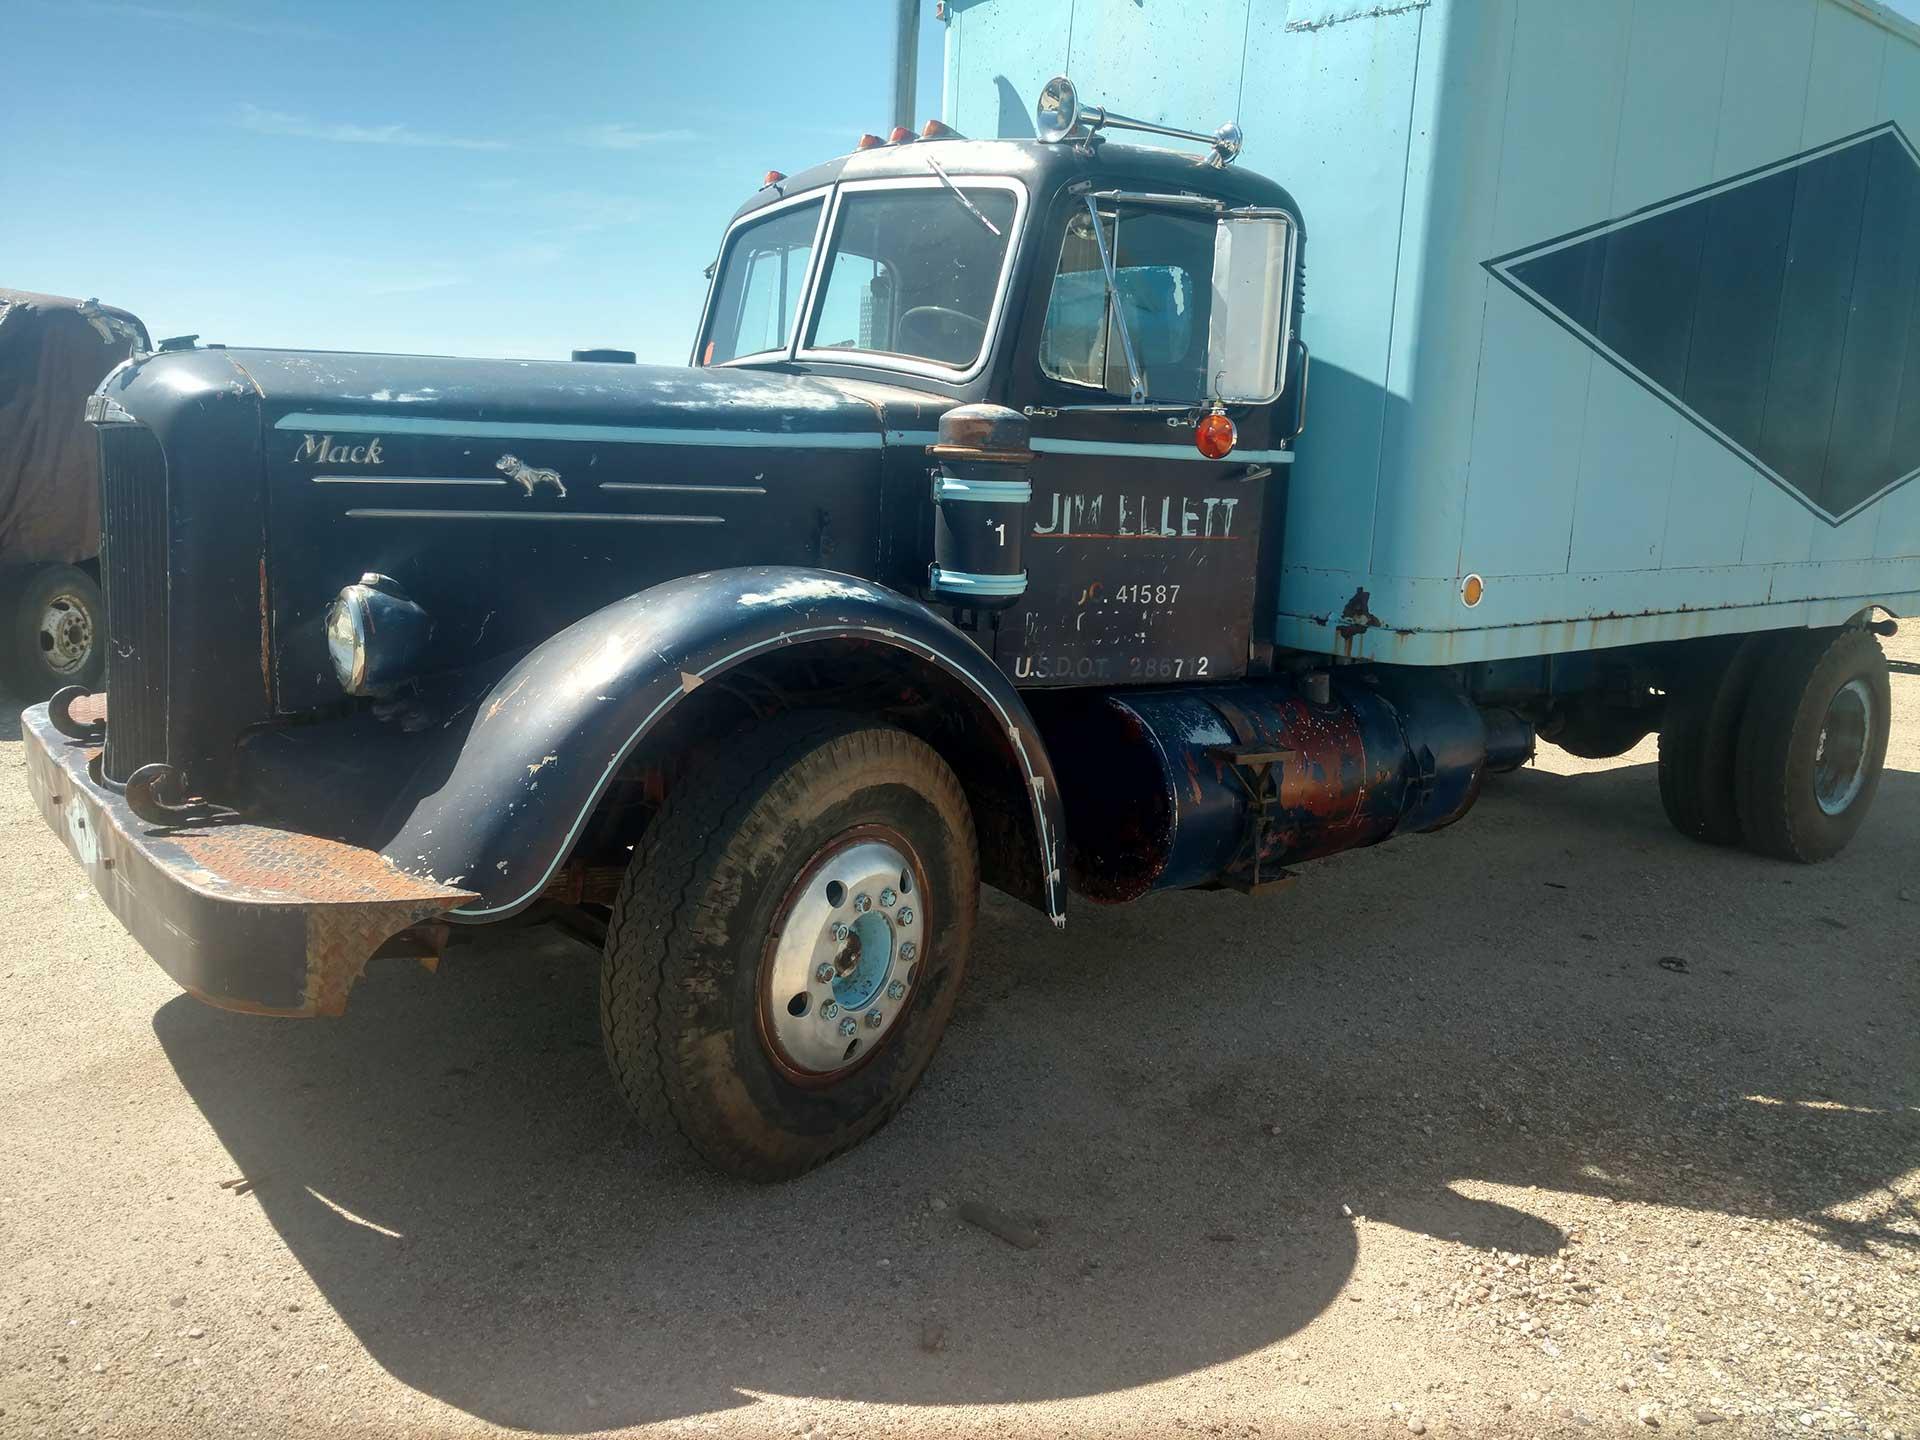
I spent about a year chasing a few different Mack models when the LHSW popped up on one of my searches, at first glance it appeared to check most of my boxes, vintage Mack, currently running and mostly complete. I was told that the truck was mechanically sound, ran & drove great and with just some maintenance items could be made usable or our intended purpose. I don’t believe the seller intentionally misled me but unfortunately I didn’t have the knowledge to ask all the questions that needed to be asked and when I received the truck it was painfully obvious this truck was modified several times with a cutting torch and stick welder, the suspension & frame was dangerous at best and needed a complete redo to feel comfortable driving it more than just a few miles around the block. The Cummins 743 engine ran fantastic and the transmissions shifted great so I set out to find a donor frame and suspension with the hope of keeping the old Mack all Mack, locating something on the west coast that was going to be dimensionally correct was turning into a deal killer if I wanted to keep it all Mack parts.
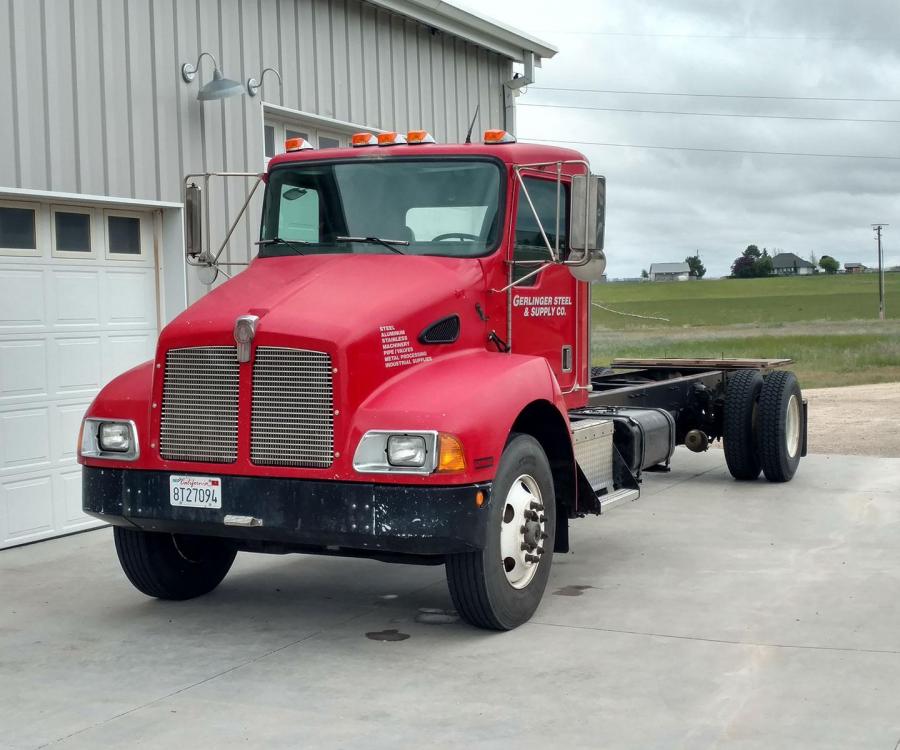
I admittedly know nothing about semi-trucks nor am I setup to work on them so I was struggling to come up with options to save this old truck within my skill set and budget, after asking around to a few of the truckers I know the idea of finding a class B donor truck and updating the Mack body to a modern running gear was the new plan. I found a 1995 Kenworth T-300 with a new 8.3 Cummins engine for sale in CA that looked like it would work dimensionally so after buying that truck I’m back to trying to get the old Mack back on the road.
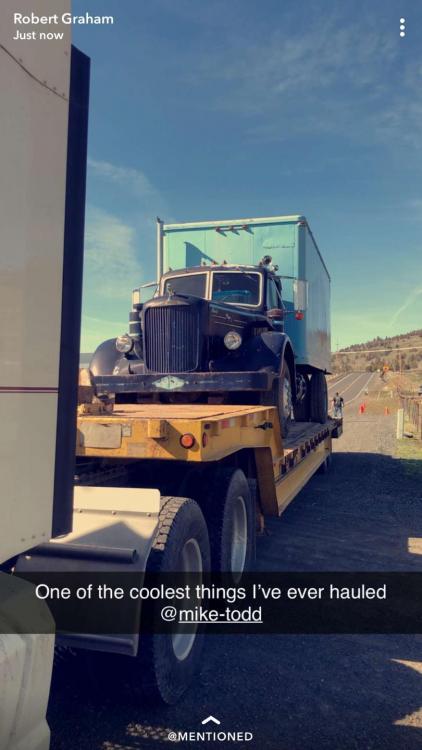
Mack when I had it shipped from Oregon to Idaho.

-
3
-
I would like the two non locking handles.
Let me know how much and how to pay you.
-
On 10/23/2019 at 5:43 PM, KKERGALL said:
NOS door handle outside locking with two(2) keys, square shaft 3 1/2" length, two(2) screw swivel base. Best offer FOB / CT
P/N# 1245-2505060000
B2 Door handle
Can you post some pictures?
-
- Popular Post
- Popular Post
I've been working on the new frame and suspension and don’t have many pictures of the old Mack just yet, the previous owners had modified everything over several years to suit their needs and unfortunately some of that work was heavy handed gas axe type work that will prevent me from doing a restoration like I had originally planned. I don’t want to scrap or partout the truck so the new plan is to make a nice little driver/ toy hauler that I can haul one of my buggies around and have a box that gives us a place to get out of the weather.
I’m in the process of cutting the hacked up firewall and floor out and gathering the material to replace them now, I’ll try to start taking a few pictures along the way and post them up here.
Thanks for all the help.

-
5
-
Thank you guys, I'm going to need about one of everything when I start putting this cab back together so I'll bookmark those sites now.
Sounds like @fifth wheel has what I need for these front windows.
Nothing photo worthy yet as I'm still taking everything apart labeling and putting it up on shelves.


BMT Forum Logo

Mack LHSW
in Antique and Classic Mack Trucks General Discussion
Posted
2020 has been a strange year with the China Flu and I’ve been reluctant to take the Kenworth cab off a perfectly good truck to save this old Mack if I wasn’t going to be able to commit the time and money to see it through to the end.
Well for better or worse I’m fully committed now.