


David Johnson
-
Posts
29 -
Joined
-
Last visited
Content Type
Profiles
Forums
Gallery
Events
Blogs
BMT Wiki
Collections
Store
Posts posted by David Johnson
-
-
So I’m on the tail end of this build and need to set my front toe (it’s clearly toe’d out). I was thinking of going with 1/8th inch toe in which is typical for smaller, dropped I beam style front axles. Does anyone know if the factory Mack setting is different or doesn’t anyone have another recommendation?
-
23 hours ago, 609albert said:
does it have hydranlic brake or mechanical ?
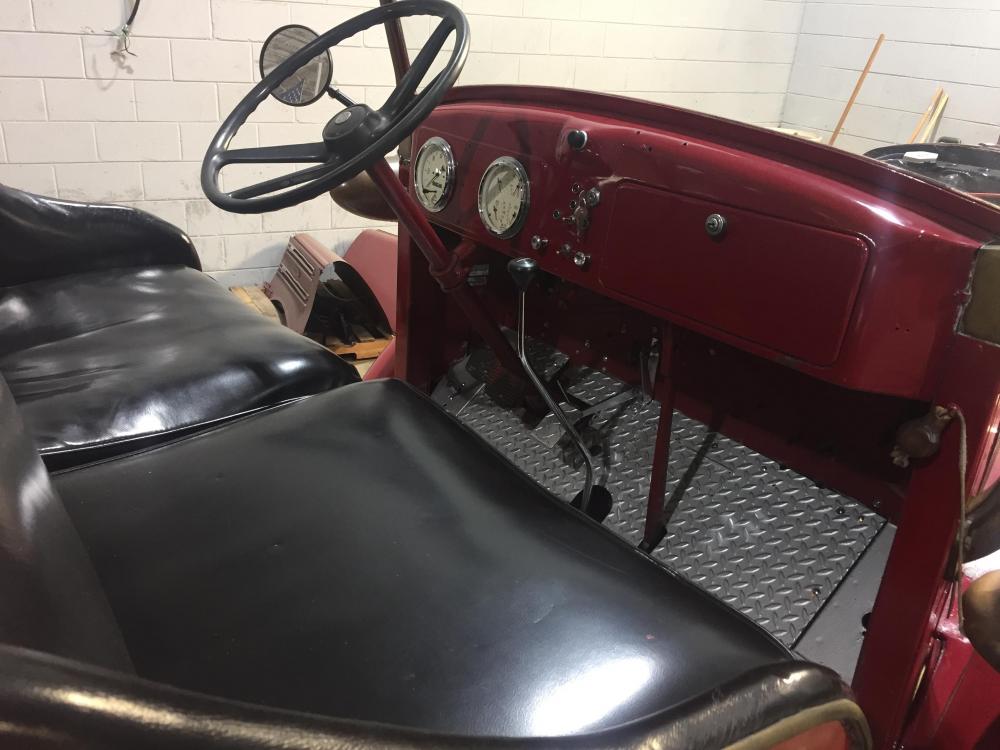
Vacuum boosted hydraulic. I converted it to a dual master.


-
 1
1
-
-
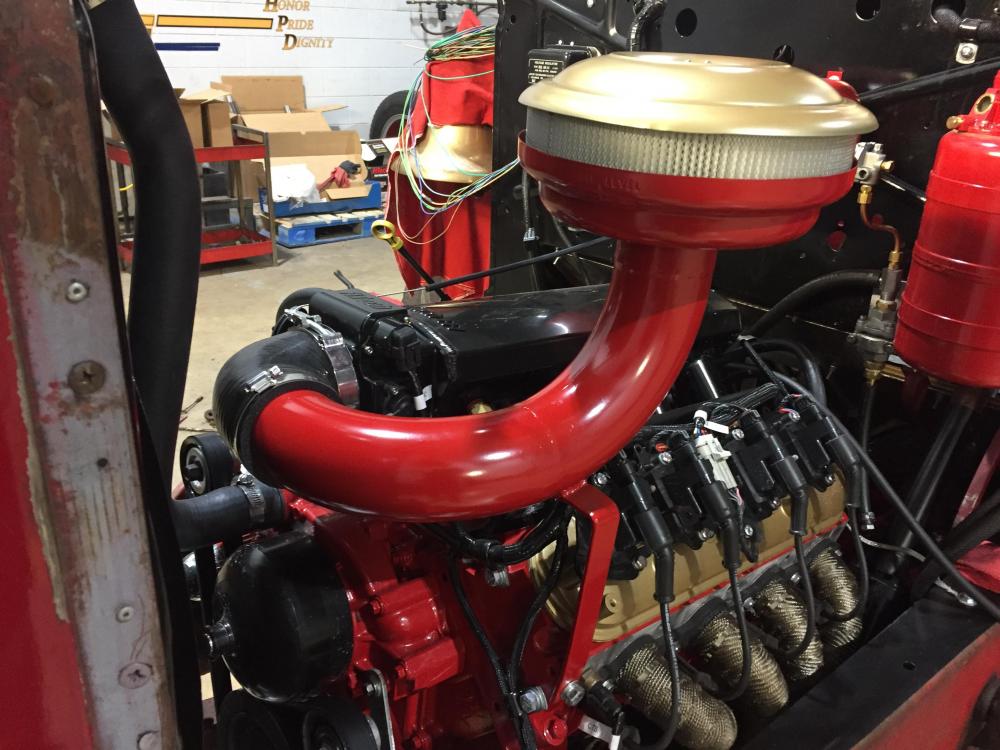
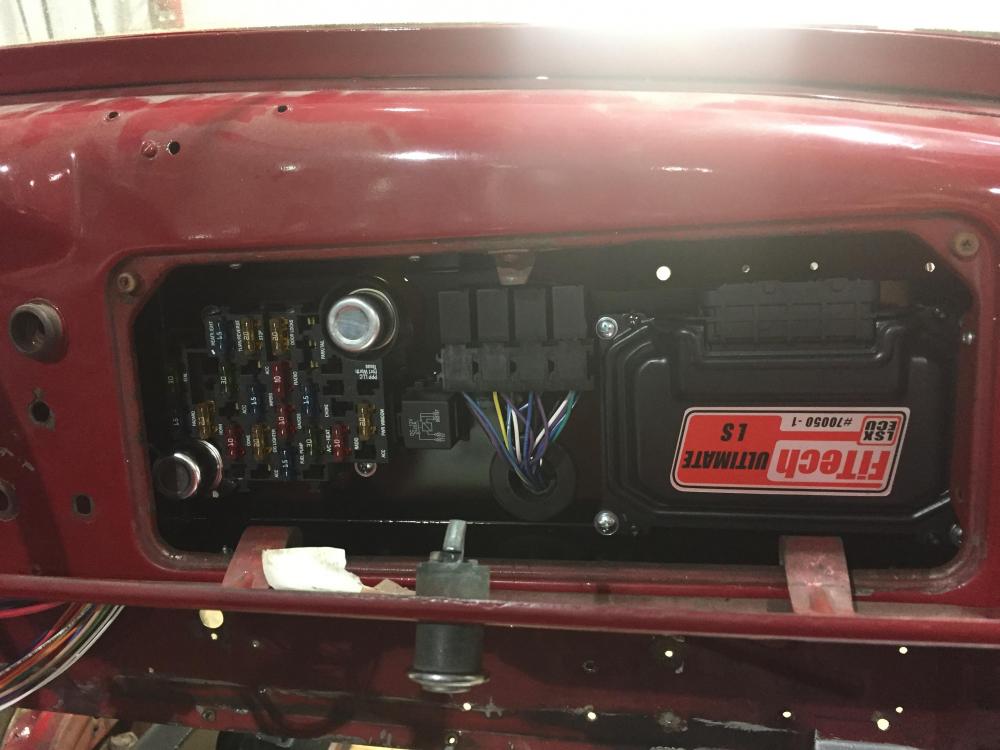
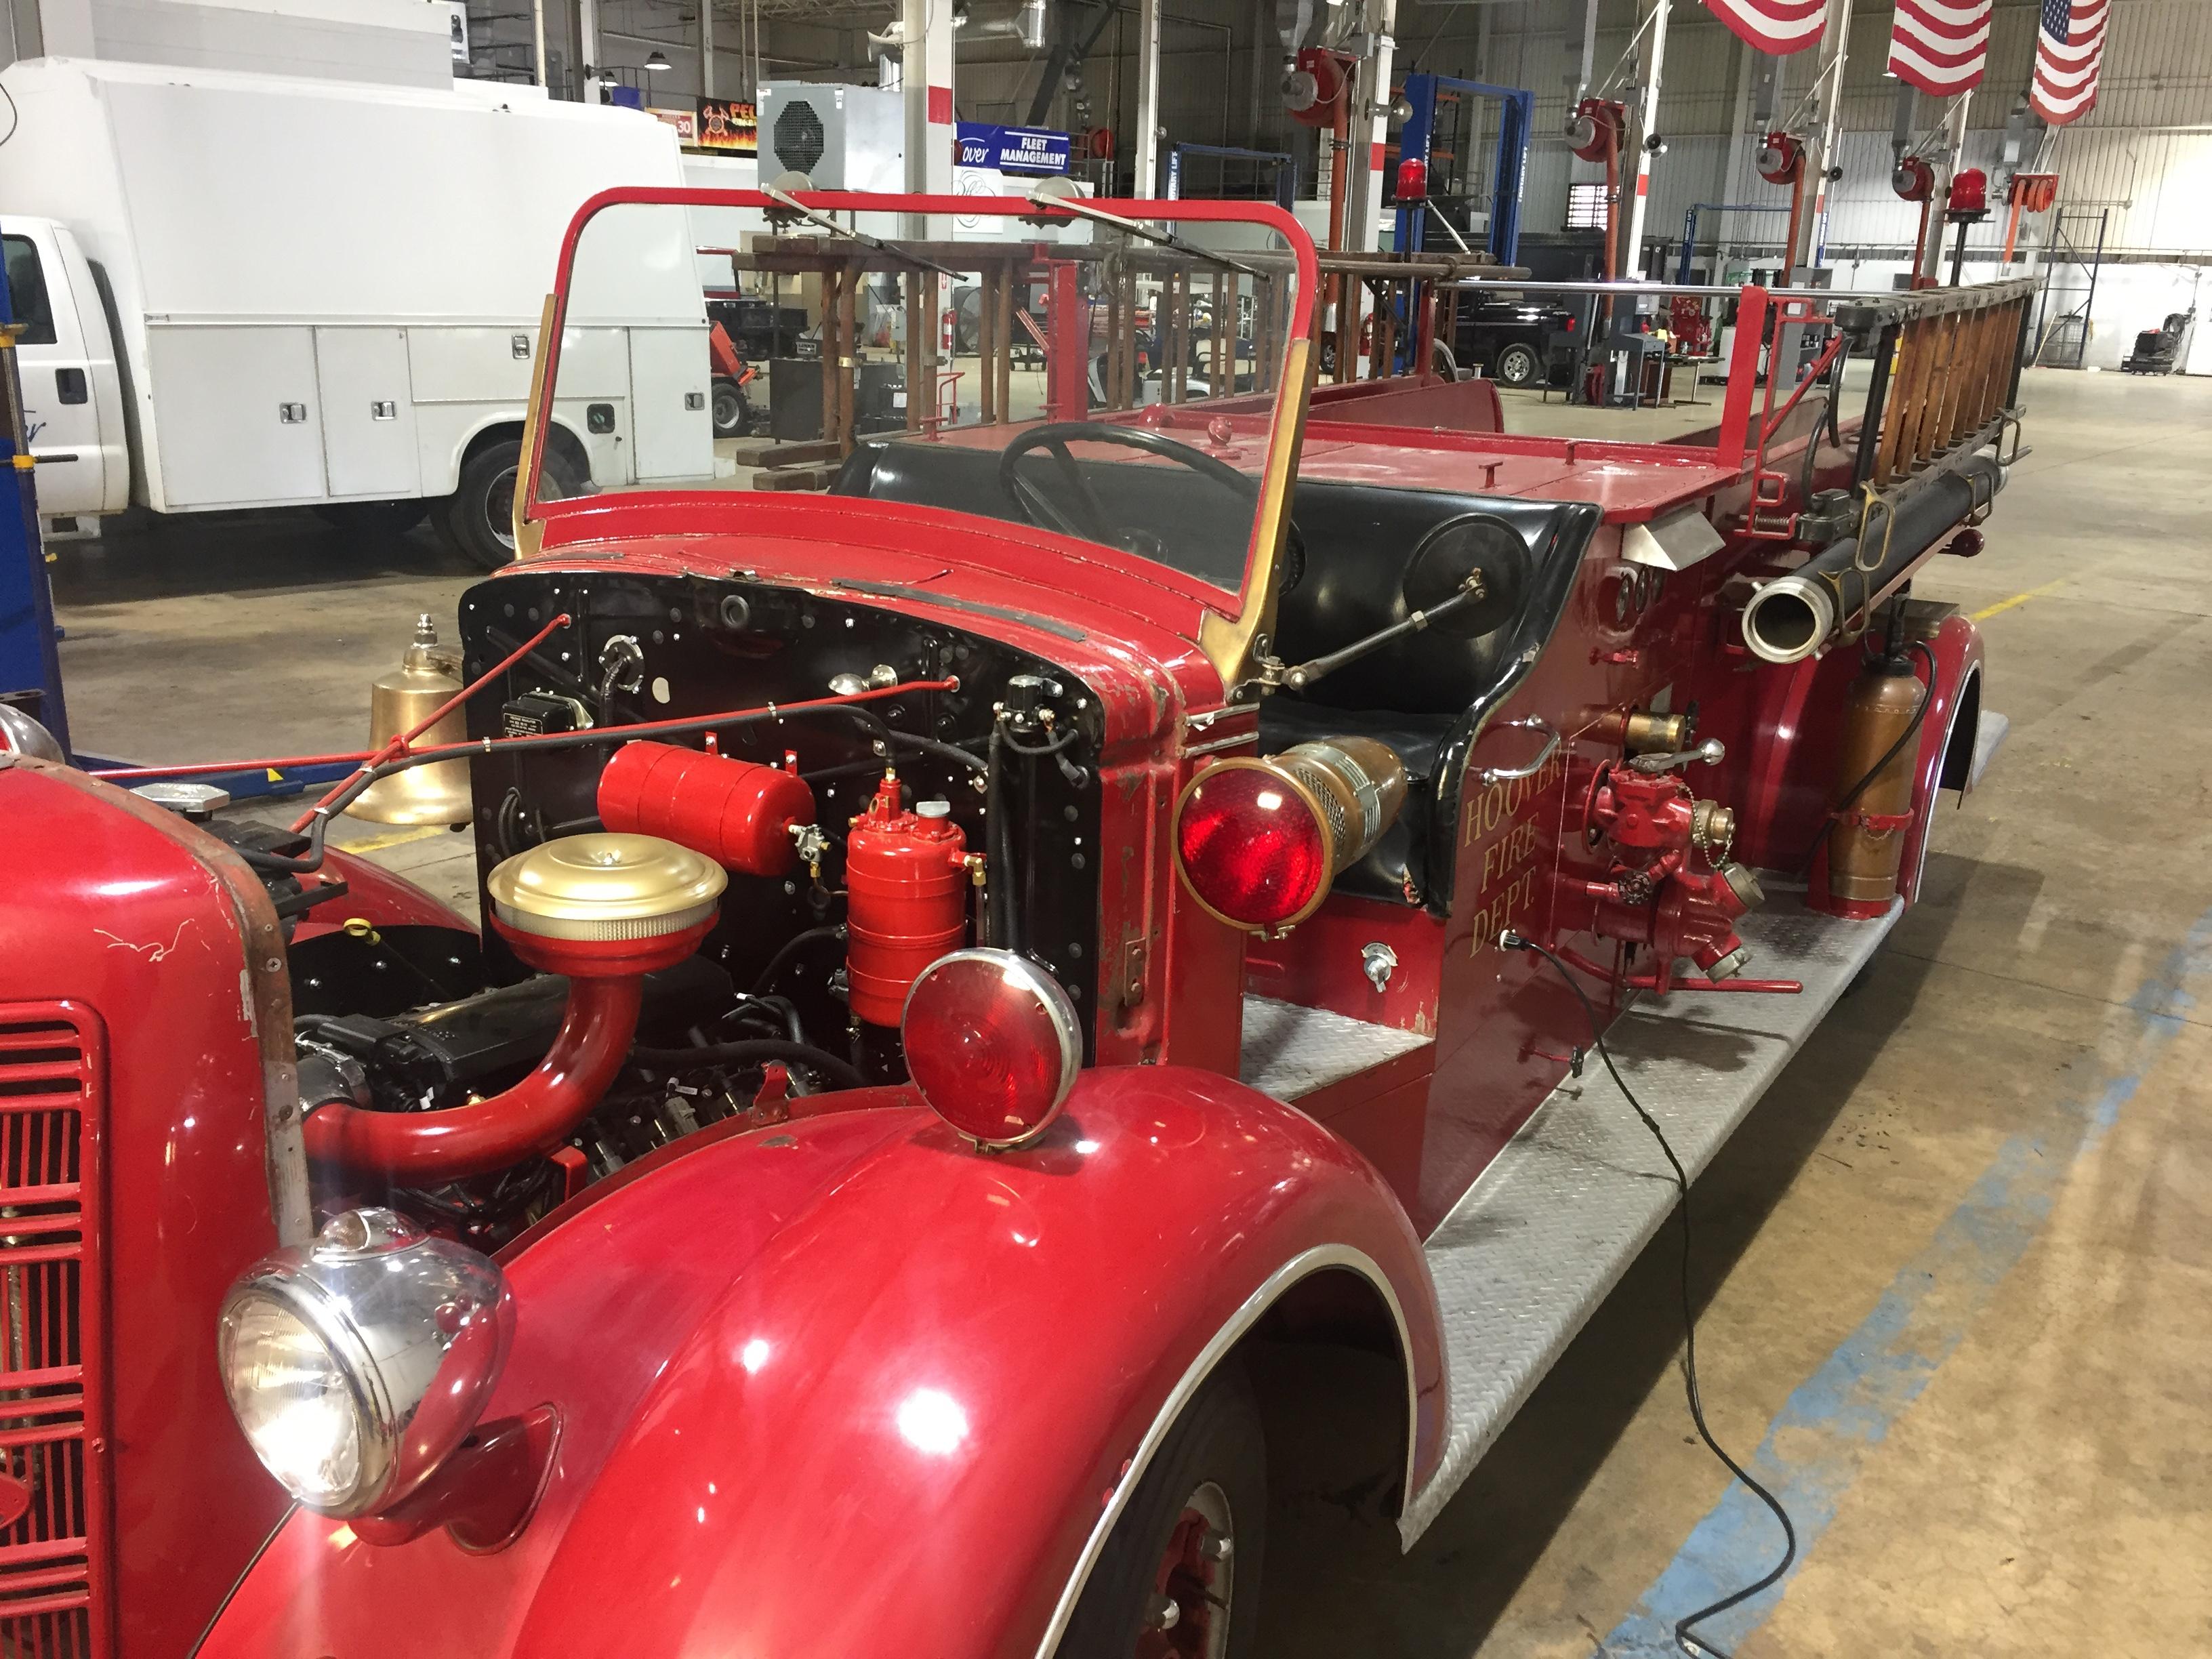
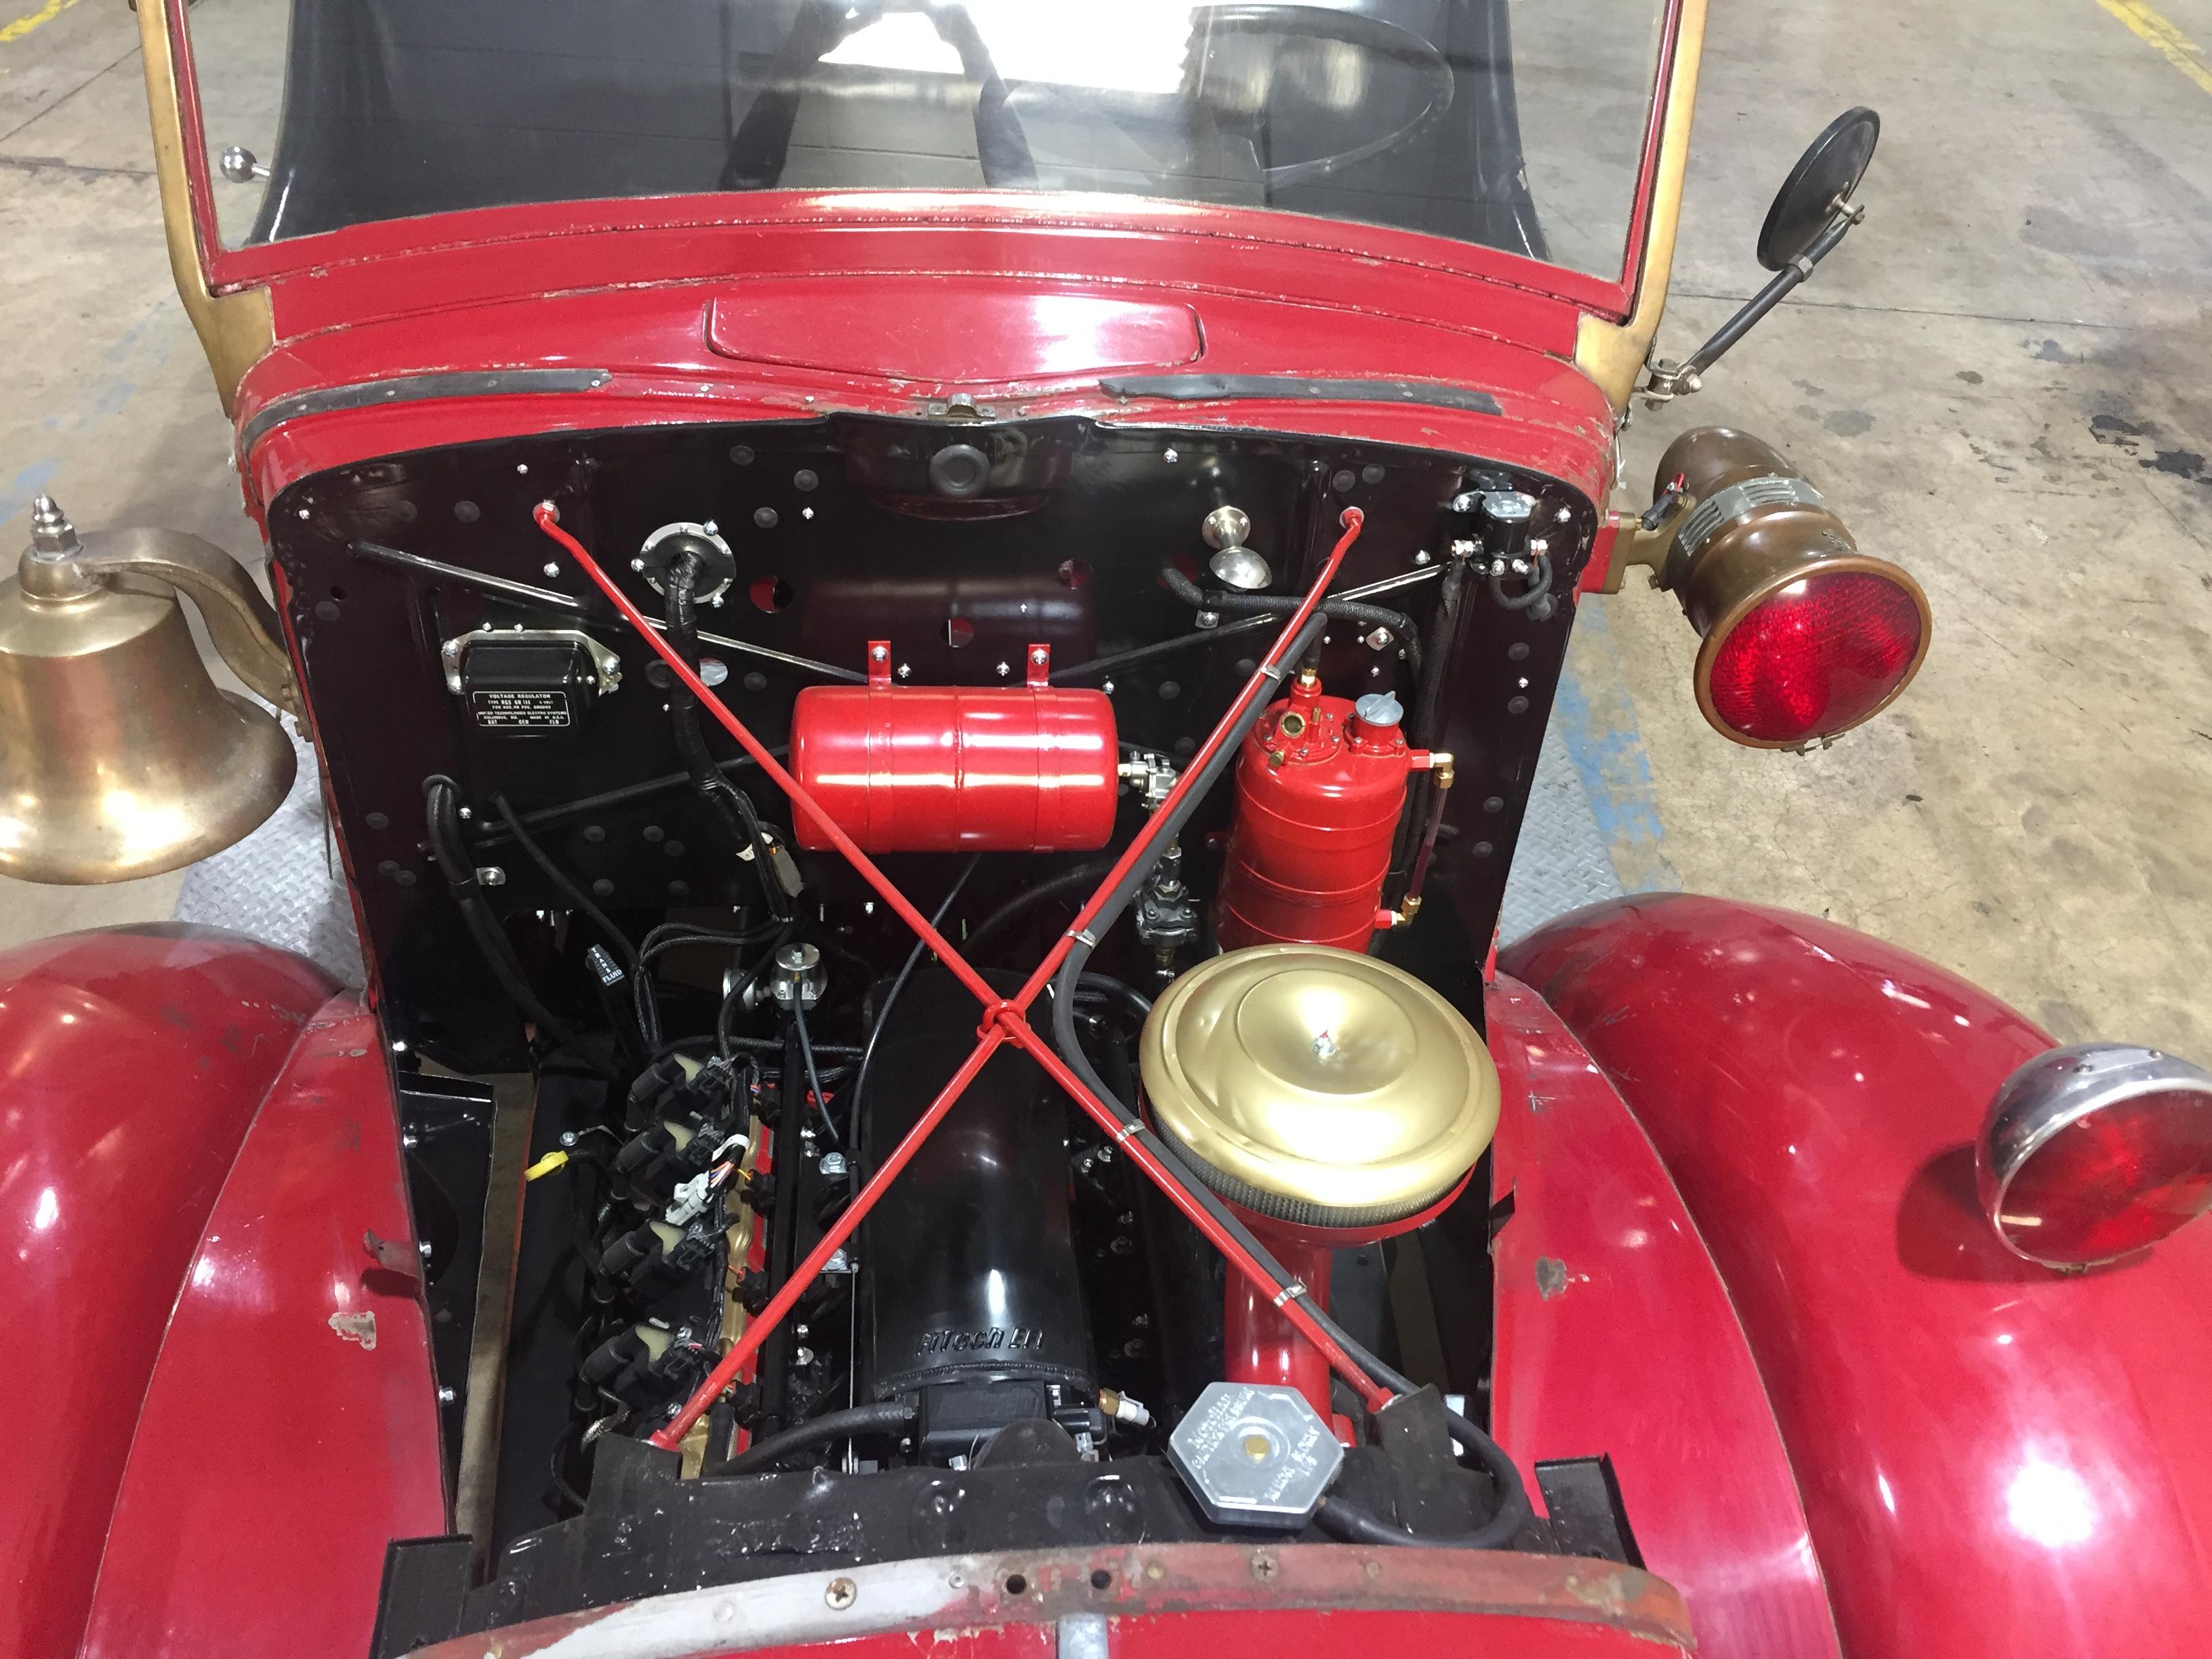
5.3 LM7 (so its LS family).
-
1
-
-
Thank you!
-
I was trying to keep it as “period correct” as possible as far as the engine swap went. A lot of the original pieces either got rebuilt and reused, cleaned or repurposed. I tried to stay away from modern conveniences like plastic wire loom, zip ties, aluminum parts and really anything that didn’t fit the time period.
-
1
-
-
On 3/24/2019 at 8:29 AM, j hancock said:
Parts were more generic back in the day. The same part would sometimes fit tractors, cars and trucks.
Did you send the trucks VIN to the Mack Truck Historical Museum to get more info?
I did not! I’ve never even heard of that. I know where it was stations all it’s life and it’s timeline history but that’s about it. There was a fireman that was supposed to get me a bunch of pics and papers but I never got it before he retired.
-
I would love to learn more about this truck. I never even noticed the IH wheel until I found out that the front brake lines were for an IH Tractor. I’m beginning to think this thing was put together with all sorts of different parts in ‘45.
-
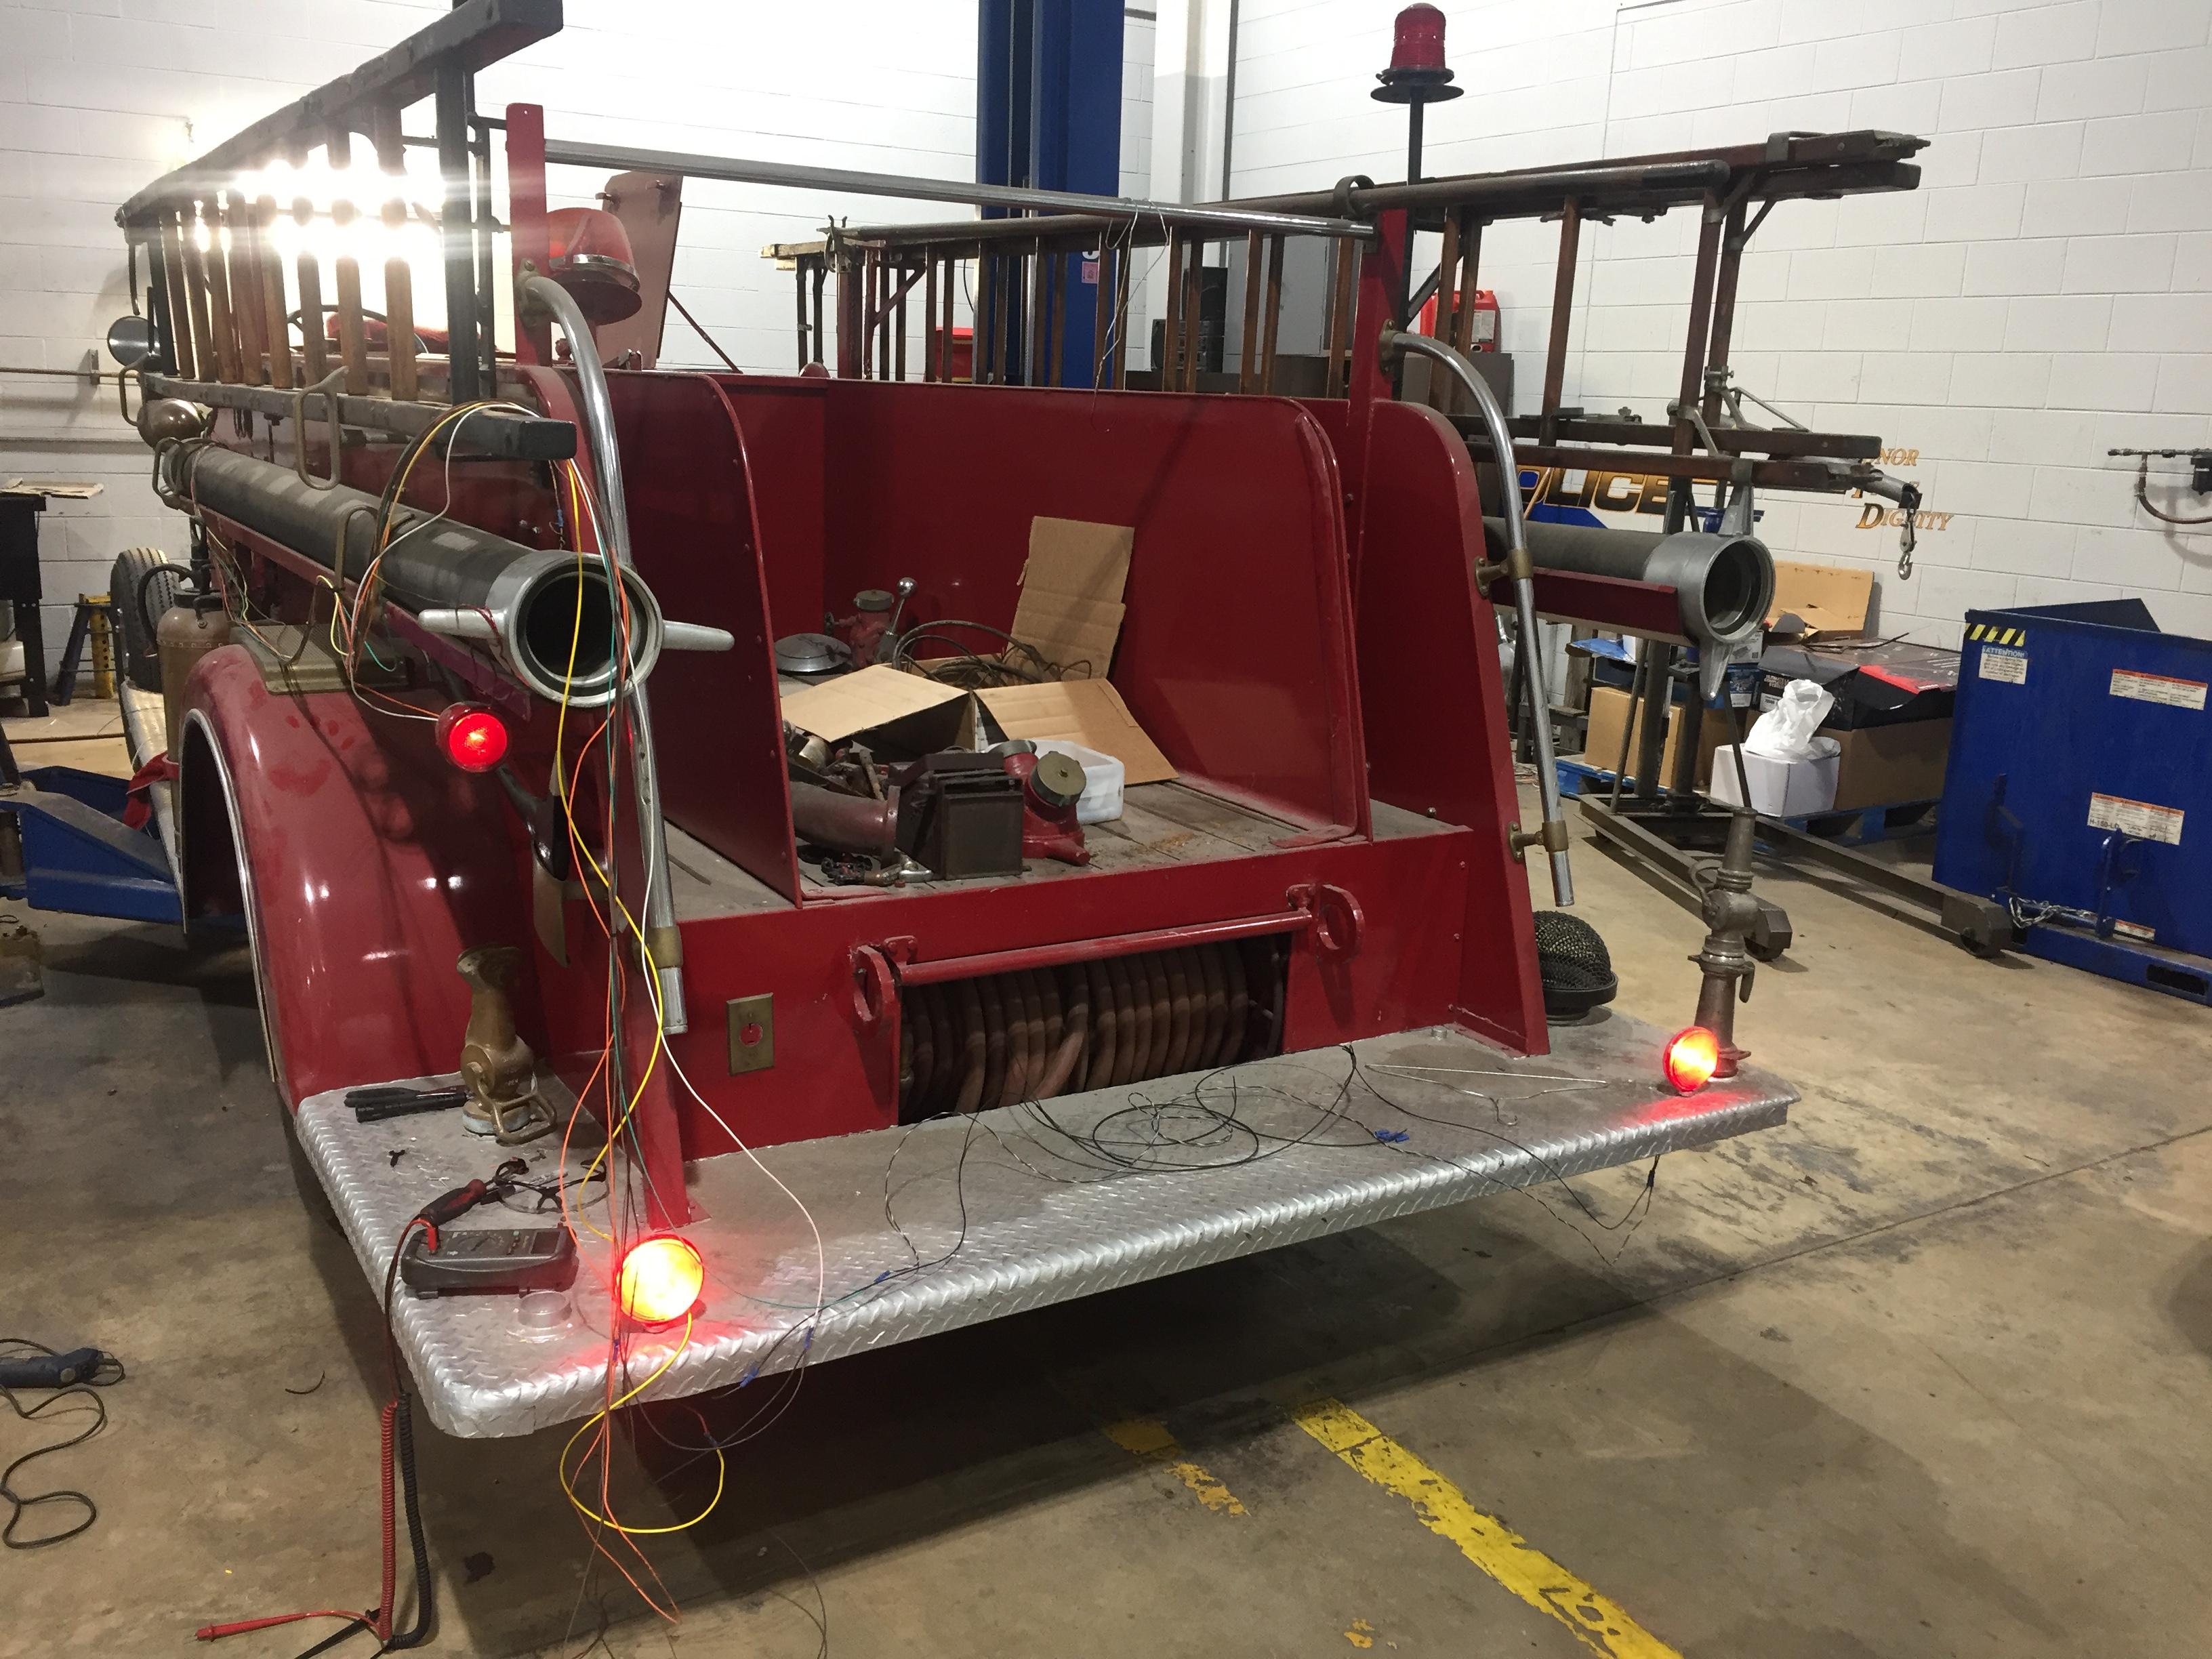
I know some of y’all think it’s sacrilegious to do what I did but I love it. Took her around the block for the first time the other day. Wiring is 100% done and there are only a couple minor things left to take care of. Hope to have her at her first show in about a month.


-
2
-
-
- Popular Post
- Popular Post
That looks the same as my ‘45 Type 45. On one than more occasion I have replicated those spring clips that hold the glass in by bending coat hangers.

-
3
-
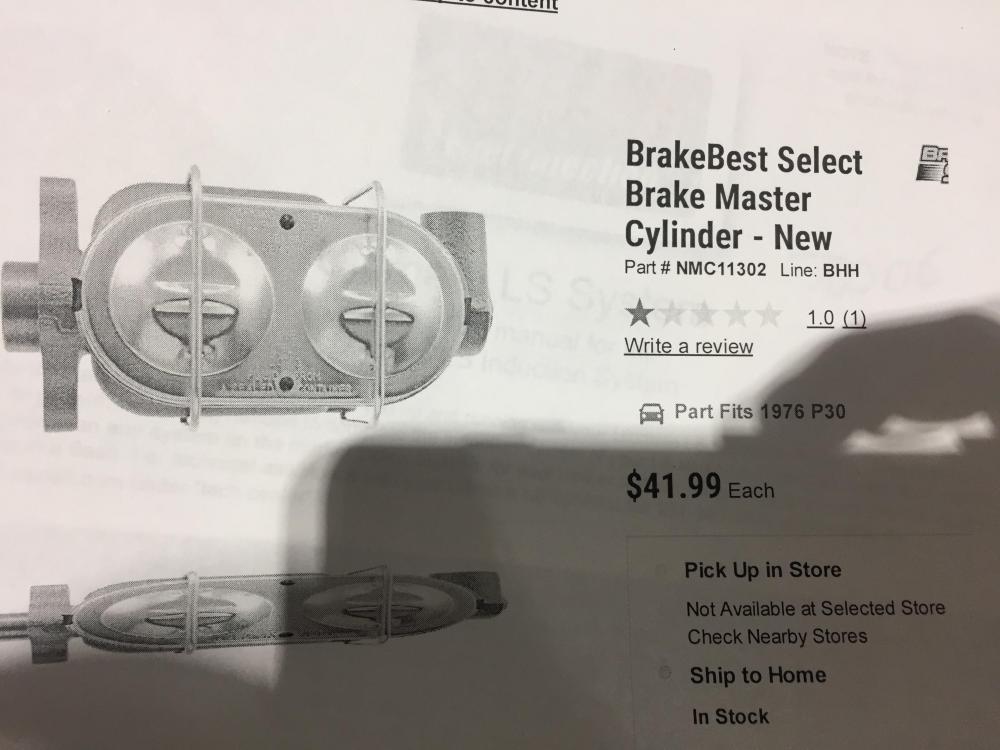
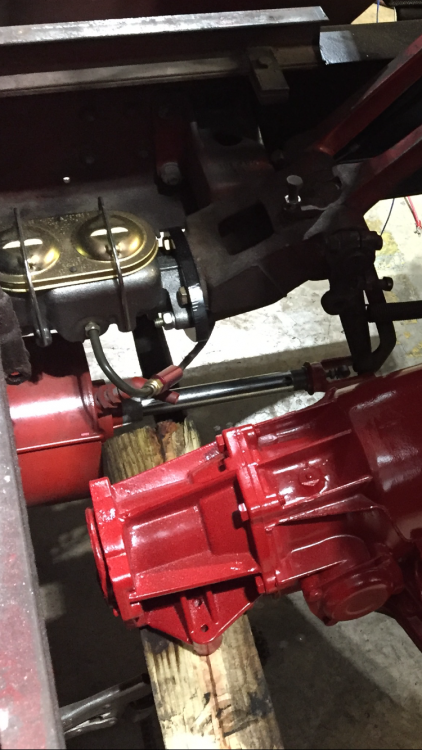
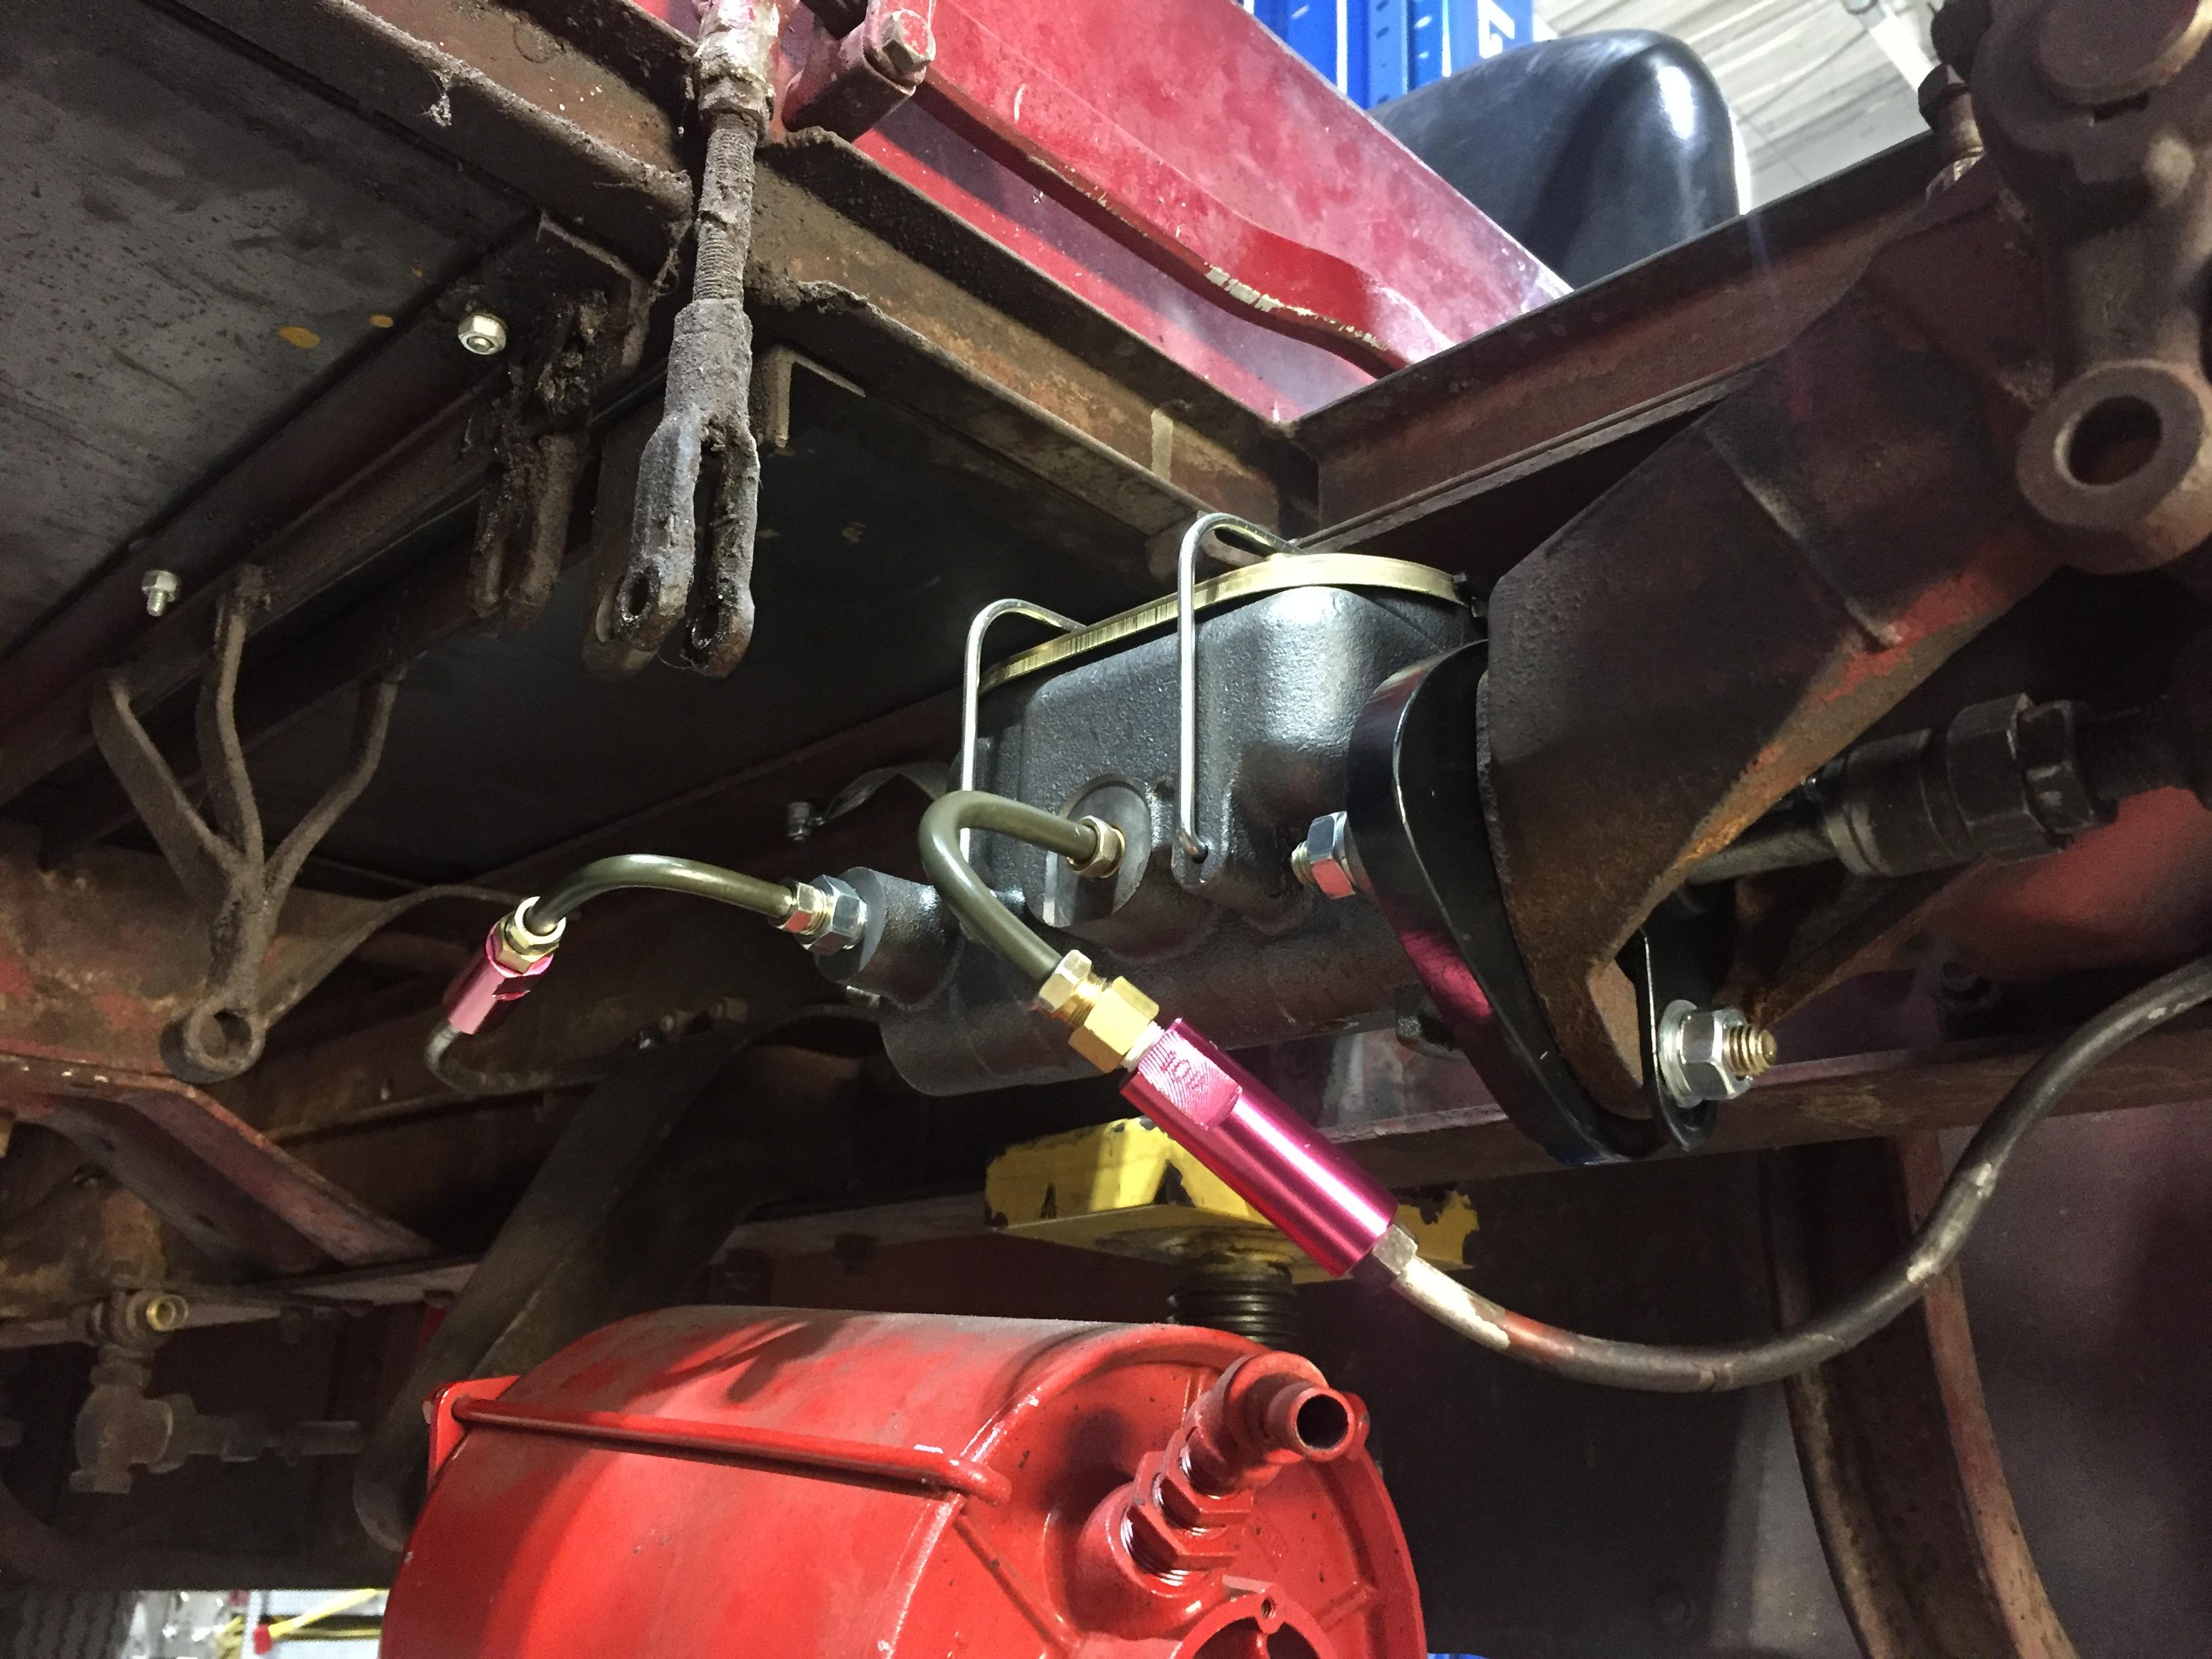
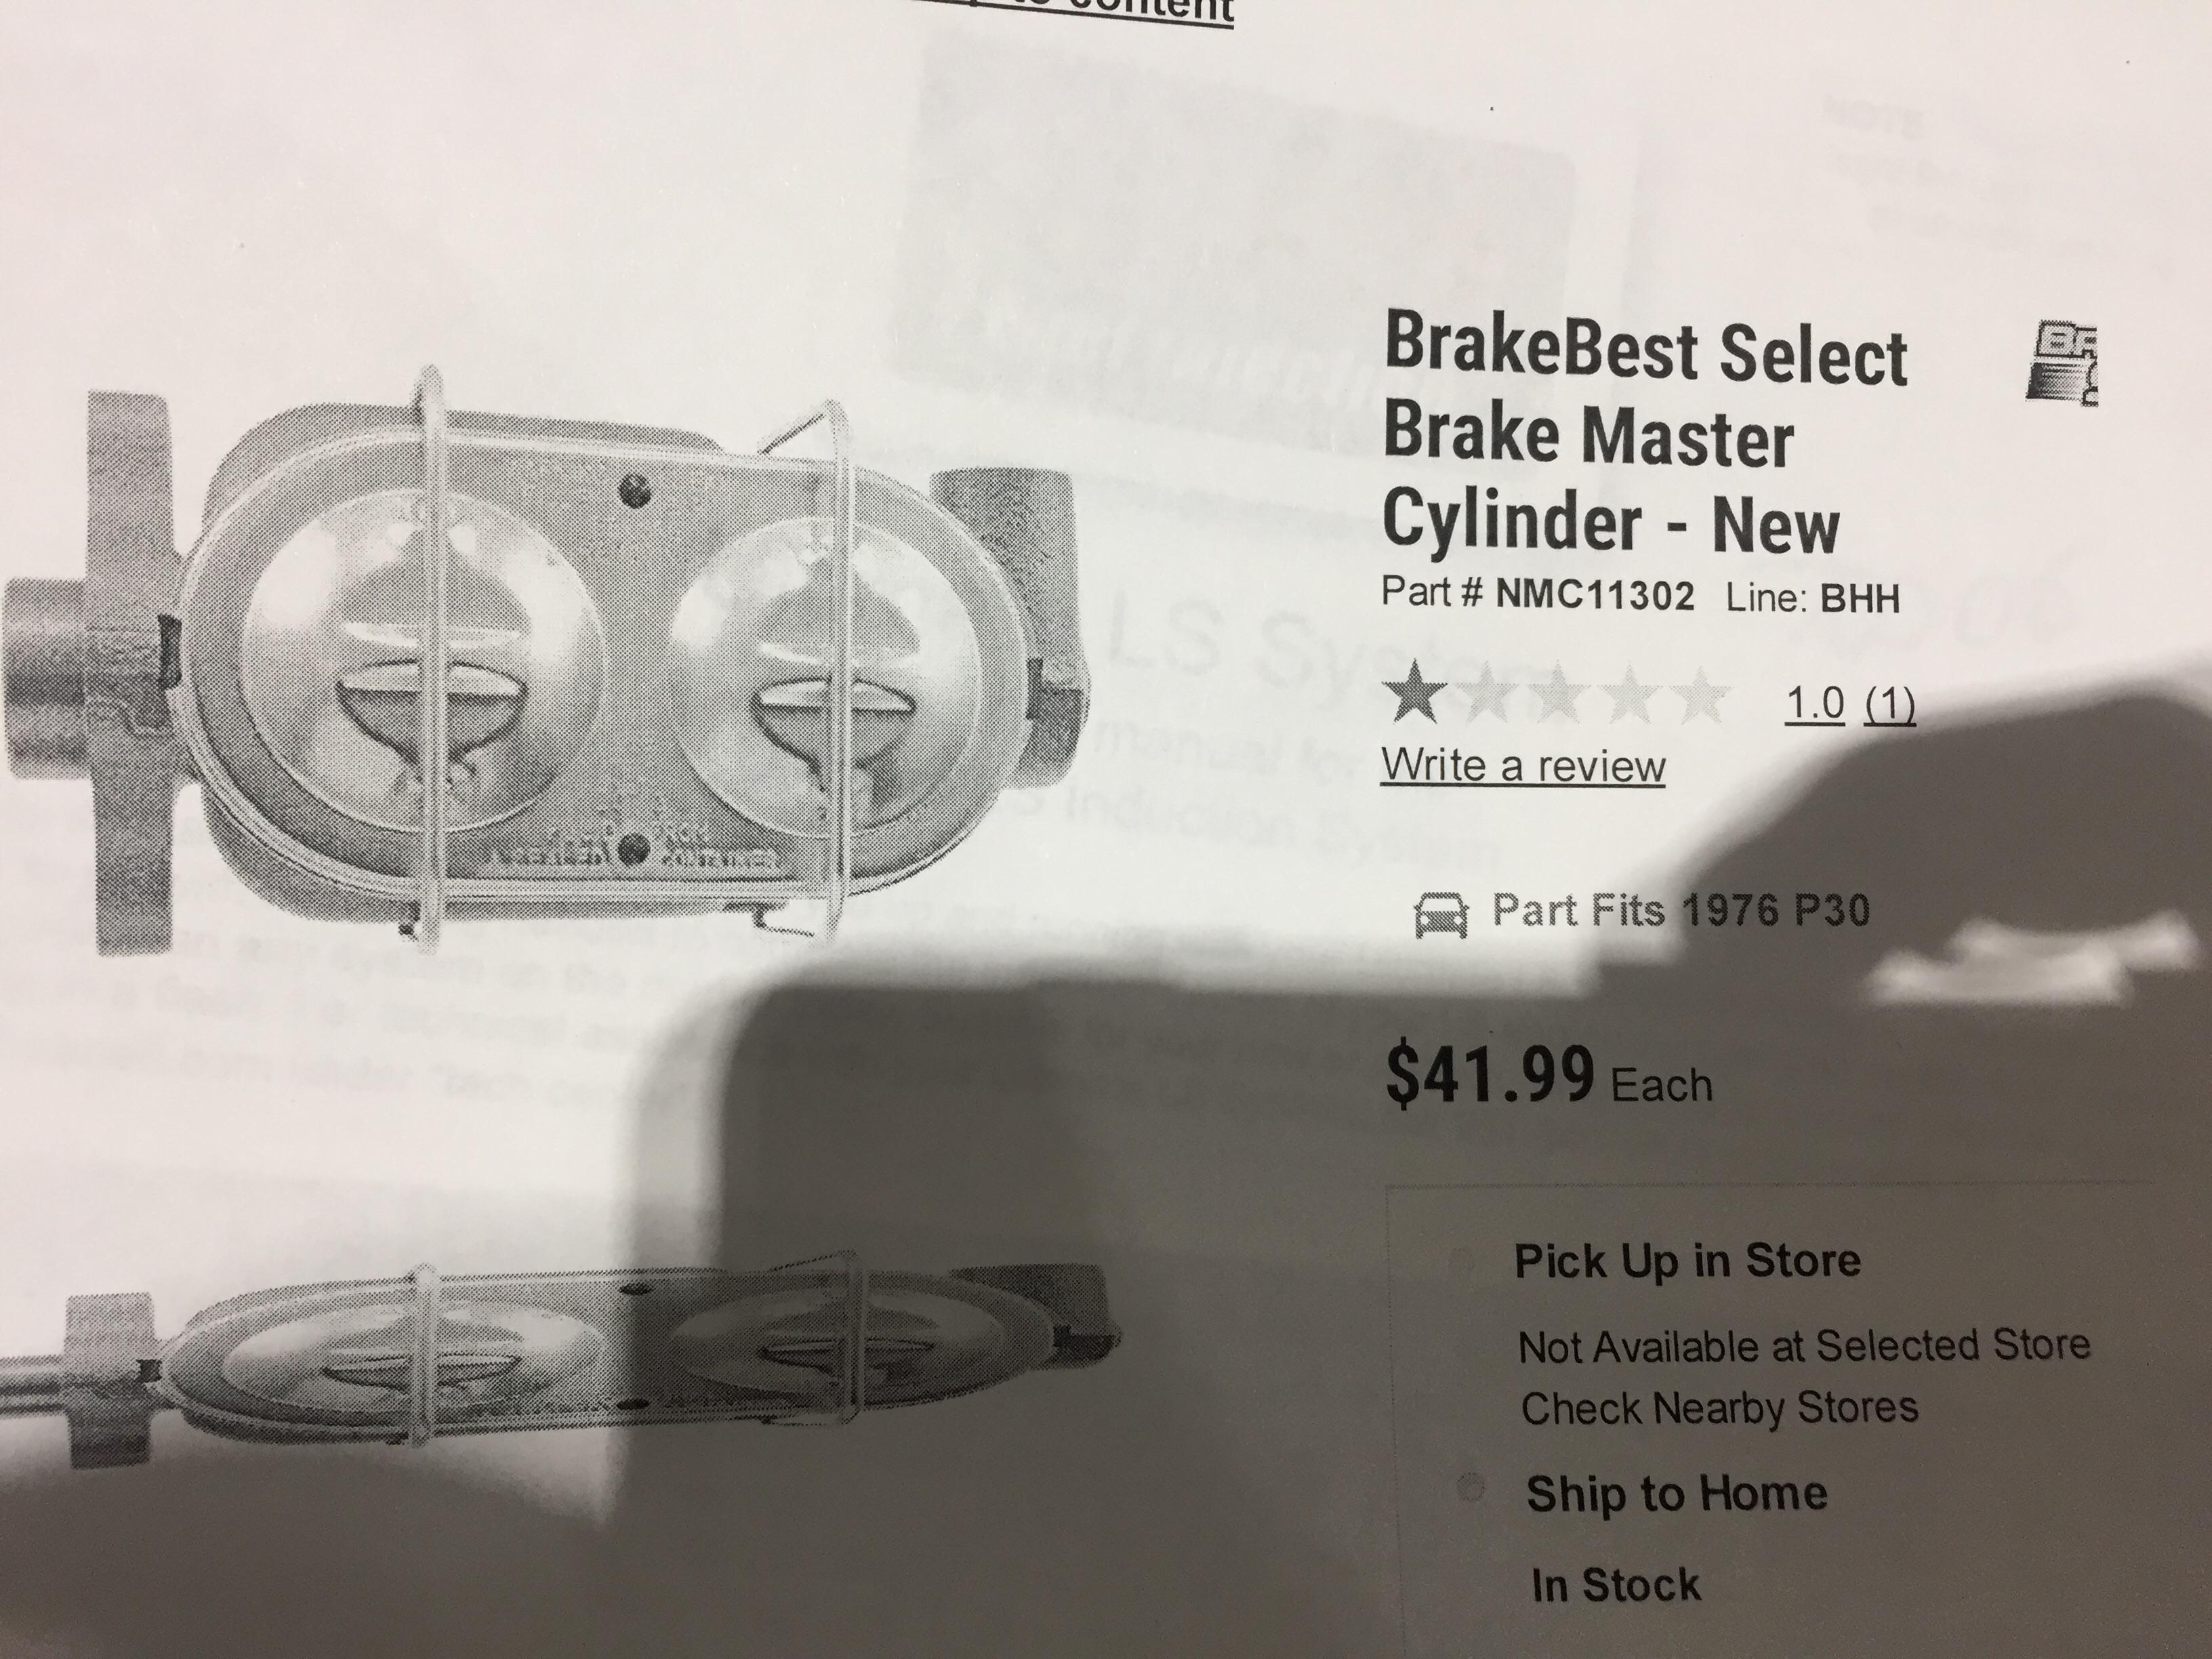
Here is the master cylinder I used. It has the same bore and stroke of the original single chamber.
-
22 hours ago, 609albert said:
looks nice & neat and safe too
Thanks. Way safer than the rats nest of exposed wire and wire nuts that was on it when I got it.
-
22 hours ago, 609albert said:
nice job on the master cylinder, is that an adapter plate that you had to make for the master cyl. and what is the new master cylinder from? what engine is that ?
Thanks. I did have to make the adapter plate but I did it just with a plasma cutter and basic power tools. I believe the master cylinder is off a ‘70’s or ‘80’s motorhome. It had the same bore size and stroke of the original single chamber. I’ll have to get the p/n when I get to work. The engine is a 5.3 out of a ‘05 Tahoe with a FiTech efi system.
-
-
-
-
1 hour ago, Quickfarms said:
What Mack trans is that
It’s not. Th400 behind a LM7
-
23 minutes ago, Quickfarms said:
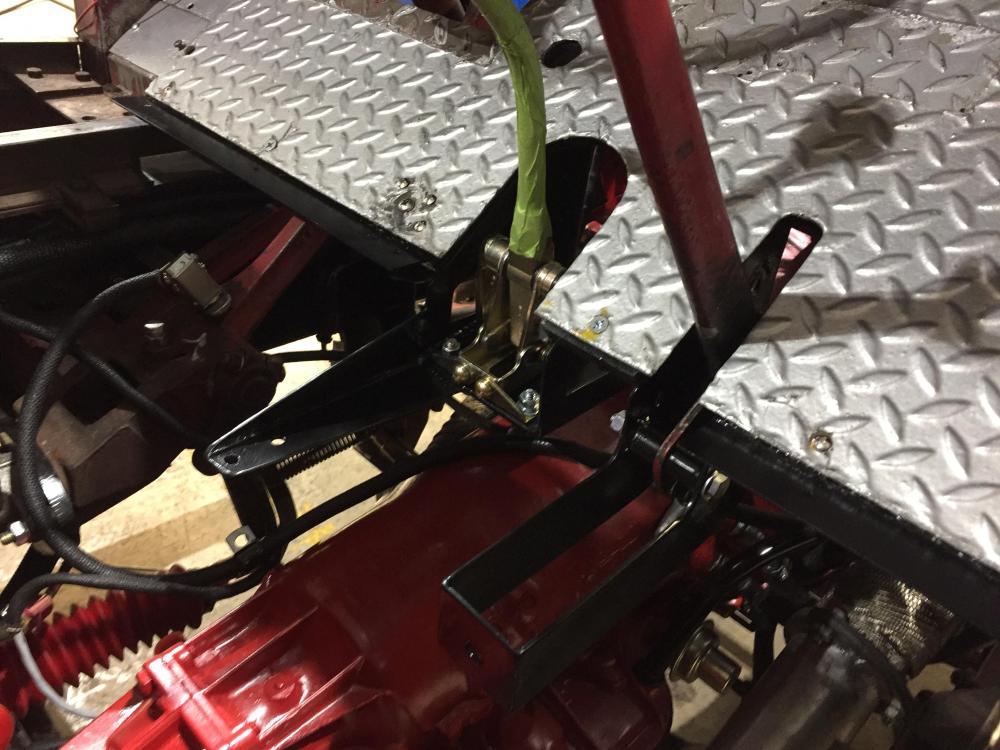
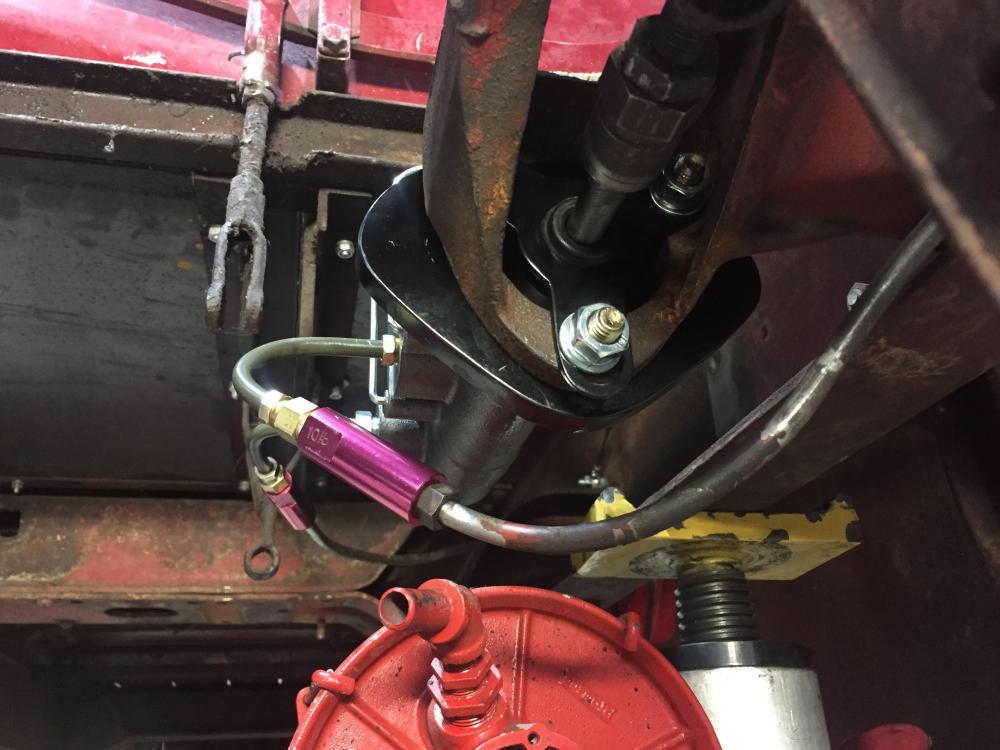
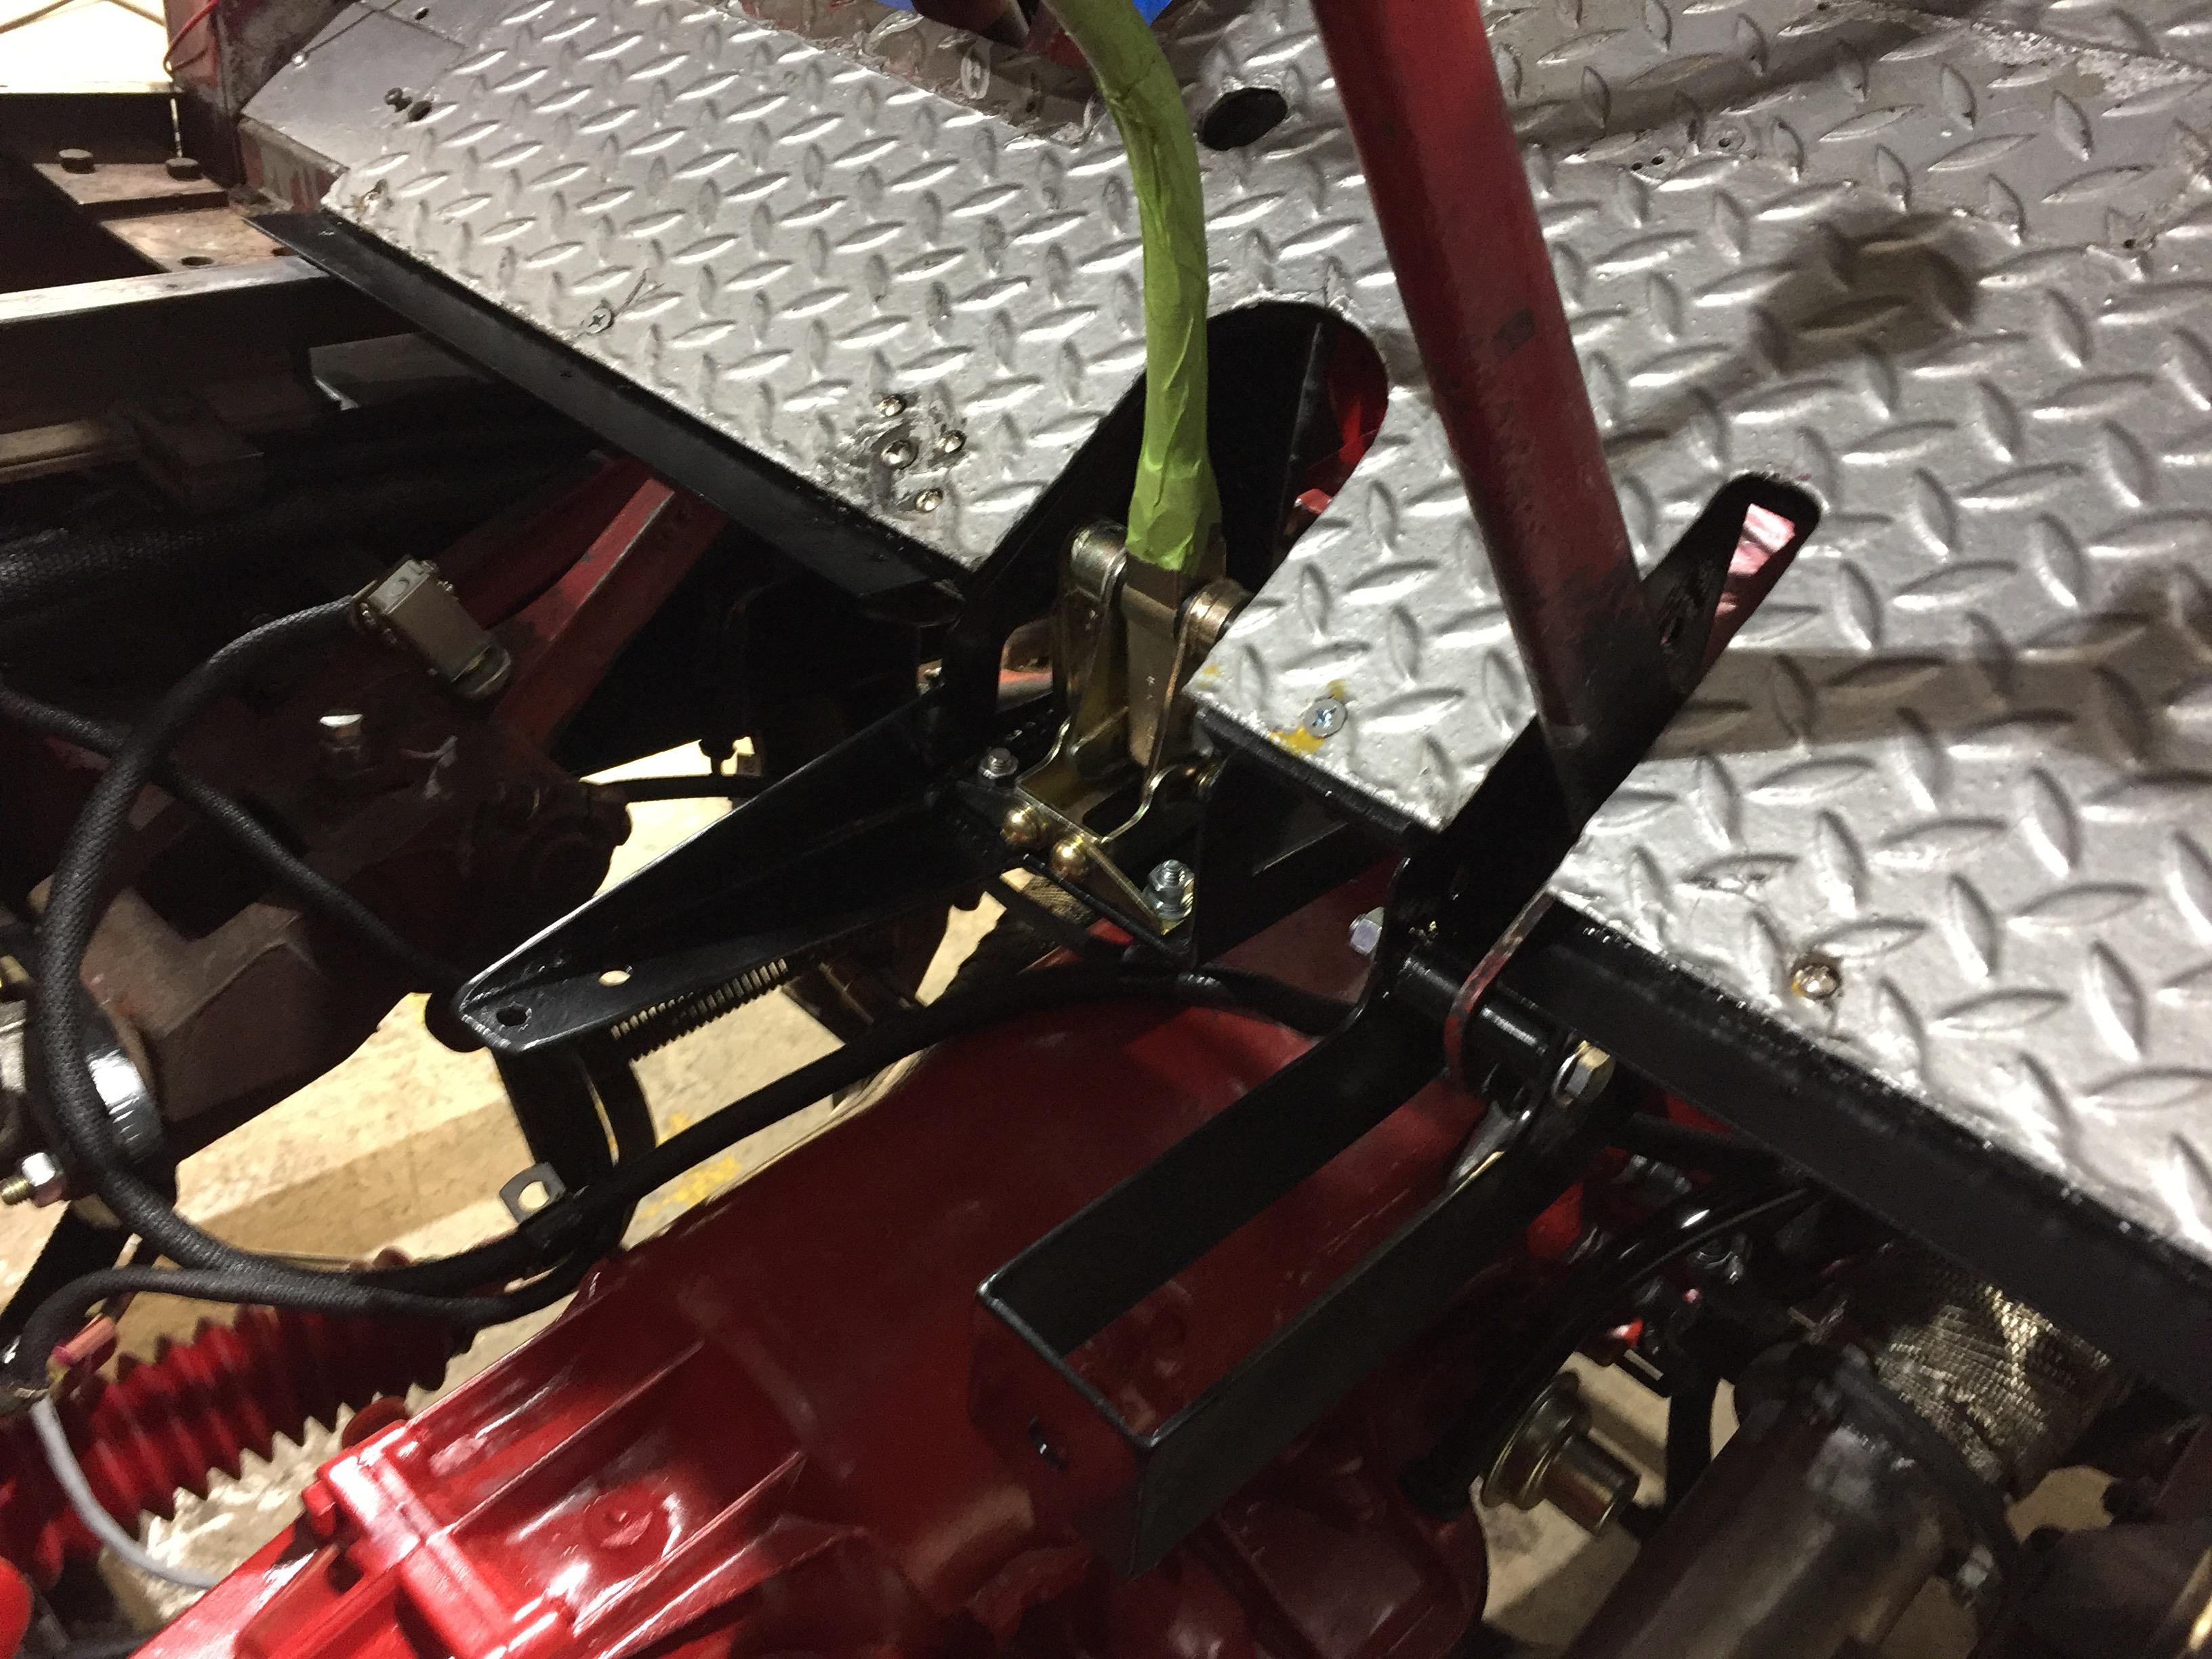
How did you plumb the dual master cylinder into the booster?The booster is a separate vacuum assisted brake booster. It attatches to a mount on the frame and then on the bottom of the brake pedal.

-
1
-
-
8 hours ago, 41chevy said:
It sure looks like it, wonder how the great the pedal effort will be with out it.
I rebuilt the booster and properly adjusted it. That thing works awesome now. Just by closing the vacuum rod by hand is enough to apply the brakes fully.
-
1
-
-
10 hours ago, Quickfarms said:
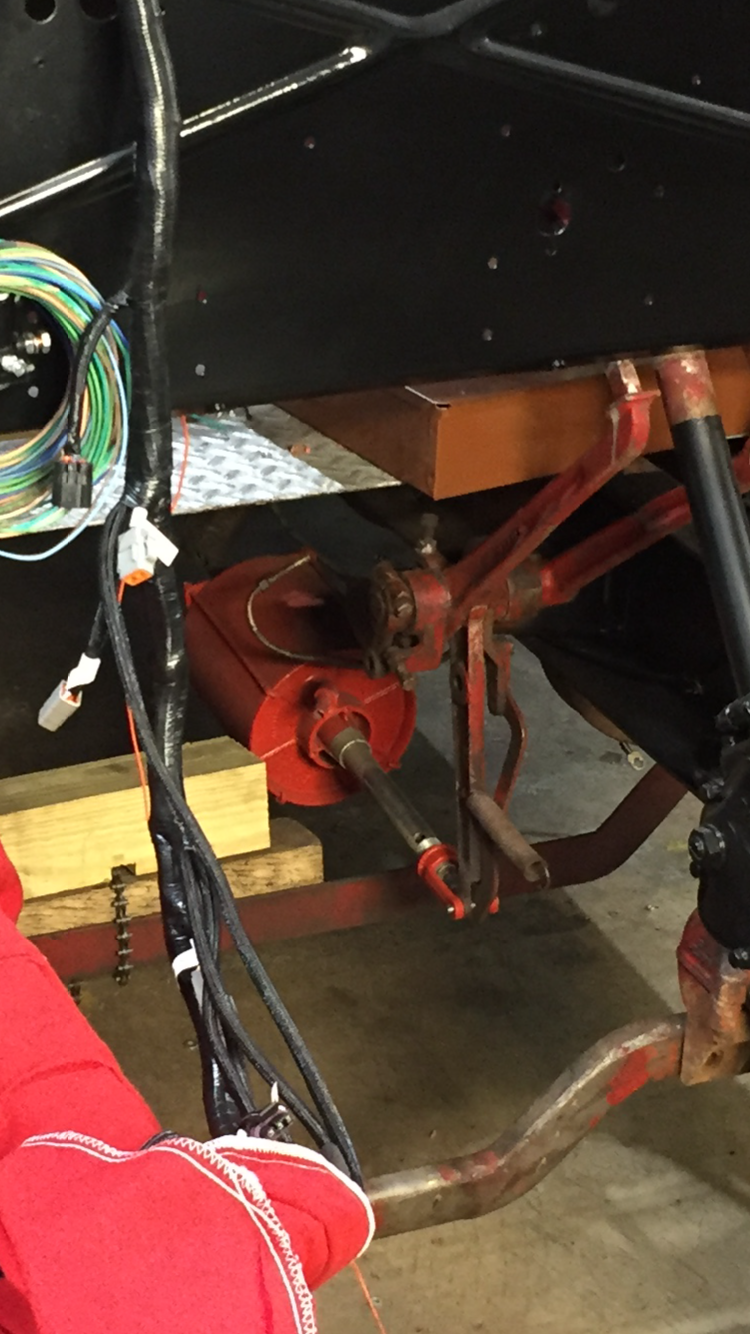
Is the red item in the bottom of the pictures a hydro-vac?
It is the booster. My first experience dealing with that particular style. Kind of a bugger to get adjusted.
-
On 10/22/2018 at 8:41 PM, 609albert said:
sounds like a wiring issue ,might be best to rewire all,my Mack was like a rats nest with wiring added through the years, check all the steel brake lines too ,I had a steel line that rotted away. good luck and post photos
I would second that. I re-wired my 45 bumper to bumper. I used a Painless Pro harness to start with and reconfigured it to work for my application. I had to switch to 12v negative ground but you can still use it for 6v positive ground.
-
I thought about just doing a direct replacement of my type 45 master cylinder but I decided to go a different route and converted to a dual chamber.

-
Hello all, I’m getting closer to getting my ‘45 Type 45 on the road. I wanted to have the tubes changed out but no one is willing to work on the suicide rims. I’ve heard that Dayton rims will bolt up to the hubs but they are way to wide. Has anyone come across a safer more modern direct replacement rim?
-
Thank you fxffmn. I will get the model number tomorrow. Will it be on the plate on the body under the passenger seat?
-
As a second thought, I kind of really like the modern engine and trans route. I think that would be really cool and unique.


BMT Forum Logo

Alignment on ‘45 Type 45
in Fire Apparatus
Posted
Thank you.