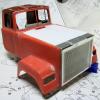
mowerman Posted June 3, 2011 Share Posted June 3, 2011 Hello!I've got some progress on my model to report - I put the sleeper together and now I'm working on the filler coat to smooth it before priming it:I'm also working on the frame, I installed cab mounts and the frame stiffener on the frame:The battery boxes, their covers and the air tanks slung underneath are also on their wayAnd finally I dechromed the details that will go on the cab roof with brake fluid. I'll rechrome them later, after filling the imperfections:That's where I have a question: What are those two snorkel-like things mounted between the three central bullet-lights on the cab roof? I like to know what I'm modelling, but I don't have an idea what they might be. Also please remember, if you see something you think is inaccurate im my work-in-progress pictures, I'd be grateful for pointing it out. Thanks for reading, and thanks in advance for your help, have a nice dayPawełwell,the roof vents,are supposed to be the color of the cab,,but chrome might look good...bob Quote Link to comment Share on other sites More sharing options...
fifth wheel Posted June 3, 2011 Share Posted June 3, 2011 I can add attention to the roof vent, on the Brockway version of the Shellar cab the vent is centered and without the scoops, on the Mack version the vent is more to the front with the scoops and the back of the center ICC light is bobbed off.FW Quote Link to comment Share on other sites More sharing options...
mowerman Posted June 3, 2011 Share Posted June 3, 2011 I can add attention to the roof vent, on the Brockway version of the Shellar cab the vent is centered and without the scoops, on the Mack version the vent is more to the front with the scoops and the back of the center ICC light is bobbed off.FWya,,he,s rite,,used to own one,,think that bobbed off lite,had its own part no.and the rounded part of vent goes to the front...bob Quote Link to comment Share on other sites More sharing options...
mowerman Posted June 21, 2011 Share Posted June 21, 2011 hey pawel,,,i took a buncha pictures of my DM,,but they vall came out lousy,,i deleted them all,,,better luck next time.lol bob Quote Link to comment Share on other sites More sharing options...
Pawel Posted June 22, 2011 Author Share Posted June 22, 2011 Bob - that's a pity, I'd just love to see the pics of your model. Please try again!In the moment I'm almost done smoothing the sleeper, it will probably get a coat of primer next week. I'm also preparing parts to rechrome them. That bobbed center light is bugging me... Does anybody have a photo? Notice how rarely this detail is seen, most of the time the trucks are photographed from ground level and the top of the cab roof is invisible. In the model kit all five lights are the same, of course. So please help, thanks a lot in advance and have a nice dayPaweł Quote Link to comment Share on other sites More sharing options...
jaysm35a2 Posted June 22, 2011 Share Posted June 22, 2011 Heres a few I took. Why not go chrome with the engine. Quote Link to comment Share on other sites More sharing options...
Pawel Posted June 24, 2011 Author Share Posted June 24, 2011 jaysm35a2 - thanks a lot for the photos you posted - just can't get enough of them here. The truck I'm trying to depict is supposed to be pimped up a little, but not that extreme - although I wouldn't rule out someone making a model of the very truck you posted the photos of, someday.Please remember - photos of the innards of a Superliner I are most welcome here all of the time.About the roof - after reading the recent posts about the roof I checked it up again, and discovered Italeri moved the roof vent back some and so worked around the "bobbed" center roof light. I think I'm going to cut my roof up again (just a little bit) and try to add this interesting detail. Any photos showing this arrangement (roof vent and the "bobbed" bullet light) will be a great help for me. Thanks in advance for your great help, have a nice dayPaweł Quote Link to comment Share on other sites More sharing options...
other dog Posted June 24, 2011 Share Posted June 24, 2011 jaysm35a2 - thanks a lot for the photos you posted - just can't get enough of them here. The truck I'm trying to depict is supposed to be pimped up a little, but not that extreme - although I wouldn't rule out someone making a model of the very truck you posted the photos of, someday.Please remember - photos of the innards of a Superliner I are most welcome here all of the time.About the roof - after reading the recent posts about the roof I checked it up again, and discovered Italeri moved the roof vent back some and so worked around the "bobbed" center roof light. I think I'm going to cut my roof up again (just a little bit) and try to add this interesting detail. Any photos showing this arrangement (roof vent and the "bobbed" bullet light) will be a great help for me. Thanks in advance for your great help, have a nice dayPawełwish i'd seen this post yesterday! I was unloading some steel beams at Banker Steel in Lynchburg yesterday and was standing on my trailer when their beat up Superliner yard dog was hooking to a trailer right beside me. I could have gotten some good pictures of the top of the cab. Quote Producer of poorly photo-chopped pictures since 1999. Link to comment Share on other sites More sharing options...
Pawel Posted June 27, 2011 Author Share Posted June 27, 2011 Ain't that a pity when it happens :-)) Not to worry, I got a nice photo I needed. But of course you can't get too much of a good thing - if anybody has photos of Superliner I innards please post them here! Thanks in advance, have a nice dayPaweł Quote Link to comment Share on other sites More sharing options...
Doug Maney Posted June 29, 2011 Share Posted June 29, 2011 Attached are photos of the roof lights and air diverters. Doug 1 Quote Interested in Old Trucks? Check out: www.antiquetruckclubofamerica.org Link to comment Share on other sites More sharing options...
Pawel Posted June 30, 2011 Author Share Posted June 30, 2011 Bob - a nice rim you got there! About the chrome - you can rechrome your parts using a paint called "Alclad 2". It is sprayed over really smooth gloss black base and after that the parts look pretty chrome! I'll demonstrate that on my model soon, as I got a few details to chrome too.Doug - great photos, thanks a lot! Now I'm good to go. First thing to fix, and I'm working on it right now, is the roof vent, which Italeri put too far back. I'm about to put it in its correcxt position, and then I'll mount the diverters, lights and horns. I'm working slowly, so it will take some time, but when I'm done, I'll post the photos. Thanks again for the photos, they are a great help, and have a nice dayPaweł Quote Link to comment Share on other sites More sharing options...
Legorigs Posted July 6, 2011 Share Posted July 6, 2011 Hi Pawel,Must say you're doing a great job on the Superliner. Found this on the net. May help you also. Got some nice shots of the V8 too. Have fun browsing the pictures and keep up the good work.Superliner project Quote Link to comment Share on other sites More sharing options...
Pawel Posted July 8, 2011 Author Share Posted July 8, 2011 Legorigs,Thanks a lot for your kind words. The link you sent is very interesting, especially for someone building a Superliner II. It was also very interesting for me to see how many differences are there between a Superliner I and Superliner II. Currently I'm working on the roof, but also on rechroming some of the parts. Tedious job and not much to show. Maybe I'll have something to show you later. Thaks again, have a nice dayPaweł Quote Link to comment Share on other sites More sharing options...
Pawel Posted November 25, 2011 Author Share Posted November 25, 2011 Hello everybody! It's been a really long time, I also got a lot of help from the forum members here, so I wanted to let you know I'm movin' on with this one, although slowly. Recently I put together the battery boxes complete with the air tanks. Putting something "chrome-like" on the parts was tedious. Anyway, here's what it looks like now:My request to you is, if you see something that looks bad on my model, please let me know, maybe I can correct it in time. The pity is I've never seen a Superliner real-life, so I have to depend on sources! Thanks in advance for your help, have a ncie dayPaweł Quote Link to comment Share on other sites More sharing options...
mowerman Posted November 25, 2011 Share Posted November 25, 2011 wow,,welcome back,,,was wondering what happened to ya,,nice work,,keep it up.bob Quote Link to comment Share on other sites More sharing options...
41chevy Posted November 26, 2011 Share Posted November 26, 2011 Beautiful work!! Here is one of mine done about 5 years ago. Paul Quote "OPERTUNITY IS MISSED BY MOST PEOPLE BECAUSE IT IS DRESSED IN OVERALLS AND LOOKS LIKE WORK" Thomas Edison “Life’s journey is not to arrive at the grave safely, in a well preserved body, but rather to skid in sideways, totally worn out, shouting ‘Holy shit, what a ride!’” P.T.CHESHIRE Link to comment Share on other sites More sharing options...
mowerman Posted November 26, 2011 Share Posted November 26, 2011 Beautiful work!! Here is one of mine done about 5 years ago. Paulgeeeees very interesting,,,but it looks like you drug it outa a swamp.lol.bob Quote Link to comment Share on other sites More sharing options...
41chevy Posted November 26, 2011 Share Posted November 26, 2011 It was modeled after on at a sand mine here....close to a swamp. LOL Paul Quote "OPERTUNITY IS MISSED BY MOST PEOPLE BECAUSE IT IS DRESSED IN OVERALLS AND LOOKS LIKE WORK" Thomas Edison “Life’s journey is not to arrive at the grave safely, in a well preserved body, but rather to skid in sideways, totally worn out, shouting ‘Holy shit, what a ride!’” P.T.CHESHIRE Link to comment Share on other sites More sharing options...
mowerman Posted November 26, 2011 Share Posted November 26, 2011 It was modeled after on at a sand mine here....close to a swamp. LOL Pauli noticed that roadway,,couple of weeks ago,that looked like it went thru a blizzard thought it was a interesting idea,,,they both look definateley used...ive never seen anything like either of them,,,i must admit,,,very creative.bob Quote Link to comment Share on other sites More sharing options...
Pawel Posted November 26, 2011 Author Share Posted November 26, 2011 Bob - thanks a lot for dropping by! Don't worry, I'm not going to give up that easy.Paul - nice model! Good job on the dirt and rust. I'd be glad to build this model too, but unfortunately that kit is almost ungettable nowadays. As for my truck, I plan to model it used, but clean and well maintained.Thanks again for the comments and have a nice day!Paweł Quote Link to comment Share on other sites More sharing options...
Superdog Posted November 26, 2011 Share Posted November 26, 2011 Hello everybody! It's been a really long time, I also got a lot of help from the forum members here, so I wanted to let you know I'm movin' on with this one, although slowly. Recently I put together the battery boxes complete with the air tanks. Putting something "chrome-like" on the parts was tedious. Anyway, here's what it looks like now:My request to you is, if you see something that looks bad on my model, please let me know, maybe I can correct it in time. The pity is I've never seen a Superliner real-life, so I have to depend on sources! Thanks in advance for your help, have a ncie dayPaweł"I've never seen a Superliner in real life"That statement is probably one of the saddest things I've heard in awhile.One more thing we as Americans can take for granted.Hopefully someday you can come over here and see one in all it's glory.I give thanks everyday that I can walk out my front door and climb into my Superliner and go to work.I can't imagine how some people can even drag themselves out of bed each day knowing they have to drive a Brand X truck.Good work so far on your model,maybe someday you can build a replica of mine for me,my model building days are in the past. Quote Link to comment Share on other sites More sharing options...
vision386 Posted November 27, 2011 Share Posted November 27, 2011 I agree! i think thats one of the things i like most about this website,so many like-minded people,interested in preserving a piece of our heritage,and helping to keep the Mack "legend" alive. I also cant wait to see this (model) Superliner finished!..................................Mark Quote Mack Truck literate. Computer illiterate. Link to comment Share on other sites More sharing options...
mack4ever Posted November 27, 2011 Share Posted November 27, 2011 a nice model of a b model. Quote Link to comment Share on other sites More sharing options...
Pawel Posted December 2, 2011 Author Share Posted December 2, 2011 Superdog - thanks for your comment! The Superliner came to be very important for me, too - although I didn't get to see one in person yet. Maybe someday. I still need a visa if I want to visit USA - ain't that bad? Thanks for your kind words, be sure to gather a lot of reference material of your truck (I mean photos, especially of it's innards and underside, those are hard to find, and some measurements, like the frame length, ride height and the likes) if you ever want to have it modelled.Mark - oh yeah, I heard it before and I also can't wait to see it done - mainly because if I wait it will never get done mack4ever - nice picture! The B model sure is something special. I thought about building a model of one, but that won't happen soon. Maybe someday!Thanks again for your comments, have a nice dayPaweł Quote Link to comment Share on other sites More sharing options...
Pawel Posted December 13, 2011 Author Share Posted December 13, 2011 OK - one more quick update. Recently I built a representation of the air dryer:What do you think - did I get the look? Now the big question - where to put it? Some sources say it should be behind the cab, inside the frame, on the left rail. But then the sleeper would pretty much block the access to the cartridge and make it's exchange a PITA. Others say it should be on the outside of the frame, behind the fuel tank (on the left or on the right rail?). Any help here would be greatly appreciated.I also went back to the engine and painted the filters:After installing them the motor looks like this:That'd be it for now - thanks for readin and have a nice dayPaweł Quote Link to comment Share on other sites More sharing options...


Recommended Posts
Join the conversation
You can post now and register later. If you have an account, sign in now to post with your account.