

thomastractorsvc
-
Posts
3,060 -
Joined
-
Last visited
-
Days Won
16
Content Type
Profiles
Forums
Gallery
Events
Blogs
BMT Wiki
Collections
Store
Everything posted by thomastractorsvc
-
Neway air ride panhard bar question
thomastractorsvc replied to Freightrain's topic in Driveline and Suspension
I have replaced a bunch some were ball socket some were bushings. I have had good luck with inland truck parts. Installing the rubber are easy I use a 10k ratchet strap and pull the axles one way or the other to get lined up doesn't take much pull to move them and a 3 ton floor jack to lift enough to get it to float on the bushings. -
A week or so ago finally got it back from paint. I really wish I had better luck with auto body painters.

-
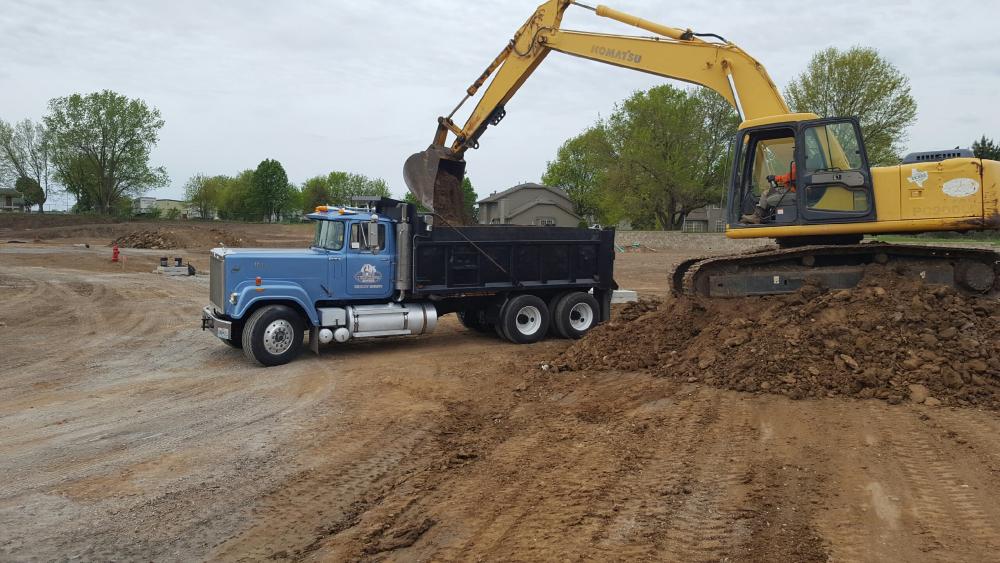
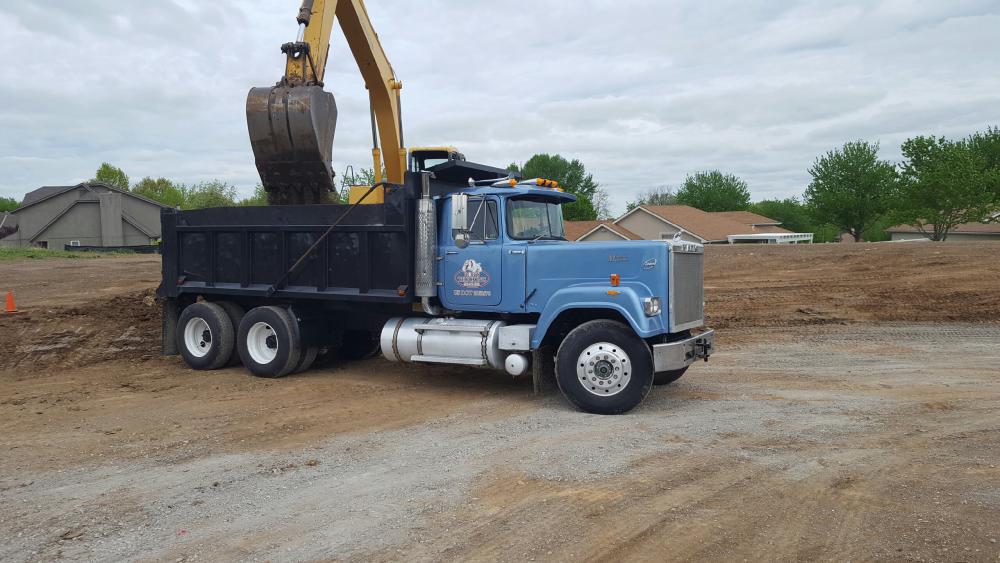
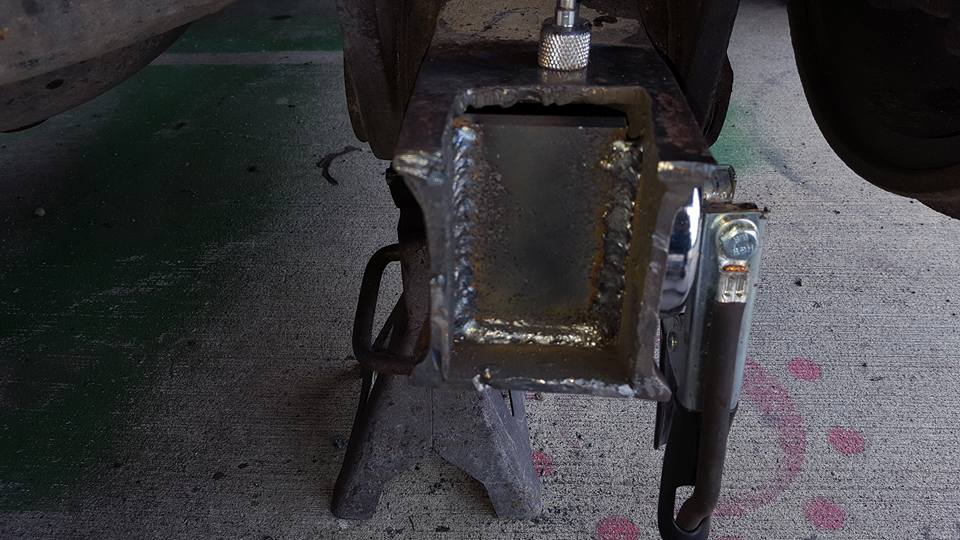
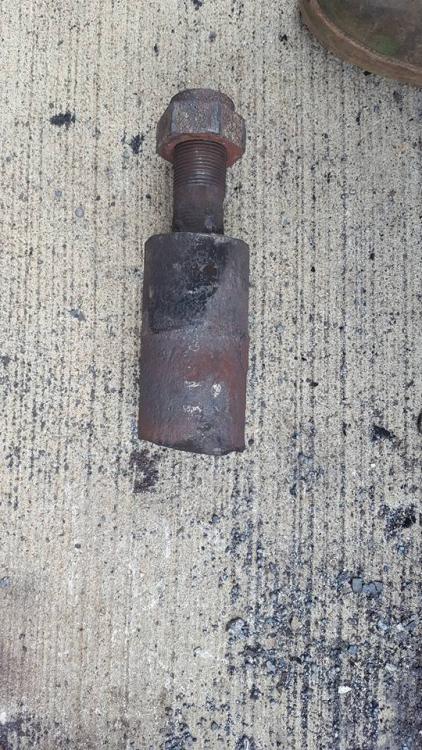
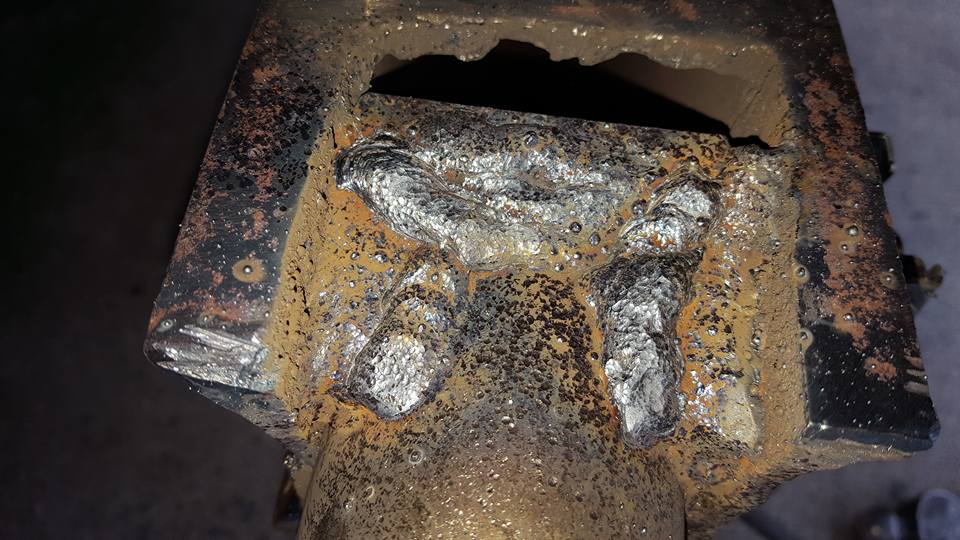
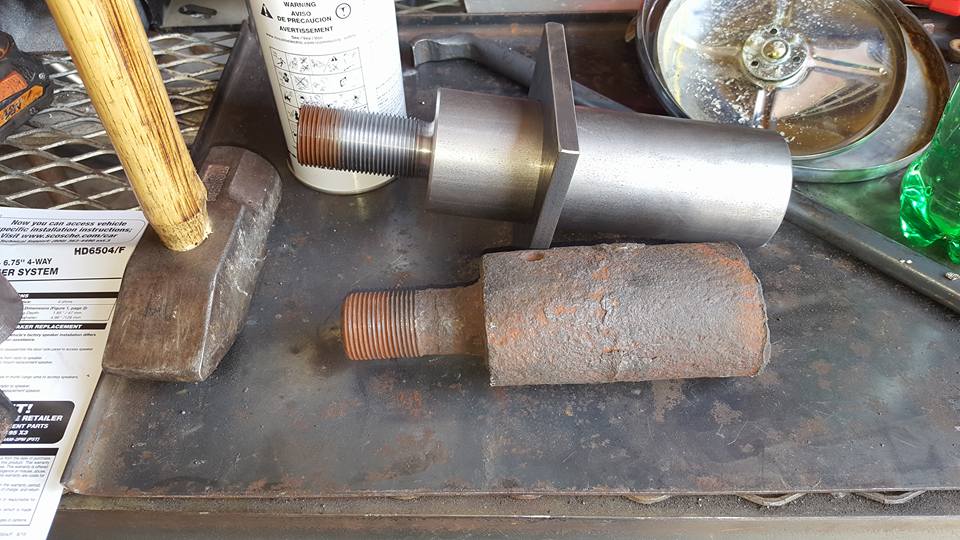
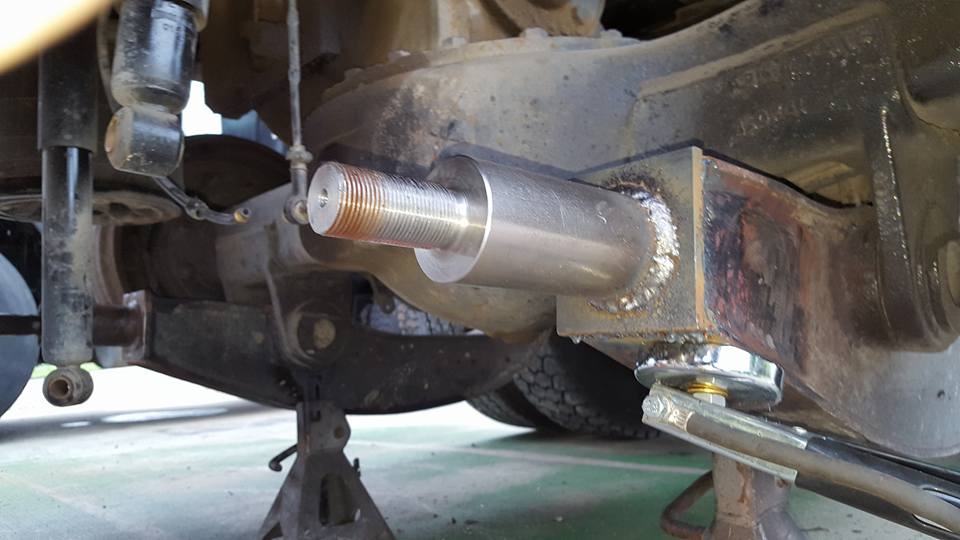
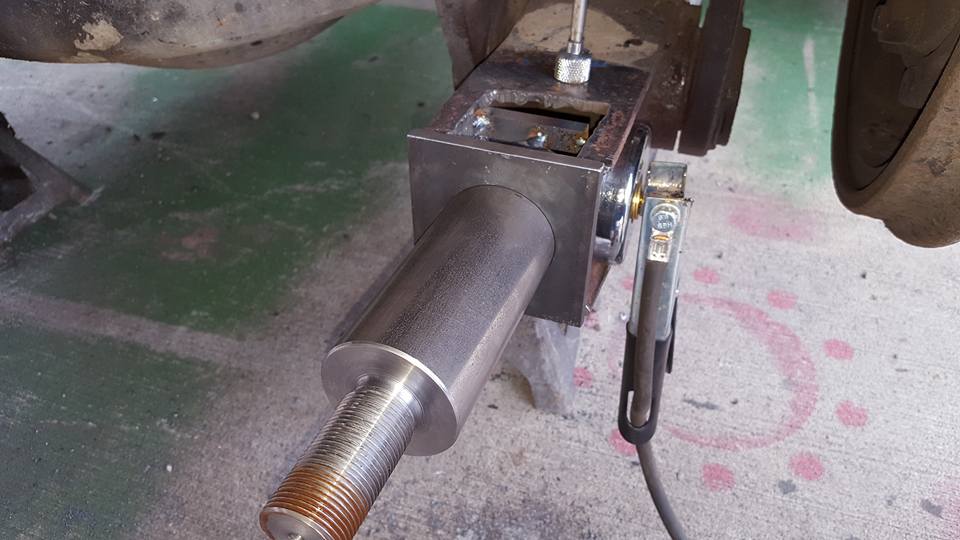
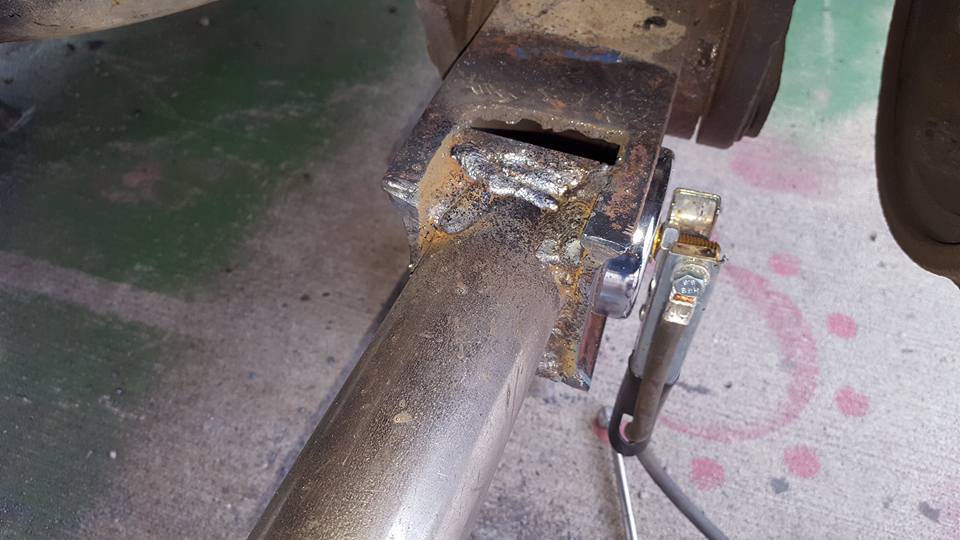
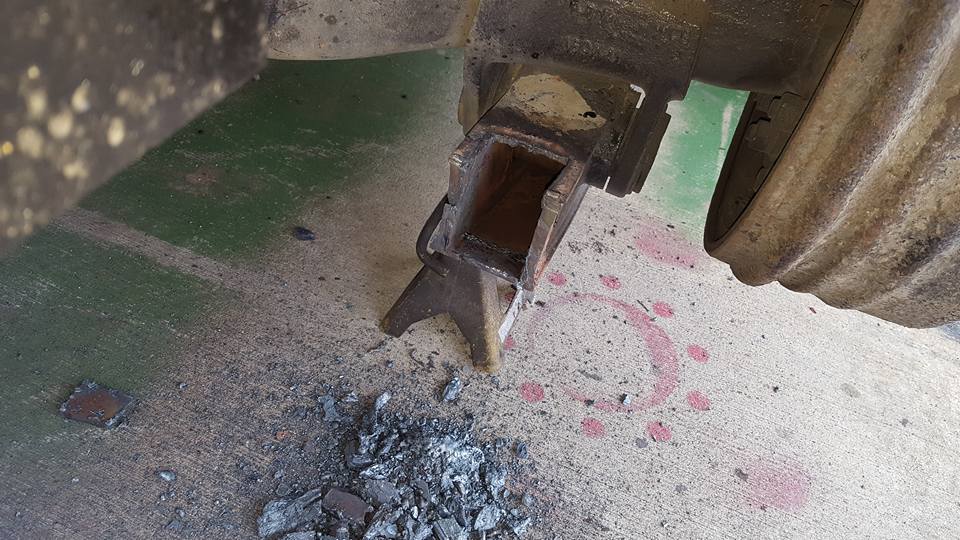
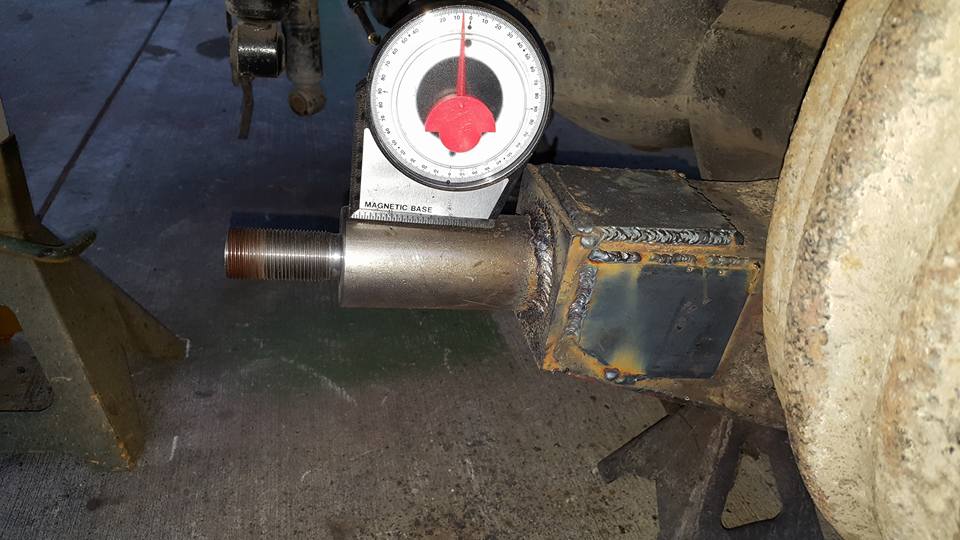
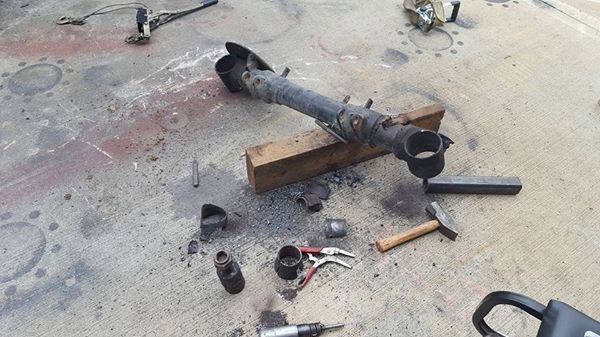
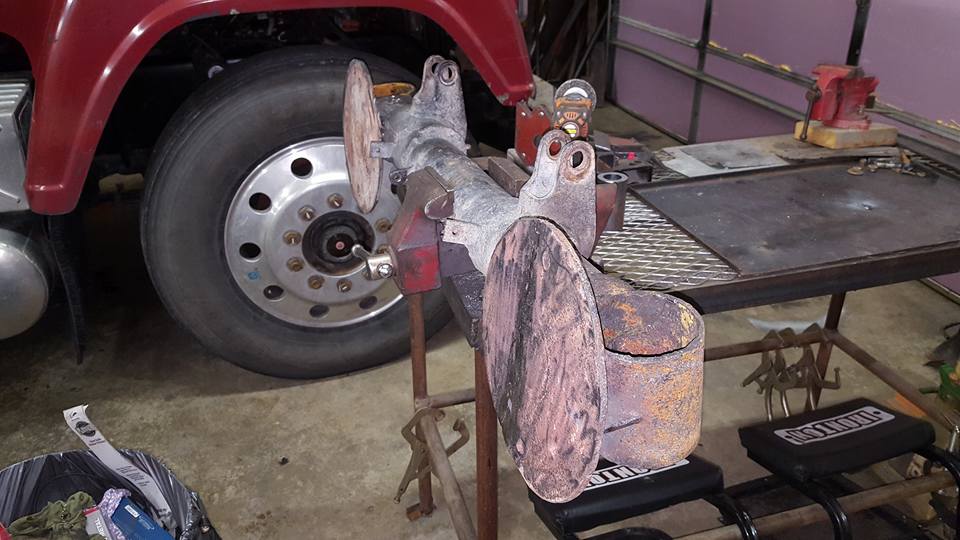
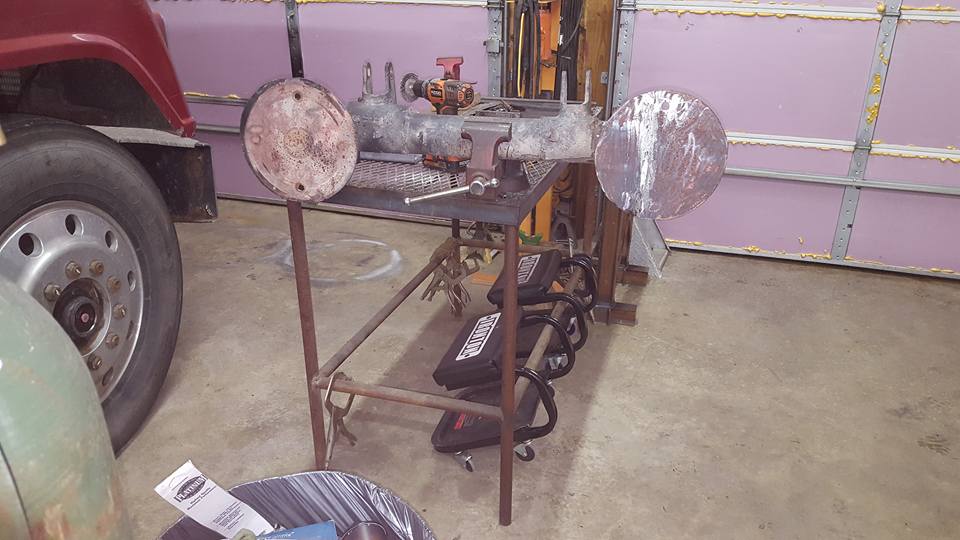
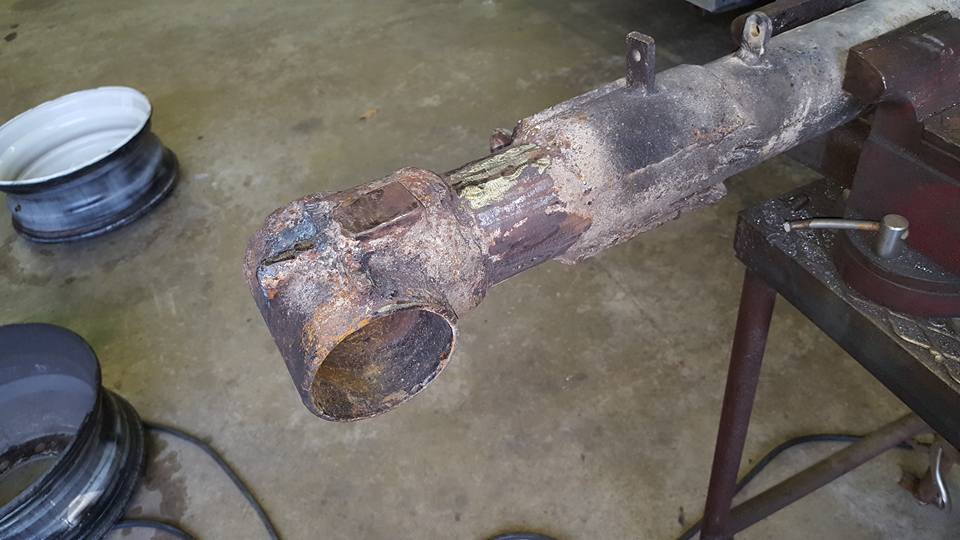
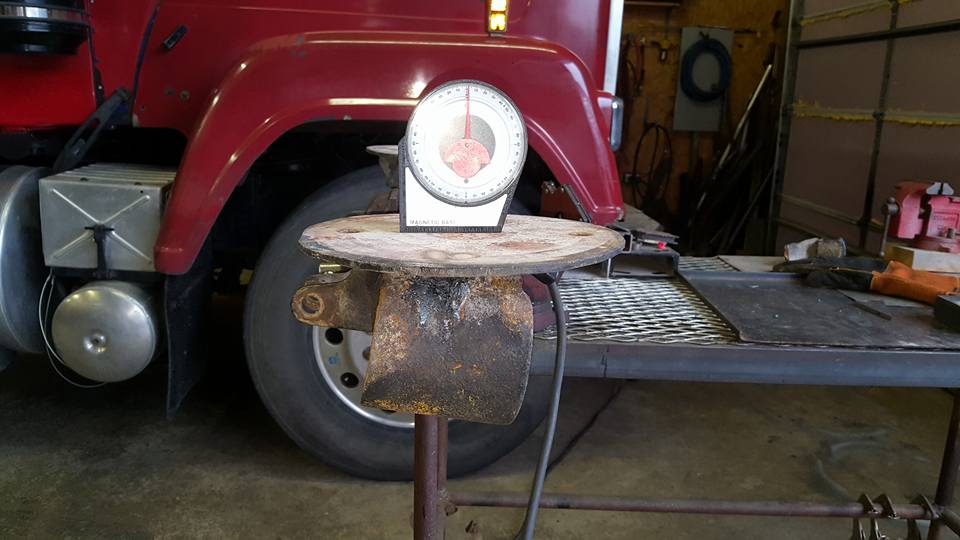
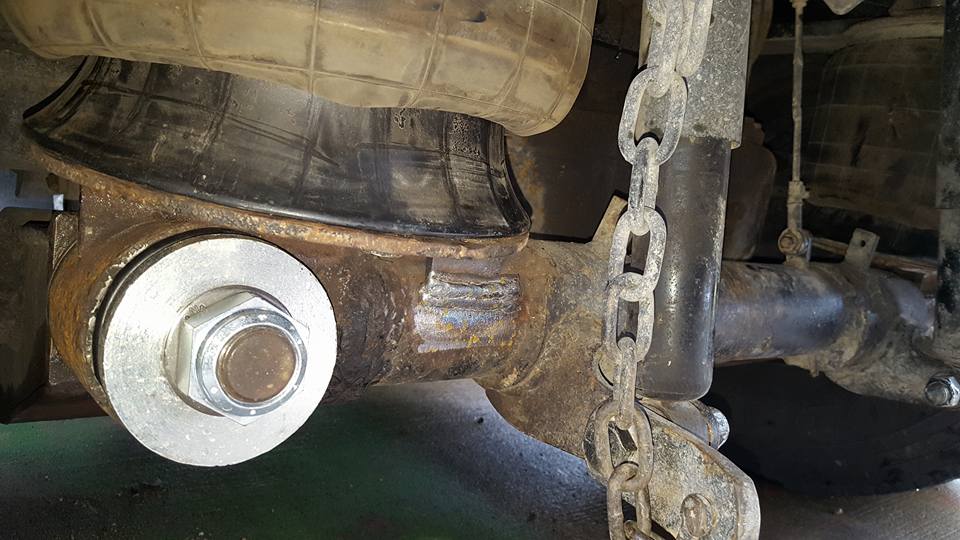
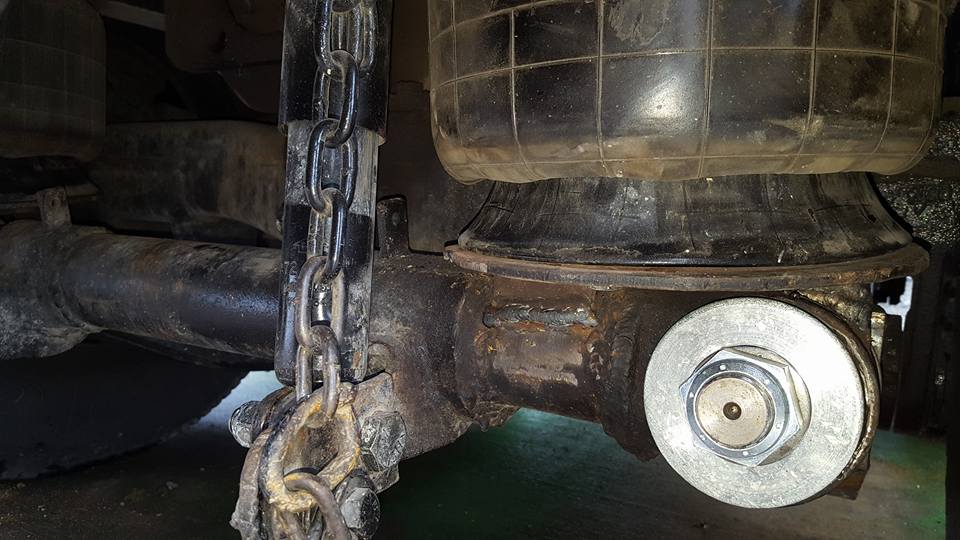
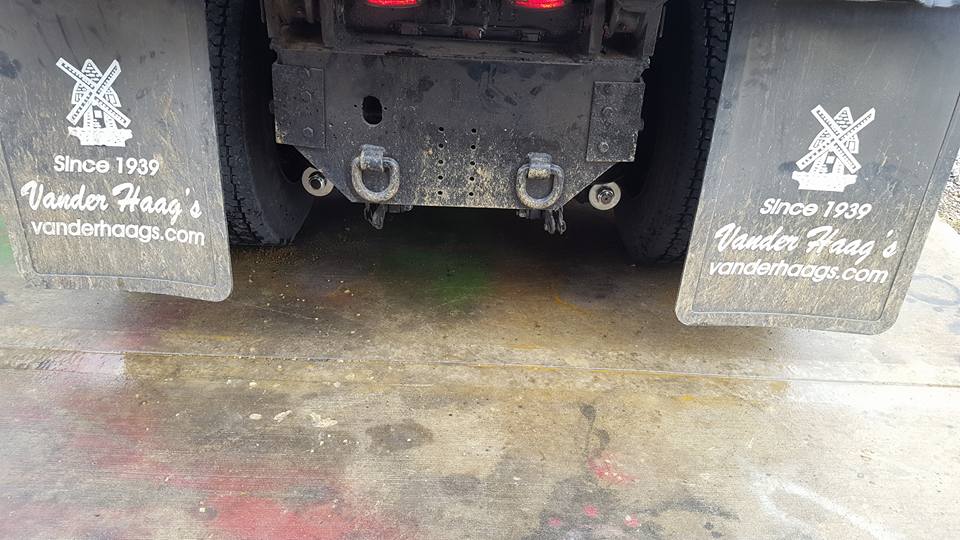
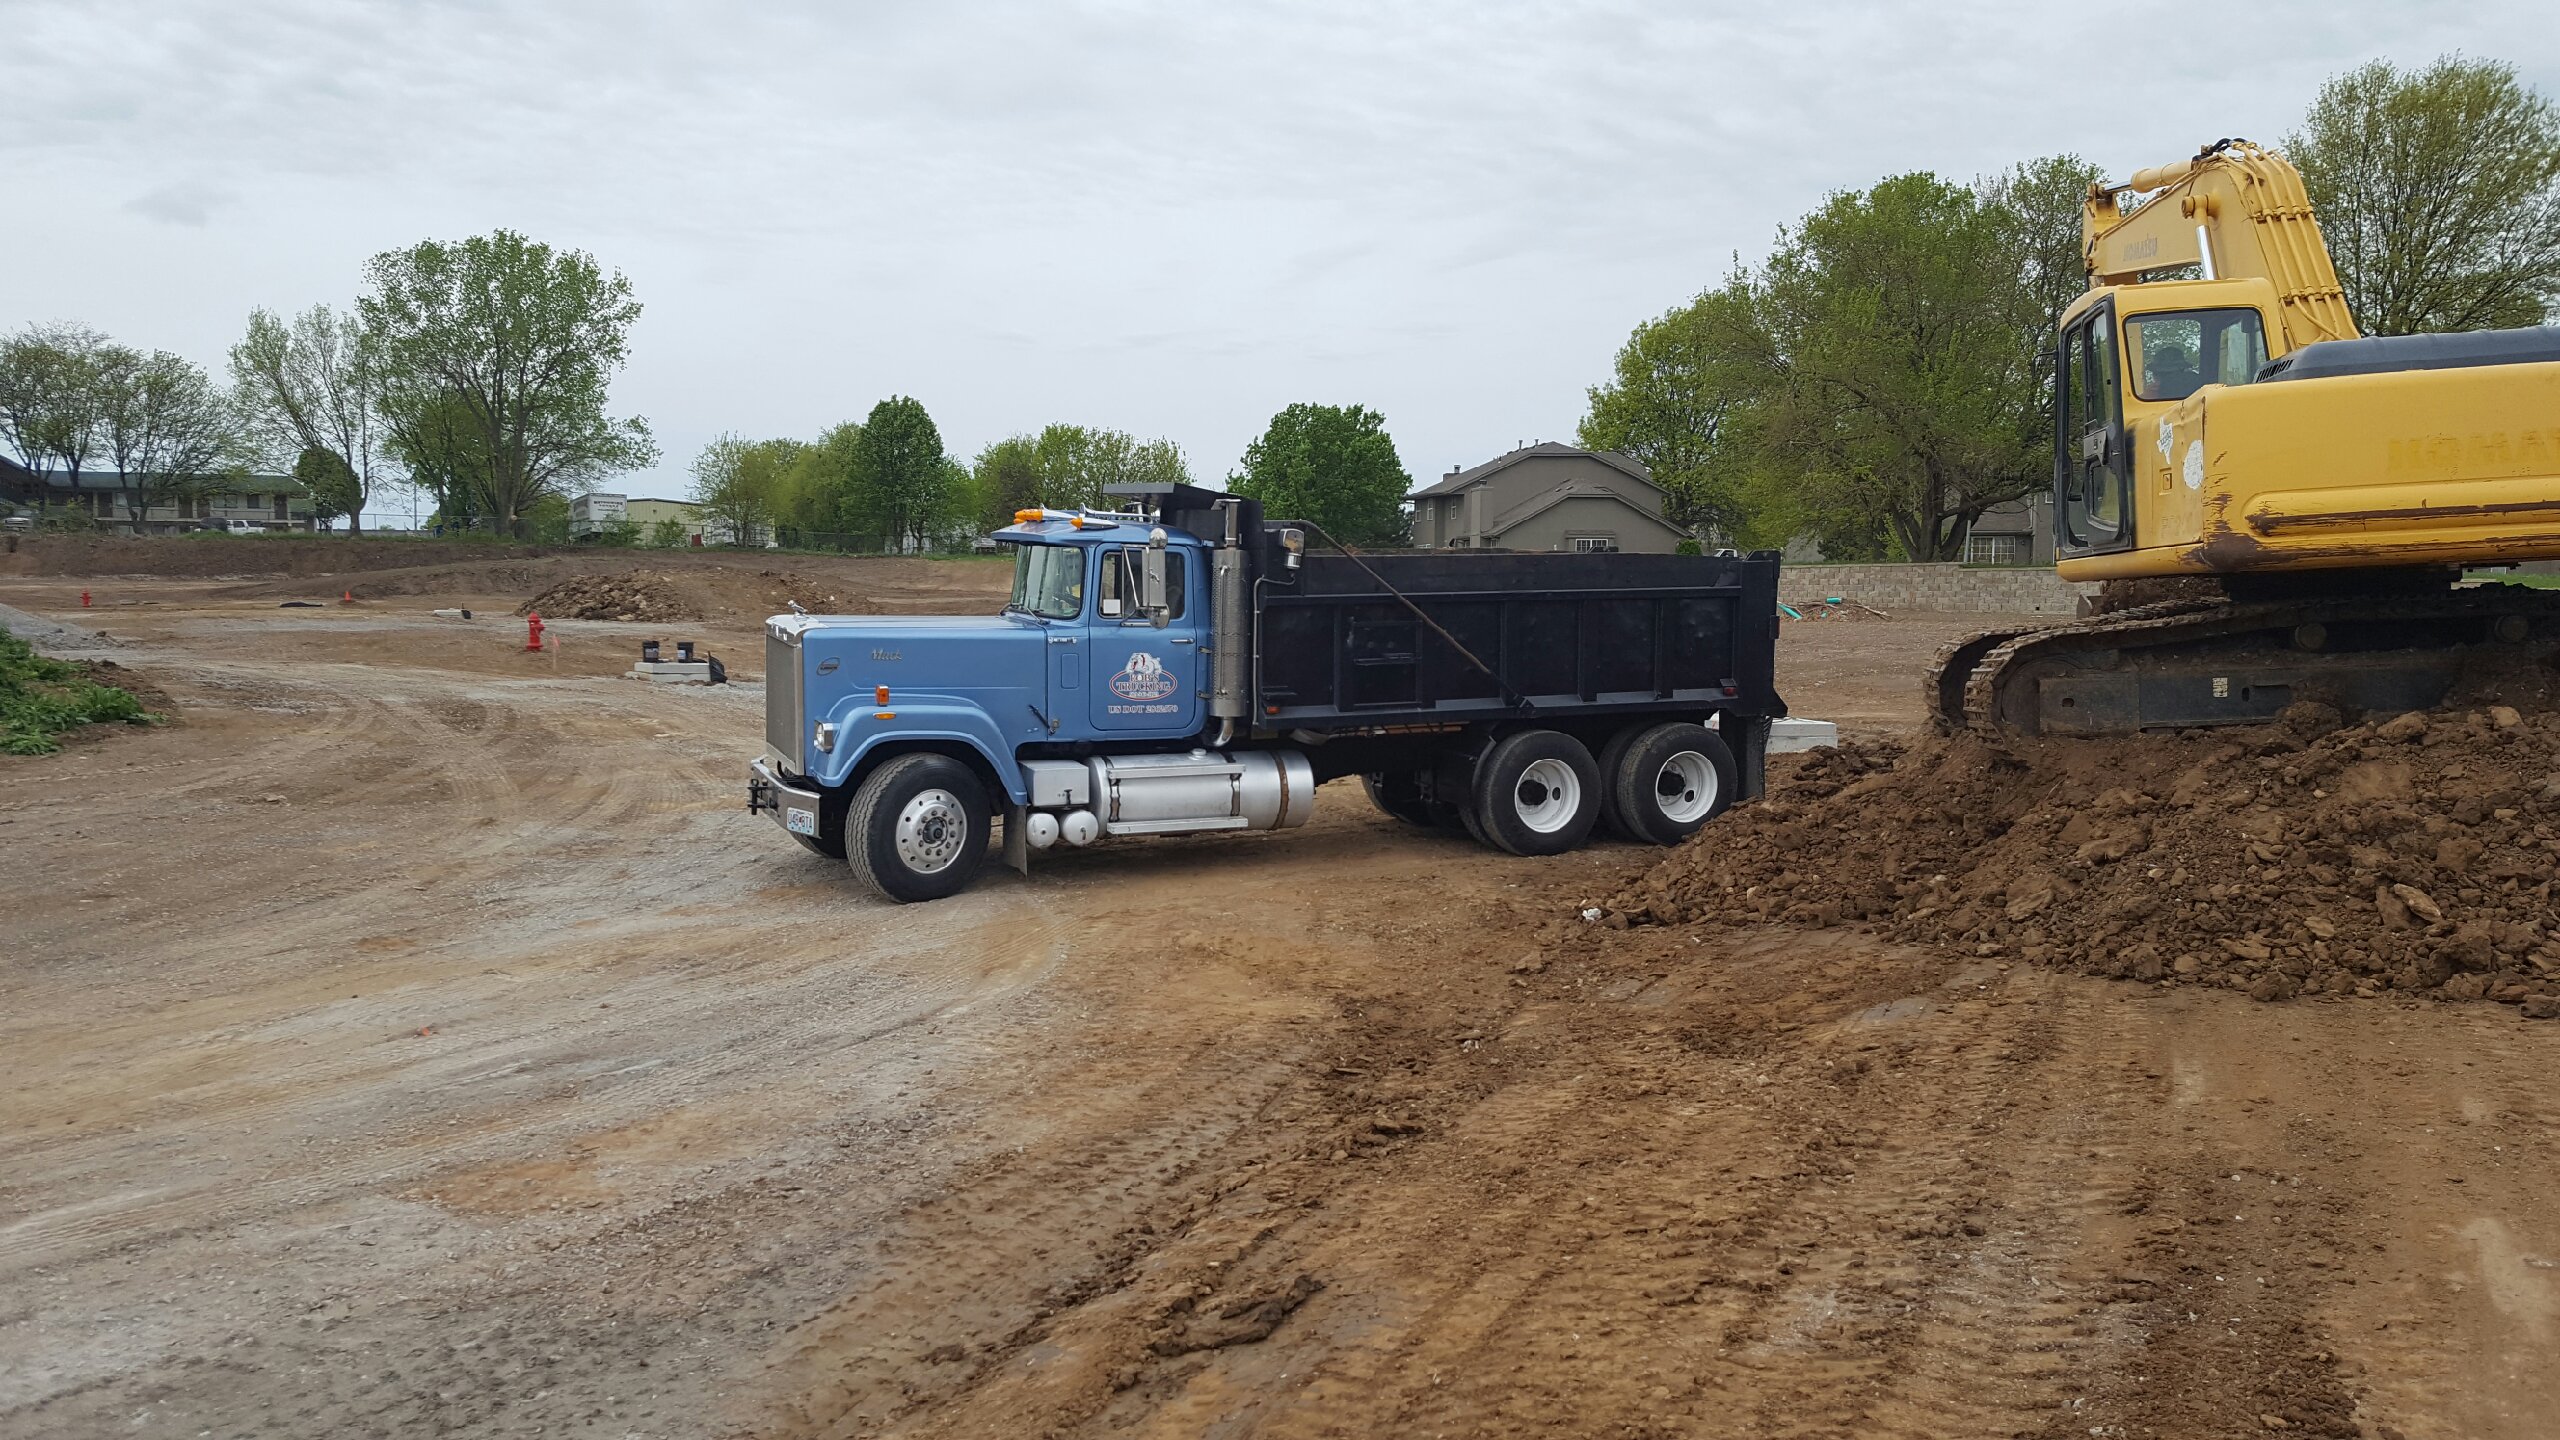
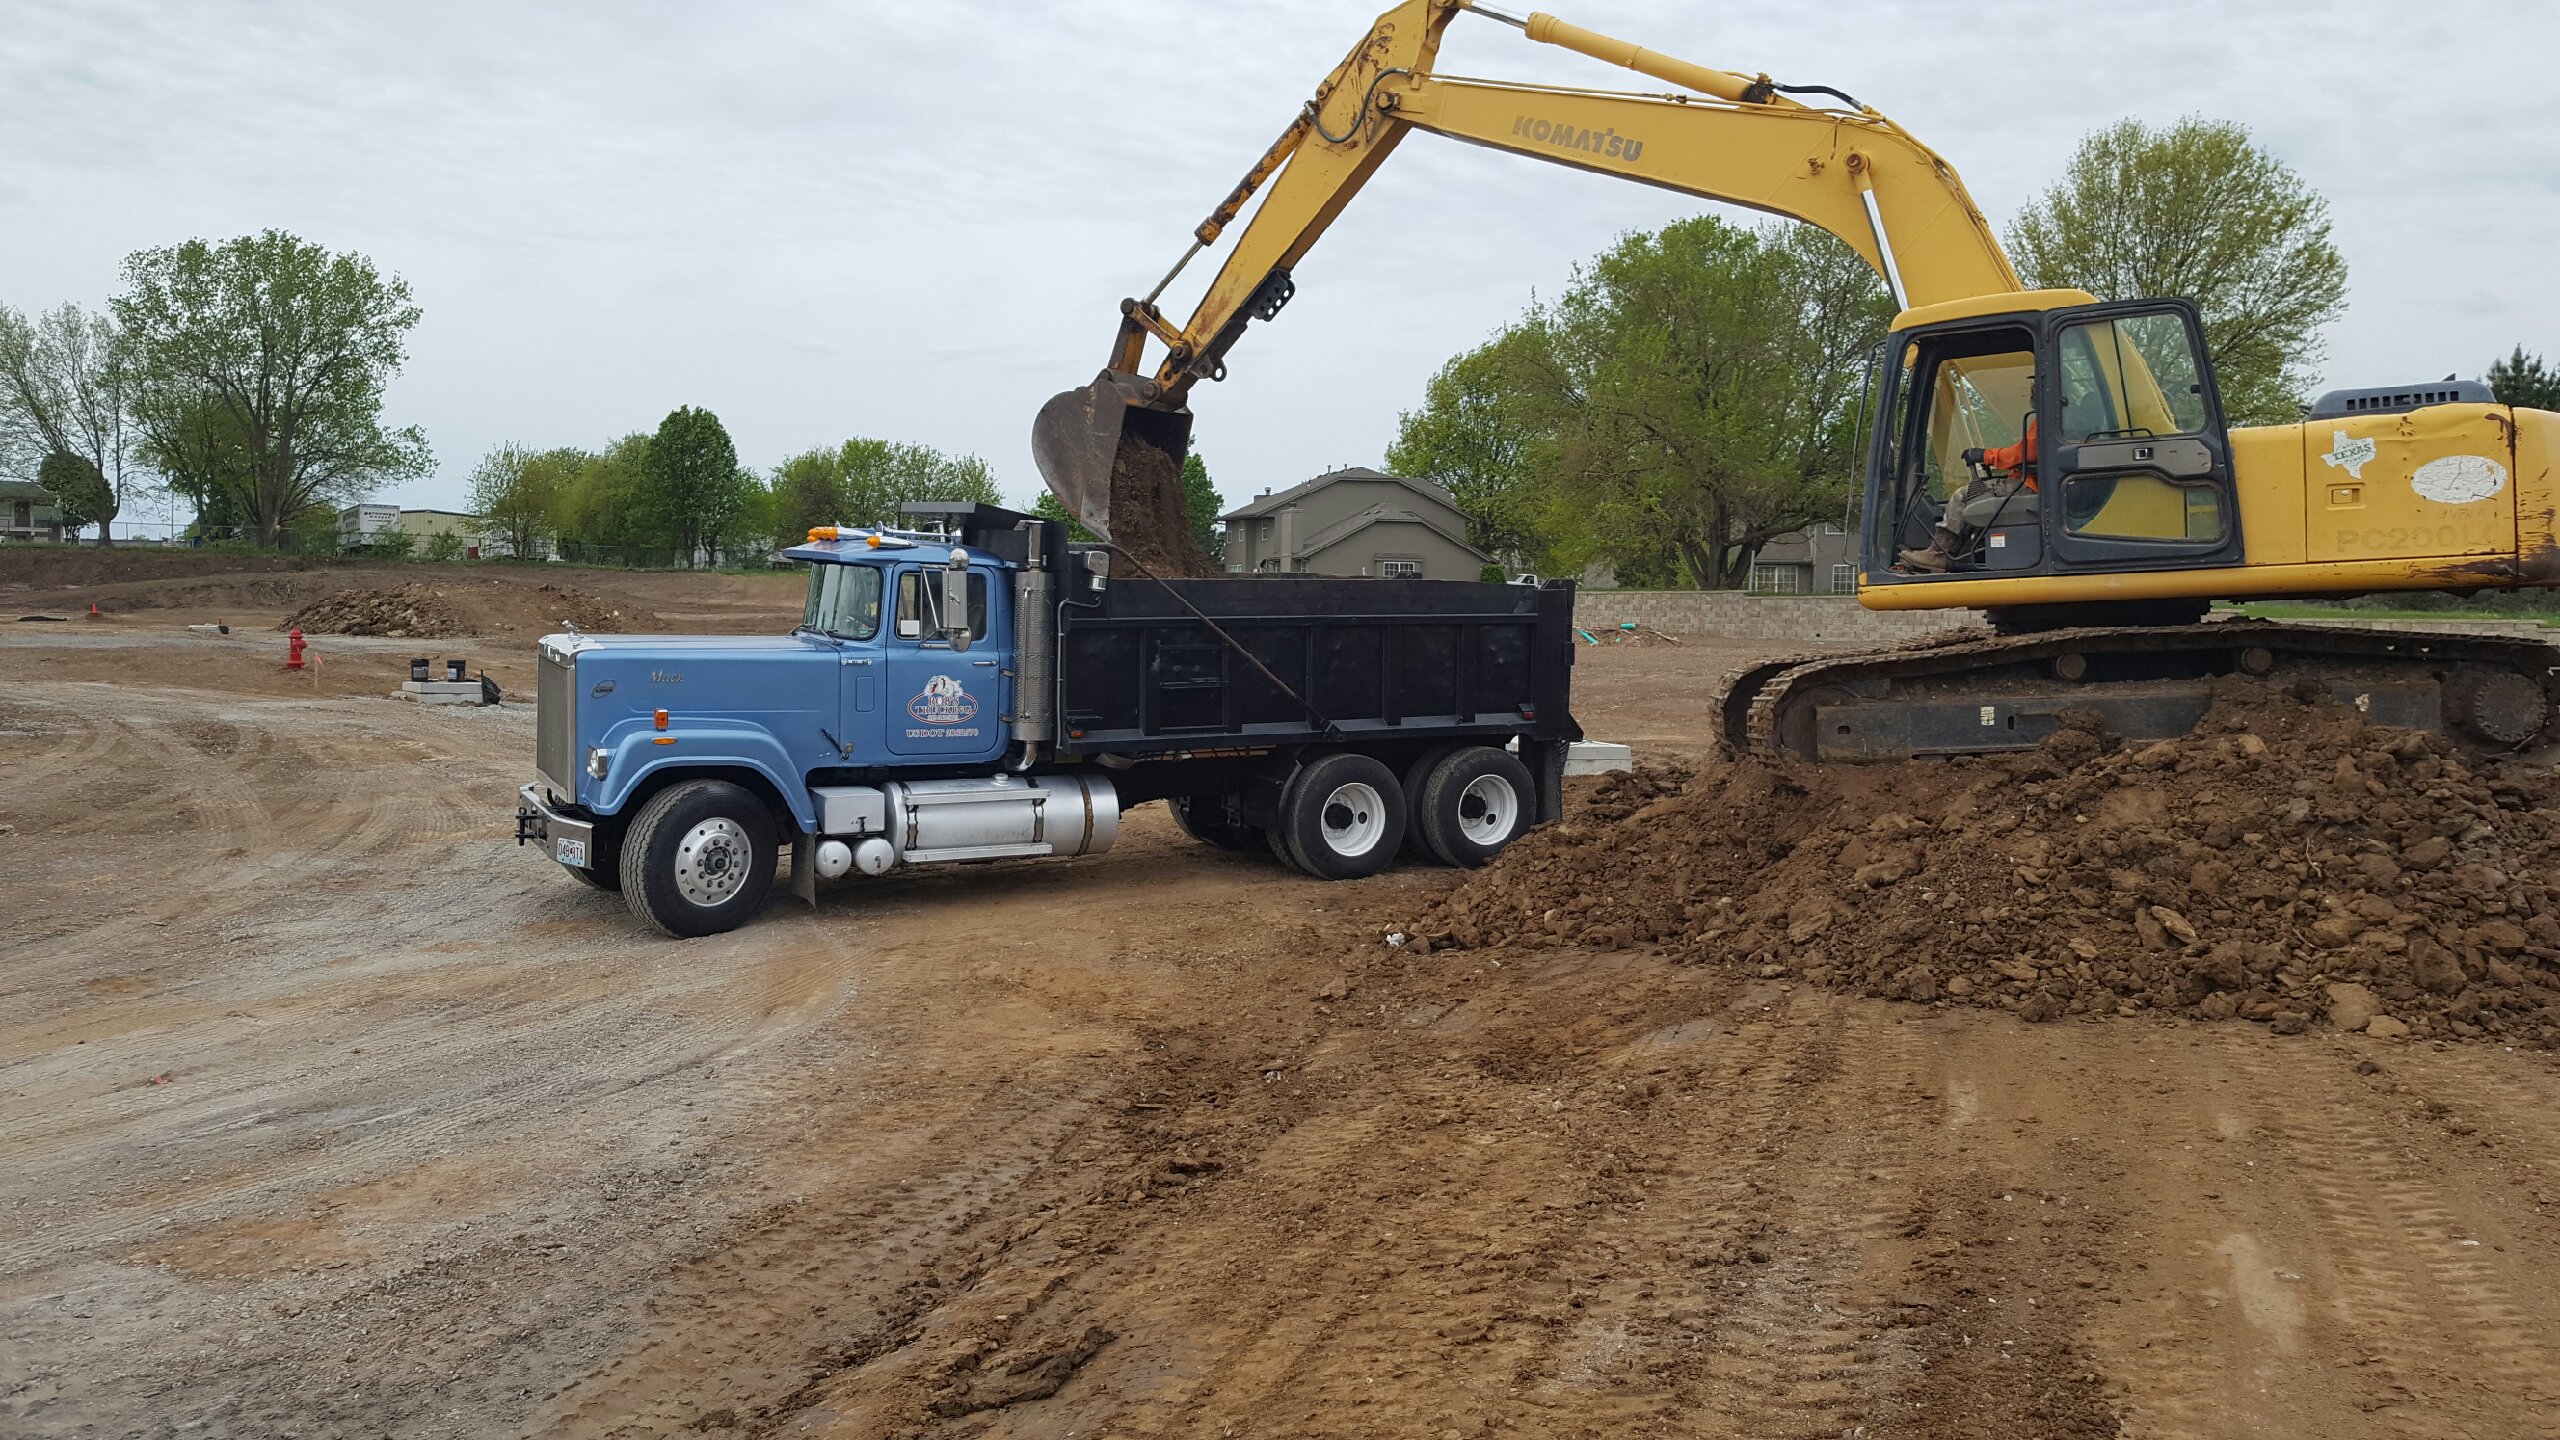
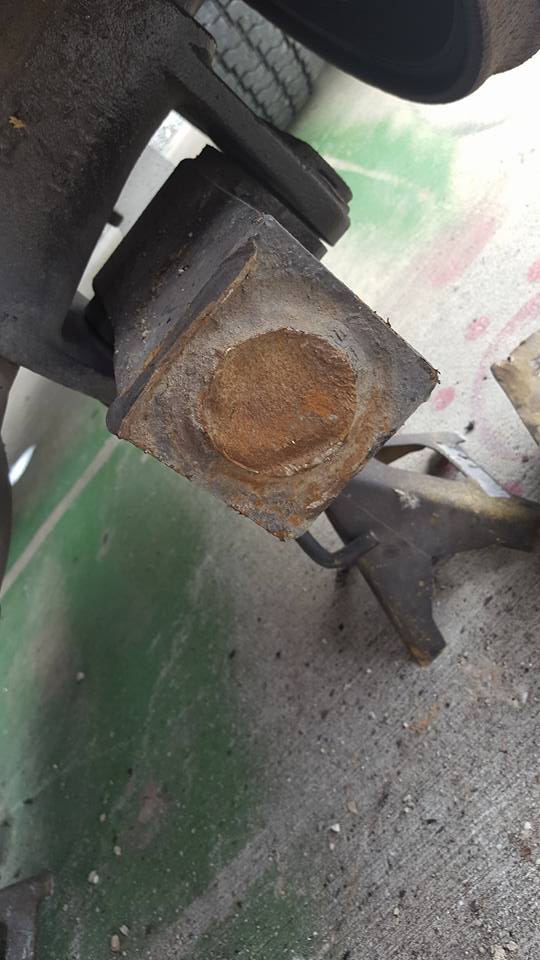
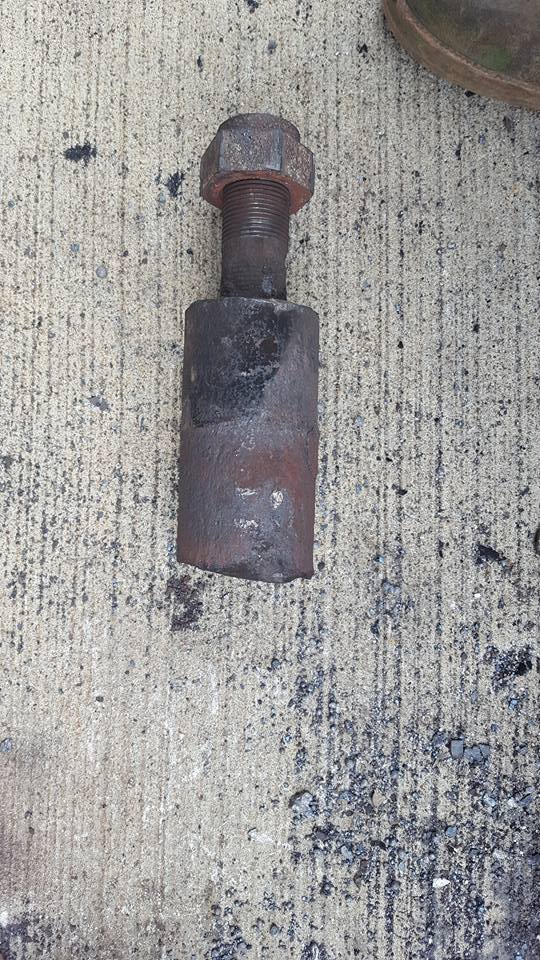
First of this week I had an air bag mount break off. After closer inspection the reason it broke was it had been welded to the swing arm as the pin/stud that is mounted to the end of the swing arm that supports the airbag and transverse rod was broken. After removing the transverse rod it was apparent that the pin had been broken for a long time. Not sure but it was obvious a PO had that repair made. The way the repair was made it was not detectable as it was being held in place by the air bag mount and the transverse rod. The shoddy repair held for some time as I have used the truck for the last year and hauled many a ton of rock with it. When I purchased the truck I went through it mechanically and I replaced the air bags last year and never noticed. I got in the manuals, online and called Mack and learned that the pin was actually a two piece design. The heavy pin portion and the threaded part. The pin accepts a threaded stud and is held in place with a roll pin (Vlad talks about this in a post from several years ago). In my search for parts the pin and stud were NLA. By looking at the pin and break it appeared the the pin was just welded to the plate. Dan, a facebook friend told me that the pin actually extends into the arm several inches and that I would need to cut a hole in the top of the arm and remove it. Here you can see the old pin and the new one. I had the pin made with a cut down threaded portion and a new washer/end cap plate. $150. Pin is 9 1/2" long x 2 1/2" round and threaded portion is 2 3/4" long x 1 1/4" fine thread Here is the cutting out of the old pin and welding in the new 3/8 plate used to secure the end of the pin. Dan mentioned that his problems were not the pins breaking off like mine did but t end of the pin breaking loose in the swing arm. I used the same pitch as the other pin on the other side, 6 degrees and used the washer to align in the pin left to right. I used ER90S mig wire I welded the best I could around the sides and bottom then used some filler to weld up across the bottom I also plated the top and sides just because a repair that is worth doing is always worth over doing! Test fitting a bushing The most difficult part was removing the transverse arm. I used heat and a 3/4 impact to remove the nut and washer. The bushings were packed with rust and debris and I used my tractor as an anchor point a come along, air chisel. hand chisel, torch and hammer to eventually get it off about 3 hours and that was from just one side. I was trying not to damage anything because I was unsure at the time what i could find for parts (new or used) I located a Swing arm for $200 and a Transverse Rod for $150 but my concern was the pin may not last very long and the transverse rod was going to be a couple days to get. I had to rebuild the air bag mount on the passenger so I decided to redo both sides. There were some scabbed on brackets and poor welds so at least it would look the same and I would not have to lay on the ground and try to fix it if the other side broke. I have about 3 hours redoing the transverse arm. I used a 4" wire wheel air needler and a 2" drill mounted sanding drum to clean up the insides. Installing was straight forward I used silicone spray antiseize on the pins and soap on the rubber. The service manual states to replace all bushings at service of 100K miles, like most they only get replaced when worn out. The service kit for the transverse bushings is SKR 77-1 ($138) it consisted of 2 inner beveled washers, 4 bushings, 2 large outer washers, 2 nuts and 2 smaller washers that go between the nut and the outer washers. I coated the pins with antiseize, placed the large bevel washer and a bushing on each pin, lifted the transverse rod on and pushed best I could into place. As I did this by myself, I used a floor jack to help hold the transverse bar while I inserted the outer bushing and drove it in using a block of wood and hammer. Once I could get the outer washer on and start the nut I did the other side the same way. I then used my 3/4 drive ratchet and worked both sides until I had at a couple threads exposed. I test drove and then rechecked and got about another full turn or so. As the nuts are lock type I am not concerned about backing off but will watch and check over the next week or so. I am no Neway Suspension expert but if I can provide any answers to your questions feel free to ask or pm. I did the work myself and the weather was raining most of the week so I wasn't missing out on any hauling. My cost was around $325 including the bushings, machine shop, welding wire/consumable/torch. I spent a total of around 16 hours working on it but now that I have done it could probably cut it down to 10 to 12 including running for the parts. I spent about 2 hours using a portable band saw and cutting the welds off the end of the swing arm because at the time I was doing it I did not know that it was welded on the inside.
.jpg.8bb1bf36f479e7691d360857ab1edf68.jpg)

.jpg.57d435f1fbc9c3844f0b3b51f38e7d33.jpg)

-
I use power service silver or white depending on time of year. In the dump truck maybe once in a while in the other trucks since thet sit more I try and keep the tanks full of fuel and suppliments
-
The truck body guys around here all do vertical straight cuts and weld with migs ER90S B3 or a ER110S. They typically don't fishplate as the older truck frames were diffrent type of steel. But if the frame is double at least 12" stagger and they will try to place a cross member or suspension bracket on the splice to reinforce it. I spoke to a lot of folks about this as I was going to have one of my trucks streached a couple feet to make it into a tri axle, but found an end dump I could afford
-
There is a guy here in KC that pull transmissions and swap or will do a clutch for $500 you supply everything
-
New pictures posted looks like a lot of rust in the frame from the puctures. Probably needs new rails.
-
Aluminum frame tandem if that's all you need would be a great starter. Been for sale for over a year.
-
I a messing with one today looks like I am going to remove the intake on the back so I can get at it. I worked for several hours trying to get it loose with no luck. Mine was rounded off also so I took a old wrench and tried welding it to the nut. On so tight it ripped some of the metal off the nut. I figured that the heat would lossen it but nothin. Got to go buy a 12 pt 10mm thin wall to get the intake bolts off.
-
Where you located
-
Superliner Door Disassembly
thomastractorsvc replied to Plowboy's topic in Exterior, Cab, Accessories and Detailing
First roll the window down remove handle and crank Roll pin and escutcheon. remove door latch screws on side that latches remove door panel perimeter screws window/door assambly should fall out -
Use seam sealer on the cracks and stuff on the cowl and don't forget the rain channel
-
Wanted right side round fuel tank 1958 B61
thomastractorsvc replied to smithmotorsports's topic in Parts Wanted
Original owner family quarry in Wichita KS, then bought by a farmer and pulled a hopper bottom and hay trailer. -
I will sell you my 1968 F with one make offer on truck need the room.
-
I will sell you mine $25k, 1978 Western 400 Cummins 13 speed new paint ready to go drive anywhere is featured in the Iowa 80 catalog
-
Aluminum western R model battery box covers
thomastractorsvc replied to ranchhopper's topic in Parts for Sale
What are the dimensions would they fit a superlinervous 1 or 2 -
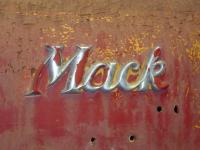
1937-8 Mack Jr Panel
thomastractorsvc replied to Teradacto's topic in Antique and Classic Mack Trucks General Discussion
Great find. Now there is a real money-back Mack. That's a great investment so do it up right -
IMG-3593.JPG
thomastractorsvc commented on Outbehindthebarn's gallery image in BMT Member's Gallery - Click here to view our member's albums!
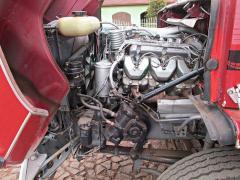 What is that coil on the front of the motor a fuel heateror oil cooler?
 -
Wanted right side round fuel tank 1958 B61
thomastractorsvc replied to smithmotorsports's topic in Parts Wanted
No to far away, I am in Kansas City -
Wanted right side round fuel tank 1958 B61
thomastractorsvc replied to smithmotorsports's topic in Parts Wanted
Just saw this let me know how much do you think shipping would be? -
FOR SALE Superliner for Sale in Illinois
thomastractorsvc replied to macknutt's topic in Parts for Sale
Why not just sell it complete? Or trade for one without a sleeper? What year and specs? -
VMAC Interface tool/software
thomastractorsvc replied to thomastractorsvc's topic in Engine and Transmission
and you can use it with VMAC I ? -
Bed sitting down is probably rotted away and window down on the truck for 15 years ='s lots of work. Plus side looks like you get a free bottle of Moonshine to drink when you get home and are contemplating the buyers remorse.
-
VMAC Interface tool/software
thomastractorsvc replied to thomastractorsvc's topic in Engine and Transmission
Thanks for the info I asked Mack about resetting the codes they said needed a tool. I didn't know how true that was as from what I can find it is a primitive system. Really all you need is a copy of the VMAC I codes and the light to work. Is the codes the same for the VMAC I, II, III, IVs? -
Mack E7 from Vmac1 to mechanical
thomastractorsvc replied to fullfuel01's topic in Engine and Transmission
How would you block off the timing? Then you would have to also install everything from the foot pedal to the pump. Maybe it would be better to wait until you have issues and replace the pump with a mechanical one.


BMT Forum Logo
