Dieseldriver65 Posted April 13, 2015 Share Posted April 13, 2015 Time for a gopro and some long videos. 2 Quote Link to comment Share on other sites More sharing options...
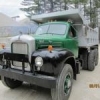
Popular Post Wobblin-Goblin Posted April 14, 2015 Author Popular Post Share Posted April 14, 2015 Today we steam cleaned the chassis and I drove the truck to a dealer to get a VIN check. Truck is back in the garage now, ready for work on the back end and ready for permanent tags. 4 Quote Link to comment Share on other sites More sharing options...
james j neiweem Posted April 14, 2015 Share Posted April 14, 2015 I think Matter was on you tube when you first got her. She was smoking a bit. Any plans for that? Quote Link to comment Share on other sites More sharing options...
Wobblin-Goblin Posted April 15, 2015 Author Share Posted April 15, 2015 I think Matter was on you tube when you first got her. She was smoking a bit. Any plans for that? Not at the moment. When it warms up, it doesn't smoke much at all. Besides, I'm not sure what could be done anyway. 1 Quote Link to comment Share on other sites More sharing options...
mrsmackpaul Posted April 15, 2015 Share Posted April 15, 2015 If it starts ok there is proberly not a lot than can be done with out spending big heaps of bucks with out much gainA lot of the time I find that once motors warm up and get driven hard most of this smoke goes away and only smoke at idle Paul 1 Quote Link to comment Share on other sites More sharing options...
Wobblin-Goblin Posted April 15, 2015 Author Share Posted April 15, 2015 Pulled out more old wiring today. Lots of runs went nowhere. Can't believe how much wiring I've taken out. So much was scabbed in or just hanging around.All the wiring from the cab back to the rear lights will be new. Maybe by the end of the week the chassis will be completely painted, too. Just picked up permanent plates for it today as well. 1 Quote Link to comment Share on other sites More sharing options...
Dieseldriver65 Posted April 16, 2015 Share Posted April 16, 2015 Going with black for the frame? Quote Link to comment Share on other sites More sharing options...
Wobblin-Goblin Posted April 16, 2015 Author Share Posted April 16, 2015 Going with black for the frame?Yes. Quote Link to comment Share on other sites More sharing options...
mrsmackpaul Posted April 16, 2015 Share Posted April 16, 2015 sounds like its Sesame street with the wiring "Big Birds nest"mind you most trucks are like a birds nest after a few years and a few ownersPaul 1 Quote Link to comment Share on other sites More sharing options...
Wobblin-Goblin Posted April 16, 2015 Author Share Posted April 16, 2015 Ran the new 5-wire from the cab back to the rear lights today and hooked up everything but the license plate light. I've got directionals and tail-lights, but no brake lights yet because the switch under the cab isn't hooked up yet. By tomorrow's end, I should have 100% lighting on the truck (and maybe a painted chassis).BTW, with five different rear lights also functioning as full-time tail-lights (two directionals, two brake lights, one licence plate light), I needed to come up with a good way to hook them all into the tail-light wire feed. My dad and I came up with a pretty neat solution which I'll take a pic tomorrow and post it. I think you guys will like it, too. 1 Quote Link to comment Share on other sites More sharing options...
Wobblin-Goblin Posted April 16, 2015 Author Share Posted April 16, 2015 Ran the new 5-wire from the cab back to the rear lights today and hooked up everything but the license plate light. I've got directionals and tail-lights, but no brake lights yet because the switch under the cab isn't hooked up yet. By tomorrow's end, I should have 100% lighting on the truck (and maybe a painted chassis).BTW, with five different rear lights also functioning as full-time tail-lights (two directionals, two brake lights, one licence plate light), I needed to come up with a good way to hook them all into the tail-light wire feed. My dad and I came up with a pretty neat solution which I'll take a pic tomorrow and post it. I think you guys will like it, too. 1 Quote Link to comment Share on other sites More sharing options...
Popular Post Wobblin-Goblin Posted April 20, 2015 Author Popular Post Share Posted April 20, 2015 Today's progress:1. Put the 3 bar light on the back. I have a close up picture of the way I hooked all six rear lights into one post on the tail light circuit. 2. I also put the dump piston pin (actually a 3ft. steel rod) back in.3. Headlight switch crapped out, so I bought a replacement for it. 3 Quote Link to comment Share on other sites More sharing options...
Dieseldriver65 Posted April 20, 2015 Share Posted April 20, 2015 Your truck sure has a nice frame! 1 Quote Link to comment Share on other sites More sharing options...
thomastractorsvc Posted April 21, 2015 Share Posted April 21, 2015 Your truck sure has a nice frame!wow sure does not rust mites in that frame.so is that the ground all the wires are hooked to? Quote Robert"I reject your reality and substitute my own." Link to comment Share on other sites More sharing options...
Wobblin-Goblin Posted April 21, 2015 Author Share Posted April 21, 2015 so is that the ground all the wires are hooked to?No, that's the power. Many of the lights are self-grounded. The license plate light ground is attached to the bolt that fastens the solid rubber pad to the chassis. Quote Link to comment Share on other sites More sharing options...
Green Dash Posted April 21, 2015 Share Posted April 21, 2015 No, that's the power. Many of the lights are self-grounded. The license plate light ground is attached to the bolt that fastens the solid rubber pad to the chassis.Will the wires be protected from the elements? Quote Jim Link to comment Share on other sites More sharing options...
thomastractorsvc Posted April 21, 2015 Share Posted April 21, 2015 What are you using to isolate the stud from the chassis?, from the pictures looks like the stud is through the metal plate that is attached to the rear cross member which would not allow it to work. This what I use for doing what you did the single post with cap is like $.75 and multiple studs with cover (I typically use the 4 or 6) are $3-$4 respectively. 1 Quote Robert"I reject your reality and substitute my own." Link to comment Share on other sites More sharing options...
Wobblin-Goblin Posted April 21, 2015 Author Share Posted April 21, 2015 What are you using to isolate the stud from the chassis?, from the pictures looks like the stud is through the metal plate that is attached to the rear cross member which would not allow it to work. This what I use for doing what you did the single post with cap is like $.75 and multiple studs with cover (I typically use the 4 or 6) are $3-$4 respectively. 71252_primary.jpg73800_primary.jpgThat's not a metal plate you are looking at. It's rubber, and it works just fine. I've got a piece of fire hose that will go over it to protect it from the elements. 1 Quote Link to comment Share on other sites More sharing options...
thomastractorsvc Posted April 21, 2015 Share Posted April 21, 2015 That explains itThat's not a metal plate you are looking at. It's rubber, and it works just fine. I've got a piece of fire hose that will go over it to protect it from the elements. Quote Robert"I reject your reality and substitute my own." Link to comment Share on other sites More sharing options...
Wobblin-Goblin Posted April 21, 2015 Author Share Posted April 21, 2015 BTW, does anyone know where I can find the brake switch on this truck? Obviously, it's needed to hook up the brake lights, and I don't know where it is. Thanks. Quote Link to comment Share on other sites More sharing options...
Maddog13407 Posted April 21, 2015 Share Posted April 21, 2015 on a dump truck it should be mounted to the front of the treadle valve. I think only road tractors had them mounted in the air line behind the cab Quote Link to comment Share on other sites More sharing options...
Wobblin-Goblin Posted April 22, 2015 Author Share Posted April 22, 2015 What and where is the treadle valve? Quote Link to comment Share on other sites More sharing options...
1957B61Vt Posted April 22, 2015 Share Posted April 22, 2015 That is the valve the pedal hooks toMine is behind cab in air line 2 wires Quote Link to comment Share on other sites More sharing options...
Wobblin-Goblin Posted April 22, 2015 Author Share Posted April 22, 2015 Today's progress:1. Greased the truck again. After steam cleaning it, it seemed like the sensible thing to do.2. Took the driver's dashboard out, stripped it, primed and painted it. That was the last part of the interior to not have paint (because painting it in place earlier would have been difficult with all the gauges in place).3. While the gauges are out, I took the fuel gauge apart to clean the glass, which was dirty and cloudy to the point where you almost couldn't see through it. Now it's clean and clear. I also attached a new needle to the tachometer. All I did was cut a piece of plastic out of an Armor All container and super glue it to the small piece that was still there.4. Replaced all the small bulbs that light up the dashboard.Hopefully, I will have pics for you tomorrow. 1 Quote Link to comment Share on other sites More sharing options...
Ezrider Posted April 23, 2015 Share Posted April 23, 2015 i have never been a fan of that style crimp connectors even covered they are prone to corrosion. i will ocasionally use them on interior stuff and even then i pack them with some silicone and then put shrink wrap on them. i know yours isnt going to be a everyday working truck so it will probably be fine but id probably still try to squirt some silicone up the backside of the crimp connectors and smear a little on the front side before you cover everything up. 2 Quote Link to comment Share on other sites More sharing options...


Recommended Posts
Join the conversation
You can post now and register later. If you have an account, sign in now to post with your account.